Possible construction errors
If you are building a gazebo with your own hands, then you should remember the following possible mistakes:
- Do not install it in a low area, as the high humidity in this area will shorten the life of the structure.
- Correctly select the level of the roof slope, so that it is sufficient for the slope of snow and water.
- Use moisture resistant woods in the lower house and on the floor. Waterproof between the foundation and the first crown.
- Wood should be built in dry warm weather.
- Consider at the design stage the electricity supply and the ventilation system of the room.
- Stick to the project drawing so that there are no unpleasant surprises with a lack of materials or a mismatch of the design with the original plan.
Examples of other beautiful buildings + decor
Gazebos vary in shape. Round, square, oval and hexagonal options are equally good. Much depends on their purpose - they should not only be attractive, but also functional. Some buildings resemble small houses with windows and doors, others are completely open.
One of the options for an open gazebo for relaxation
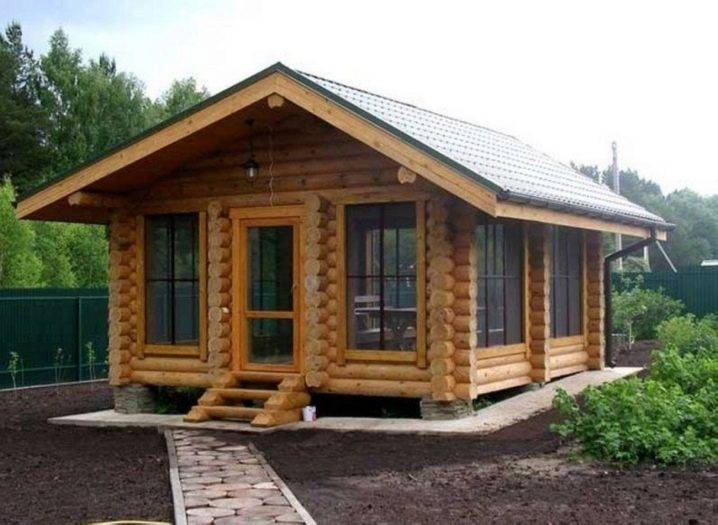
Closed gazebos retain their lightness due to the transparency of windows and doors
Being inside the building, a person should not feel cramped or discomfort, therefore, much depends on the size.
A gazebo with a grill is a good option for a country house, whose owners love Sunday family dinners and friendly companies
For example, a small room is enough for relaxation, and for dining you will need a spacious structure in which a table, chairs, and additional furniture can freely fit.
The small gazebo looks original thanks to the contrasting design
A shady gazebo entwined with green plants is a real salvation in the summer heat
Do-it-yourself gazebos made of logs can be decorated with flowers by planting them in pots around the perimeter. Walls entwined with climbing flowering plants look no less successful. The choice of decor, as well as the choice of the model of the structure, completely depends on the taste of the owners of the suburban area.
The log gazebo is massive and very attractive. A well-designed project of such a structure is perfect for decorating a landscape in a folk style. When drawing up a drawing, you need to take into account the size of the site and the purpose of the building.
Interior furnishings and decorations
The interior of the gazebo depends on its size. If this is a spacious room, then you can put a table and chairs in it, as well as place flower pots so that it is beautiful inside. In a small gazebo, it is enough to make a bench around the perimeter of the walls - it will become a good shelter from the rain and a romantic place for communication.
The walls of the building can be decorated with climbing plants: they can only grow along the pillars of the roof, or they can completely cover the walls, fencing the inner space of the gazebo from the outside world with magnificent greenery. It will be very cozy inside, in addition, the plants will create a special atmosphere.
It is also necessary to consider the need for glazing. Fully open gazebos will be uncomfortable in cloudy weather, in addition, they will suffer more from dampness. You can install large frames that will let in maximum light, but reliably protect the interior space from the vagaries of nature.
Garden gazebos can be very unusual, but it is important that their style matches the style of the entire site, including the house. It is unlikely that an exquisite Art Nouveau building next to a siding house will look appropriate
A modern house made of glass and metal will not tolerate a Russian hut next to it. Rustic style is very popular today. In each country, the village has its own special look, but they also have something in common: natural materials, simple, even rough forms, functionality.A Russian gazebo is a tree, optimally - a rounded beam, a stove, a grab, cast iron. The KRAUS company offers gazebos with a barbecue from a log, the price of which is affordable and acceptable. There you can add white embroidered tablecloths, curtains, a charcoal samovar. The main thing is not to overdo it and not turn the gazebo into an ethnographic museum.
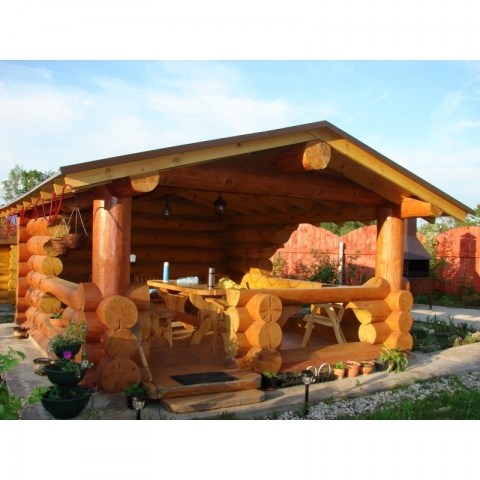 Having a dacha, city dwellers get the opportunity to grow their vegetables and fruits and get a natural, environmentally friendly, healthy, tasty product. But today, your land plot is used not only as a vegetable garden, but also as a place where you can take a break from the bustle of the city, relax, enjoy nature and fresh air. They ennoble their own corner, decorate, try to make it cozy and attractive. You can buy a gazebo from a log with a barbecue , it will be not only an aesthetic, but also a functional element on the site. You can stay here with a large company for a pleasant pastime, accompanied by grilling and a delicious dinner.
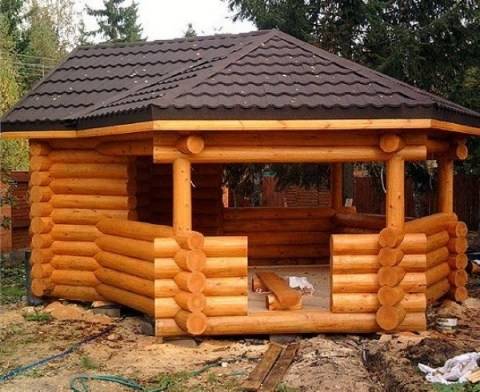 The word "rusticos" in translation from Latin means "simple", "rough". A rustic style gazebo - massive, durable, brutal. Its walls can be partially covered with natural or artificial stone. It is convenient if the gazebo has additional devices for cooking dishes on hot coals: barbecue, barbecue, grill. But the design of such a gazebo should be more thoughtful for safety reasons. Company developers KRAUS when designing, all the details are taken into account in order to create the most optimal construction option for a comfortable stay. We offer attractive, durable, safe gazebos with barbecue from a log inexpensively in Moscow ... Our prices and terms of cooperation differ favorably. Our own fleet of vehicles allows us not to delay delivery times, and professional builders will help you install a gazebo on your site.
The Barbecue Gazebo transforms the usual cooking process in your kitchen into the culinary magic of cooking over an open fire. Not many dishes on our menu are as truly loved as barbecues cooked on the grill.
Let's take a look at how to get more fun for everyone from participating in this unforgettable experience.
Roof and decoration
The technological stage of the construction of the roof of the house and the gazebo are identical:
- we securely fix the rafter frame.
- we lay the boards perpendicular to the rafter legs.
- we attach the roofing material to the roof lathing.
To decorate the finished pavilion, you can use garden furniture - wooden benches, a rocking chair or a hammock. Take care of chairs and a table made of logs, or purchase headsets from a vine.
Perfect forms of lumber in tandem with modern building technologies will ensure the quality and durability of a do-it-yourself log building that will conquer with its comfort for many years.
Projects of gazebos from logs
In order to correctly draw up a project of a wooden gazebo on your own, you need to create a competent sketch of the future building and working drawings. The scheme and sketch will allow you to effectively plan the location of the gazebo on the site, mark the arrangement of interior items and determine the places for supplying communications. Based on such a project, you can calculate the consumption of building materials as accurately as possible. When drawing up a project, you need to be guided by the following recommendations:
- the choice of the type of structure, which can be open or closed;
- the choice of the design of the gazebo, which should correspond in appearance to the style of all buildings on the site;
- choosing a place for future construction in the backyard;
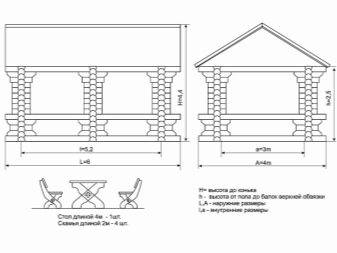
- determination of the dimensions of the gazebo, indicating the height, length, width of the structure, the location of the support posts, the entrance, the shape and height of the fence.
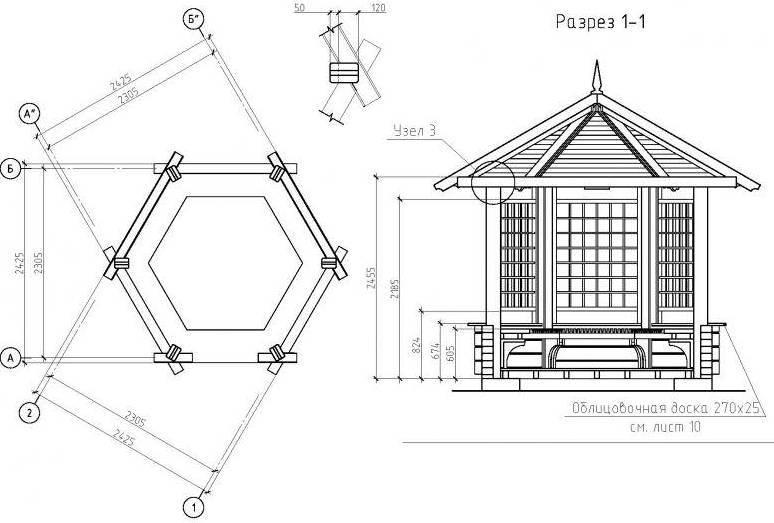
A competent drawing must have several projections, necessarily represented by a facade image, sections, as well as a layout and a diagram of all technical units of the structure being erected. When erecting a closed building, a ventilation system diagram is prescribed.Separately, a plan of the foundation is being developed, which can be strip, columnar or slab, and a description of all structural units is performed, including their dimensions and installation areas.
It is very important to correctly draw up a roof scheme, indicating in the project its dimensions, configuration, slope angles, height and material for covering. If it is planned to install a fireplace, stove or barbecue inside the structure, then a plan must be attached to the project, indicating the ordinal laying of bricks
At the final stage, if necessary, electrical wiring diagrams, as well as water supply and sewerage systems are performed.
Types of structures
Gazebos can have a variety of shapes, so it will be possible to build a suitable structure for a site of any area. For example, for a compact territory, a small wooden house with benches, which has a square shape and dimensions of 3x3 m, would be an ideal solution. Such buildings can be supplemented with two- or four-pitched roofs.

Some owners of small plots use another interesting technique - they arrange the gazebo so that it adjoins to the walls of the house and complement it with barbecue. Such solutions look no less attractive.

Square structures are often decorated with various decorative elements, for example, lattices or carvings. If you want such an angular building to look more expressive, then you can use a combination of light and dark logs during construction.
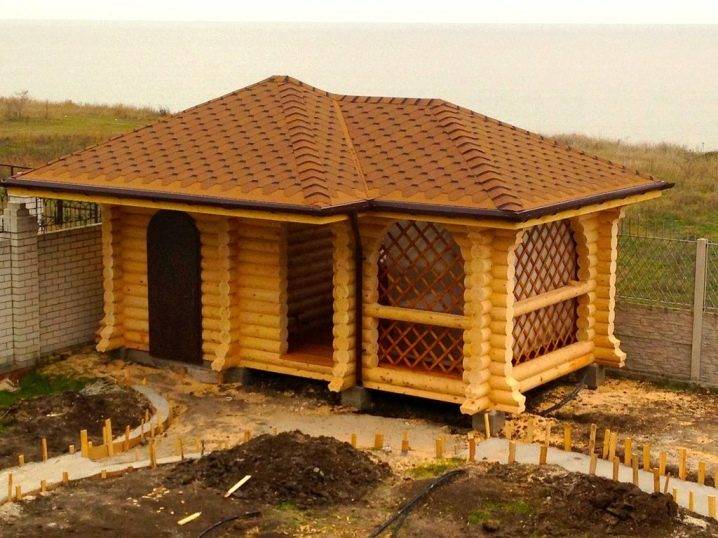
Beautiful rectangular gazebos are very popular. The dimensions of such structures are most often 3x6 m or 3x4 m. As you can see, rectangular options are larger than square ones, so they are not recommended to be installed in conditions of too limited space. Such structures are also decorated with various decorative elements and refer to a combination of different logs.
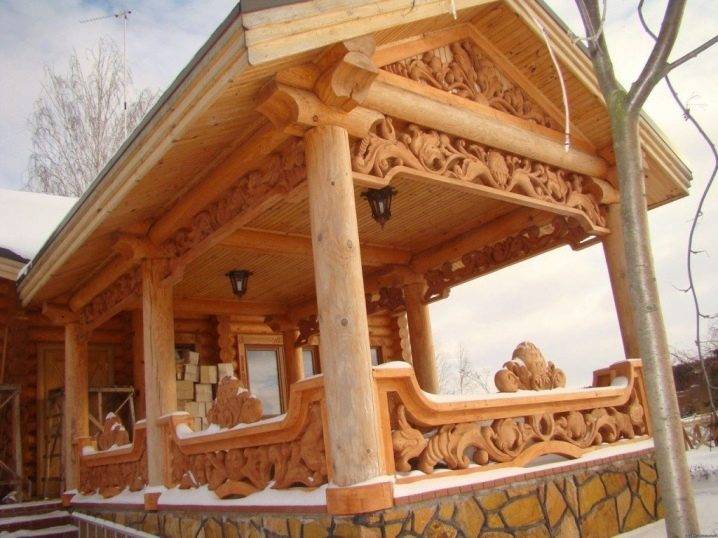
Also, on the plots, spectacular hexagonal and octagonal wooden arbors are often found. As a rule, these structures are quite compact due to their architectural form. Their dimensions are slightly smaller than those of square products, so such structures can be safely located even in a small area.
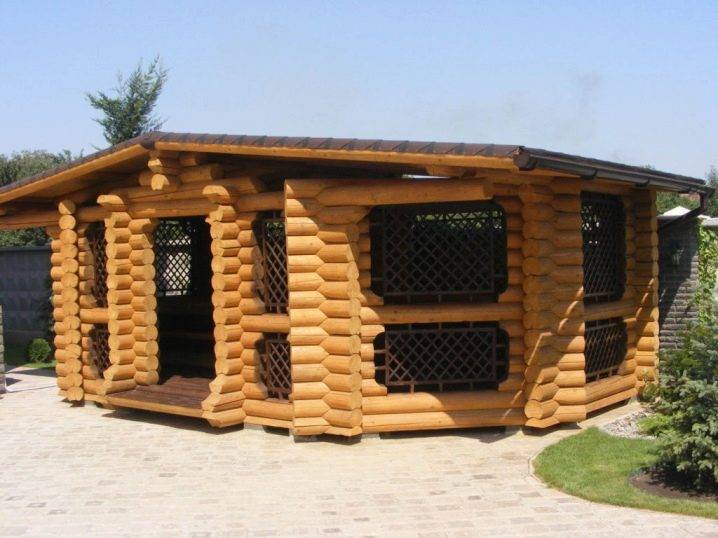
Today, designs with bizarre shapes are in vogue. Such gazebos are most often approached by creative people who want to deviate from the usual standards. These structures can resemble a large carriage, a forest mushroom with a large roof hat, an inverted cone, or a trapezoid. With the help of such gazebos, you can refresh the site and make it more original, but their construction cannot be called simple and quick. In addition, such buildings cost the owners much more, and they require more free space.

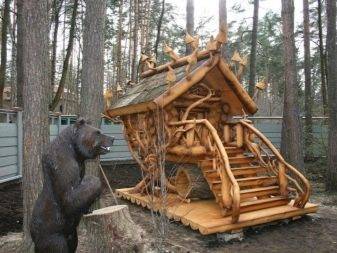
If your site is very small, don't be upset. You can place a mini-gazebo on it, consisting of a minimum number of parts - a canopy and supports. In such a design, several people can also comfortably fit.

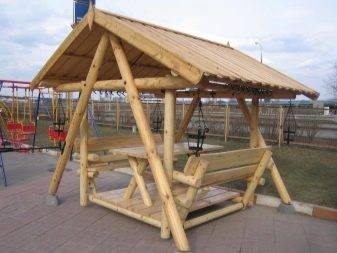
Log gazebos can have not only different shapes, but also different designs.
Open. These simple gazebos have no windows or walls. They contain only fences of different heights and degrees of openness. Such structures are summer wooden pavilions, supplemented by awnings. Free air circulation is characteristic for open structures.


Step-by-step construction of a gazebo from a rounded log
Any construction must start with a project! In an amicable way, it must also meet all the requirements for the distances for building, so that later the neighbors do not appeal the demolition of an objectionable structure in court, therefore it is undesirable to build a wooden gazebo with a barbecue near the fence. Indent at least 1 meter.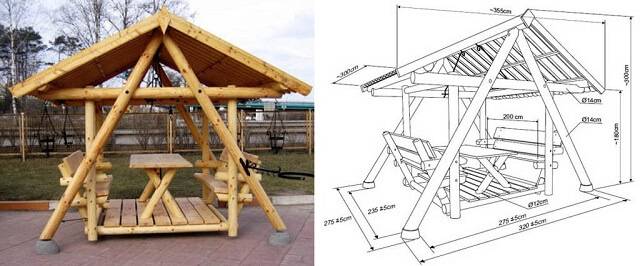
Tools and materials
To work you will need:
- saw (hand, electric or gasoline);
- electric drill or screwdriver;
- ax, construction knife;
- hammer;
- level;
- shovel.
According to the materials, you need to purchase:
- concrete blocks and sand or all for the strip foundation;
- wood;
- self-tapping screws;
- roofing materials;
- any bituminous waterproofing;
- fire-retardant composition for wood impregnation (at the sawmill, rounded logs are impregnated only with compositions from decay, unless otherwise agreed with the customer).
Foundation and bottom crown
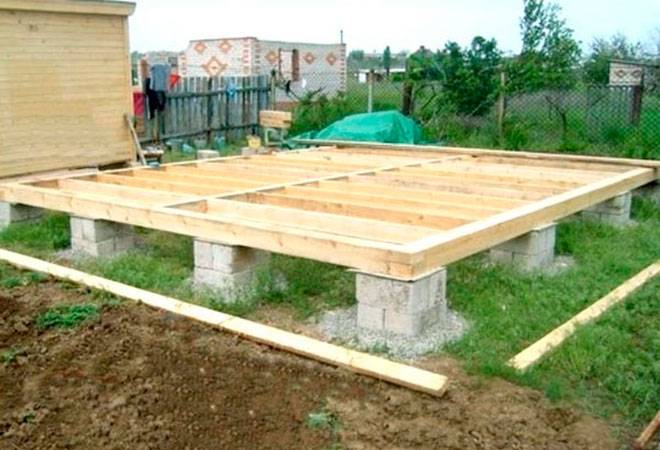
A log house, erected by non-professionals with their own hands, should be small in size. In this case, you can do without a foundation, but when choosing a simple quadrangular shape, make better concrete foundations at angles using blocks. For them, a shallow hole of 40-45 cm and sand for a pillow will be enough.


In the case of large gazebos, at least a strip foundation is required, which can be single-level (all corners of the log house are at the same level) or two-level (respectively, there will be 2 levels of logs at the base). It looks like this:


The first, the lowest crown of the entire log house, is called the salary. It is exposed to the negative effects of moisture more than the rest of the wood, therefore, in order to ensure the durability of the structure, it requires special attention to itself. It is desirable to put it from thick logs of wood, which is particularly resistant to decay (larch, oak).
If the foundation is single-level:
- The first log should be cut longitudinally to half and installed without the slightest gap on a waterproof foundation. Use a level for this. On the opposite side (or parallel), everything is done the same.
- The third must be cut so that it rests securely on the foundation and two previously installed logs. All other logs are stacked according to the same principle.
If the foundation is made two-level, then a cut on the first log to be laid is not required.
A gazebo made of rounded logs requires the creation of waterproofing between the concrete (foundation) and the wood. For this, it is better to use bituminous waterproofing mixtures. Thanks to them, moisture from the cement will not seep into the wood, which will increase the life of the gazebo.
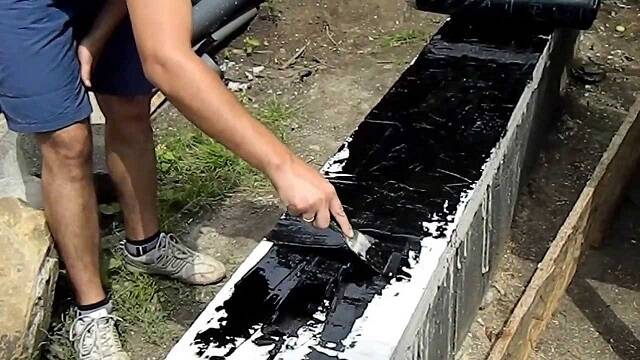
It is advisable to make the floor in the gazebo itself of wood so that it matches the entire structure. You can also use a moisture resistant laminate or parquet board for a covered gazebo.
Connections between log cabins
For gazebos, the connection "in the bowl" or "in the paw" is used. Their features, advantages and disadvantages are discussed above. A dowel is used for fixing:
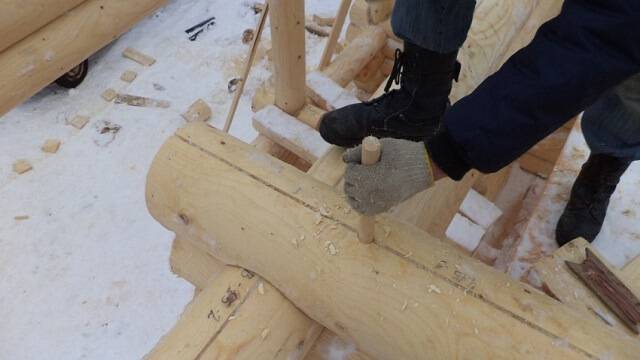
The dowel should be made a couple of centimeters less than the length of the groove for it. This is done so that in the process of wood shrinkage, it just fits.
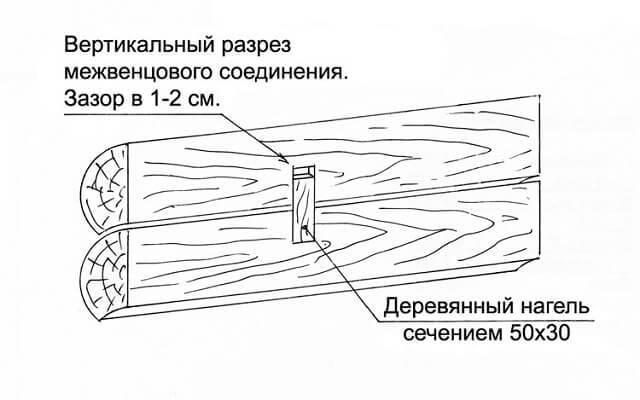
The walls of the gazebo made of logs
Bearing supports at the walls of the gazebo made of rounded logs can be vertical or horizontal. The installation of the upper trim and the roof will depend on what exactly you choose.
Roof
The roof can be made with a crown. Then it will look like a semicircle or a cone.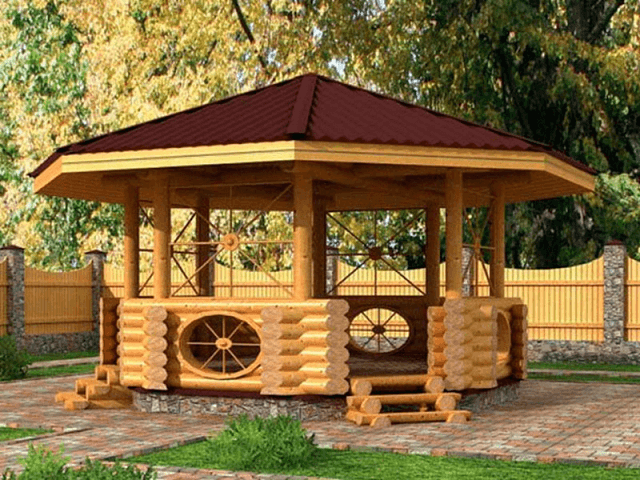
The second option for installing the roof is with a ridge beam. Then it will be gable.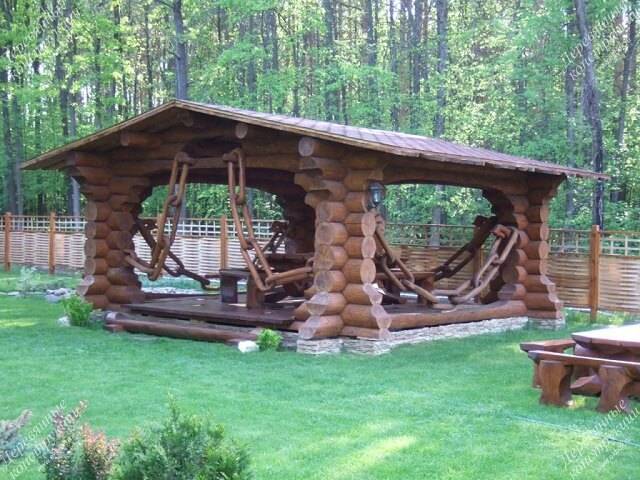
The roof made of profiled sheet or metal tile is attached with self-tapping screws to the rafters of the gazebo. If shingles or bituminous roofing is used, an additional layer of moisture resistant plywood is required.
Step-by-step instructions for building a wooden gazebo with barbecue
A wooden gazebo with a barbecue oven will surely become the center of your summer vacation. This is one of the most popular models, which is not surprising. Remember, however, that wood is flammable. This means that when building a gazebo with a barbecue, you need to take into account not only design and functionality, but also safety.
The first, even preliminary, steps are drawing up a schematic drawing of the future gazebo. Make it accurate with detailed measurements of every detail. Based on this drawing, you will not only bring the project to life, but first draw up an estimate of all the necessary materials.
Since the gazebo will be roomy, it needs a foundation. To book it, dig a hole of the shape and size that are assumed by the drawing. The foundation may not be solid, but “tape”, that is, only under the walls. Reinforce the trench with a depth of about 40 cm with reinforcement and fill with concrete. Wait until the reinforced concrete foundation of the gazebo hardens.
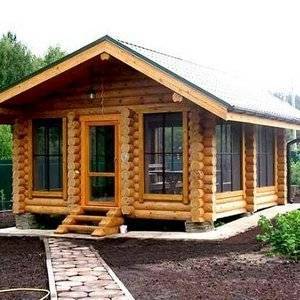 In the perimeter of the strip foundation, you will need a separate furnace foundation. Its dimensions depend on the size of the future barbecue, and its location depends on your drawing. The foundation of the barbecue is filled with successive layers: sand, crushed stone, reinforcement, concrete.
The final stage of laying the foundation is the formation of the formwork along its perimeter. A layer of sand is placed within the formwork, a layer of rubble is placed on it, and then poured with concrete.
We recommend using 300 grade concrete to ensure that the foundation is strong enough. The concrete will finally harden in 3-6 days, depending on the weather.
The brazier is built of bricks before the frame of the gazebo is being erected. In the place where you laid the foundation for it, lay waterproofing and start making brickwork. Use heat resistant red brick.
When the grill is ready, set the logs vertically around the perimeter of the gazebo. The number of beams is determined by the number of corners of the building. Strengthen the beams, and immediately “sew up” the back wall of the gazebo with thinner logs.
At the upper ends of the posts, make a strapping for the base of the rafters. Fix the horizontal logs using the bowl method. Form the truss system, triangular in cross section. On it, make a flooring of boards. So the gazebo with its own hands made of wood, step by step, begins to acquire its recognizable outlines.
From the outer part of the flooring, hydro and thermal insulation is needed, as well as a counter lattice. Roof material, wood or tile, choose to your taste. Make a hole above the barbecue and take out the chimney through it.
The floor of the gazebo is made of logs with your own hands from planks and laid on the logs lying on the foundation. Depending on the height of the foundation, steps can be made to enter the gazebo. If railings are supposed, then they are also installed at this stage.
The finishing touches - varnishing the logs, decorative masonry around the foundation and other stylish elements, each owner chooses to his taste. But even the simplest log gazebo will look dignified and attractive. Let the rest in it be pleasant!
And for the most curious, we suggest that you familiarize yourself with the video on the construction of a gazebo from a log
Installation of walls
Before starting the installation of the walls, it is imperative to correctly install the first logs, called the "crown", on the foundation. It is advisable to choose the most dense and moisture-resistant types of wood for the first logs. This can be done in two ways:
- install at the same level when all corners of the gazebo are on the same plane relative to the foundation;
- set in two levels, when only the parallel sides of the gazebo are installed on the same plane.
For open large (or polygonal) gazebos along the perimeter, vertical supports can additionally be installed. The walls are built up to the required height. For closed options, door and window openings are provided according to the project. Around the perimeter of the gazebo, a compulsory strapping of logs is made.
More about foundation and assembly
Let's take a closer look at how to properly lay the foundation for a chopped gazebo:
- Layout, preparation of pits. Gravel is poured into them, which will need to be well tamped. Then the formwork is installed, concrete is poured.
- Conclusion to one level. For these purposes, you can use cement blocks.
- Laying the first crown. To prevent wood from rotting, waterproofing must be placed under the lower crowns. Roofing material will be just the way.
The assembly of the log house is carried out according to the drawing. The logs are laid out in advance on the sides according to the marking. To achieve good strength, do not limit yourself to just joining the corners. It is customary to connect the crowns with pins made of wood.For this, holes are drilled in the logs through two, three crowns.
The roofing system consists of rafters, lathing. We collect it in stages, lay the roof.
Tips & Tricks
By and large, the gazebo, made of wooden logs, is a country pavilion that is used during rest. Such wooden buildings are very popular in central Russia. Such a building is capable of solving several problems:
- decorate the site on which it was erected;
- perform the function of a pavilion;
- used as the main vacation spot.
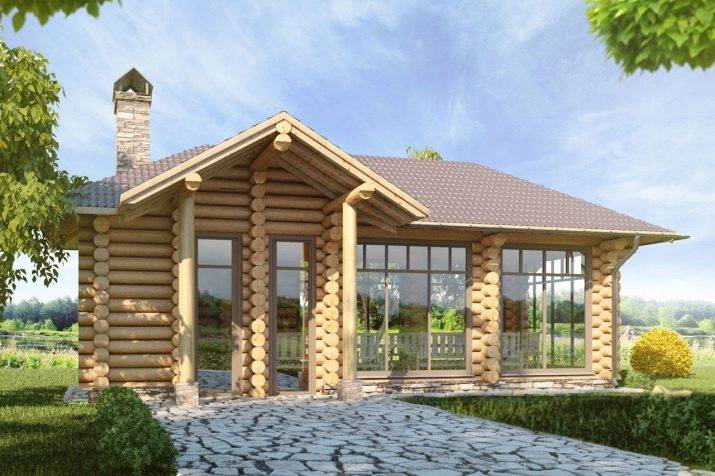
However, in order for the gazebo to be a cozy place for daily rest, it must be properly designed and built.
It is very important to correctly determine its location on the site before construction. When building a wooden gazebo, it is recommended to leave some free space around it and design its structure in such a way that there is free access to it
Immediately before erecting a wooden gazebo, you need to take care of the foundation on which it will stand. As a rule, the buildings, in the construction of which the logs were used, are massive. Therefore, it is recommended for them to prepare a tape-type foundation in advance.

At the initial stage, you need to prepare a place on the site and make the markup correctly. Then, along the supposed perimeter of the future gazebo, you need to dig a shallow ditch. A small amount of sand should be poured at the bottom of the ditch and covered with roofing material. Then, bars are installed at the bottom of the ditch, to which reinforcement is attached, the diameter of which must be at least 12 millimeters. Then the moat must be filled with concrete.
The walls of a log gazebo can be erected using several methods. The first method is called "into the bowl", and the second - "into the paw." When placing the logs "in a bowl", small protrusions remain at the corners of the building. As a rule, this method is recommended to be used in the case of the construction of gazebos that are planned to be used for recreation in the winter season and to be heated by additionally placing a fireplace in them.
The second method of laying, which is called "in the paw", implies making special grooves in them immediately before the installation of the logs. The walls of buildings that were erected in this way do not have any protrusions and visually look absolutely flat.
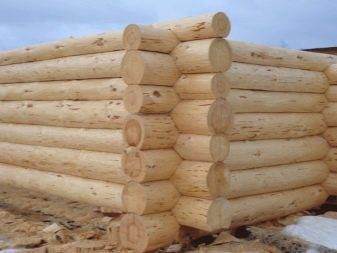
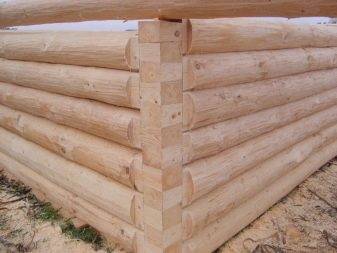
As a rule, the walls of wooden arbors do not need additional finishing. However, if the gazebo is a capital structure, then in this case one or even two of its walls will be deaf. As a rule, such gazebos are planned to be used in the winter season, which means that the inside of their walls needs additional finishing.
Realize decoration of the interior walls of the gazebo you can use ordinary clapboard or special paint. Also, the most ordinary plaster is perfect as a finishing material, which is then additionally covered with emulsion paint.


The capital building, which is planned to be used in the winter season, must also be well insulated. Moreover, it is necessary to insulate not only the inner part of the walls, but also the roof, as well as the floor of the building. For floor insulation, you can use carpet, laminate or chipboard. To insulate the roof and ceiling, you can use special panels that are made of foam. Today it is the most popular material used to insulate the facades of houses.
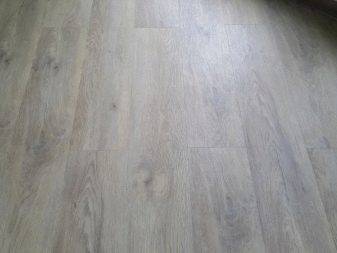
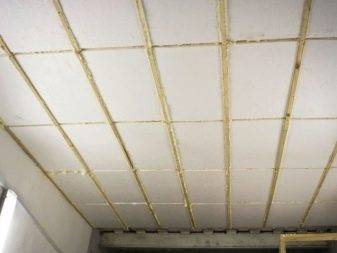
We build a gazebo from a rounded log
Further, in all the details, we will figure out how to build a gazebo made of wood with our own hands. For example, consider the technology of erecting a structure from a rounded log.This material has an absolutely flat, neat cylindrical shape.
Photo of a calibrated log - the material is very even and neat
How to build a foundation
A strip foundation is usually erected under such rather massive structures as arbors from a log house. It is filled in as follows:
- A plot in a country house or in a village is marked out according to the "Egyptian triangle" method.
- A trench is being dug along the perimeter of the future wooden gazebo.
- Sand is poured at its bottom.
- Next, formwork is installed in the trench.

Pergolas made of logs. Photo of the process of pouring the strip foundation
- Then the sand is covered with a strip of roofing material and 5 cm thick blocks are placed on it.
- A reinforcing cage from a 12mm rod is installed on them.
- Then everything is poured with concrete mixture.
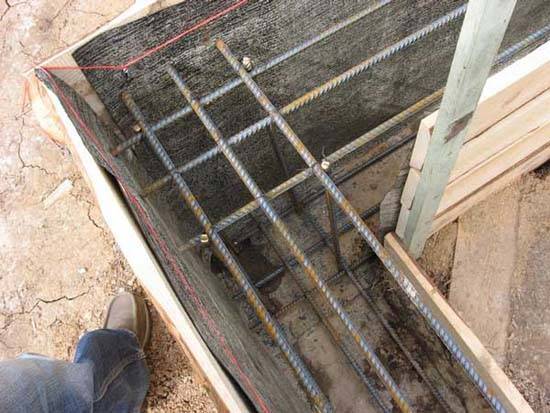
Photo of the foundation reinforcement. They tie it from twigs 12mm
Important: Two parallel strips of the foundation for the log house should be half a log higher than the other two. This design is due to the assembly features of the flap.
How to assemble a log house
Before installing the flange, you need to lay the foundation with two layers of roofing material and tarred boards around the entire perimeter. The logs of the first row are cut from the bottom so that a flat area about 15-20 cm wide is obtained.

Gazebos made of rounded logs. Laying the flap
Log walls can be assembled in three ways:
- "Into the bowl." In this case, protruding scraps of logs remain in the corners, and the structure looks more original. A similar method of connection is usually used if you want to build a heated winter version of the gazebo. The fact is that in such wooden structures made of logs, the corners freeze much less.
- "Into the paw." In this case, grooves and ridges are made directly at the ends of the logs. The gazebo will look like a regular quadrangular structure with even corners. You can clearly see this in the photo:
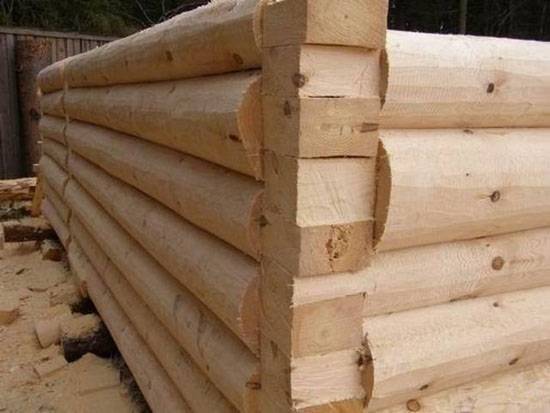
Photo of the corner of a gazebo made of a log assembled "in a paw"
"In the bowl" the logs are connected as follows:
- 25 cm recede from the edge of the log and draw across the line.
- At the marked place, up to half the thickness, choose a semicircular even "bowl" so that the line is exactly in its center.
Important: The size of the "bowl" should be such that the adjacent log falls into it freely and at the same time without gaps.
A small semicircular groove is selected from above along each log. The elements of the next crown will fit into it.

Diagram of the assembly of a log house from a log by the "in a bowl" method
Assembly in the "in a paw" way includes the following steps:
- On the outside of the log, two of its diameters are measured and washed down.
- The three remaining sides are marked in the same way, but at a distance of 1 diameter.
- At the end of the log, a rectangle is drawn with a side length of 0.75 in diameter.
- The end of the log is cut along it to the vertical marks.
Features of the construction of walls of an open gazebo from a log
The walls of an open wooden structure, as described above, are erected only up to the height of the parapet. Further under the roof, some corners are collected by the same method (from short sections of logs). The space between them can be left open or covered with a wooden lattice. Photo of the option without lattice:
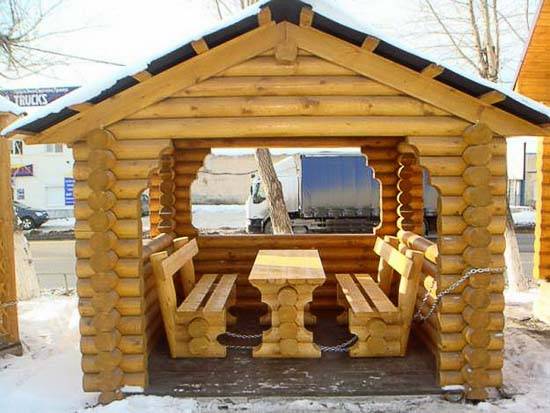
Photo of chopped log arbors. Building with corners laid out above the parapet
Roofing
Usually, wooden chopped pavilions are erected in the style of a small village "house", and therefore a gable roof is placed on them. Next, we will consider a method for erecting just such a structure. Such a canopy is assembled as follows:
- Floor beams (one or two logs, depending on the span width) are laid on the upper crown of the log house between the long walls. They cut them in the "bowl" method.
- A stand is installed strictly vertically on each log beam in the middle.
- Next, the racks are connected by a run.
- The rafters are connected in pairs, cutting the ends at an angle.
- Then they are raised to the roof, and fixed to the girder and walls.
The result of all these actions is a reliable, durable design. You can clearly see this in the photo:

Large log structure. Photo of a gazebo with a simple gable roof
Important: The rafters should be fastened to the walls with special fasteners - "skids", which ensure their mobility.
After the rafters are installed, the crate is stuffed on them, and then the roofing material is mounted.
Project number 2 - a gazebo decorated with carvings
The second option is a simple rectangular gazebo, which takes on a fabulous look due to openwork carving.
Recent Entries
English rose varieties with strong resistance to powdery mildew and black spot From Gagarin to Jackie Chan: Garden flower varieties named after famous people 7 varieties of unpretentious barberry that can be planted in any soil

Carved elements are produced manually or industrially from moisture-resistant plywood or wind panels
When drawing up a project, you should take care of the wooden decorations that give the log gazebos a complete look. It can be any decor associated with wood - carved elements, weaving from twigs, birch bark carving, ornamental wooden mosaic.
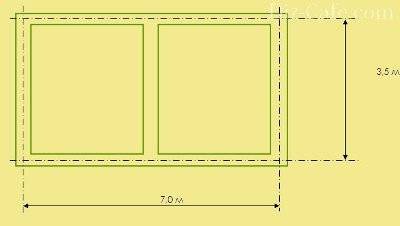
A simple gazebo layout is essential for foundation planning.
Options:
- The area of the building is 3.5 mx 7.0 m.
- The total height is 3.8 m.
- The main material is a rounded log with a diameter of 16 mm to 22 mm.
- The foundation is tape concrete or on cement blocks with a cushion of crushed stone and sand.
- Base / plinth finish - stone or tile cladding.
- Roofing - wooden or metal tiles (other options are possible).
Start, as always, with the foundation. Concrete (brick) blocks, installed not around the entire perimeter, but under the main spans and in the corners, give the structure additional lightness and airiness. In addition, raising the structure above the ground will help preserve the wooden elements for longer. If the choice fell on the tape option, it is necessary to ensure air circulation in it by making special holes.
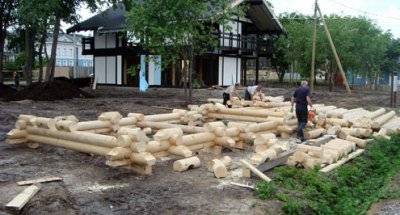
Logs prepared for the construction of a log house are laid out around the gazebo in a clear sequence so that the construction process takes place quickly and in an orderly manner.
Next is the laying of the log gazebo from logs, starting with the first crown. One of the conditions is clear alignment, in which each element is laid strictly horizontally, checking by level.

Development - detailed diagram - allows you to accurately and consistently position the details of the log house
In order not to be mistaken in the choice of elements, assembly diagrams are used, which indicate the sequence of laying and the dimensions of the logs. For vertical connection, pins are used, inserted into the drilled holes.
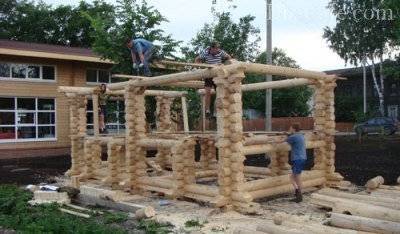
Logs are laid along the entire perimeter of the log house so that the walls rise synchronously - this makes it easier to monitor the level of the masonry
The assembly of the roof resembles the construction of the roof of a house: first, the rafters are fixed, then the sheathing is made and the roofing is mounted. Metal tile or metal corrugated brick (red) color is well combined with chopped log arbors.
After the construction of the walls and the arrangement of the roof, it remains to carry out the internal and external decoration of the building. A preliminary priming with an antiseptic agent is required to protect against fungus and rot. Then the wooden parts are varnished, at least 2 layers. Inside the building, a plank floor is collected, and a primer and varnish are also applied to the boards. Last but not least, a porch with a railing is attached - the gazebo is ready.
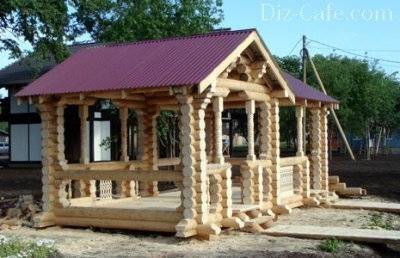
First, the roof is built, and then the floors are laid and the structure is decorated with carved elements.
Methods for mounting wooden beams
A gazebo with a log house is made according to two technologies: "no residue" - you get even corners and "with a residue", where the logs go beyond the walls.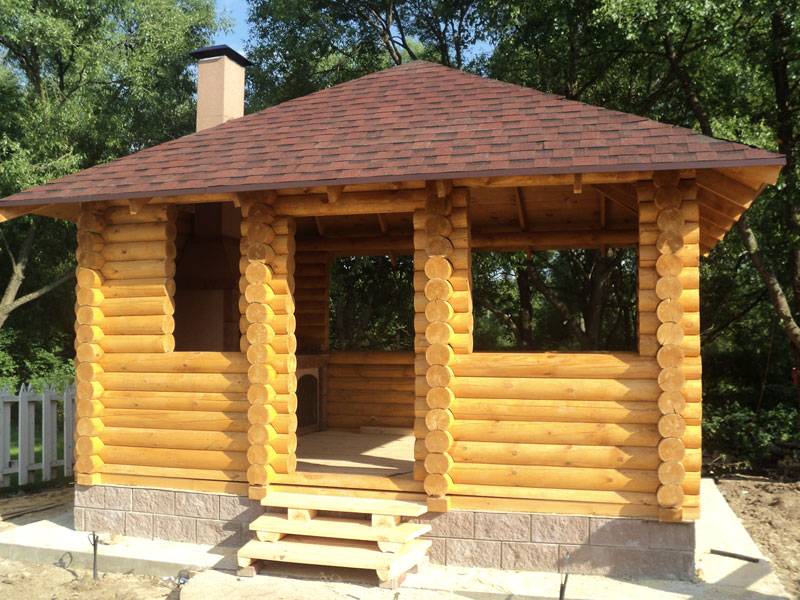
Cutting "in the paw"
Installation of logs "without residue" allows the rational use of building material, but its implementation requires certain skills from the master. The complexity of the design lies in a uniform and tight connection without gaps:
- From the end part, we outline a log with a minimum diamat of the log house, along which it is necessary to adjust the rest of the material with an accuracy of a millimeter.
- We process the bars with four edges. The through outside edging should correspond to the diameter of two logs, the other three - slightly thicker than the diameter of the wood.
- We cut out the grooves in the logs.
- We connect the logs outside the foundation. If the structure is sealed, mount them directly on the foundation.
A year after its construction, the constructed pavilion needs maintenance. Remove excess cracks from the structure through which heat escapes.
Cutting "into the bowl"
Installation of timber in this way determines the following sequence of actions:
- We lay the bars crosswise.
- We cut out the legs with a carpenter's line so that the first rests on the first log, and the second on the second.
- To remove the lower log, place the edge of the line at half the diameter of the upper log, and vice versa.
- First we place the bowl, then the longitudinal groove.
- The log we are working with is laid on top of the others so that a gap is formed by the bars. Before marking the lower groove, we spread the edge of the line by the distance of the gap and increase it by 2 cm.
- We put the wood on the blockhouse and define the contour of the ledge.
- After processing the logs, we lay them on top of each other, and eliminate the gaps using wedges and a sealant (moss or tow).
The strength characteristics of both methods are identical, and which of them to choose depends on your wishes, skills and capabilities.
Ways of joining logs: "in a bowl" or "in a paw"
Chopped arbors are erected using two cutting methods:
- The paw joint allows significant savings in building materials. However, wood fibers at the joints are more susceptible to rotting. Because of this, the structure is not very durable.
- The connection “in the bowl” is more attractive, since the structure then very much resembles the old Russian ones, but the material consumption increases by 15% compared to the “in the paw” method.
If we compare the strength characteristics of the cutting methods, then they are approximately the same and the choice between them is most often based on the aesthetic preferences of the owner of the future gazebo and the budget for the construction.
