Garden gazebo made of metal - both effective and practical
When the heat and heat on the street no longer brings pleasure, and the walls of the house are warmed up to such an extent that they want to escape into the fresh air as soon as possible, some owners of suburban real estate have an acute desire to find a cozy and cool place where they can hide from the scorching sun. An excellent solution in this case would be a metal garden gazebo, which you can design with your own hands.
Made in accordance with all building codes and recommendations, the elegant design will not only benefit its owner, but will also become the centerpiece of the entire architectural ensemble.
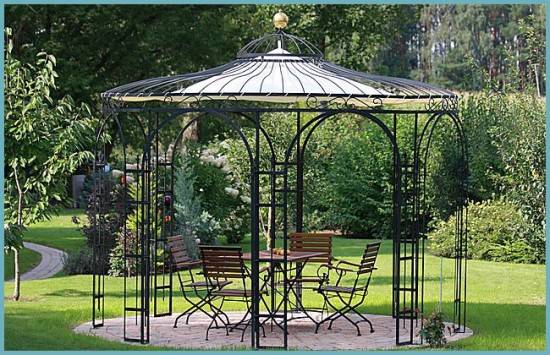 Metal gazebos can look very light and airy.
Neatly constructed and beautifully decorated metal gazebos are an excellent aesthetic addition to landscape design. Fitting organically into the overall architecture, they emphasize the taste and preferences of the owner. The variety of sizes and styles of garden pavilions, unusual design solutions and extraordinary, and sometimes very intricate decor, shapes that are far from the stereotype (square, round, 6 and 8-angle designs) - all this amazes the imagination.
And yet, the main advantage of metal arbors is not their appearance, but excellent strength and durability: such a building will regularly serve not only you, but will also benefit your children and grandchildren. The only thing that will be required of you is to periodically inspect the structure and remove corrosion in a timely manner. Due to the good rigidity of the frame, the metal gazebo does not deform and does not lose its geometry, even when the soil under the building will sag unevenly due to seasonal changes.
 The metal gazebo is very reliable
There are a huge number of options for arranging the internal space of a garden gazebo and ways of decorating the roof. Most often, metal profiled sheets, slate, polycarbonate are used - here the choice is limited only by the personal preferences of the owner of the future design and his financial capabilities.
The garden gazebo can also be stationary or portable. Stationary structures are mounted on a previously prepared foundation (most often it is a columnar foundation, but a slab foundation can also be built), and their portable competitors are fixed directly in the ground. The advantage of the latter is that with the onset of frost they are quickly and with minimal effort dismantled.
 Parts of a light forged gazebo can be dismantled for the winter
A self-made garden gazebo is, of course, an excellent reason for the owner to be proud. Therefore, we suggest that you familiarize yourself with the main stages of the construction of a strong garden gazebo, which is so necessary on a personal plot.
Step # 3. Installation of support legs
Having built the base, it's time to make special marks around the perimeter of the entire site, along which support pillars will be installed in the future.
Important! The number of corners of the building determines the required number of racks.
Using a brace, holes are made on the soil surface in the designated areas. The depth of the holes should be at least 80-100 cm (this is just below the level of soil freezing). The bottom of the finished pits is reinforced with a sand and gravel mixture. Then pillars are installed in the center of the holes. Further, the voids are filled with a cement mixture. Use a building level to determine the verticality of the metal posts.
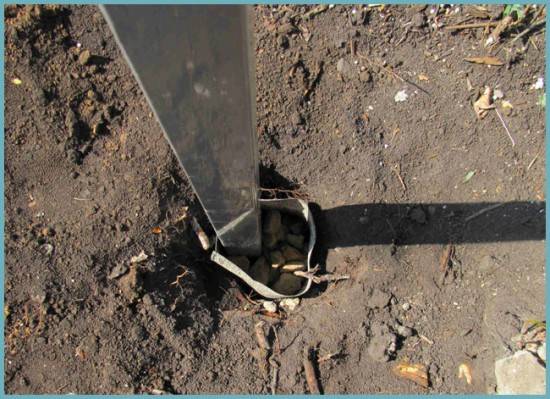 Installation of a support post for a gazebo
You can use another method of erecting racks: we are talking about the manufacture of a columnar foundation (concrete pillars with mortgages). Metal pillars will be welded to the latter. The veins are fixed in 2 rows, the distance between them is no more than 1.5 m. In the future, it is on them that the arbor sheathing will be mounted.
 Scheme: installation of support pillars
The metal structure is usually assembled with self-tapping screws and bolts, less often welding is used. It all depends on the availability (absence) of welding equipment and welding skills. The main advantage of using bolts is the ability to quickly and easily dismantle the garden gazebo for the winter.
How to calculate the material
Calculations of the consumption of building materials must be made in accordance with the project. The main stages of construction are:
- foundation construction;
- setting of supports;
- installation of rafters and roofs;
- spans clearance;
- Finishing work.
Select positions in accordance with the material used for the building with dimensions of 3 by 4 m. Purchase everything you need with a margin.
| Position | Material | Quantity for building a gazebo 3 by 4 m |
|
Foundation |
Blocks |
6-8 pcs. |
|
Screw piles |
8 pcs. | |
|
Cobblestone grillage, timber 20 x 20, length 4 m |
4 things. | |
|
Concrete for strip foundations 20 cm wide and 40 cm high using M150 cement |
1.1 cc m | |
| Support |
Beam 20 x 20 cm, length 4 m |
8 pcs. |
|
Log, round timber with a diameter of at least 20 cm |
8 pcs. | |
|
4 supports made of bricks with 1.5 masonry |
432 pcs. | |
|
Metal profile of rectangular cross-section not less than 40 mm |
16 m | |
|
Walls and railings |
Edged board at least 5 cm thick |
14 m |
|
Profile pipe |
14 m | |
| Floor |
Logs with a thickness of at least 10 cm and a length of 4 m |
5 pieces. |
|
Unedged board at least 3-4 cm wide 20 cm long 3 m |
20 pcs. | |
|
Edged board at least 3-4 cm wide 10 cm long 4 m |
30 pcs. | |
| Roof |
Rafters - a wooden block 10 x 10 cm, 2 m long |
10 pieces. |
|
Lathing - board 10 cm wide, 3 cm thick, 6 m long |
10 pieces. | |
|
Slate |
27 sheets | |
|
Roof tiles in sheets |
8 sheets | |
|
Profile for sheets |
3 rm. m | |
|
Polycarbonate 8 mm thick |
12 sq. m | |
|
Professional sheet, length 3.2 |
8 sheets |
To build a gazebo with your own hands, you will need metal fasteners - large rods for fastening four wooden supports, self-tapping screws, rubber washers, nails.
Design examples
The options for metal garden gazebos in suburban areas are very numerous, but not every person is given a bright enough imagination to independently develop the design of a summer house. For this reason, it is worth considering some interesting examples of how other owners have adequately got out of the situation.
Usually metal gazebos have a rounded shape, but it can be difficult to make such structures on your own, so square structures are not such a rarity. They may look less pretentious than the sophisticated round models, but they are affordable for everyone. The photo shows a vivid example of how even a simple square gazebo can be quite cozy - it only lacks a wooden table and chairs in the style of a summer cafe. A semi-open summer cottage structure already in itself provides some protection from the wind, and if the owner has chosen the location deliberately, then the winds in this region, most likely, blow mainly from the side where the canopy is protected by a bush. By the way, it is such a building that can be built in conjunction with a utility block, because under a similar canopy, which should simply be divided into two parts, a woodpile can be successfully organized. The latter can be a good wind protection.

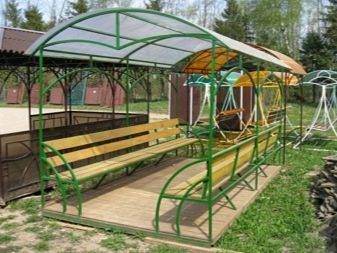
You can not invent anything incredible at all, making ordinary benches the basis for the gazebo. Often, such designs are extremely simple.They are not always equipped with a table, but by the time the seats are installed, the owner already has not only the frame of the building, but also the furniture in it. In this case, the supporting pillars will be a continuation of the edges of the bench. Most often, structures of this type are made completely open, because the choice in favor of a shop already speaks of the desire to be on the street.
The octagonal gazebo made of metal in the design of the case may not differ in any way from the above, and it may be exquisite, as in the photo. Naturally, beauty will require additional effort - at least, the owner must be able to use a welding machine, as well as make curly metal structures.

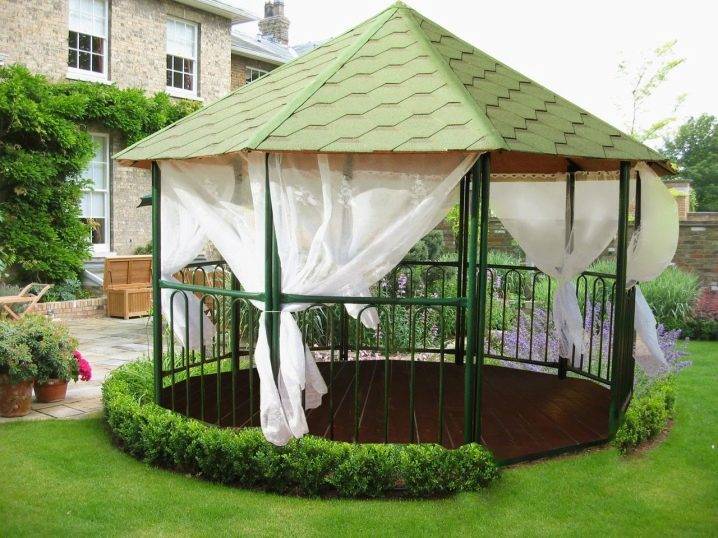
If we talk about decorating a metal gazebo, you can pay attention to the fact that metal parts do not have to be beautiful - other elements of the interior and exterior can perform the function of giving beauty, for example, a well-groomed lawn, as well as low bushes planted along the contour will give the building and liveliness and charm. Curtains will not insulate an open gazebo, but they will create a secluded atmosphere inside it, saturated with comfort.
Correctly selected furniture will also add coziness.
Curtains will not insulate the open gazebo, but they will create a secluded atmosphere inside it, saturated with comfort. Correctly selected furniture will also add coziness.
Gazebo construction
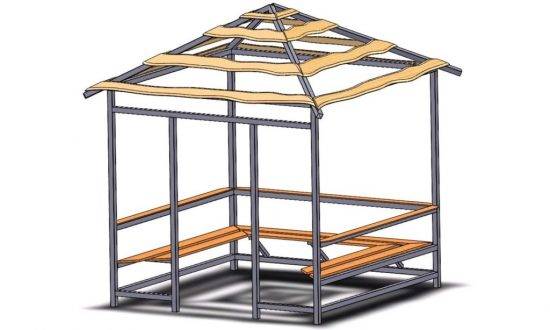
When you have chosen the place where the garden gazebo will stand, the production material and have decided what functionality the building will have, proceed to the active part of the construction.
Calculation of the project and preparation of the territory
If you decide to do everything yourself, the first thing you should do is draw up a detailed drawing of the entire structure. All stages, all details, and even the smallest, should be described. A schematic representation of the gazebo must be made in different planes and sections. If the assembly is planned to be communicatively connected to the housing, make a separate drawing of all connection elements. Make a detailed plan if you are doing ventilation. Based on the finished drawings, draw up an approximate estimate, including in the expense column and wages to hired workers, if necessary.
Interesting! The gazebo can be made in the form of an extension to the house. It is allocated to a separate dining area in the summer.
Once you have chosen the location and type of building, start preparing the area. It needs to be cleaned, leveled and fenced. The need to compact the soil on which the assembly will stand depends on the material of the building. Remove the first 20 centimeters of soil and compact this area with tiles or concrete. The support pillars should go deep into the ground, as this will fix and immobilize the structure as much as possible, especially in winter, when the ground can become mobile. Another way is a strip foundation. If you are making a wooden floor, weld the reinforcement lintels.
It will take up to four days for the concrete to harden. After that, you can proceed to the construction of an external building. If there is no welding machine at hand, or there are absolutely no welding skills, then fastening can be done using a standard angle. If the metal is light (for example, aluminum), you can do it yourself. Remember that the transverse laying of the material should be done with a certain protrusion beyond the edges, while the strapping does not require this. After strapping, you can start wall sheathing. When the gazebo is ready, cover it with protective paint and varnish.
Gazebo design
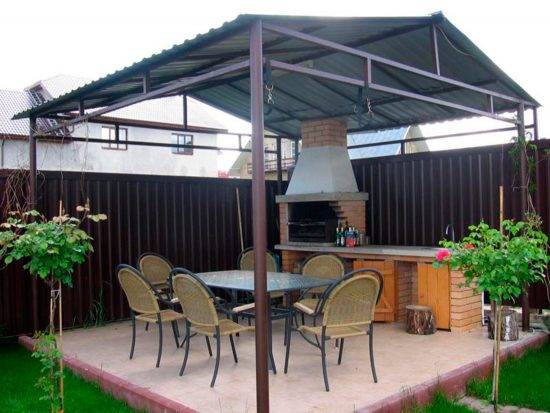
It is quite simple to make a gazebo beautiful without even resorting to exclusive design. Exterior decor will make any building unique. If the gazebo is not sheathed in sheets, imitation of the walls can be done using plants and hedges. This will not protect from a strong wind, but it will give shade and the coolness necessary on a hot day. The design of the gazebo should start not from the building itself, but from the adjacent territory
A well-groomed lawn, gravel paths, several beautiful trees nearby will distract attention from the ascetic appearance of the gazebo

How to make a trellis for cucumbers on your own: detailed manufacturing instructions for beginners The direction of growth of vegetable plants upwards, and not horizontally along the ground, allows you to competently plan a limited ...
Protective paint can be colored, a practical way to add a certain mood in the least costly way. The gazebo can be completely painted in any color. Making decorative forging can significantly improve the appearance of the gazebo.
Video - Hexagonal gazebo
The gazebo will consist of six identical elements, and therefore you can only draw the roof and one of the wall elements. Do this with utmost precision, because any inaccuracy can cause the structure to not fold.
Next, calculate the amount of materials required and the costs in general. As for wood, it is better to use pine or spruce - they are very durable and inexpensive. We also note that the construction process will not be particularly difficult, since the gazebo itself will consist of:
- grounds;
- six supports;
- railings;
- a roof that includes six triangles.
Materials and tools
After drawing up the project, think over what you will need for the construction, in addition to the profile pipe. So, walls and partitions are made of glass, wood, cellular polycarbonate or fancifully curved steel rods. For the table and benches, you will need wooden boards or professional pipes.
The roof of collapsible gazebos is often made of matte, glossy, translucent or colored polycarbonate sheets. This budget material "survives" only in warm, clear weather; the gazebo will have to be hidden under a canopy from hail and rain. Tarpaulin or PVC awning has similar characteristics.


Ondulin, resistant to any whims of the weather, is also suitable for them. A wooden roof on a profile gazebo looks like a bulky and inappropriate structure.


Once you've decided on the materials, stock up on the tools you need to build. The bulk of the work is carried out using a low-power welding machine. You will also need a grinder and a drill with a set of drills for metal surfaces. You also need to keep a shovel, a sledgehammer, a measuring level, a tape measure on hand, and do not forget about waterproofing materials.
Building instructions
You can make a high-quality metal gazebo yourself, subject to strict adherence to the instructions. In fact, the manufacture of homemade gazebos does not imply any impossible manipulations, however, the accuracy of the execution of instructions is fundamental.
The need to pre-create a drawing has already been mentioned in passing, but it should be clarified that it should be detailed, that is, indicate absolutely all the details and describe their dimensions. It is better if the gazebo is shown from different sides and in different sections. If we are talking about something more complex than a primitive canopy, a separate drawing should be drawn up for communications. Similar plans are being made even for the ventilation system and the roof.
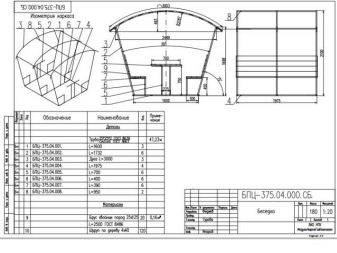

In any case, the area allocated for construction must first be cleared of all vegetation and then leveled. The top layer of soil 10-15 cm thick is usually removed; in its place, for greater stability, paving slabs can be laid (laid on top of a thin layer of sand) or concrete can be poured.
If a columnar or even a strip foundation was chosen as the base, then they must be built according to a separate instruction. If the owner decided to do without such a solid structure, it is necessary to provide that the support pillars should go deep into the soil, at least a meter - this will ensure high stability of the structure, and also make it possible to protect the structure from ground movements during frost. Sand and gravel are poured into the dug holes; after installing the pillar, a small pit is also poured with concrete.
When the support pillars are installed, and the concrete has frozen (usually it takes at least 3 days), you can start creating the outer part of the structure.It is believed that it will be more reliable to weld the structure, however, if the owner does not have a welding machine, and also does not have the skill to work with it, you can simply twist the individual parts together using a corner and standard fasteners. If necessary, metal pipes can be bent without special equipment (this can be done using a grinder and a welding machine, or using ordinary sand and a blowtorch).
If a simple transverse strapping is usually performed from a pillar to a pillar, then the transverse joists for the roof are made with a protrusion about half a meter outside the contour of the walls. This is necessary so that the roof protects the structure even from slanting rain. When the harness is mounted, you can sheathe the walls and roof with sheet materials, if this is provided for by the project.
Step # 2. Site selection and work with the base
When choosing a territory for placing a future building, you need to remember that you and your guests should be very comfortable and cozy, so you should make sure in advance that a picturesque and beautiful view of the site opens from the gazebo.
Before construction, it is important to properly prepare the site and design layout.
When choosing one or another project of a garden structure, decide on the type of its execution: whether the building will be open (blown) or closed, whether the installation of lighting equipment will be needed or not. In order to objectively assess the aesthetics of the project, its rationality, parameters and dimensions of the object, you can use the visualization capabilities of the project, only for this you need to correctly execute its drawing.
For an error-free calculation of the size of the doorway, be guided by your height (up to 2.0 m), while the width of the opening will be approximately equal to the width of a regular entrance door (around 1.0 m).
The site selected for construction is cleared of vegetation and debris. The fertile soil layer (which is 15-20 cm) is removed. In the future, it will be useful for enriching the land in greenhouses and leveling the soil drop on the site. After the order on the site has been put in order, and the top layer of soil has been removed, the bottom of the so-called pit must be covered with sand (5-8 cm), poured abundantly with water and, with maximum effort, tamped.
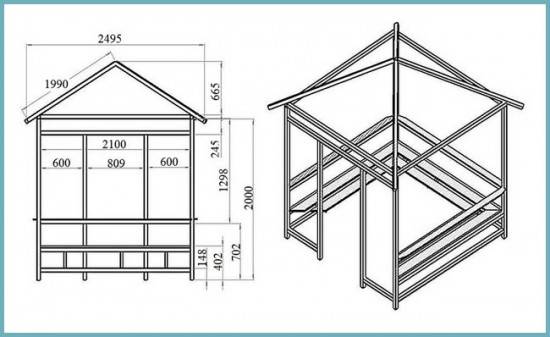 Blueprint: Metal Gazebo
If paving slabs are stale in your household, then you can safely lay them out on a sand base. You can also build a concrete platform. To do this, however, you will have to form a wooden formwork, fix it with a peg driven into the ground and fill it with concrete. The resulting base should be left for 3-5 days before hardening. If the site for the construction of a garden gazebo occupies more than 2 m², then do not forget to make shrinkage seams.
Equipping the recreation area with barbecue
You can also build a brazier on your own. To do this, you need to prepare some materials: steel plates or sheet metal materials, bent corners and pieces of iron. And the tools that will be needed in the process of creating a barbecue are a grinder equipped with a disc for metal, a welding machine and a drill. In order for the work to be carried out correctly, you should arm yourself with a tape measure. The best fasteners for a steel box are bolts. If you want to paint the brazier, you will need to purchase black heat-resistant paint in the store.
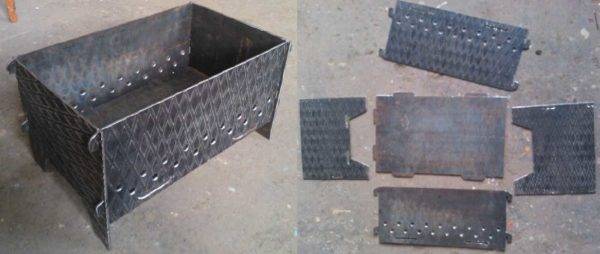
You can make a box for frying kebabs from such blanks
The first thing to do to build a barbecue is to determine its parameters. If it is assumed that 4 people will eat kebabs, then the area with coals can be 30x50 cm in size. And for a large company, such a barbecue will be small. To find out the appropriate sizes, the required number of skewers must be multiplied by 10 cm.The width of the barbecue remains unchanged - 30 cm.
The brazier is created from segments cut from a sheet of metal with a thickness of 1.5 mm. On a steel workpiece, you need to make a markup and bend a metal sheet along it so as to give it the shape of a box. All the seams obtained must be welded. It is recommended not to attach the legs of the structure tightly, but to screw them onto the bolts so that they are removable. Such a trick will allow, if necessary, to transport the grill in the car trunk.
The brazier does not have to be done by welding. The pieces of metal can be bolted together. To do this, you will need to cut pieces from metal sheets with allowances of 3 cm. These surpluses will need to be bent, making overlaps. They will serve as a platform for creating technical holes into which bolts will be inserted.
After creating the box and attaching the legs to it, you need to make holes in the box so that there is traction. The holes are supposed to be drilled at a height of 3 cm from the bottom edge of the box. One hole should be located at a distance of about 5 cm from the other. The rule applies here: the smaller the diameter of the holes, the more they need to be made. Last but not least, on the edges of the barbecue you need to cut out recesses to fix the skewers. Each groove should be created at a distance of 10 cm from the previous one.
Planning and development of a drawing of a gazebo
Before starting work, the home craftsman needs to decide on the size of the future structure and its appearance. This largely depends on where the gazebo will be located. It can be made both as a free-standing pavilion and adjacent to the house.
After determining the required parameters, it is recommended to draw a drawing, which will take into account the width, height, and configuration. Thus, you can accurately calculate the amount of materials required for construction, and prepare an approximate estimate.

It is easiest to assemble the supporting frame of the gazebo from shaped pipes. They come in rectangular or square sections. The characteristics of this material allow it to be used for the manufacture of all kinds of metal structures. Experienced craftsmen claim that it is significantly better than other types of similar products, such as a corner, round bars or rods.
Did you know? Summer buildings can be made not only in the form of a capital structure made of stone, metal or wood. In tropical countries, their walls are often made of vines, like a wattle fence, which is traditional for southern Russia, and the roof is made from armfuls of large leaves.
On the Internet, you can find many ready-made options for building a gazebo from a professional pipe. Any of them can be taken as a basis for construction or adjusted to the needs of the consumer. After reviewing the examples and choosing the appropriate option, the home craftsman can begin the construction of the summer pavilion.
Foundation for 6 coal gazebo
Ways to make a hexagonal gazebo with your own hands are based on a solid and durable foundation. Arbors of this type are lightweight. Often they are generally built on an open type and do not even provide for fences. Therefore, when building a foundation, it is recommended to use columnar technology.
The main load falls on low brick posts. The lower harness is mounted on them. In general, columnar base technology is the simplest and most affordable.
In each of the six corners of the gazebo, it is necessary to dig holes to a depth of 70 cm.They should be 40 cm wide.To ensure better adhesion of the brick column to the ground, a layer of sand 10 cm high should be poured onto the bottom of the hole. It is recommended to put a piece of roofing material under this layer to protect the bricks from moisture.
You can lay bricks on a sand base. At the same time, in order to save money, you should use the material used. the cost of one unit of such a brick will be 7 rubles, which is almost two times lower than the price for a new brick. Meanwhile, a used brick is no different from a new one in terms of its properties and service life.
The bricks are laid as follows - on each row, two bricks are placed along and one across. Then the arrangement of the bricks changes. They alternate with each row.
Each column should rise slightly above ground level. It will be enough 30 cm. Accordingly, the floor of the gazebo will also be raised to the specified height. This is required to protect the wood from moisture.
There is an easier way to create a foundation. For this, six support pillars are dug into the ground and concreted with cement mortar.
It is important to remember that with a gazebo height of 2.7 meters, each pillar should be deepened into the soil by at least another 2 meters. This design will be the most durable.
Step # 4. Roof arrangement
When doing roofing work, remember that it rains in nature, and so that they do not flood the gazebo, you need to position the transverse logs so that they look out from the end by about half a meter.
Advice! If the project provides for the construction of a 6 or 8-sided roof, then the cross beams are welded to the support posts, taking into account a distance of 2 meters from each other. Lags are fixed to the metal crossbars, and the rafters are attached and attached to them.
One of the most affordable roof design options is the use of polycarbonate. To make the sheathing, small holes are made in the rafters to fix the roofing material. In order to put the first sheet correctly, you should lay 2 sheets, calculate and set the angle and offset according to them. Then the first sheet is removed, and the remaining one is attached to the screws. Roofing sheets are fixed in turn. To give the roof more rigidity, it is better to make the fastenings after 2 waves.
 Roof installation - the final stage of the construction of the gazebo
Our garden gazebo is almost complete. It remains to attach side panels to the structure and paint the metal elements. To do this, you can use not only the traditional painting with paint on metal, but also the powder spraying technique.
Enjoy your stay in the new gazebo!
Gazebo with or without floor
The gazebos are mounted on the ground and on the foundation, depending on the materials and purpose. For example, plastic is placed only on the ground, and heavy brick is placed only on a prepared base. But with wood and metal there are options in which we will figure it out now. If you install the gazebo directly on the ground, you must definitely protect it from moisture. Otherwise, the wood will rot, and the iron will rust, because wet soil is aggressive.
For light frame structures, a columnar foundation made of rubble or brick is suitable. You can use ready-made foundation blocks - it's even faster and easier. But for a major stone or brick building, you will have to fill in a strip foundation with a depth of 20-30 cm. Lay boards on the floor, but first lay a layer of waterproofing and foam. Frost-resistant floor tiles will be more durable and reliable. In an open gazebo, make a small slope over the edge so that moisture rolls to the ground and does not accumulate on the floor.
