What to use for work
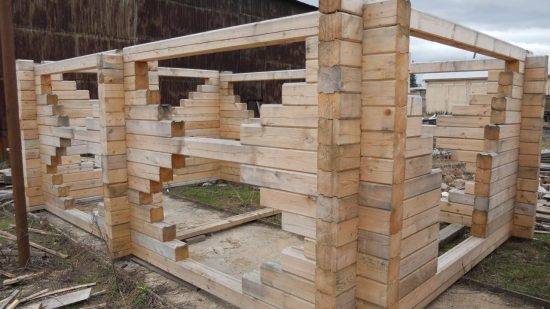
For the construction of a gazebo from a bar, ready-made elements are used. Each is suitable for work, none of them have problems in strength. But in terms of ease of assembly and price, they differ very much. Select material:
- Planed. The simplest, cheapest option is profiled elements with a treated surface. It is better to use it for open structures, as well as for frames, since it is inconvenient to connect such parts, and the appearance of the finished structure is not very good. There are many options, there are sections from 50 to 50 to 300 to 300, or even more.
- Profiled. The end parts are made according to the groove-ridge system, therefore, when connected, a strong joint is obtained, and the parts are ideally aligned with each other. This option is used in the construction of houses, as well as baths, it provides good thermal insulation and is well suited for a closed structure. It comes in many shapes, and the corners are often rounded to make them look attractive.
- Glued. Made from heat-treated parts, pressed under high pressure. Most often they sell ready-made kits that are assembled as a designer, which is convenient for inexperienced craftsmen.
Most often, the following breeds are used for manufacturing:
- Pine, spruce. They are inexpensive, inferior in strength to other options. To ensure durability, as well as eliminate the appearance of cracks and mold, it is better to process the surfaces every 2-3 years. Pay more attention to the outside, which is more affected by precipitation.
- Larch. Wood almost does not deteriorate from water even without treatment, it is often used for terraces, as well as other outdoor structures. It is much more expensive than pine, but it lasts longer. Processing also needs to be done to maintain the attractiveness of the wood. It is better to purchase a ready-made kit so as not to process and do the joints yourself.
- Cedar. It is very strong and durable, it releases useful substances, being inside such a gazebo is good for health. It is more expensive than all the options. It is more difficult to process, cedar is harder than pine and larch.
Assembling a gazebo from a bar
The whole process of assembling the gazebo takes place in several stages.
Installation of the lower trim
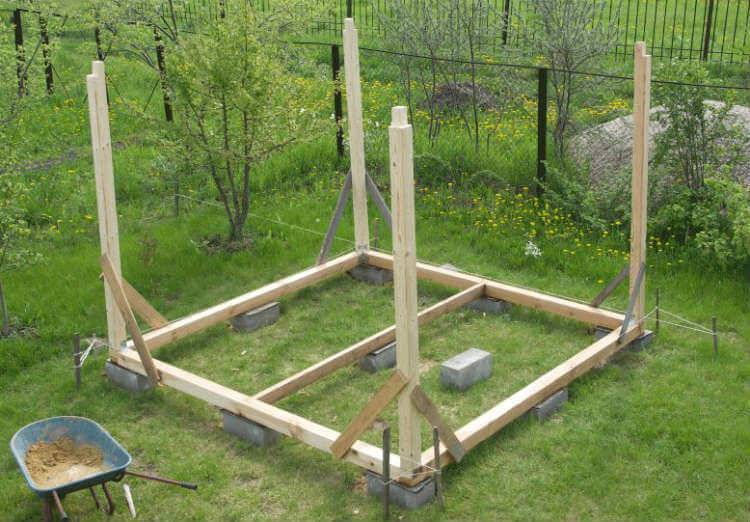
The harness is the basis of the entire wooden structure. It represents the beams laid and fixed to each other in the form of a future gazebo. Waterproofing is pre-laid on the foundation and the tree is fixed with anchor bolts. Naturally, the first crown, like all other elements, is set strictly in level. The type of corner bunch can be any, more often they use the option of a joint in half a tree or a joint "in a paw".

Installation of pillars
The pillars are installed inside the corner of the strapping or from above at the corner. The timber is attached to the lower strapping with corners or bolts. Additional fastening to the harness is possible using spacers installed at an angle of 45 ° on both sides of the post.
Installation of cross-bars
Lintels are placed to increase the rigidity of the structure at a height of 80 to 110 cm from the floor, as well as to create a fence, the options for which are many.
Installation of the upper trim
The bars of the upper knot are tied together with corners, they are attached to the racks from above or from the side. Sometimes there are structures with double strapping (both the first and the second way of arrangement).
Installation of the roof frame and roofing material decking
The shape of the roof often depends on the configuration of the structure, it happens:
- Shed.
- Gable.
- Four-slope.
- Shatrova.
- Other options (six-slope and curly roofs in one or more tiers).
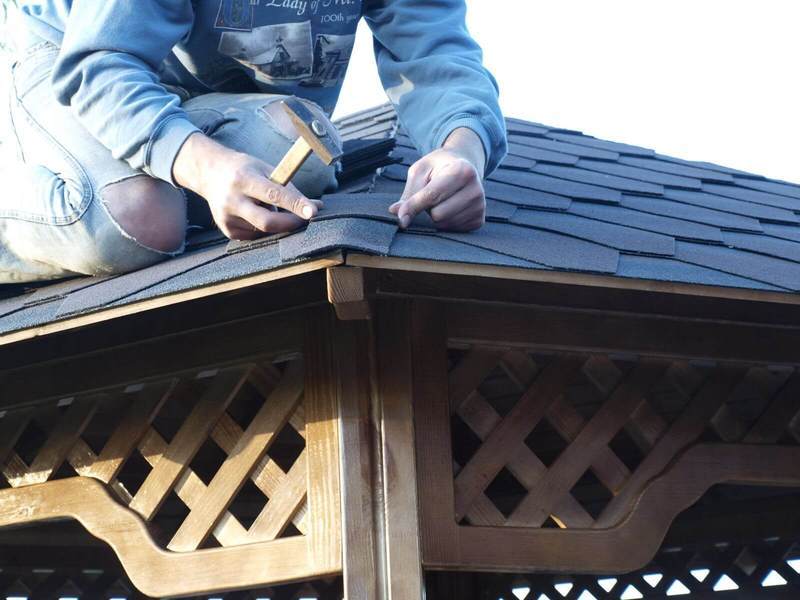
Another question: how to cover the roof of the gazebo. If it is planned to place a stove or barbecue inside, then it must be a refractory material, while it is not recommended to use metal tiles or profiled sheets, because in hot weather the roof will heat up, and there will be a lot of noise in the rain.The best option is a flexible and lightweight soft roof; bitumen slate is in second place in popularity. Budget gazebos are covered with a profiled sheet or roofing felt.
Regardless of the chosen roofing material and the shape of the roof, several rules must be followed:
- Installed rafters must have a slope and extend beyond the upper trim by at least 50 cm.
- The step of the lathing must correspond to the selected material.
- The roofing material can be attached directly to the rafters or on pre-laid sheets of moisture-resistant plywood, attached to the frame with self-tapping screws.
- Roof waterproofing is an important construction step.
The floor in the gazebo
There are three fundamentally different options here:
- Concrete floor with or without coating.
- Wooden flooring.
- Paving slabs.
Concrete floor
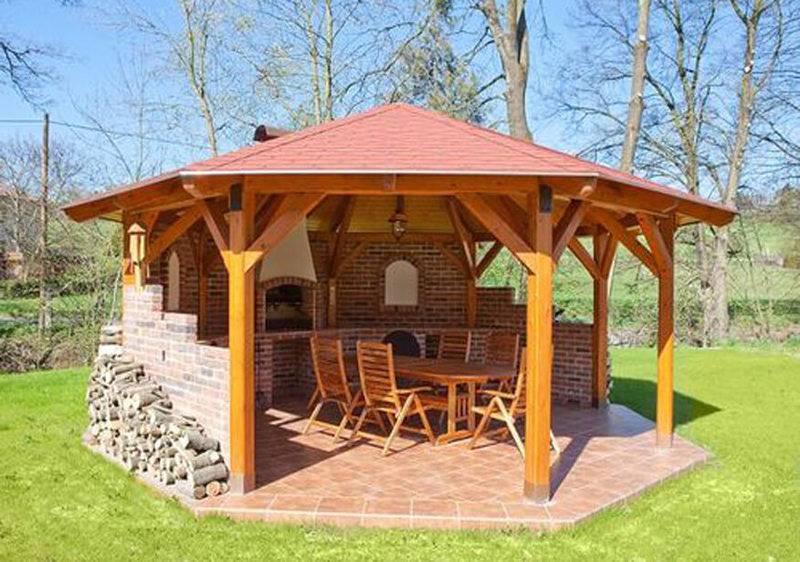
The concrete floor is reliable, practical and durable. The screed is usually poured inside the strip foundation or made in the form of a screed over the ground. Such a basis provides for the possibility of further coverage:
- Ceramic tiles.
- Clinker.
- Porcelain stoneware.
- Artificial grass and other synthetic materials.

Wood floors
They always make the room more cozy and colorful, great for a gazebo made of timber. There are several types of wood flooring, all of which are laid on a wooden crate:
- Plain board.
- Terrace (deck) board.
- DPK.
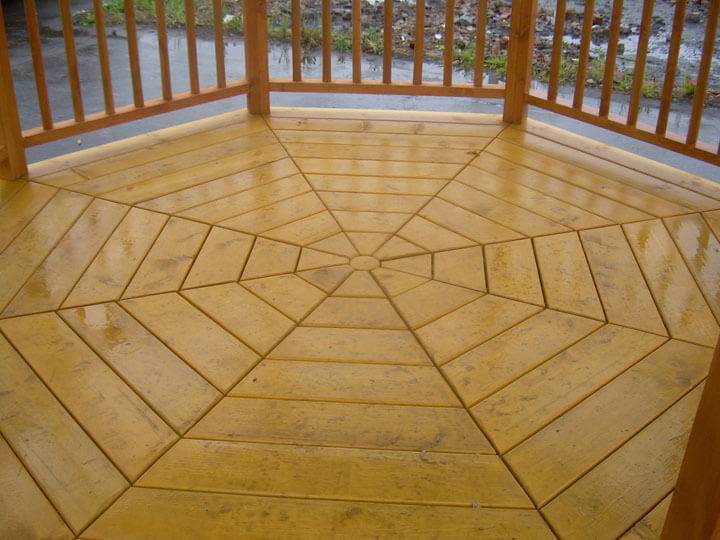
- Garden parquet.
Paving slabs
Usually this option is chosen when the gazebo floor is part of a tiled yard. It should be noted that in winter the tiles become rather slippery, and if laid incorrectly, they end up with an uneven fit. Paving slabs should be laid strictly according to the technology on a tamped cushion made of sand and gravel.
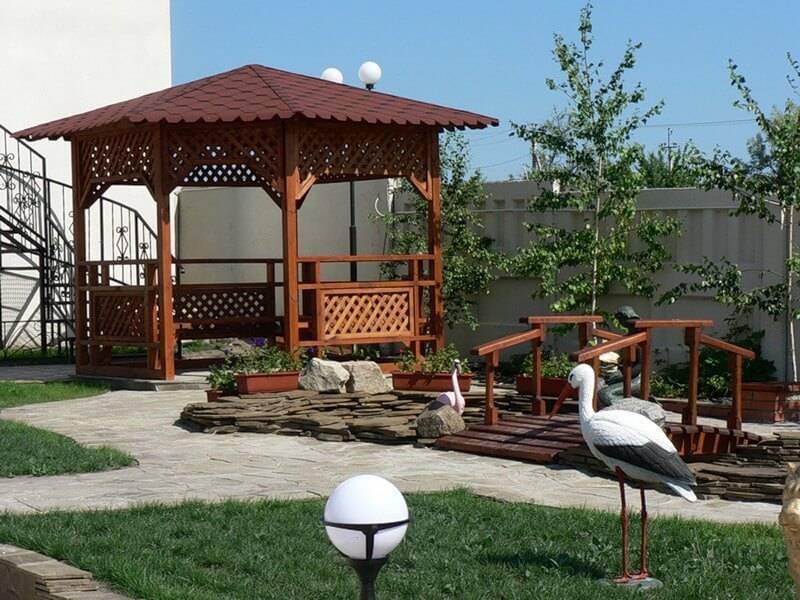
On a note! Upon completion of installation work to improve the appearance and protection, lumber is treated with moisture-repellent agents with fire and bio-protection, wood oil or paint.
Without a doubt, a log gazebo on the site is an excellent option, but it is worth considering that its construction is quite troublesome and time-consuming task, which, in addition to enthusiasm, will require competent preparation, certain knowledge and skills.
Choosing the type of gazebo - fresh air or comfort?
Arbors from a bar for a summer residence - a broad concept. Here you can enter both very light arched structures over a pair of benches, and houses closed from all the winds, in which you can not only relax, but also live with all the conveniences. On the net you will find hundreds of photos with different designs.
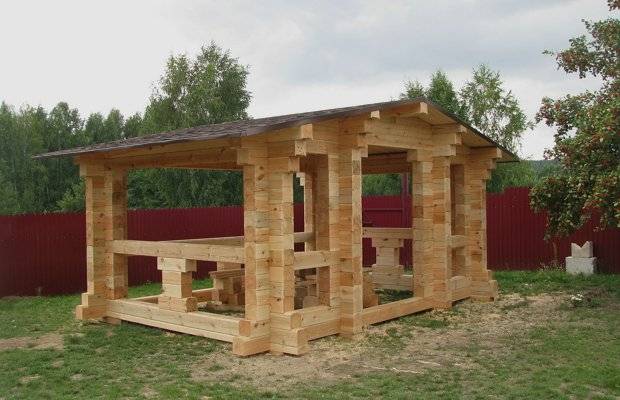
To simplify the choice, we will divide all structures for summer cottages into three types:
- Open - small architectural forms with a simplified design. Support posts, a roof and a low perimeter fence are characteristic features of open gazebos. It is good to spend time under such a canopy in the summer, but in other seasons, the rest can be spoiled by cold winds, precipitation or insects. Most often, an open type of gazebo is built of metal or lumber. A beam for such a simple design is completely impractical to use - you will get a minimum of comfort by spending a decent amount of money.
- Semi-open - gazebos for summer cottages that have one or two solid walls. Often these are structures with a barbecue or barbecue, kitchen counters and a minimum of necessary plumbing. Solid walls shelter vacationers from gusts of wind and precipitation, but at the same time there is access to fresh air and a view of the landscape. This type is quite convenient and practical, it can be operated all year round, with the exception of severe winter frosts. Often, the gazebo is attached to an existing wall, as in the photo. For construction, they use logs, stone or brick.
- Closed - these are the most comfortable gazebos, which will be cozy all year round. Such houses for summer cottages are distinguished by large panoramic windows, the presence of a fireplace or barbecue. The use of timber for the construction of closed gazebos looks the most reasonable - the structure will be warm and cozy, filled with the aromas of wood. Its construction will take very little time, which cannot be said about the construction of bricks or stone. In addition, timber arbors can be erected on a columnar foundation.
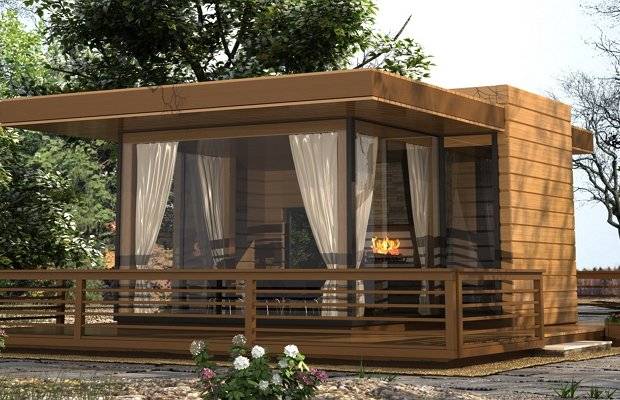
The choice of a gazebo is also influenced by the size of the site that you are ready to allocate for the building. If there is enough space, then you can build a large closed gazebo in which a large company can easily fit. If the area near the dacha is limited, and it is problematic to build a large gazebo, then it is better to make an open or semi-open option, as in the photo - this design will avoid the feeling of crampedness with a large number of guests, and in good weather the table and chairs can be taken outside the gazebo.
Do-it-yourself wooden gazebos: photos, drawings, diagrams
Here is a small gallery of handmade wooden arbors. Of course, you can collect more photos, because there are millions of options. Each gazebo, made not according to a template, but with your own hands, even according to standard drawings, is still a work of art. Here are collected relatively simple designs that are within the power of any master who does not have much experience. There are, of course, examples of industrial products, which may come in handy.
Another version of the gazebo: step-by-step adjustment instructions
The construction of the gazebo consists of two parts. The first stage is preparatory actions, and the second is the construction work itself. Each of these actions is considered an important and integral part of the work in the construction of a gazebo from boards.
Prep robots
Preparation involves the following steps:
- selection of boards;
- preparation of materials and tools;
- drawing up a drawing and marking the territory.

Board selection
The technical characteristics of the finished gazebo largely depend on the material itself. Boards can be selected from various types of trees, but resinous species, such as larch or spruce, are considered the best option. This choice is due to the fact that this wood, due to its composition, is capable of repelling moisture, as well as preventing the decay process.
Did you know? Architect Minnie Evans installed an original gazebo in the Wilmington park. Thousands of bottles form unusual ornaments and artistic compositions on this element of landscape design.
When choosing boards, you need to pay attention to their texture. It should be understood in which design they fit better
A natural country style gazebo looks great from unedged planks. For a more sophisticated structure, it is better to choose the tongue-and-groove option.
The size of the boards also varies. For the construction of a gazebo, you can use this material with different parameters or apply the same size.
As a standard, craftsmen choose boards of 50 × 150 mm for the entire structure, but you can also take the raw materials in question 50 × 100 mm and 25 × 100 mm.
Many experts are inclined to believe that this material should be of different sizes to build one gazebo. For example, for floor logs, rafters and strapping, boards of 50 × 150 mm are taken, for roof sheathing - 25 × 100 mm, and the best option for the floor is 50 × 100 mm.
Required tools
Before starting work, you should prepare the necessary equipment, materials and other devices necessary to create a gazebo.
To complete construction work, the master will need:
- Devices for marking the territory: level, tape measure, pencil or marker, cord.
- Hacksaw for wood.
- Antiseptics, fire retardants and the necessary equipment for their application.
- Fasteners: nails, corners, screws.
- Screwdriver.
- Waterproofing material.
- Hammer.
- Wood putty.
- Electric drill with drills.
- Varnish or paint.

Preparation of boards and other materials
To build the considered element of landscape design, it is recommended to choose the following types of trees: spruce, cedar, larch, pine, and birch. If the material is wet, then it must be dried. You should also treat the wood with special preparations, designed to protect buildings from mold, parasites and decay.
Important! To level the plot, it is recommended to remove the top sod layer of soil 10–15 cm thick.
The main materials are 150x150mm timber, 50x150mm boards and bitumen shingles. To build the foundation, it is also necessary to prepare concrete, consisting of cement, crushed stone, sand and water.
Drawing and marking of the place
Drawing up a project of the desired structure is necessary in order to have an idea of the appearance of the gazebo, as well as to understand how much material needs to be prepared
The drawing will help the master to pay attention to all the nuances even before the moment when the work begins. The project should contain several schematic images illustrating the view of the gazebo from all sides, as well as the dimensions of the elements of the future structure.
The next step in the preparatory work is the arrangement of the site and its marking. The selected area must be cleared of debris, stones, plant roots. The marking is carried out using stakes and a cord.
To determine the places intended for the corner posts, it is necessary to carry out an accurate marking, as a result of which the diagonals of the quadrangular figure must be the same, and the corners must be perpendicular.
Arbor made of timber and slats
To build an open wooden frame-type gazebo, you will need:
- timber with a section of 80x80 mm;
- slats 20x40 mm;
- plumb line;
- screws and nails;
- hammer;
- screwdriver;
- antiseptic primer.
When installing the floor of the gazebo, the lower harness from the bar has already been laid. Now you need to install vertical supports and sheathe the walls of the building. For vertical supports, a dry flat bar of 80x80 mm is used. First, they mount the corner posts, fix them with temporary spacers and set them strictly vertically. The racks are nailed to the lower trim or fastened with metal plates and bolts. Intermediate supports are installed between the corner supports, at a distance of 1-1.25 m from each other.
When all vertical supports are mounted, they should be secured with a top strapping. As a strapping, the same 80x80 mm timber is used, it is laid on top of the corner posts, aligned horizontally and nailed. All elements of the upper trim must be in the same horizontal plane. At the end of the installation, temporary spacers are removed and the walls are sheathed with slats.
Diy rectangular gazebo
Building a rectangular gazebo with your own hands is not so difficult, and it will undoubtedly decorate your site, but it is a little more complicated than a square-shaped design. Always plan to shape everything at the very beginning if you want to get a good result. Plus, proper planning can prevent many costly mistakes.
Choose materials with great care, making sure all parts are straight and in good condition. Building a rectangular gazebo is a little different from building a square one, but anyone with average carpentry skills can handle this task easily.
We will not describe the process in detail, all steps are shown in the diagrams, more detailed information can be obtained on the website, link under the photo with drawings.
The second part shows how to make a roof for a rectangular gazebo. Construction roof for rectangular gazebos is a difficult task, as it includes many cuts and measurements.Besides, you will definitely need an assistant. To make everything work out beautifully and reliably, observe building codes and select quality materials. It is also necessary to use good quality weatherproof lumber without defects. The sequence of works is shown in the pictures in the gallery; details of the construction stages can be found on the source's website.
Another option, how to make a rectangular gazebo with your own hands... If you have the financial resources, then of course it is better to buy quality wood, such as cedar, pine or mahogany. Also make sure that the material used is suitable for the climatic conditions. According to this project, if all the materials are available, the gazebo can be built in one day.
How to build a gable roof for a rectangular gazebo
The first stage is the manufacture and installation of the upper ridge and rafters. As you can see in the picture, it is necessary to cut off the ends of the rafters of the required size and fasten them to the upper rails with screws. Make sure the top ridge is horizontal, otherwise the roof will not be symmetrical. The next step is to install the rafters on both sides of the roof. You have to place the beams in the center. Cut the rafters to the required size (45 °) and shape and install them in place. Drill the holes and secure them with galvanized screws. Attach the rafters to the front and back edges of the rectangular arbor. Install the side rafters. Secure the roofing sheets. In order to protect the gazebo from precipitation, it is recommended to cover the roofing sheets with tar paper.
Attach the planks to the rafters, but it is very important to cut the ends of the planks at a 45 ° angle if you want a nice looking roof
Gazebo-pavilion for summer cottages
This, of course, is not the easiest project, but the pavilion gazebo for a summer residence is an ideal place for a summer dining room. You can always change the size and design of the pavilion to suit your needs and budget, but it is better to use the instructions and advice provided in the diagrams. A gable roof will improve the appearance of the structure, but it will require a large investment and a lot of materials. If you're looking to build a simple pavilion to enjoy with family and friends, there are several options you can choose from. On the one hand, you can build a gazebo or a simpler structure like this wooden pavilion. You can do it yourself, but you have to plan every step of the construction from the very beginning. It is recommended that you buy the very best materials you can afford. They should be weather resistant such as pressed wood, pine or cedar. Take accurate measurements carefully before adjusting sizes. Pre-drill holes in the parts before driving in the screws to prevent the wood from splitting. All stages of construction are shown in step-by-step diagrams, detailed instructions are on the site.
Do-it-yourself open gazebo
It shows how to build an open gazebo with your own hands from wood. The design, as you can see, is solid. The main building material will be wooden beams, the volume, and the quantity will depend on the size of the structure, the author does not give figures, so you will have to select it yourself. The second required material is metal rods of two types, T-shaped and L-shaped. And you also need screws, very large screws, twice the thickness of the beams. Do not forget about the ladder, preferably a sturdy one, in this project it is the main tool. Concrete is another essential material for building your gazebo, it will be used as a base and anchor for the entire structure. Once you have drawn the drawing, you will be able to see what dimensions are needed for all the wooden parts. If you have tools, you can cut all the components yourself. This is the cheapest option. If you don't have the skills or tools, you need to find someone to do it ..
The first step is to build the base.
- Prepare the area and fill the slab of the desired size. If you want more strength, add metal reinforcement concrete.
- Next, install the wooden beams and metal supports into the concrete at a 90 degree angle.
- If there are gaps between the metal and wood parts of the supports, use tar and silicone to fill in and create a waterproof seal.
- Repeat this step for all supports. Typically four pillars are installed, but if you choose a different design, more pillars may be required.
- The next step is to place the wooden rungs on the supports, remember to measure all sides and make sure they are equal. Then secure them in place with the screws.
- The next step is to attach the side rails to the ones you installed on the posts.
- Then you need to make a triangular structure that will support the roof. The triangular shape of this part of the structure is designed to distribute weight down to the supports, which will be especially useful if you live in an area with high rainfall, especially snow.
- Use metal rods to hold the diagonal pieces securely in place. Pass the metal bar through the two pieces of wood to make sure they hold firmly in place.
- Now install the top bar where the roof will be attached. This may require the use of a rope or extra help to keep the pieces together.
- Now it's time to put in the roof supports to help support the weight. Place the support approximately every 55 cm. Fasten the supports securely with screws.
- Cover the roof with sheets of plywood, this layer must withstand a lot of weight, it must be fixed very securely.
- Then attach the waterproof layer. There are different types of roofs, you can choose whichever you prefer, but laminated tiles are a popular and effective choice.
Do-it-yourself wall gazebo
No matter how small a free-standing gazebo is, it still takes up enough space. The ideal option for a small yard is to make a wall gazebo with your own hands. Indeed, this option has a lot of advantages. First, savings, because less materials are needed. Secondly, compactness, because the space is needed half as much as for a free-standing gazebo. Thirdly, it is very convenient, you do not have to go far, that is, it serves as a veranda and, most importantly, such a gazebo can serve for different purposes, for example, you can put a workbench, here is a workshop in the fresh air. Sleep on a sweltering night, organize a summer dining room. In addition, it is even easier to build a wall gazebo than an ordinary one. Here, step-by-step diagrams show how to do this, and you can read step-by-step instructions on the website.
How to make a gazebo with your own hands (drawings)
In this section, we will analyze the simplest version of the gazebo - a rectangular one with a pitched roof.
Drawing
Before starting construction, it is necessary to draw, if not a drawing, then at least an approximate diagram of the future gazebo. Based on this scheme, you will be able to prepare all the necessary material, in the required quantity. It will also become clear to you which tool to use.
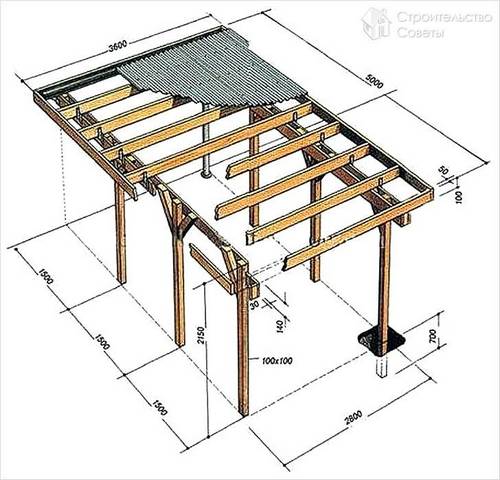
This is just a rough diagram to guide you. The dimensions depend, first of all, on the size of the site on which it will be built. The functionality of the gazebo also plays an important role: it is just a resting place, or it is a place for a barbecue.
Another assembly diagram:
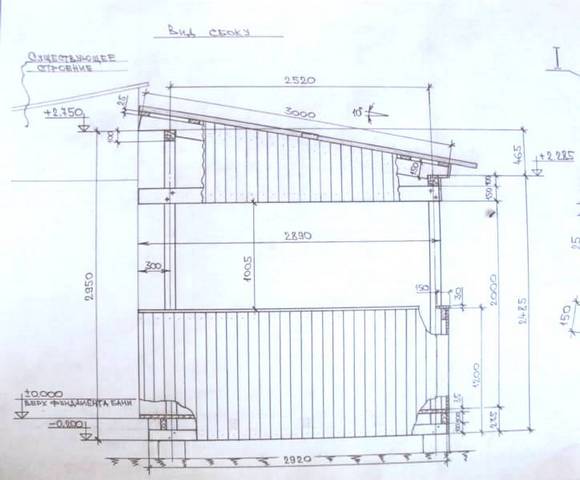
Other options for do-it-yourself wooden gazebos
On the site, we often write about the construction of a wooden gazebo, since it is very popular. We try to use structures of different sizes and shapes in our articles. I would like to give you a few links by which you will find other options for building wooden arbors in the same way as the above-described construction was made.
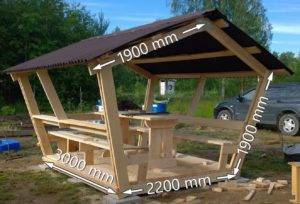 Dimensions of the proposed building
How to make a gazebo with your own hands: photos, videos, projects - the construction process from Vasily Popikov is shown. This is one of the most popular videos on this topic on the Russian Internet.
In the process of publishing articles, we will add even more links here so that you are not limited to just a few options for wooden arbors.
If you have any examples of your own, where the construction of such gazebos is shown in a high-quality and interesting way - leave your comment, we will definitely consider and comment on it.
Design
To decorate wooden buildings in the country, elements that are combined in style are used:
- lattices made of wooden slats, installed instead of glazing;
- carved details;
- elements that imitate an aged surface;
- thin curtains for draping open openings.

Especially attractive are buildings with ceiling chandeliers located in the center of the room. They are usually placed above the dining area. Summer houses are often decorated with hanging and wall sconces. Lamps imitating old wood or metal are very good. Large decor and pompous details are inappropriate in a small summer building. They take up too much space and overwhelm the space.
Usually in summer suburban buildings, a barbecue area or barbecue is installed. The choice is made in favor of simple models of ferrous metal or brick ovens. They go well with wooden furniture. When decorating a summer house, the space is not overloaded with decorative details and the correct lighting of all zones is organized.
A summer building made of bars decorates the courtyard, makes the rest in the country more comfortable. The correct shape of the building material makes the gazebo aesthetic, durable and comfortable. It goes well with any landscape design. It takes very little time to build it.
Gazebo 4x3 with barbecue

To equip a compact and solid gazebo equipped with a barbecue or barbecue, you need to take care of fire safety and chimney. When arranging a building with the ability to cook food on fire, consider the following recommendations:
- place the cooking area at the opposite end from the rest;
- do not decorate the wooden elements of the gazebo in the vicinity of the fire with flammable materials;
- protect the tree with special fireproofing impregnations;
- sew up the segment of the location of the barbecue with cement-asbestos or other heat-resistant materials;
- equip the hood;
- close the working area from the wind to prevent the fire from blowing up;
- use barbecues with the ability to remove charcoal after cooking.
Use stainless steel sheet for chimney and exhaust. At the end of the pipe that goes out, put on a protective casing that prevents precipitation from entering the structure. Next to the barbecue, make a small rack equipped with shelves at the bottom where you can cook and store dishes and skewers below.
Diy octagonal gazebo
Shown here are three stages of construction - main body, roof and railings. An octagonal gazebo is a more complex design than a rectangular or square shape, as it requires more materials and more complex wood handling. However, this is not an excuse to give up construction as long as you use the right blueprints for the job and plan every aspect of the project. According to the plans presented, you can build an octagonal gazebo with your own hands in 2 - 3 days. I will not write detailed instructions, you can read them on the site, but here are some tips.
- The first step is markup. The easiest way to lay out an octagon is to make a square and cut the corners until you get the shape you want.
- Install the middle beams using the template shown in the pictures.
- Use a good saw to cut the corners for tough seams.
- Use waterproof bond adhesive to strengthen the bond.
- Check that the main beams are perpendicular with a joinery square.
- When installing the deck, remember to countersink the screws and make sure there is a small gap between the drainage boards.
- When installing the top bars, cut the ends of the top bars at an angle of 67.5º. Place a wooden plank between the uprights and secure with galvanized screws.
- When installing a new component, use a plumb line to check each support.
Sketches of gazebos with drawings and dimensions
Available sizes can be increased or decreased proportionally
It is important that you understand that as the size increases significantly, the frame requires a more powerful one. Do not forget about this, and everything will work out for you: a self-made gazebo will be beautiful and reliable
Simple gazebo made of wood
Almost the same project, but with different dimensions: the top point of the roof is raised higher, which makes it visually seem lighter. The gazebo is also quadrangular, the roof is hipped.
When installing such a roof, the most problematic are two places (nodes).
Large gazebo on the foundation
Before you build this gazebo, you need to make a strip foundation. Its parameters depend on the soil, on the material that you are going to use for the frame: metal or wood, and what you are going to glaze with. In general, the width of the tape is about 20 cm, the depth is 20-30 cm deeper than the level of the fertile layer. On heaving soils, it is better to make a pile foundation.
Drawing of a swing gazebo
The swing gazebo requires special attention: it is fastened very firmly so that the arising variable loads do not loosen or overturn the structure. To do this, you can extend the legs down, dig a hole under them, fill them with rubble, tamp, and then fill everything with liquid concrete. If the frame is made from a pipe, there are no questions; for a tree, you can use "P" -shaped mounts with a pin mounted in the lower part. Here it can be bent and filled with concrete.
For even greater reliability, crossbars are attached to the legs, which turn out to be slightly recessed in the ground. They are hammered in with U-brackets.
Do-it-yourself large gazebo made of wood
This large gazebo can be called a pavilion rather. Not a bad option if you have a large yard or enough space on the site. Not a bad project in the sense that in the future, under such a canopy, you can install a brazier or barbecue, or even organize a stationary summer kitchen. To build such a gazebo, you need a columnar foundation, but perhaps the most difficult part is the roof. To do this, the upper contour of the gazebo must be installed with horizontal ties. Then fix them with self-tapping screws to the supports.
For the reliability of the screed, it is necessary to fasten it with metal strips. Then secure all other parts. Finally, saw off the central support flush and lay the crate.
Please note that the lathing is made in different ways, depending on the roofing material, if under the slate, then it can be either single-layer or two-layer. But this is a separate topic.
Arbor for giving with your own hands made of wood
It shows how to make a square garden gazebo with a hipped roof is no longer in diagrams, but in visual step-by-step photos. For the construction, a standard material was used - board, timber, roofing material. The only non-standard solution was to use a sewer pipe with a diameter of 125 mm for the construction of the foundation for the support pillars. The photo shows all stages of work, from marking and pouring a columnar foundation to fixing the roof. In my opinion, an excellent option for a summer residence, a light and simple design without any special claims.
