The foundation for the gazebo
Even the simplest gazebos for summer cottages require support - a foundation. This is due to the presence of groundwater, which, depending on its volume, can destroy the structure above the ground surface.


Erection pile-screw foundation is carried out in several stages:
- Marking the area for the foundation;
- Leveling the ground;
- Deepening of piles, depending on the type of soil (the flow of water at a low level gives a reason not to deepen the pillars much, but with a high flow, the piles must be screwed in deeper - by one and a half meters);
- Wrapping support piles with polyethylene;
- Filling the finished holes with rubble - the gaps between the piles and the walls of the soil.
- Pouring holes with concrete.

Further, pillars are built into the piles. The bottom must be supplemented with load-bearing elements for the flooring. Thick bars act as the first, and the process itself is called the lower strapping. Later, horizontal logs are attached to the bars, which can be sheathed with boards.

DIY square gazebo
Here are detailed instructions for building a square gazebo.
The simple design and construction of this gazebo might interest you. The dimensions in the drawings are in inches and feet (1 inch - 2.54 cm, 1 foot - 30.48 cm), you can of course set your dimensions while maintaining the proportions. Construction begins with markings, measure the diagonals so that they are exactly the same.
- Dig holes for the posts and place the molds in the holes.
- Fill the pipe molds with concrete and let dry for a few days.
- Install the horizontal beams and screw to the posts. Use a spirit level to make sure the beams are perfectly horizontal.
- Next, you need to install the middle joists to the floor of the gazebo.
- Align the edges and make sure the corners are square.
- Then install the intermediate beams on the floor of the gazebo. Lay the floor by fixing the boards with screws.
- Using a level, install the top beams.
- Align the edges and use the corner connectors to secure the top comb.
- Do not leave any gaps between parts.
- To protect the gazebo from dampness and improve its appearance, varnish or paint it.
How to make a gable roof for a square gazebo.
And here are a couple of options for gazebos using polycarbonate
Important stages of construction
The construction of the foundation is really a difficult process in terms of physical activity, but with the abandonment of the project and the sequence of work, problems usually do not arise (this applies primarily to the strip and monolithic base, since difficulties may arise with the columnar one due to savings).
Markup
After choosing the site and the type of foundation, it is necessary to mark the site. For the columnar, you need to mark the pits, and for the tape, the width of the trench.
Strip foundation marking
Digging holes, trenches or platforms
 Dug trench
Depending on the type of base, it is necessary to prepare a flat area for it with a certain depth. I will tell you a little experience that I got in the manufacture of strip foundations.
Formwork manufacturing
The process is quite exhausting, requiring the installation of the formwork strictly according to the level. For its construction, sheets of chipboard or OSB, boards, slats, self-tapping screws, a screwdriver and a level are needed.
Strip base formwork
All work consists in leveling in all projections of the walls, which, in addition, will have to withstand the concrete solution and not fall apart. To do this, they are fastened with self-tapping screws. The connections should be as tight as possible.
Rebar tying
Metal rods held together with knitting wire make the foundation really strong and reliable. Without going into technological features, I will say: there should be at least some kind of reinforcement, you should never abandon it, otherwise your concrete solution may fail.
Metal reinforcement inside the strip foundation
For each foundation, its own reinforcement is used; for bored piles and a monolithic foundation, it will be fundamentally different. I suggest you watch a video that clearly shows the process of tying a reinforcing cage.
Preparation of concrete mortar
There are three possibilities here, each with advantages and disadvantages.
- Purchase of ready-made concrete solution in a "mixer" (from 3,500 rubles per cubic meter plus delivery to the site). In addition to being expensive, you will need to quickly implement the grout as it hardens quickly. In the case of self-mixing, the rush will be noticeably lower.
- Mixing the mortar in a concrete mixer. Physical activity associated with manual mixing of sand, crushed stone, cement and water is excluded, besides, the solution turns out to be really mixed (it is more difficult to achieve such a result manually). A serious disadvantage is that the speed of pouring the foundation will not be able to move faster than mixing the solution in a concrete mixer. If we are talking about a large number, then this is very noticeable.
- Mixing the solution in a trough or film. The most labor-consuming method that does not require special equipment. You will need shovels, buckets and a great desire to interfere, interfere and interfere again.
Diy octagonal gazebo
Shown here are three stages of construction - main body, roof and railings. An octagonal gazebo is a more complex design than a rectangular or square shape, as it requires more materials and more complex wood handling. However, this is not an excuse to give up construction as long as you use the right blueprints for the job and plan every aspect of the project. According to the plans presented, you can build an octagonal gazebo with your own hands in 2 - 3 days. I will not write detailed instructions, you can read them on the site, but here are some tips.
- The first step is markup. The easiest way to lay out an octagon is to make a square and cut the corners until you get the shape you want.
- Install the middle beams using the template shown in the pictures.
- Use a good saw to cut the corners for tough seams.
- Use waterproof bond adhesive to strengthen the bond.
- Check that the main beams are perpendicular with a joinery square.
- When installing the deck, remember to countersink the screws and make sure there is a small gap between the drainage boards.
- When installing the top bars, cut the ends of the top bars at an angle of 67.5º. Place a wooden plank between the uprights and secure with galvanized screws.
- When installing a new component, use a plumb line to check each support.
Construction of a hexagonal arbor
Construction of a hexagonal arbor
A hexagonal garden gazebo always looks very elegant and is a decoration of any site. During its construction, the accuracy of calculations is very important, because errors at any of the stages will significantly affect the final result. You need to start with a drawing of the future building, which will allow you to correctly mark the site and calculate the amount of materials.
Sectional diagram of a hexagonal arbor
For construction you will need:
- cement mortar;
- brick or cinder block for pillars;
- wooden beams with a section of 150x150 mm;
- planed timber 100x100 mm;
- edged board 50x100 mm;
- roofing material;
- floor boards;
- self-tapping screws;
- primer;
- wood varnish;
- screwdriver;
- jigsaw;
- building level;
-
roof covering.
Step 1. Markup
To mark the site, you will need two wooden slats and a rope about 2 meters long.The selected area is leveled, freed from vegetation and stones, a rail is driven into the ground in the middle and tied with a rope. The other end of the rope is tied to another rail and, using such a homemade compass, a circle is drawn with a radius of 1.75 m. The resulting circle is divided into 6 equal parts and beacons are placed on the marking line. Support posts for the gazebo will be located here.
Step 2. Making a columnar foundation
In place of the beacons, holes are dug 0.5 m deep and rectangular. River sand is poured onto the bottom with a layer of 10-15 cm, then a layer of coarse gravel of the same thickness. A 70 cm long steel bar is driven in in the middle of the hole, after which everything is poured with cement mortar. A brick is laid on top in 3-4 rows with obligatory dressing. The rebar should be centered on the masonry. In the same way, lay out the remaining 5 supports and allow the solution to dry well.
Step 3. Installation of the base of the gazebo
Making the foundation
Measure the distance between adjacent posts and cut the beams according to measurements. You should get 6 beams of the same length and thickness. To securely connect the supports to each other, cuts are made at the ends in half the thickness of the tree. After that, the lumber is primed and dried, and then laid on poles in the form of a hexagon. Pieces of roofing material must be laid between the beams and pillars of the foundation.
Gazebo construction
When the beams of the lower harness are fixed, lags are attached inside the hexagon. The central joist is placed exactly in the center of the structure, horizontally aligned and fixed to the beams using metal plates and bolts. Next, 2 logs are mounted perpendicular to the central one, and all the rest are inserted at an angle, for which small cuts are made at the ends of the boards on both sides. In conclusion, the logs are strengthened with jumpers from a bar and sheathed with boards.
Step 4. Erection of walls
Hexagonal gazebo made of wood
The frame of the gazebo is made of 6 beams 100x100 mm of the same length. Each beam is installed on one of the corners of the base and fixed with anchor bolts. Be sure to check the verticality of the support posts so that the structure is not skewed. Along the upper edge, a strapping of thick boards is mounted, and at a height of 70-90 cm from the floor, the racks are connected with horizontal jumpers from a bar, leaving the entrance free.
The walls can be made in several versions, depending on the materials available. You can close the gazebo up to half with sheets of waterproof plywood, sheathe it with boards, fix wooden figured lattices on the jumpers between the posts. You can make two or three walls blank, and decorate the rest with forged elements.
Step 5. Roof installation
Roof fabrication on the ground
When the walls are ready, proceed to the installation of the roof rafters. Take as rafters boards 50x100 mm; for For convenience, the assembly is carried out on the ground. Since there is no central post in the gazebo, it is quite difficult to neatly connect the rafters. To simplify this process, a hexagon cut from a bar will help, each side of which will correspond to the thickness of the rafters. The ends of the boards are cut at an angle and fastened with nails to the hexagon; and on the inside of the strapping, grooves are cut out for installing rafters. After that, the structure is sheathed with boards in a circle, leaving small gaps, lifted up and fixed with bolts. Now all that remains is to lay the roofing material.
Gazebo furniture
Prices for various types of fasteners for rafters
Fasteners for rafters
Roof installation
Before installing the roofing material, you need to build a rafter system. Usually a traditional gable roof is made.
If the gazebo is spacious enough, you can build a hipped roof, but this option is more difficult in terms of construction.
The rafter system is mounted directly on arbor frame (upper harness). During the installation process, the vertical position of each triangle of the rafter system should be monitored. Jibs are used for fixing.
After the installation of the rafter system, the lathing is made and the roofing material is laid.
Do-it-yourself open gazebo
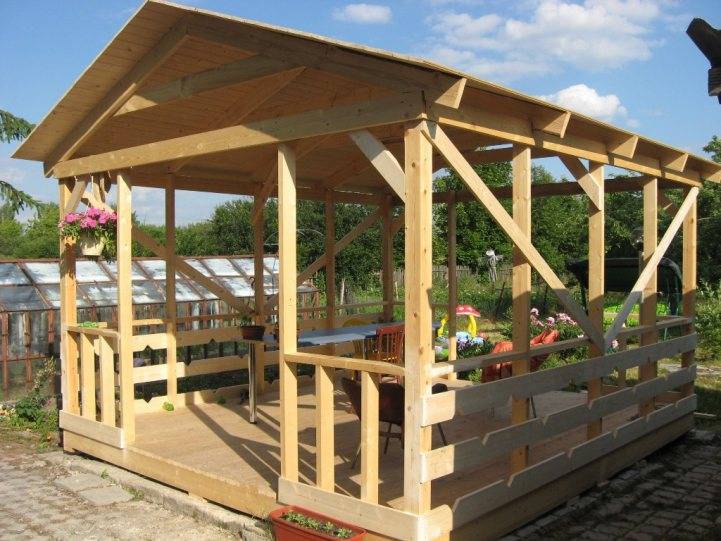
Shown here, how to build an open gazebo with your own hands made of wood. The design, as you can see, is solid. The main building material will be wooden beams, the volume, and the quantity will depend on the size of the structure, the author does not give figures, so you will have to select it yourself. The second required material is metal rods of two types, T-shaped and L-shaped. And you also need screws, very large screws, twice the thickness of the beams. Do not forget about the ladder, preferably a sturdy one, in this project it is the main tool. Concrete is another essential material for building your gazebo, it will be used as a base and anchor for the entire structure. Once you have drawn the drawing, you will be able to see what dimensions are needed for all the wooden parts. If you have tools, you can cut all the components yourself. This is the cheapest option. If you don't have the skills or tools, you need to find someone to do it ..
The first step is to build the base.
- Prepare the area and fill the slab of the desired size. If you want more strength, add metal reinforcement concrete.
- Next, install the wooden beams and metal supports into the concrete at a 90 degree angle.
- If there are gaps between the metal and wood parts of the supports, use tar and silicone to fill in and create a waterproof seal.
- Repeat this step for all supports. Typically four pillars are installed, but if you choose a different design, more pillars may be required.
- The next step is to place the wooden rungs on the supports, remember to measure all sides and make sure they are equal. Then secure them in place with the screws.
- The next step is to attach the side rails to the ones you installed on the posts.
- Then you need to make a triangular structure that will support the roof. The triangular shape of this part of the structure is designed to distribute weight down to the supports, which will be especially useful if you live in an area with high rainfall, especially snow.
- Use metal rods to hold the diagonal pieces securely in place. Pass the metal bar through the two pieces of wood to make sure they hold firmly in place.
- Now install the top bar where the roof will be attached. This may require the use of a rope or extra help to keep the pieces together.
- Now it's time to put in the roof supports to help support the weight. Place the support approximately every 55 cm. Fasten the supports securely with screws.
- Cover the roof with sheets of plywood, this layer must withstand a lot of weight, it must be fixed very securely.
- Then attach the waterproof layer. There are different types of roofs, you can choose whichever you prefer, but laminated tiles are a popular and effective choice.
Do-it-yourself beautiful gazebo made of wood
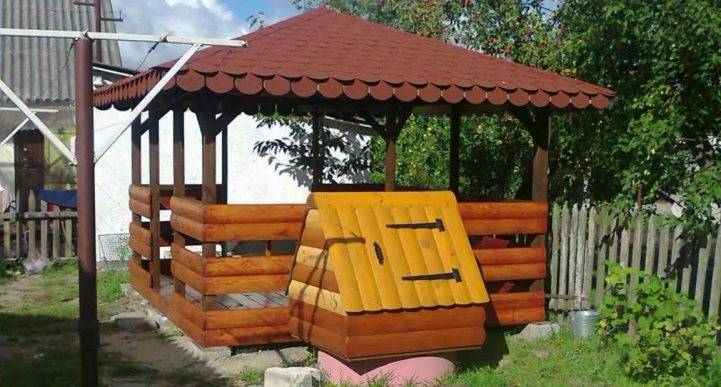
Simple rectangular structure with a gable roof and beautifully designed side walls. The gazebo is assembled from ready-made forms, all the details of the project were made to order according to the personal drawings of the author. The third photo shows the modules made in the workshop. The structure is installed on a red brick point foundation. See the step-by-step photos for the assembly procedure.Due to the unevenness of the terrain, the gazebo is slightly raised, the stairs apparently were not included in the author's plans, so a temporary version was made.
Diy gazebo with a hipped roof
Building a square gazebo with your own hands is not an easy task, you need to take into account the skills that you must master, as well as the tools and materials needed to complete the work. However, if you make the right plan that suits your tastes and needs, and of course your budget, and use the right woodworking techniques, you can build a pretty decent gazebo. Buying a ready-made kit or hiring a professional is also an option, but if the budget is limited, perhaps make the gazebo your own hands would be the best solution. Choosing the right plans and designs is a real challenge, as there are so many alternatives. Therefore, you should write down the required features and budget on paper from the very beginning. Then you need to develop a plan, taking into account the necessary materials and tools. Buy the right materials for outdoor structures so that the gazebo does not fall apart in a month. In general, there are step-by-step diagrams in the gallery, you can read a description of each step on the website.
Another example of how to make a square gazebo with a hipped roof. In principle, this is the same as the previous one, only it is shown in more detail how to make a roof for a gazebo and a railing. You need to properly design an open gazebo. You need to decide what the dimensions will be and if, for example, you want to add a barbecue or barbecue, this must be taken into account when planning. The options are almost limitless, but you must remember that each additional feature comes with additional costs, so a balance must be struck between benefits and costs. Choosing the right gazebo design is a tough decision as there are many potential alternatives: on the one hand, you can build an octagonal gazebo, a rectangular structure, or just a square one. This article shows you how to build a square gazebo in a couple of weekends, while saving a lot. All this is not so difficult, provided that you know how to hold a hammer in your hands and use a hand saw.
How to build a gazebo with your own hands 3 projects
Here are three projects with step-by-step photos of how to build a wooden hexagonal gazebo with your own hands. All stages of construction have already been described above, they are simple and straightforward. There are naturally a lot of options for construction, as well as types of wooden arbors, each project has its own nuances. These three projects do not differ in particular complexity, but if you are interested in a more detailed description of each stage, links to sites are located under the galleries. Here is the first project, a hexagonal gazebo with a porch.
Here are several diagrams and introductory photos with the stages of construction.
15 steps how to build a wooden gazebo with your own hands. This is a project that anyone can complete with a little help in two days. Of the tools, you will need mainly a drill and a hammer.
5 unique ideas for gazebos:
(click to enlarge)
How to make an open gazebo
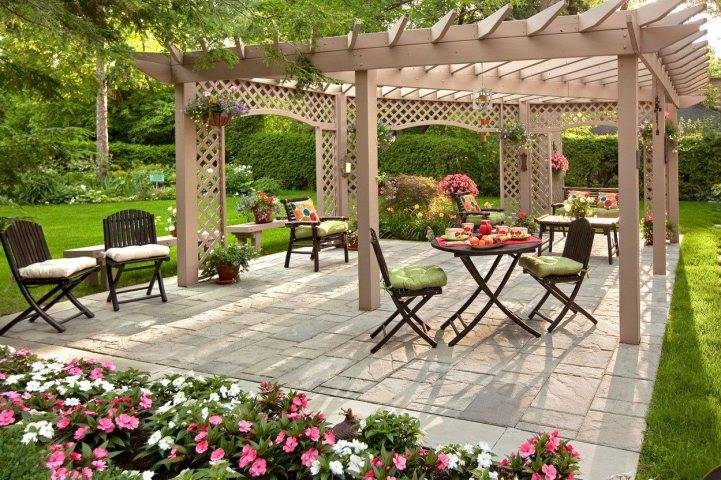
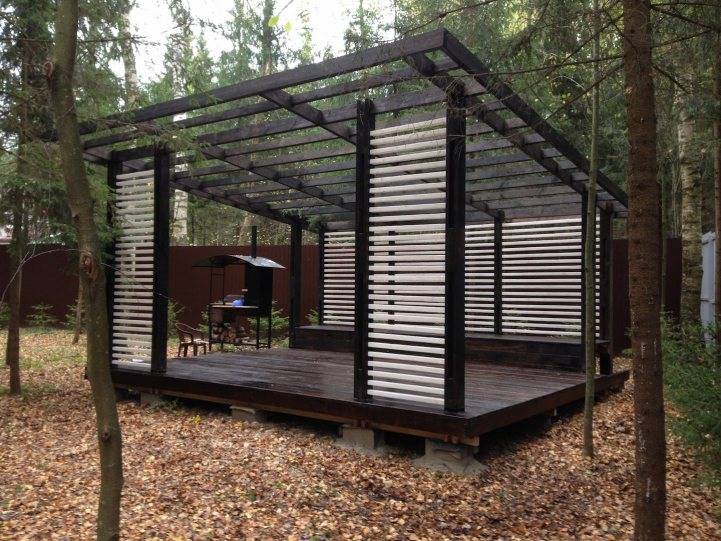
If you want to create a recreation area on the site, you should think about building an open pavilion or pavilion, a shed. In fact, they are one and the same, only I have slightly different design features. An open gazebo, the same as a classic one, only without walls or railings, and a canopy is even simpler, that is, just a roof that rests on several pillars, where there is no entrance or walls. This project includes instructions for building a gazebo from scrap materials. Any amateur can build such an open gazebo within a few days.Ultimately, such a canopy can be used for different purposes: it can be an open gazebo for relaxation, a summer kitchen or a barbecue, you just need to change the design a little. The stages of construction are presented on the diagrams in the gallery, instructions for each step can be read on the website, the link is under the photos.
Gazebo railing
Railings, this is the final stage. There are many plans for an octagonal gazebo railing, so make sure the appearance matches the style of the gazebo and your tastes. The first step is to create lower and upper guides. Use a router to make a wide and deep channel in the battens as shown in the diagram. These channels will hold the balusters tightly. Then there is the installation of the lower cross members, check with a level that they lie strictly horizontally. Repeat the process on the remaining 6 sides of the gazebo. And the last step is the installation of the railing. Make sure the pilot holes are evenly spaced before drilling the pilot holes and tightening the screws. Place a block of wood between the planks to create consistent spaces
It is very important to secure the bar with the screws before installing the top bar. Check that all parts fit snugly and that the screws are flush with the wood surface
Sketches of gazebos with drawings and dimensions
In this section, we will look at examples of different types with drawings. If you do not have time to draw yourself or you do not know how, then the examples given will help you when building your own version of the gazebo.
Simple gazebo made of wood
Wood, the most common material, cheap and not difficult to work with. When it comes to construction, most people do not even hesitate to choose wood as the material.
This figure shows a fairly simple version of a gable gazebo.
The next drawing also represents a simple gazebo, albeit with a hipped roof.
The number 1 denotes the lower strapping made of a 100x50 bar, 2 - a vertical support (80x80 bar), 3 - entrance racks (80x50 bar), 4 - an upper strapping and 5 - rafters.
In this version, the main thing is to connect the top of the tent. Here, a slightly different rafter pattern is needed than with a gable roof.
Do-it-yourself gazebo made of wood, drawing with a gable roof
A gazebo with a gable roof, as well as with a flat one, is one of the common options erected on a garden plot.
The figure shows a 3x3 layout.
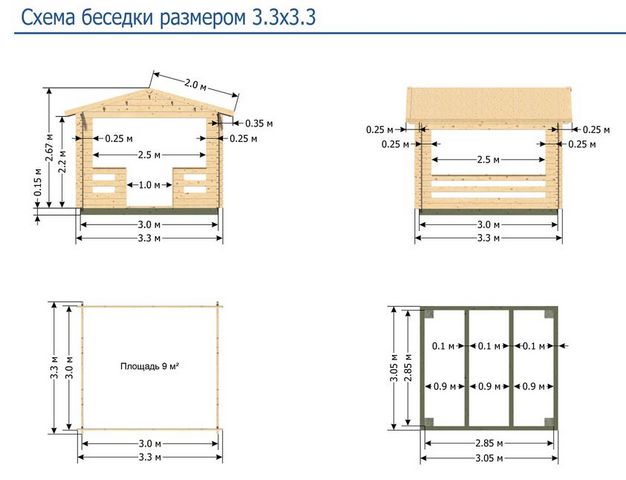
Foundation
As a foundation, concrete blocks are used, which are installed according to the level on a prepared and marked site. This is a less laborious process compared to concreting. Roofing material is placed on the foundation blocks. Next, the lower harness is assembled. For it, a beam of 100x100 is used. To fasten the vertical racks, gaps are cut out at the ends of the timber, which, when the timber is connected, give a square where the rack will be inserted.
This is a very convenient option, as it provides additional support for the rack. We install the assembled lower trim on the foundation, after which we begin to assemble the side walls.
Walls and trim
First of all, we install four support posts, after which we make the upper strapping. In order for the racks to be leveled, during further construction we strengthen them on jibs. After the upper harness has been erected, we make the middle one.
Fastening is done with metal corners and self-tapping screws. After assembling the frame, you can start building the roof.
Roof
You can first assemble the roof on the ground and install it on the upper harness, or make triangular rafters, fix it on the upper harness, and then assemble the roof on them. As for the second option, the triangular rafters are made as shown in the photo.
If you are assembling a roof on the ground, then it will look like this:

The assembly scheme in both cases is the same, the only difference is in the place of assembly. Therefore, we choose the option that is more convenient for you. When assembling the roof, grooves are cut in all elements, then the entire rafter system will be even. At least two people will have to lift the rafter system upstairs, so you will have to take care of your partner.
After installing the rafter system, the crate is made.
The lathing is needed for laying roofing material on the roof. It can be slate, metal tiles and other material.
With the roof in place, you can start laying the floor. We use a floorboard. Before installation, it is covered with an antiseptic. The main thing is to install the first board exactly, and then attach the rest to it.
And the last - clapboarding of the gazebo
Usually, only the lower part of the gazebo is sheathed: from the floor to the middle harness. The upper part can be left open, or a decorative grille can be installed. At the end of the finishing work, the gazebo can be painted, you can leave it covered with stain.
As a result, you get something like this:
DIY garden gazebo
This project is, of course, more ambitious. To build a garden gazebo with your own hands, you do not have to be a high-class carpenter or a jack of all trades, although it would not hurt. All stages of construction are shown here.
- Work begins with marking. Remove the sod and about 10 cm of soil to ensure proper drainage and prevent grass and weeds from growing.
- Then cover the prepared area with gravel.
- Then set up the spot foundation molds and fill them halfway with concrete.
- Use a level to make sure the top of each shape is at the same height.
- In this case, the relief is slightly inclined, so the height of the molds for each hole is different.
- In the second photo you can see the device, the laser level, which was used for marking.
I will not describe all the details further, in the photographs everything is shown quite well, and detailed instructions can be read on the website, the link is under the gallery.
