

How to make drip irrigation yourself - the necessary materials and installation rules


In the summer, when the heat is incredible, your vegetables, fruits and plants need constant watering... But not everyone wants to stand in the scorching sun with a hose in hand and water the garden, flower bed or vegetable garden. The most optimal solution to this issue is drip irrigation, which can be completely made with your own hands.
Content:
- Features and main advantages
- Installation materials
- System installation rules
- Installation diagram
- The subtleties of care for the irrigation system
Features and main advantages
Drip irrigation system save you time and effort. It is not difficult to install it on your site and you do not have to spend a lot of financial resources on it. Of course, in order to fit it clearly in the shape and area of the land plot, you will need to sweat a little.
But the irrigation system organized in this way will become a real source of pride. In addition, your cultivated plants and flowers will feel great and bear fruit. It is also suitable for seedlings flowers, and for cultivated plants.
It perfectly moisturizes the soil, from which plants grow and thrive well.
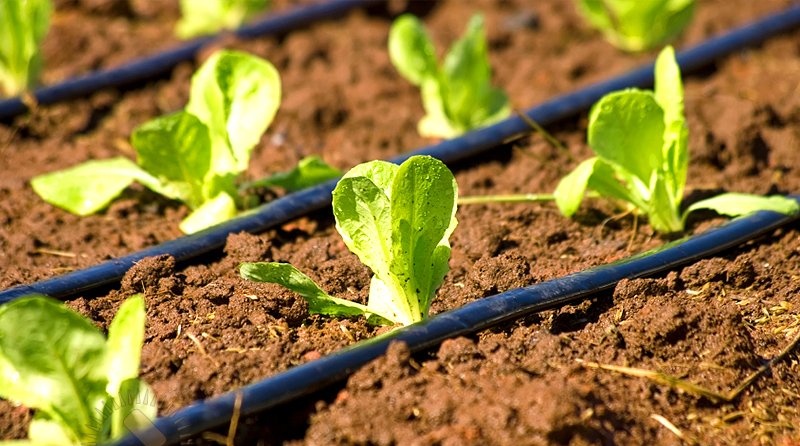
The simplest and most primitive drip irrigation system can be prepared using ordinary plastic bottles. Only now they can irrigate small areas and, moreover, unevenly. This is of course economical, but it is very inconvenient to regulate the water supply. For larger land areas, you need to strain a little and organize an effective irrigation system for your site with convenient watering, with which you can not only accelerate growth harvest, but also greatly facilitate your task of maintaining the territory.
Among the main advantages of the drip irrigation system are:
- It can be safely used as in greenhousesand outdoors
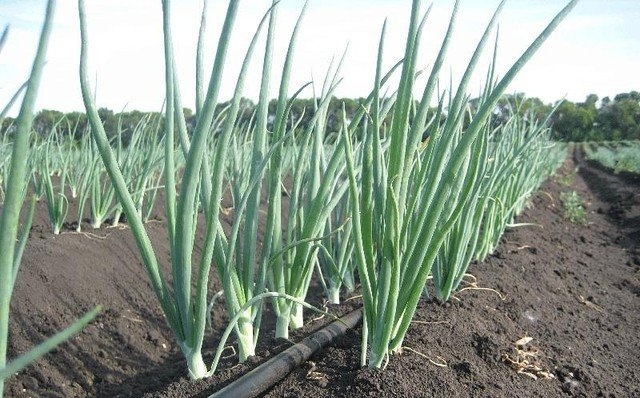
- With its help, you can carry out watering any plantings - garden crops, fruit trees, hedges from plants and shrubs
- Drip irrigation system significantly saves water, your time and effort
- Due to the fact that the water supply can be controlled, drying out and overflowing of plants is impossible. Water goes directly under the root in small portions
- You can enter fertilizers and feeding for plants without causing significant harm to them
Thus, a do-it-yourself drip irrigation system is a faithful assistant in caring for a land plot. By installing it, you will forget about endless hoses and long waiting times until the plants are saturated with moisture.
Installation materials
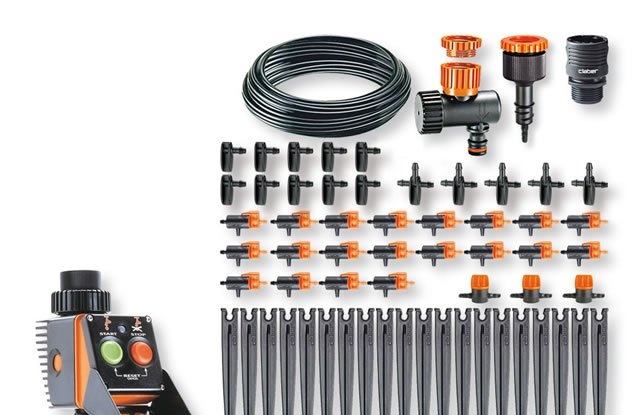
A do-it-yourself drip irrigation system is installed from the following materials (not taking into account the container or central pipeline):
- HDPE - pipe and plug to it
- Ball valve
- Special pipe adapter
- Couplings
- Detachable connection
- Dispensing tap
- Drip tape or perforated pipe
- Tee or HDPE - corner
- Small crane
- Squeeze
- Special filter
Among the additional materials, you may need the presence of such tools as:
- Drills
- Drill
- Nibblers
- Pakli
- Silicone sealant
- Rubber seal
- Pliers
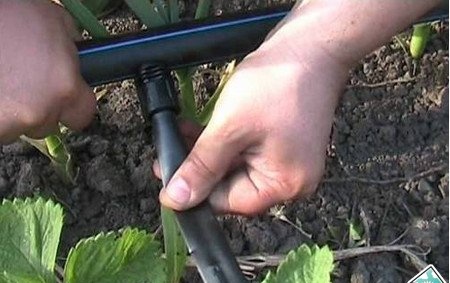
System installation rules
Before proceeding with the installation of the irrigation system, you must:
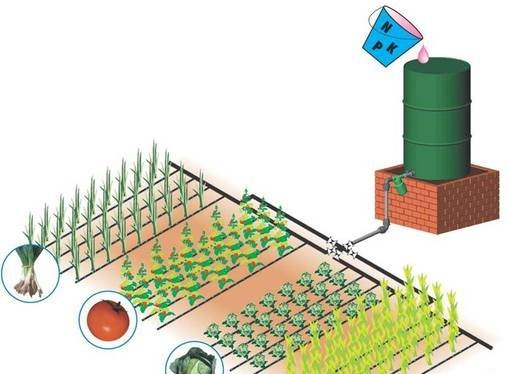
- First, draw a plan of the irrigated area. In the drawing, you need to indicate all the beds or areas that will be irrigated.
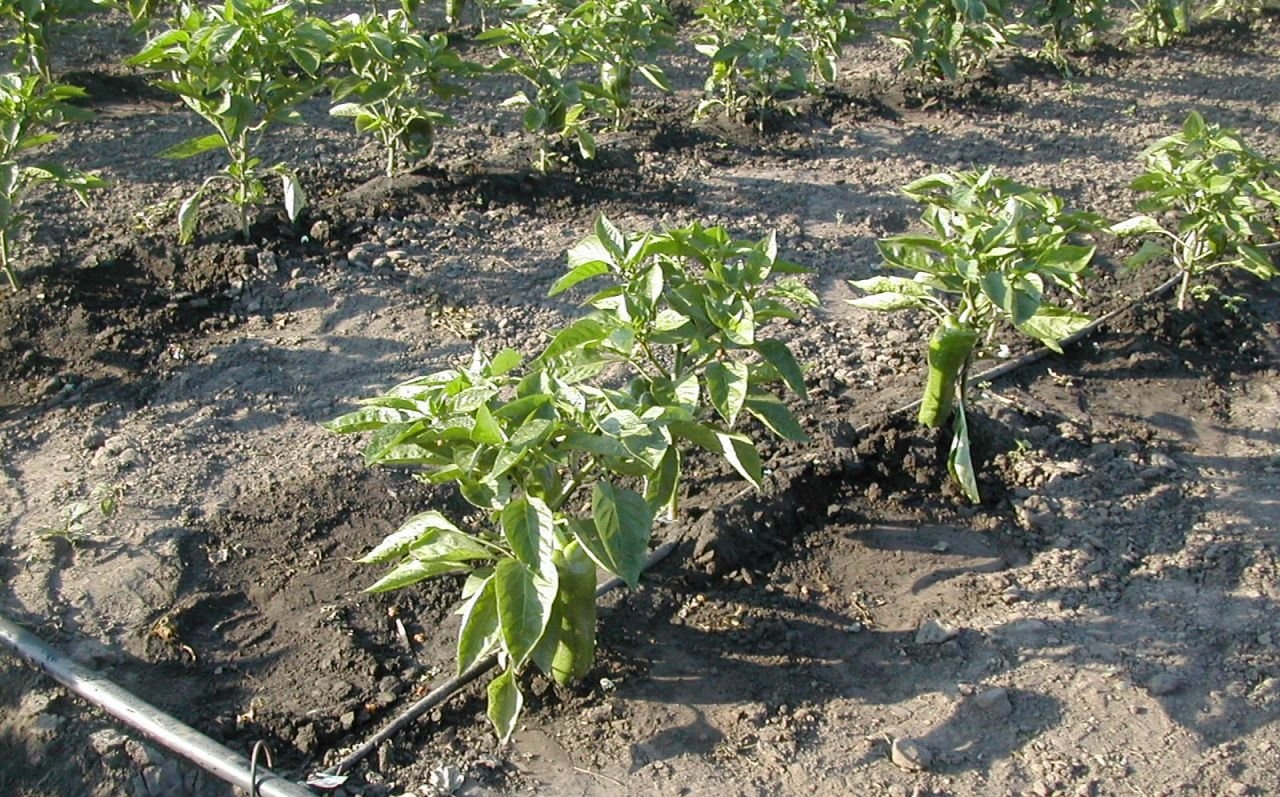
- Next, you need to think over and indicate on this plan the placement of pipelines, a hose, a dropper and other fittings. Consider the following fact - if your site is located on an area with a pronounced slope, then pipes should be placed in a horizontal position, and drip-type hoses under a slope.
- Then you need to mark all the places where the pipes will be connected. You will need this when it comes time to calculate splitters and connectors, place taps and plugs. In order to connect the pipes, as a rule, either tees or start connectors are used. They are installed in the pipe itself.
For a main-type water supply system, plastic pipes are best suited. They are significantly economical, easy to carry and, moreover, do not rust. They provide plants without restrictions not only with water, but also with various kinds of feeding.
It is very important to carefully consider the drip irrigation water supply system.
If you decide not to use the plumbing, then the most economical and practical solution would be to install a special water tank that could be filled without much difficulty. It should be installed on an elevated place from one and a half meters. The only thing that needs to be taken care of is the shelter of the water. This must be done so that direct sunlight does not provoke it. bloom and pollution.
The pipes and hoses themselves can be laid in several ways - directly on the ground, suspended on supports, or buried in the ground. The easiest and most economical way for you is to lay it on the ground. In this case, it is necessary to use opaque pipes, as the water in them can bloom. If you decide to deepen them, then purchase pipes with thick walls.
It is imperative to use a filter for fine water purification.
This will help you avoid blockages in drip hoses and drip tips. In order to fully automate the irrigation system, you can use special electric controllers that run on batteries.
After the beds have been formed, you can safely proceed with the installation of equipment. First, you need to flush the entire system before its first irrigation. To do this, remove the end caps and run water through them until clear water flows. Do not forget to clean the filters from time to time during operation.
Installation diagram
Five-liter plastic canisters can be used as a storage tank and funnel. Cut the top at an angle. Now you can start assembling the irrigation system according to the diagram. The water tank must be installed at a slope. Using adhesive tape, it is necessary to attach it to a strip of wood, on the opposite side of which there is a pre-installed counterweight. The drive has the ability to turn around the axis from the stop A to the stop B, which are fixed on the base itself. Here you also need to fix the funnel, an irrigation pipe is attached to its hole.
Water from the barrel itself goes straight into the storage container.
From this there is a displacement of the center of weight from the side of the accumulator until the time when the mass of water becomes greater than the mass of the counterweight. Subsequently, the container is overturned, and the water will calmly enter the pipe through the funnel, and through numerous holes it will pour out onto the beds.
Having become completely empty, the reservoir, under the influence of the counterweight, falls into place, waiting for the next filling with a new portion of water. You can adjust the amount of water yourself by installing special taps. Thus, your beds will always be hydrated, and the plants will grow and bear fruit.
The subtleties of care for the irrigation system
Most of all, droppers need care, which fail at the slightest blockage. It should be noted right away that there are several types of dropper blockages:
- Mechanical. When particles such as sand and dirt appear in the water. They clog the droppers and the water does not pass further. Mechanical filters are used to clean them.
- Biological. Implies the blooming of water. If the drip is not cleaned in time, algae or mucus may form in it. To prevent this, you need to rinse it with chlorine and drive the water through the system until it is clean.
- Chemical. May occur when water has been added fertilizer... To clean the dropper, specific additives are used, with which you can regulate the acidity of the water.
In order to root system plants received the required amount of water throughout the day, it is necessary to install automatic sensors and controllers, which can independently control the irrigation process according to the parameters you set.
If, for any reason, the irrigation system has undergone mechanical damage, then first of all, shut off all water supply in the area, cut the hose at the place of damage and connect the ends with a sealant.
Upon the arrival of cold weather, the irrigation system must be dismantled. To do this, thoroughly rinse the entire system with water and carefully disconnect all components and move them to a room that is heated. If you placed the hoses underground, then you should not get them out of there - frost will not harm them.
Automation must be removed without fail, cleaned from dirt and stored in a warm place.
As you can see, there is nothing difficult in leaving. The main thing is to check all droppers and filters in time so that the water does not stagnate and bloom. Thus, the self-installed drip system glaze will help you save your time on watering the site. To do this, you just need to set the necessary parameters on the automation and watch how your plants grow and gain strength.
More information can be found in the video.