There is nothing more important than a healthy upbringing of a child, which is achieved, including through regular sports and physical education.
In the summer, the child gets the opportunity to spend time outdoors, frolic, play on horizontal bars and parallel bars, and in winter, if you don’t give it to the sports section, you need to figure out what to do at home.

We do it with our own hands
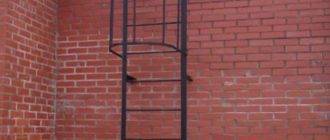
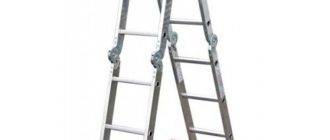
The simplest and at the same time the most versatile version of a sports equipment that we can arrange with our own hands is the wall bars. Therefore, in the article, we will focus on the installation of this particular device.
Where to begin
First of all, we need not calculations and sizes, but a simple determination of the purpose of such a wall, if it is intended only for a child, these are some conditions, if for the whole family - others.
Important!
You need to understand that the difference in weight categories will affect the entire assembly process, on the choice of materials, on fasteners, so initially we decide who will be engaged on the stairs.
So, it has been decided that the wall will be for children, so we start from this, and we begin to determine the sizes and materials.
With the dimensions, everything is simple, we will install the projectile to the entire height of the wall, and our length depends on the ceilings - in an apartment or house, the heights can be different, so we measure this parameter.
Advice!
You can not adjust the height of the racks directly to the size of the wall, but fix them above the floor, by 5 centimeters, for example, this will save us from the constant collection of dust, from problems with the baseboard.

We choose a width of at least one meter, this is just enough for normal physical education on our wall.
And lastly, we decide at what distance we will have degrees, the most optimal option is 300 mm, or 30 cm, so that approximately we will get 8 crossbars, taking into account that the high-rise of the structure is at least 2.5 meters. (see also Original Goose Step Ladder - description of the structure and calculation of parameters)
Material
For the device of the structure, we need lumber:
- Six-meter board. Preference can be given to a pine board, it is both strong and pleasant to work with. We choose the dimensions 50x120 mm, that is, 50 mm is the thickness, and 120 is the width.
- Crossbeams. And here we suggest using the most common shovel cuttings. They will need 8 pieces, in general, according to the number of crossbars.
- Several metal plates, for fastening to the wall, can be based on a step of 80 cm, three per rack, and that 6, but we, as always, take with a margin of safety.
- Anchor bolts, we will hang the whole structure on them.
- Wood screws, can be 7-10 mm long.
- Sandpaper.

In principle, this is the end of the list, Swedish stairs are very simple sports equipment and there is no point in philosophizing here.
Treatment
In order for us to get a high-quality wall, smooth and comfortable, without defects and uneven surface, on which you can also plant a splinter, we drive all the lumber through an electric jointer.

Further:
- It is ideal to grind everything immediately after that, and not by hand, but on a grinding machine... This is a simple operation, and it can be carried out in any woodworking workshop for very little money.
- Next, we remove the chamfer, it is beautiful, it looks much more pleasant from the outside, and it is more convenient during operation... You can remove it all in the same place where we just polished everything.

- The next step is to select a core drill for the diameter of the cuttings, which will go to the crossbeams.... The diameter of the shank is 40 mm, so we select the drill of the same size.
We mark everything up and start drilling.Let us say right away that the principle of "measure seven times and cut one" is in effect here, so we are not in a hurry and we measure everything very accurately.
This is what we get the seats for the crossbars. And yet, be sure to drill all holes of the same depth, otherwise the crossbars will go in the nests.

We cut the crossbars. Considering that the width of the entire structure is one meter, and we made the nests 20 mm deep, we cut off the cuttings by 104 mm. Be sure to make a cut on the angle cutter so that everything is smooth.
If the crossbars were not sanded together with the uprights, we quickly process them manually with sandpaper.
Now we need to drill through all the slots in order to get the screws in them and tighten the crossbars. Our core drill has a guide pin in the middle, and it is the recess from it that we use for drilling.
The assembly instructions indicate that the screw must go into the middle of the crossbar, so we have a great disposition for that. We make the holes with a thin, up to 5 mm drill for wood, the task is not so much to drill a hole as to facilitate the work with a screw, which is necessarily larger in diameter than the diameter of the hole.
Assembly
Be sure to glue the nest with glue, put a crossbar into it, drill, this time with a drill of even smaller diameter and a crossbar, drive in a screw and tighten it with a drill. We repeat the procedure on all other "steps".
It is a little more difficult to mount with the second post, this will require help. We pre-grease all the nests with glue, and then at one time we put the beam on all the cuttings at once.

Finishing and fixing to the wall
We give the wall a beautiful appearance, the price of the issue is minimal, because we simply varnish the entire projectile with several layers of varnish. True, from this the staircase instantly takes on a different appearance.

Then we fasten the metal plates obliquely to the inside of the drain, with a step of 80-60 cm. We tighten the fastening well and begin to make the connection of the stairs to the wall. To do this, we drill holes for our sizes, and “we put the entire structure on the bolts. We tighten them, and the projectile is ready!
Output

All work takes a maximum of one day, while the child gets the opportunity to perform a lot of exercises on the Swedish wall and not stop in his physical development. (see also Elite stairs: beauty that is worth the money paid for it) And in the video presented in this article you will find additional information on this topic.