Cement compositions are used as facade

Wall decoration in the bathroom with moisture resistant putty
Finely ground Portland cement serves as the basis for most facade putties and plasters. It hardens perfectly in a humid environment and becomes stronger if it is watered with water for the first day. As additives that improve its properties, use:
- lime;
- sand;
- gypsum;
- polymers;
- fiber;
- glue;
- minerals;
- antiseptics.
A dry mixture can contain 2 - 3 components and be made independently. Complex compositions are prepared using special equipment. They have minimal shrinkage and high strength. Stone and clinker tiles are kept as facade cladding. By grinding or grouting, bring to a surface suitable for painting.
For interior work, cement putty is used in damp and non-residential premises. Under the tiling, it is applied to the reinforcing mesh.
Lack of cement mortars in low vapor permeability. They are not recommended for use in decorating the walls of living rooms.
My friend and I used cement plaster when finishing the basement and facade. Decorative plaster and paint perfectly fit on it. On the foundation there is a glue-based stone cladding.
Which plaster is better to choose
Many mixtures are popular on the market for decorating and leveling walls in damp rooms, applying an additional layer.
Positive reviews, for example, have the following compositions:
- Ceresit CR 65. Good resistance to salt and alkaline wall materials. Has vapor permeability and moisture resistance.
- Dufa Kratzputz aussen. This is an original decorative plaster with an orange peel texture. Consists of polymers. It has strength, vapor permeability. It is convenient to work with the composition.
- Magma GidroPlaster. Suitable for all substrates, has a special plasticity and water resistance. The integral part includes modifying components.
Moisture resistant plaster is recommended in bathrooms and rooms exposed to high humidity. If you ignore the application of the composition to the walls, repairs will be more expensive.
Nuances of application
Surface preparation
It is permissible to putty on concrete, moisture-resistant slabs or a layer of rough plaster. First, the surface of the walls and ceiling must be thoroughly cleaned of the old coating. If cracks and depressions are found under the finish layer, they must be freed from dirt, dust and traces of building materials, and expanded if necessary. Protruding screws, self-tapping screws, parts of the fittings must be removed (cut off or knocked down). Rinse the prepared surface from dust with a damp cloth, treat oily areas with soapy water.
Then you need to carefully inspect the working area for traces of mold and mildew. If parasites are found, it is necessary to clean the affected area and burn with a blowtorch.
The next step will be the priming of the room. You will need a deep penetration primer. A top primer is not suitable due to the formation of a smooth surface with poor adhesion. If an antiseptic is already included in the finished solution, the previous stage of processing (provided there are no traces of damage) can be skipped.
Putty stage
If serious irregularities and holes are found on the walls and ceiling, they must first be repaired with cement plaster or foam. After drying, you need to reapply the primer solution. Too protruding areas, on the contrary, can be knocked down with a hammer drill.
Then estimate the required coating thickness. If the surface is uneven, choose a starter filler.If work is carried out on a finished plaster layer, use a finishing type of coating.
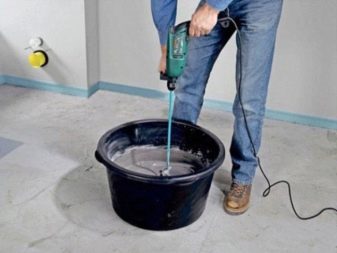
To apply dry cement mixture, measure out the required amount and place in the container where you will prepare the mortar. Add the amount of water required according to the instructions gradually, thoroughly stirring the composition with a drill with a mixing nozzle. With the right approach, the consistency of a paste is obtained. Leave the finished composition for 10 minutes or another time indicated on the package to completely dissolve the impurities, then stir again thoroughly.
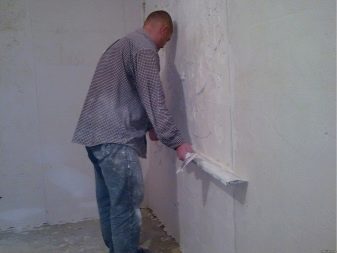
The finished mixture must be applied to the surface of the walls until it hardens. This is the most difficult stage and requires some skill and experience. But, if you understand the essence of the process, you can quickly learn. For filling, you will need a medium and large spatula for the main front of work, as well as a small one for sealing defects and covering hard-to-reach areas and an angle tool for working in corners.
On large areas, the mixture is poured from below and then leveled with a rule. If the area is very large and a significant thickness is assumed, you can preliminarily mark the thickness of the coating with metal profile beacons fixed on the wall at regular intervals. Where it is impossible to throw in the mortar, the mixture is drawn up with a medium spatula, placed on a large tool and carefully applied in place.
Use the smallest spatula in tight spaces and for blemish removal. Thus, both a rough and a finishing coat of finishing is applied in a damp room.
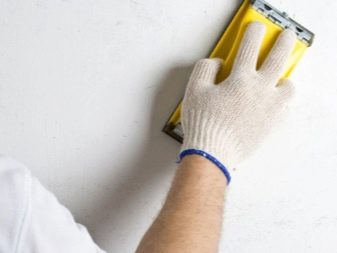
Then you need to give the resulting coating to dry completely. To do this, try to ensure the most stable temperature in the room and exclude drafts. Usually 14-18 hours are enough, but it is better to wait a day if time permits. After that, the surface is carefully sanded for the subsequent application of fine finishing materials.
When sanding, protect your eyes and respiratory tract from dust, as there will be a lot of it. Use a special electric sander or hand float with an abrasive mesh or fine-grained sandpaper. The movements during grinding should be smooth, circular, the result should be periodically checked by the rule and the building level.
Upon completion of work, thoroughly remove all dust from the surface, then prime the entire area again with a penetrating compound. This step will bond all the finish layers and prepare the surface for the next fine finish.
Types of moisture resistant putty
 Moisture-resistant cement putty Moisture-resistant putty not only retains its strength in conditions of high humidity, but also protects the treated surface from negative factors, be it fog, rain or condensation, and also prevents the formation of mold or mildew.
Of all the putties on the market, only the gypsum mixture does not fall into the category of moisture resistant, other options differ in varying degrees of resistance to high levels of moisture.
Often, mixtures that have a high indicator of resistance to moisture are called facade, but this does not mean that they are suitable only for outdoor work, this option is quite often used for interior decoration of a bathroom, kitchen, boiler room or loggia.
Almost any waterproof putty is made on the basis of Portland cement, which is an astringent hydraulic mass that can harden in air and in water. The composition of the substance also includes gypsum in small quantities to slow down the drying process.
Portland cement is gaining more and more popularity in the construction industry and is used not only in the composition of moisture-resistant putties, but also in the manufacture of precast and monolithic concrete, reinforced concrete, various building mixtures, and is also used for fastening structural elements and increasing heat resistance.
In addition, Portland cement is a worthy replacement for wood, brick, lime and other building materials that have traditionally been used in construction for many years.
Putty made on the basis of Portland cement, in addition to its main properties, has another interesting feature: the more often moisture settles on the treated surface, the stronger the applied layer of material becomes.
The cement-based moisture resistant putty can be gray or white, depending on the material used for its preparation. Mixes based on white cement are of higher quality than those based on gray cement.
Also, putty for work in wet rooms can be acrylic or gypsum, with the addition of polymers.
Acrylic putty is a synthetic mixture made specifically for finishing work in rooms exposed to moisture: bathrooms, kitchens, and so on.
Acrylic blends are used as a topcoat before decorative surface finishes.
In addition, she herself can become part of the decor, if a relief pattern is applied on a wet layer. However, when resorting to this method of decoration, care should be taken to preserve the integrity of the coating.
When using gypsum plaster with polymer additives in humid rooms, you also don't need to worry about its resistance to moisture. The synthetic components in such a mixture not only make it resistant to high humidity, but also extend the time of its use, and, unlike ordinary gypsum, the putty does not harden or crumble. Such a mixture is perfect for sealing irregularities, cracks, as well as seams and joints between the details of the treated surface.
Most moisture resistant putties are sold in the form of dry compounds, which must be diluted with water before use.
The exact proportions and preparation methods are always indicated on the packaging.
By following all the recommendations, you can be guaranteed to get the composition of the desired consistency and easily process the walls or ceilings of the bathroom, kitchen and other rooms with it.
Advantages and disadvantages
Due to its special composition, the putty has certain advantages over other solutions. Positive differences are presented:
- maintaining high strength when exposed to moisture;
- the presence of additional antibacterial and antifungal components;
- versatility when applied indoors and as a facade coating;
- fast curing time.
Almost the only drawback can be called a coarse-grained structure, which is due to the Portland cement that is part of the composition. However, when used in bathrooms, this is compensated by the tiles, which are applied in the final stage.
Rules for puttingty surfaces in the bathroom
You can't just apply the mixture to the walls and smooth it out. There is a whole range of activities that precede such work. Any surface, even if it seems like it is perfect, needs preliminary preparation.
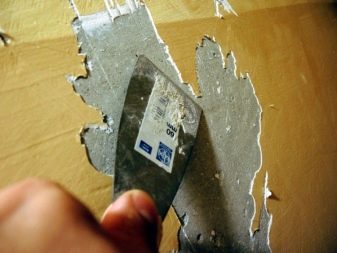
Cleaning
This activity is as follows:
Completely remove previously applied coating
Expand cracks that will be closed in the first place.
Protruding objects - screws, mortgages, are knocked down with the help of an improvised tool.
Dust and dirt are removed with a cloth soaked in water.
Oily areas are treated with soapy water and turpentine.
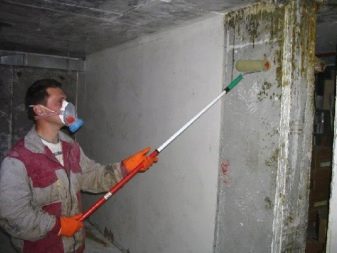
Disinfection
High humidity and temperature have a beneficial effect on the appearance of mold and mildew, therefore:
All damaged areas are completely cleaned.
If there are traces of the appearance of such phenomena, then they are additionally fired with a blowtorch.
All surfaces pass well with an antiseptic, attention should be paid to joints and seams.
After waiting for drying, proceed to another stage.
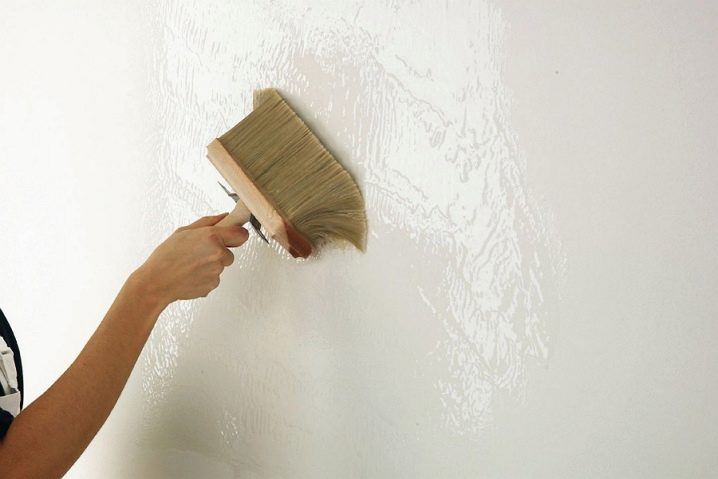
Padding
This is a mandatory event, it is as follows:
A solution with deep penetration is selected. It is better to give preference to a primer that includes an antiseptic.
Application of the primer does not require any special skills, you can use a spray gun.
Before proceeding with the main actions, you should wait until the applied layer is completely dry.
Carrying out filling
The putty for the bathroom must contain an inscription on the packaging - it is suitable for wet rooms, and also belong to one of the types that were given above. Thus, we can say that the main condition will be achieved a priori. Namely - the mixture will have the desired qualities. But now another problem arises, it needs to be applied correctly.
It is especially difficult when surfaces are supposed to be painted. The fact is that the paint immediately detects and highlights all existing defects.
Stage one
Determine the required number of layers. If the work is carried out on the already applied plaster, then you can limit yourself to the finishing mixture. When there are significant irregularities that require the application of a solution with a thickness of one centimeter, then they resort to starting putties.
Starting putty - used in the presence of significant irregularities, cracks and drops
Stage two
Dry cement putty is often used, it needs to be prepared:
- The required amount of the composition is poured into the container, water is gradually added, constantly stirring with a drill with a mixer nozzle.
- It is required to obtain a pasty consistency, which is left for 10 minutes. This is done to ensure that all additives are completely dissolved. After that, the stirring is repeated.
Dilution of dry putty
Stage three
The hardest part begins - the application of the mixture on the surface. Although if you practice a little, it turns out that everything is not as scary as it might seem at first glance.
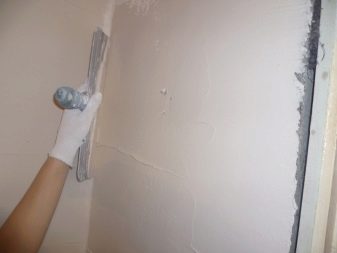
For work, two main tools are used: a medium and large spatula, they keep a small one in reserve, it will be required for puttying in hard-to-reach places.
Start of putty work
- On large areas, the following technique is used: the solution is thrown from below, and then smoothed out with the rule.
- When this is not possible, then they do this: with a medium spatula, apply the mixture to a large one, with which they work on the surface.
- The corners are formed with a special corner tool.
Smoothing inner corners with an angled trowel
With the help of such simple rules, it is possible to apply starting and finishing compositions in any wet rooms.
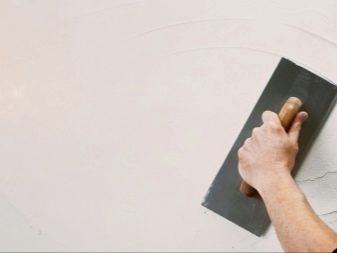
After complete drying, the surface is sanded. If you want to get a perfectly smooth, almost mirror-like layer, then the glossing method is used.
Surface sanding - finishing stage of putty work
How to choose the right finishing material
Before choosing a putty for decorating the walls in the bathroom for the subsequent paint, it is necessary to calculate the volume of the substance. For calculations, it is necessary to clarify the surface area and determine the layer thickness.
It should be borne in mind that there may be pits and cracks on the surfaces, which will require additional volume of material to seal. It is recommended to purchase a putty with a 10-15% margin.
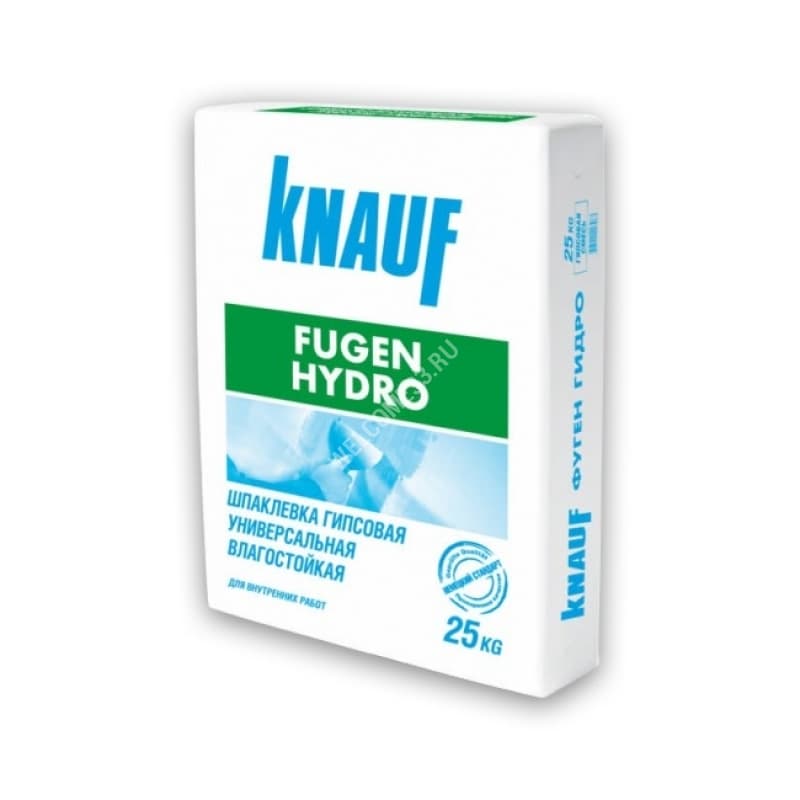
The type of material is selected by the buyer at his own discretion. Cement-based putties have a standard composition, but drying takes 2-3 days. For example, the Vetonit VH cement mix allows you to form a layer up to 2 mm thick. The manufacturer allows the use of the mixed solution for 3 hours, the applied material hardens within 48 hours. To ensure uniform evaporation of water, constant ventilation of the room is necessary.
If you need to use an odorless solution, you should purchase an acrylic-based polymer finishing material.The mixture is characterized by increased plasticity, the substance forms a smooth surface on which the paint is applied. The solution does not contain substances that cause allergic reactions. An example is the ready-made Vetonit KR + putty applied with a trowel. The manufacturer allows a layer thickness of up to 5 mm. An open container is suitable for use throughout the day, the crystallization of the material occurs after 24 hours.
For walls with pits up to 70 mm deep, it is allowed to use gypsum plasters with the addition of special additives (for example, universal UNIS Teplon). After hardening, the gypsum layer is impregnated with a primer that does not allow water to penetrate into the depths.
It is recommended to purchase material from large manufacturers (for example, Knauf, UNIS or Vetonit)
When buying, you should pay attention to the date of manufacture of the material and storage conditions. Ready mixes are supplied in plastic buckets, and dry formulations are packaged in paper bags weighing up to 50 kg
The composition and approximate area of application (with a fixed layer thickness) are indicated on the outer surface of the container.
Characteristics of moisture resistant putties
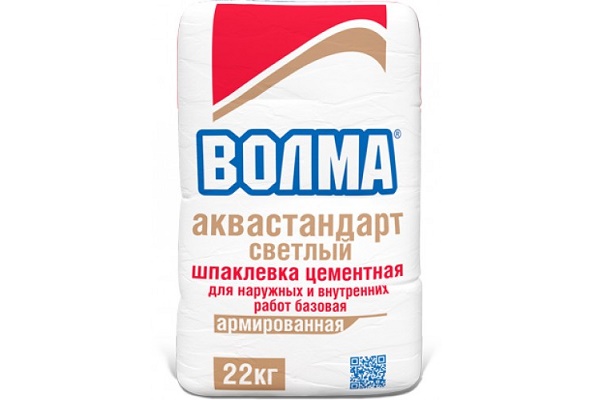
Cement based
All moisture resistant pastes contain one main component - Portland cement. This material is obtained by combining ground gypsum and clinker. This powdery substance is stored in dry form, and before use, a certain amount of water must be added to it and mixed to the desired consistency.
In a liquid form, the waterproof putty does not last long, since almost immediately after adding water it begins to harden. If water gets on such a paste composition, this only enhances the hardening process of the solution. For those who are starting to work with putty mixtures for the first time, we recommend not to make large batches, so as not to rush to use them quickly.
All professional technicians use a cement-based moisture resistant paste for facade repairs. In addition, it is also used for interior decoration of the house, in particular, in bathrooms where moisture is present. Thanks to its unique composition, any wall surface will be protected from moisture and have a finished look.
Gypsum-based
An alternative to cement mixtures is considered to be a gypsum moisture-resistant putty. The advantage of this material is that its consumption will be less than using a cement-based mortar. Despite the fact that the gypsum composition hardens rather quickly, it does not form cracks.
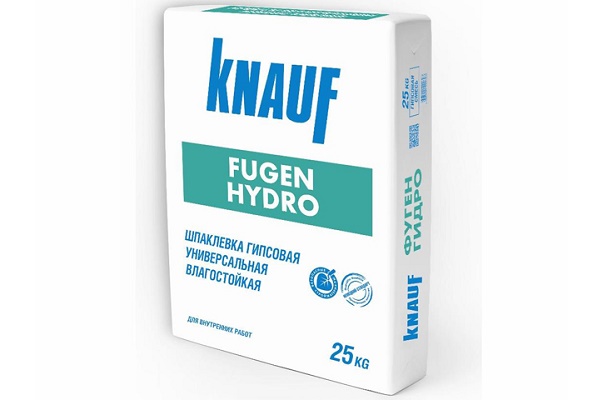
Gypsum putty is created thanks to the gypsum-purtsalan composition. It was specially designed for the repair of wet rooms, so it found a good response from professional specialists. Be sure to consider these components when buying putty pastes.
However, gypsum plaster can only be used under certain conditions. Also, experts recommend using a moisture-resistant gypsum-based paste, in which Portland cement is present, otherwise its use in wet rooms will be a big question.
Material handling technology
Putty for the bathroom for painting or another method of decoration, is applied to the work surfaces only after their preliminary processing. The process itself does not require expensive equipment and special tools. The technology allows all operations to be performed independently without the involvement of specialists. Only work is required to be approached carefully and without haste.
Preparatory activities
Before preliminary work, you should prepare the necessary tools and purchase materials so as not to be distracted and not to waste time on this in the future. It is necessary to purchase a putty based on a preliminary calculation. To do this, proceed as follows:
- calculate the area of the working area;
- by the curvature of the surface, estimate the average thickness of the leveling layer;
- calculate the volume of the required material, and by density - the mass.
You should purchase a primer and putty composition with a 10% margin.
You will need the following tools and devices for work:
- several spatulas of different sizes;
- a set of containers for solution and water, primer;
- perforator and attachments to it;
- rule;
- level;
- metal brush;
- roller and brushes;
- grater and sandpaper;
- ladder.
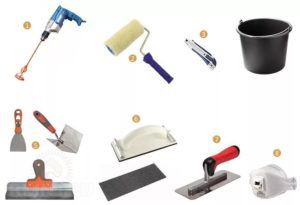 Tools
Tools
Under unforeseen circumstances, you may need other tools, for example, a grinder. The necessary set for wall putty is assembled in the photo below.
The preparation of the walls in the bathroom (in a humid room) takes place in the following sequence:
- remove completely worn out old finishing coating, or only its defective areas;
- existing projections (nodules, stones or metal fragments) are dismantled flush with the base plane;
- the work surface is cleaned of dust and other contaminants (oil stains, fungus);
- existing large damages (depressions, cracks) are filled with cement plaster, and, if necessary, the leveling is carried out completely;
- treat the surface with an antiseptic to prevent mold;
- cover the walls with a primer;
- waiting for the coating to dry.
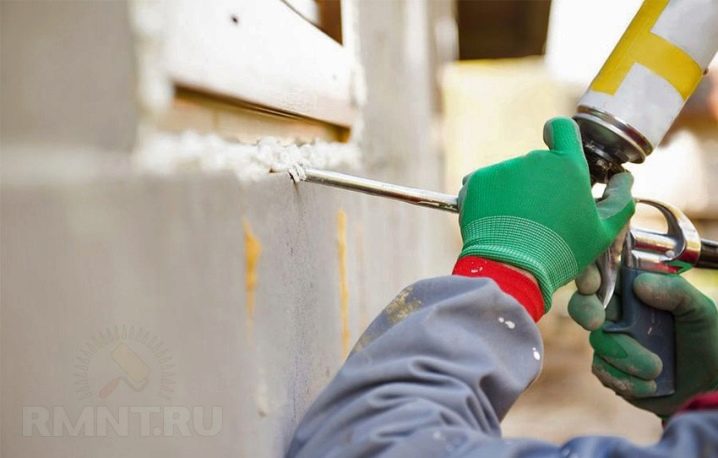
Polyurethane foam can be used to fill joints (in panel structures) and deep cracks. The moistened work surface is pre-dried. Places with mold are burned with a blowtorch to destroy microorganisms that have penetrated deep into the base.
Putty application
After the preparatory manipulations, they begin to putty the walls. The process consists of several stages:
- determined with the number of layers applied;
- when using dry mixtures, a solution is prepared: the material is poured into the container and the required amount of water is added, everything is stirred until a homogeneous mass of pasty consistency is obtained;
- using a spatula, putty is applied to the surface, and in large areas they use the rule, having previously sketched the working composition on the base;
- if necessary, apply the following layers after the previous levels have dried;
- primed the surface;
- after the time required for drying, a final layer is formed;
- sand the dry topcoat.
The application of the mortar with a spatula is shown in the photo below.
Technology of work with moisture-resistant plaster
The process of applying decorative moisture-resistant plaster begins after the formation of the leveling layer. It turns out that the complete decoration of the bathroom requires the sequential use of 2 types of mixtures. Step by step, the activities are carried out as follows:
- prepare the base by removing old finishing materials from its surface: plaster, tiles and paint;
- form a leveling layer that is resistant to water;
- a decorative moisture-resistant layer is applied, which gives the coating not only a stylish design, but also increases the resistance of the finish to the negative influences present.
The plastering process itself is as follows:
- after mechanical cleaning, the existing salt and oil stains are removed from the working surface with special means;
- if a brick wall is plastered, then the seams between its elements are further deepened in order to improve adhesion;
- when working on concrete surfaces, a notch is applied, which increases the degree of adhesion of the solution to the base;
- the prepared wall (ceiling) is primed, and if the base is porous, then the process is repeated up to 3 times;
- wait for complete drying specified in the instructions for the composition used;
- alignment is performed, and if the irregularities are significant, they are pre-set at the level of beacons, which are dismantled after the solution has dried;
- on the completely dried first layer, the desired design is already applied: tiles, decorative plaster, or left for painting.
Varieties of paintable putties
The main types of paintable fillers:
-
Cement-based. The material is characterized by increased resistance to water and reduced cost. The mixture contains Portland cement, sand, fillers (such as marble chips) and plasticizers or hardeners. Due to coarse-grained inclusions, the surface has a rough structure, and the gray color of the material does not allow the application of light colors. To eliminate roughness and change the color of the base, it is allowed to grout the surface with a special finishing plaster.
-
The plaster-based waterproof coating allows walls to be painted with light colors. The material does not tolerate temperature extremes; cracks appear on the surface, into which condensate penetrates. The plaster is not recommended for use in rooms exposed to prolonged exposure to hot steam. There are mixtures with additives that increase resistance to moisture.
-
Polymer-type solutions (based on acrylic or latex), including special additives on a synthetic basis. Solidification of a substance occurs as a result of the evaporation of water and chemical reactions with oxygen. The putty is characterized by increased plasticity, allows you to get smooth surfaces. Painting is carried out after the material layer has hardened; paints of any color can be used.
-
For budget repairs in a bathroom with low humidity, an oil-adhesive coating is used. The substance is supplied in the form of a fine powder, which is diluted with water in accordance with the manufacturer's recommendations. The solution crystallization time is 24 hours, the resulting layer is not of high quality.
Moisture-resistant bathroom putty is divided into categories according to surface quality:
-
leveling, used to seal large cracks and holes in walls or ceilings;
-
finishing, allowing to eliminate minor defects;
-
universal, providing leveling of surfaces, but does not require finishing.
Plasters are classified as dry and ready-to-use. The dry material is supplied in paper packaging with additional moisture protection. The substance is mixed with water before use. Since the solution loses its properties in 2-3 hours, it is recommended to knead the putty in portions.
Gypsum with polymers and hydrophobic additives does not absorb water

Everyone knows that gypsum absorbs water, swells and breaks down. Manufacturers have found ways to make it moisture resistant. The putty contains polymers and hydrophobic substances as additives. They bind the gypsum and make it water-resistant.
Antistatic agents and antiseptics prevent fungi and bacteria from developing in the wall covered with plaster. At the same time, gypsum retains its ability to maintain an optimal microclimate. It absorbs excess moisture from damp air and releases it when the room gets very dry. Cement and latex don't.

Finishing with moisture resistant putty yourself
Vadik decided that gypsum plaster would be suitable for the kitchen. There is little dampness in it, only during cooking. Most of the steam is taken up by the hood. For safety reasons, in addition to an apron over the tables, a friend decided to install glass on the walls near the taps, protecting it from splashes.
It was decided to finish the pool with a cement mixture and cover it with water repellents. This guaranteed complete waterproofing and made it possible to create a beautiful glass mosaic finish.