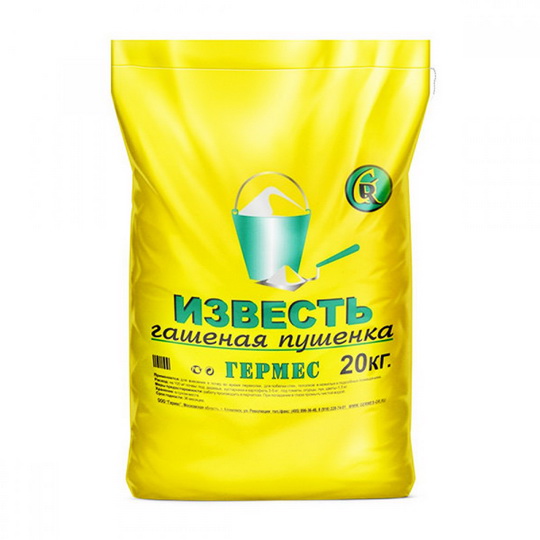
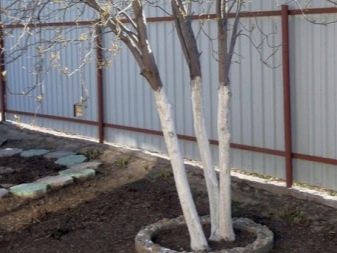
Application in horticulture
Fluff is used for whitewashing tree trunks in gardens and enriching compost with minerals, as well as preventing its acidification.
How to dilute lime to whitewash trees?
To obtain a solution of the desired consistency, 1 kg of the mixture is diluted with 3 liters of water. Lime mortar is used to lubricate tree trunks: it helps protect them from direct sunlight and pest attacks. Processing is recommended in the spring. They tear off the old bark and cover it with a limestone solution.
The downside is that the mixture is quickly washed off the trunks in adverse weather conditions, so the addition of other components is recommended. Recipe:
- 300 g of sandy clay;
- 1 kg of dried mullein;
- 200 g of powder of copper sulfate;
- 1 kg of slaked lime;
- 10 liters of settled water.
All components are mixed and left to swell for 2-3 hours. Then the tree trunks are coated. Clay provides additional anchoring to the bark. Such processing is carried out in September for the winter.
Fluff to improve the quality of compost
Any organic material is added to the compost pit. Then they begin to ferment and new mineral complexes are formed. When organic matter decomposes, a large amount of acid is released, which delays the fermentation process. Slaked lime has the property of neutralizing an acidic environment, accelerating the activity of microorganisms, eliminates the formation of unpleasant odors.
Tips & Tricks
Lime is diluted with water in proportions that differ depending on the purpose of the composition. If the mixture is prepared for whitewashing walls and ceilings, then raw materials and water should be mixed in proportions of 1: 2 (2 liters of water are taken for 1 kg of limestone). The solution is left for two days, after which it is filtered. To process tree trunks for 1 kg of powder, 4 liters of water are taken, the mixture also requires infusion for 24 hours. For spraying plants, limestone is diluted in a large amount of water with copper sulfate, the resulting solution can be used in an hour.
Professionals recommend following these tips for working with lime.
- so that the coating is more durable and the plaster layer does not swell, wallpaper glue or latex-based paint (up to 10-15% of the total weight of the mixture) is added to the milk of lime;
- when making a mixture for whitewashing, a tablespoon of liquid green soap can be added to the milk solution - this ensures a tighter adhesion of the composition to the bark of trees;
- it is worth adding natural drying oil to the decorative whitewash (1/3 tsp per 1 liter of composition or 5 g of salt), which will make the coating resistant to external adverse influences;
- if you add a little blue to the whitewash, it will give a light bluish tint - this property is often used in the preparation of solutions for covering the ceiling;
- color limescale compounds are best used in cold or damp rooms.

If you are storing lime in bags, it is best to do so in a dry place out of the sun. When buying this substance, make sure that it is stored in suitable conditions, a description of which must be included on the package. In addition, lime whitewashing is quite cheap and would be a great solution on a limited budget. Another important point - lime whitewash will be an excellent solution for wet rooms, as it has excellent moisture resistant properties.
You should also very carefully dissolve lime in water. Given the differences between the different species from each other, the amount of water that is needed will be different.
Boiling lime, sodium or carbonic acid will require different amounts of water for proper dilution.
To give the whitewash some pleasant shade, you can add color to it. Usually, in this case, 20 g of blue is added to the container with whitewash. For carrying out various kinds of finishing work at a house made of wood or brick, it would be best to choose a cloudy day or evening. The reason is simple. The characteristic of lime is that it does not like too dry and hot weather, as well as exposure to direct sunlight.
The technological procedure for applying whitewash should be followed as much as possible. Any deviation from the process will cause you to be disappointed with the result.
Lime is an excellent material that has many uses. For example, white lime traditionally decorates trees since spring, protecting them from pests, serves as an excellent solution for whitewashing walls and generally has a lot of advantages that distinguish this rather affordable material from others.
For information on how to properly extinguish lime, see the next video.
The substance is characterized by slow decomposition. On contact with air and high humidity levels, hypochlorous acid is formed. Due to its bleaching and disinfecting properties, as well as its ability to remove limescale, the product is widely used; in the old days it was used in gold mining.
How to slake lime: tips and tools
When quicklime interacts with a small amount of water, a lime dough is obtained, to which sand and other materials are added. The resulting substance is used in construction to hold bricks together as a binder.
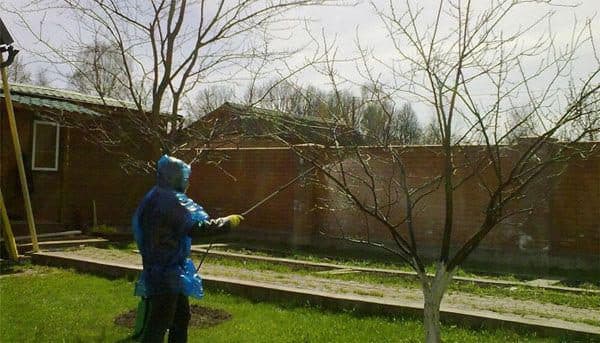
If the mass is diluted with a large amount of water, you get a lime suspension or milk of lime. In agriculture, the suspension is used to treat the bark of fruit trees from sunburn and to destroy the embryos of parasitic organisms that cause disease. A solution in a mixture with other substances is also sprayed on fruit trees and shrubs, whitewash curbs, walls of buildings.
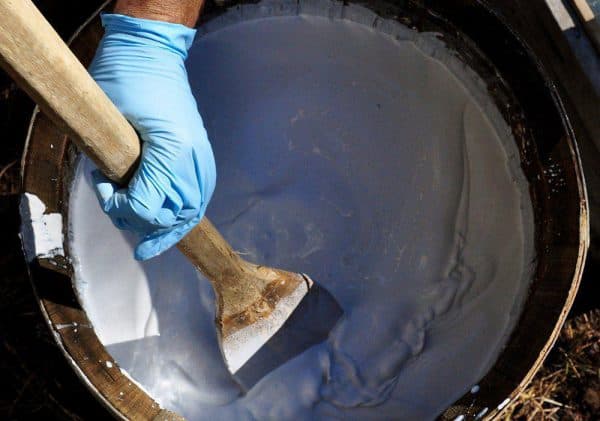
To extinguish lime, do not forget about safety precautions and follow these tips:
- During slaking, lime gives off heat. To prevent the container from melting, use an enamel cookware.
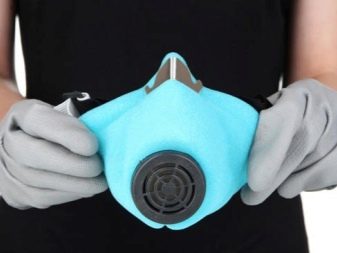
- The vapors released are toxic to the body and can also cause airway atrophy, so wear a respirator.
- When slaking lime, an ebullient reaction occurs, accompanied by splashing of the substance. To avoid burns, wear goggles, rubber gloves and work clothes that cover exposed areas of the body.
- Extinguish lime outdoors. If there are windows in the room, open them, creating conditions for ventilation.
- During the procedure, keep away from the container until the vaporization ends.
- Use a wooden spatula when preparing the substance.

The method of extinguishing depends on the purpose of use.
Whitewashing the walls.
Lime dough is used during this procedure. It is obtained by mixing lump lime with tap water.
The solution is prepared in a 1: 4 ratio. Water is added in small, even portions. After stopping boiling, the substance should be well stirred and filtered. After 1 hour, the solution should be left in a dark room for 1-2 weeks.
Whitewashing trees.
To whitewash the trees, a lime suspension is prepared. For this purpose, the lime dough is diluted with water. For 1 kg of lime, take 10 liters of water. The solution is used immediately.

During lime slaking, the following tools are used:
- enameled container;
- wooden spatula;
- a bucket or watering can for water.
Make sure that no lumps remain during the extinguishing process, and the substance of the ball is homogeneous. For the treatment of walls, trees, shrubs, you can use a spray. In this case, remember to wear a respirator.
How to make slaked lime from quicklime?
Procedure for preparing quicklime:
- put on safety glasses and overalls;
- work under a hood or outdoors;
- choose calcium carbonate: chalk, limestone, dolomite, or other white slaked lime;
- make sure there are enough ingredients: for 1 part of quicklime, 1.8 parts of raw material are needed;
- it is necessary to use a kiln with a heating of 1000 ° C;
- put calcium carbonate in the oven and wait for it to completely disintegrate, about 3-5 minutes;
- wait for the quicklime to cool completely, exclude the ingress of water;
- store the mixture correctly.
How to extinguish lime?
Today, you can purchase many types of material, including slaked ready-to-use. However, such situations are not excluded that may require you to do it yourself.
In order to get slaked lime, it is necessary to add water to it. The liquid reacts with calcium oxide, releasing large amounts of heat and carbon dioxide. This process takes place by converting water into steam, which loosens lumps of lime to a fine fraction.

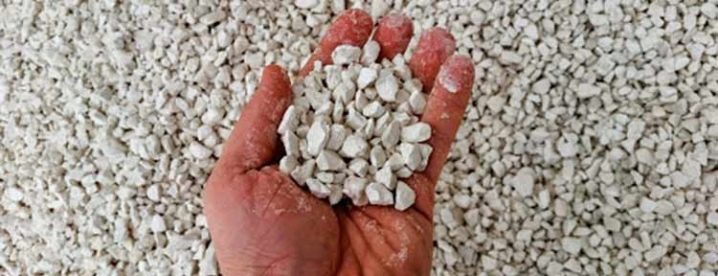
To obtain a hydrated composition - fluff, it is necessary to add liquid in the amount of 70-100% of the total weight of lime. To get a building lime paste, you need to add water in a 3: 1 ratio, where 3 is the amount of limestone.
The main components of mixtures for whitewashing
Slaked lime
Slaked lime is perhaps the most important component of a homemade mixture, since it allows you to paint it white in a simple way. The whiteness of the "chatterbox" is not necessary at all to give the garden an aesthetic appearance, as inexperienced summer residents believe. The whitewashed bole and lower skeletal branches (the basis of the tree "skeleton") will reflect the sun's rays and will be reliably protected from burns. Lime stains the mixture white. Garden crops are especially in need of such protection in winter and early spring, when they are deprived of foliage that protects from direct sunlight in summer. That is why "scientists" urge us to focus on the autumn whitewashing of the garden and repeat the procedure in late winter or early spring.
chalk
An alternative to lime can be chalk, which also allows you to achieve a snow-white shade of the working mixture. In addition, this natural product is softer than lime and is the most suitable option for whitewashing young trees. Chalk solutions are more quickly washed off by sediments from the bark than commercial whitewash paints, so chalk is a less reliable assistant. Chalk is the most suitable component of a mixture for whitewashing young trees.
Clay
This natural product is included in the mixture by gardeners in order to impart viscosity to it. With this approach, the solution will not drain to the ground when working and will firmly anchor on the bark. In addition, the clay-based mixture, due to its viscous consistency, will act as a kind of putty for small cracks and damage in the bark, closing the gate to pathogens and harmful insects. For whitewashing, use white or yellow clay, pre-soaking it in water
Fungicide
Fungicide, which is part of the whitewash solution, acts as a prophylactic agent against fungal diseases of trees. And if the garden plantings in the past season were affected by any ailment, then the presence of such a drug in the composition of the "talker" is necessary - it will consolidate the effect of the previously carried out medical spraying. copper sulfate comes to the fore, which is present in many whitewash mixtures as the main disinfecting component. Alternatively, you can use another fungicide (Bordeaux mixture, iron vitriol, "Hom", and so on).The main thing is to take into account the rates of its consumption indicated in the instructions.
Glue
Various types of glue in the mixture act as an "adhesive" and allow you to extend the life of the whitewash layer on the bark of trees, protecting it from moisture. For these purposes, use casein, carpentry, wallpaper or PVA glue. The latter, although cheap, is the least preferred option, since it interferes with the normal respiration of plants in comparison with other species. Glue increases the adhesion of the solution to the bark.
Soap
Soap can be used as a substitute for glue, which also allows the solution to adhere to the bark of trees. Soap appears to be more gentle than glue, but less reliable. Ordinary household soap can be used as an adhesive. Some gardeners use ordinary household soap, which is rubbed on a grater and thoroughly dissolved in a solution. Others - more caring comrades - use a special green soap that acts as an insecticide and fungicide. And still others replace both with ordinary flour paste.
Manure
Many of these solutions contain cow dung. This natural product adds viscosity to the mortar and promotes better adhesion of the mixture to the surface of the trunk and branches. In addition, manure has antiseptic properties and effectively disinfects tree tissues, and also acts as a fertilizing agent, feeding plants with useful elements through the bark. Manure is the main component of many mixtures for whitewashing
Preparing walls for whitewashing
If whitewashing is applied for the first time
In order for the whitewashed walls to look beautiful, the surface must be prepared for repair. In the event that the walls are simply plastered, and they have never been whitewashed before (as, for example, in a new building), the work is simplified. True, it is necessary to whitewash the walls under these circumstances in three layers.
The first layer can be applied without using blueing. When the base coat is dry, it will be possible to apply the next ones, to which, if necessary, you will add ultramarine blue or a special dye of a suitable shade. As for the drying time of the surface, it is approximately five to six hours for each individual layer.
Eliminate rusty and greasy stains
Sanding the ceiling surface
In the same case, if the surface of the walls is not ideal, careful preparation should be carried out for applying a layer of lime whitewash. First of all, gently wash off streaks on the walls, as well as rusty stains with plain water. Then treat these places well with a solution of copper sulfate. The proportions for the preparation of this solution are as follows: from fifty to one hundred grams of vitriol are diluted in one liter of boiling water.
What if there are oily stains on the walls you plan to whiten? In this case, soda ash will come to the rescue, from which a two percent solution is prepared.
Moisten a clean, white cloth with this solution, and then blot the stain well. Hold the rag until the stain is completely gone. Further, the surface treated with a solution of soda ash should be thoroughly rinsed with water.
No soot, no cracks or 100% whitewash
But if the walls are smoky enough, another recipe will help you. Take a solution of hydrochloric acid (two or three percent) and wipe the surfaces to be whitewashed with this solution.
In the event that there are cracks and other defects on the walls, you will need to seal them up before you start whitewashing the walls. This will require a putty. You don't have to buy an expensive proprietary blend.
You can easily make the solution yourself. To do this, take one piece of plaster, two pieces of chalk, and two pieces of wood glue (diluted).Keep in mind that when diluting wood glue, you also need to take into account the rules regarding proportions: for example, fifty grams of glue is required per liter of water. As a result, you will get the simplest, but sufficiently high-quality putty mixture.
There is another recipe for an excellent putty. Take a dough of lime (that is, thick slaked lime) in the amount of two and a half kilograms. Add five liters of water to it. And finally, add one more component - one hundred grams of ordinary table salt (it must be diluted in hot water).
Then you need to add another five liters of water to the resulting solution and mix everything carefully and thoroughly. Then strain the mixture through a fine sieve. The last stage is the addition of wood glue, diluted with water in a ratio of one to ten, as well as with chalk powder (about two hundred grams).
Whitewashing the ceiling with lime (using slaked lime)
This type of finish is characterized by a long service life and can be applied to a variety of surfaces. For this reason, when choosing a method for finishing the ceiling, many people stop at lime.

Be careful! Lime whitewash should not be applied to rusty or greasy surfaces.
Let's consider step by step how the ceiling is whitewashed with a lime mortar:
- Preparing the base for lime finishing. The surface of the ceiling should be primed and putty. Ensure that the surface is clean and solid before applying the mortar.
- Preparation of lime mortar. To prepare a solution for two and a half square meters of space, you need slaked lime (0.4 kg) and water (0.6 l). To make the solution strong and water-resistant, you should add drying oil (0.3 tablespoons) and table salt (5 g) to it. Further, the resulting mixture should be well mixed in a metal container and filtered with a sieve to get rid of lumps and impurities. To give the solution a bluish tint, add ultramarine (20 - 25 g) to it.
- Applying lime to the ceiling. The surface of the ceiling should be slightly moistened, after which 2 layers of whitewash should be applied. The second layer is applied over the not yet dried first. These actions will make the whitewash more durable.
Now, a few words about the moments that affect the quality of the ceiling whitewash.
Lime whitewashing can be made stronger by carbonizing it (saturate it with carbon dioxide). To create the necessary conditions for this process, moisture must remain in the whitewash for some time. For this reason, a prerequisite for applying lime whitewash is the moisture of the ceiling surface. In addition, in order to ensure normal crystallization of the whitewash, its composition should include table salt, which makes it possible for the accumulation of additional moisture from the environment in the composition of the lime film.
Advice
- If you need to store the ready-made lime mortar for a long time, you can periodically add water to it. Initially, water is added until the material no longer absorbs it. This rule does not apply to the preparation of milk of lime.
- The optimum depth for digging lime into the soil is 20 cm, but if the fertilizer dose is small, then the depth should be less. From above, lime is covered with a layer of sand. For storage in winter, it is recommended to pour another layer of soil 70 cm high on top of the sand layer.
- Before applying to any surfaces (wood, concrete, cement, metal), it is necessary to completely remove dirt, grease, defects, and rust from them.
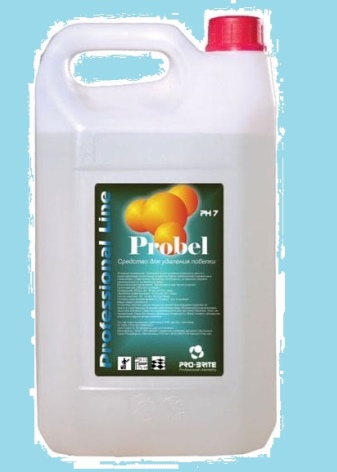
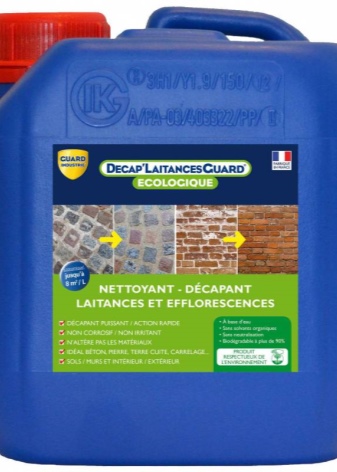
- It may happen that lime gets to an unnecessary area and should be washed off. To do this, first of all, it is necessary to abundantly moisten this area, wait for the lime to dissolve well, and then remove the material with a hard metal sponge. Repeat these steps if necessary.There are ready-made solutions on the market for such needs, for example, Guard Industrie or "Space". You can also use homemade hydrochloric acid solutions.
- It is not recommended to carry out a primer before whitewashing, as lime will not fix on such a base. It is also advisable to whitewash with brushes, and not with a spray gun. The brush will better distribute the lime mortar and the finish will be better.
- The longer the aging period of the finished mixture, the better it will perform its functions.
- For the preparation of mortars, it is best to add sand as well.
- This material is not suitable for making fireplace or stove cement, as carbon dioxide is released when heated.
- To obtain insulation, you can add sawdust and gypsum to the fluff. In other cases, the lime mortar should not contain sawdust, lumps and other inclusions in order to evenly and completely cover the surface.
- Bleach must be stored in a dark room, because part of the active chlorine is lost under the influence of sunlight.
For information on how to determine the quality of lime, see the next video.
Step-by-step instruction
here
Surface preparation
To prepare the ceiling for lime whitewashing, you need to do the following:
- Remove the remnants of the previous coating. It is scraped off with a spatula. If the process moves too slowly, the whitewash layer needs to be slightly moistened - this will increase its pliability.
- Carefully examine the surface of the ceiling for irregularities and cracks on it. If found, you will need to putty them. The dried putty is treated with sandpaper to obtain a smooth base. Large defects are subject to plastering.
- We will have to remove all the spots on the surface to be treated, since it will be impossible to paint over them. Rust streaks are well removed by the usual "Whiteness" or "Anti-rust" composition. Soot stains can be removed by applying hydrochloric acid. Traces of fat can be removed with 2% soda ash solution.
- The smoothed surface is treated with a primer for better adhesion. You can use ready-made mixtures or prepare the composition yourself.
Application principles
how to whitewash the ceiling with lime with your own hands using a brush
- Before applying, the solution must be thoroughly mixed, then the shade on the entire surface will look the same.
- The starting layer of the mixture must be applied perpendicular to the window.
- The second is applied in a direction parallel to the window frames. This technique will allow you to make the brush marks invisible.
- Masters advise to moisten the ceiling a little before processing. This will improve grip and the surface will be smoother.
- First, with a thin brush, the corners and zones of joints between the walls and the ceiling are worked out.
- Then a large natural bristle brush is used. It is used to paint over the main surface area of the ceiling.
- You don't have to wait for the first coat to dry completely before applying the next one. The whitewash should set slightly.
If you need to whitewash a large area, it is more convenient to use:
- spray gun;
- garden pump spray;
- vacuum cleaner with reverse draft function.
Proportions for whitewashing walls during construction in the country
When the dry powder of the material and plain water are mixed, a certain chemical reaction occurs, which in turn generates a large amount of heat.
It does not matter at all where the process of mixing the powder with water is carried out. At the factory, at the summer cottage, you need to do all the work, in a special protective suit and gloves
Whitewashing suit and gloves
Professionals recommend mixing materials in a rust-free container, it is best to choose a plastic container.
If you have a large volume, it is better to use a large metal barrel. The workflow is a simple manipulation that needs to be taken seriously.
Then pour it into powder with cold water. It is best to add water not immediately, but in small portions and be sure to stir.
Solution preparation
The ideal situation is to leave the cooked lime to stand for a couple of hours, it is best to leave it alone for a couple of days.
If you will whitewash the house, it is better to prepare the mixture in advance. The very process of whitewashing will cause itself nothing complicated. Just prepare the solution in advance. To make the lime white, it is best to take a first or second grade material and mix it with water in one-to-one proportions.
Before you start whitewashing the walls, you need to mix the solution well. Here about the putty of the walls under the wallpaper. With a large brush, start smearing the walls and ceiling.
As practice has shown, one layer is not enough, so you can apply whitewash in several layers. The process of whitewashing trees is, in fact, no different from whitewashing walls. Here about mdf for walls. The same solution, the same brush. Speaking of plant treatment, the solution must be sprayed over the entire area of the plants.
Shelf life
Different categories of lime have different shelf life. For example, if you take quicklime, it should be stored for about two weeks in a room that will be extremely unheated, dry and closed. If it is possible to store it in a production environment, then it is better to do this in special containers that have a feeding system.
If such a product is stored in a sealed package, then its shelf life is unlimited. It must be said here that the storage of this type of lime must completely exclude the ingress of any liquid on it, otherwise it can cause a very strong heating of the substance.
After that, a 20-centimeter layer of fine sand is usually poured onto the solution. If the outside temperature is below freezing, in order to exclude the possibility of freezing, you can pour a 70-centimeter layer of earth on the sand. Also, a pit with lime should be fenced off and marked so that everyone around them knows about its presence and animals cannot get on it. As a rule, in the consistency of the dough, such lime is stored for quite a long time. And the more time passes, the more quality it becomes.
Bleach is usually stored exclusively in sealed packs in a place that is completely protected from moisture and ultraviolet rays. The packaging must be marked with a label that indicates that the substance is corrosive. It is packed in polypropylene or polyethylene bags, as well as in steel drums with polyethylene liners. On the market, these will be packages weighing 0.5, 1.2 and 1.5 kilograms. The pack can be sealed, or it can be tied with a metal ring or chlorine-resistant twine.

Decomposition of chlorine-based lime results in the evolution of oxygen and chlorine. But this is possible only under the influence of natural factors. It is a strong oxidizing agent, and chlorine dust can irritate the mucous membrane.
When working with such a substance, the respiratory system and eyes should be protected with special equipment - a respirator or a filter-type gas mask. Packages of this type can be stored in warehouses with a high-quality ventilation system, which are unheated and protect the lime from UV rays. The floors must be made of brick, concrete or asphalt. In a room with such substances, it is impossible to store gas cylinders, flammable, as well as various explosives. The storage period in warehouses can be either a year or three years.