What is laid on the floor of fiberboard or chipboard. Chipboard fiberboard mdf osb plywood that is laid on the floors
High-quality floor repair depends on the correct choice of the base. The choice of modern materials is so wide that it is often difficult for a common man in the street to decide what exactly he needs. For flooring on a wooden base, chipboard materials are most often used. But what to opt for, chipboard or MDF? How do OSB boards differ from plywood and what will be better for flooring?
Distinctive characteristics of materials
Knowing the basic parameters of sheet materials, it will not be difficult to make a choice by comparing their characteristics.
Material characteristics:
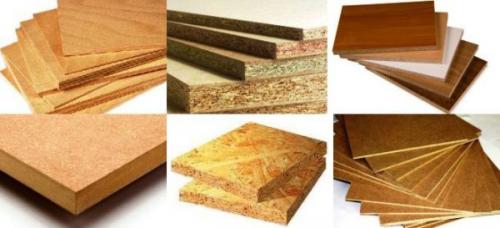
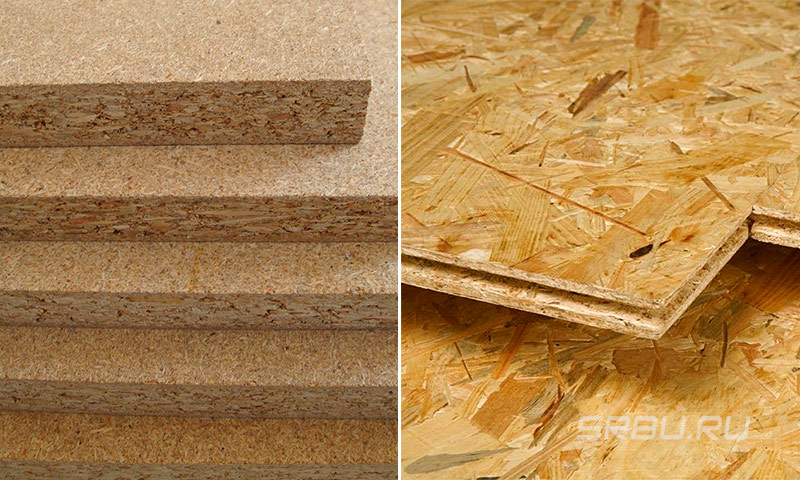
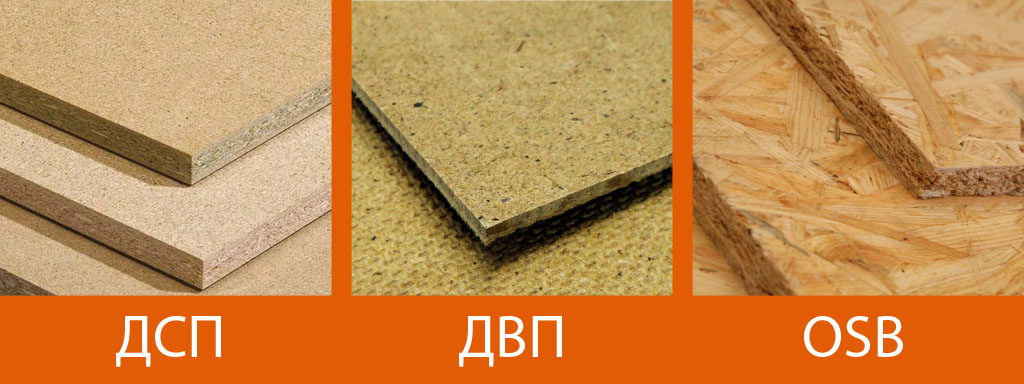
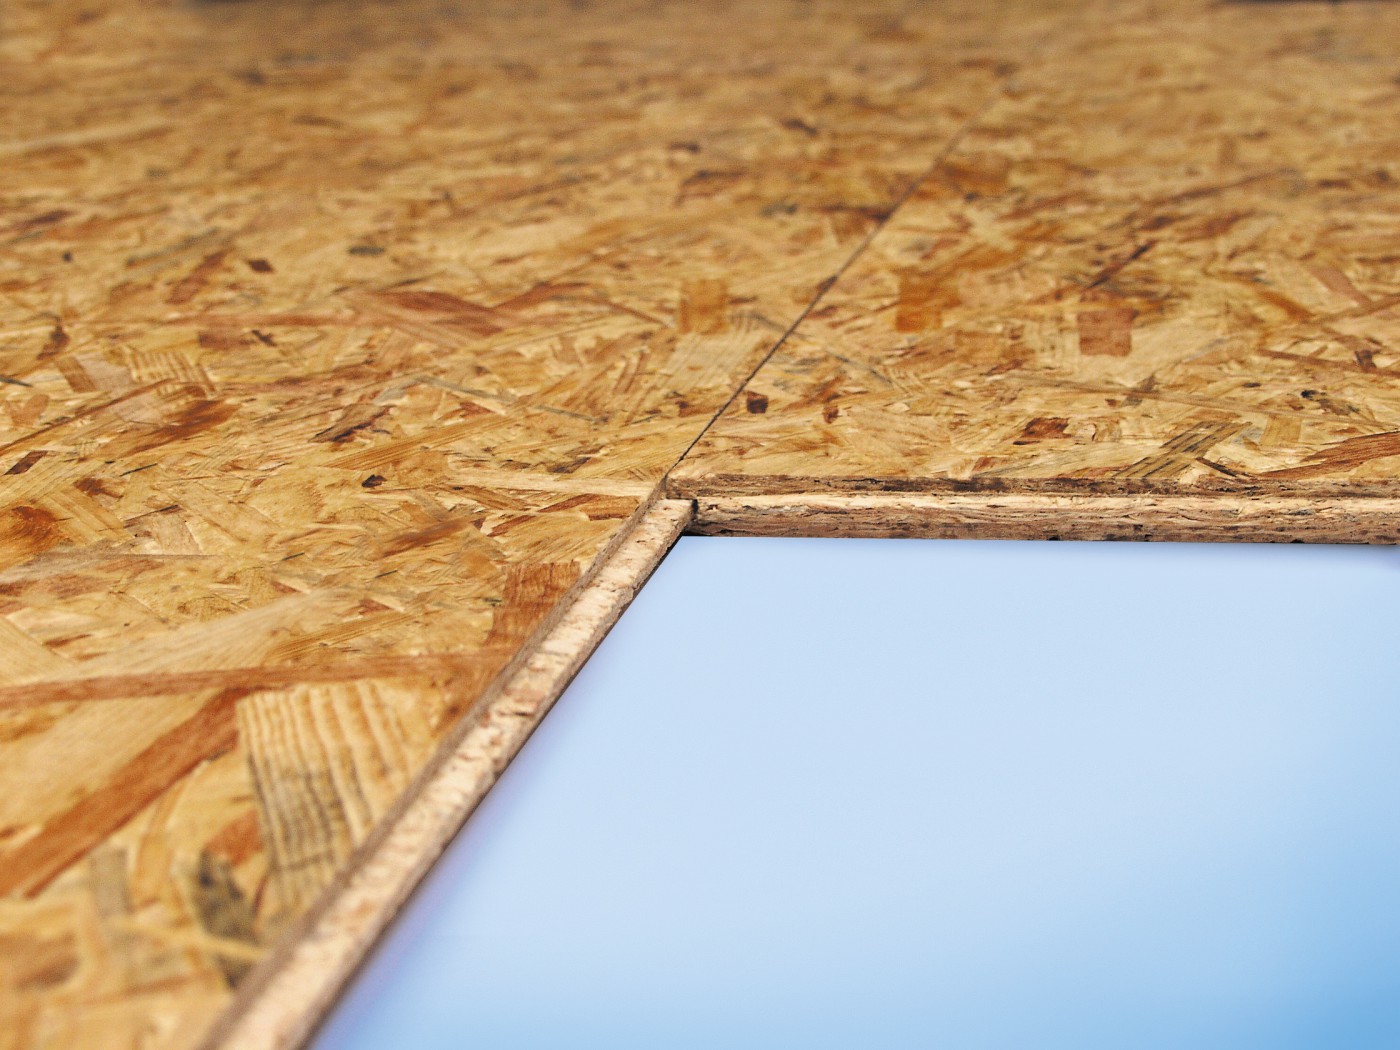
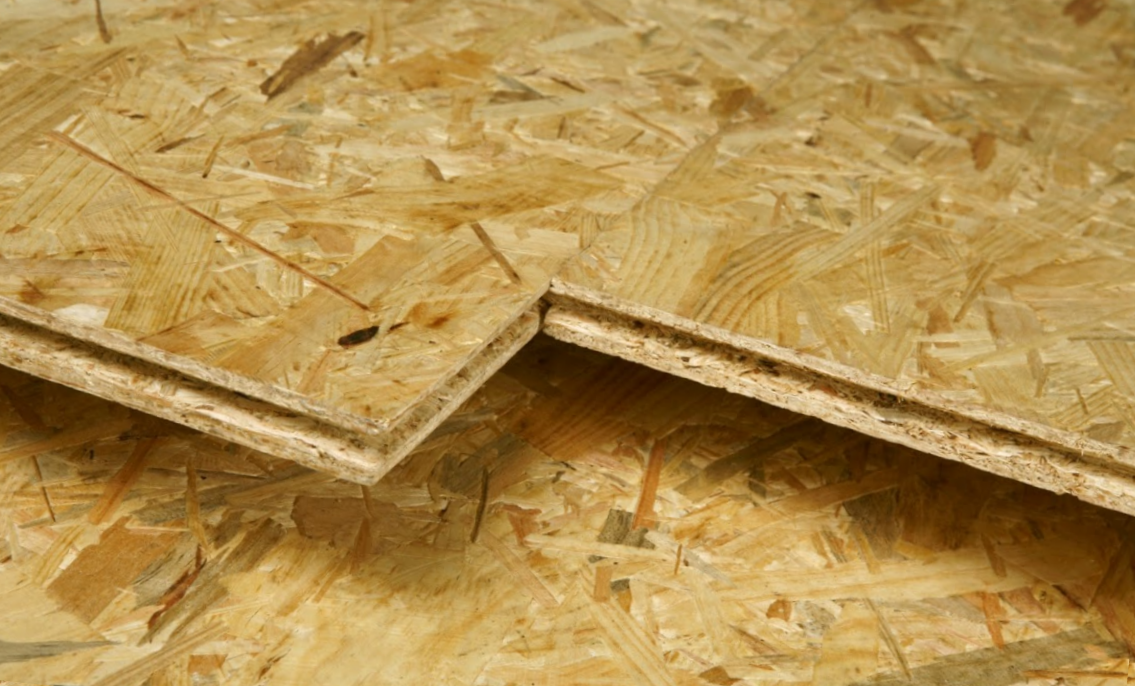
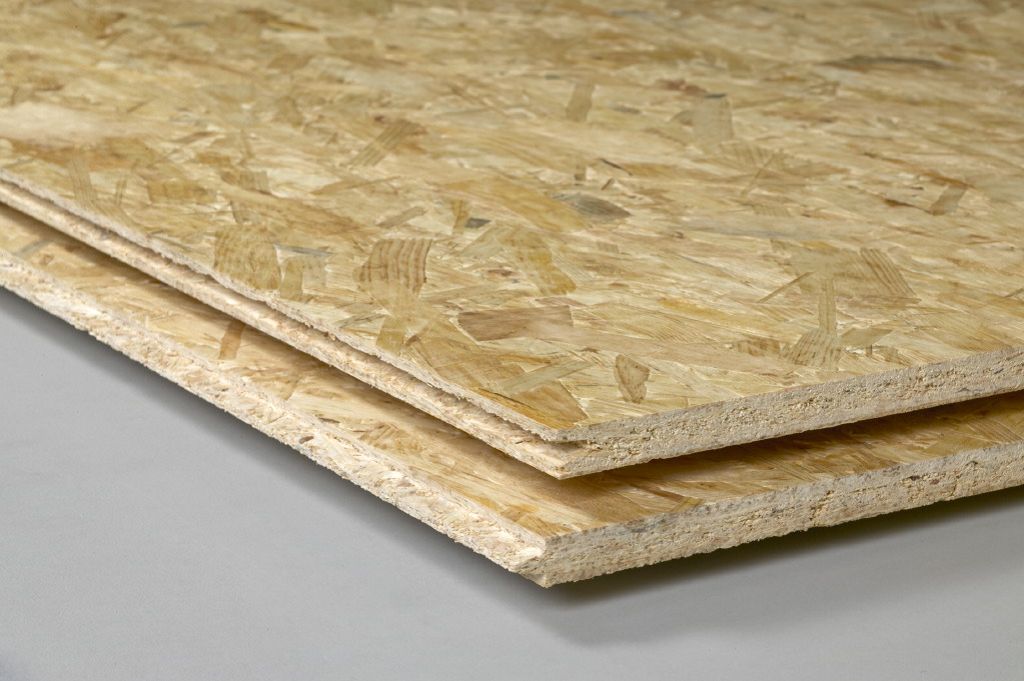
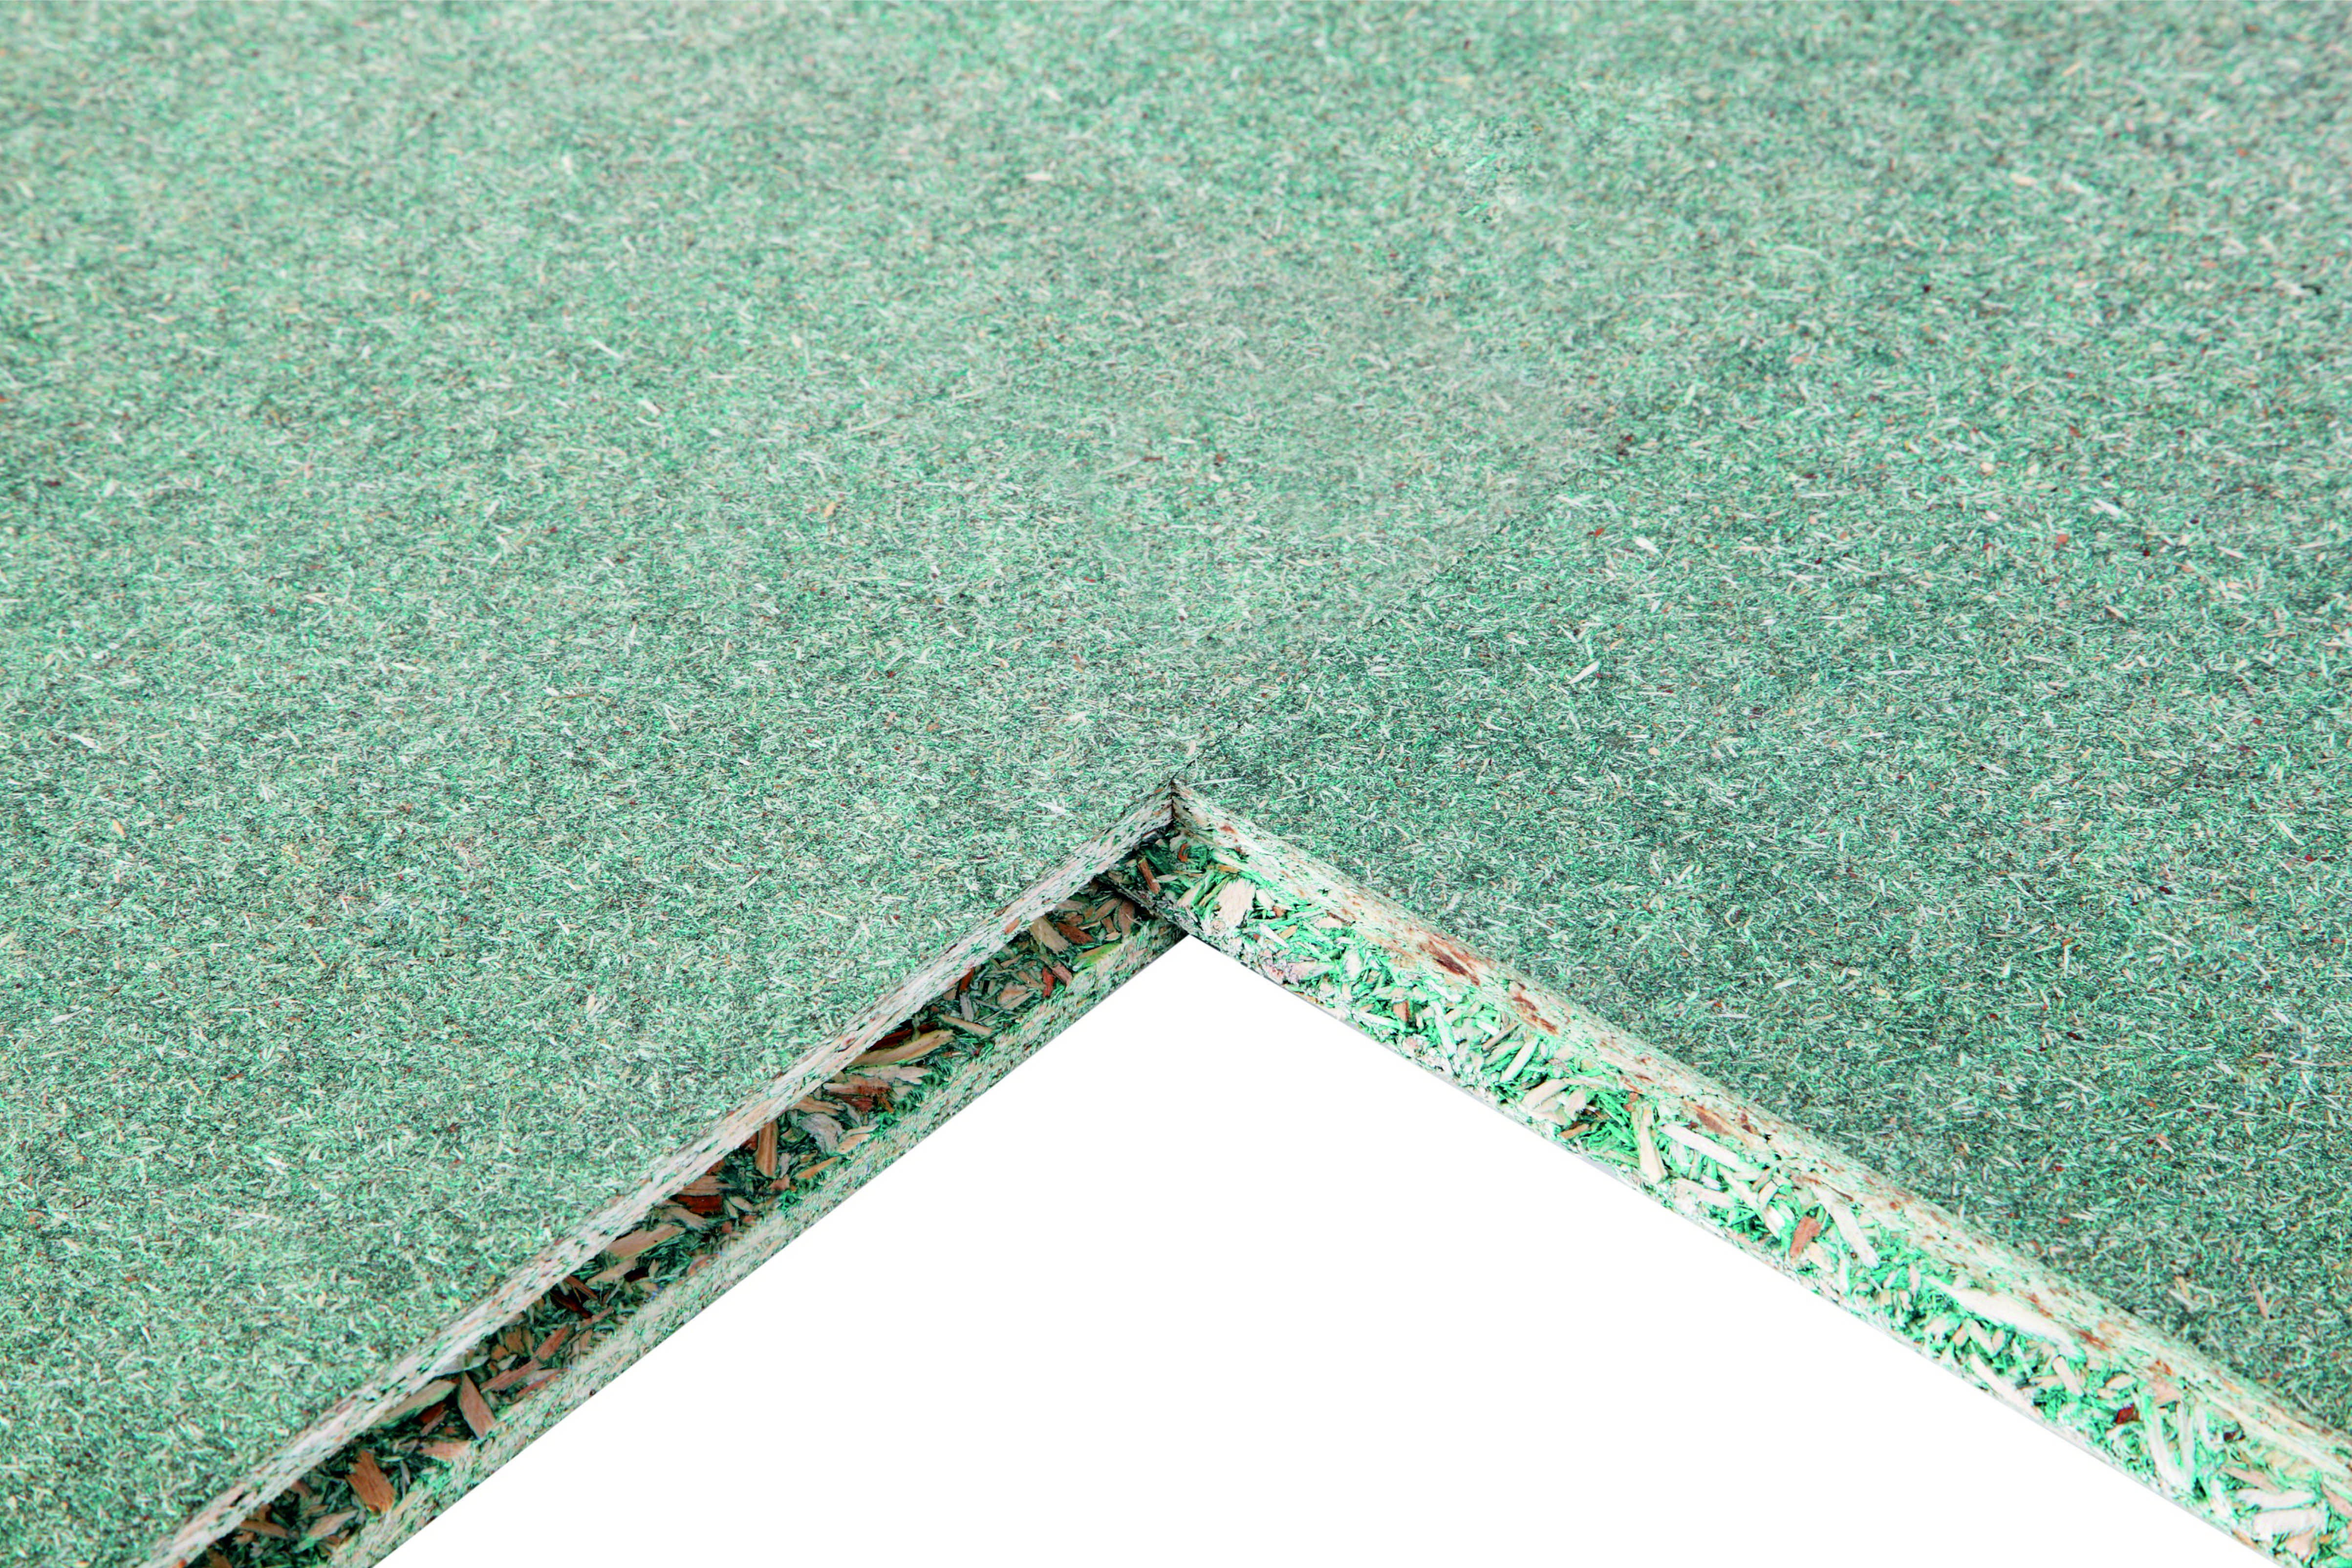
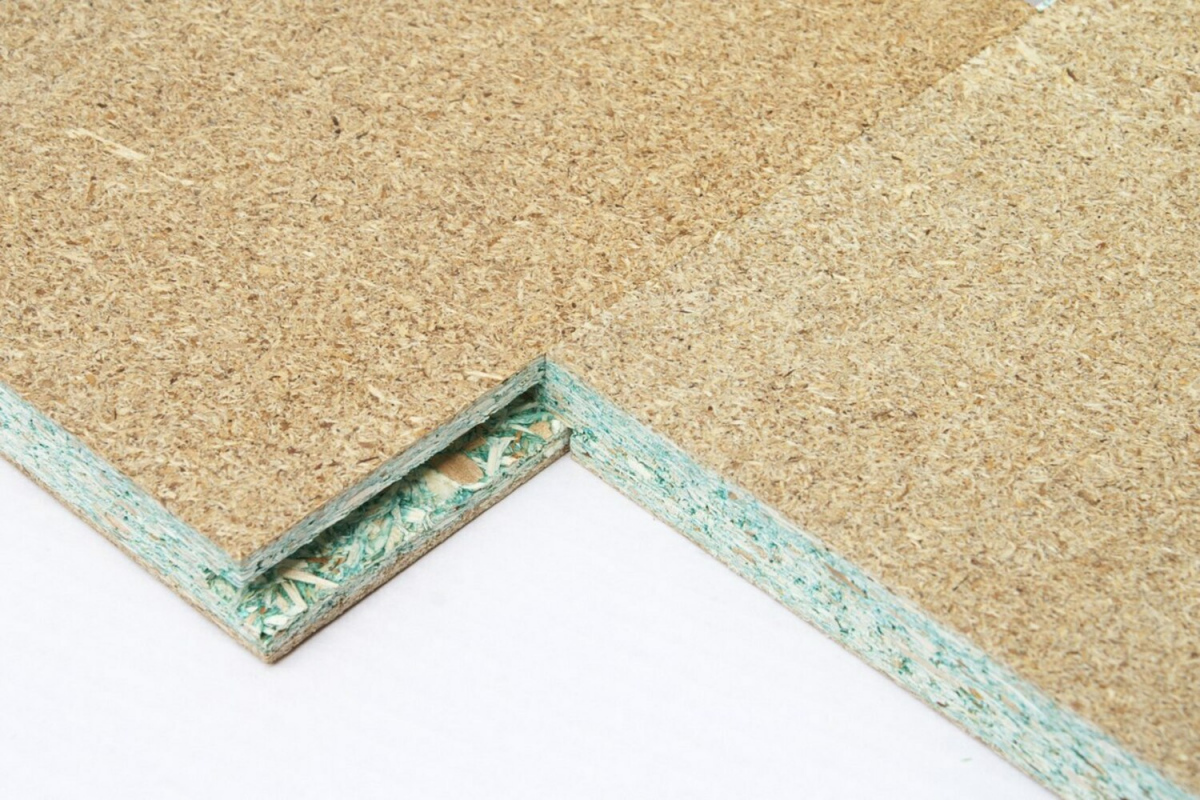
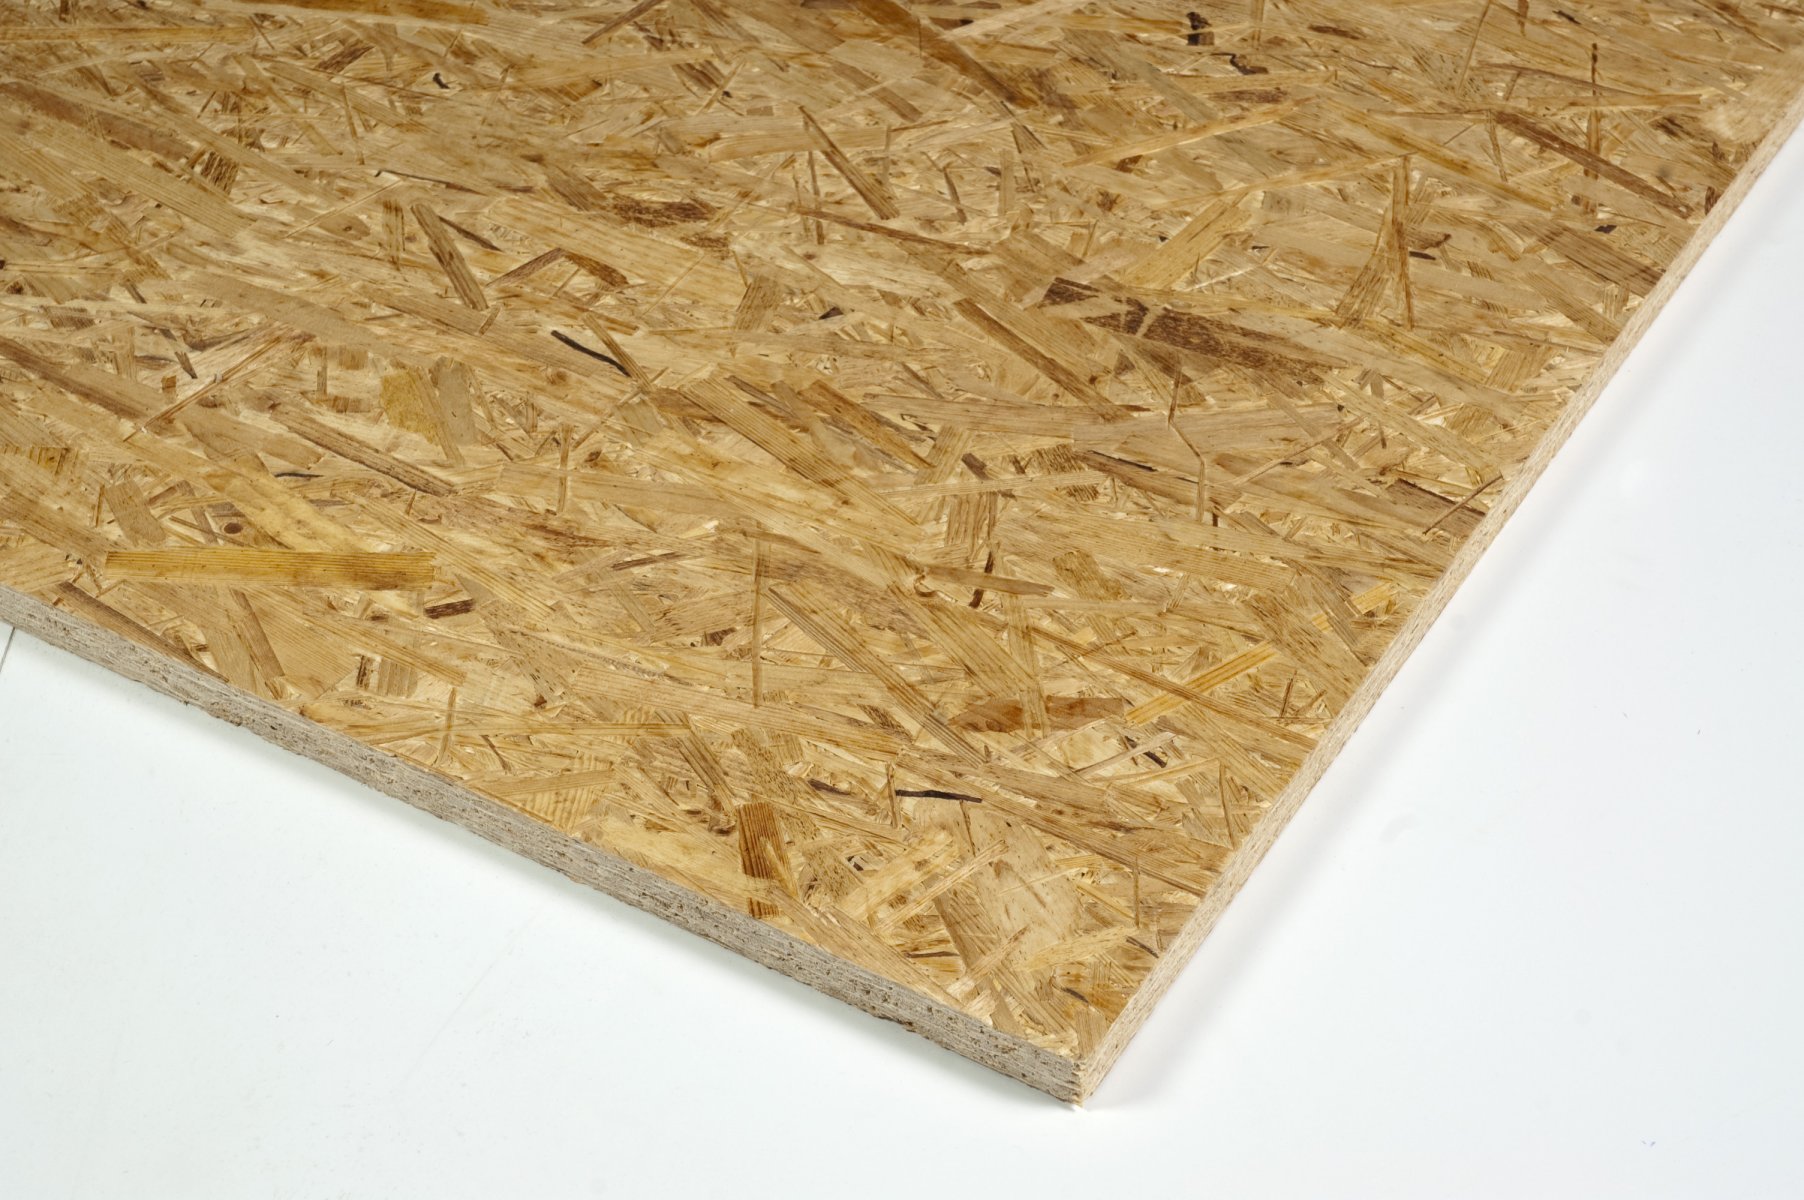
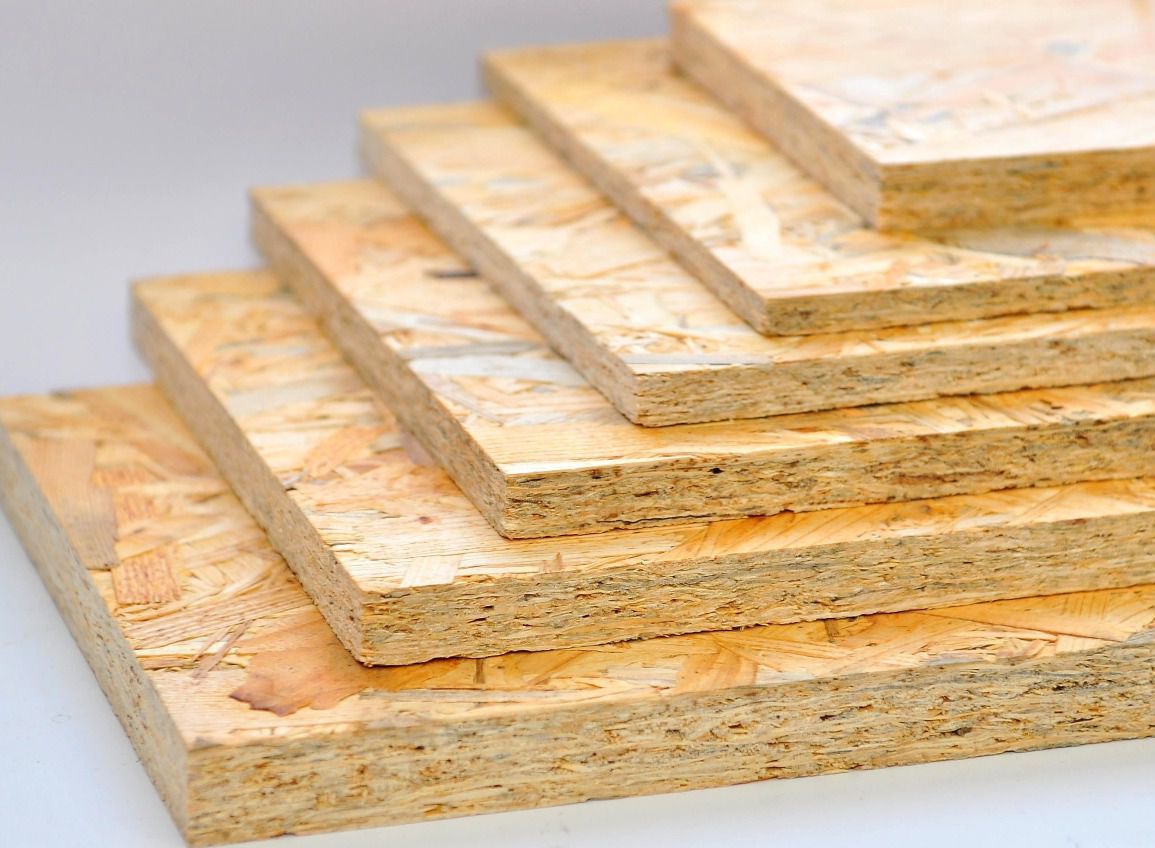
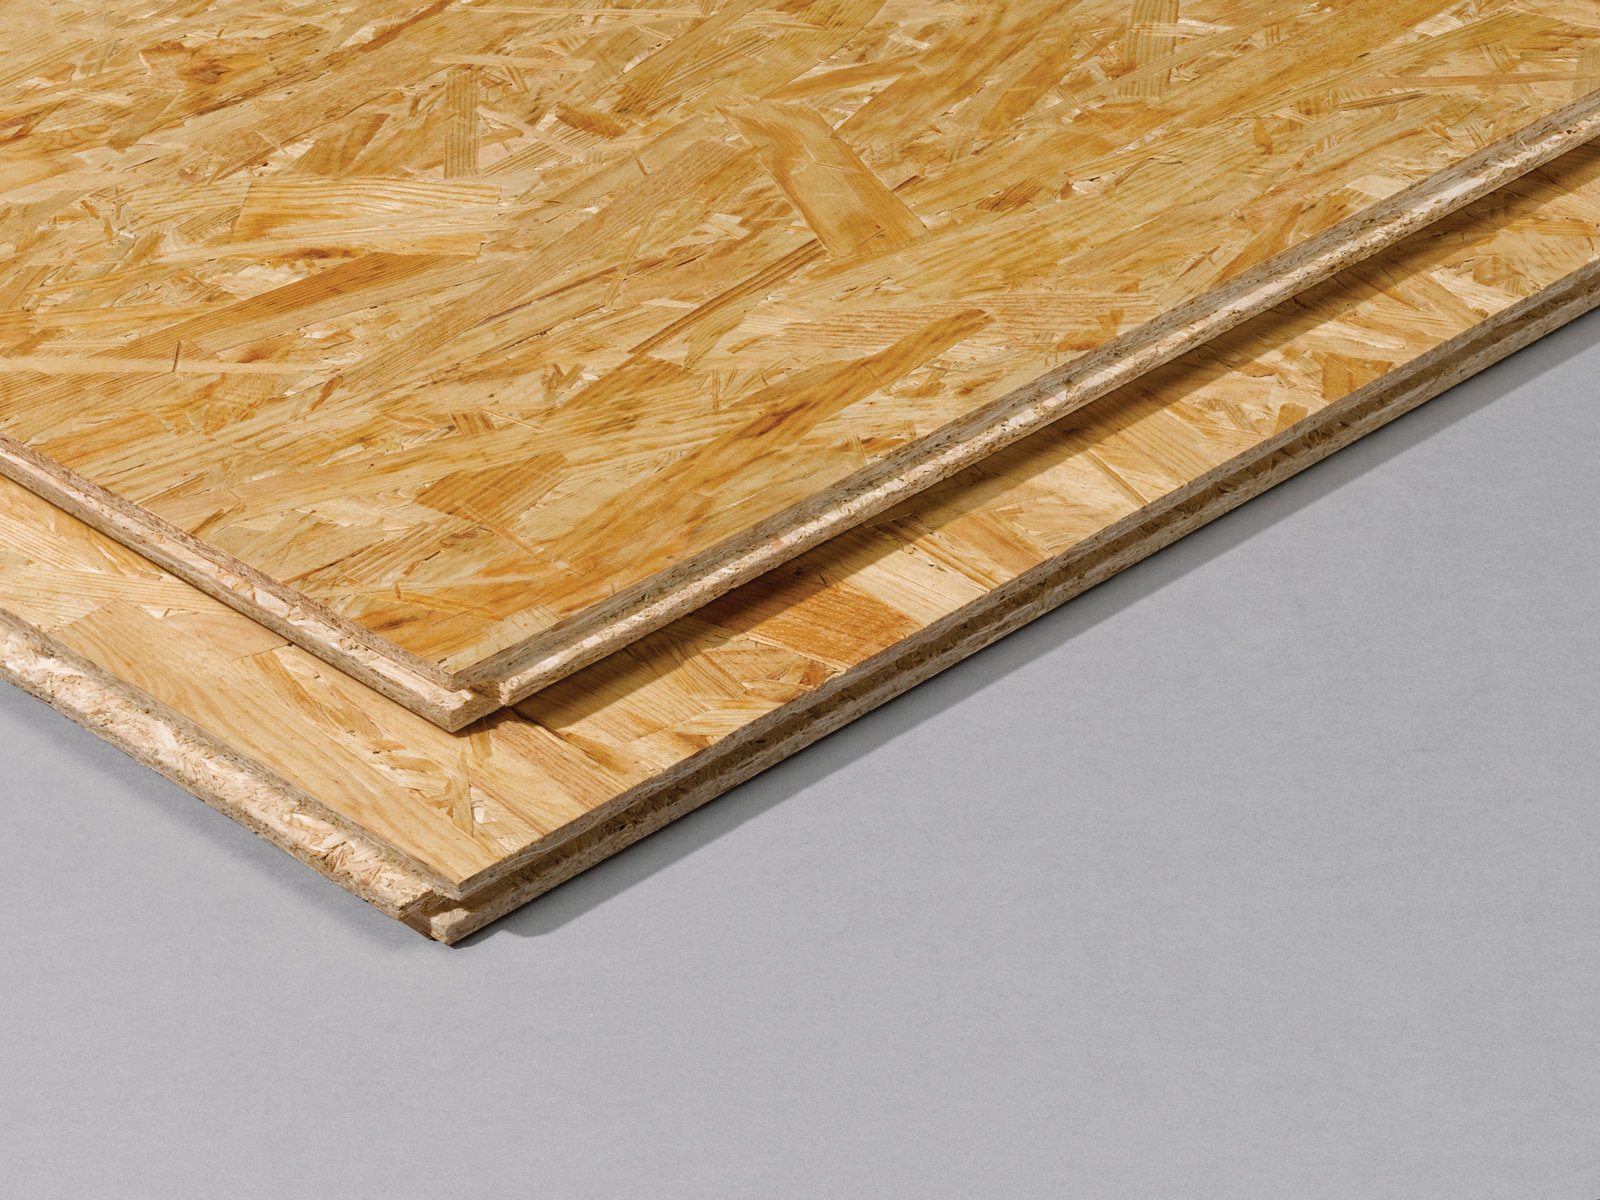
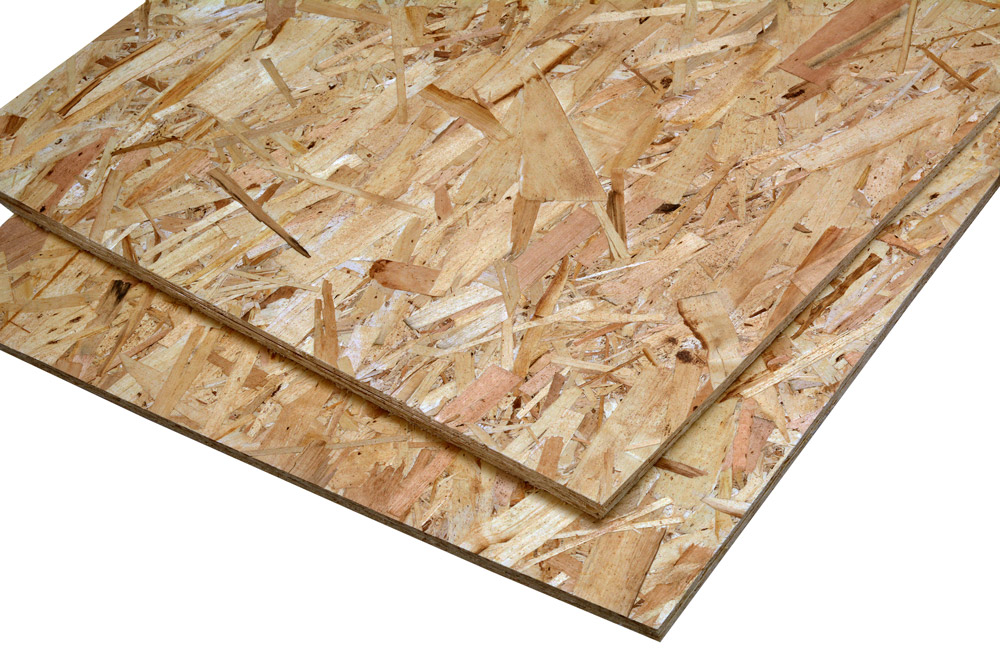
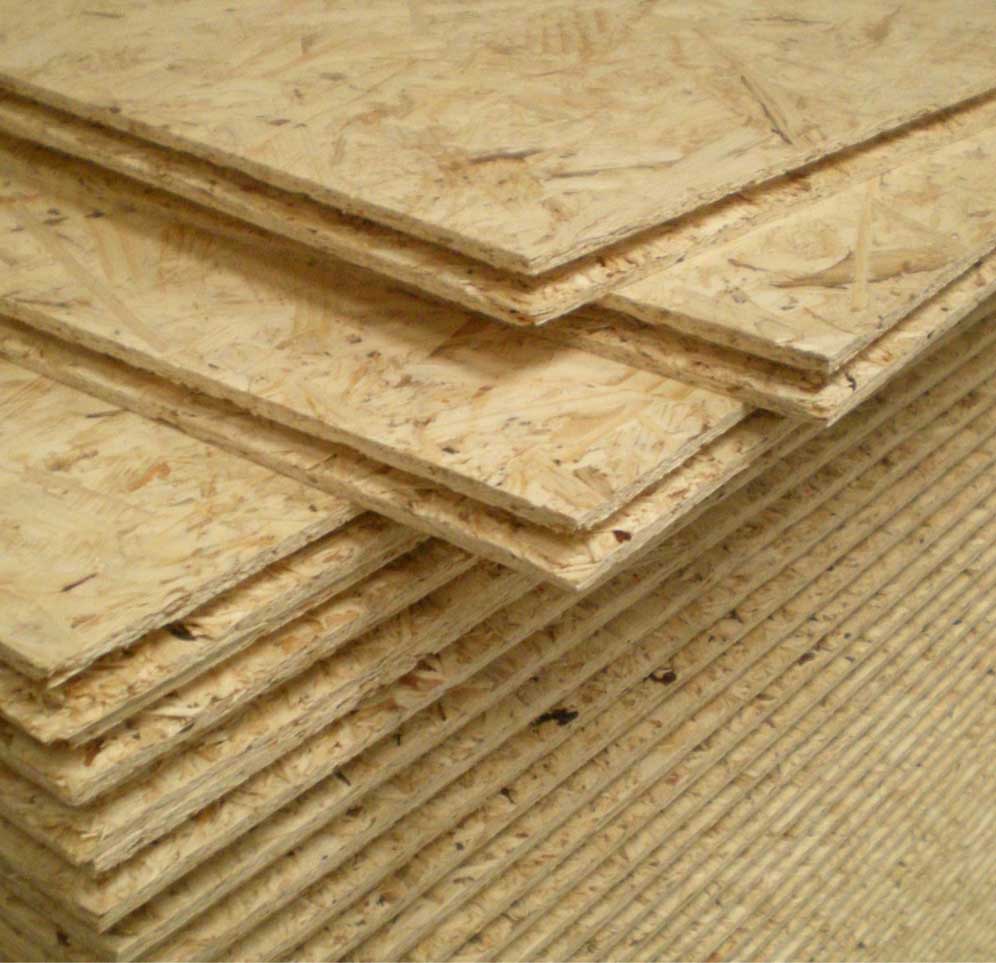
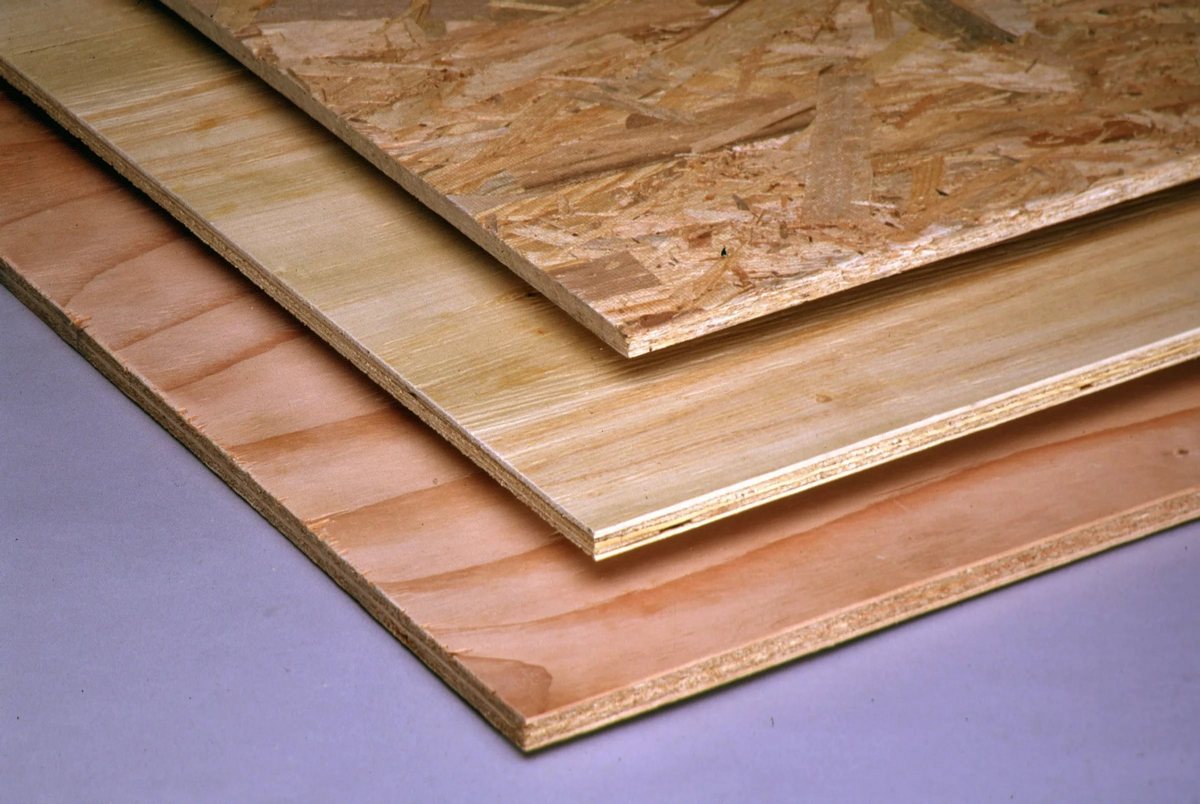
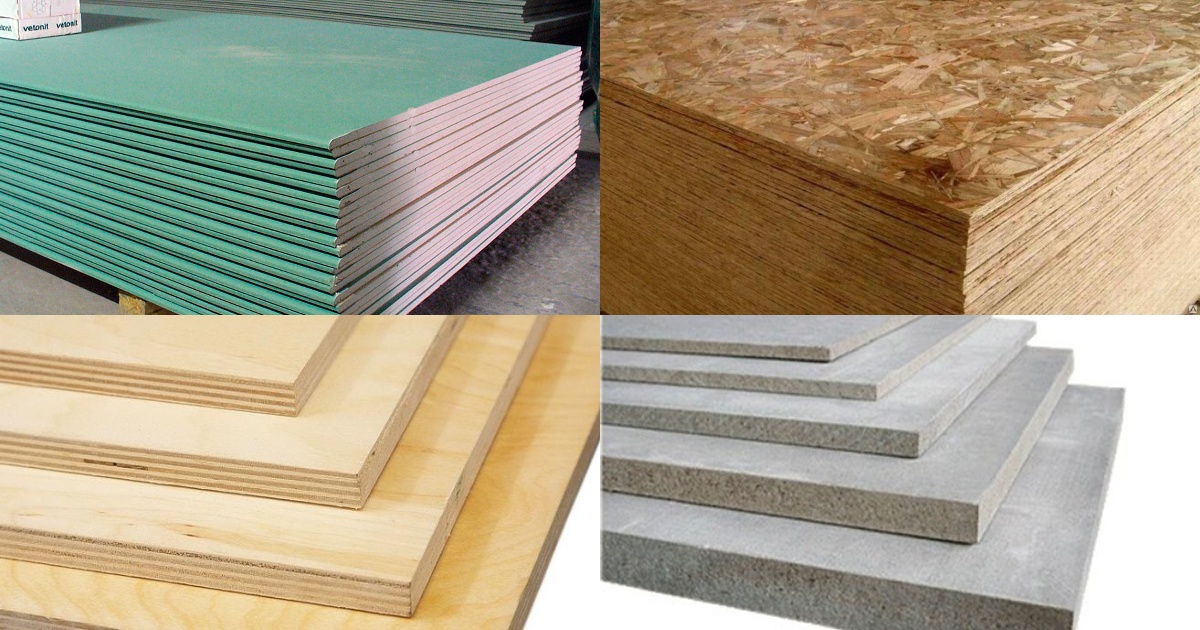
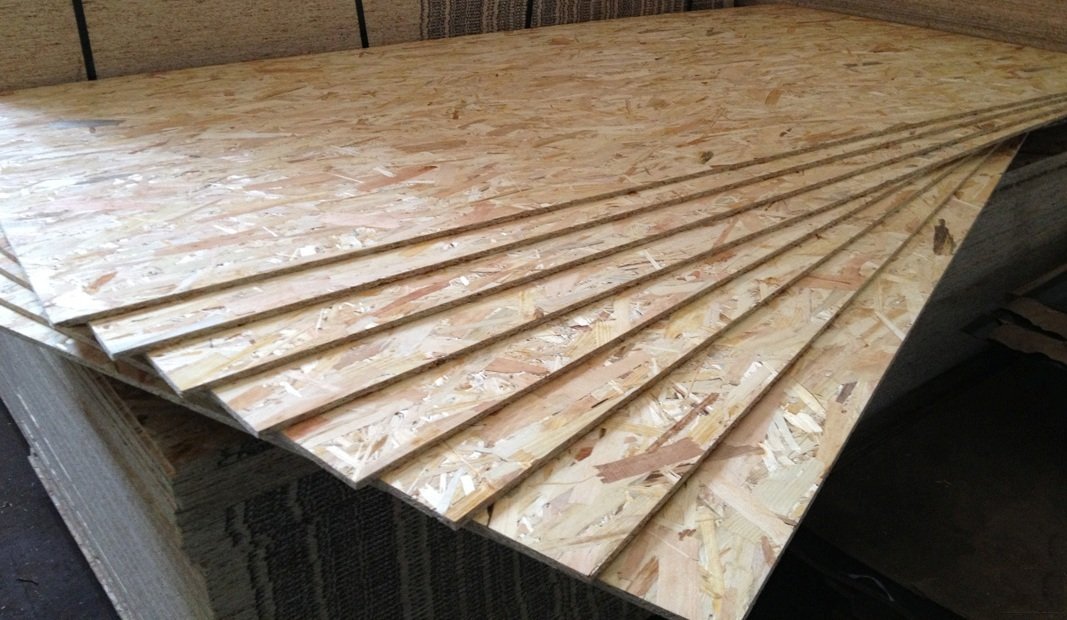
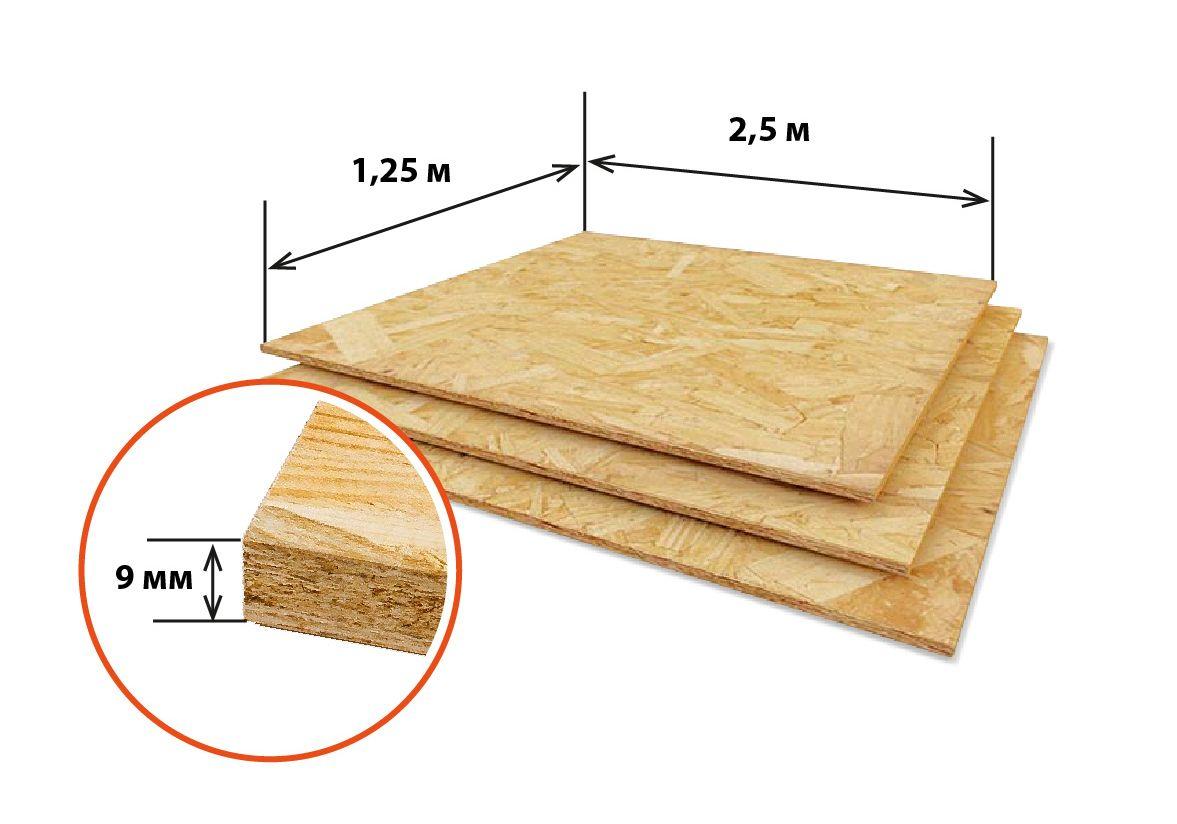
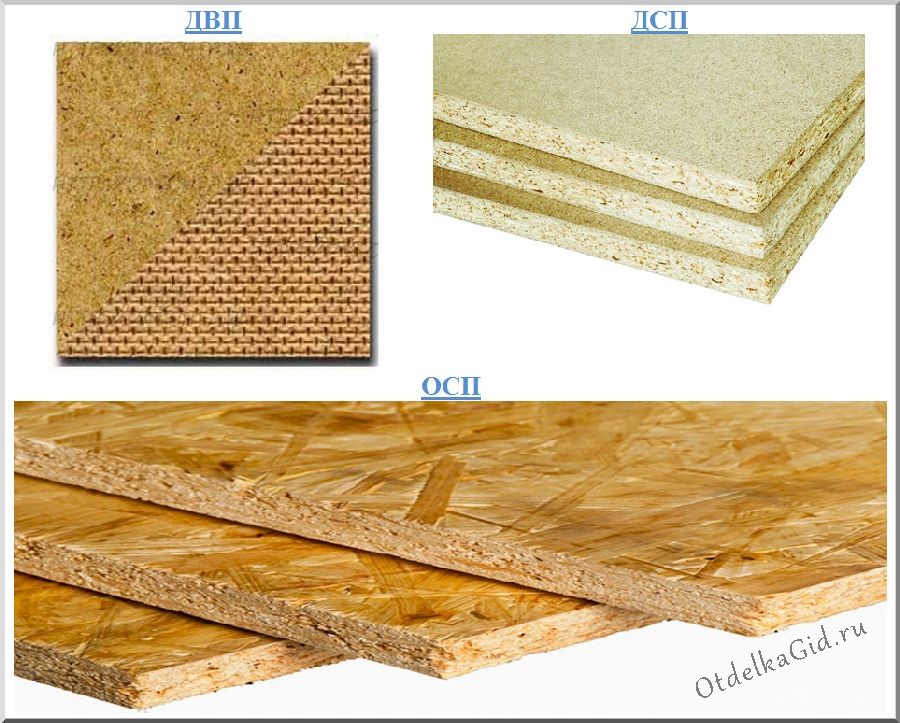
- OSBs are becoming more and more popular in the arrangement of the subfloor. Sheets are produced by gluing recycled wood recyclable materials with binder resins. Chips and cuttings are stacked in layers, then pressed. OSB boards differ in the level of moisture resistance and resistance to physical stress. OSB sheets, as a rule, are used as a rough floor covering, however, in some interiors they are quite appropriate decor.
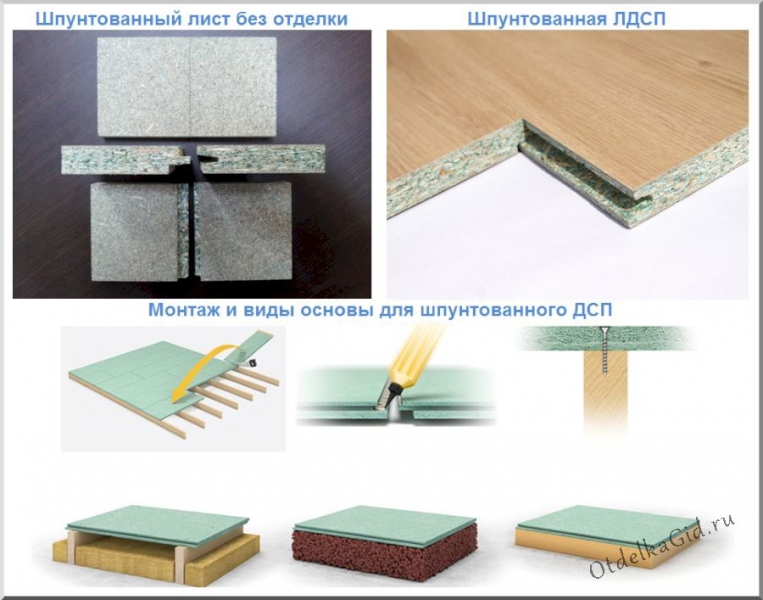
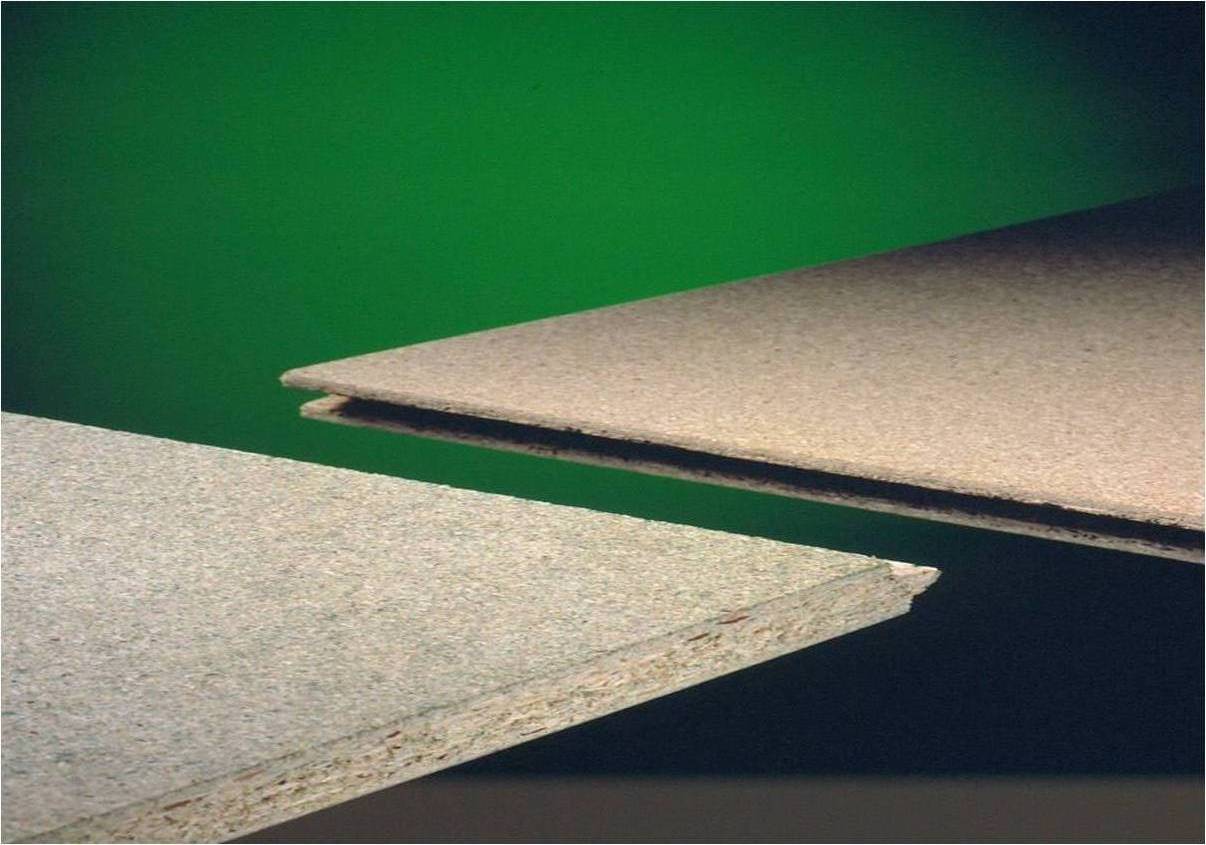
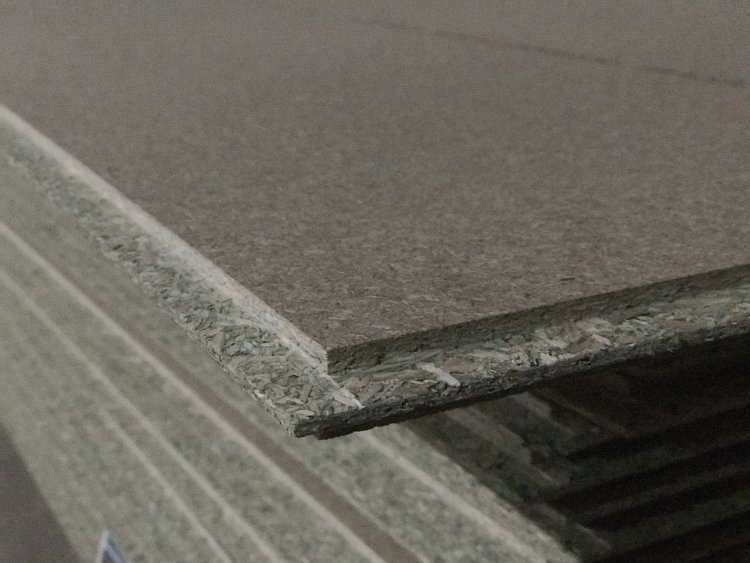
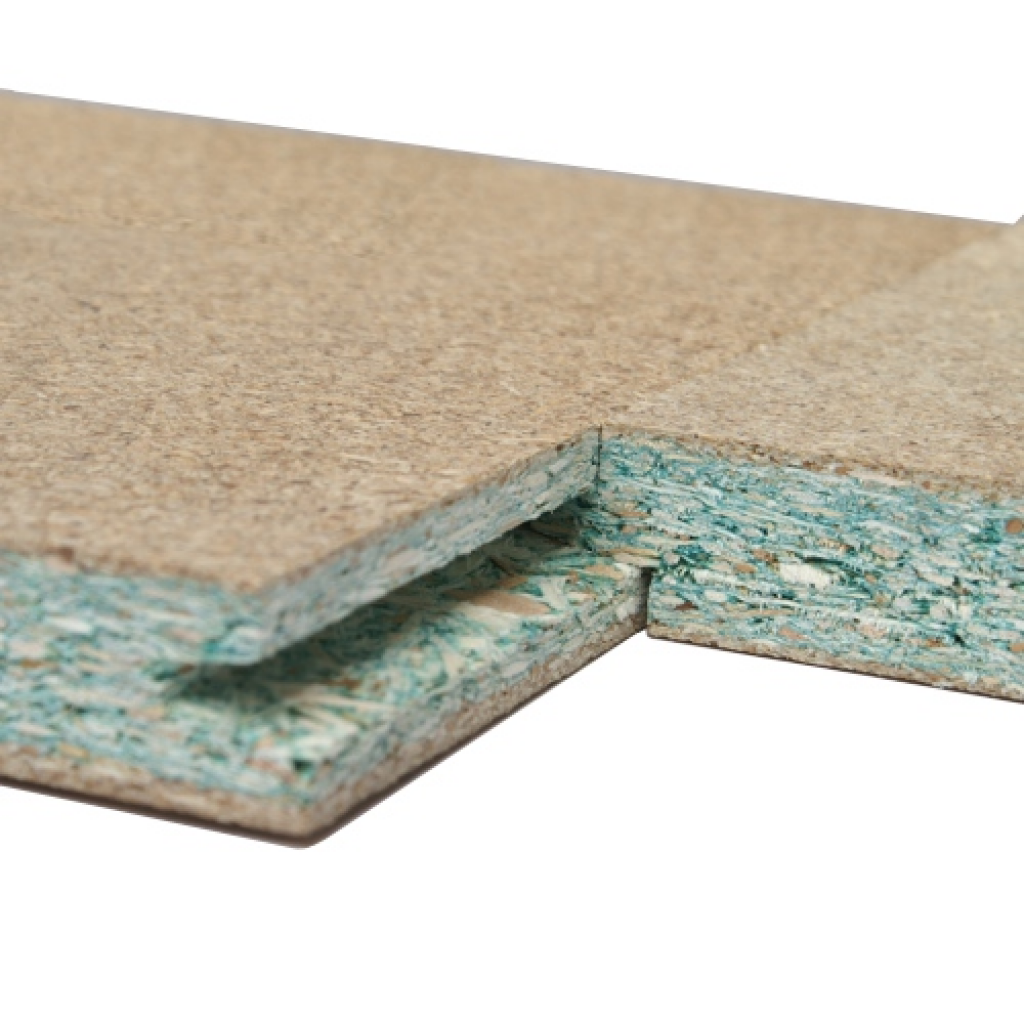
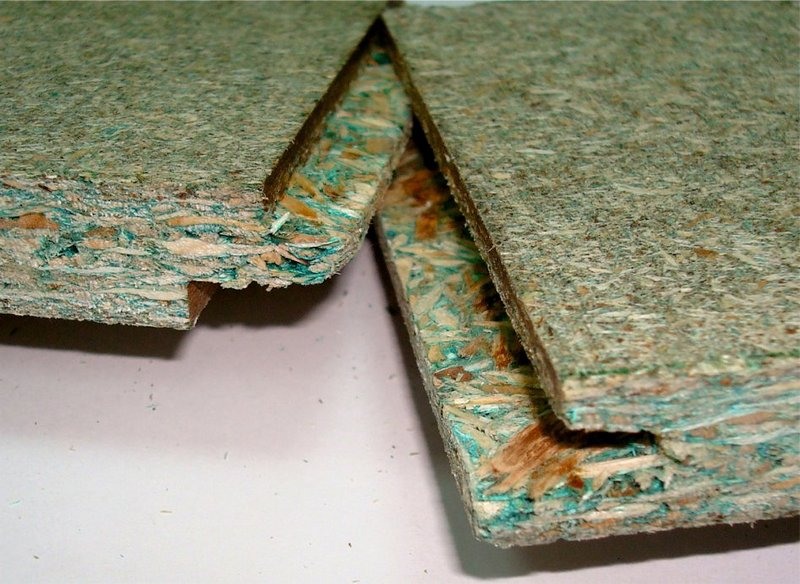
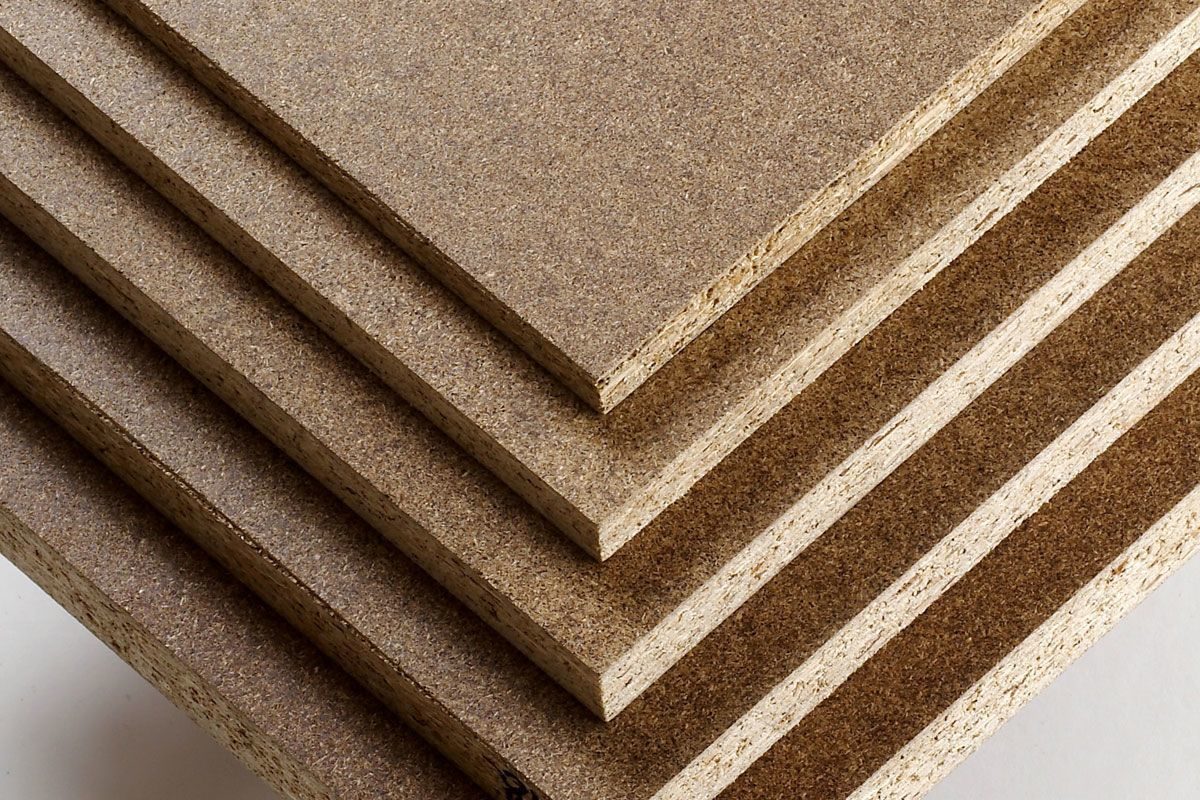
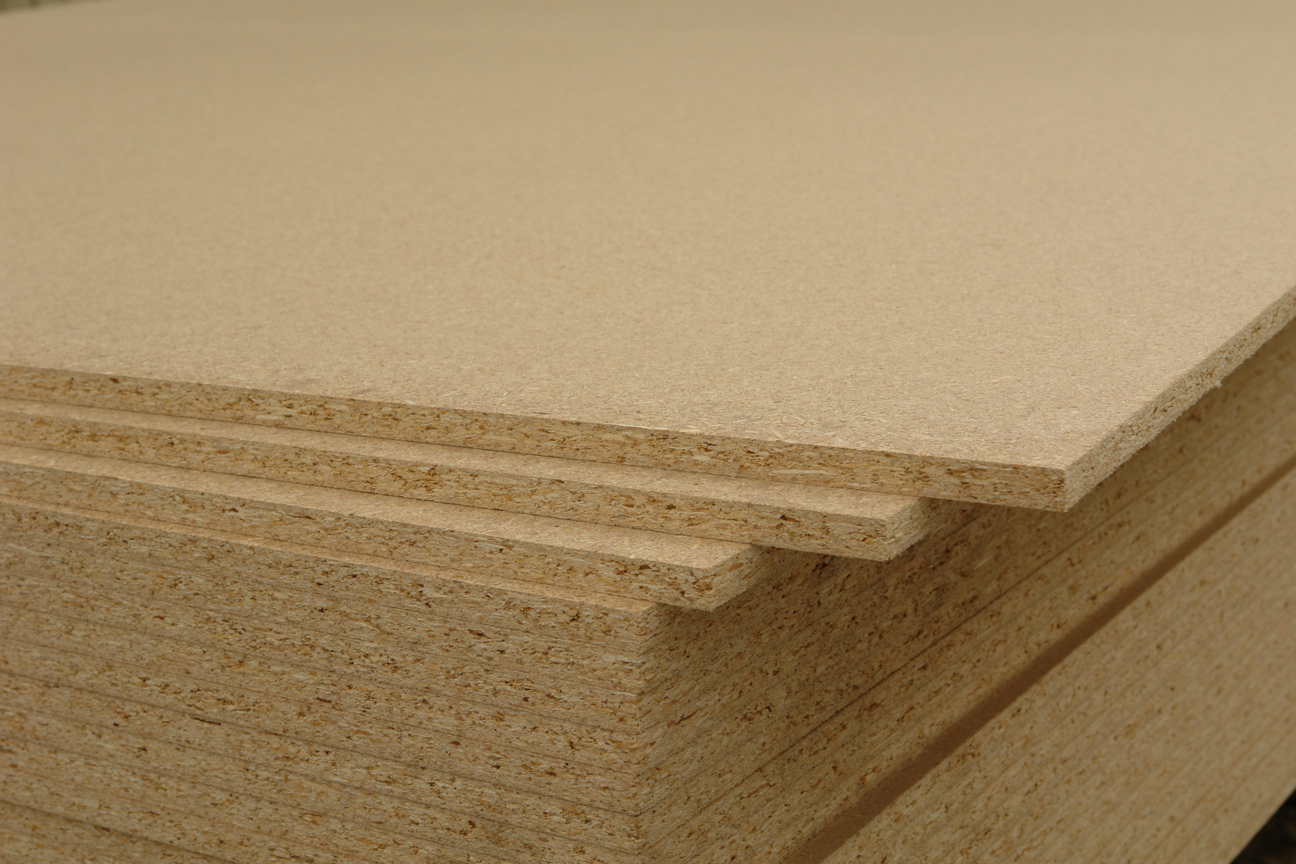
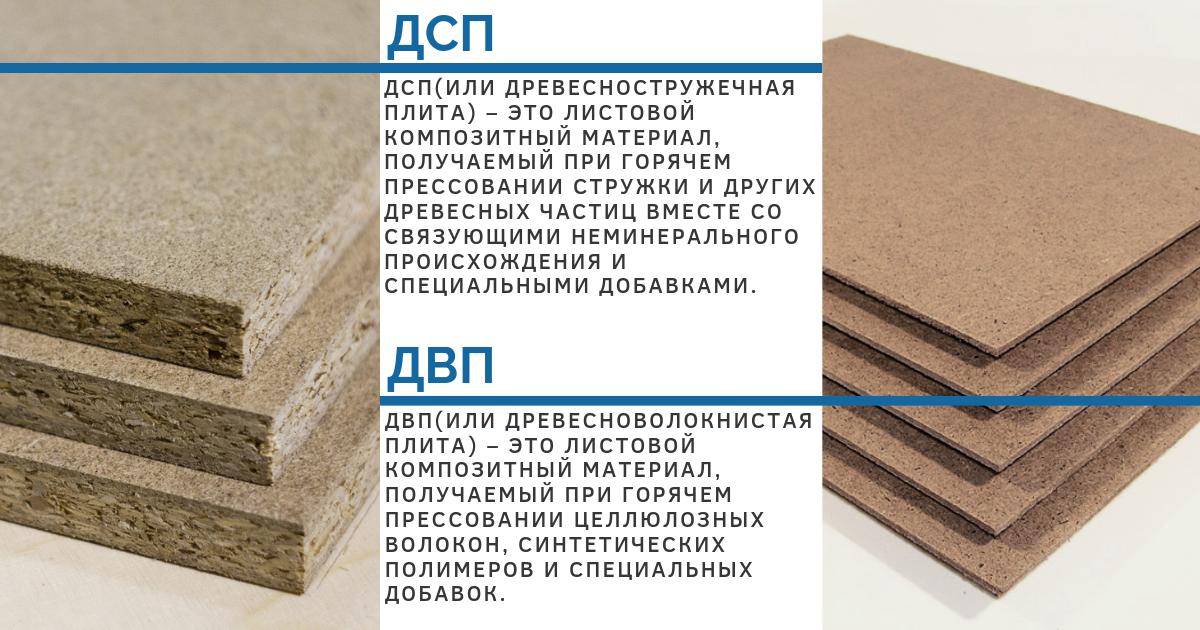
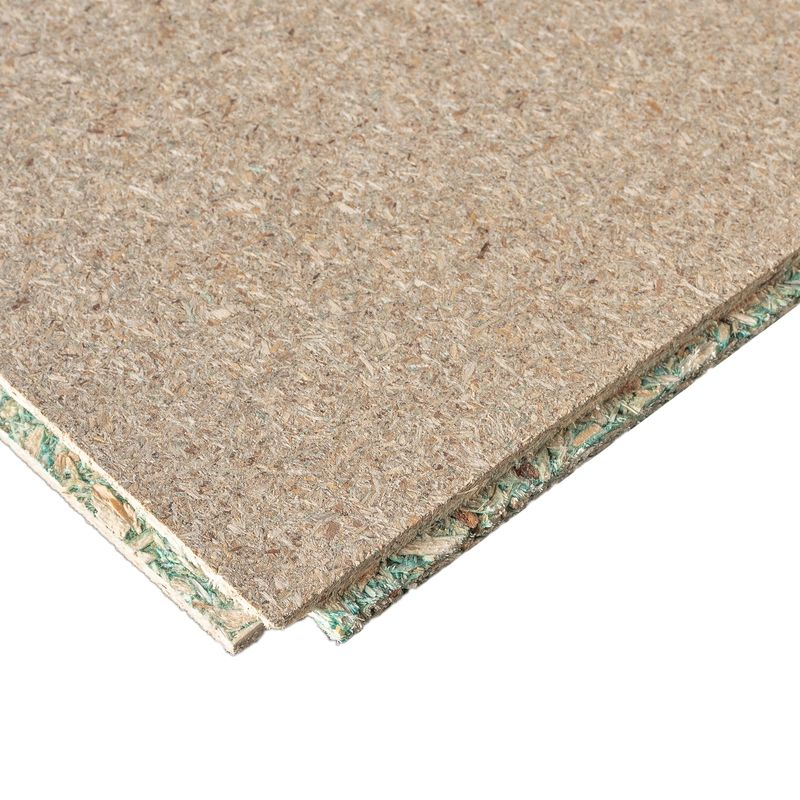
- Chipboard is made from wood waste or rejection. The raw material crushed to the required fraction is mixed with resin and pressed at high temperatures, forming plates of the required dimensions. Chipboard sheets are of different types: laminated or untreated, with and without polishing. Today, waterproof shunted sheets are especially popular.
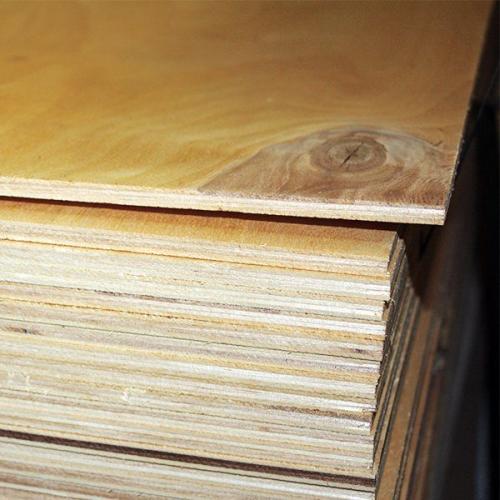
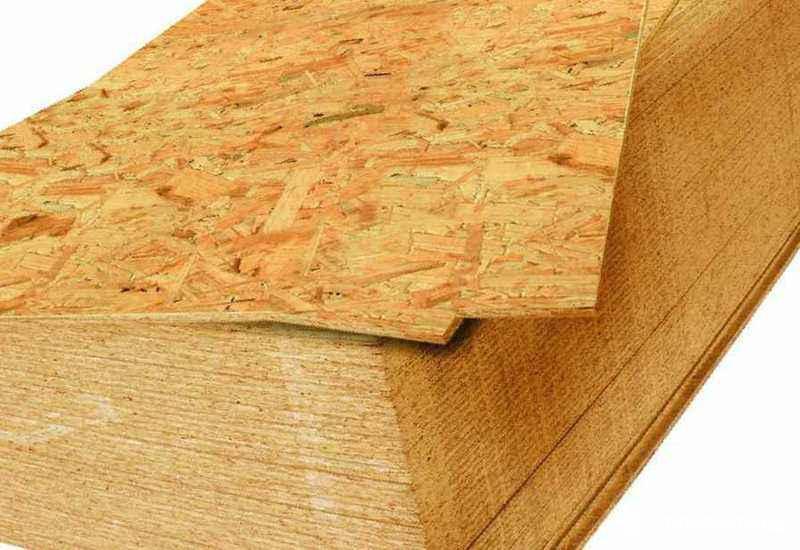
- Plywood is used much less frequently when leveling the floor, as newer and cheaper analogs are being used more actively. Plywood is made from natural veneer sheets of different wood species by gluing the layers together. This technology makes it possible to obtain a strong material that is resistant to moisture and physical stress.
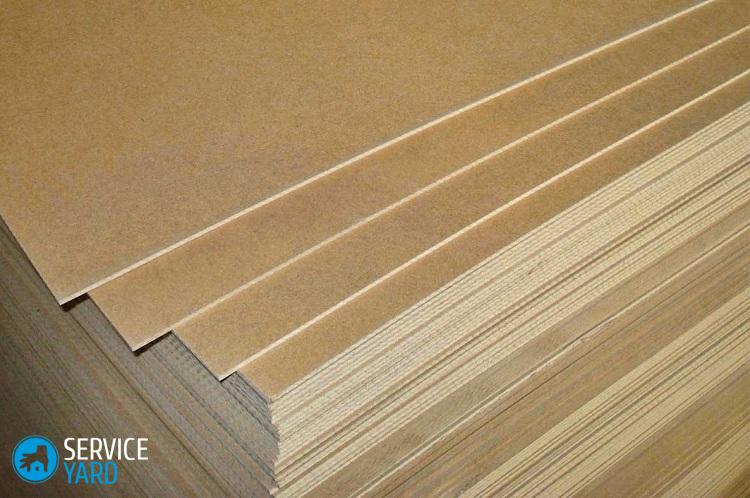
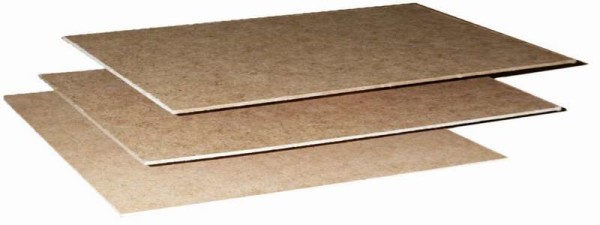
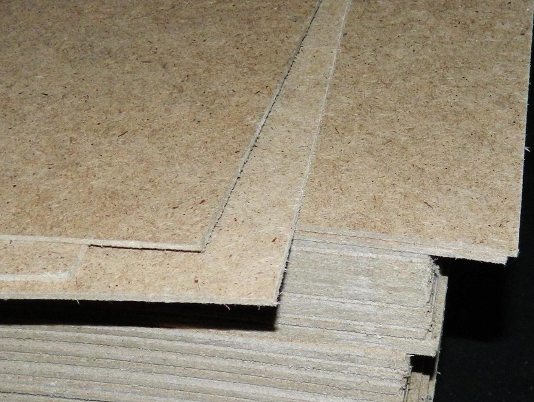
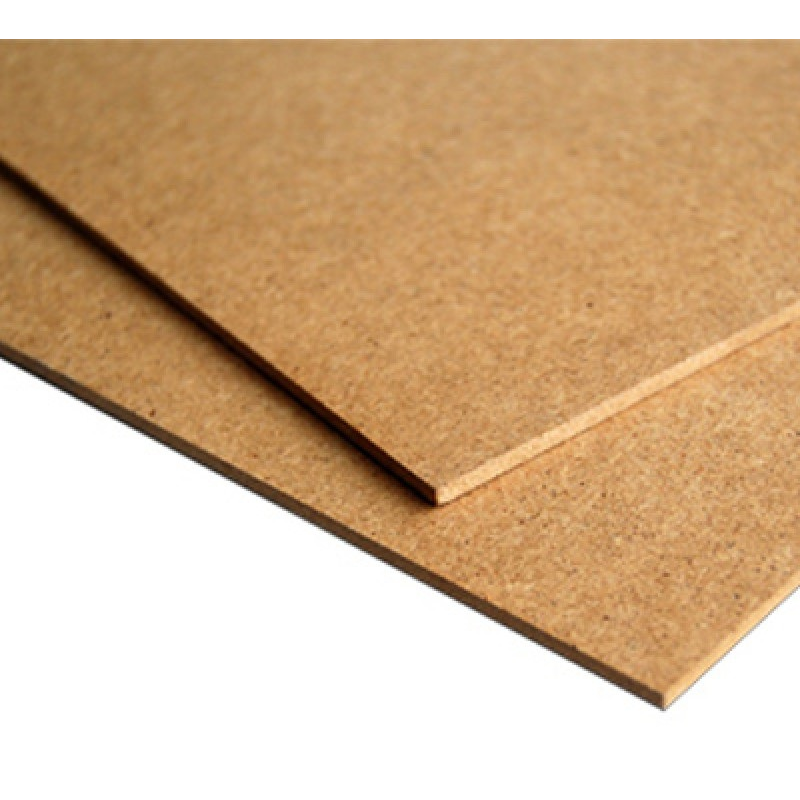
- Hardboard or fiberboard is an economy class material that is produced by the "wet" method: raw materials are crushed to the desired fraction, mixed with binding components and kept in special containers for a certain time, after which they are squeezed out and formed into sheets by pressing. Hardboard has several varieties and differs in the level of rigidity of resistance to various kinds of influences. Hardboard does not have a sufficient level of strength to be used as a base floor, therefore it is suitable only as a decorative coating.
- In terms of density, MDF is close to hardboard, but it is produced by a “dry” method. For the subfloor MDF boards are used much less often, since they do not have a sufficient level of rigidity.
Let's compare the characteristics
Based on the basic characteristics of the materials, you can decide on the choice of the base floor:
- Sustainability is one of the key factors. The indicators of the materials under consideration vary. So, plywood is considered the safest, and chipboard is the most controversial.
- Strength. When choosing a material for this parameter, it is worth considering the density and structure of the material. So, plywood and OSB are removed the most durable, and in the last place - hardboard and MDF.
- Dimensions. For the construction of a subfloor in small rooms, this indicator also matters, however, the length and width of all slabs is approximately the same, which cannot be said about the thickness. So, the most dense material is OSB and chipboard, and the thinnest is hardboard.
- The cost of materials is variable and this parameter depends on many factors, such as the method of production, the class of material, the raw materials used, additional processing, etc.In the first place in terms of budget is OSB, in the last - plywood.
Mounting method
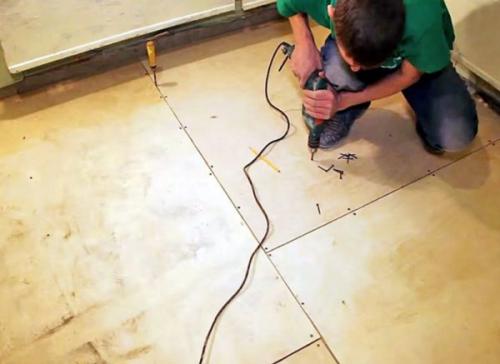
Fastening sheets to logs does not provide for any special difficulties:
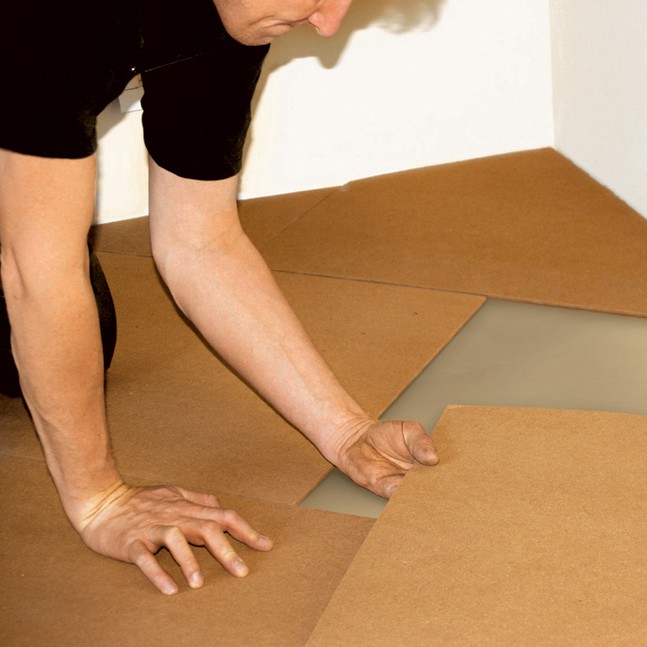
Step 1. We measure the square of the room, stock up on the necessary materials (chipboards and hardware).
Step 2. We lay the first sheet on the floor surface, fasten it with self-tapping screws to the logs, check the stability of the structure and compliance with the level
Step 3. Thus, we fasten each sheet in turn, checking the overall level of the floor.
What should you choose?
To choose the most suitable material, you should not rely on the price and beauty indicator
It is also important to take into account the operating conditions, the specifics of the premises being repaired and the decorative coating. So, for finishing the bathroom and kitchen, plates with an increased moisture resistance index are used. For fragmentary floor repairs, less dense sheets will be enough; for a full-fledged base, it is better to take the thickest and most durable slabs
For fragmentary floor repairs, less dense sheets will be enough; for a full-fledged base, it is better to take the thickest and most durable slabs.

Preparatory work
The preparation is as follows:
- Surface grinding for painting. In addition to eliminating pores, grinding will make the original roughness of the material more uniform, which will not only facilitate the coloring process itself, but also increase the visual perception of the finished result.
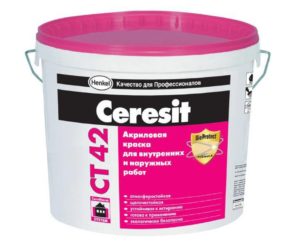
- Putty joints. Performed if it is necessary to paint several connected sheets of fiberboard. Not any putty is suitable, but only one that is characterized by increased plasticity, in particular, acrylic. It will help to tightly fix the contact points of adjacent sheets and thereby facilitate their subsequent staining. Acrylic or silicone based sealants can also be used.
- Degrease the surface with any organic solvent. The operation is performed so that traces of grinding, as well as excessive oiliness of the surface, do not impair the quality of its painting.
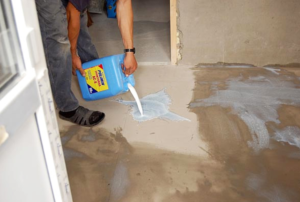
- Primer. Provides a reduction in the consumption of the base paint; at the same time, those pores that could not be eliminated as a result of grinding are closed at the same time. The primer should be warmed up to 40-60 ° C before use. The viscosity of the primer (common linseed oil is most often used, although alkyd primers are also suitable), this decreases, and its fluidity increases. The primer is applied in one layer.

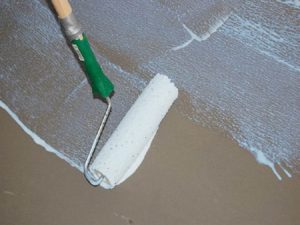
Hard brushes and rollers on a natural (not foam rubber) basis are suitable as a working tool for painting fiberboard. The rest of the options are unsuitable, since they will not be able to hide the fibrillation of the original surface, and traces of paint layers will be very noticeable.
Good results are obtained by painting fiberboard with a spray gun or a spray gun, however, the costs with this method of painting will increase. Mechanized painting is justified only with significant processing areas.
How to wisely choose fiberboard for the floor
First of all, it is necessary to get an idea of the nature of the future loads on the floor to be coated, the conditions of dampness or dryness and the regime of low, normal or high temperatures.
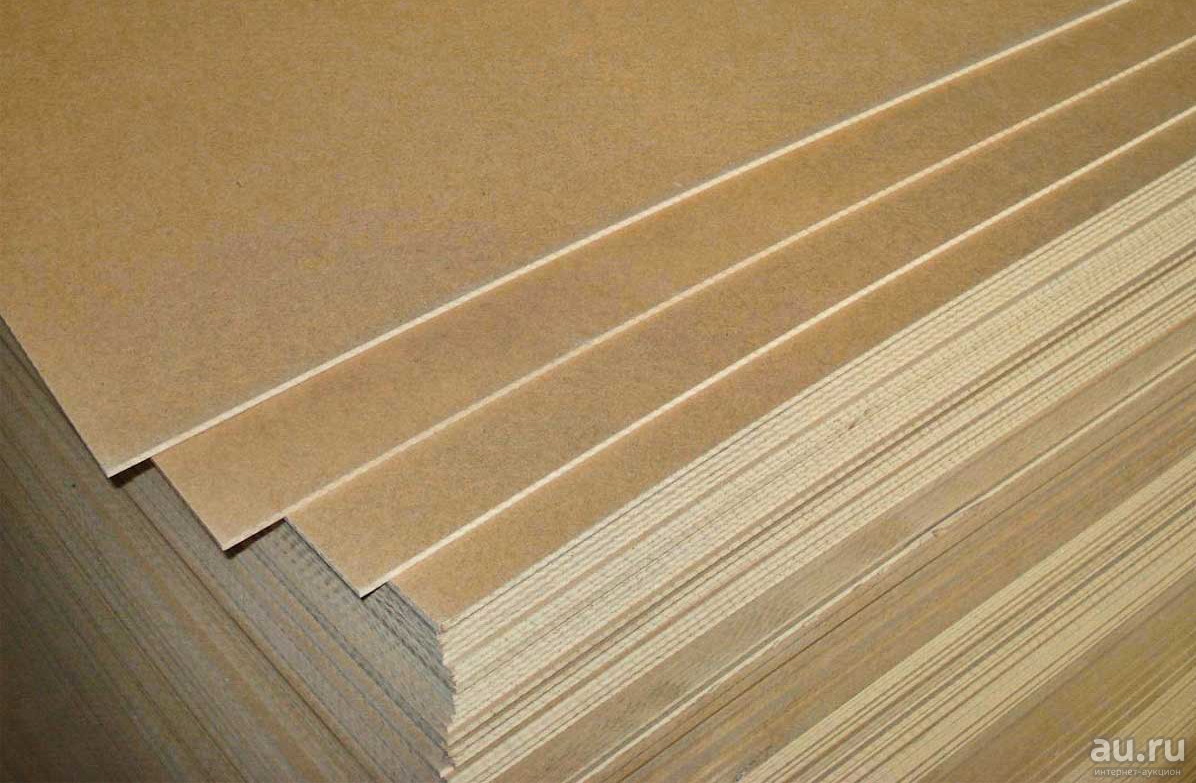
The standard size of one slab most commonly used for most floors is 1.7 mx 2.745 m with a thickness of 3 - 3.2 mm. They also produce moisture-resistant oil-impregnated boards with a thickness of 6 mm, which are advisable to lay on the floors of the first floor and in damp rooms.
 It will not be difficult to select fiberboard sheets for specific purposes.
By brands, they are divided into M - soft fiberboard sheets, T - hard, ST - superhard with an unpainted or painted front layer. Based on the purpose of the rooms, plates of a suitable brand are chosen.
Harder slabs (hardboard) are used as a substrate for laminate (laminated flooring), parquet or parquet board, linoleum and for better thermal and sound insulation of the floor.In addition to the device of floors, such fiberboard sheets are used for the installation of intra-apartment partitions, wall cladding, for cladding panel systems.
Give preference to trusted manufacturers
Particle board can be painted and laminated. All general products intended for interior painting of wood surfaces are suitable for painting boards.
In the event that the floor is leveled with subsequent painting, it will be right to choose special decorative fiberboard sheets, which, like parquet, can be laid out in patterns.
When buying floor slabs, you should pay attention to the fact that all the selected canvases are even, have the same surface appearance, size and thickness.
When purchasing this material, it is important to take into account the characteristics of the bars. They must be coniferous wood of the second or third quality grade, dry, treated with special fire-retardant compositions, without visible large knots, fungi and other similar defects. At the same time, small cracks in the wood are permissible.
If mold and mildew are found, these areas are cleaned and a fungicidal solution is applied on top of them to prevent damage to the new coating.
However, small cracks in the wood are acceptable. If mold and mildew are found, these areas are cleaned out and a fungicidal solution is applied on top of them to prevent damage to the new coating.
They must be coniferous wood of the second or third quality grade, dry, treated with special fire-retardant compositions, without visible large knots, fungi and other similar defects. However, small cracks in the wood are acceptable. If mold and mildew are found, these areas are cleaned out and a fungicidal solution is applied on top of them to prevent deterioration of the new coating.
During transportation and storage, the boards must be protected from dryness and moisture, dirt, sunlight, contact with the ground, dents and scratches. Fibreboard is stored face down on a flat base. If necessary, support timber is used at 0.5 meter intervals.
 During transportation, make sure that the plates are not damaged.
Advantages and disadvantages of fiberboard
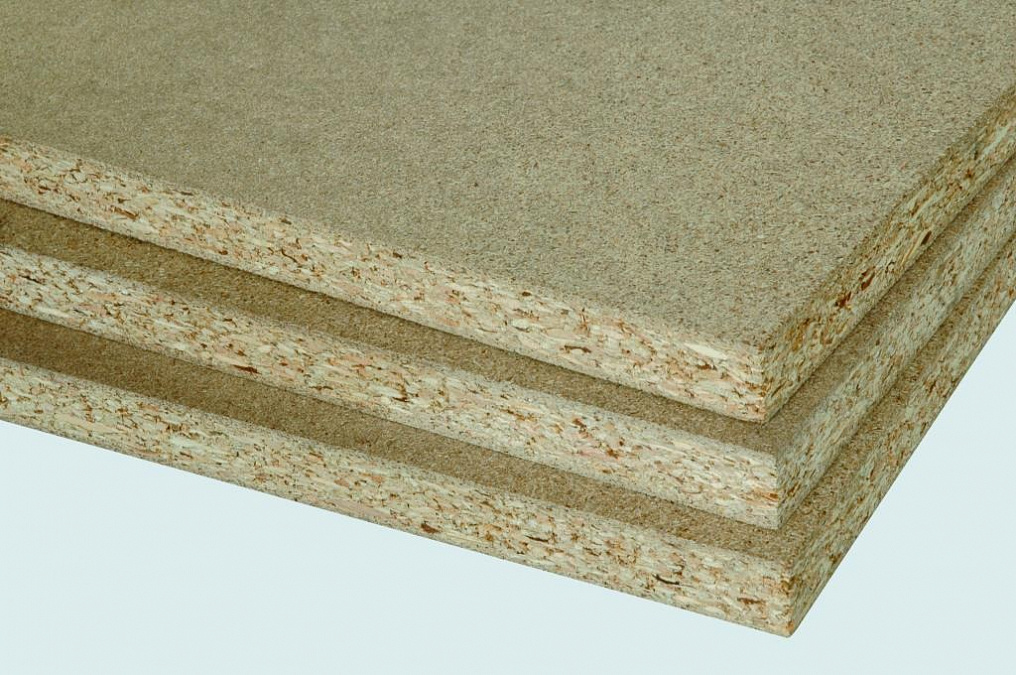
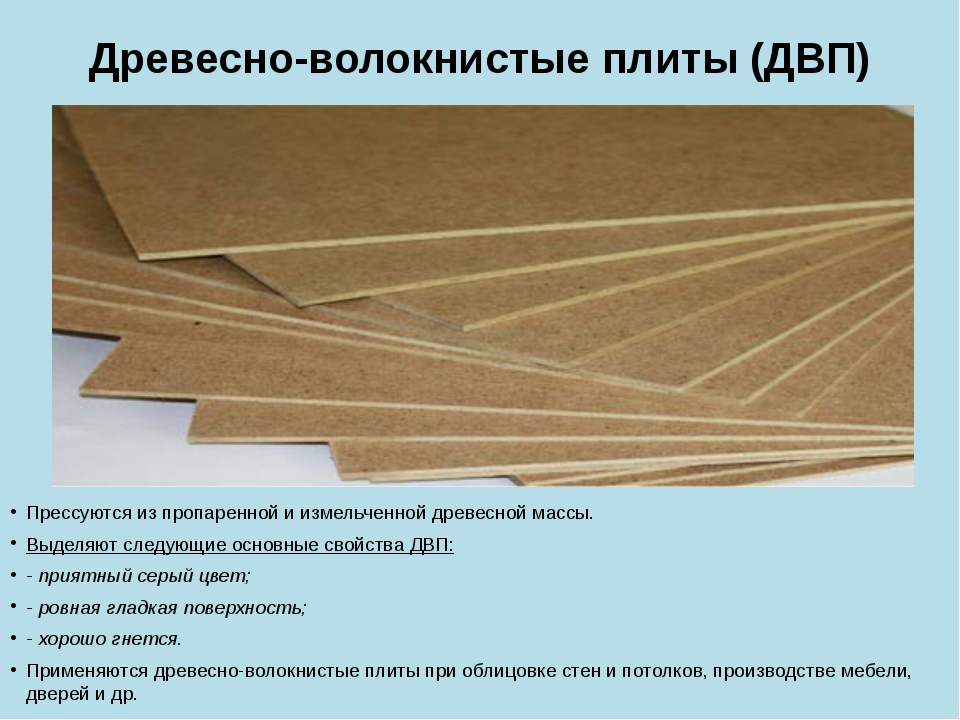
Fiberboard is made by pressing the waste left after woodworking. When exposed to high pressure and high temperatures, a smooth and light material is formed. Due to their advantages, the slabs can be used for cladding walls, floors, often you can see fiberboard on the ceiling. Also, the material is widely used for the production of cabinet furniture.

Among the main advantages are:
- Affordable cost. The board is made from various waste products of woodworking industries. It also contains a sealing resin and antiseptic additives. The price for these materials is much lower than for other analogues.
- Strength. On the modern construction market, fiberboard boards of various degrees of strength are offered - the strongest of them is marked "ST".
- Resistant to moisture. If the fiberboard is properly processed and then painted, the material will be well protected from moisture.
- High durability. At the production stage, fiberboard sheets are coated with special impregnations that protect the material from fungal formations or insects. As a result, the slabs can keep their original appearance for a long time.
Like any other material, fiberboards have disadvantages, but there are only two of them:
- impossibility of using in various load-bearing structures;
- decorative processing is possible on one side only.
Slabs are great for arranging rough or finishing floors, but first, you should carefully treat their surface.
In the video: types of wood-based panels - characteristics and features.
Dyeing technology
Fiberboard painting technology is no different from painting any other materials. The process is carried out in several stages:
- collection of tools;
- surface preparation for painting;
- choice of paint;
- directly painting;
- applying a protective coating.
Required tools
To paint a fiberboard floor, you need to prepare:
- fur roller (foam rubber is not suitable for these purposes);
- paint brush;
- paint tray;
- rag;
- vacuum cleaner.
Next, the preparatory stage begins.
Surface preparation
It is imperative to take into account an important nuance - before performing any work with fiber boards, first the fiberboard is brought to a certain humidity. Otherwise, over time, the plate will go in a wave, thereby ruining the floor or wall. It is simple to moisten the fiberboard: the reverse side of the sheet is moistened with warm water, and then the sheets are folded in pairs. The plates must be left to dry for a day.
Often, floors are trimmed from fiberboard
In order for a fiberboard floor to boast the same lifespan as a wooden base, it is important to properly process it, including painting. Hardboard floor is very porous - any paint will be absorbed there in a significant amount than in a concrete or wooden floor
Experts first of all propose to cover the surface with a primer - if this is not done, then a positive result can be achieved, but the paint consumption will be very large.
Paint for fiberboard should be applied only from the glossy side of the sheet - the other is not suitable for this. On the second side, a primer is more appropriate. Due to the peculiarities of manufacturing and structure, the plate is capable of absorbing 4 times more paint, and the application of a primer is one of the stages before painting.
Primer materials are now widely represented in the construction market. Fiberboard and hardboard are traditionally processed with linseed oil - this is an affordable and practical tool. But the drying oil should definitely be warmed up to 40 degrees.
Before applying the primer, the slabs are thoroughly cleaned of dust. This can be done both with an ordinary rag and with a vacuum cleaner. The slots on the floor are sealed with tape or reinforced tape. The rest of the surface must be degreased - you can use a solvent or alcohol.
The primer is applied with a roller. Experts recommend applying multiple layers. When the slab is impregnated with linseed oil in three layers, the resistance of the material to moisture is significantly increased. To increase the service life of hardboard, it is necessary to process it after the cutting is done, but before the laying process.
Choice of paint
Fiberboard painting is performed using any coloring enamels, but it is better to choose superhard types of paints. They are marked - "ST". It is these dyes that will give the floor the maximum resistance to wear and tear. Oil and alkyd paints are used as alternatives.
In this case, water-based paints are not suitable - they will not be able to adhere to the fiberboard coating. The plate contains paraffin - it will repel paint.
You can also use decorative varnish instead of paint. There are also some tricks with which you can create unusual color schemes. So, to imitate natural wood, a liquid bituminous varnish can be applied to the surface with a brush. To create a color with a "plastic surface" effect, glossy compositions are used.
Painting process
For painting work, experts do not recommend using foam sponges or brushes - these tools will not allow you to evenly distribute the dye over the surface. As a result, there will be divorces. The best choice is a spray gun, but a fur roller will work as well. For work on small areas, you can apply paint in spray cans - the process will go much faster.
The paint in the jar is thoroughly mixed and, if necessary, diluted with a solvent to the desired consistency.

How to paint fiberboard? First, the first coat of paint is applied. If it seems that somewhere the dye has absorbed poorly or too well, then the defect is not corrected, but they are waiting for complete drying.The next layer is applied to the painted layer after the first is completely dry. It takes about a day to dry completely.

You cannot make a popular mistake and create drafts in the room - the paint will not dry faster than necessary. For the second layer paint should be thick. The third layer is applied after the second has dried. Fiber boards after painting do not so much improve aesthetically as increase their strength and other characteristics.
Laying linoleum on fiberboard
To complete the complete picture, we offer a small master class on attaching linoleum to wood-fiber material, which is already installed on a wooden floor. The whole process takes place in this way:
- We prepare linoleum for laying. We leave it to lie unfolded for three days. This is necessary in order for the structure of the material to get used to the temperature conditions of the room. After these simple manipulations, the sheets will become soft and pliable for further work. If the waves on the surface of linoleum are quickly and well smoothed out, then this means that it is time to use the material.
- We lay out the linoleum sheet in the room so that all its sides overlap slightly, taking into account the walls. If you have a large room that requires flooring several pieces of material, then they need to be correctly aligned according to the pattern. Make sure that there are no gaps at the joints.
- Cut off the extra edges around the entire perimeter of the floor surface. We bend the edge of the canvas so that it fits as tightly as possible to the wall. Now we press the place where the material is folded with a long ruler, and then cut off the extra piece of linoleum with a sharp knife.
- We glue the canvas to the floor with mastic. Roll up the sheet on a dust-free surface. We carry out the previous steps on both sides of the canvas, reaching the middle of the sheet. We move from the roll to the wall, grease the base of the linoleum with an adhesive.
- Roll one side of the roll on the oiled floor. Do not forget to roll the linoleum with a roller in the direction from the center of the canvas to the wall - this will help remove excess air. In a similar way, we lay the second half of the roll. Now all that remains is to install the plinth.
Features of working with fiberboard
How to process chipboard, how to fix it and how to cut it - these are the main questions that have plagued the craftsmen of the planer and hammer for quite some time. For example, few people know how to stick fiberboard on fiberboard, because even liquid nails and epoxy adhesives do not always cope with this task. In this case, ordinary construction PVA glue or special adhesives for gluing fiberboard can help.
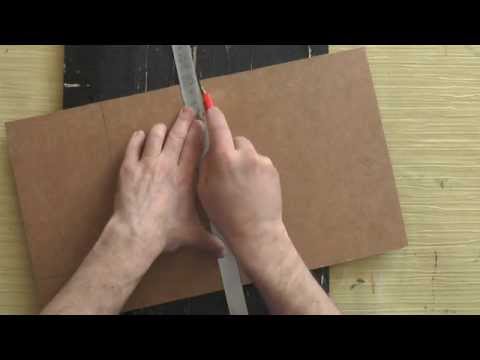
How to cut fiberboard at home? Again, it's very simple - with an assembly knife, or a hacksaw for metal
It is worth paying attention to the knife cutting technology. The knife blade must be sharp, it is best to cut with a metal ruler and slowly and carefully, otherwise there is a possibility of damaging your fingers when the blade breaks
There are also several roller-type devices for cutting fiberboard, one of which is shown in the photo.
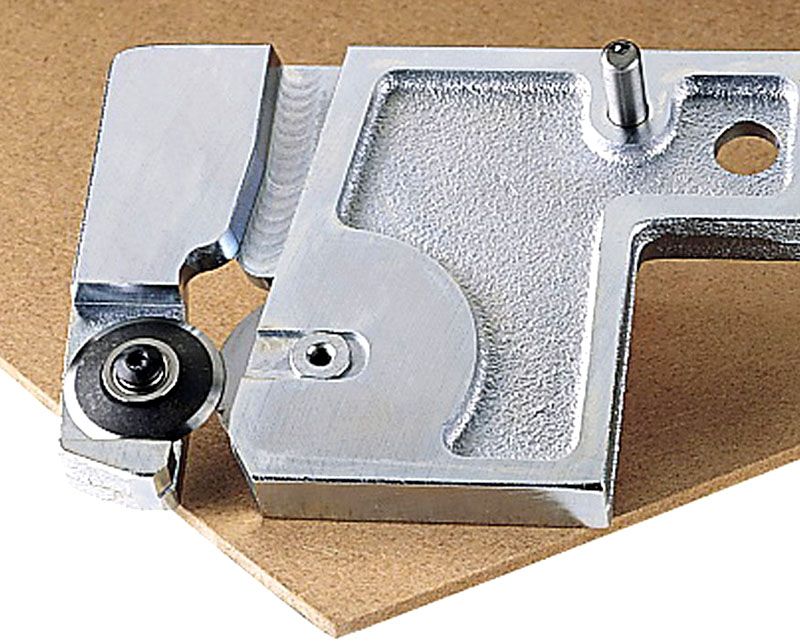 Finger Saver - Roller Knife for Cutting Fiberboard
Frequent question and surface finish of fiberboard. Wallpapering or painting. The fact is that fiberboard does not take moisture very well and has low adhesion. In other words, paint adheres poorly to the fiberboard surface. For this reason, the surface must be primed before painting. For convenience, you can prime the sheets before mounting them on the frame.
A separate issue with the preparation of the fiberboard surface for wallpapering, since this material does not tolerate moisture well, then before applying wallpaper glue, which can cause warping of the panels, it is worth painting the surface. Then further finishing will not raise questions or problems. Here is the answer to the question of whether it is possible to glue wallpaper on fiberboard. You can, but you need to prepare the surface.
Often, during the operation of fiberboard products, defects appear on them, these can be both mechanical damage and traces of operation. Traces of exploitation in the form of dents and scratches are quite easy to repair. To do this, you only need to putty the damaged surface, then paint it, or cover the surface with a self-adhesive film.
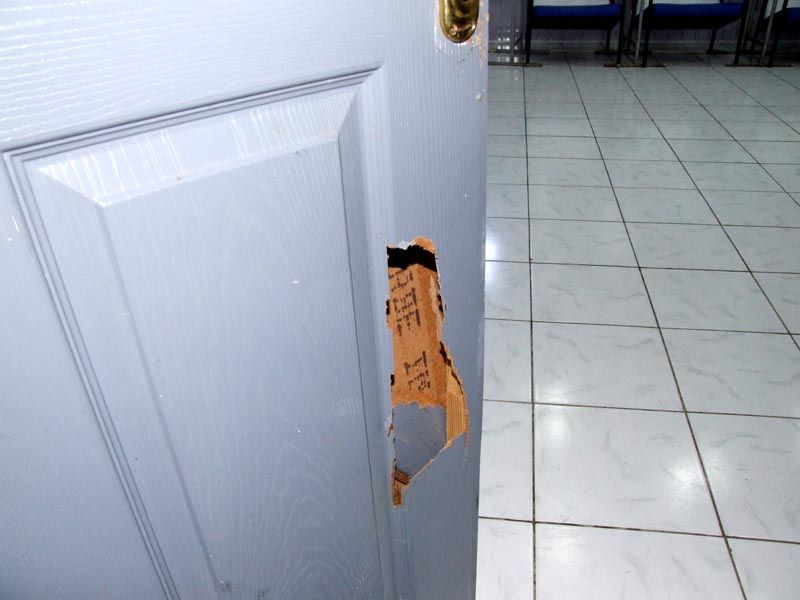 A hole in the door, and what to do with it?
In the case of a through hole in the floor or in a door made of fiberboard, such situations also sometimes arise, first of all it is necessary to prepare materials for repair, first of all it is a sharp assembly knife, putty, a piece of fiberboard, polyurethane foam and any filler.
Before sealing the hole in the fiberboard door, cut off the uneven and dented edges of the hole so that the edges of the hole are even, without dents or cracks. After that, we install partitions inside the hole, these can be fixed bars, pieces of fiberboard or crumpled, thick paper. The next step is to fill the hole with polyurethane foam, after it has hardened, it is necessary to cut off the protruding foam flush with the door surface.
After that, the surface of the door around the hole and the foam is putty, for example, with epoxy resin. After drying, everything is again cleaned with fine sandpaper, which is best fixed on a wooden block. This will allow you to achieve a level surface. Then you need to restore the appearance of the door itself, this can be done either by painting, or by sticking a self-adhesive film with imitation of wood texture, or veneering.
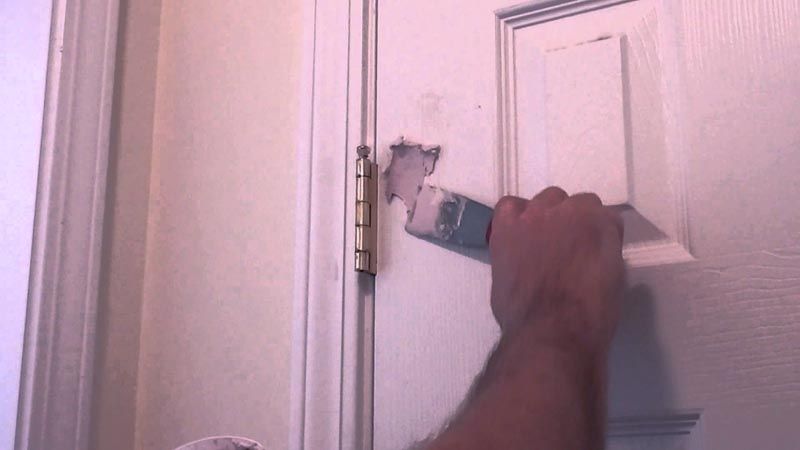 Door repair is a difficult and painstaking task
If there is a through hole on any base, most often this happens when fiberboard is laid on a wooden floor, a bulging board can wipe the sheet through. In this case, it is best to change the whole sheet, in parallel with this, deal with the board, process it with a plane or fix it with self-tapping screws. But often there is no such possibility, so you can proceed as follows. Carefully, using a mounting knife, cut off the wiped hole until you get an even geometric figure. Then cut out a patch of the same size from a piece of fiberboard and insert it into the resulting socket, securing it there with self-tapping screws or glue.
Thus, despite some peculiarities in the processing of fiberboard, the material is quite subject to manual work and repair at home.
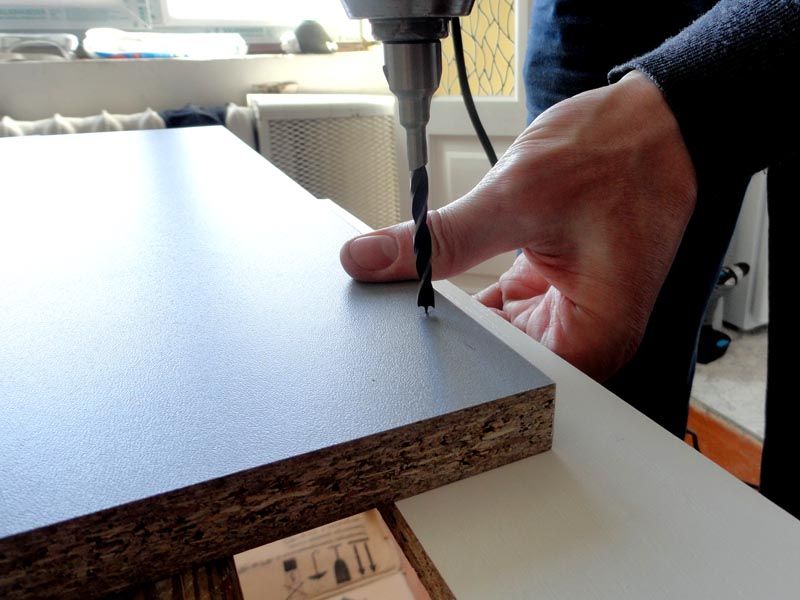 Wood composites are subject to processing
Technology of laying laminate on a wooden floor
After leveling the floor using one of the above methods, proceed to laying the laminate.
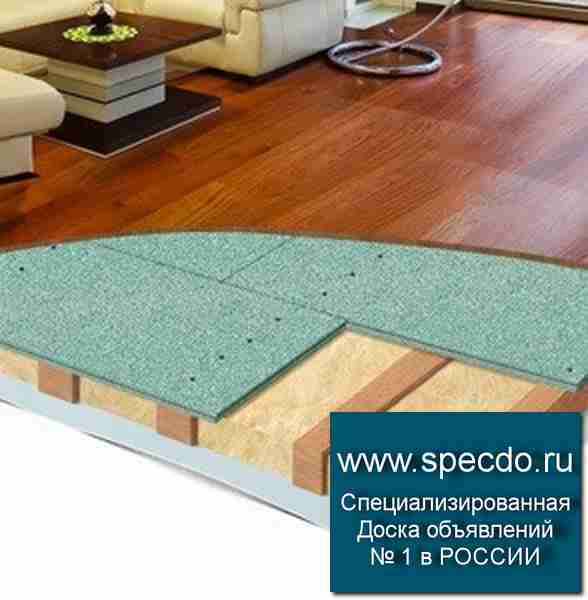
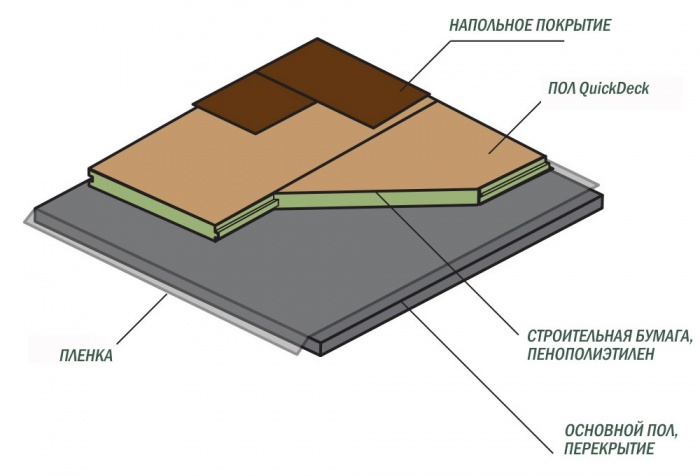
Laying the underlay
A layer of waterproofing is placed on the leveled floor. As a rule, in this case, take a dense plastic wrap. After that, the substrate is laid. The substrate performs the following tasks:
- is an additional compensator for unevenness of the base;
- prevents the laminate from knocking on the floor;
- acts as a heat insulator;
- serves as a sound insulating layer (especially a cork backing).
A substrate is laid on the leveled floor and only then can the laminate be laid
Manufacturers offer laminate substrates made of different materials:
- polyethylene foam;
- from natural cork;
- from a bituminous canvas interspersed with cork grains;
- dense polyurethane foam backing.
Most often, a polyethylene foam substrate with a thickness of 1–3 mm is used. In principle, choosing a thicker substrate does not make much sense, since over time it still cakes. The substrate is available in rolls and sheets. Polyethylene foam is laid loosely with a slight overlap. The rest of the substrate is laid end-to-end. The edges of the underlay can be sealed with tape to prevent shifting during the installation of the laminate.
PE Foam Roll Backing For Laminate
Laminate preparation and layout
The laminate must be "acclimatized" prior to installation. It is brought into the room where it is to be laid, and left without unpacking for 2-3 days.This is to bring the material into balance with the temperature and humidity of the environment.
Laminate is brought into the room in advance
Laying begins from the far corner of the room. Most often, the laminate is laid perpendicular to the window. This way of laying perpendicular to the incident light makes the joints less visible. Parallel and diagonal laying is also possible. Diagonal styling requires careful fitting. It is recommended for small narrow rooms, as it helps to visually expand them.
Diagonal laying of laminate
Markings are made on the floor. Measure the distance and calculate how many boards will be laid. It is taken into account that when laying each subsequent row, it is necessary to make a half-offset of the laminate panel, thereby preventing the overlap of the seams. If the width of the last board is less than 1/3, then it is better to lay the first row from boards sawn in half.
DIY laminate flooring
The method of laying laminate flooring depends on its type:
- Adhesive laminate. The locks of such a laminate are coated with special glue. For better fixation, the boards are additionally fastened with tape until the glue is completely dry. Most often, this type of laminate is used in damp rooms.
- Laminate with "Click" lock. When laying a board with a "Click" lock, set at an angle of 45 ° to the previous one. After that, the lock is clicked, laying the laminate on the floor. A system with such a lock allows you to disassemble the laminate if necessary. Installation of this type of laminate is done in rows. First, the end boards of the first row are attached. The recruited row is aligned in place, leaving a technological gap from the wall to adjust the temperature expansion possible during operation. Each subsequent row is first assembled completely, and then, placing it at an angle to the previous one, inserted into the lock and snapped onto the floor surface.
Correct joining technology of laminate Laying technology of laminate with "Click" lock
Laminate with lock "Lock". To fix the board with such a lock, insert a spike into the groove and lightly tap on the opposite end until it clicks.
Laminate laying technology with Lock
Important! Do not tap the laminate directly on the end, as this can lead to deformation of the lock. It is necessary to perform this action through a small block. Laminate of this type is laid out
If a whole number of boards are laid across the width of the room without a remainder, then after a row one board is cut in half and laying begins from this half of the board. A wedge from the rail is installed between the wall and the floor, leaving a temperature gap of 3 - 5 mm
Laminate of this type is laid in a ragged manner. If a whole number of boards are laid across the width of the room without a remainder, then after a row one board is cut in half and laying begins from this half of the board. A wedge from the rail is installed between the wall and the floor, leaving a temperature gap of 3 - 5 mm.


We described in detail how to lay laminate flooring on a wooden floor correctly so that the result does not disappoint. In the video, the specialist will tell you how to prepare the floor for the installation of this floor covering.
Interesting on the topic:
The sequence of laying linoleum
Like fiberboard, linoleum should lie down in the room where the repair is being carried out. For this, 2-3 days are enough: during this time, the material adapts to the temperature and humidity conditions, and after installation it will not expand or, conversely, shrink. Linoleum sheets are spread on the floor so that they take the correct shape. If the material is supposed to be laid in stripes, care must be taken to match the pattern of the floor covering.
Linoleum must be glued to the flooring; it is not recommended to use self-tapping screws: they will spoil the appearance of the floor. For installation work, special glue is used. It is applied to the floor using a serrated trowel, avoiding lumps and untreated areas.When the glue on the fiberboard plates thickens a little, it is applied to the back side of the linoleum sheets, and then they are laid on the floor surface. To properly distribute the adhesive under the linoleum surface, the flooring sheets are aligned from the center to the corners.
Often, laying linoleum on fiberboard is done in a different way. Instead of gluing the material, it is fixed with a furniture stapler. This tool is designed for working with wood and wood waste boards and will provide high reliability of fastenings.
On the floor, sheets of linoleum should not be laid close to each other, but with a small gap. The size of the gaps is usually one third less than the thickness of the sheets. Outwardly, these gaps are invisible, so there is no need to worry about the appearance of the floor covering. They are designed to remove moisture that accumulates between linoleum and fiberboard, and prolong the life of the coating.
Sometimes the installation of linoleum is carried out on a painted surface. This usually happens when there are no other materials for assembling the flooring, except for painted fiberboard boards. In this case, it is allowed to lay linoleum on the floor only if the paint has dried for a long time, is evenly distributed over the surface of the flooring and does not contain lumps. Usually, linoleum is not attached to a painted base.
There may be several reasons for repairing the floor: unevenness of the base, various damage, the need for insulation, and the like. There are many materials on the market today, which makes it very difficult to choose one or another floor covering.
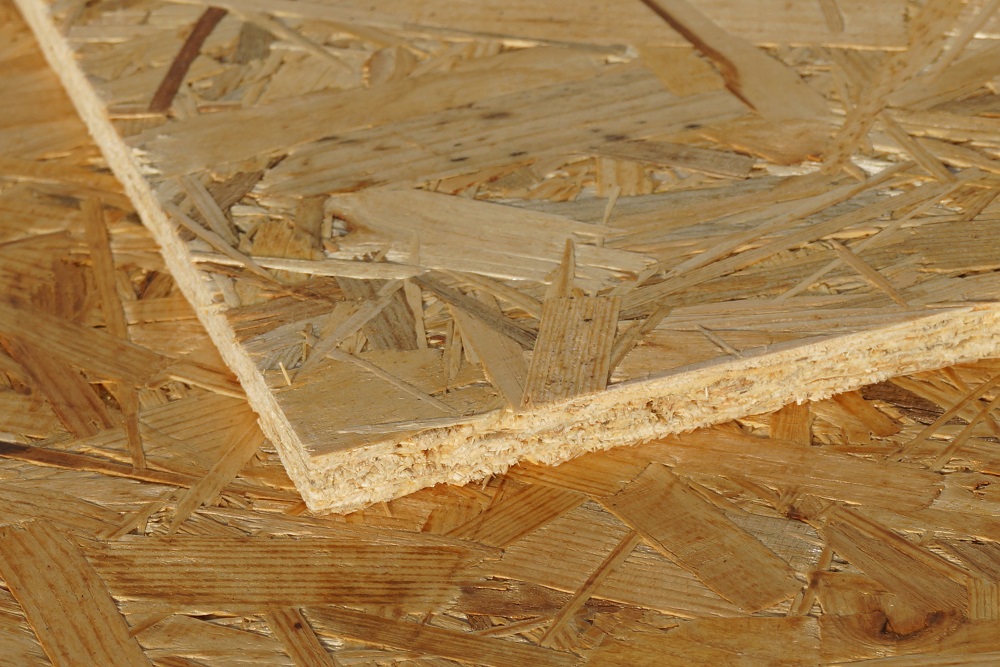
However, no matter what material you choose, be it laminate or parquet boards, in any case you cannot do without a solid foundation for laying new flooring. Different materials are also used to create it, but hardboard would be the best option. The material is one of the varieties of fiberboard (fibreboard).
Hardboard
Paint application
When painting hardboard, we do not recommend using brushes or foam sponge. When using these tools, the paint will not lay flat on the floor and streaks may appear. To paint a fiberboard floor, it is best to take a fur roller, or, if available, a spray bottle. If you need to paint over a small area, you can initially purchase spray paint if it is comparable to the price of a large can. Since the paint in the can has a spray gun at once, it will be more convenient and faster to paint it.
-
And so, after our primer layer has completely dried, we take the selected paint can, thoroughly mix the contents. If the paint seems thick to you, you need to add a little solvent to it and mix again.
- After mixing, take a roller and apply the paint in a thin and even layer gradually to the entire floor. It is worth noting that if the paint has absorbed somewhere or dried out in non-primed areas, it is not necessary to correct these places after a while. It is better to wait until the first layer is completely dry and paint on the second.
- Wait until the first coat is completely dry before applying the second coat. This usually takes a day. At the same time, it is not recommended to make drafts in the apartment or room. As the first layer is dry, apply the second layer. This time we already take not diluted - thick paint. And again, after a day has passed, as the second layer dries, we apply the third - the finishing one.
Painting hardboard sheets will not only make them look pleasant, but also extend their service life. It is also worth considering the important point that the basis primers by composition matched the base of the paint.
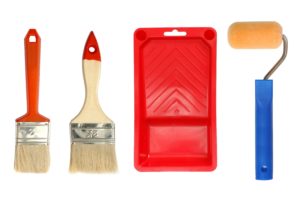
Required tool
And so, let's start in order. Just before preparing the surface, we will collect everything we need that we may need when carrying out the work. First of all, you should stock up on the necessary tools so that the work would take place as soon as possible and with less effort.
- Paint roller with fur nozzle, not foam
- Brush, some areas cannot be painted with a roller
- Ditch for paint
- Spatula if sealant is to be applied
- Vacuum cleaner for cleaning the surface after grouting
Now that you have prepared all the tools, let's proceed to painting. But here, too, do not rush. Further preparatory work is needed.
Advantages of the material
Fiberboard
The advantages of this building material are as follows:
- low cost;
- ease of installation;
- environmental friendliness, since the slab contains natural wood;
- dense structure, due to the fact that fiberboard is obtained by hot pressing sawdust. The addition of antiseptics and synthetic resins gives it better properties even in comparison with a natural wood floor;
- high resistance to mechanical damage;
- strength and durability, but subject to proper use. This involves the creation of a protective layer of waterproof paint or water-repellent varnishes, moreover, allowing to significantly improve the appearance of the coating;
- excellent heat and sound insulation, therefore fiberboard is often used as insulation. Plates are laid on the first floors of multi-storey buildings, as well as in private houses, that is, in cases where the floor surface cannot be raised to a great height. Insulation of any floors is usually performed using fiberboard grades such as PT-100, as well as M-20. Different coatings are laid on top of the fiberboard. An exception is thin linoleum or ceramic tiles;
- the flat surface of this material allows you to get a perfectly flat floor on which you can mount any kind of covering.
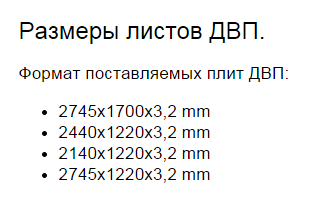
Sizes of fiberboard sheets
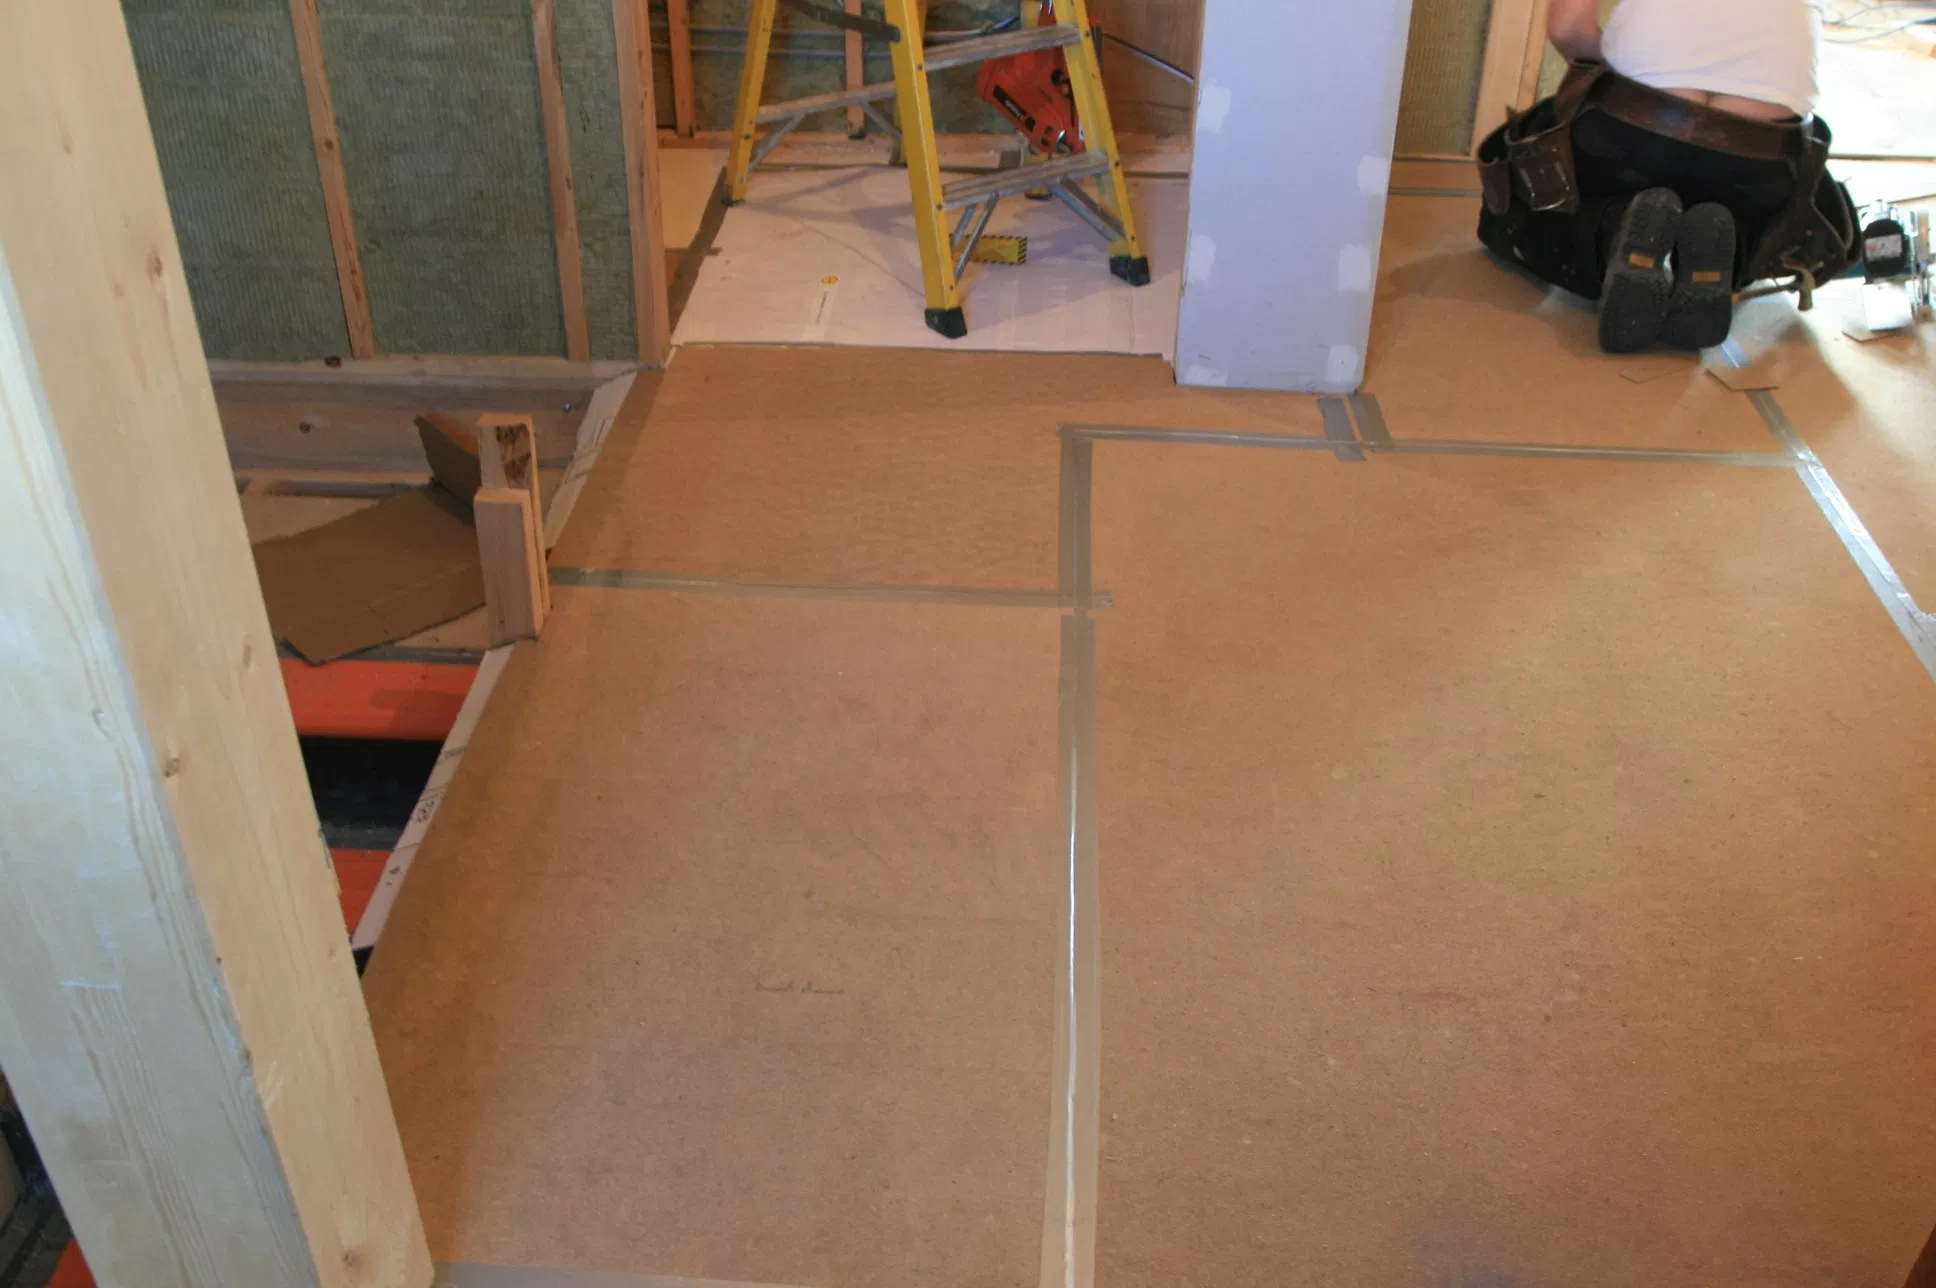
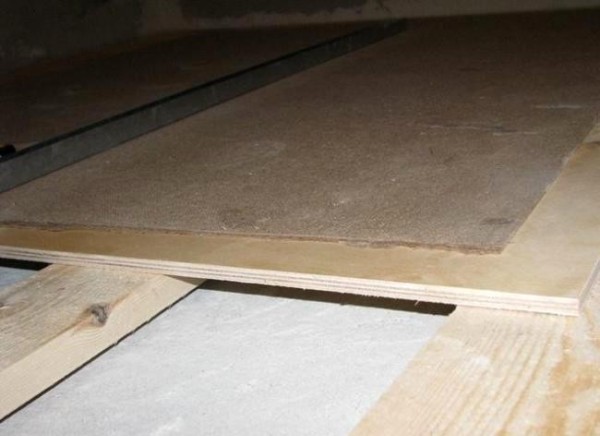
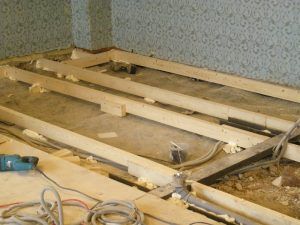
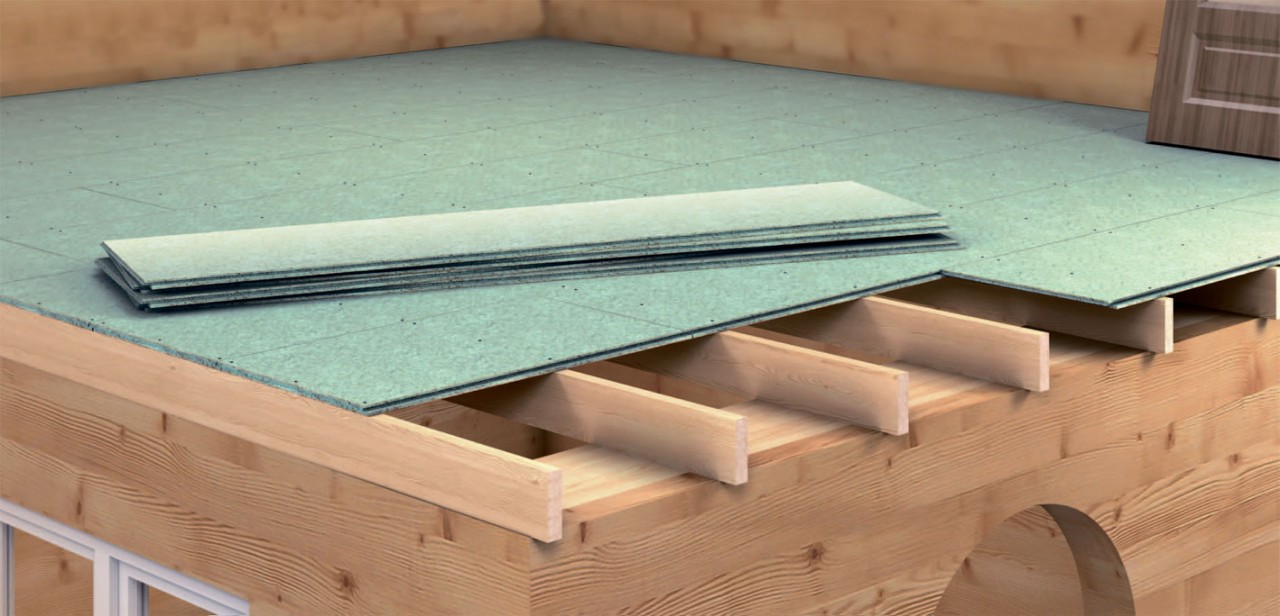
The procedure for laying lag and fiberboard on the floor
Please note that materials should not be stored in a damp place. It is better to place the timber horizontally, and the fiberboard vertically along the wall. In this case, it is desirable that the room temperature is at room temperature.
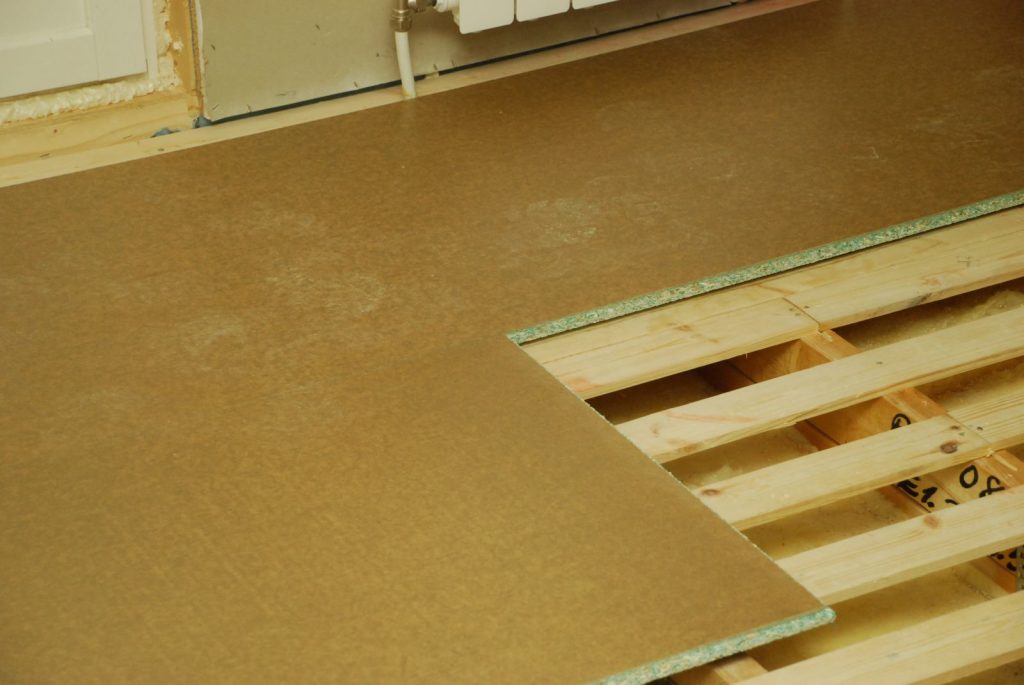
The lag is laid on a previously prepared surface. Preparation is carried out with a cement screed. The fiberboard installation method is suitable both for leveling the surface and for completely replacing it.
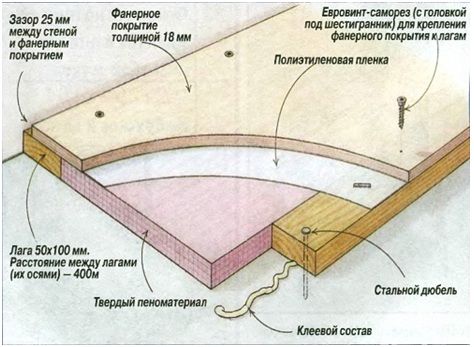
Before starting work, we recommend getting rid of large differences, unevenness or slopes in the floor. Installation of the lag can be done using the diagram below.
If this is your first time creating a fiberboard floor, we recommend watching the tutorial video. Many for the installation of lags attract professionals, and the installation of the plates is done independently. The first step is to carefully inspect the surface for the presence of fungus or mold and, if found, get rid of it. For more information on leveling the floor, see this video:

Then you will need to treat areas of the floor with a primer and antiseptic to prevent the possible growth of bacteria.
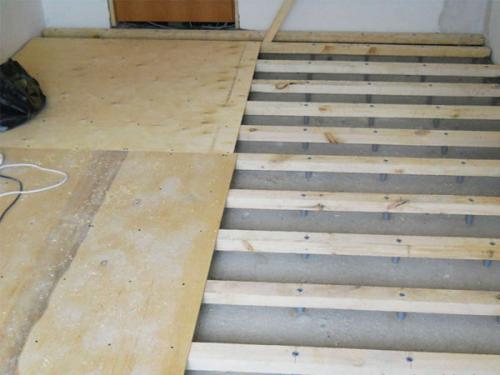
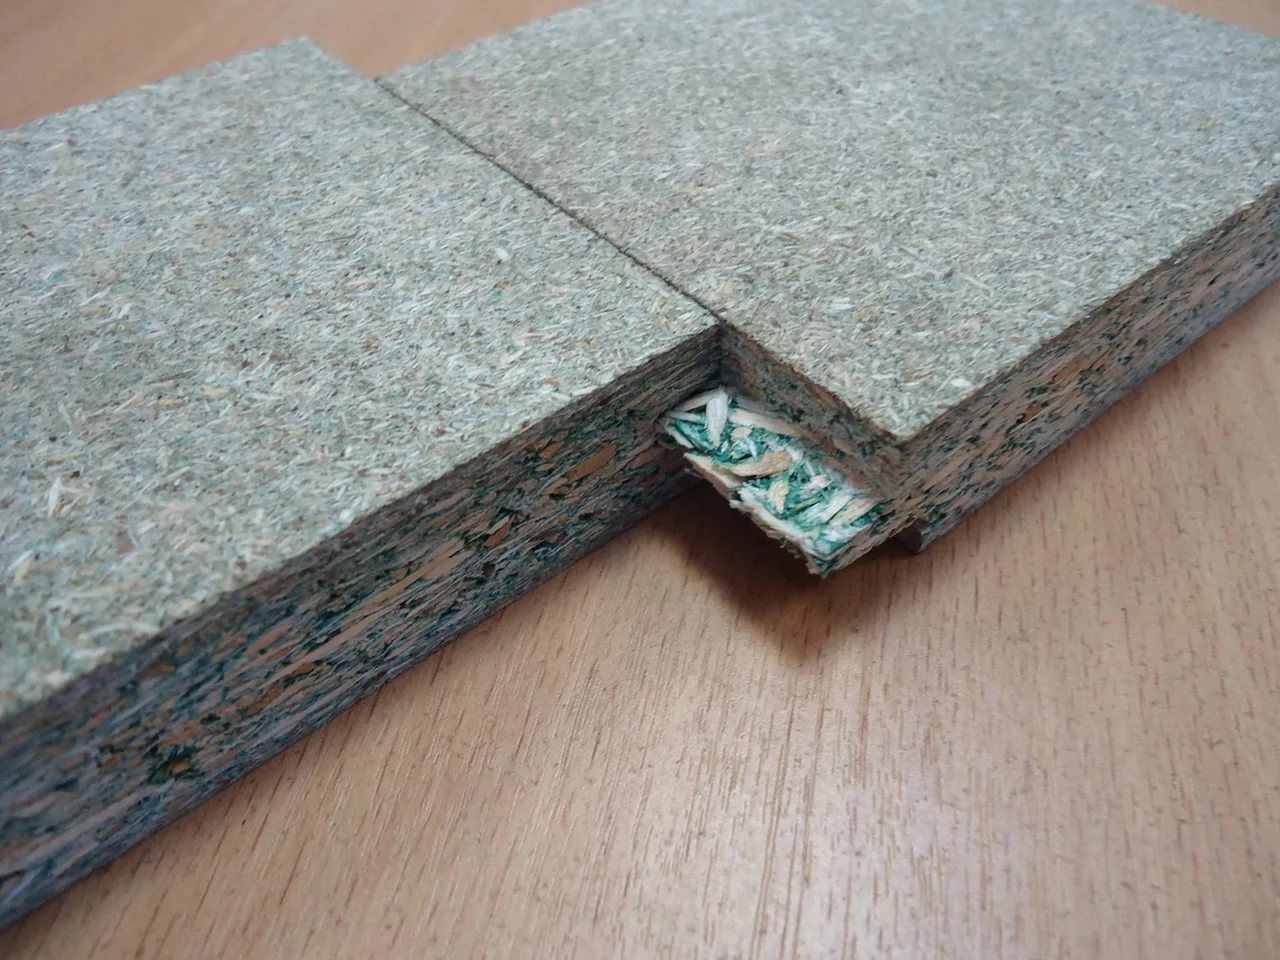
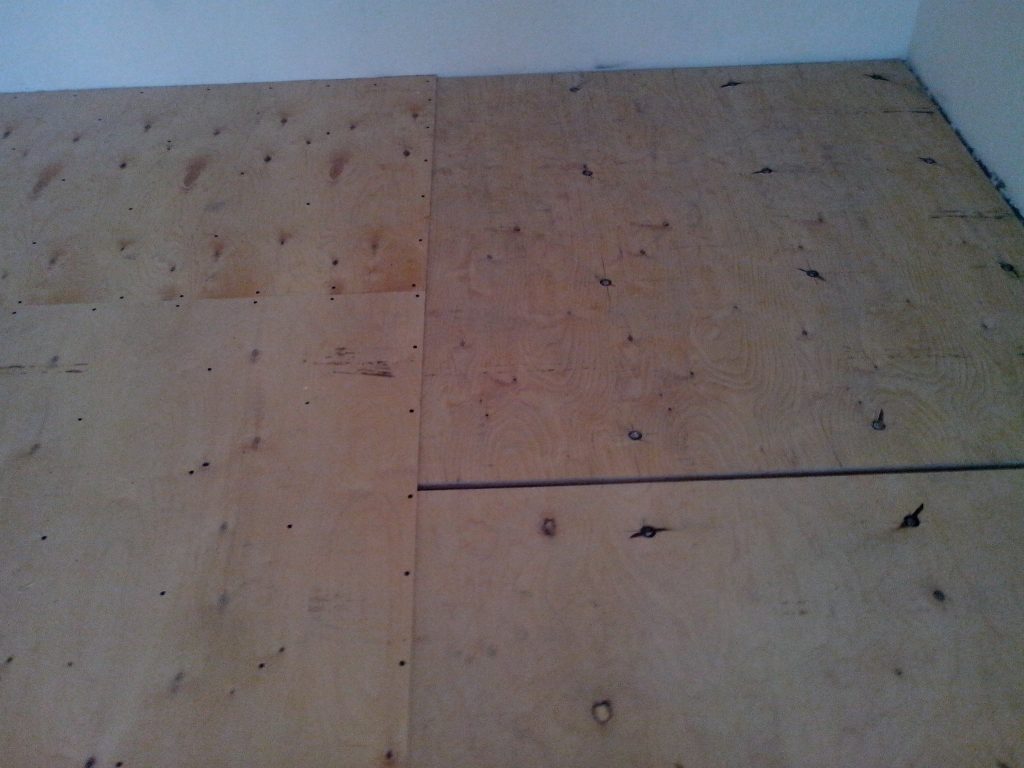
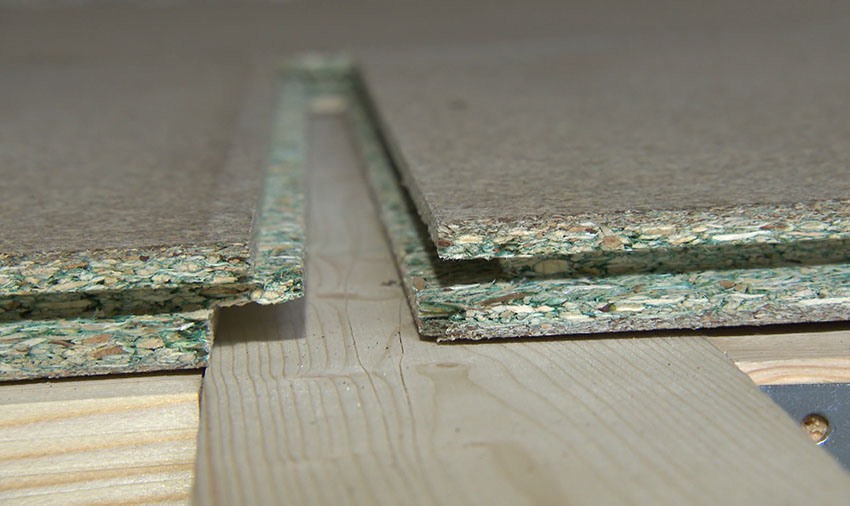
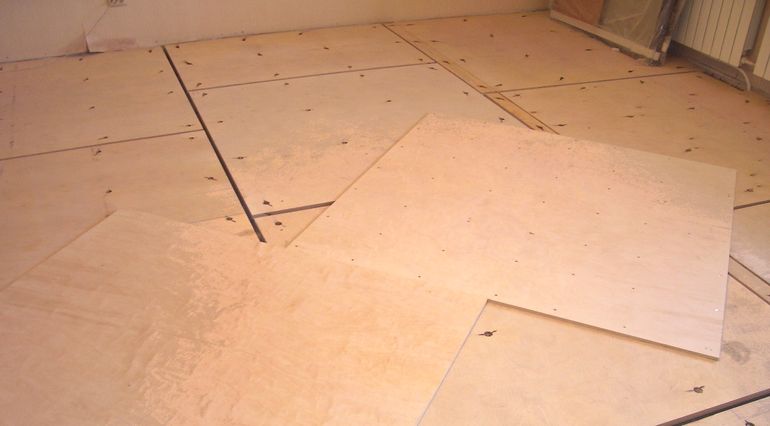
Fiberboard sheets should touch on the joists
The procedure for installing fiberboard on logs is as follows:
- sheets of material must be laid so that the seams touch directly on the bars;
- fastening takes place with screws or nails. The spacing is about 100 mm at the edges and about 135 mm in the center;
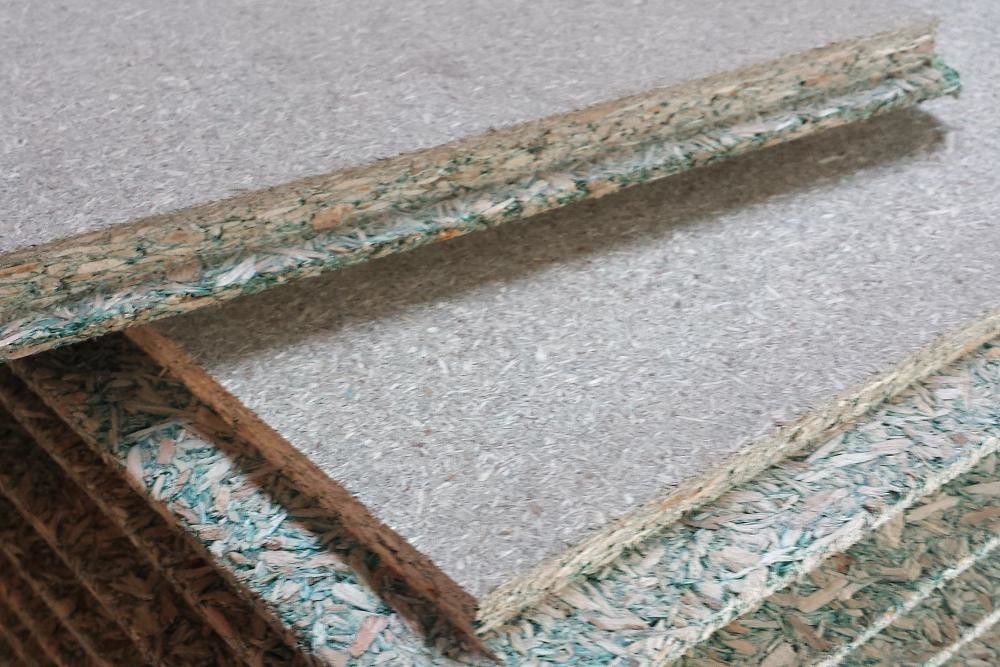
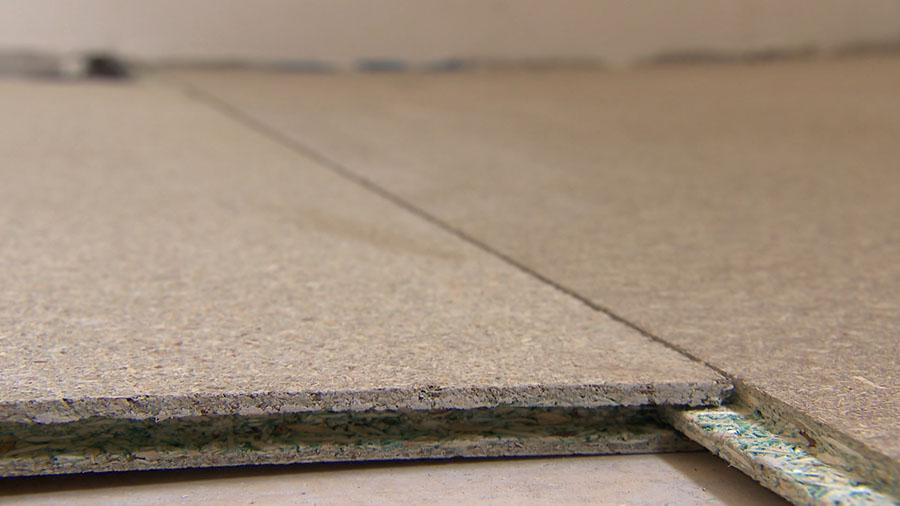
- the next sheet should not be installed back to back. The space between the rows can vary from 2 to 3 mm;
- installation in parallel is done in a similar way.
Installation with glue has the following nuances:
- The glue must be applied to the entire plane of the structure and at the same time try to distribute the substance without smudges.
- It is necessary to allow time for the solution to dry. It will take about 30 minutes.
- The glue is applied over the primer.
- After that, the material is pressed and its location is checked.
Finally, you will need to remove all adhesive residues. The space between the sheets can be treated with putty or reinforcing tape can be used. Then, on top of the fiberboard, the floor can be varnished or painted to provide additional protection.