In what style is it better to arrange?
The arrangement of a kitchen in a wooden house is carried out in various directions:
- American style. Differs in natural color palette - white, beige, gray, green, blue. Usually the surfaces are plain, sometimes there is a floral print in the setting. A small number of accessories are used (mostly framed photos).
- Country style. Classic rustic style with a lot of wood - in decoration, furniture, accessories. The actual use is not of new furniture, but of restored old samples.
- Provence style. It is also called French country. The tree is usually painted in white or colored pastel shades (lavender, green, blue, yellow). There should be a lot of decor: flowers in pots, bouquets in vases, paintings, beautiful dishes.
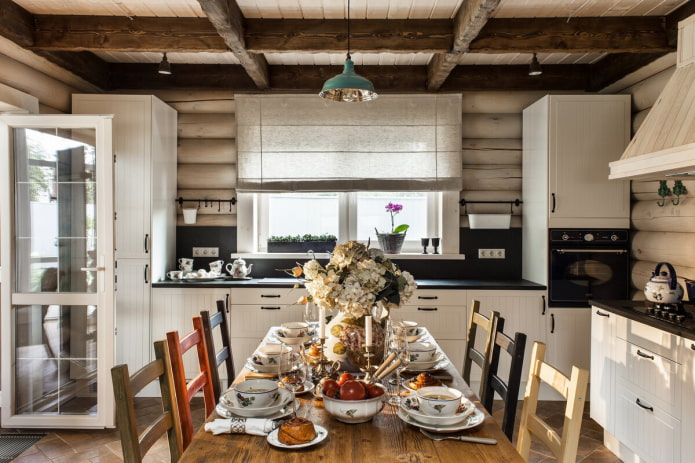
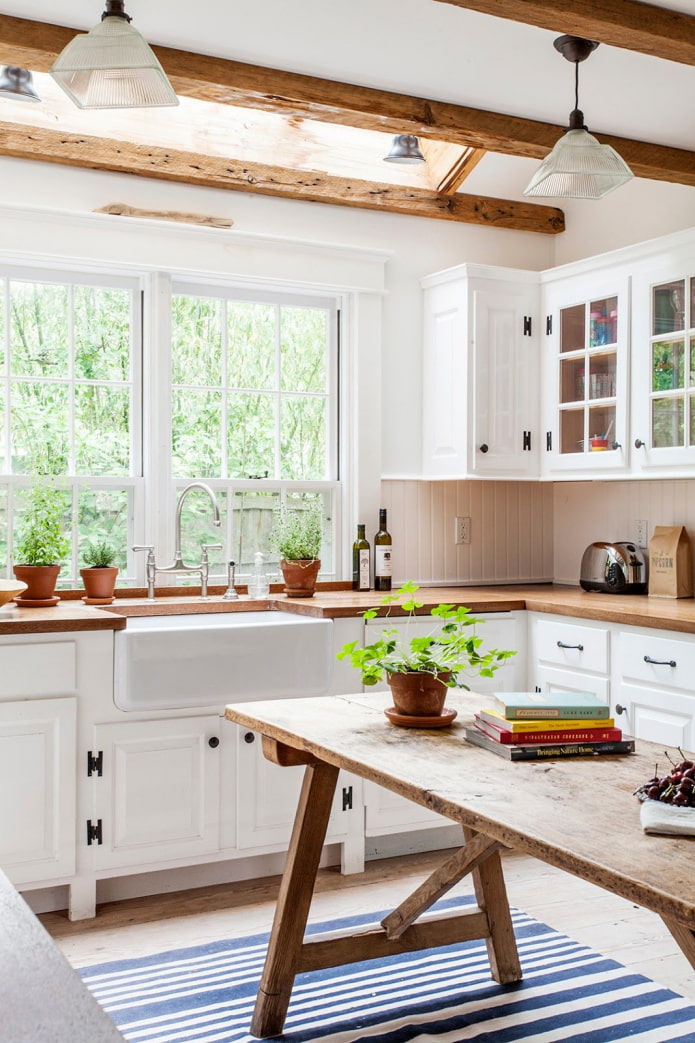
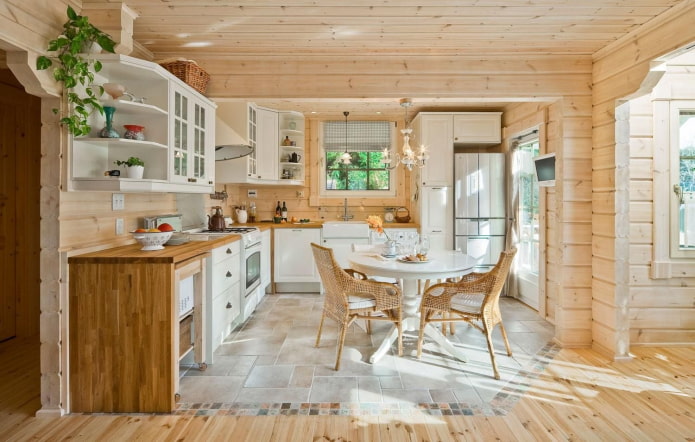
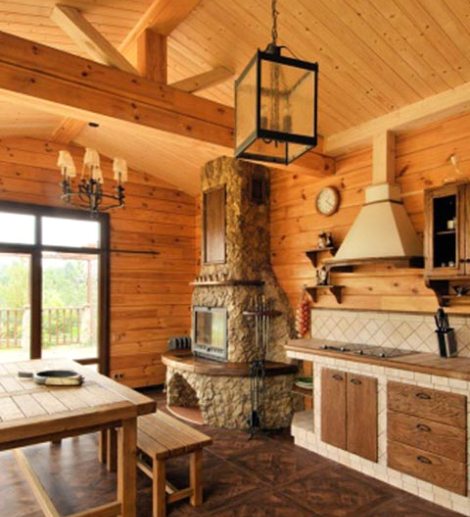
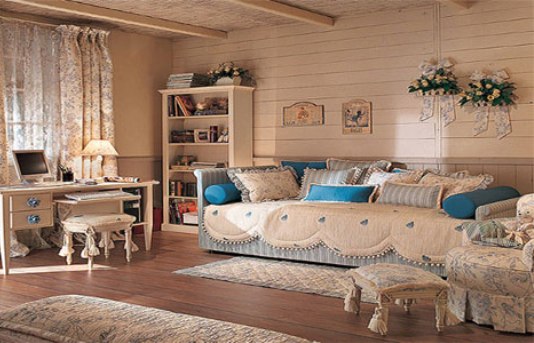
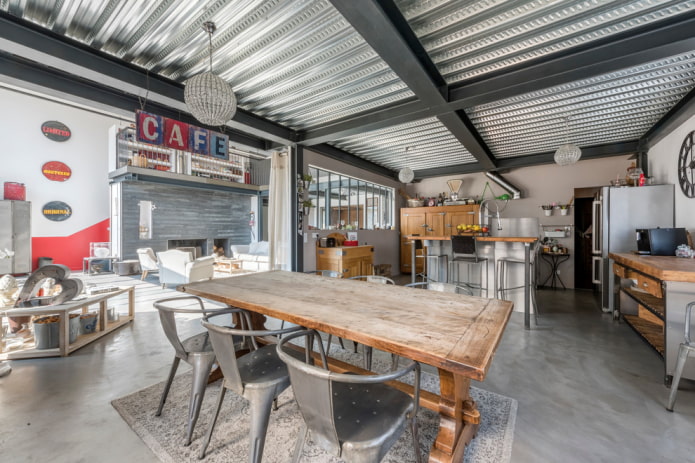
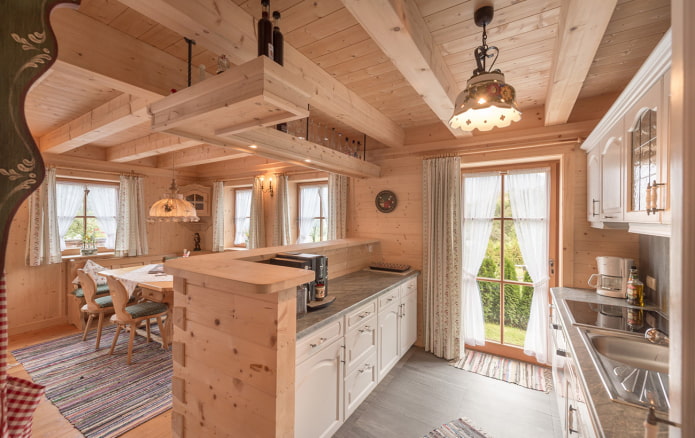
Pictured is a dining table in the center of the kitchen
- Scandinavian. The main difference is the love of white. Walls and ceilings, furniture, decor - everything can be snow-white. Therefore, it is perfect even for small kitchens.
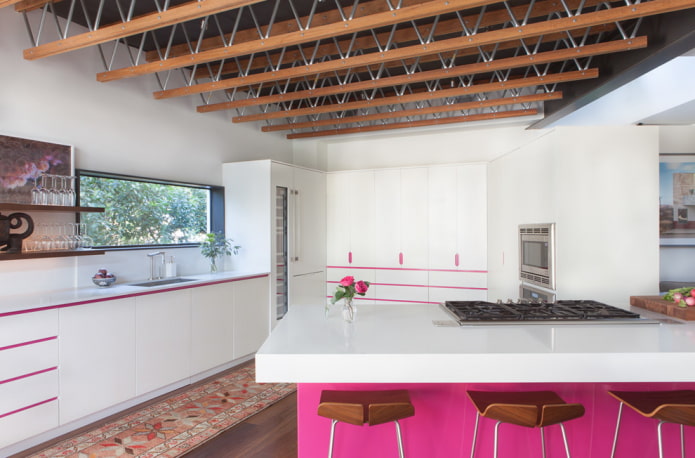
- Minimalism. Despite the lack of decor and seeming coldness, this direction is ideal for a modern interior. The main requirement is no detail in plain sight. To do this, order a headset with two or three rows of closed cabinets.
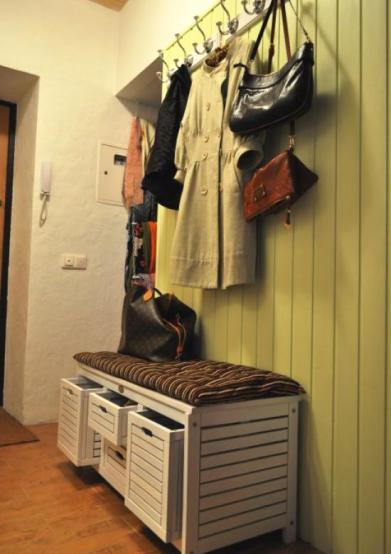
In the photo there is white furniture without handles in a country house

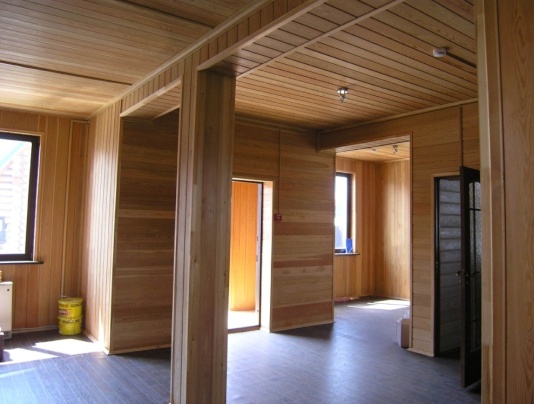
Wooden lining - varieties and installation method
Eco-friendly materials are preferable for living spaces. Lining, made from hardwood, is used to decorate a long list of rooms, including kitchens
In order for the wall decoration to last a long time, you need to pay attention, first of all, to the type of raw materials
Alder and pine lining is best suited for rooms with temperature extremes and high humidity. Wood of medium density is not afraid of moisture, does not suffer from physical damage, and retains its shape for many years. Resinous pine almost does not rot and does not suffer from fungus, therefore it can be used to decorate walls, create accessories: cabinets for a washbasin or a dishwasher, as a back wall for stoves, etc.
After purchasing the required amount of materials, it is necessary to process them with special means:
- Primer for better adhesion of antifungal agents;
- Antiseptic, anti-fire mixture (if there are problems with the wiring or there is a smoker in the house);
- Colorless varnishes or stains to give the desired shade or color.
It is necessary to apply the mixture in this order, applying the next layer after the previous one has completely dried
It is important to maintain the temperature regime: preparatory work is carried out in the same room where the repair is being done. It is necessary to monitor the changes in humidity: the lining should not be wet

It is important to know that conscientious manufacturers impregnate their materials with antiseptic and other chemicals at the factory, before sending them to the warehouse. Having carefully studied the passport of the goods, you can find that the cost of repairs will sharply decrease - you can save on waterproofing and antifungal agents
However, when cutting lining sheets, especially if the installation must be done at an angle, it is better to soak the cut point with means, since this is the most vulnerable place.
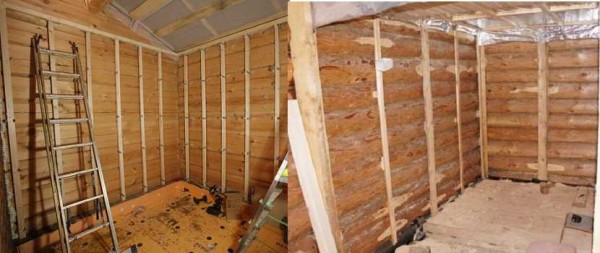
It is better to make the mounting frame for wooden lining from processed hardwood lumber 3x3 or thicker. It is attached to the wall with self-tapping dowels. The alignment of the frame on an uneven wall (relevant for old panel houses) can be done by releasing or pressing screws or using pads - thin strips that are attached under the timber.The lining itself is mounted using secret cleats. For budget finishes, you can attach sheets with self-tapping screws or galvanized nails, but this will affect the appearance of the wall.

For the horizontal finishing of the kitchen with clapboard, the frame is mounted vertically on the wall. The distance between the timber in the frame should not exceed 50 cm - so the lining will be rigidly fixed, you can avoid large backlash and loads on the wall.
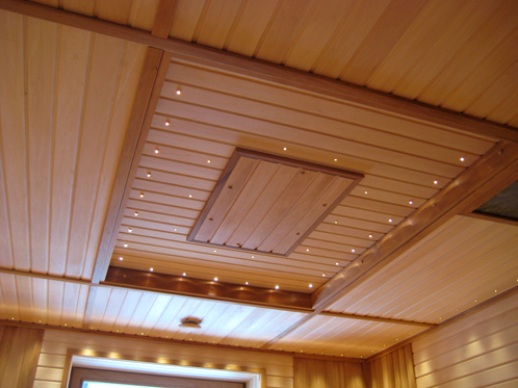
Ceiling style, design and decor
In a wooden house, the natural structure of the wood is played up and preserved. The desired style is created by tinting or coloring the tree. For the Provencal style, the logs are bleached, the ceiling is sewn up with pastel shades. The chalet style is dominated by brown, sandy shades. The emphasis is on the ceiling beams. The simplicity and brutality of the loft is emphasized by untreated beams, boards, timber. Correctly chosen decor emphasizes the design of the ceiling and the stylistic direction of the room.
Decorative panels
Slabs from solid oak, mahogany, linden are produced with a smooth, carved surface. The standard thickness of wooden tiles is 1 cm, length is from 30 cm to one meter.
Expensive finishes can be replaced with three-layer panels. Spruce or pine boards are covered with a layer of valuable wood, glued under high pressure. The appearance of the ceiling depends on the surface of the panel. Smooth paneling gives lightness, carved panels look more massive.
3D plates made of thermoplastic vinyl imitate stucco, hammered metal, carved wood. Inexpensive decor quite accurately reproduces the relief and texture of natural materials.
Textured coffered panels will add stylistic completeness to rooms in a classic style. They are mounted on a frame made of box-shaped support beams or ready-made blanks that need to be sawn and assembled. For the ceiling in a wooden house, caissons made of wood, MDF boards, drywall are suitable.

False beams and beams
Imitation of supporting elements is made of wood, polyurethane foam, gypsum board. Plasterboard, wooden, stretch ceilings are decorated with decorative elements.
False beams, beams perform various functions:
- serve as a box for communications, the basis for the installation of lamps;
- zoning rooms;
- change the visual perception of the room;
- emphasize the interior direction.
For Provence, country use wood beams to hide the wiring, make grooves. Massive bars on a wooden base base are fastened through long self-tapping screws. If you need to expand the walls, the elements are placed perpendicularly. For a visual increase in length, the bar is installed along the surface. Beams, mounted as a lattice, add volume, imitate a coffered ceiling. It is impossible to implement a rustic style, chalet, loft without beams. The desired color is given with varnish or paint. The effect of aging with cracks and grooves is created with brushes.
Alfrey finish
Artistic painting copies carving, gilding, stucco molding, stone inlay, applied to certain sections of the ceiling by hand or using stencils. First, the master develops a sketch, determines the color scheme, primes the surface. On false beams wood ceiling can be patina. The result is the effect of scuffs and cracks in different directions. The method of polychrome painting is used to decorate the ceilings for the interior in the Provence style. The alfrey finish on the surface of the lining and solid wood looks extraordinary. Colored landscapes, rosettes are painted on beams, boards, 3D pictures with imitation of carving are created on plywood.

Painting wooden ceilings
Paintwork materials improve the aesthetics of wood, protect against decay. Before applying the paintwork, the surface is cleaned, treated with fine sandpaper, and primed. If you need to preserve or emphasize the texture of the wood, use a stain, varnish, decorative glaze.

Choice of paints and varnishes:
| Material | the effect | Peculiarities | |
| 1 | Stains | Strengthens the structure, does not create a film, stains the wood from the inside | Easier to control color and apply light stain |
| 2 | Lucky | Protect from dirt, ultraviolet radiation | Dry fast, odorless, water-based formulations |
| 3 | Oils | Forms the thinnest protective film, enhances texture | Flaxseed oil has good water repellency |
| 4 | Wax | Gives velvety, strengthens, protects from moisture | Gentle blend removes minor scratches. Hard wax is used for restoration |
| 5 | Drying oil | Forms a film that protects against rotting, insects | Used as a primer |
| 6 | Paints | Creates a glossy or matte finish | Provide high hiding power alkyd, acrylic paint |
Types of wall decoration of a wooden house
If the frame itself has an attractive appearance, it is rarely sheathed. In this case, it makes sense to reduce the cost of interior decoration: to grind a log or timber and tint it. Only the floors should be varnished: the varnish will prevent abrasion of the wood. And the walls and ceiling are best covered with tinting antiseptics or water-based paints. They do not paint over the texture of the wood, but only give it a shade, better showing the pattern. You will still have to use antiseptics - to maintain the attractive appearance of the wood.

You will most likely have to use antiseptics, you can take them with a coloring pigment, at the same time emphasize the beauty of the wood pattern
If the log or timber is normal, the caulking seam looks bad, it is sealed with a twisted cord, and the walls are finished as well - they are polished and tinted. Everything looks good too, and the cord in the groove serves as an additional guarantee against drafts.
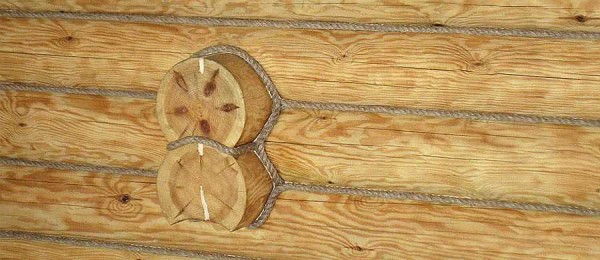
Ugly seams from caulking can be sealed with a cord - it looks attractive, and even from drafts
How to sheathe the walls in a wooden house inside
If the log house is so crooked or old that you can't help the matter by grinding, you will have to make the interior decoration of a wooden house from lining, wall panels, drywall or other material.
For any of these materials, it is better to make a crate: this way you can level the surface of the walls. In addition, there is room behind the crate for free air circulation.
In a wooden house, this is important, since only dry wood does not rot or blacken. Free air circulation between the decoration material and the wall will maintain their normal condition
The lathing in the house from a bar or a log is done in the same way: you need to remember that it must "float" so that the finish does not fly off
The distance behind the crate is also used for laying communications - electrical wiring, for example. In a wooden house, it must be made in non-combustible pipes, so there is a lot of space for it. There, if necessary, you can lay insulation - this is if your house turned out to be cold. If you spend a little on heating and the house is warm, it is better not to use any additional materials: no insulation, no vapor barrier. Wood itself does an excellent job of maintaining a stable humidity in the house, and the extra layers only upset the balance.
Fastening the trim to the crate is not to everyone's liking: if an animal or insects settle behind the casing, it is difficult to get rid of them. In this case, you can level the surface of the logs by removing the protruding parts and nail the finish to such a surface. It is difficult to achieve a perfectly flat surface, but it is possible. The gaps between the finishing material and the wall, which in this case are still there, were once covered with clay. It will be both thermal insulation and protect from drafts. Technologically this is not correct, but they do it too.
Whatever materials are used for cladding the walls of a wooden house inside, a gap of at least 2-4 cm must remain to the ceiling. For a "young" log house, this is insurance in case of shrinkage. For the old one - a gap to compensate for changes in the geometry of the wood.She breathes all her life: it gains moisture and swells, then dries up. The gap under the ceiling will allow the wood to expand or shrink easily, without affecting the finish. If it is not done, then either gaps will appear, or bend / tear out the finish. So that the gap does not "cut the eye" it is closed with a ceiling plinth. It is nailed only to the stream, only leaning against the wall. In this case, all progress will be invisible.
Read about the interiors of a wooden house and methods of interior decoration in the article "Design of a wooden house inside in photos and videos"
Photo in the interior of the apartment
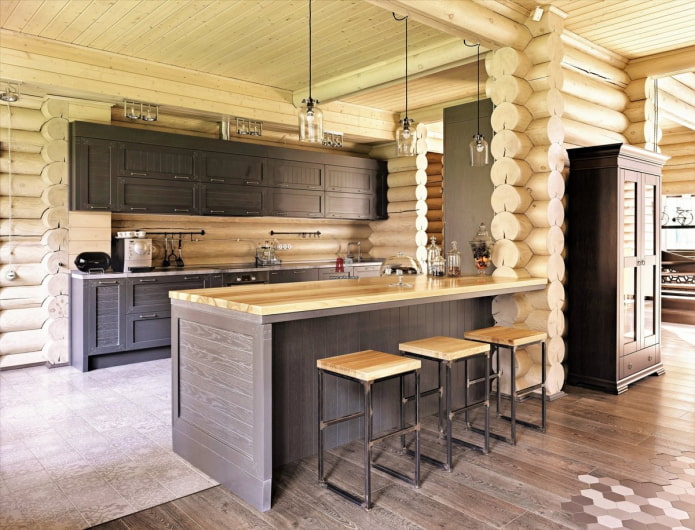
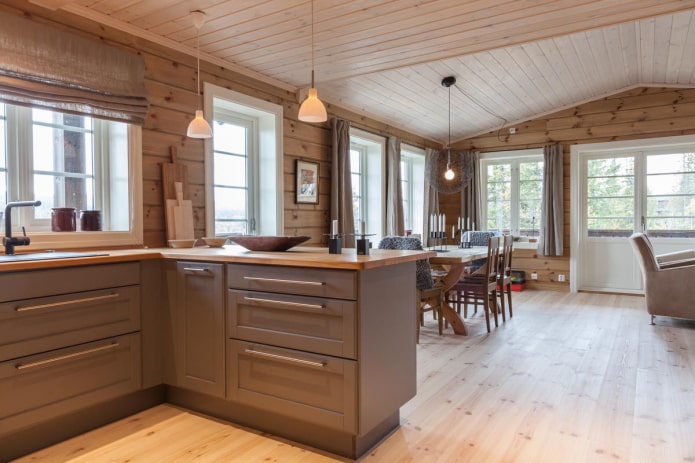
Kitchen
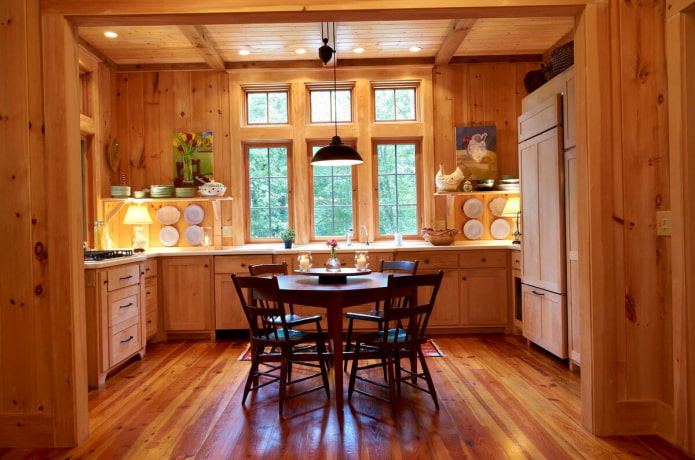
The location, color and material of the ceiling beams depend on the size and stylistic direction of the kitchen. In a compact room, minimalistic straight beams on a glossy surface will harmoniously look. Another way to save space is with light-colored ceiling beams. In a spacious kitchen, the location will completely depend on the layout of the room or the style in the interior.
The photo shows the interior of the kitchen with a black set. Partial ceiling beams separate the cooking area.
Living room
The ceiling in the hall will be decorated with beams against the background of a flat surface. Depending on the area of the room, the crossbeams can have a light palette, identical or similar to the main color of the ceiling finish. Or contrast against the general background, thereby playing the role of the main object in the room.
Bedroom
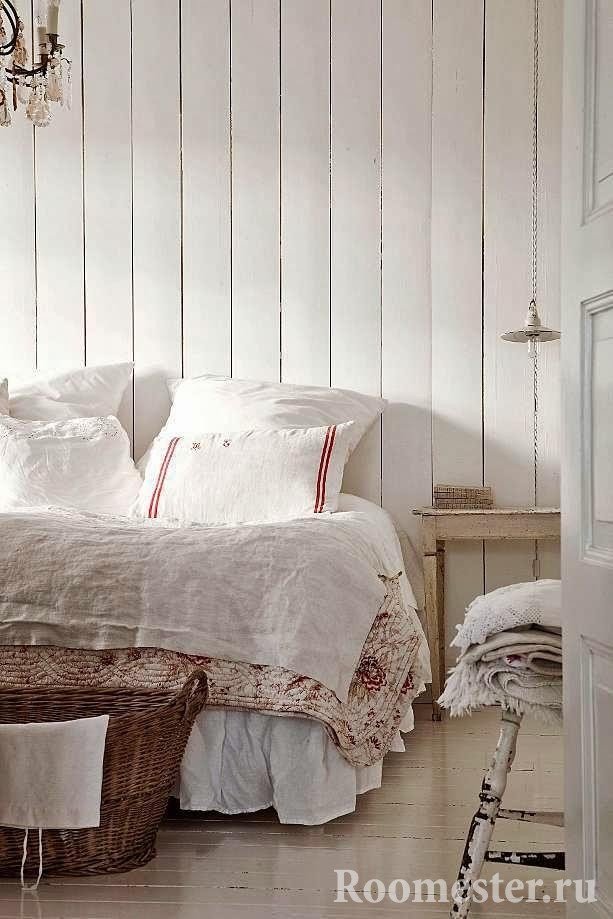
Wooden beams will make the bedroom more comfortable. The design can be around the entire perimeter of the ceiling or just above the bed, indicating the sleeping area. The color of the finish depends on the style of the room.
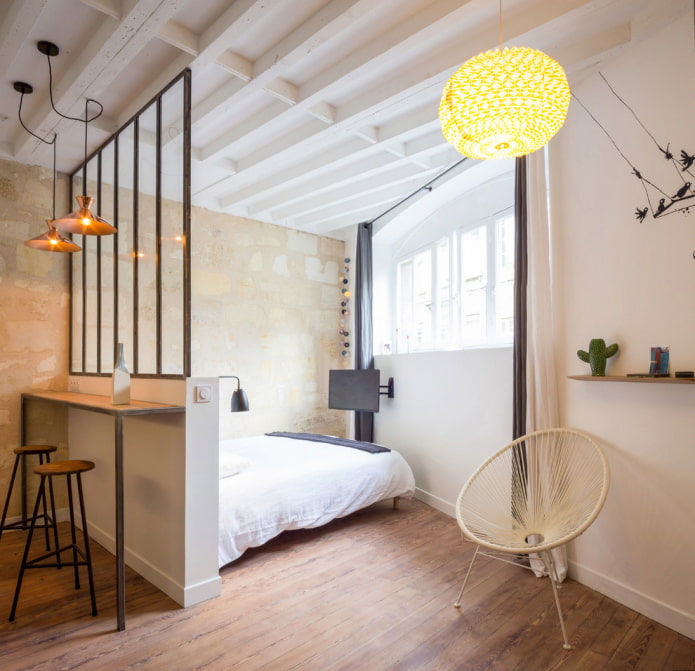
The photo shows a delicate bedroom in pastel colors. On the ceiling there is a structure made of plasterboard and decorative beams.
Children
In the children's room, ceiling beams will support themed decoration, for example, marine or eco style. The rungs can become part of the image of the room.
Hallway and corridor
If the room of the hallway or corridor is small and devoid of natural light, then the best solution would be a modest ceiling structure in the form of several bars along or across the room.
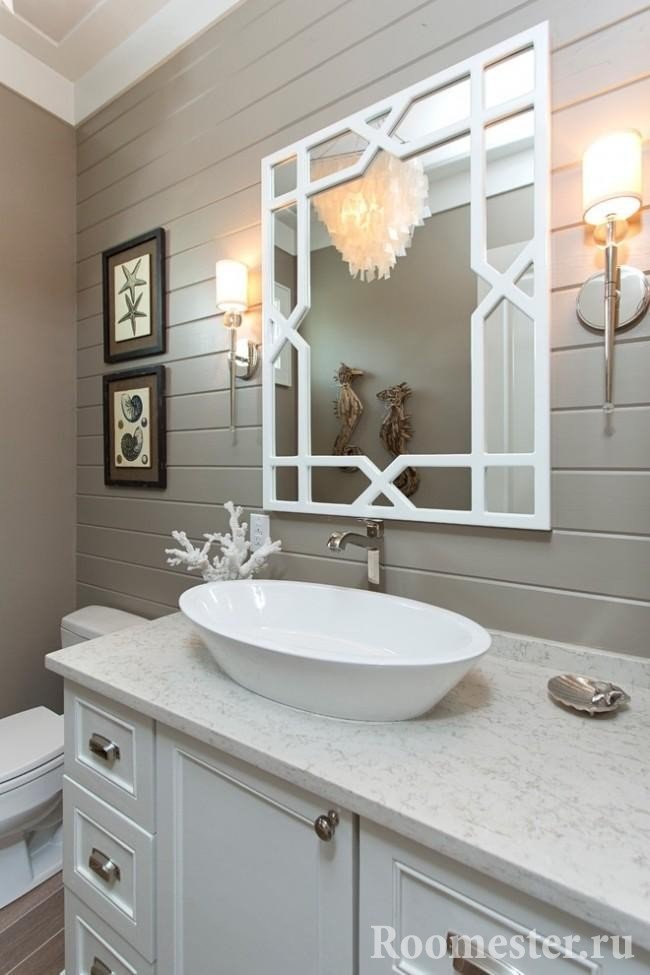
Bathroom
When decorating a bathroom, it is worth considering the ever-changing humidity. The best solution would be to use plastic or polyurethane ceiling false panels, which can also simulate the desired material.
How to decorate a kitchen-living room?
A combined kitchen with a stove, fireplace or without is found both in large estates and in small country houses. The main task in the design is to zone the space. To preserve the visual volume, you should not erect partitions, it is better to use one of these options:
- Bar counter. Or a peninsula that occupies part of the passage. It performs both a separating and a strictly defined function: it is convenient to eat or cook behind it on the stove.
- Island. A freestanding pedestal, if necessary, put it on wheels and make it mobile. The advantage over the first option is that the island can be bypassed from both sides. A compact hob is taken out on it, a sink, or an empty countertop is left. There is a refrigerator nearby so that the hostess has everything at hand.
- Sofa. Back to the kitchen, facing the living room. A great option for a functional divider.
- Finishing. You can visually separate the zones from each other using different colors and materials. For example, make walls of different colors or use a combination of tiles with laminate on the floor.
- Level. Make a decorative podium in one of the parts by changing the floor level. The only drawback is that the resulting step is not always convenient, especially in families with small children.
In the photo, a walk-through kitchen with a peninsula
If the kitchen is in a niche, and you have taken the dining room into the living room, place the cupboard near the table - this will free up space in the work area and facilitate the serving process.
Often the dining room is left on the border of the kitchen-living room, then the sideboard is taken out into the living room, or used as a delimiter.
In the photo, the zoning of space using a different gender

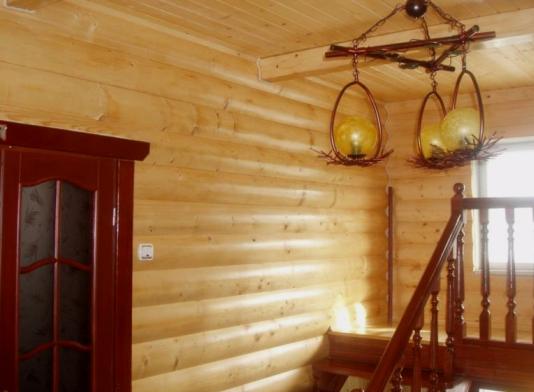
Wooden lining
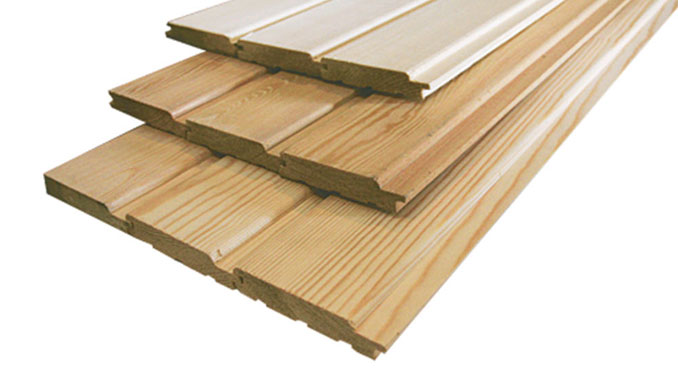
Initially, this type of lumber was used to sew up the gaps between the boards of freight cars, hence the name - "lining". Today it is an independent, widely used material, both for external and internal decoration of buildings and structures..
An ordinary lining (euro lining) is a narrow, long, flat board with a groove on one side and a tongue on the other. At the same time, the lining is of higher quality, it has special grooves for ventilation on the inside. The width of the board is from 100 mm, the length is from 2 m, the thickness of the profile is usually 12 mm.
But lumber producers are not standing still. Everyone knows such names as "blockhouse" and "American" - this is the same lining, but modified.
Blockhouse is a lining that imitates round logs (the outer side is semicircular). The profile thickness reaches 36 mm, the length is from 2 to 6 m, the width varies depending on the thickness from 90 to 190 mm. The block house is usually made from coniferous wood.
The American lining resembles a wooden bar. As the name implies, it came to us from America. The lining profile resembles a rectangular trapezoid. The thicker part (from 22 to 40 mm) has a groove, the narrower (from 14 to 28 mm) has a tongue.
"American" is usually used for outdoor work - facade decoration, and is laid strictly horizontally from bottom to top. The narrow part of the board is on top, and the wide one is overlapped. But it can also be used for interior decoration in certain interiors.
The lining is classified by classes:
- class "extra" - the highest quality and most expensive lining, with high decorative properties;
- classes "A" and "B" - lining of average quality;
- class "C" - the cheapest and lower quality material.
In the ratio "price-quality", the most popular lining is made of coniferous species (spruce, pine), it is cheaper in comparison with other species.
Hardwoods (linden, aspen, larch, cedar) do not emit resin when heated, are less prone to decay, have healing properties, therefore they are often used in the decoration of saunas and baths.
Interiors with lining
There is an opinion that clapboard decoration inside the house is the lot of the dacha, baths or interior of a residential building in a rustic style. Let's try to debunk this statement. Wood is a noble building material that can be combined with many other finishes in rooms of different styles, even in modern high-tech.
Wooden lining looks great with plaster, painted walls, wallpaper, textiles, tiles. With the right proportional and color combination of materials, you can create a truly unique, elegant and cozy interior.
You can use the lining in the interior not only for sewing walls and ceilings, but also for decorating furniture.
Of course, the most traditional interior with lining is country style.
Lovers of natural wood color prefer the Scandinavian style, in which wooden paneling is perfectly combined with stone and massive wooden beams on the ceiling.
Those who are bothered by the excessive abundance of unpainted natural wood in the interior will be attracted by the Provencal style. The lining can be painted in pastel colors traditional for this style, harmoniously combining it with plastered walls and a rough plank floor.
Artificially aged lining is a highlight of the shabby chic style.
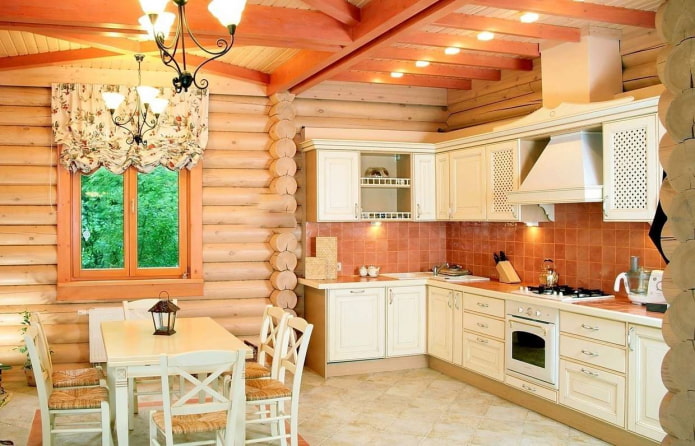
And this is how the walls of a house look in Russian style. If the house is built of stone, and this style is very close to you, then the internal (however, as well as external) surfaces of the walls can be sheathed with a block house.
High-tech wall decoration option. They can be painted white, gray or silver.In this interior, the walls are the background and do not attract much attention.
A variant of combining lining with stone, painted walls and ceramic tiles in a minimalist interior.
Lining in the interior of the hallway in combination with plaster.
Clapboard can be used as a finishing material not only in living quarters, kitchens, corridors, but also in bathrooms. Only the requirements for it will be more stringent: the main condition is moisture resistance.
Any material in the bathroom can become moldy. To avoid this, you need to provide for good ventilation in the room, fix the lining vertically, treat it with protective impregnations, wax or varnish, provide ventilation between the lining and the wall to which it is attached.
Ceilings can become beautiful and interesting when used in the decoration of the lining.
The possibilities of this material are endless. It is enough to show your taste, correctly apply the lining in the interior style you like, combining it with other materials, and the result will certainly delight you for many years.
Suitable styles
Loft
The loft style is characterized by a minimal or complete absence of decorative finishes. If there are metal, concrete or wooden ceiling beams in the room, they must be left behind. In their absence, false beams will help, which can also correct the space.
Provence
The Provence style interior is made in light pastel colors and mainly from natural materials. Wooden beams can be painted in one of these shades or have the original wood color and texture. This trend is characterized by artificially aged pieces of furniture and decoration.
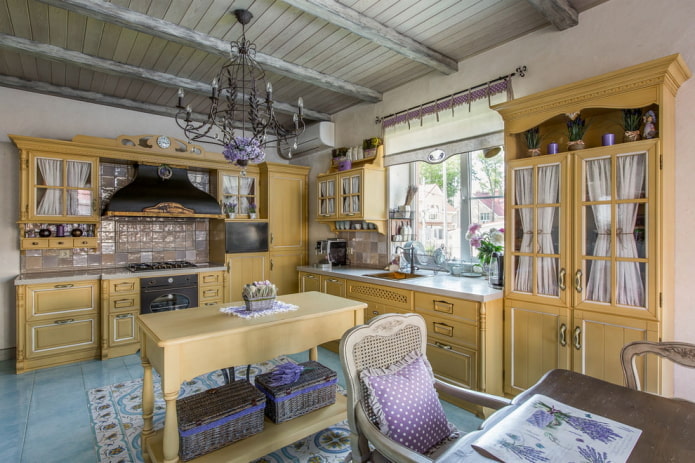
In the photo there is a kitchen in olive color in the style of Provence. The ceiling is finished in one color with an aging effect.
Country
Country style is hard to imagine without wooden beams. A spacious room will be decorated with complex timber structures, in a small room there will be enough simple wooden boards in the right direction.
Scandinavian
The Scandinavian-style interior has a light, most often white color scheme. Natural materials are used to decorate and fill the room, such as wood or stone. Ceiling beams made of bleached wood will harmoniously look in the interior.
Modern
The ceiling in a modern style can be decorated with beams made of wood, metal or drywall. The layout can be simple or complex geometric shapes. The design will be complemented by stylish lamps, LED strip or spotlights.
Classical
The interior in a classic style will be decorated with smooth wooden or plaster beams. Cross-on-cross masonry will look harmonious.
Chalet and rustic
The chalet and rustic style is characterized by the cozy atmosphere of an alpine house. Wooden ceiling beams do not have to be painted, the original color, texture and pattern of the tree will be very useful. In such a design, it is appropriate to use lamps with warm light, emphasizing the comfort and warmth of the interior.
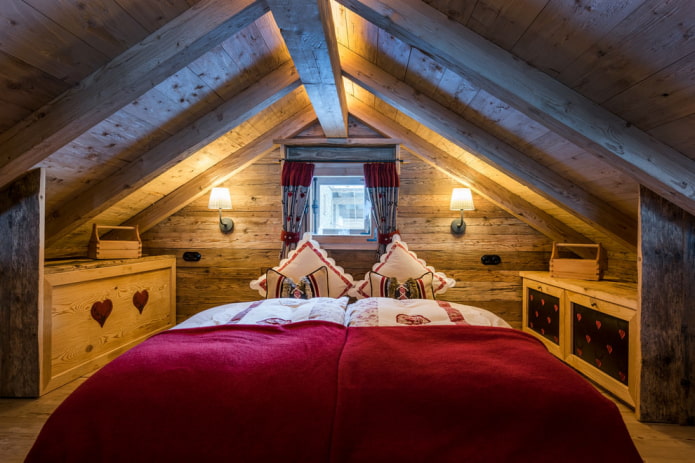
In the photo there is a chalet-style attic. The decoration is completely made of natural wood.

Lighting nuances
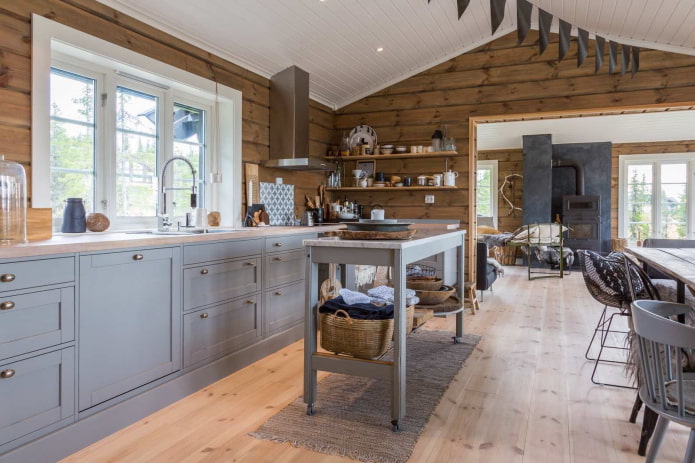
The kitchen in a log house should be light in order to cook comfortably. However, dark wood chopped walls (if you left them in their natural shade) obscure the light, so there should be more of it than usual.
Above the working area with open narrow shelves, there are enough ceiling spots or directional lamps on the tires. If there are cabinets or wide shelves hanging above the countertop, add extra lighting underneath them.
An island, a peninsula or a bar counter needs additional lighting - a ceiling suspension will do the best for this. The same applies to a separate meal table.
It is good to separate the light sources, making the light brighter in the cooking area and dimmed in the dining area.
In the photo, the lighting of the working area
Lining kitchen apron
Bold solutions proposing to make a kitchen apron from lining look stylish, and it's quite simple to install. But the features of the room and the proximity to the stove, sink makes you think about the need for protection from moisture, temperature, fire (if it is a tree)
And such precautions exist:
- Primer for strengthening the fibers of the material.
- Application of moisture resistant paint intended for interior renovation.
- Sometimes protection made of impact-resistant glass over the top is appropriate.
If this is not foreseen, fumes, grease and splashes can ruin the surface, because it should be easy to care for. It also increases the risk of bloating due to stagnant moisture.
Colour
Some of the presented style solutions involve painting the lining, which can transform boring walls into a truly designer creation. Some are based, on the contrary, on the maximum preservation of not only the texture, but also the color of the tree.
There are nuances everywhere:
- Golden honey is a natural color that gives a particularly warm atmosphere and indescribable energy. The main aspect is the dosage amount to avoid the "sauna" effect. Combination with any contrasting colors - blue, red, green, of varying intensity from catchy to pastel. The matt finish of the wood paneling is an indicator of fashionable, modern design.
- Brown shades can be used with sufficient lighting. It is not recommended to get carried away with ceiling performance in a dark range, if desired, the lightest shade is chosen. For an apartment, you can play on one of the favorite tricks of designers - contrast. Options: one accent wall, the rest are made in an extremely light color scheme with support in decorative elements or alternating brown parallels along the entire perimeter with light wallpaper.

- Whitewashed lining is a stable association with expensive interiors, airy and sophisticated. Stylistic performance, implying calm, natural colors: burgundy, terracotta, blue, pistachio, olive, gray, can impose restrictions on the choice of companion colors. A completely whitewashed interior has the right to live only with the support of bright accents of furniture and decor.
- Painted lining retains the texture of wood and does not limit imagination at all.
- The alternation of colored rhythmic parallels, filled with 4-5 tones of paint, will add volume. Option - a ceiling in white and blue tones, complemented by two shades of wood will look contrasting and cheerful, but calm and natural in the bedroom or nursery.
Among the popular design techniques based on the play of color, one can single out contrasting painting in a rich shade of the walls against the background of a white floor or ceiling, a combination of two bright colors. Lovers of calm solutions will use one color, but on surfaces with different textures, or a design option in two adjacent shades. If you don't like it, you get bored - you can always change the interior by simply repainting. Bright accents look good against the background of neutral light gray, light beige lining, which is important for the kitchen and dining room areas.
Features and phased installation of lining on a wooden ceiling
First of all, you need to calculate the amount of material. For this, the area of the panel is calculated. For example, multiply the width of 9.5 cm by the length of 300 cm, we get S-0.285 m2. To calculate the amount, we divide the squaring of the ceiling by the area of the board: 16: 0.285 = 56.14. This means that 57 panels are needed.

The purchased material is unpacked, laid on a flat surface in the room where the installation is planned, for 7-12 days. In advance, you can treat a 5x5 cm bar for the frame with an antiseptic and a fire retardant.
To work you need tools:
- drill;
- hacksaw;
- roulette;
- screwdriver;
- level.
Installation of a wooden frame

- Determine the lowest point of the ceiling.
- From it down the wall, measure 10 cm, put a mark.
- Using the level, mark the remaining corners, beat off the line with a thread.
- A bypass rail is mounted to the walls with a step of 40-50 cm. The self-tapping screws should be 3-4 cm longer than the thickness of the bar.
- At opposite ends of the room, they are fastened along a rail with an indentation of 10 cm from the wall, and the thread is pulled.
- On this level, perpendicular to the direction of the panels, the remaining bars are installed at a distance of 0.5 m, making sure that they are parallel to the floor.
- For reinforcement, jumpers are made between the main rails.
- In the gap between the ceiling and the crate, waterproofing, insulation are laid, and vapor barrier material is attached.
Installation of lining

- The panels are cut 5 mm shorter than the required length, treated with an antiseptic, varnish or wax.
- The starting strip is fixed to the wall, the kleimer is pushed into the groove, screwed to the crate with self-tapping screws.
- The rest of the boards are inserted into the groove with a comb, carefully knocked out with a mallet.
- Plinths are installed around the perimeter.