Which is better
The lining for interior decoration is presented in the construction market with a huge assortment, so each of its types differs not only in a unique design, but also in technical characteristics. To make the right choice and determine which of the materials is the best, you need to take into account many nuances.
Currently, manufacturers produce wall paneling from both deciduous and coniferous wood species. Pine and other coniferous planks contain a lot of essential oils and resins, which protect it from mold and mildew. In addition, such a lining serves for a long time, is easily processed and has an unusual texture. Also, products made from coniferous trees have high thermal insulation and fill the space with a pleasant smell. Therefore, if you need to beautifully decorate the interior inside a house or apartment, then you cannot choose the best option.
If you plan to finish the sauna or bath, then you can give preference to the lining made of hardwood, you can also sheathe the toilet. After special processing, such a board does not emit resins, withstands high temperatures and is not afraid of moisture. Oak board is in great demand among craftsmen: although it is expensive, the price is justified by the quality. In a private house, such material is perfect for decorating slopes and the second attic floor.
For cladding the walls of a country house or summer cottage, you can also use birch or linden lining. A pleasant shade of these types of wood will not only make it possible to embody an interesting design of the room, but also create a special atmosphere of home warmth and comfort in the room. The decorative wall decoration with clapboard looks beautiful in the hallway, bedroom, bathroom, it is also suitable for the corridor, and the doors decorated in this way will become a real decoration.
How to install imitation timber: preparation of the base
Decorating a wooden house with imitation timber begins with the preparation of wall surfaces.
Clean the walls from dust, dirt. You may need to apply a primer solution (we wrote about it above).
Then, you need to put a waterproofing layer for wood - most often it is a film membrane, sometimes it is replaced with glassine - a bare, roll material, impregnated with petroleum bitumen.
Fasteners for imitation of a bar may differ - the film sheet is attached from below, connected with construction tape, glue or self-adhesive strips, while the membrane overlap should be no more than 15 cm.
Plastic dowels are not suitable for attaching profiles to a concrete wall - only self-tapping screws, clamps to simulate a bar (curved plate with a hook and two holes) or galvanized nails.
If the wall is without flaws - irregularities, potholes or chips, the crate is installed tightly. If there are defects, then synthetic linings are inserted into the gaps.
To prevent the crate from turning out to be a curve, apply a level to it. The distance of one bar from another should be no more than 80 cm.
Then pipes and wires are carried out, a layer of insulation is laid, another frame of the sheathing is placed and a film membrane is stretched over it. The second crate is necessary for air circulation.
Preparing the timber before installation
The next step is to unpack the panels. It is not recommended to lay the canvas immediately; wait a few days for the tree to absorb all the moisture (the wood may increase in size). This will prevent possible distortion after installation.
Installation of imitation timber for exterior decoration of the house begins only after applying a protective composition to the surface of the tree.
Install panels from bottom to top only.
Where to begin? Cladding and fastening of the false timber
Imitation of timber for exterior decoration of the house should be carried out only in sunny, dry weather. It is better to mount a light beam on the sunny side - when it burns out in the sun, the color changes will not be as noticeable as on dark panels.
Attach the first plank to the batten using a self-tapping screw, clasp or nails. Drive nails into the longitudinal groove of the panel (comb).
The first (starting) board should be set up with a comb - level it with a building level, fix it. If the first panel is placed unevenly, then all subsequent boards will lie crooked. The result will be a strong bevel.
The next step is to install the second board.
When attaching the second panel, insert the spike into the groove of the first board. Do not drive it close to the first bar, leave a small gap (no more than 4-5 mm). The gap is left so that the canvas does not deform due to possible temperature changes in the room or outdoors.
Using this technique, install the boards to the top of the ceiling. To make the parts fit together beautifully, saw down the corners (45 ° angle is suitable for outdoor wall mounting) or install a decorative strip.
Imitation of a bar vertically, "raise" the ceilings, make a room with a low ceiling higher.
Installation of imitation timber inside rooms
The interior decoration of a wooden house with imitation of a bar differs little from external installation work on the street.
The only thing, with vertical installation in the rooms of the house, for fixing the boards, they do not take self-tapping screws, but nails intended for furniture.
Otherwise, all actions are repeated.
New panels can be attached to old wood surfaces using a construction stapler.
The last step is to treat the surface with a protective solution.
How to mount an imitation timber on the ceiling: installation sequence
Ceiling cladding is considered the most difficult job due to the strong pressure on the hands during installation.
To reduce the load, choose boards that are not too wide (a wide panel visually makes the ceiling smaller).
The length also needs to be selected - the fewer joints, the better.
Ceiling installation begins with the installation of a wooden frame and film (if the beams are curved). Start fixing the boards from the side of the window (no more than 3 cm wide).
The technique is the same as for wall cladding - if necessary, put a layer of insulation between the beams.
If there are already beams on the ceiling, then it is enough to stretch the vapor barrier layer, without the lathing.
Types of finishing materials used to imitate timber
Imitation of a bar in the interior of a house can look very different depending on which specific type of this material you choose. There are different possibilities.
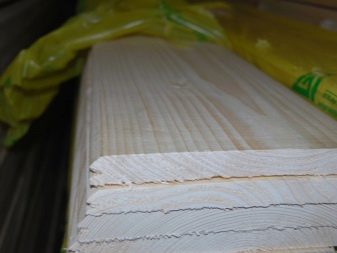
The cladding of the walls of the bedroom with imitation of pine timber
For example, boards from different types of wood are used for decoration:
- from cedar;
- pine trees;
- larch;
- ate;
- oak;
- linden;
- alder.
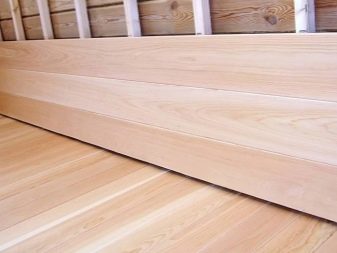
The original interior of the living room, sheathed with cedar imitation of timber
There are other options, but it is these types of wood that are most often used to imitate timber. The table shows a comparison of their main properties:
| Breed | Density (kg / m3) | Colour | Resistance to decay and fungal formations (class) | Where is the best to use | Price |
| cedar | 445 | heterogeneous brown-pink color, pronounced pattern | average | suitable for a nursery, bedroom, living room; not used in places with increased requirements for wall stability | average |
| Pine | 500 | bright warm reddish-brown color, the pattern is not pronounced | average | suitable for a nursery, bedroom, living room; not used in places with increased requirements for wall stability | very cheap |
| larch | 660 | the color varies from red-brown to light pink, the pattern is pronounced | high | can be used in any type of premises, including a kitchen, sauna, pantry | cheap |
| spruce | 445 | soft light yellow color, the pattern is not pronounced | low | suitable for a nursery, bedroom, living room; not applicable in places with high humidity | very cheap |
| oak | 690 | the color varies from dark brown to golden, the pattern is contrasting, pronounced | high | can be used in any type of premises, including a kitchen, sauna, pantry | relatively expensive |
| Linden | 530 | golden beige, the pattern is often poorly expressed | low | suitable for a nursery, bedroom, living room; not applicable in places with high humidity | relatively expensive |
| alder | 490 | golden reddish, the pattern is poorly expressed | low | suitable for a nursery, bedroom, living room; not applicable in places with high humidity | average |
As is clear from the table, this value is best in oak and larch. In terms of their ability to resist decay, these two types of wood are also ahead of the rest.
Larch is great for bathroom decoration
It is up to you to decide which type of material for imitation is suitable in your case.
For the ceiling, inexpensive types of wood are usually used.
Another parameter by which the types of finishes used to simulate timber differ is the size of the boards. Wider options look more brutal, more reliable and are easier to install. However, for small spaces, it is better to take thinner panels in order to visually expand the interior of the house.
Installation of wooden imitation
Before proceeding with the facing work, it is necessary to carefully prepare the base for finishing, purchase a sufficient amount of timber, take care of the tools and materials for fixing the imitation.
What material to buy for installation?
The interior decoration of imitation of a bar is performed on a flat surface of the walls and ceiling of the house or on a pre-installed crate. Work begins with the preparation of the base for facing.
It is necessary to measure the areas where the installation is supposed to be. This is done in order to calculate the amount of material. Bars should be purchased from the same batch so that they do not differ in shade and processing quality.
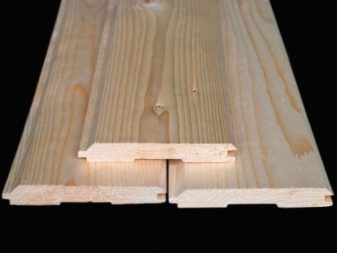
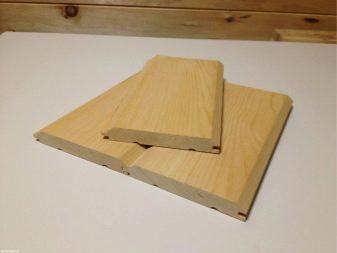
The width of the board for interior decoration of the house should be in the range of 100-150 mm. If the indicator is higher, then the finish will reduce the room. A width of less than 100 mm will make the timber look like a standard clapboard. The thickness of the board for cladding inside is no more than 21 mm. The materials can be compared by the photo.
The purchased material must be brought into the room in which the repair work will be carried out. The packaging is removed from it and left for 2 weeks for acclimatization. The tree must get used to the microclimate of the house: to its temperature and humidity.
Before installing the interior cladding, all the electrical wiring of the house is done. The wires are laid in a corrugation. The communications will not be visible under the cladding. In the photo of the walls covered with cladding, no wires are visible.
Preparation of the base for finishing imitation timber
The advantage of installing the cladding on a flat surface without a crate is that it will not make the room smaller. Large irregularities on its surface should be removed. You may need to make a cement screed. The differences of 1-2 mm will be covered by the inner lining. It is enough to clean the base, treat it with an antiseptic solution, deep penetration primer, and apply a layer of plaster. Waterproofing material can be laid on the wall of the house.
The crate will require a few centimeters of usable area. The room at home will be smaller. As a material, you will need a bar of 25 * 30 mm. If the house is built of brick, stone or blocks, then a vapor barrier film and insulation are laid on the base. Film is not used in wooden houses. It is capable of accumulating moisture, which can damage the building material.
The lathing step should be less than the size of the insulating material plates. It is necessary to leave a gap of 10 mm between the wall and the finishing material. This is necessary for air circulation. The crate is fixed vertically. If the wall is a log house, then it is better to take nails for fastening.Dowels are installed in a concrete, brick or block wall. The lathing beams are fastened with self-tapping screws.
All wooden elements for lathing and finishing must be covered with protective impregnations: antiseptic, fire retardants, which will prevent the material from igniting and protect the material from exposure to open fire.
Cladding
- An imitation of a bar is laid horizontally, starting from the floor with a groove down.
- The first board must be installed according to the markings. It should be in a strictly horizontal position. The level of all boards in the finish depends on this.
- The second and subsequent boards are laid with a gap of 2 mm. This is the expansion gap.
- Strengthen the finish of the imitation of the timber to the lathing with self-tapping screws, nails or clamps. Self-tapping screws can leave cracks on the material. If you hammer in nails, you will notice a mark from the hammer. Builders prefer clamps.
- The board is attached from the side of the groove and the ridge. A hole is made with a drill, a dowel with PVA glue is inserted into it and a self-tapping screw is screwed in. In this case, there will be no cracks on the timber.
- To make a corner joint, a 45 degree cut is made at the ends of the timber. Fillet welds should be staggered. They will be invisible in the decoration, but for greater camouflage, you can install platbands.
- If the length of the surface is large, and the board is not enough, then they are connected, as well as the seams, by sawing the end of the timber at an angle.
- When the finish of the house is ready, the boards are primed and covered with a protective layer: paint or varnish. The photo can be viewed in more detail. The coating will protect the finish from moisture and it will last longer. In addition, it is easier to look after her.
Coating with paint and varnish
Consider the conditions that are typical for the room. They will affect the nature of impregnations, protective equipment and components that will be relevant for use for panels for timber:
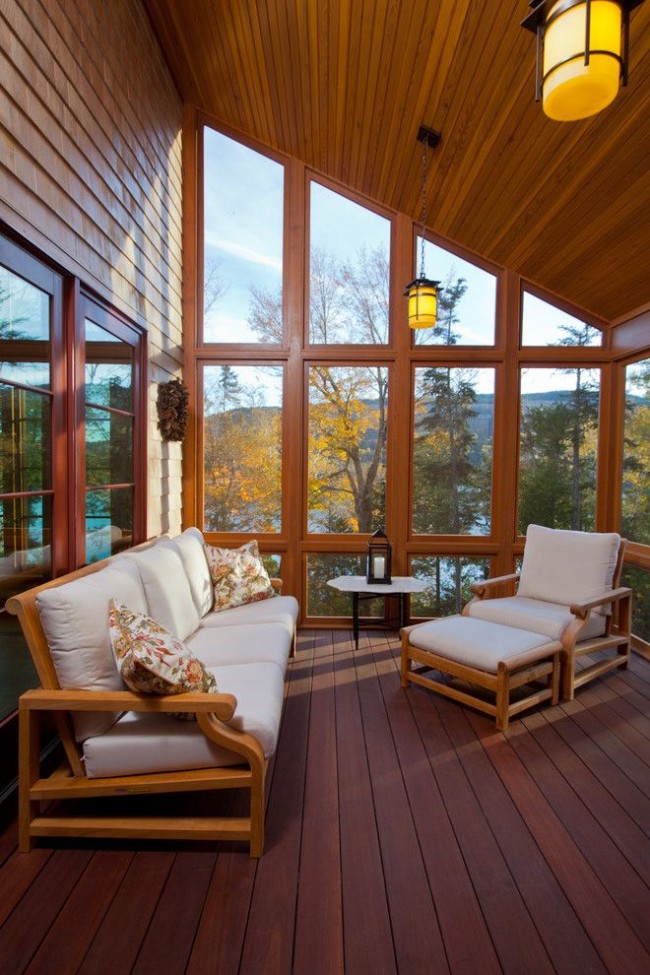
- a room without internal heating (summer cottage rooms, closed-type verandas, etc.) requires the choice of a beam or galvanized profiles for gypsum board as a basis for the future lathing under the panels. Wall cladding with siding will definitely need to be treated with several layers of antiseptic impregnation and drying oil. This will allow the interior to remain resistant to negative factors for a longer time;
- a room inside a heated room allows the use of imitation of a bar without its careful processing and the use of special impregnations. It is enough just to cover the panels with varnish;
- in the bath, sauna, bathroom, high humidity is formed and the temperature regime changes sharply, therefore, in such rooms it will be necessary to use exclusively a galvanized profile for the installation of finishing with imitation of a bar, as well as special compounds to protect the surface from the negative effects of moisture.

Calculation of the amount of timber imitation
Before buying a building material, it is necessary to calculate the quantitative indicators of the purchase. The parameters of a room, for example, a room, are taken as the initial data. The area of the walls intended for facing is determined. The area of windows and doors is subtracted from the total result, the dimensions of the selected false beam are set. There are calculator programs that give a potential buyer the result in pieces of the product and their total weight and volume. The figure below shows an example of such a calculation.
 Calculation of the number of false beams for finishing one room
Imitation timber finishing: sequence of actions
Sheathing a house with an imitation of a bar, like any other type of lining, is quite simple, for this you need to have minimal skills in carpentry.
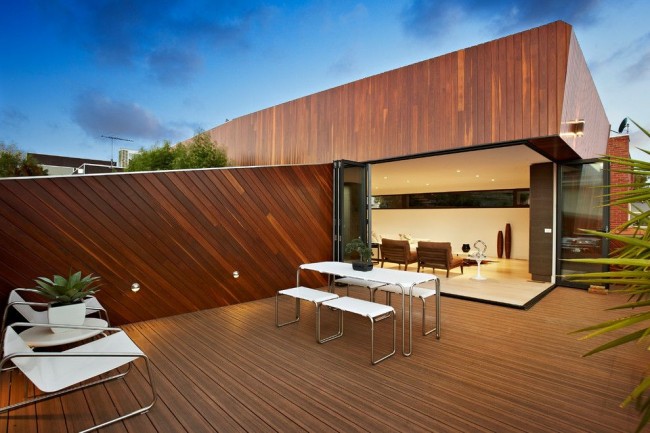
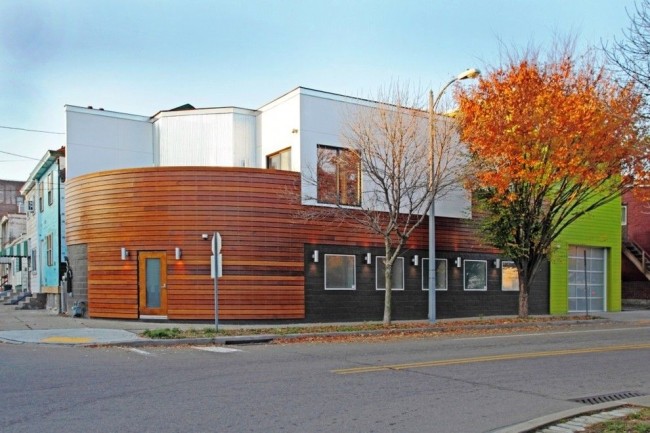
Facades "under the timber" are ventilated, their advantage is inexpensive cost, as well as the possibility of all-season installation
Environmentally friendly and safe materials for human health are used to imitate the timber.

Timber imitation is often used to decorate baths and utility rooms.
Full decoration of the facade with wooden siding
There are some differences between how the imitation timber is installed inside and outside the building, but they are not significant. Consider a more complex, external installation (the installation diagram of the imitation of a bar along the facade of the building is shown in Fig. 1):
work begins with the preparation of the facade, the surface must be leveled and cleaned
If an old wooden house is being renovated, special attention should be paid to the removal of rot and mold;
a waterproofing material (PVC film or parchment) is attached directly to the wall, overlapping 10-20 cm, while the joints must be glued with aluminum tape;
installation of the lathing - the lathing is mounted from a wooden bar of square (30-50mm) cross-section with a step of 50-80 cm. Installation of the lathing allows you to avoid moisture accumulation, but most importantly, an "air pocket" is created, which acts as a heat insulator;
With the help of imitation of a bar, you can easily emphasize individual parts of the building
- laying of insulation - in addition, between the beams of the sheathing, you can lay insulation without leaving empty spaces;
- on top of the crate with the help of a construction stapler, a vapor barrier is strengthened - it will protect the insulation from moisture.
Installation begins from the bottom, while it is very important to accurately level the first board - the quality of the entire installation will depend on this. The imitation of the timber is mounted only horizontally, while the board (panel) is installed with the spike upwards - this will prevent the accumulation of water in the grooves
The boards are fastened with a screw (self-tapping screw, twisted at an angle of 45 degrees, while the self-tapping screw is installed in a thorn, in Fig. 1 it is shown in diagram A) into each connection with the crate. With a large lamella width, it is additionally fixed with a self-tapping screw, which is twisted perpendicular to the board, while the cap is recessed by 3-5 mm (diagram B in Figure 1.).
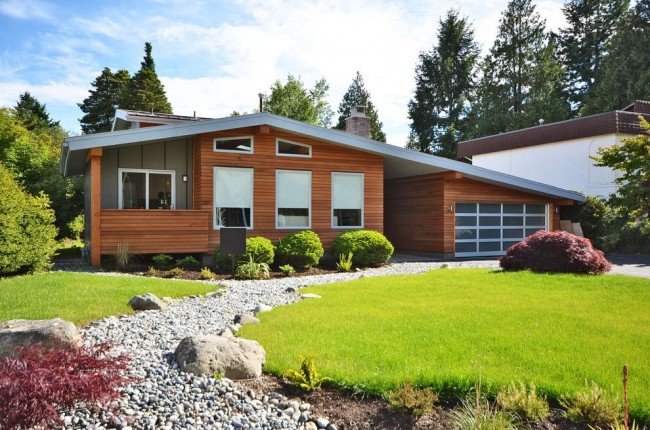
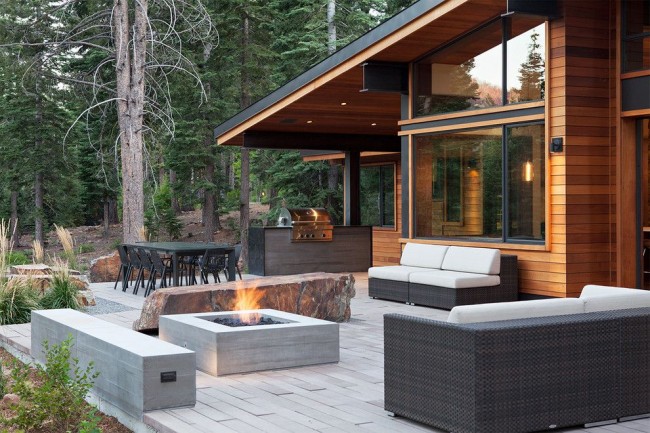
Sheathing "under the beam" of a one-story house with a balcony
House facade decoration with wood
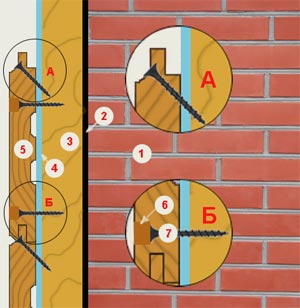
Rice. 1 Installation of imitation timber along the facade (1 - wall, 2 - waterproofing, 3 - lathing, 4- vapor barrier layer, 5 - imitation of timber, 6 - wooden cork, 7 - self-tapping screw.)
When decorating the interior with imitation of timber, there are some differences:
- since a thinner (and therefore light) board is used, the wooden beam can be replaced with thinner slats, which will additionally save living space;
- on the inner walls for attaching light lamellas, it is better to use kleimers - special brackets fixed from the end side and which leave the surface of the board intact;
Imitation of a bar is used for both external and internal decoration of the house
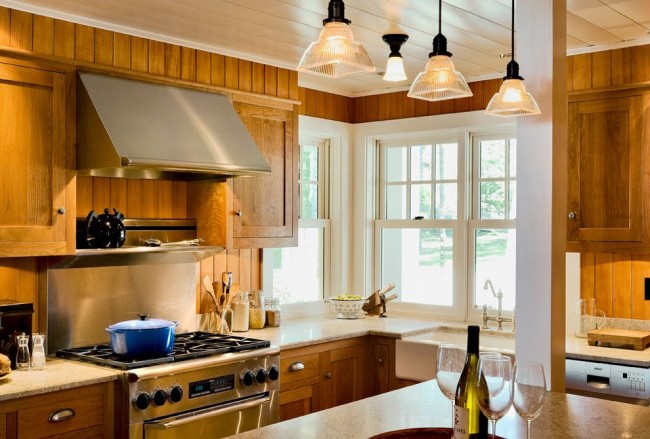
Finishing the kitchen "under the timber"
- laying of insulation is carried out only when installing an imitation of a bar on an external wall (which, in turn, is not insulated from the outside). On the interior partitions, insulation is not installed, respectively, hydro and vapor barrier does not fit;
- for interior cladding with imitation of a bar, the outer and inner corners are decorated with a decorative bar. However, if you carefully cut the end of the board at an angle of 45 degrees and carefully dock it with a bar fixed on the next wall, so that a clearly distinguishable gap does not form, you can save on a decorative bar;
For details on how to make a corner neatly - watch the video:
if the boards are shorter than the wall, then they are joined end to end (after cutting at an angle of 45 degrees) or using an intermediate bar;

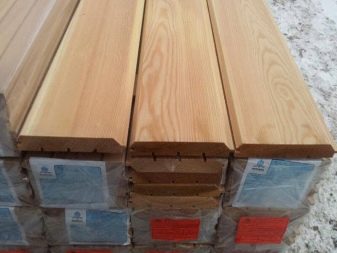
Imitation of pine timber
Before installing the lamellas, you should determine in advance the place where the switches, sockets and lamps will be located in order to cut a hole with a crown.
It is better to process the lamellas with special impregnations and paint with varnish in advance, while the crest and groove should be varnished so that over time, if the boards suddenly disperse a little, unpainted stripes do not appear in the gap.
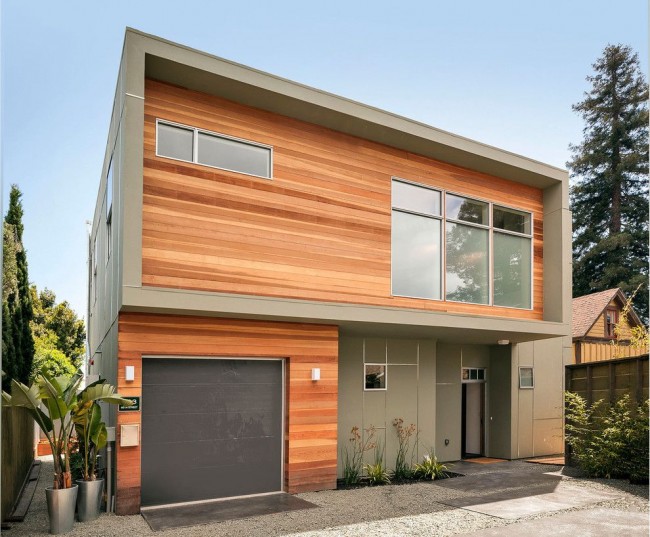
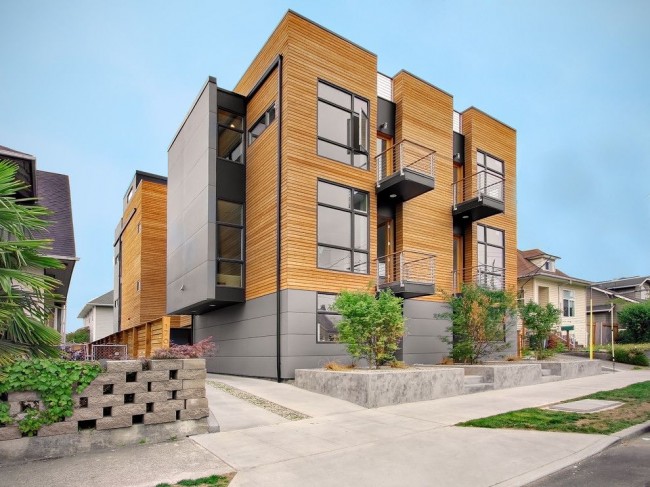
Modern exterior

Rustic house
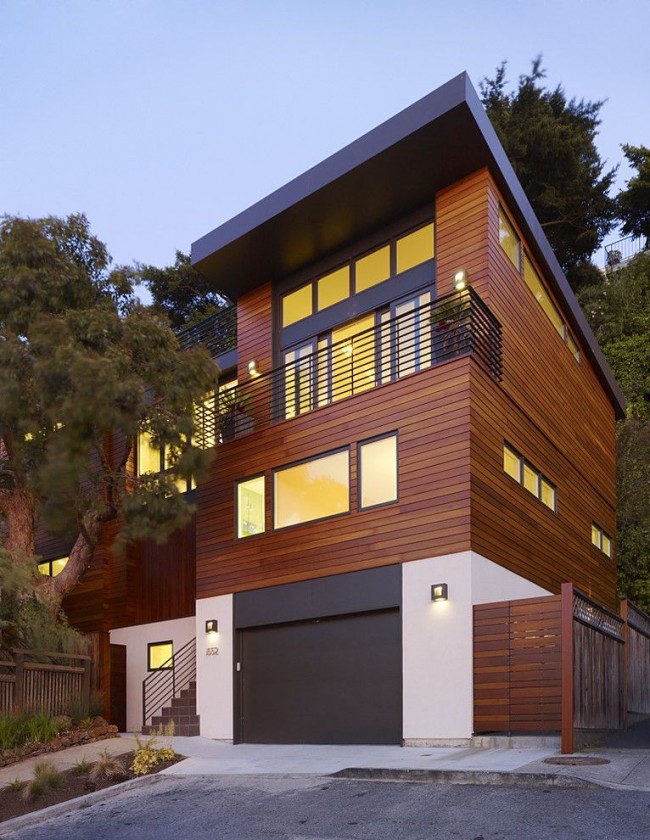
Cottage with wooden siding "under the bar"
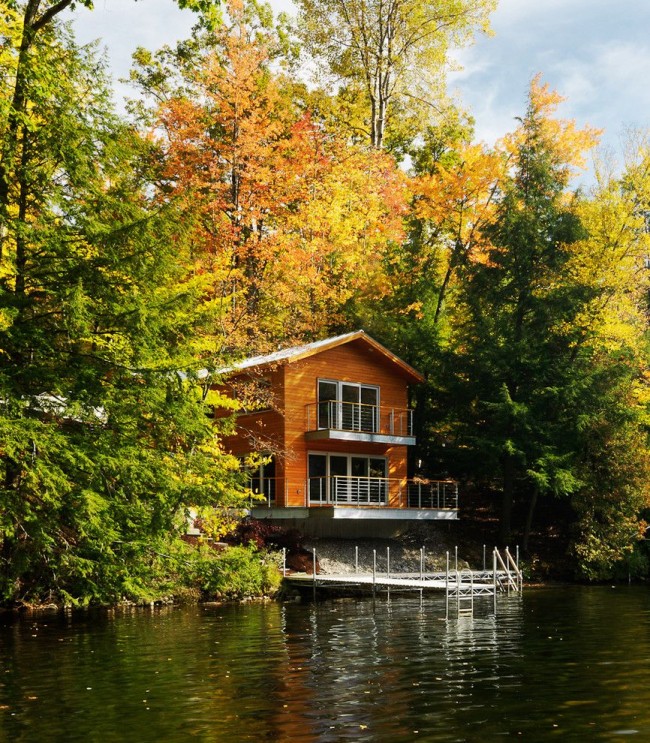
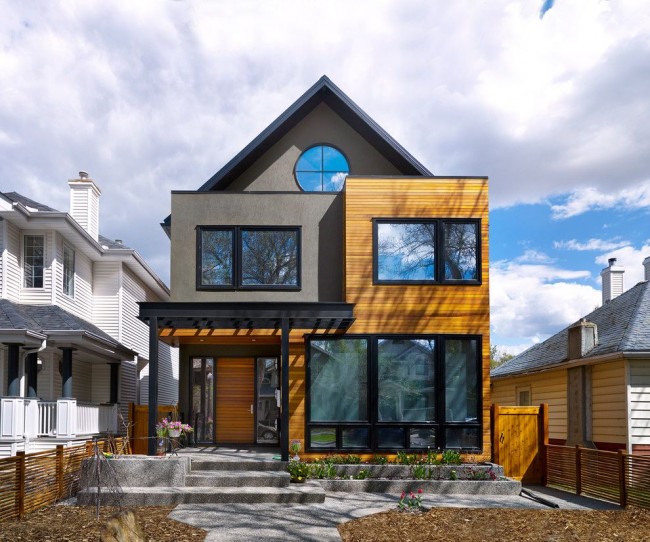
Facade decoration with imitation timber will provide you with an excellent exterior
Specificity of wood species
Wooden building elements are made from softwood and hardwood. Moreover, hardwood accounts for only 10-15% of the total volume of wooden parts. Conifers - spruce, pine, larch, fir, cedar - have higher strength characteristics, and they are used to make structural elements - piles, pillars, supports, frames. Sawed coniferous trunks are used in interior and exterior cladding, carpentry, figured structures.
Hardwoods are used as an auxiliary material in the creation of unimportant structures - temporary warehouses, sheds, formwork for concrete work, etc.
Table. Approximate prices for false beams from different types of wood
| Wood species | Thickness, mm | Estimated prices for 1 m2 of finished surface for June 2020 |
| Pine or spruce | 16, 22 | RUB 250-450 |
| 28, 35 | RUB 370-800 | |
| Larch | 20 | 400-1500 rub. |
| Cedar | 12, 16 | 800-1400 rub. |
| 18, 20 | RUB 900-1800 | |
| Linden | 12, 15 | RUB 300-800 |
| 18, 20 | 1100—1900 . |
Dimensions (edit)
Standard timber has dimensions in width from 80 to 280 mm and in thickness from 80 to 270 mm with a length of up to 6 m.The width of the bulwark is usually in the range from 90 to 200 mm, thickness - from 16 to 45 mm, length - from 1 m up to 6 m.
Manufacturing companies
The SeverLesGroup company from the Arkhangelsk region has its own woodworking production. By optimizing business processes, he sells quality goods without trade margins. A large assortment with various characteristics is always available in warehouses. The company supplies products to Moscow and the region by its own transport within the agreed time frame.
The Ural company "Color Wood" (CvetWood) has been operating since 2009. The factories of the company produce imitation of timber, calm and euro lining, straight and beveled planks, fence boards. Pine is supplied from the Sverdlovsk region, larch - from Angarsk. The painting is carried out in the factory on an Italian spray machine. Another machine rubs paint into the wood fibers. A spike-groove is made on four sides of the board, which increases the ease of installation. A board with a cut neat bevel is offered.
The company "Pilolistva" harvests pine and larch wood in the Vologda and Arkhangelsk regions. The technological process for processing is carried out on German and Japanese equipment. Own vehicles deliver products to Moscow and the Moscow region.
There are many more companies in Russia that produce imitation of timber.
Artificial wood flooring, walls and ceiling
The tree underfoot, despite all the new and more exotic species, is not surprising. How about solid timber cladding? This is a popular design proposal. The most spectacular is the "expansion" of the wooden floor to one of the walls. Depending on the imagination or the size of the room, the expansion can reach half the wall or include the entire room. This procedure, in addition to a strictly decorative function, enhances small interiors.


Rustic style in wood-like interior
Wood cladding with much wider panels is still used. Especially when you intend to decorate a kitchen or bathroom in a rustic style. Here you can use both a narrow and a wider imitation of a bar, placing it at your discretion. The resulting panel can be painted white or pastel colors, combined with a delicate floral motif in home textiles. Such interiors require special furniture, preferably wooden, with decorative design.


Views
Lining for timber has many varieties, which differ not only in size, but also in quality. The quality primarily depends on the material used to make the panels.
Lining for timber is divided into three main classes:
- "A" - this class includes boards of the highest quality. There are no defects on the surface of such panels.
- "B" - there are minor defects on the surface of the lining of this group. In appearance, such materials are inferior to the panels of class "A", but they are much lower.
- "C" is the most budget-friendly option for timber panels. The material is not of the best quality, on the surface of which there are defects. Often, such panels need additional sanding.
Material
The cost and some characteristics will depend on the material that was used to make the lining under the timber.
For the production of such panels, the following types of wood are most often used:
- Pine;
- spruce;
- cedar;
- larch.
Pine and spruce are highly resistant to decay. In addition, such wood has a wonderful resinous smell. Compared to pine, spruce is not as strong and resistant to external negative factors.
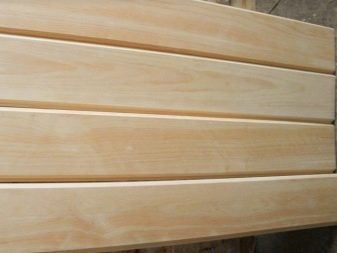
Cedar can be called both durable and soft material. Such wood has antiseptic properties and cleans the air from bacteria. Cedar lining has a light shade and a beautiful texture. Since the material belongs to conifers and contains a lot of resin, it has good resistance to putrefactive processes.
Panels and larch trees are great not only for decorating a house, but also for baths. Such wood is considered a fireproof material: the panels do not heat up under the influence of high temperatures and cannot be burned on them.
The size
As noted earlier, the panels for the timber have more impressive dimensions than the classic lining. The boards can be up to six meters long. The width of such products varies from 6.5 to 20 centimeters. On the construction market, you can also find products with a width of 25 centimeters, but since the demand for such panels is small and the price is quite high, you can rarely find them.
As for the thickness of the panels, the most common options are between 1.8 and 3.4 centimeters. The quality and strength of the finish largely depends on the thickness. Some firms can make custom-made lining according to individual parameters.