In the interior of the apartment
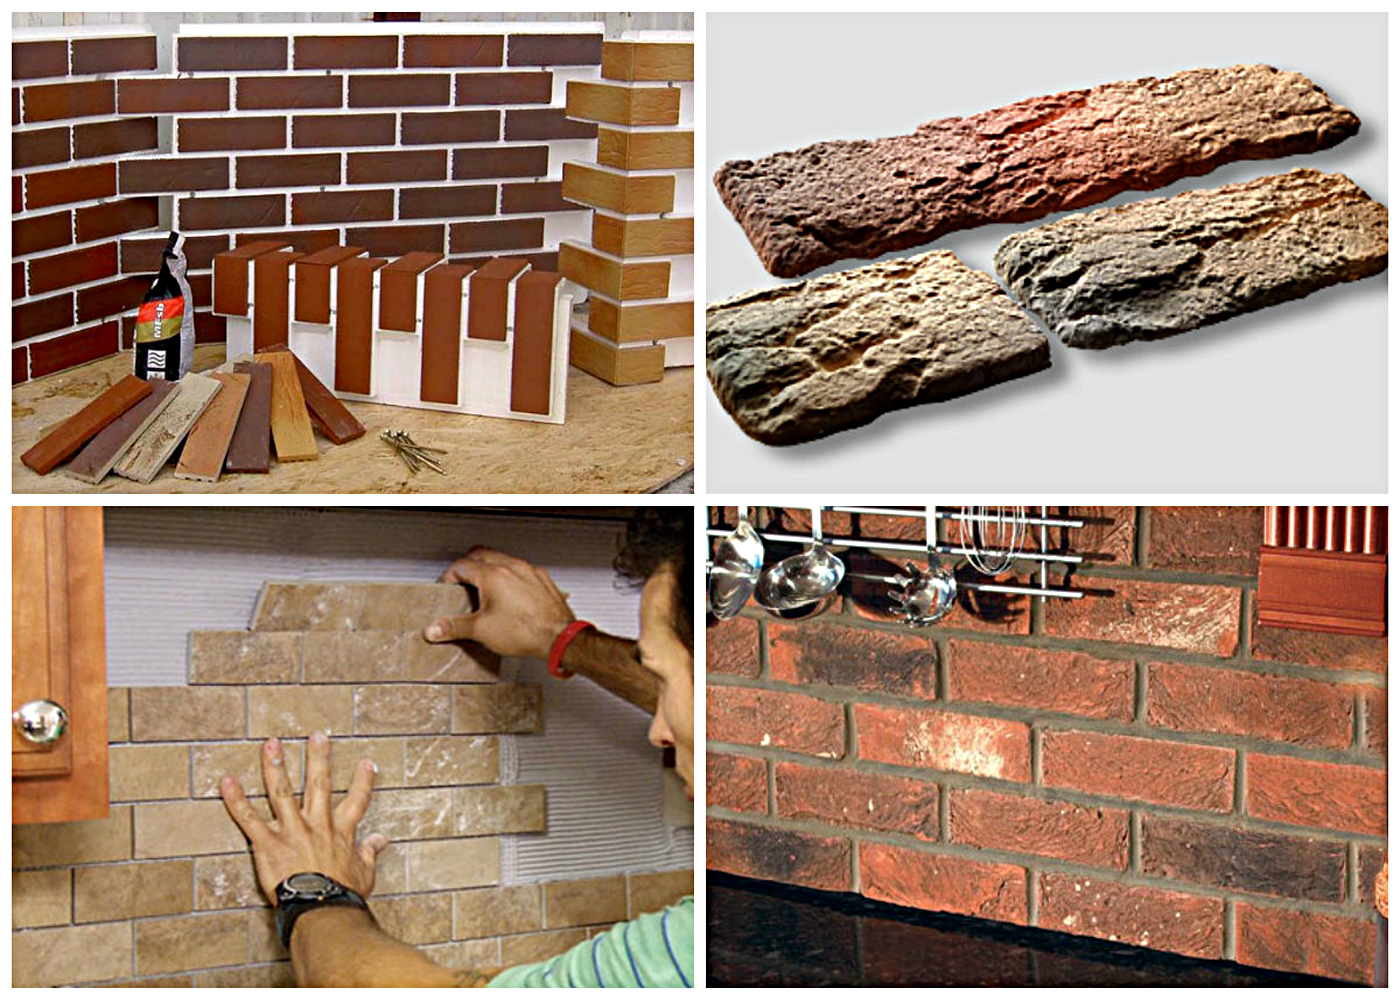
Brick is a common building material, but now it is used not only to create buildings, but also to decorate rooms.
In modern apartments, it turns out that it is not always possible to make original brickwork, but if you want to diversify the interior with it, then you can make an imitation.
There are several alternatives to the original brickwork: brick-like tiles, wallpaper, plaster, polystyrene, decorative panels, all of which allow you to very accurately simulate a brick wall.
The specified element can be used to decorate various rooms in your home:
On the balcony
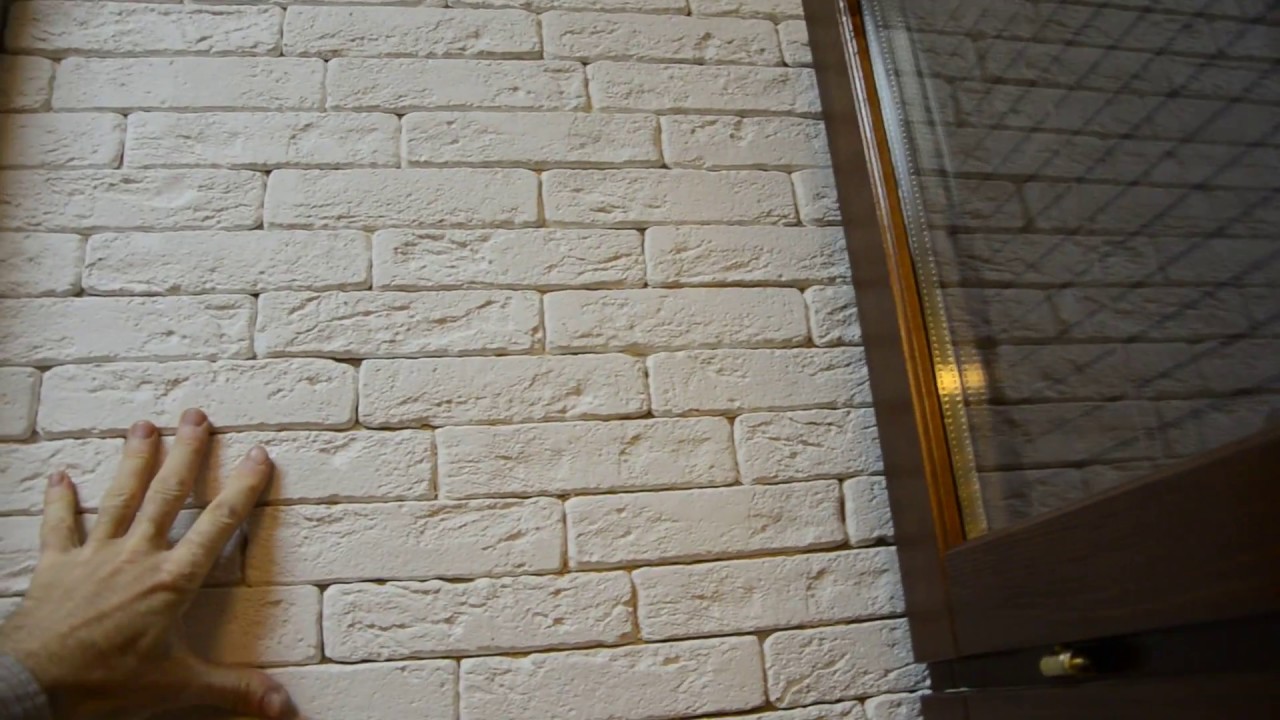
Here the brick wall brings in a street element. It can be imitated using tiles, which are lightweight, so it does not weigh down the walls and does not take up free space on the balcony. Imitation in the interior of the balcony in the photo below.
The glue must be of high quality, otherwise the tiles may fall off from the constant vibrations that occur when the doors are closed. The alternative looks good in the form of wallpaper that mimics the texture and appearance of bricks.
Living room
Brick is combined with both classic design and ethnic style, minimalism and others. Brickwork can decorate not the entire wall, but only its individual elements.
Kitchen - dining room
The natural look of the brick brings country notes to this room, and if it is painted white, the kitchen-dining room will acquire a Scandinavian style. For imitation, ceramic or clinker tiles are most often used. In this way, you can decorate one of the walls or just an apron.
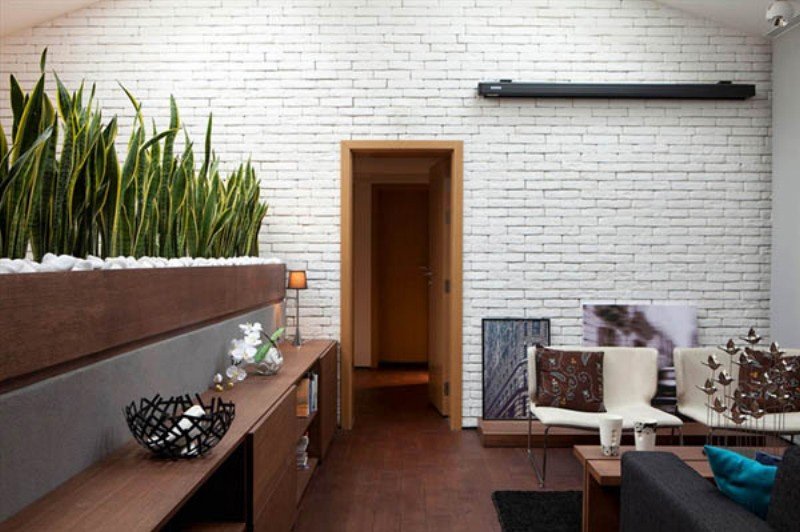
Bedroom
Modern designers also use brickwork in the design of the bedroom. It allows you to create a more brutal design, while the brick looks good with textiles.
The wall can be left intact or painted in a specific color. Creamy, blue and white shades are suitable for the Scandinavian style, while brighter ones are used in the decoration of the bedroom in an electric design.
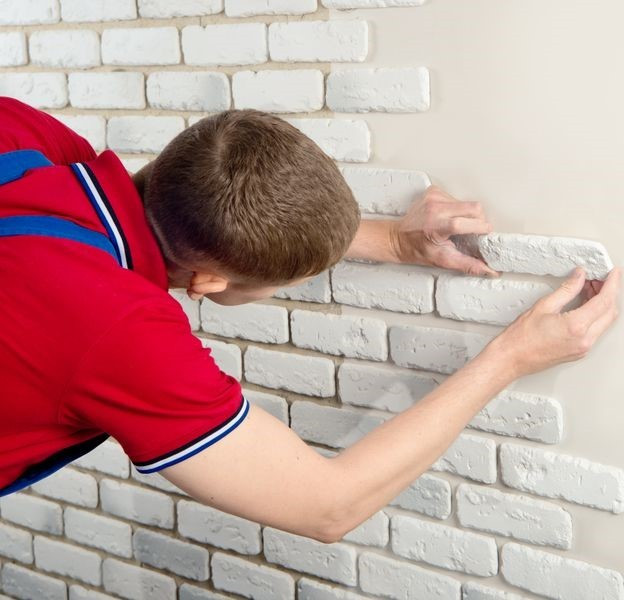
Imitation of a white brick wall with a classic interior, pictured below.
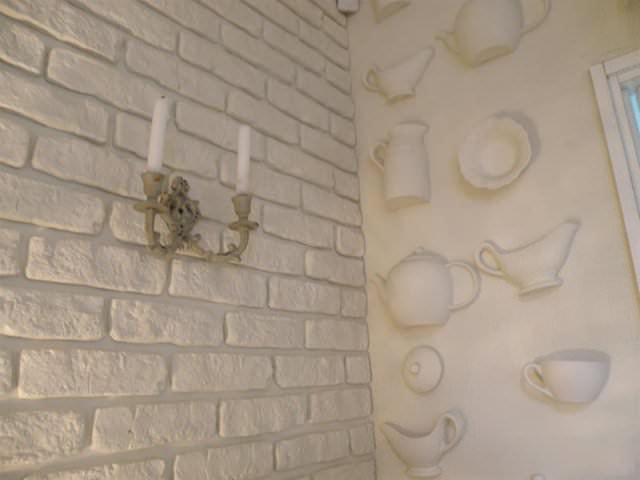
Bathroom
In this room, decoration with brickwork is also often used, but the material must be treated with means that protect it from mold.
It is best to imitate such a surface in the bathroom with ceramic tiles or you can use moisture-resistant vinyl wallpaper.
DIY styling methods
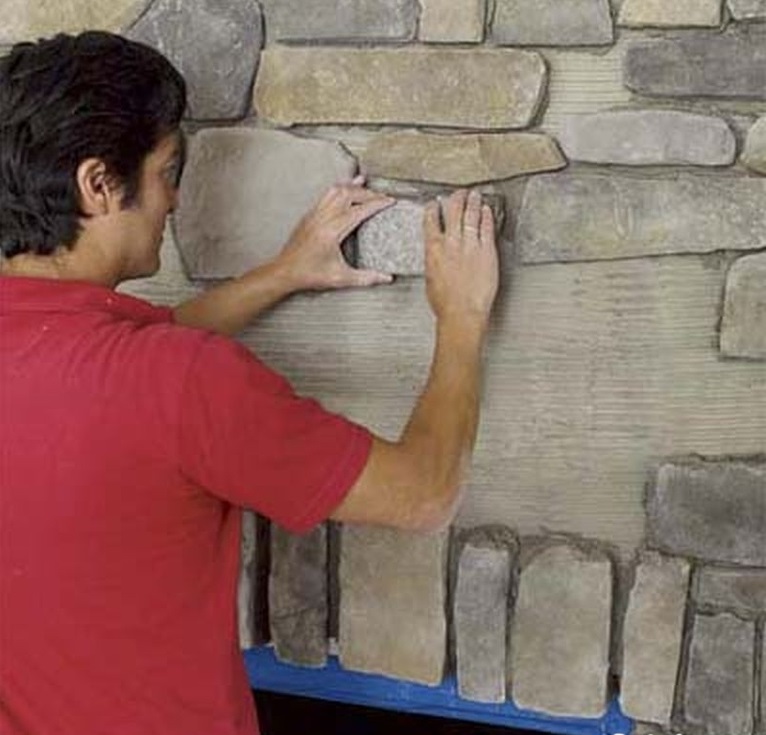
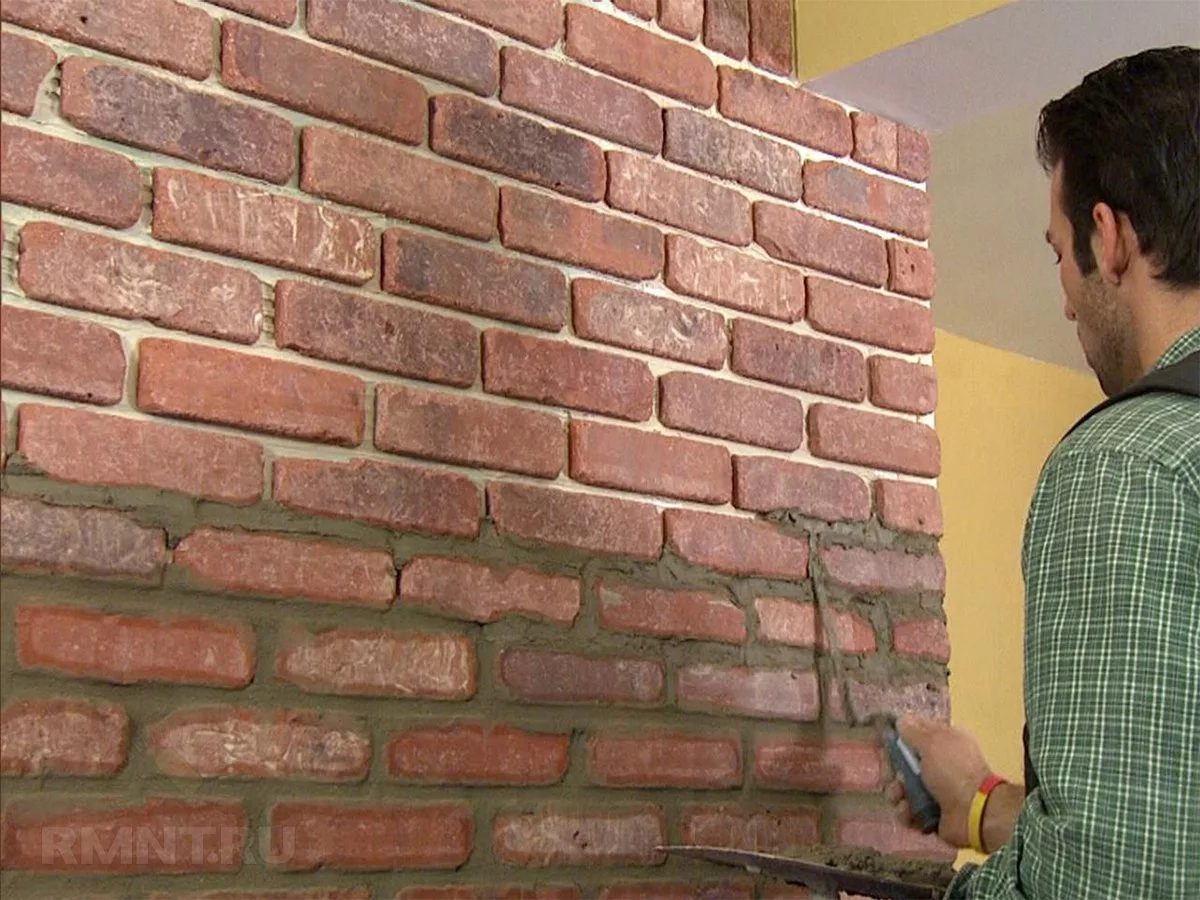
There are many ways to install decorative tiles with your own hands. Partial or full veneering of the coating is often used. In case of partial, a combination is made with other types of facing raw materials (wallpaper, plaster, tiles, etc.).
Tiles are often used when decorating doorways, arched openings, mirrors. Such a decision is made not only with the aim of giving a particularity to the interior, but also to protect it from rubbing and pollution.
A great option is the design of the fireplace!
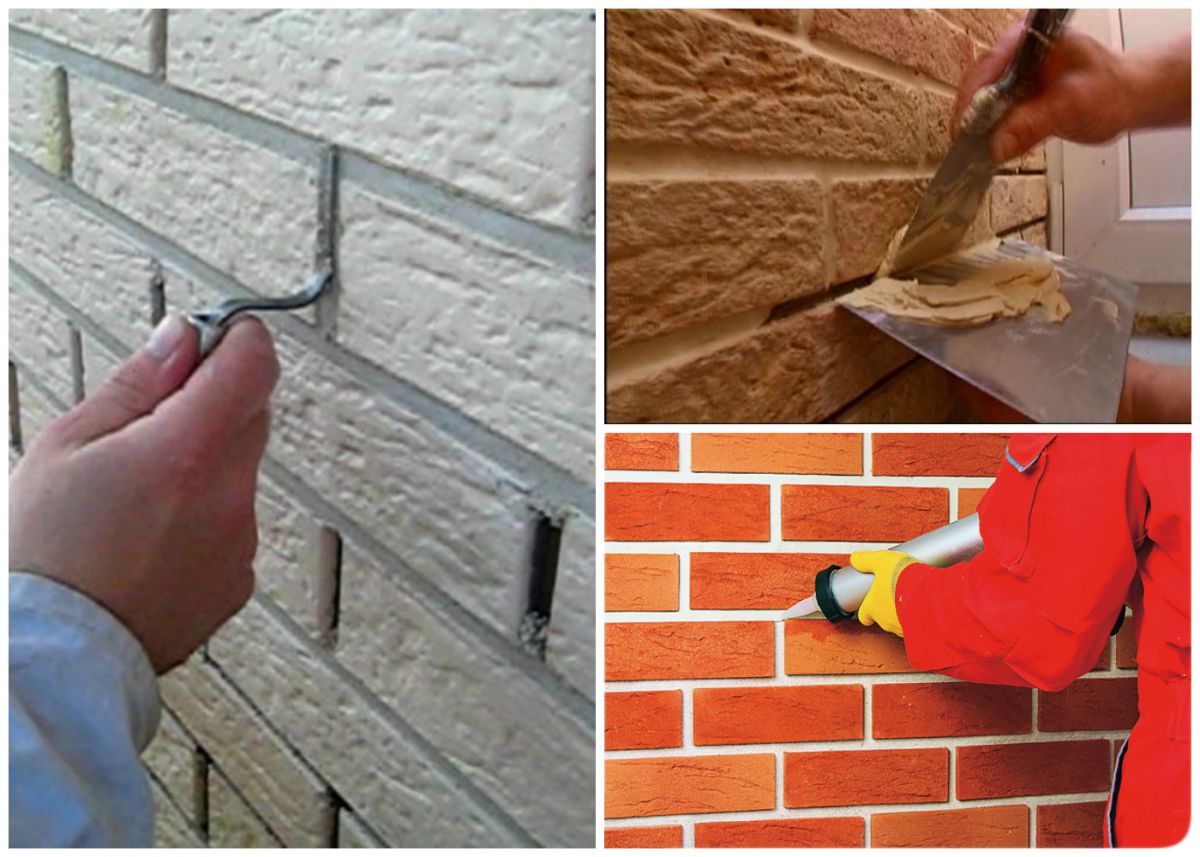
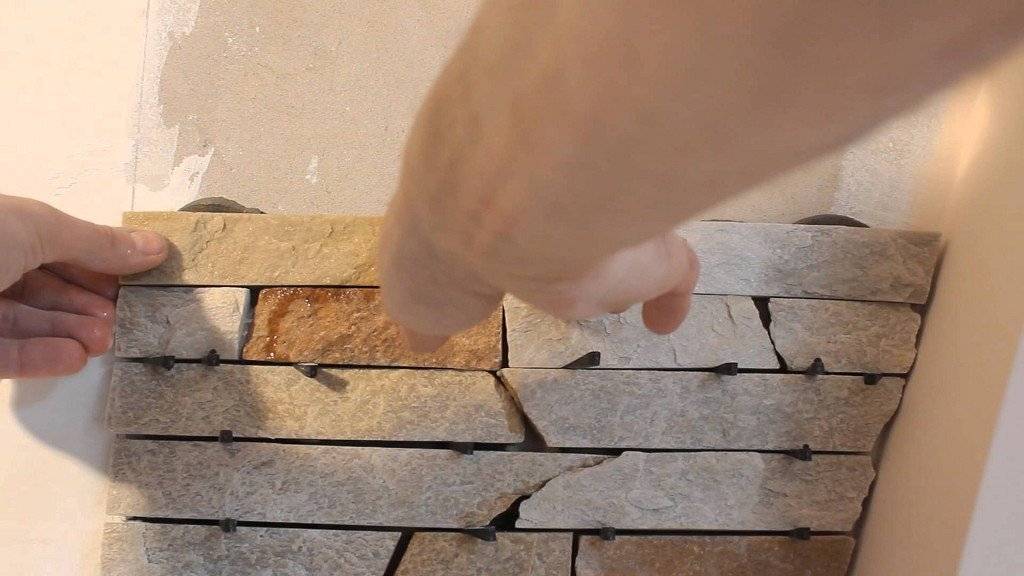
For fixing the plates to the surface, dry technology is used - fastening with bolts, rails. Or wet - the use of a special adhesive for gypsum elements.
Laying technology
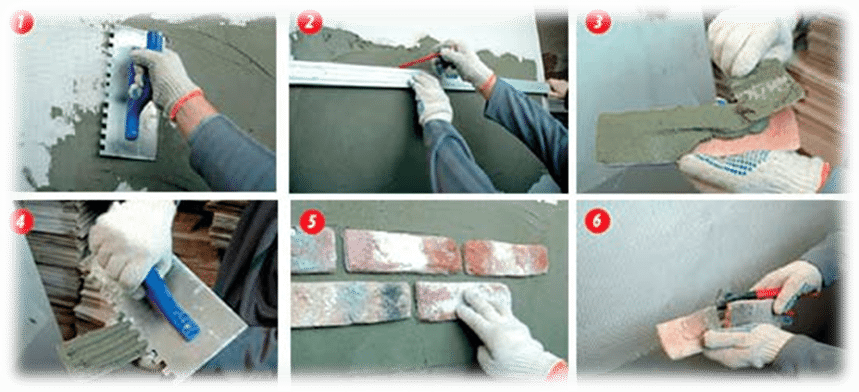
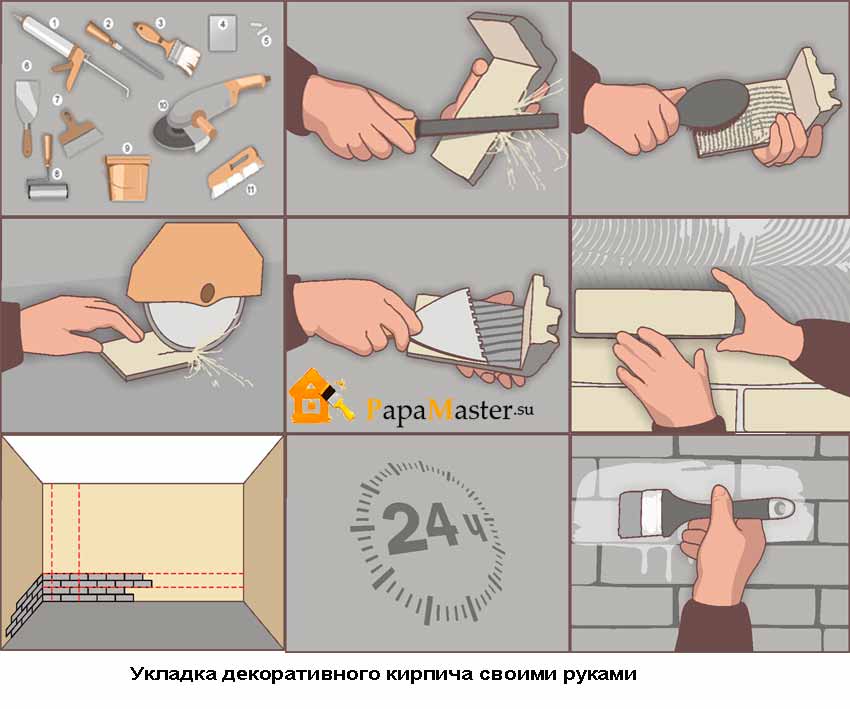
The styling technique includes four stages:
- Preparatory work and surface treatment.
- Application of the composition.
- Pinning the tiles.
- Final grouting.
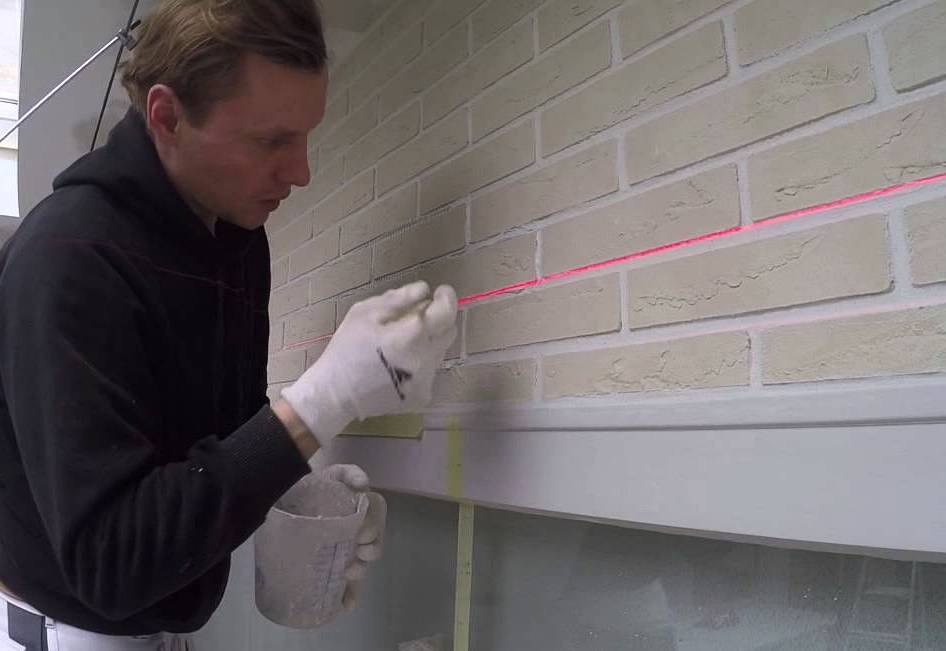
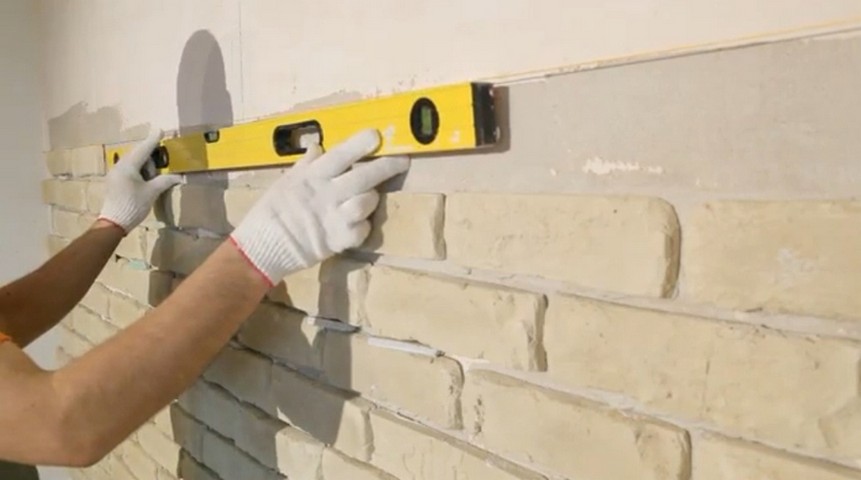
Even a beginner can handle the installation of any type of tile. First, it is necessary to measure the room and calculate the required amount of material. When laying individual bricks, you need to focus on a straight line that is applied to the wall so that the rows are even.


Preparation of the base
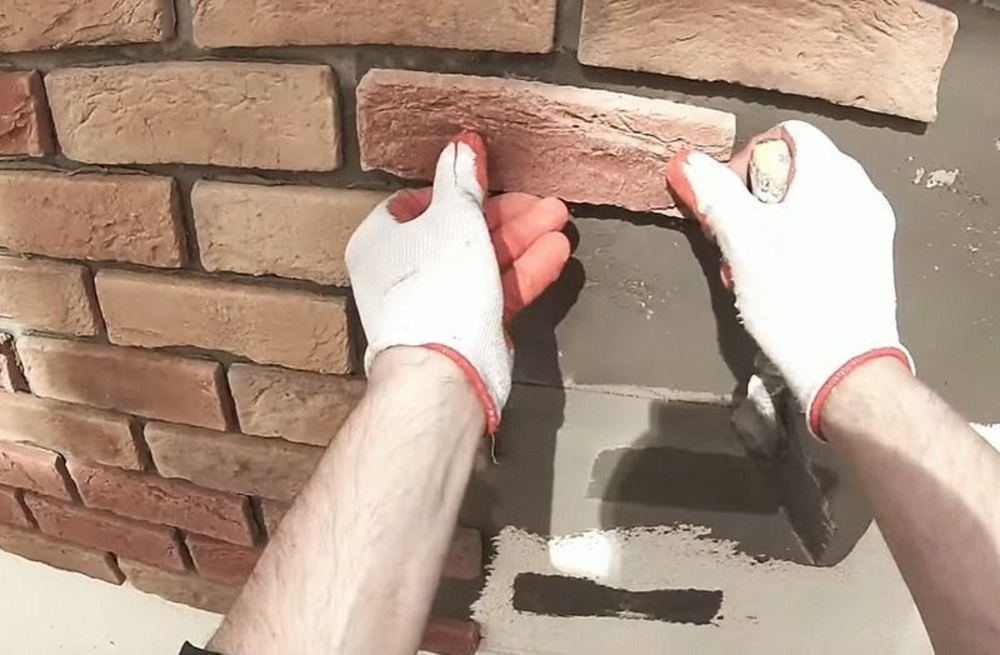
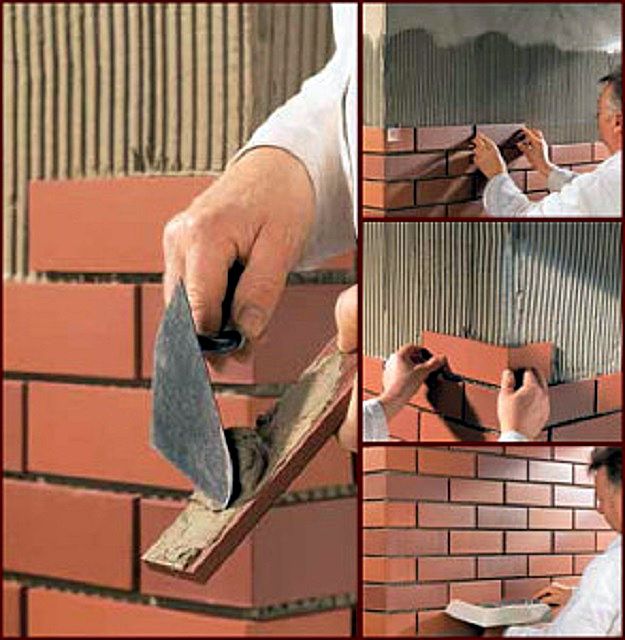
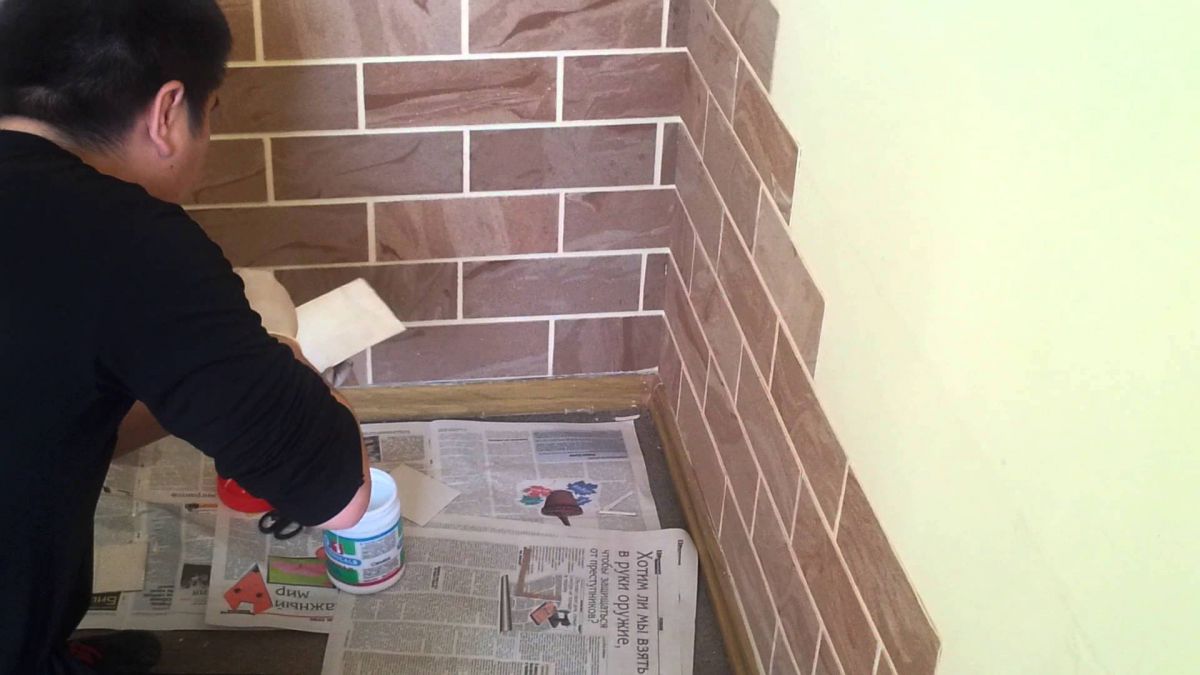
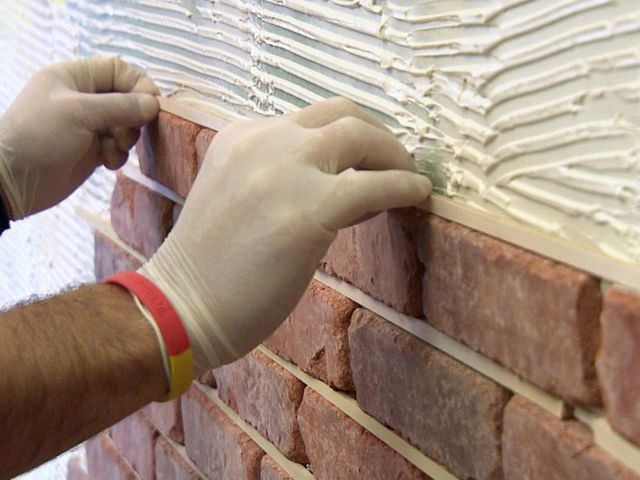
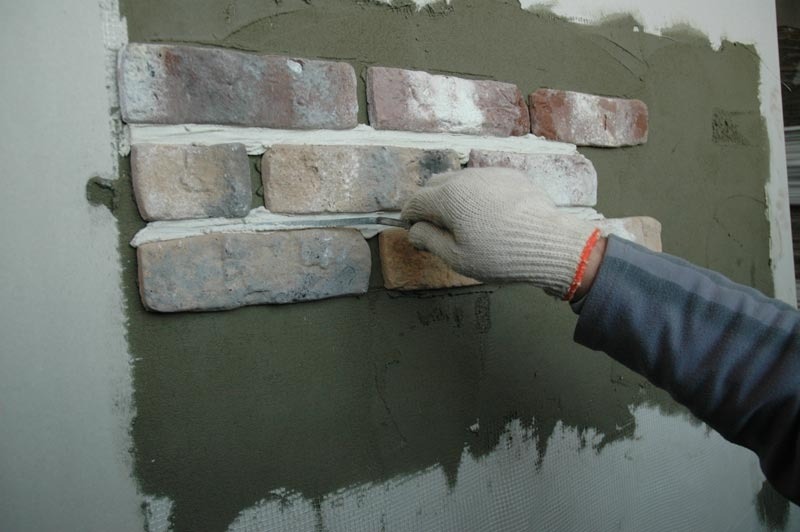
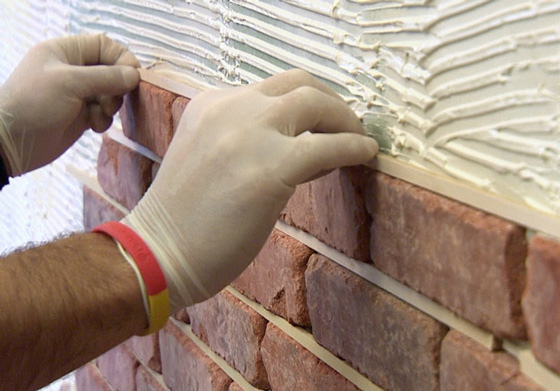
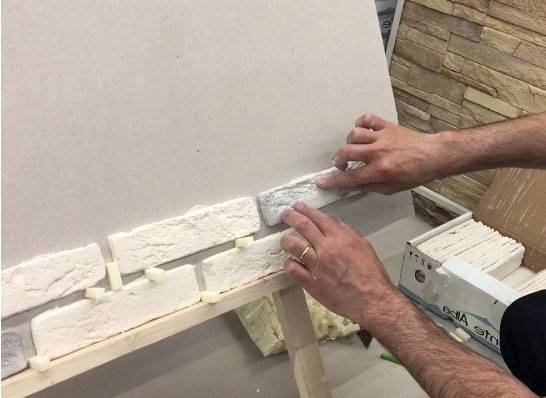
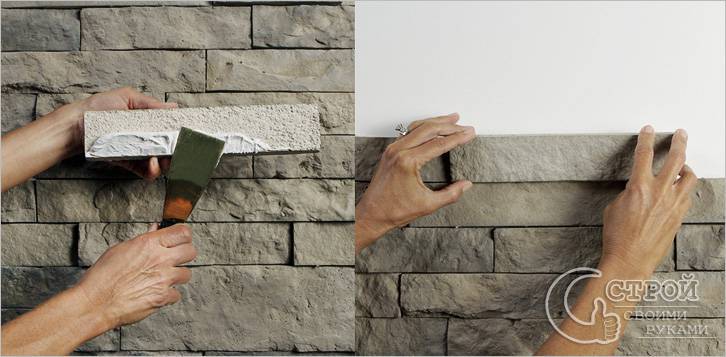
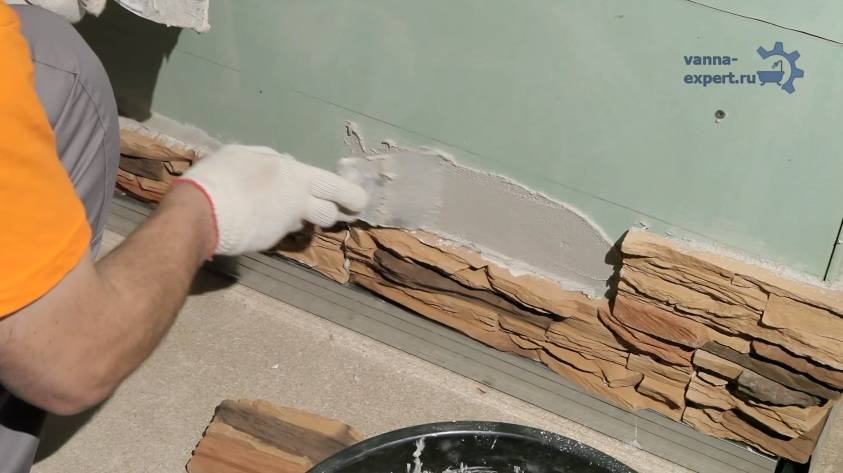
The wall must be cleaned of dirt or a layer of old paint, dismantle the previous finishing material. If there are large defects, they must be repaired with a putty and the surface should be carefully leveled. After the composition has dried, an additional layer of primer is applied. This will ensure good adhesion between the adhesive and the wall.After the primer has dried (it is advisable to wait a day from the moment of application), it is covered with a bonding agent. Construction glue or cement mortar can play its role. The thickness of the layer should not exceed 0.5 cm. The composition can be applied only to the wall, to the back of the tile, or to use both options at once. In this case, the treated piece of the surface to be decorated should not exceed 0.5 m in area. Keep in mind that the composition can quickly solidify, so you will have to glue it quickly. For facing fireplaces, cement mortar is used, since other substances may not withstand heat.
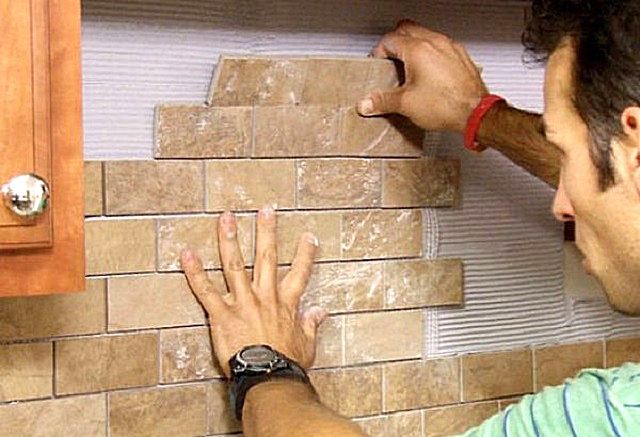
Laying tiles
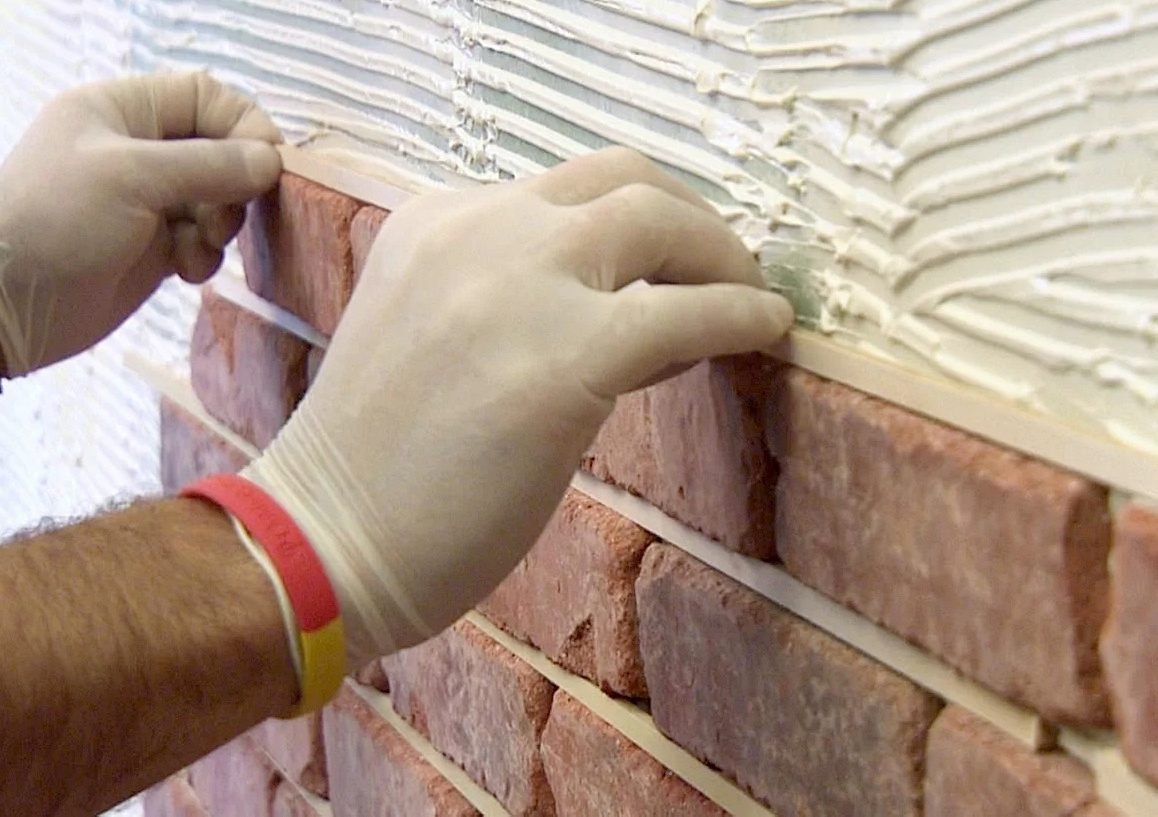
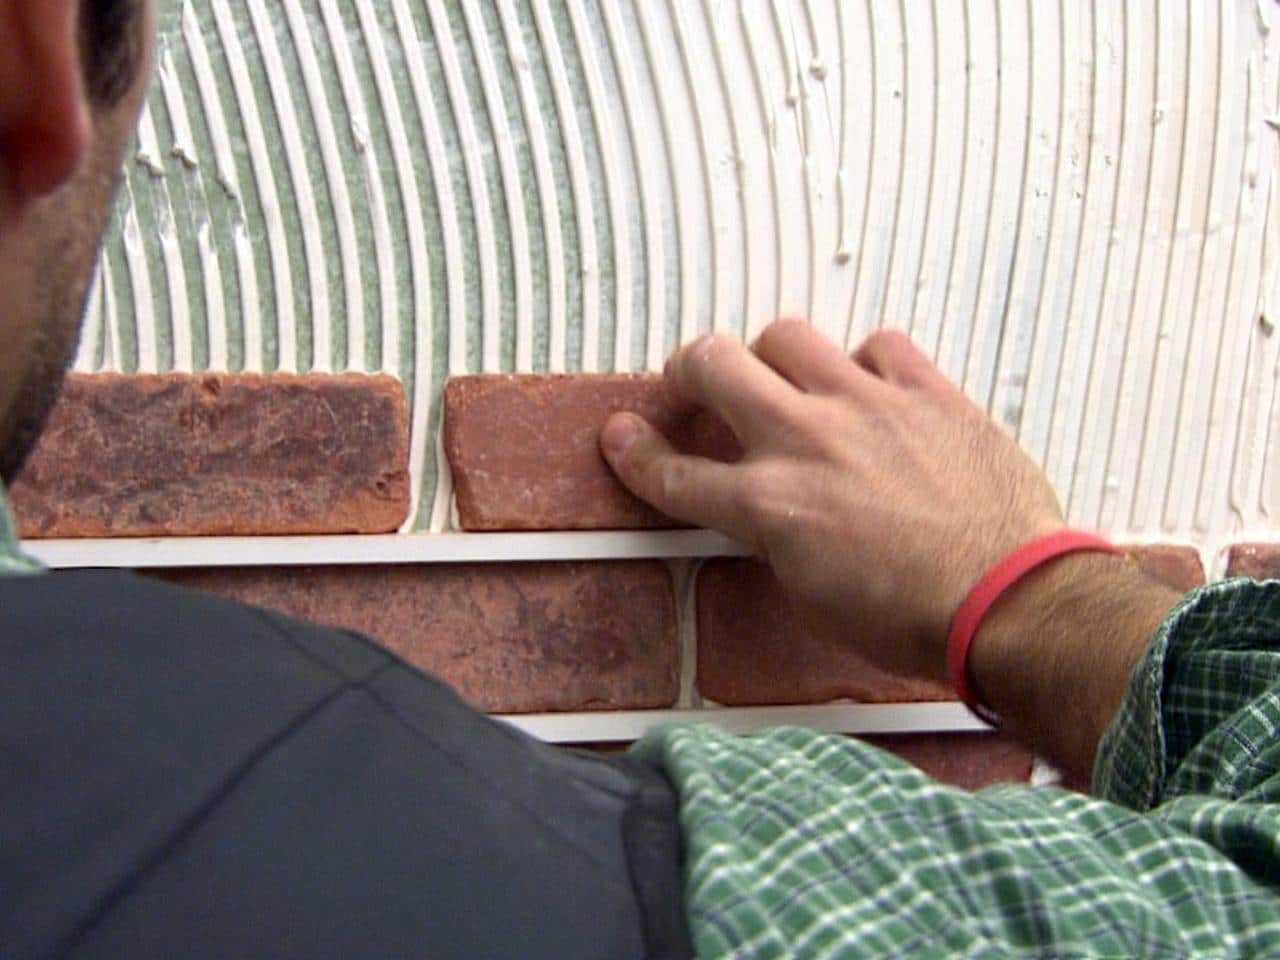
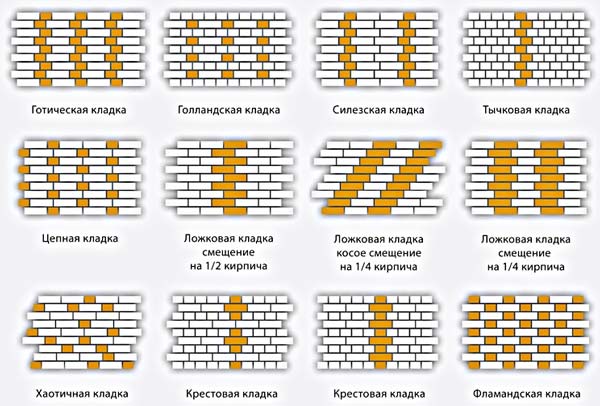
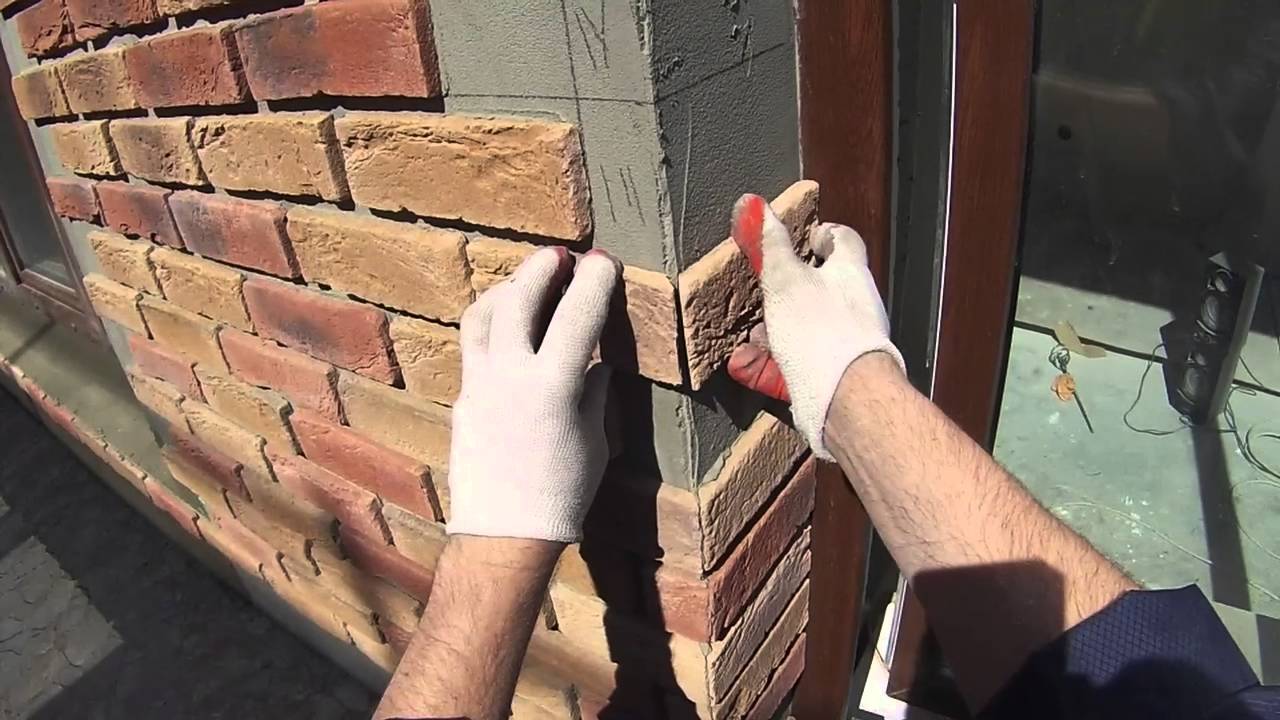
For any type of styling, it is recommended to move from corner to center. Each fragment is pressed with effort to the surface and, if necessary, its location is corrected until the tiled brick is fixed. Excess glue or mortar must be removed immediately with a rubber trowel. To make the seams the same, it is recommended to use rubber spacers. The options for laying decorative tiles are the same as for ordinary bricks. Among the most aesthetically beautiful are:
- Spoon masonry with an offset of 1/2 and 1/4. This is the traditional version found in typical homes.
- Chain masonry. It is characterized by alternation in each row of long bricks with square fragments, which are equal to half of them.
- Cross masonry. In the first row of slabs, whole fragments are laid, and in the second - their halves. The main thing is that the small pieces are located directly above the center of the large ones. This will create brick “crosses”.
- Bonded masonry. All rows consist of halves that are offset, as in the spoon version.
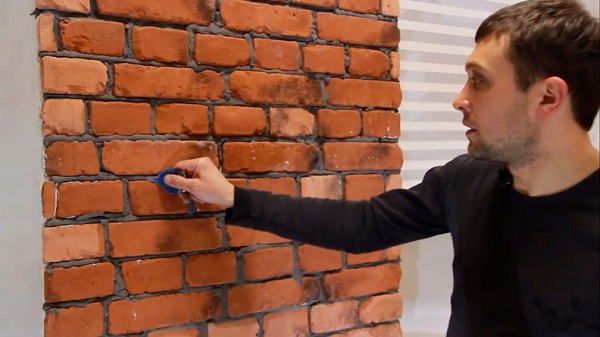
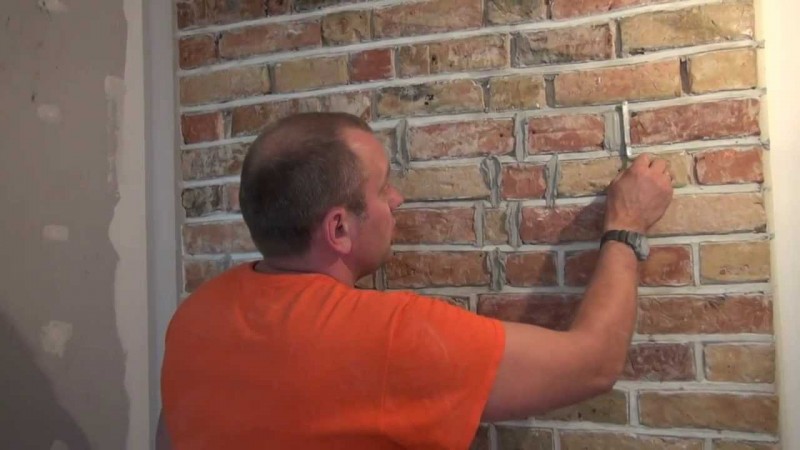
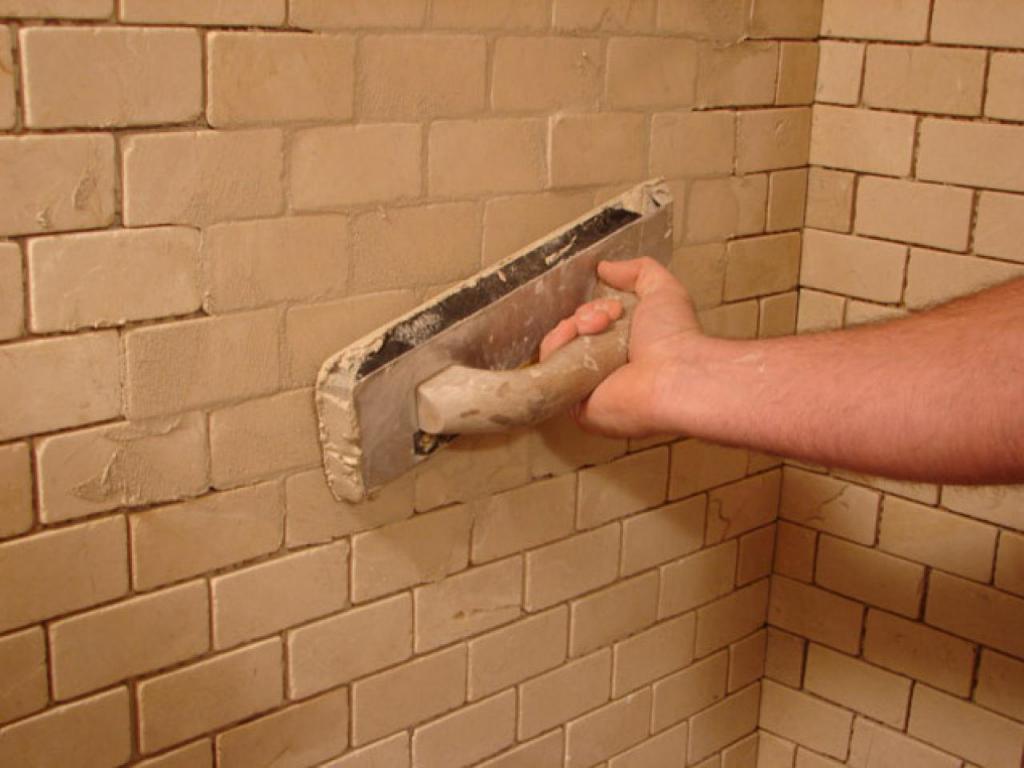
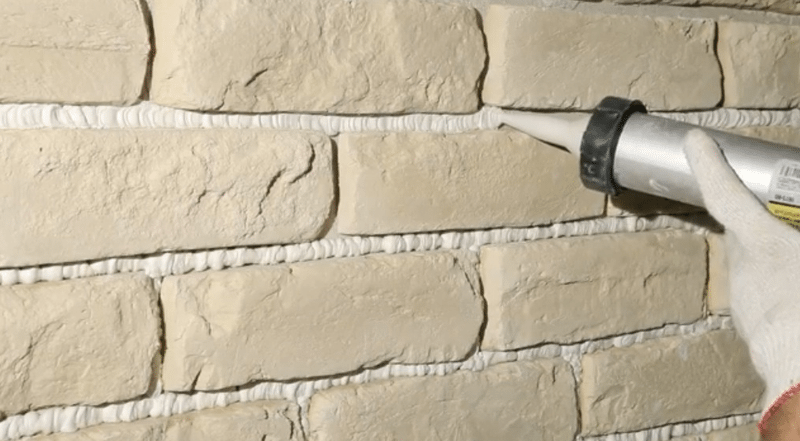
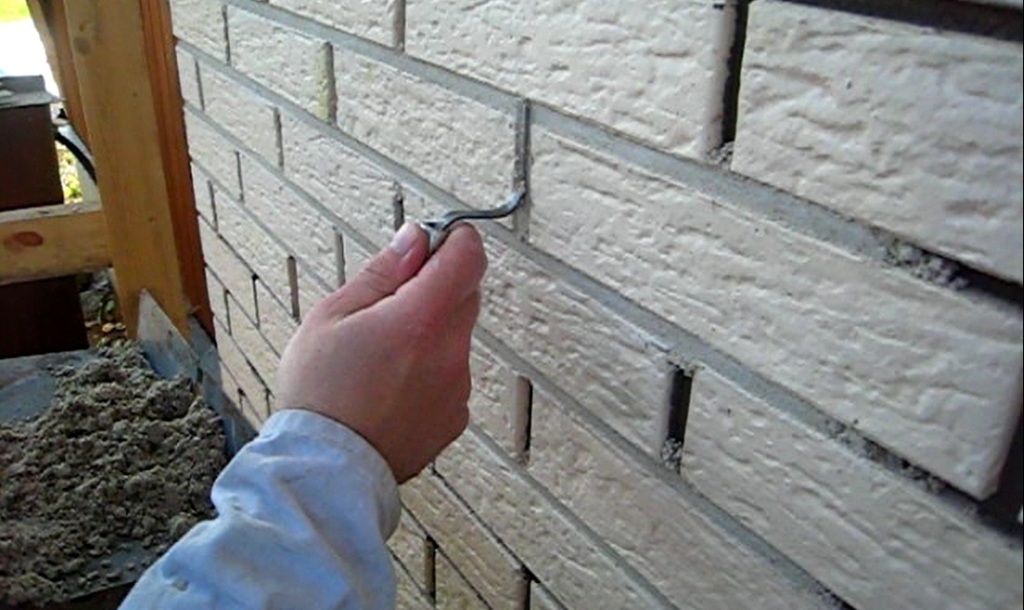
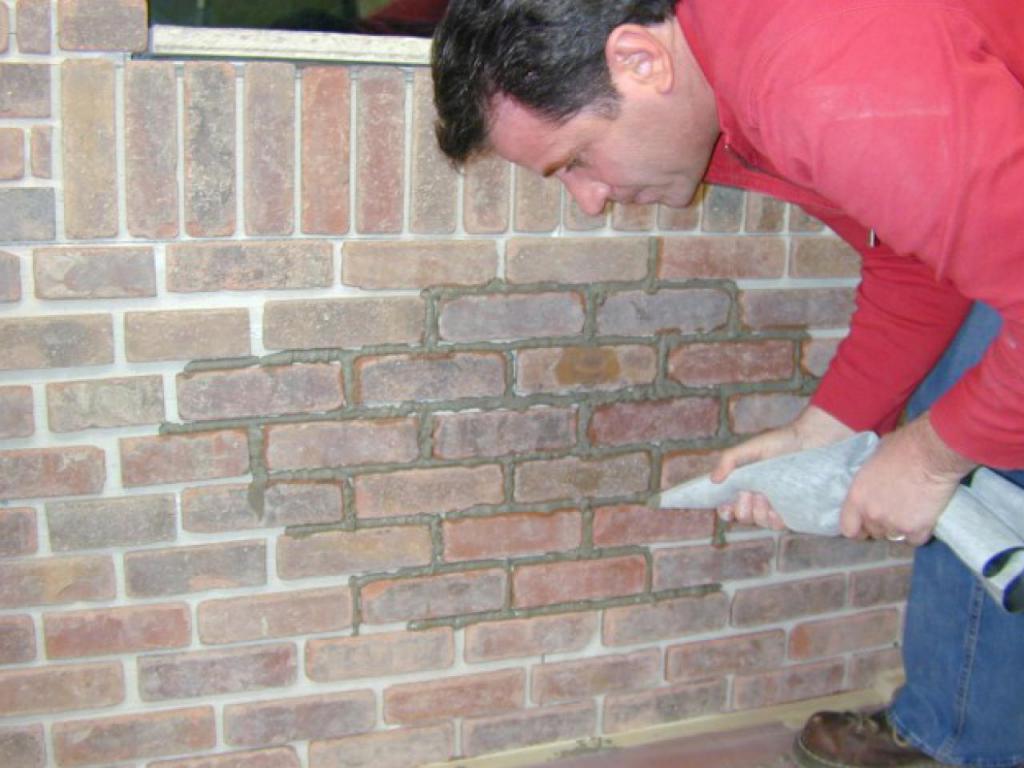
Silesian, Gothic, Flemish and chaotic masonry are also in demand. In the latter case, each brick is positioned as the designer wishes. The result can be a very original composition. After the tile is fixed, it is necessary to grout the joints so that they acquire a neat appearance. For these purposes, use special compositions based on cement or epoxy resins. After the mortar dries, its excess is removed from the tile surface with a damp cloth.
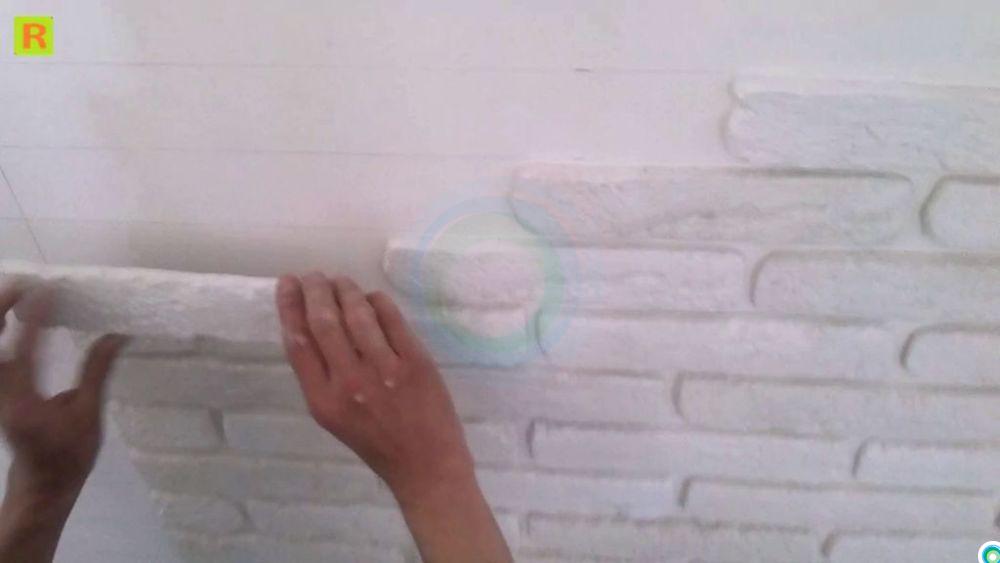
How to make Styrofoam bricks
To simulate a brick wall, you need to mark out the foam, cut out bricks according to the pattern, or make masonry seams on the sheet, and give the surface a texture. Then the decorative trim is glued to the wall and painted.
Let's take a closer look at the whole technology of decorating a brick.
Markup. If the sheets of expanded polystyrene will be glued entirely without cutting, then you need to draw brickwork on them with a marker or pencil. A cardboard template can be made to cut out individual false bricks.
For beauty decorative bricks, you can chamfer with a knife from all sides.
If the imitation of masonry is done on the entire sheet, then the seams are easiest to form with a soldering iron, the foam melts easily. With a soldering iron, they lead along the line of the masonry seam, controlling the pressure and depth. First, horizontal grooves are made from edge to edge parallel to each other. There should be a distance between them equal to the height of the brick (60 or 88 mm). Then the vertical seams are burned out and the contours of the artificial bricks are finally formed.
- Creating an invoice. To make a decorative wall look like a real brick one, you need to give it the same rough texture. This can be done with a metal bristle brush. She is pressed on the sheets, carried along the surface, creating pits and grooves on the foam. You can also emboss the bricks with a soldering iron or a lighter. This will be shown in more detail later in the video tutorial.
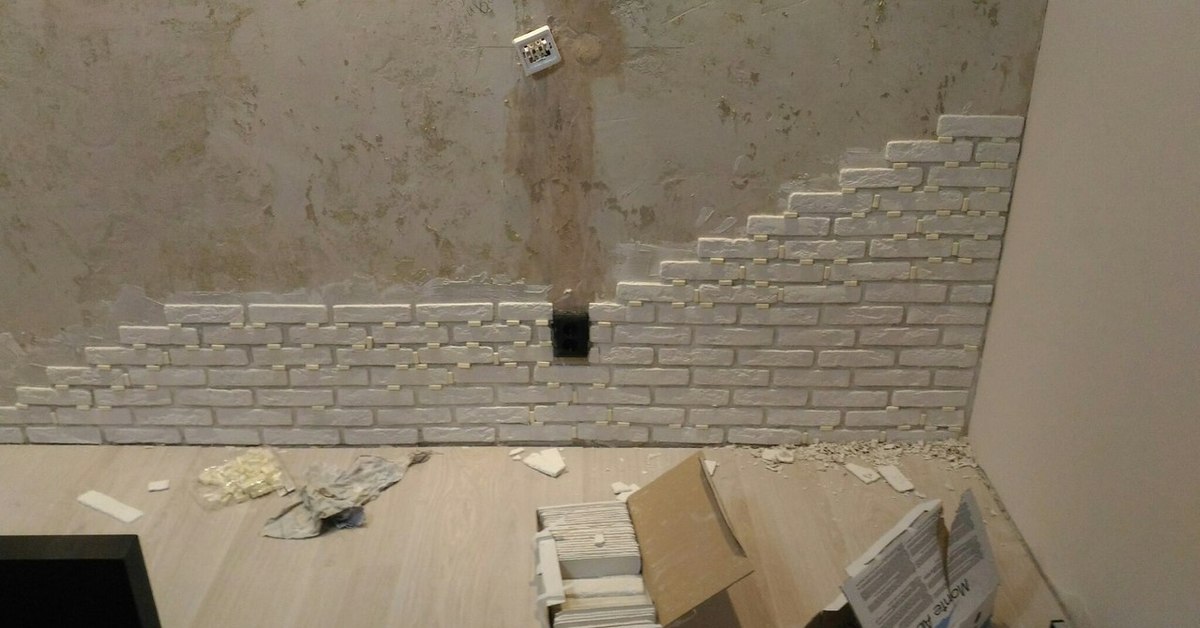
- Installation of bricks. To fix the made decor you need “liquid nails”, glue-foam or other glue mentioned above.The prepared rectangles are glued directly to the wall along a horizontal line, leaving a gap of 1 cm - a masonry seam. After laying the first row, they are shifted by half a brick to the side and the second row is glued. Then the process is repeated.
Another installation option is to imitate masonry not on the wall, but on a large sheet, for example, drywall or plywood. The advantage here is that the gypsum board lies on the floor, and it is sometimes easier to glue in this position than vertically. After finishing the decoration, these sheets are attached to the wall or frame using self-tapping screws.
Painting the wall. To complete the finish, the decorative coating must be painted. Which color to choose depends on the overall style of the room. A popular option is a pure white wall. If you want to create a brick color, you will have to tint the paint in a reddish brown shade. Artificial masonry seams can be made white or in the color of gray cement-sand mortar.
The main types of masonry
When decorating the facade, one should take into account the technical properties and external characteristics of the stone, as well as the level of personal skill and professionalism.
Varieties of facing brick masonry can be classified:
By the way the elements are distributed in a row:
front or bed - emphasis on the wide side;
spoon - attention to a narrow long surface;
butt - emphasis on the ends of the masonry element.
By decorativeness:
- stacking - vertical seams form a single line;
- Flemish - synchronization of stick and spoon methods;
- American - combination of facial and spoon technologies;
- masonry in half a brick - a shift by half a brick in the horizontal plane of the vertical seams of the bed or spoon pattern.
Some decorative types of masonry are unstable, therefore they require the care and scrupulousness of the master.
Priority activities
Laying decorative bricks requires certain components that are necessary for quality work. You will need the following:
- Glue. The brick is laid on "liquid nails" and tile adhesive.
- Special grout or simple putty. This will be needed to form the seams.
- A set of simple spatulas and a separately notched one.
- A device for cutting fragments. The choice of the appropriate tool depends on the type of product. For cement elements, you will need a grinder with a special circle, for plaster - a hacksaw with fine teeth.
- Drill with mixer attachment.
- Level and ruler.
- Paints and varnishes are purchased separately for painting the joints and the surface itself.
On a note! It is convenient to apply putty or grout into the inter-seam space with a homemade device. To do this, you will need an exceptionally strong plastic bag, which is filled with the mixture. One of the corners is cut off. This will distribute the solution in a more metered proportion.

Surface preparation
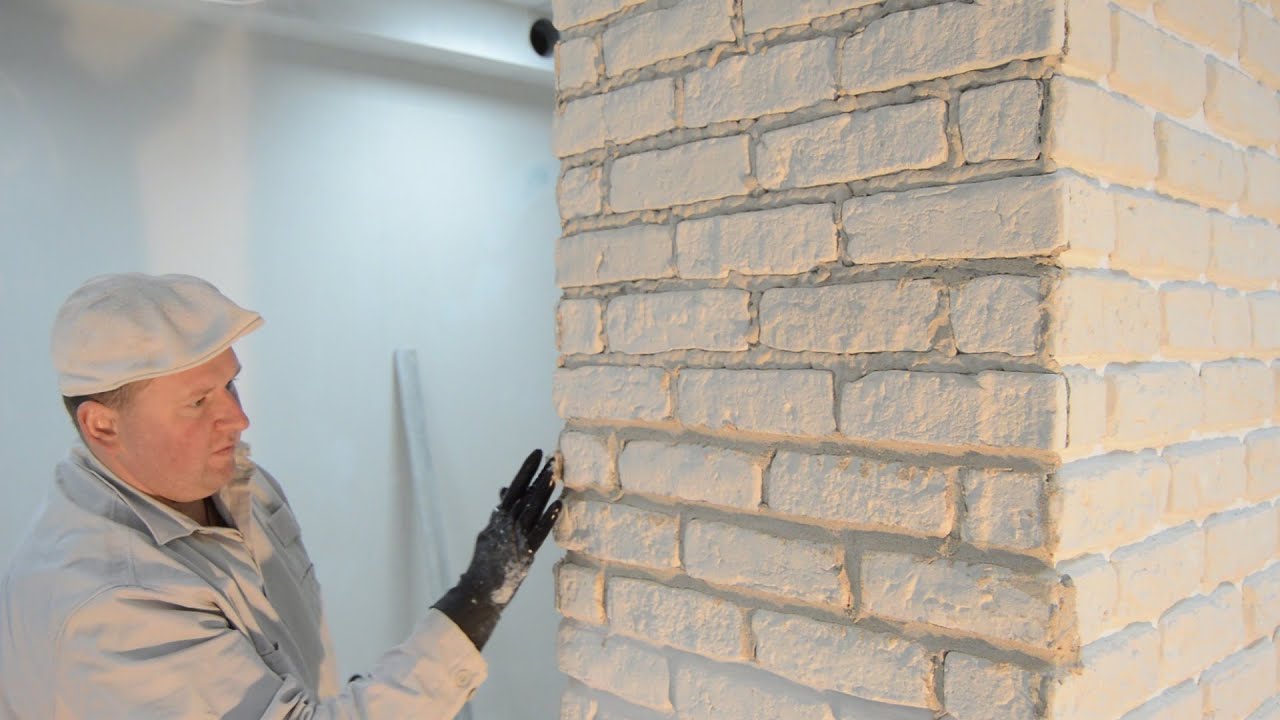
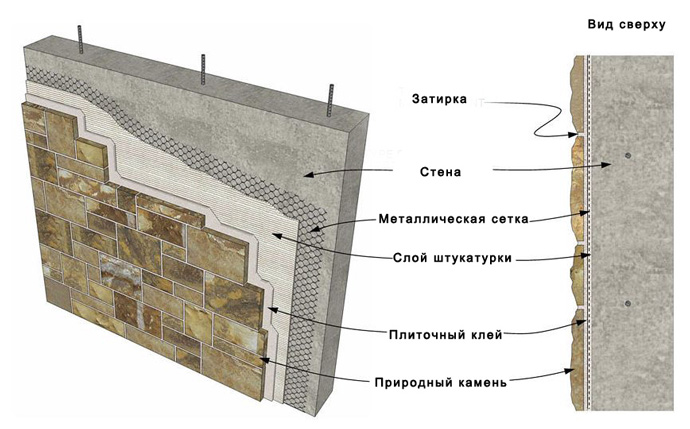
The wall needs careful preparation. The fact is that any decorative brickwork has a significant effect on the surface. In the case of using cement options, additional reinforcement is carried out.
When using a cement version of decorative bricks, it is necessary to strengthen the wall with a reinforcing mesh
The general preparation technology is as follows:
- The area selected for cladding is cleared of all unnecessary. The old decorative layer is removed.
- The plaster layer is checked for strength. Even slight crumbling or voids should not be allowed.
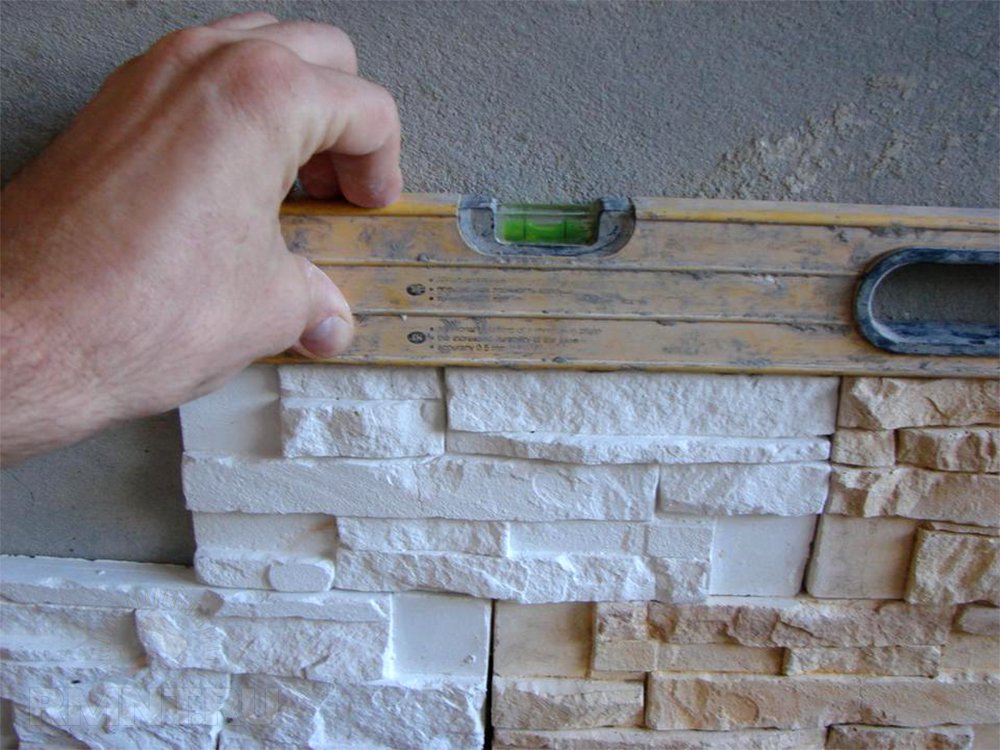
- It is required to check the evenness of the wall. The cladding allows for some irregularities that will not affect the final result.
- If necessary, a layer of putty is applied. This option must be taken into account if the laying is performed on gypsum boards. In this case, you need to take care of the reliability of the frame, which will take on part of the load.
Preparing walls for the installation of decorative bricks
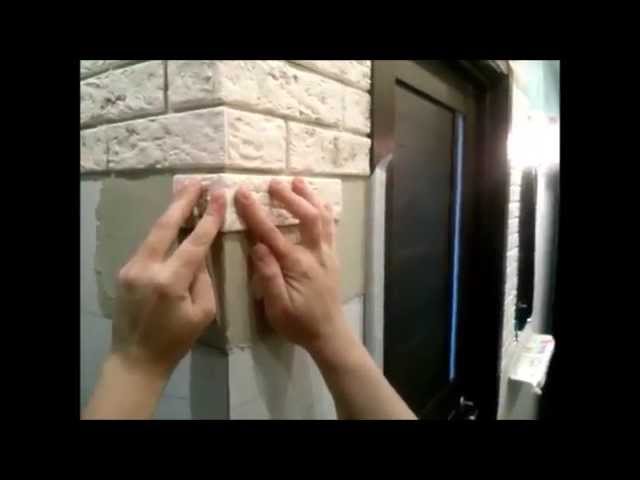
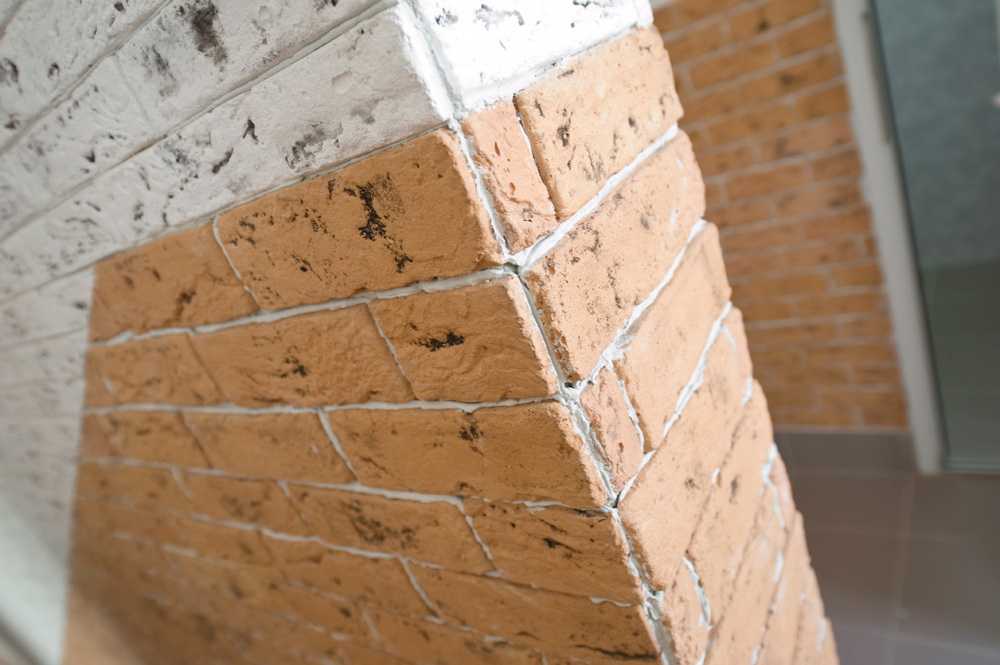
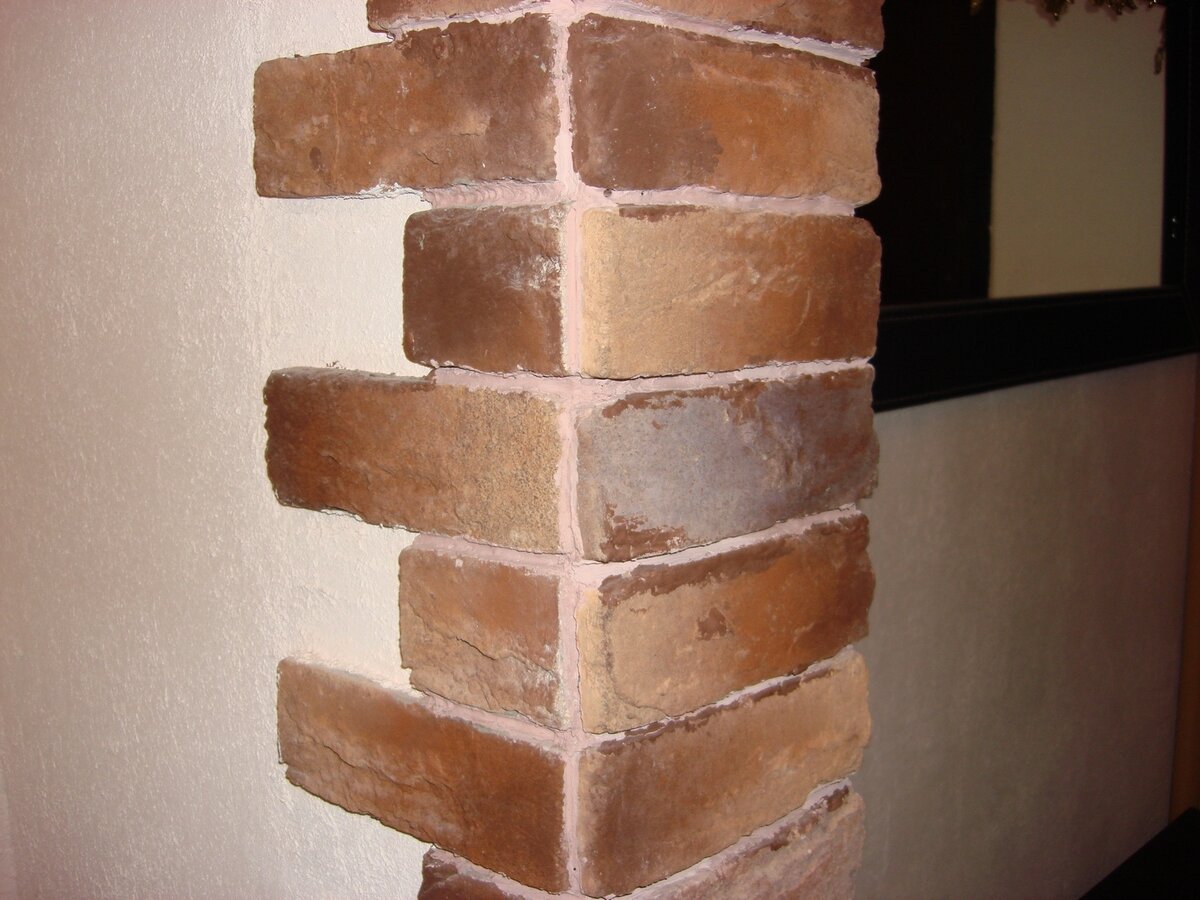
Particular attention should be paid to the corners. External and internal structural elements of the wall are displayed at a specified angle
This should not be neglected, otherwise all the drops and multilevel cropping of fragments will be noticeable.
Project creation
Decorating with decorative bricks is a responsible event. In order to achieve the most rational use of the material, as well as to create a beautiful surface, a scheme and work plan are drawn up.
You should start with a preliminary draft. It consists in creating a schematic drawing that will reflect the location of the elements. For more convenience, you can use computer programs. They help you choose the right color, create a visualization of the future room.
Before creating a brick wall, it is advisable to draw a drawing of the future masonry
The drawn up scheme is transferred to the treated surface. The size of the seams is taken into account in advance. There is no need to completely outline the wall, just outline the outline. It is recommended to carry out marking in detail when interior decoration is performed without proper experience.
On a note! The trimming of products is calculated in advance. It will not be superfluous to check the corners again, because trimming along a curved trajectory, if there is no clear perpendicularity, is an impossible task at home.
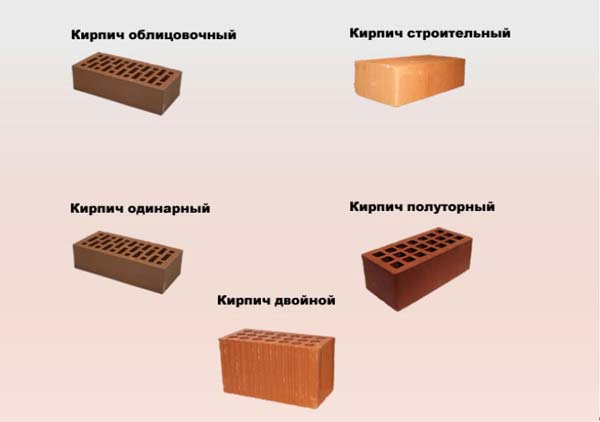
Materials (edit)
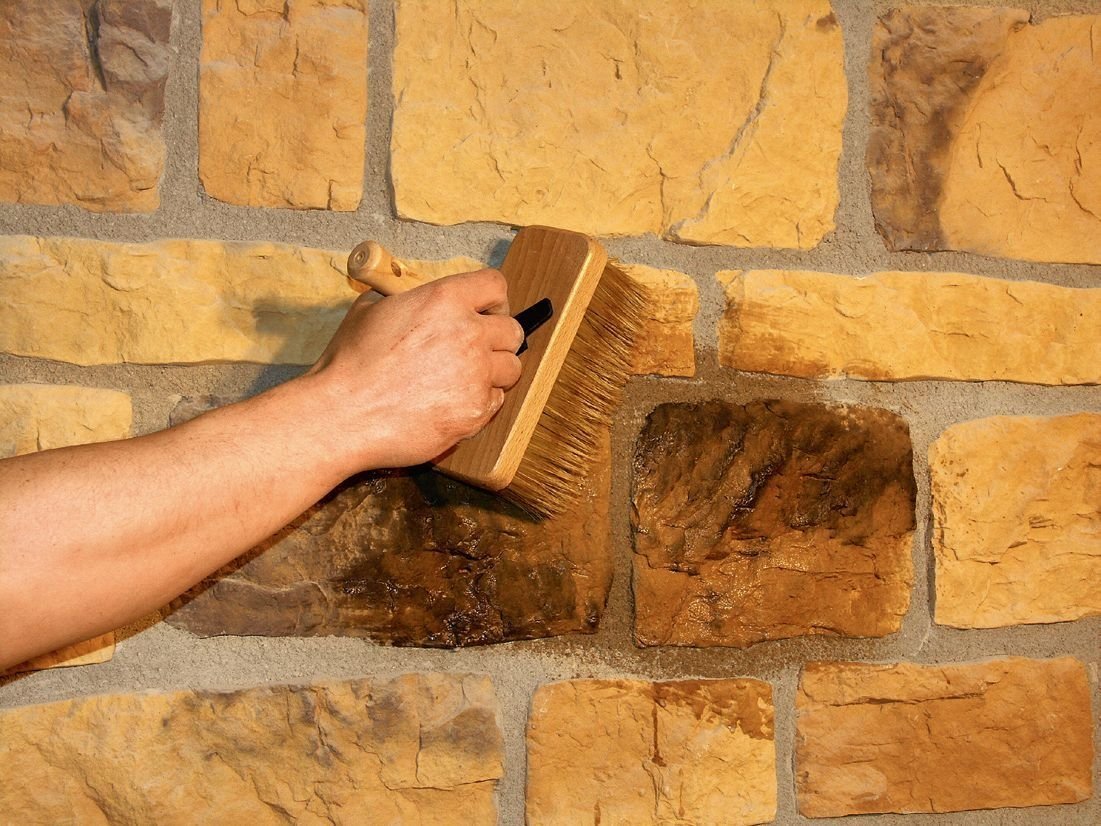
Decorative clinker bricks can be of any color. The material is characterized as strong and practical, durable in use. The option can be used both for finishing the premises inside and for finishing the facade of the building.
Everyone knows that gypsum is a friable and fragile material, although it is very lightweight and excellent for use during interior decoration. The natural color of gypsum is white, it can be changed at the stage of dilution of the solution or during installation.
Polyurethane as a material for the manufacture of decorative bricks is widely used for interior decoration.
Polyurethane is widely used for interior decoration
One of the materials for finishing a brick-like wall is polystyrene, available commercially, easy to use and often used in practice.
The most convenient and popular type of indoor decor is gypsum brick. Its cost is cheaper than other analogues, while it is stronger than polymeric materials, and its visual combination with other interior items is more harmonious. If there is a desire to create on your own, then it will not be difficult to make gypsum tiles: mix water with gypsum in the correct proportions, add PVA glue, prepare molds for pouring the solution and wait for it to dry. To make colored gypsum, you just need to add a coloring pigment to the solution.

The most popular type of room decor is gypsum brick.
When laying decorative bricks, you should choose the right adhesive mixture. Ordinary cement glue is used for tiles. Silicone sealants provide fast adhesion to virtually any surface.
To decorate the facade of a building, the adhesive mixture must be resistant to frost and temperature changes, otherwise the solution will flake off along with the decorative coating
It is important to always monitor the storage conditions and shelf life of long-acquired adhesive mixtures so that their useful properties are suitable for use.
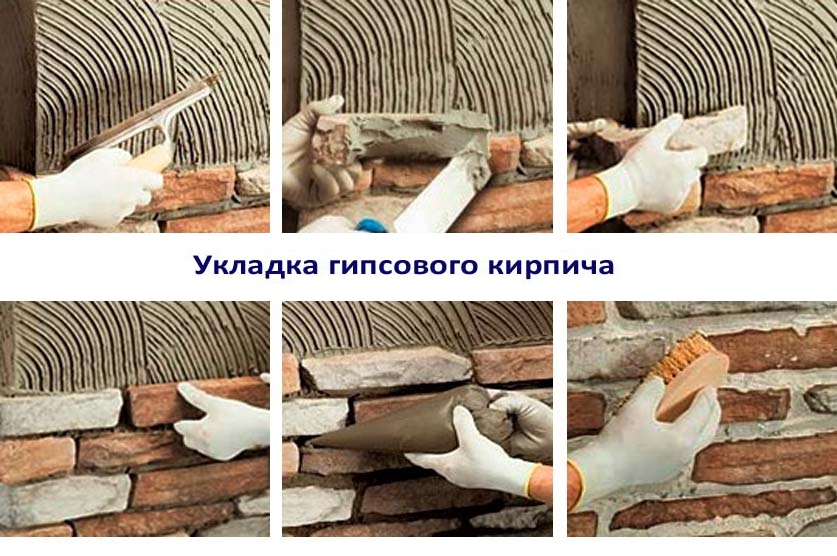
Laying gypsum bricks with your own hands
Styling gypsum bricks
If you listen to some of the recommendations of experienced finishers, the work will be quite simple:
- Before laying, do not forget about the preliminary preparation of the walls: the imposition of plaster, putty, primer.
- The range of gypsum tiles on the market is quite diverse. It remains only to calculate the required amount of material, select it and take it with a small margin.
- In order to lay the gypsum brick, you will need an ordinary white tile adhesive. The consistency of the glue must be brought to a thick and viscous mass.
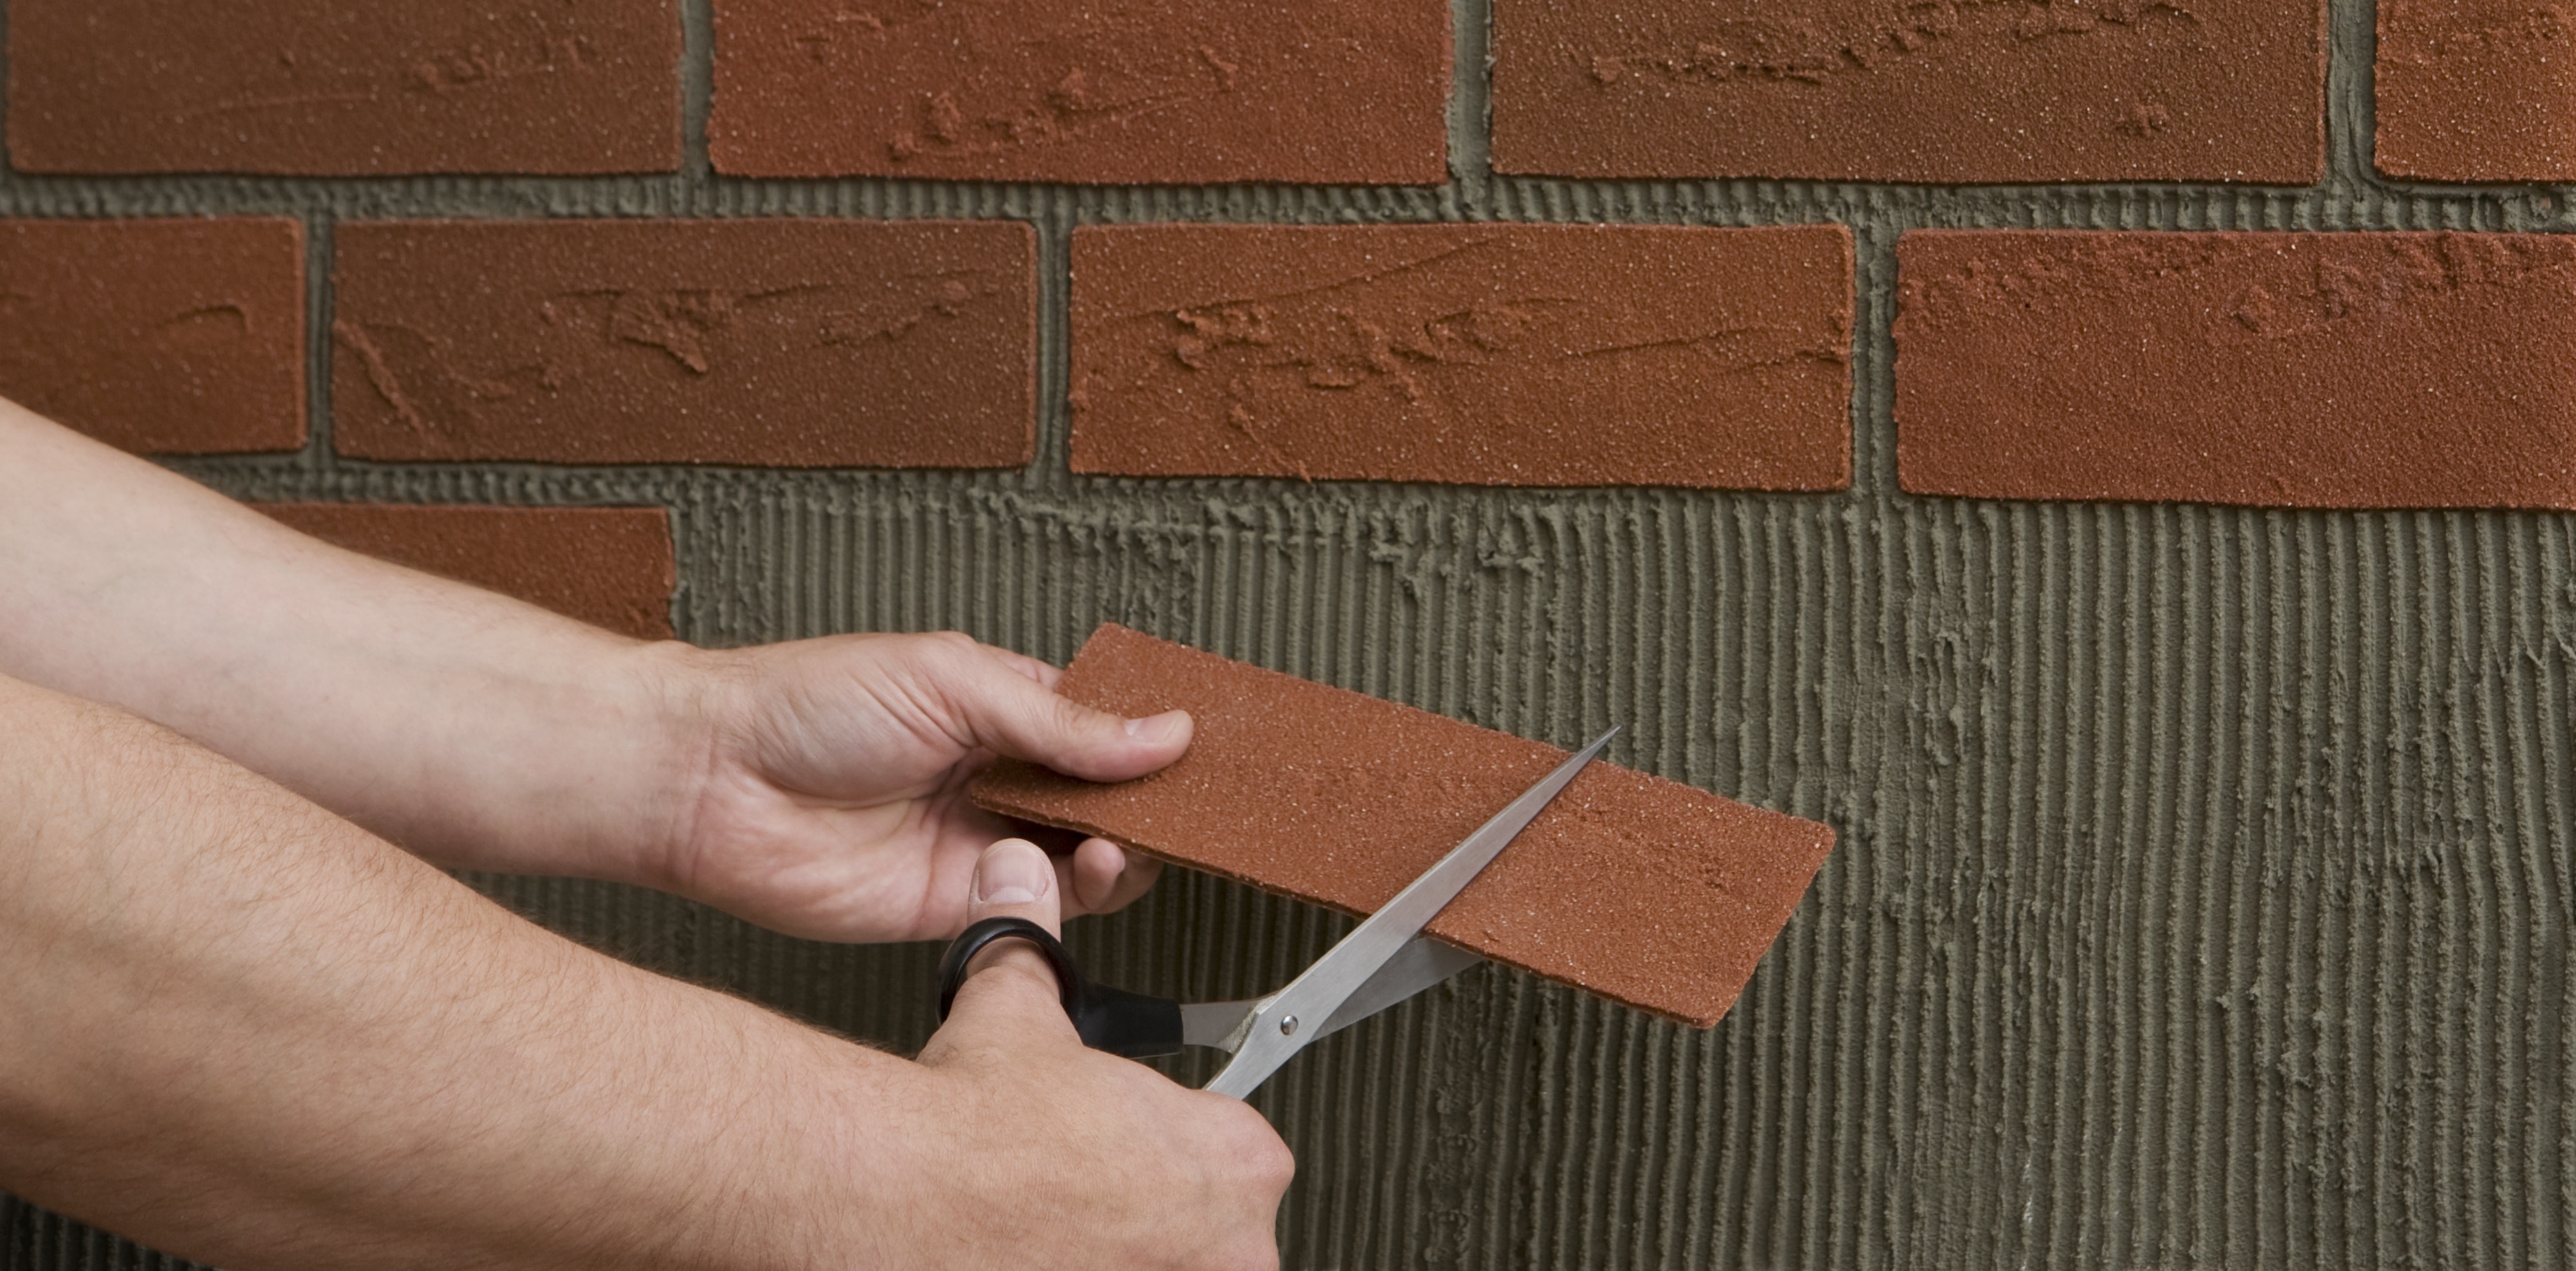
- You can trim the tiles with a metal hacksaw or a file.
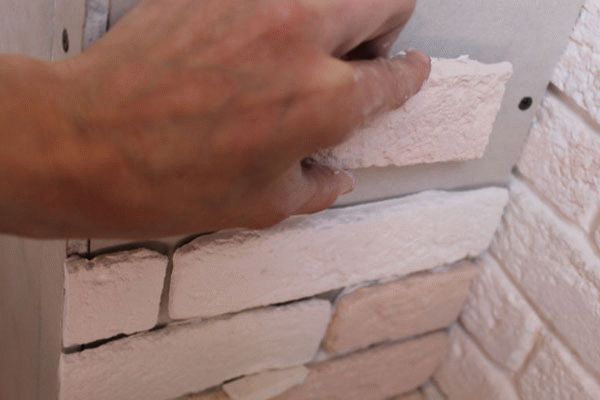
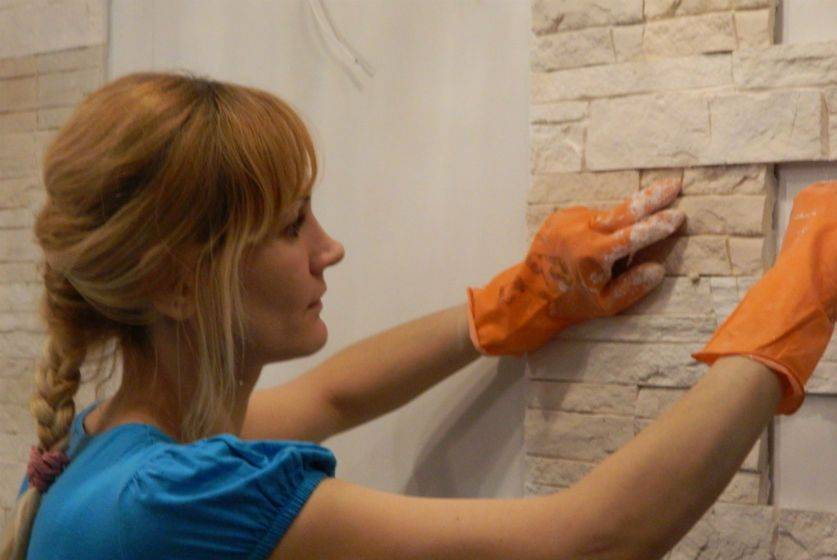
- Wall decoration is done from the bottom up, the glue is applied not to the wall, but to the tiles. It is recommended to remove excess glue immediately.
- The material needs to be firmly fixed and dry. This can take about 24 hours.
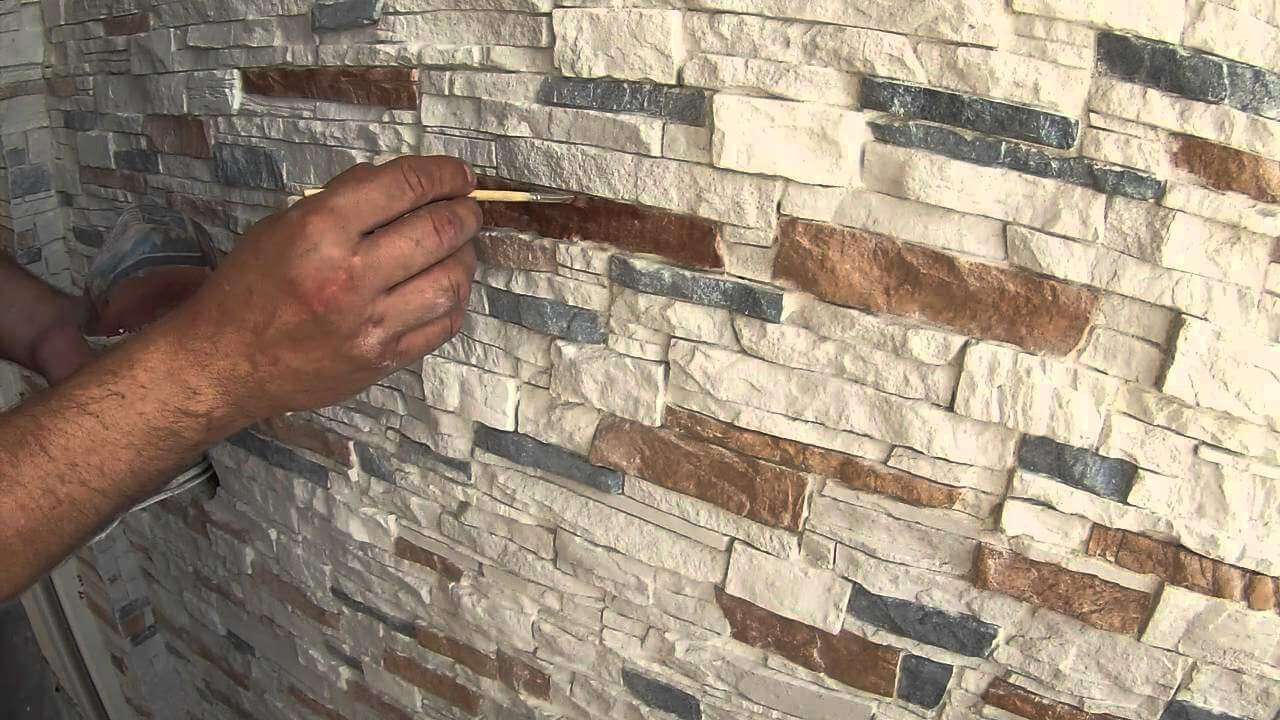
- It is best to varnish the coating with stone mortar. The choice of color or shade of varnish depends only on you. There should be at least two layers of solution application.
- The seams are necessarily processed, all defects are removed and masked.
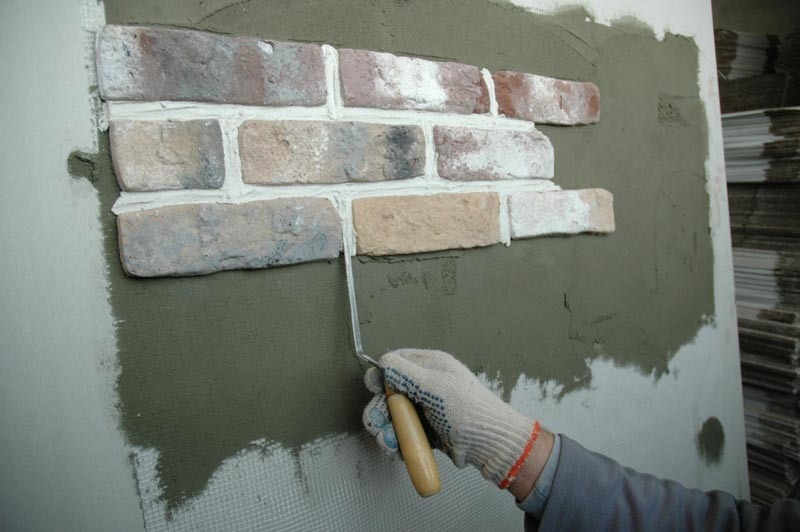
Styling process
Laying gypsum tiles, made under a brick, begins with diluting the solution and choosing a layout for the elements. The principle of staggered installation is often used.
Pay attention to the back side of the plaster, if its surface is embossed, the glue can be applied with a straight trowel, and if it is even, only with a notched trowel.
How to properly glue decorative tiles with your own hands:
- Apply a thin layer of glue to the wall. It should be enough for stacking 4-5 elements.
- Apply some mortar to the back of the tile as well.
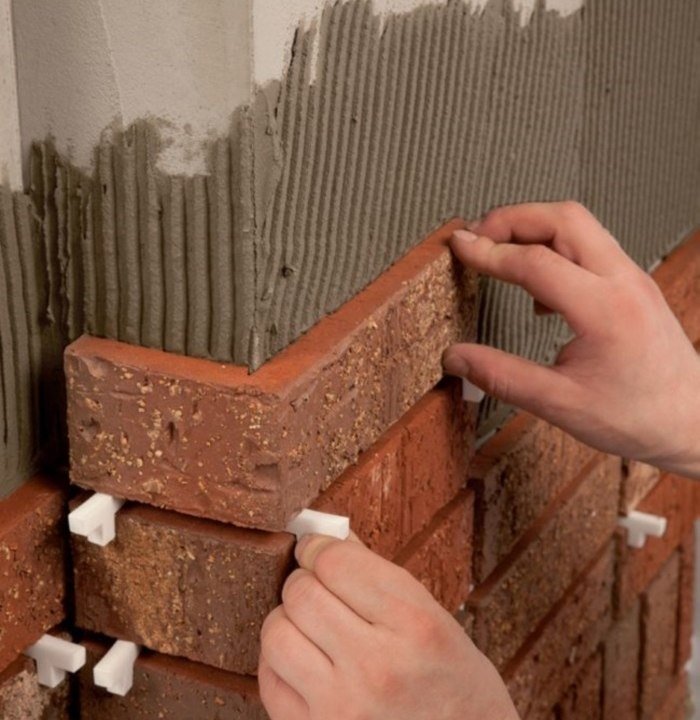
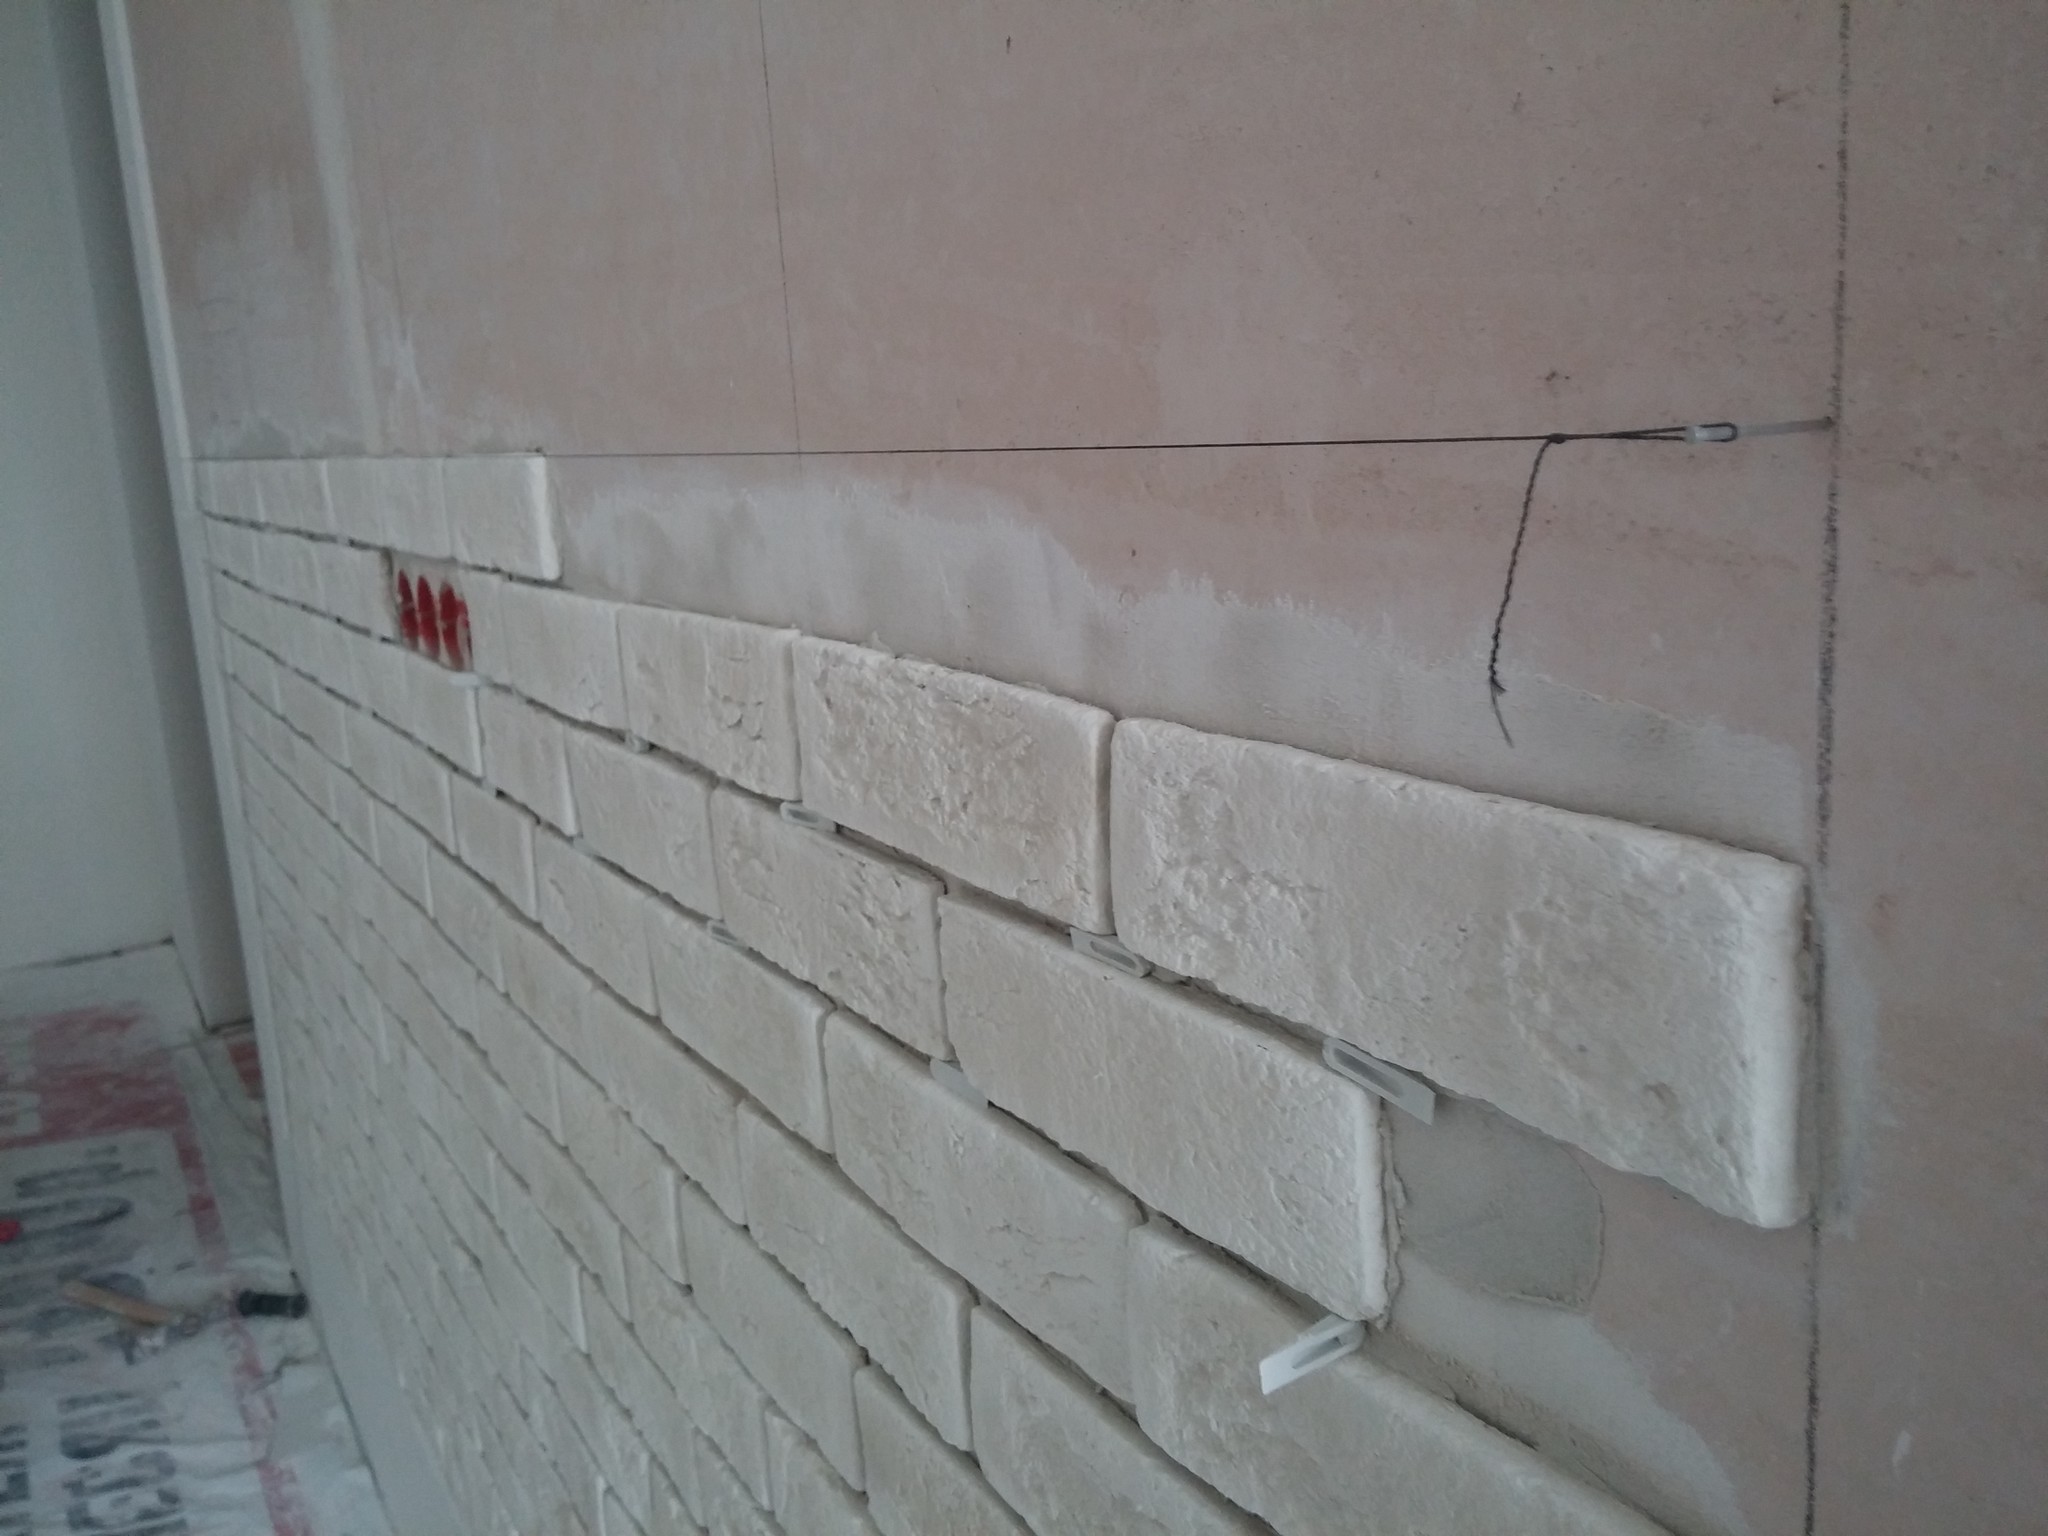
- Press the plaster against the wall and correct its position. Use plastic spacers to align the seams.
- Each row should be laid with an offset of half an element.
- The solution entering the seams must be immediately removed with a rubber spatula and its remnants washed off with a brush dipped in clean water.
You do not need to dilute a lot of solution, if you overexpose it, it will begin to set and it will become impossible to work with it.
With proper glue application, the tile will hold up well for years.
Varieties of material
Brick-like decor tiles are made of different materials. Some turn out to be durable, while others have a more presentable and unusual look. The main classification includes five types:
- Ceramic tile. A traditional timeless option that has stood the test of time and has shown excellent results in terms of durability.
- Clinker. A frost-resistant material that is often used for finishing the facades of houses.
- Gypsum tiles. A beautiful material that can be adjusted at the manufacturing stage.
- Concrete tiles. It is made according to the technology of pouring a liquid composition into a mold until it is completely solidified. Concrete is strong, durable, easy to paint, but very "cold" the room. In general, it refers to materials for rough finishing and is used to create another type of tile - paving.
- Flexible. An innovative option that has a small thickness, but at the same time reliably protects the wall surface.

Not only these materials are used to create decorative bricks. Various solidifying mixtures are used, which can be made from natural, synthetic components.
Flexible tiles
Flexible tile really bends well and its name is not at all a publicity stunt to lure buyers. In terms of the degree of plasticity, it resembles foam rubber. The material is made of sand and acrylic with the addition of pigments. The main advantage of flexible tiles lies in the ability to lay in corners without violating the integrity of the fragments, that is, they are simply bent and fixed on the wall. When it is necessary to cut off some part for finishing the edges, the material is easy to cut. Flexible tiles faithfully imitate brick and reliably protect the wall surface. It can be used as a finishing material and for decorating the facade of a house, but the difficulty in removing dirt from the surface becomes a serious obstacle to such decoration. Flexible tiles are environmentally friendly and non-flammable, but they cannot be treated with alkaline detergents.

From plaster
The option is popular due to its cheapness, but in terms of quality it is much inferior to ceramics and clinker. Gypsum tiles can be made by hand, having previously purchased molds for pouring. The surface of each fragment will have to be treated with a special composition. Unfortunately, the protective layer will not be able to save the material from the damaging effects of moisture for a long time. In addition, any mechanical impact (up to a blow with a fist) will cause the fragments to split. Plaster is beautiful but completely impractical. It can only be used as a decoration for interior decoration in those rooms where the air is always dry. Due to the fragility of the material, its surface, after production, can be decorated with cracks and roughness, which are characteristic of real brickwork.
Clinker
Clinker belongs to bricks. It is based on a mixture of refractory shale clays and feldspar, which become incredibly hard after firing at ultra-high temperatures. The original name was given to the material by the Germans because of the special sound that the elements emit when they collide with each other. Clinker tiles are universal and are used for both external and internal finishing works. The material has all the advantages of ceramic, but it is stronger and more durable.

Ceramic
Ceramic tiles are no different from the usual tiles that are used to decorate kitchens and bathrooms, except for a rectangular brick shape, not a standard square one. The material is made from a special kind of clay, which is mixed with quartz particles, pigments and carbonates. Ceramic tiles are relatively lightweight, retain their color even in constant contact with sunlight, and do not react to changes in humidity in the room. The material is durable and durable. Ceramics can have different textures, but matte and glossy surfaces remain the most popular options. The color range allows you to choose tiles for a specific interior gamut.
Required tools
The most popular decorative stone today is decorative brick. it is lighter than natural stone and more stable.
Decorative brick laying does not require complex equipment. You need to prepare the following tools:
- construction tape;
- metal two-meter ruler;
- pencil;
- brush;
- hand saw;
- twine;
- level;
- putty knife;
- brush.
For global wall cladding, you need a circular saw and sandpaper to clean the sawn pieces.
Different types of glue are used for interior and exterior work. Outdoor adhesive is available as a dry mix and sold in bags or as a ready-to-use paste. Joints can be made with different types of glue.
In the cladding, angular and planar types of decorative bricks are used. For a flat surface, a planar view is required, and to veneer the corners of the walls, corner elements are taken.
Laying scheme for decorative stone. When laying natural stone, it is necessary to reinforce the wall.
To begin with, the coverage area is calculated. To do this, you need to multiply the length of the surface that is supposed to be veneered by the height. From the result obtained, the amount of the area that will remain uncoated (doors, windows, decorative inserts) is subtracted.
The number of required corner elements is determined by measuring the height of the inner or outer corners to be clad. Then, the area that will be covered by the corner elements is subtracted from the total coverage area.

Be sure to add 5-8% of the brick, taking into account possible damage, selection and trimming.
Gypsum tiles for interior decoration under a brick: advantages and disadvantages
Gypsum is a lightweight material that, if necessary, takes the required shape, structure, relief.The use of this material in the decoration of the interior space of a room is a simple, materially feasible and physically feasible task.
Advantages of plaster stone finishing inside the building:
- A wide range of products that differ in texture, price, size and appearance.
- Relatively low pricing policy.
- Natural formulations.
- The ability to customize the finished tiles to the surface features.
- Simple design, wall mounting.
- Light weight of the finished product, which allows it to be used on any surfaces without the risk of wall deformation.
Among the disadvantages are such features as moisture absorption, lack of resistance to mechanical damage and crumbling. However, such disadvantages are insignificant, and during operation the material will not require labor-intensive maintenance. If necessary, you can replace damaged broken tiles with new ones without damaging the integrity of the wall.