Types of wall panels
The first thing to look at is the shape. They are produced in the form of slabs, sheets or strips.
The latter can often be seen in bathrooms and hallways. For the kitchen, plates or sheets are chosen. As always, it all depends on the wishes of the owner. The material is another matter. In this regard, the variety is simply enormous. Popular options are below.
Metal
Features: high cost, heavy weight. Not everyone can afford to use such products in the kitchen. True, the aesthetically pleasing option is not very attractive. Stainless steel is difficult to clean and may tarnish over time. Whether it makes sense to use them for home, everyone decides for himself. But their main advantage is strength and durability.
Tempered glass
Many consider this to be the ideal solution. Installing a wall panel in the kitchen will not be cheap, but glass surfaces are resistant to temperature fluctuations, strength and durability. They are not afraid of moisture, and all impurities are quickly cleared. You just have to regularly wipe the walls so that smudges are not visible.
Glass is a stylish and modern material. To improve the decorative properties, drawings and ornaments are applied to the glass. The matte pattern on the glossy glass surface will emphasize the taste of the owners.
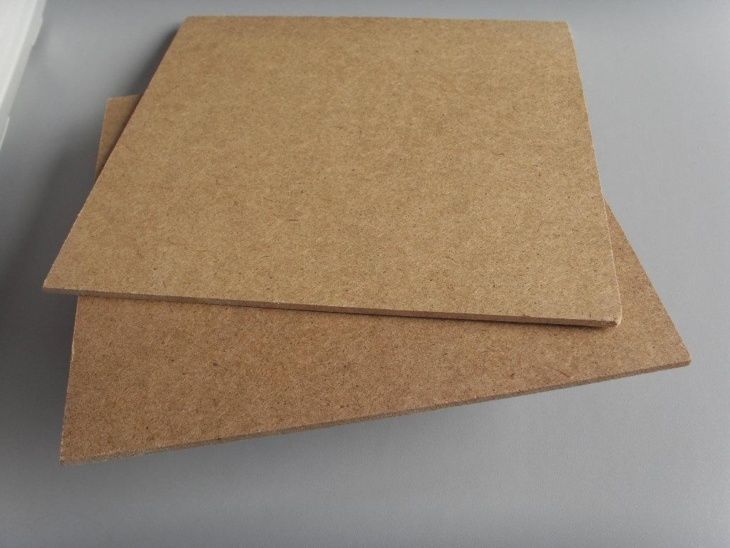
MDF
Not a bad option, which is distinguished by its density and strength. No special care required. The material is made of wood fiber, so it will not harm those living in the house. MDF panels for wall cladding can have images and drawings, there are laminated options. Mold and mildew will not form on the surface.
Plastic products
One of the most popular options. PVC is a cheap and practical material. Yes, it does not have the same strength as metal, glass or MDF, but this is not necessary. The walls are rarely subjected to mechanical stress, nothing falls on them, as is the case with the floor. But installing plastic panels is a simple solution. Even a beginner can handle this job. The work is done quickly, and the result will not be upsetting.
Materials are sold in the widest range, colors, sizes, textures, etc. The panels are lightweight, they are not afraid of moisture, they can be easily cleaned. With good care, the material will last for decades.
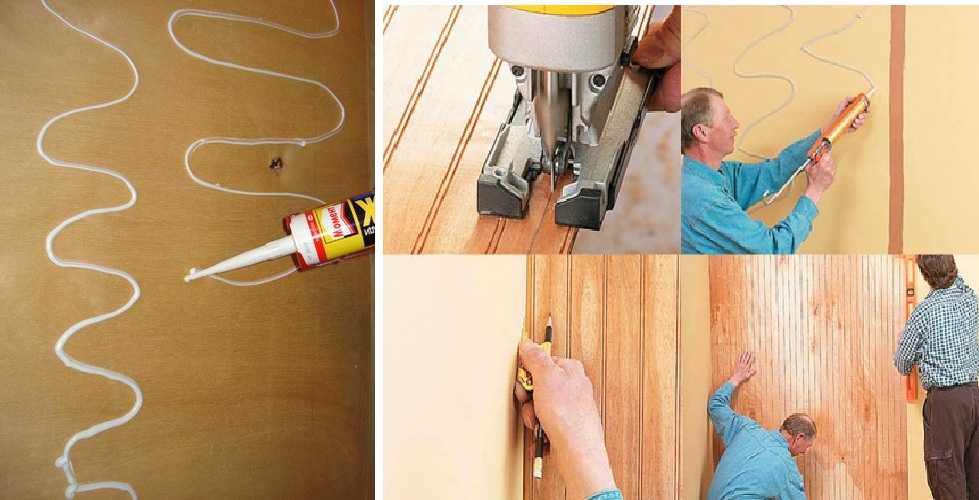
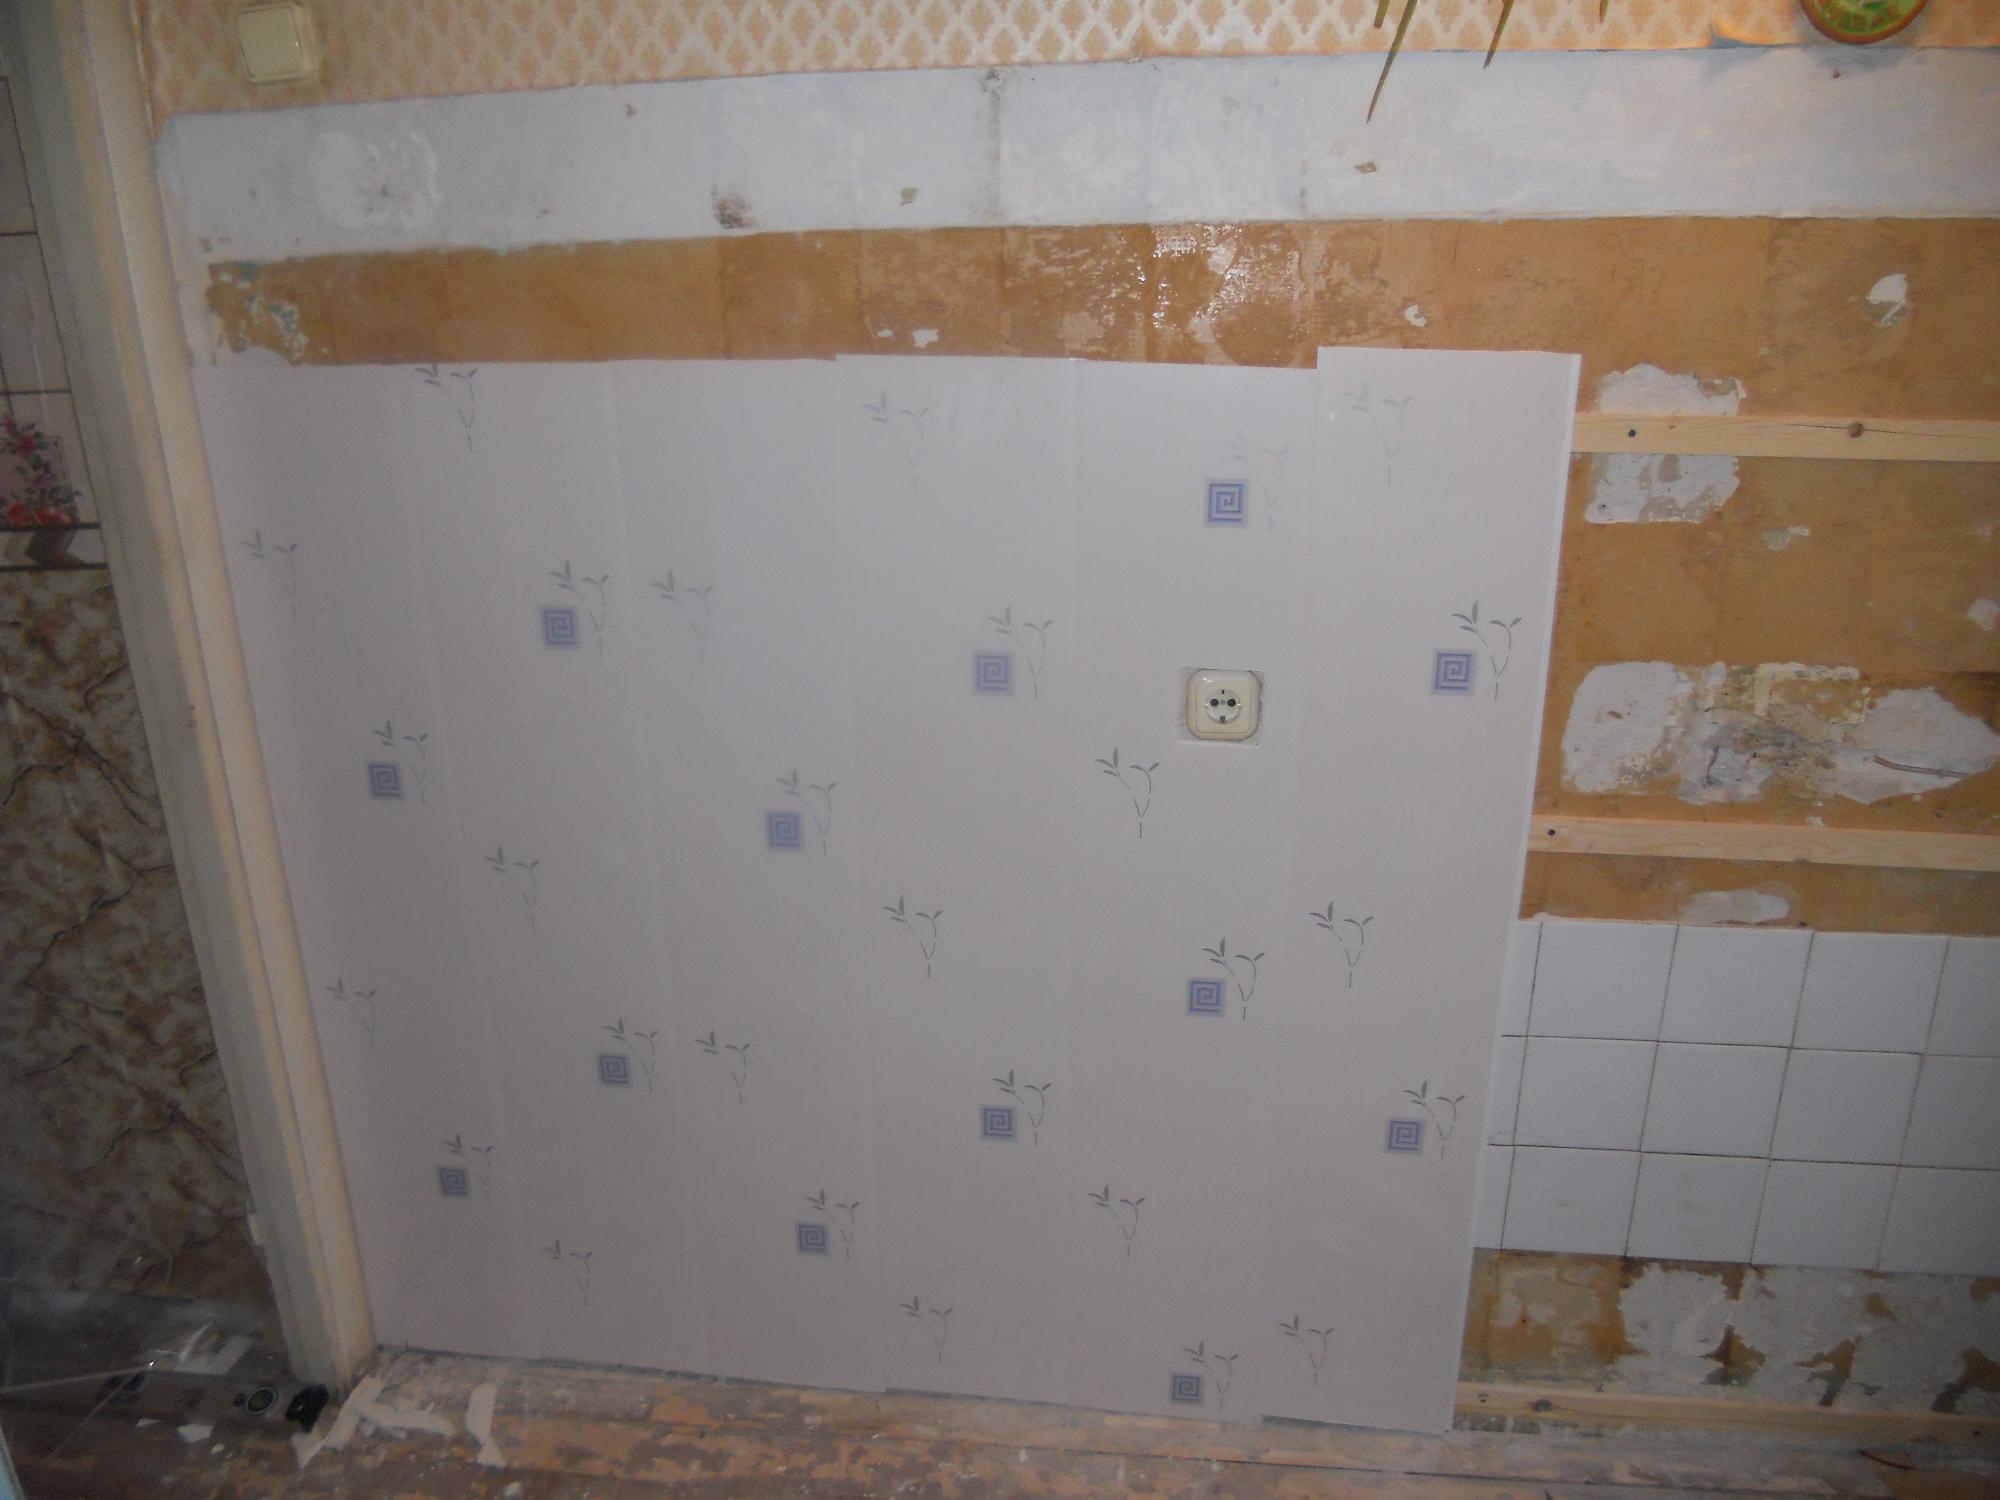
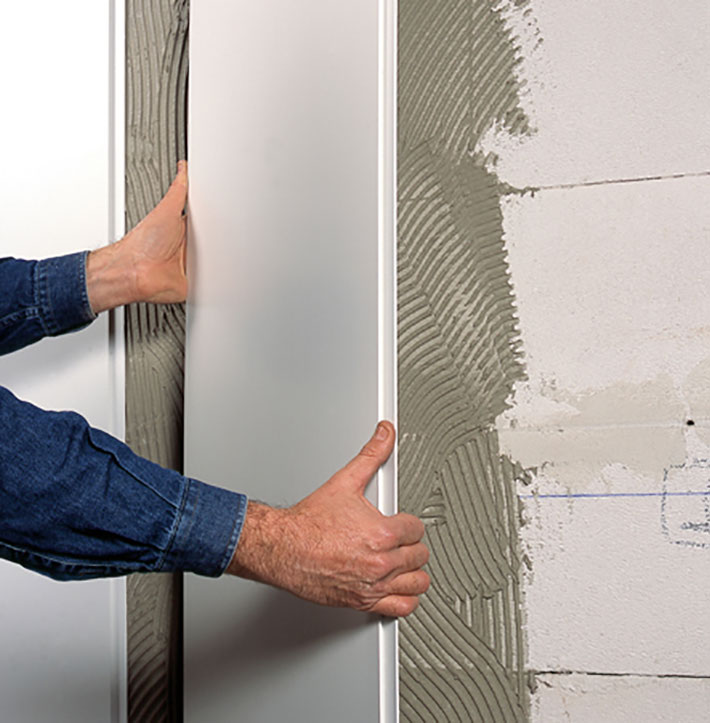
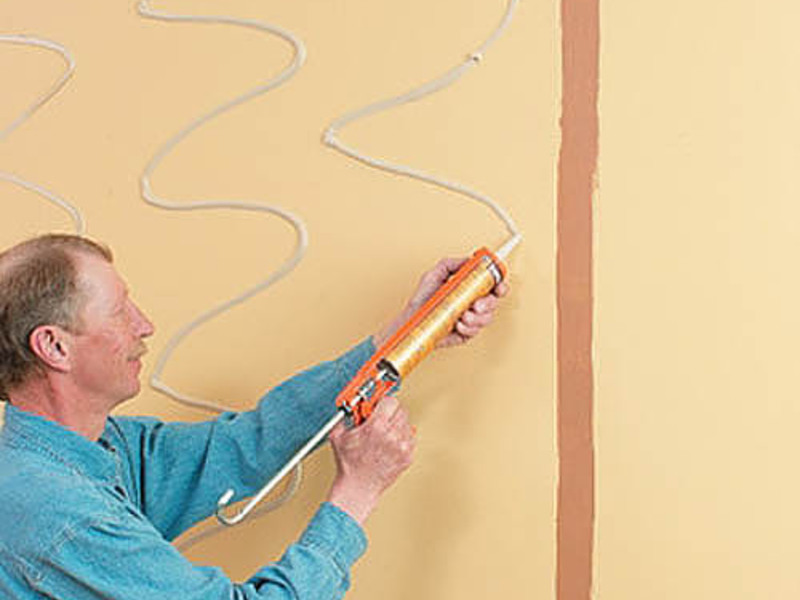
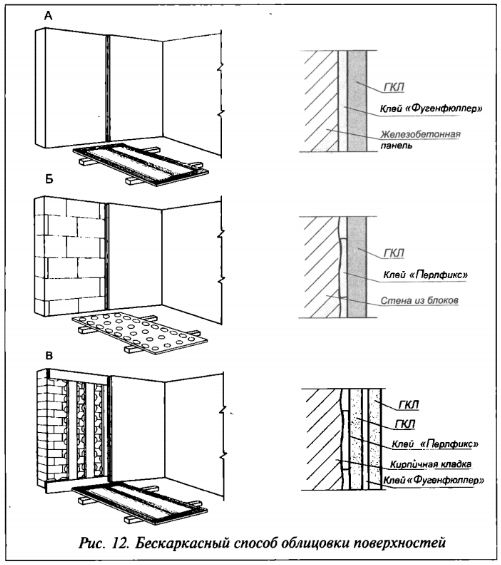
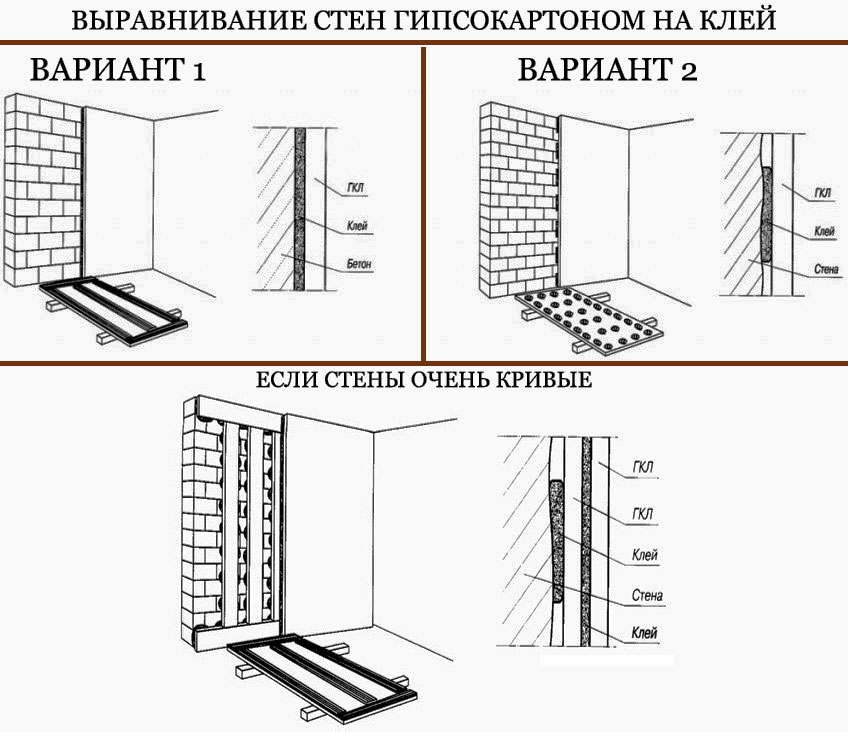
How to fix fiberboard wall panels
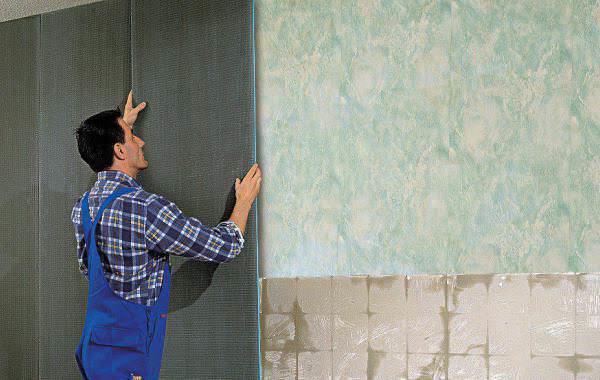
You are incredibly lucky and the walls in the room are flat. In this case, you can fix the sheets directly on them using special brands of fast-setting glue, "liquid nails" or self-tapping screws.
Fastening panels - glue is applied to the wall
If the curvature of the walls does not allow doing this, you will have to use a lathing made of a wooden beam or a mounting profile for leveling and only then fix the fiberboard panels.
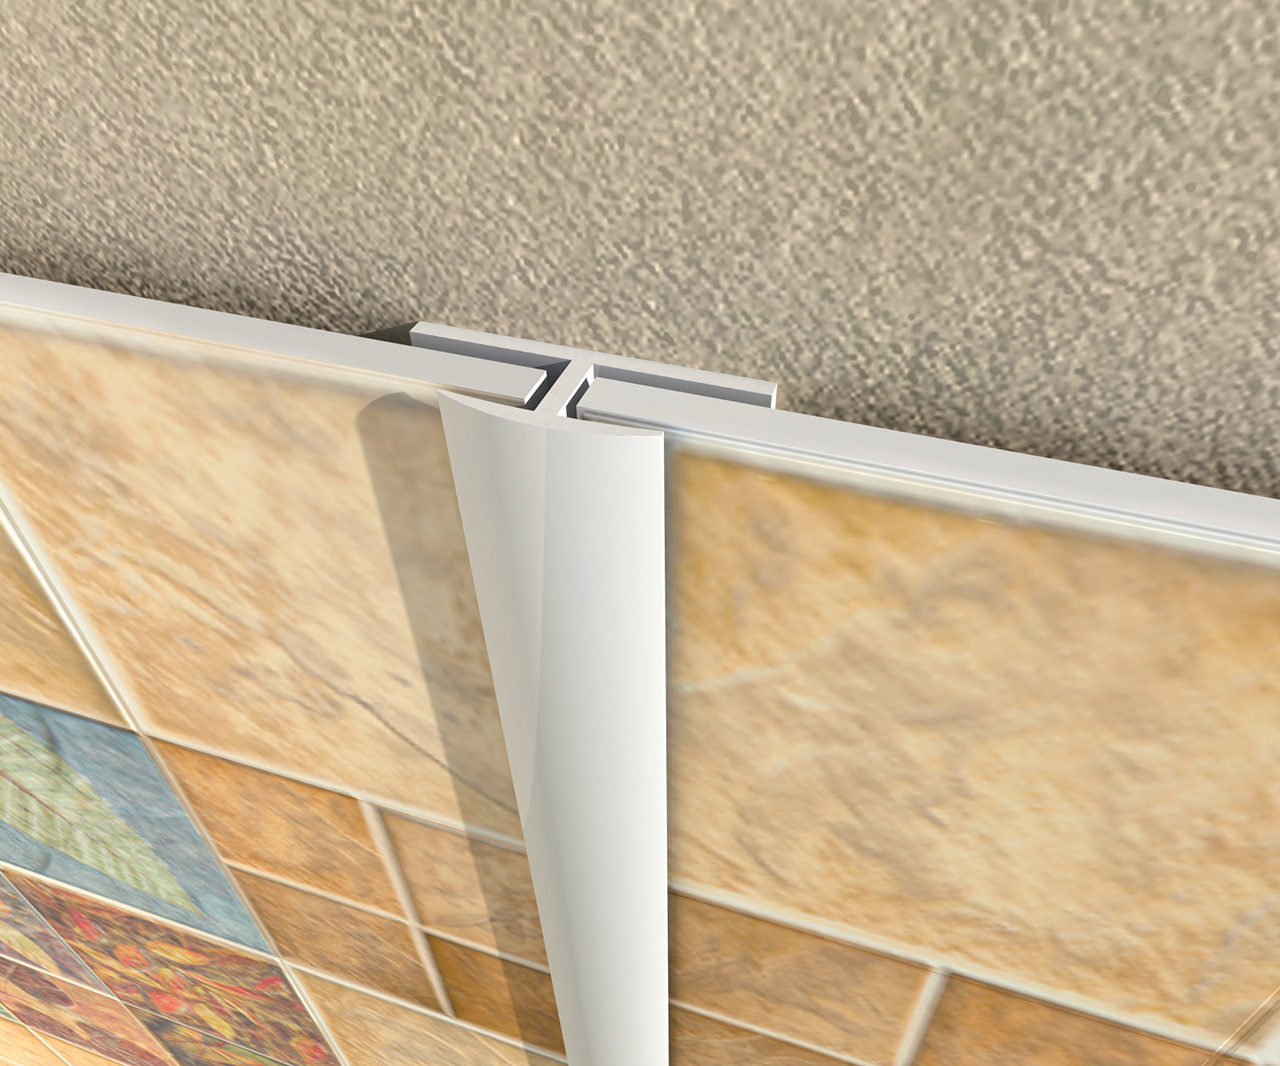
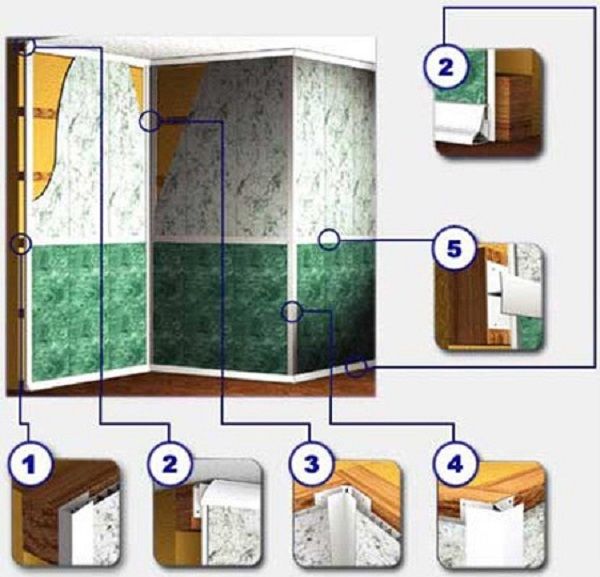
The joints obtained during the installation of tongue-and-groove joints are practically invisible. If you want to trim the joints in a contrasting way, you can purchase the so-called "jointing" - a special tape with which the individual plates are connected to each other.
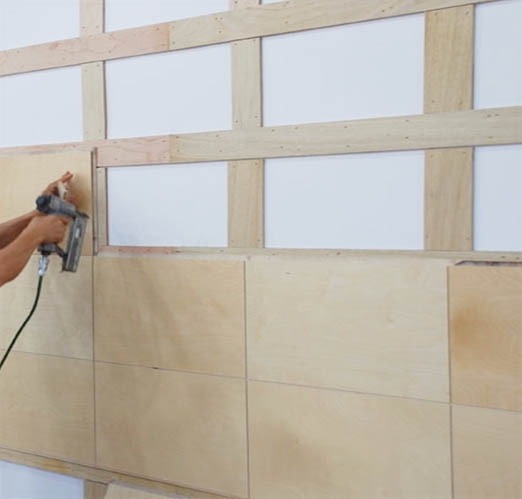
 Stages of fixing fiberboard panels to the crate
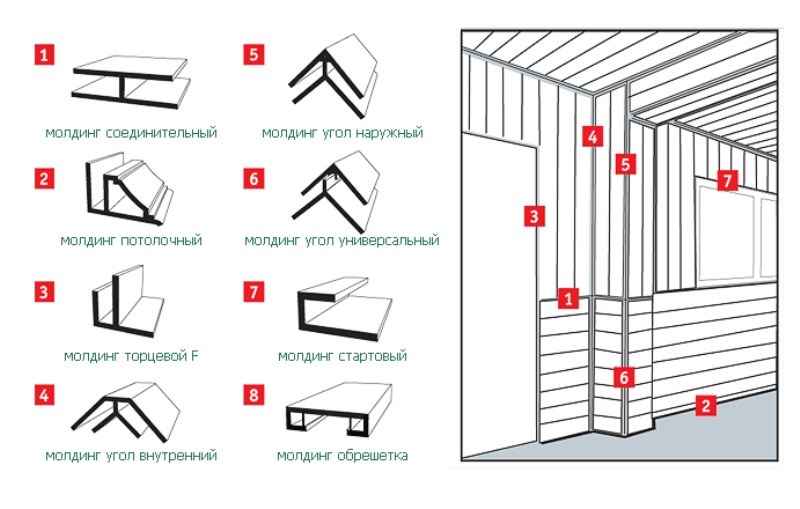
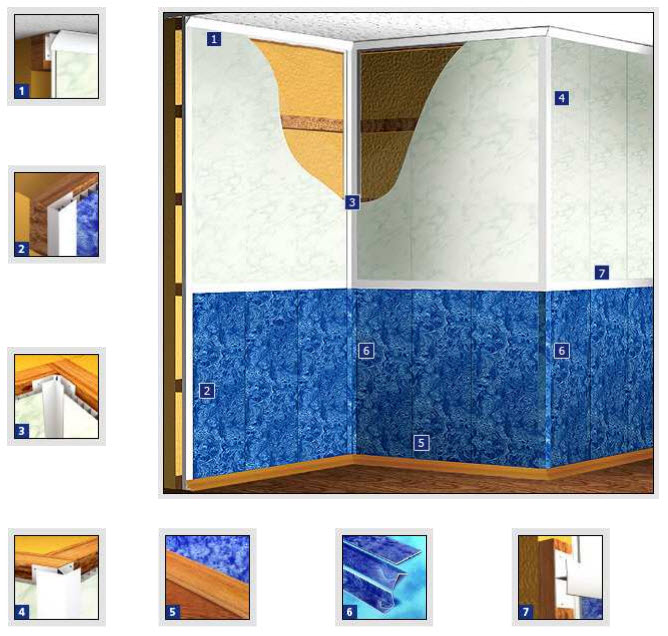
Other various accessories are sold in specialized stores, allowing you to make the result of your wall decoration as solid as possible - ceiling cornices, baseboards, corners and even columns. All these details will help to mask the joints of the slabs with the ceiling, floor or with each other. You can fix decorative elements using the same "liquid nails", because they are made of lightweight plastic or polyurethane foam.
If you use fiberboard wall panels as decoration, then you will have to deal with finishing the apartment again only when the interior gets bored, since the manufacturers provide a guarantee for wall panels from Fiberboard for a period of 10 to 20 years.
For more information about the types and installation of wall panels, see the video below:
Installation features
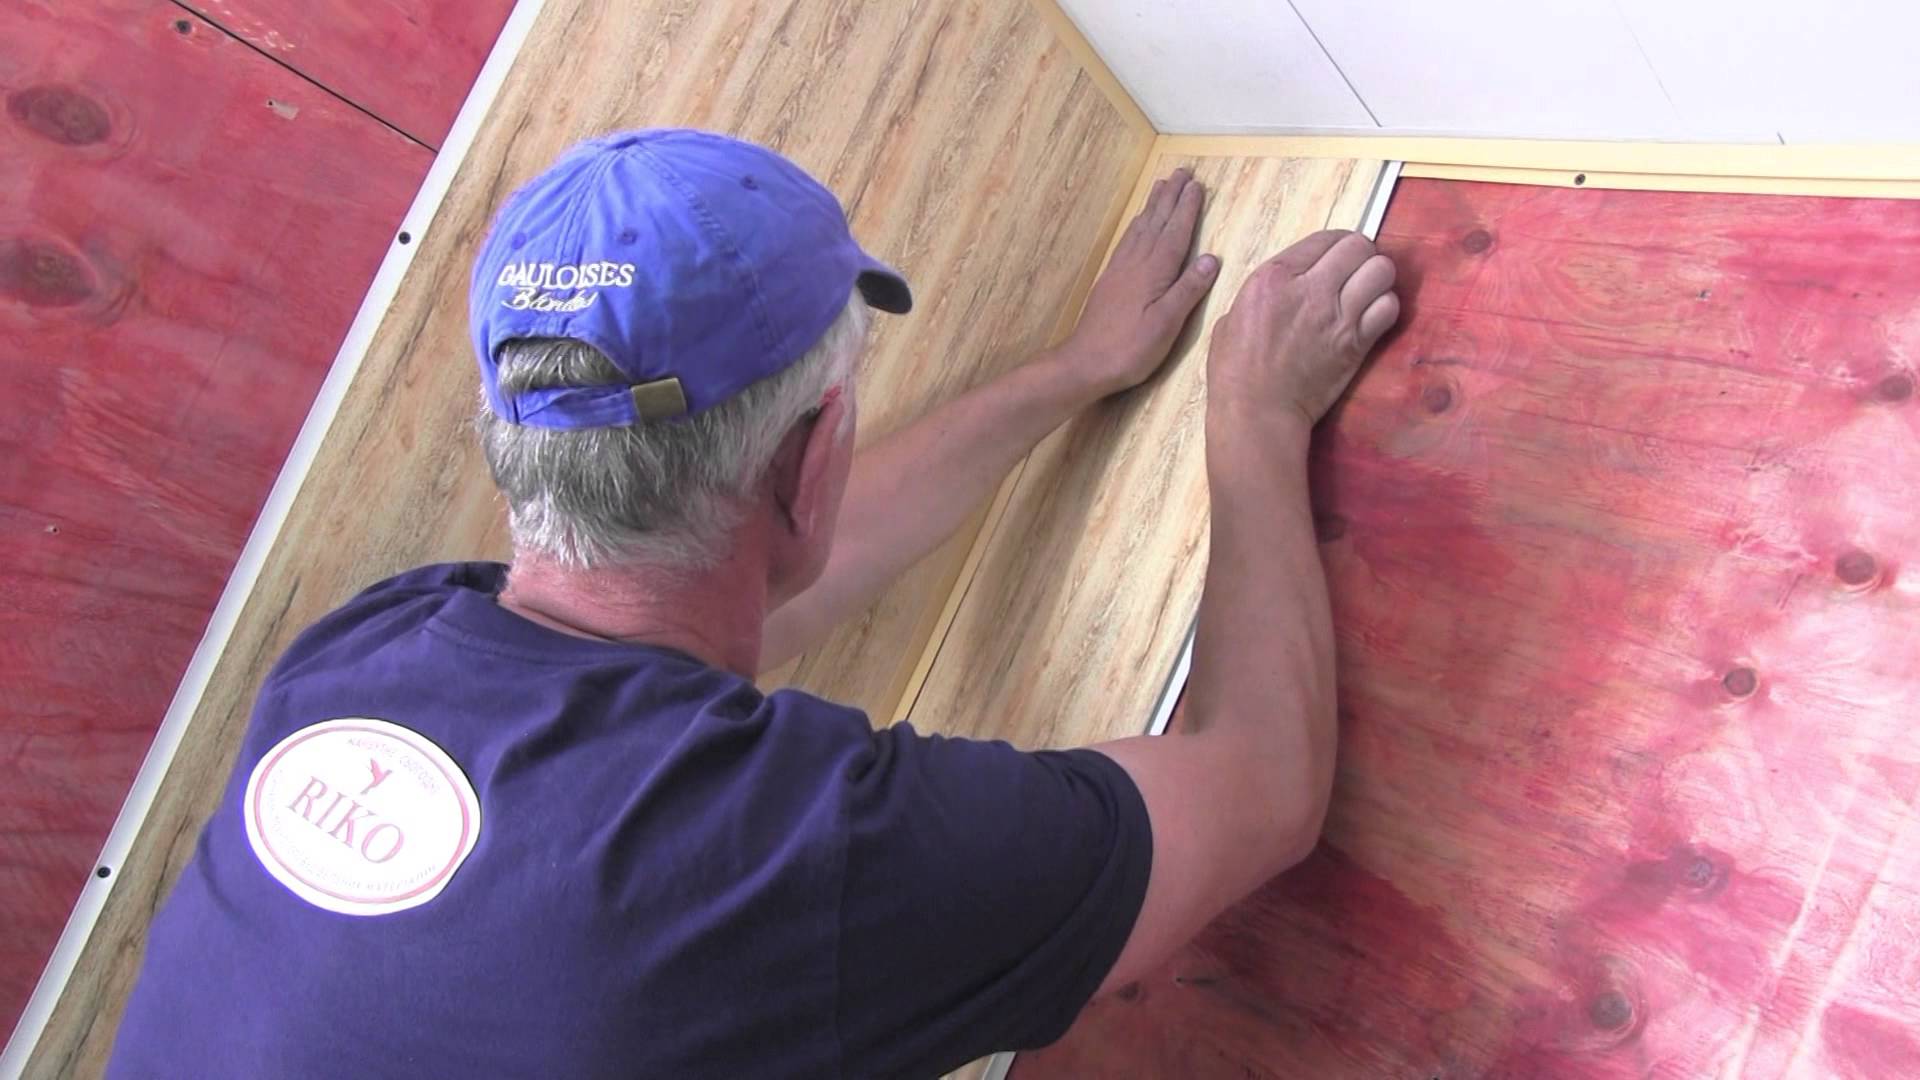
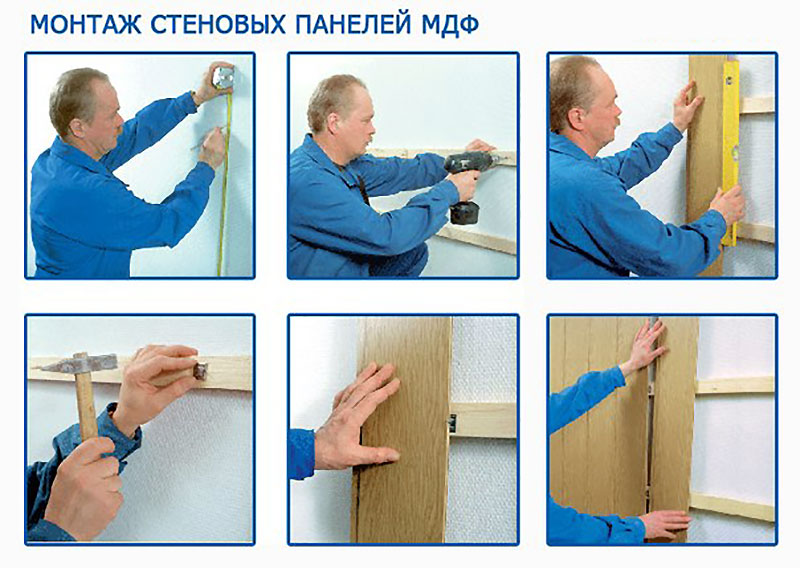
Installation of MDF panels, metal profiles or bars starts from any corner of the room by laying individual elements vertically or horizontally. If it is necessary to create additional noise or heat insulation, insulation plates are placed between the battens of the battens.
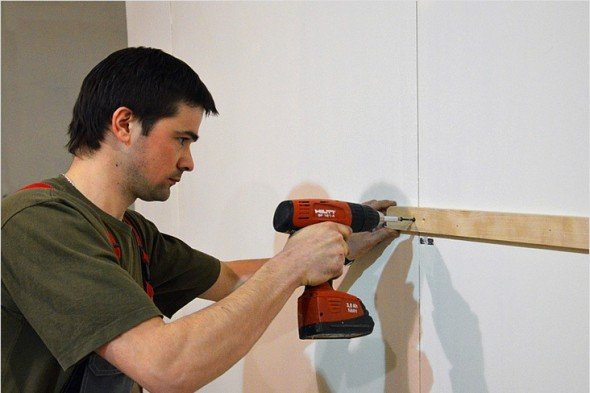
Each MDF panel is equipped with a special groove for installing cleats and attaching to the frame. The frame itself is fixed with "crabs" and brackets. Fastening MDF panels to the wall cannot be called a difficult process if the frame of the structure is assembled correctly and strictly according to the level.
When creating a lathing, it is important to remember that fasteners (screws), or rather their length, are selected taking into account the thickness of the sheathing and the height of the bar or profile. The self-tapping screw must be inserted into the wall to a depth of at least 40 mm. Before constructing the frame, you need to determine the highest point on the surface of the wall and from this value set the vertical and horizontal
All work is carried out under the constant supervision of a building level equipped with a spirit level. It is necessary to check not only the horizontal and vertical, but also both diagonals on each wall sheathed
Before constructing the frame, you need to determine the highest point on the wall surface and from this value set the vertical and horizontal. All work is carried out under the constant supervision of a building level equipped with a spirit level. It is necessary to check not only the horizontal and vertical, but also both diagonals on each wall sheathed.

The dimensions of MDF panels are of great importance in the case when it is decided to attach them to the wall using a frame, and when performing work using a special adhesive composition, certain types of panels are chosen.
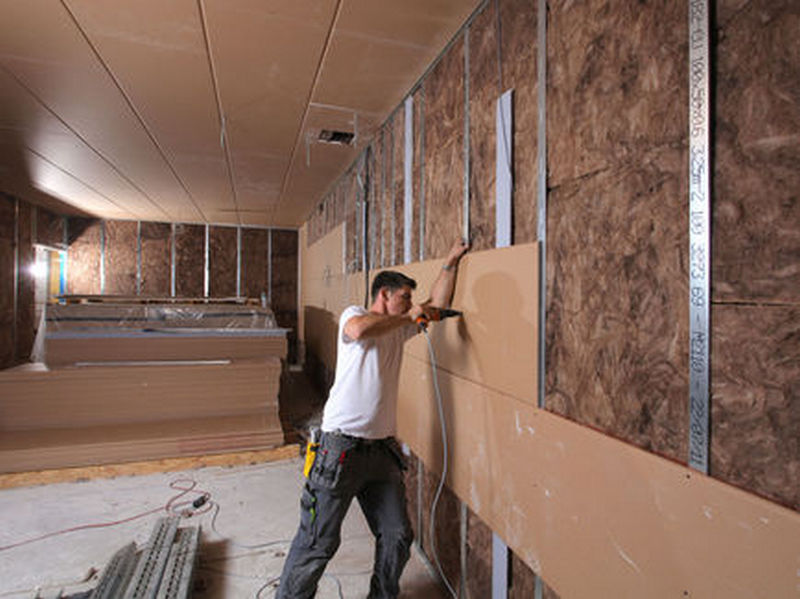
About thermal insulation
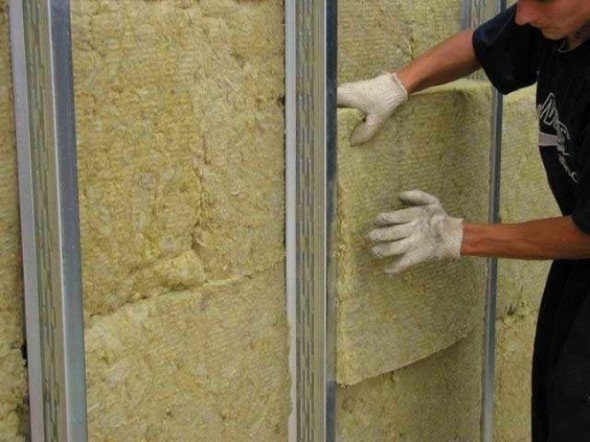
Insulation installation
The installation of the lathing is completed, but before proceeding with the installation of MDF panels, the walls should be insulated. This will allow you to save a lot on heating the room, as well as increase its thermal insulation. In addition, heaters additionally prevent the occurrence of mold, mildew and moisture in the voids of the crate. It is recommended to fill cells in a crate with one of the following insulation materials:
- Penofol is a relatively new multi-layer insulation material, which consists of polyethylene foam and polished foil with a reflection coefficient of 97%. It is fireproof, environmentally friendly, has good sound insulation and low vapor permeability.
- Mineral wool. The material has gained great popularity due to its high thermal insulation and moisture resistant performance.
- Styrofoam. Air is the best heat insulator, and this material is 98% composed of it. All this is due to the polystyrene granules that are formed in the foam during the production process. The material has a high level of moisture and vapor permeability.
- Extruded polystyrene foam. This type of foam is produced by extrusion melting. The seal is not cheap, but it fully justifies its price. The material has excellent thermal insulation as well as a high compression ratio. Therefore, it is often used for floor insulation.
The installation of this thermal insulation material is very simple:
- Sheets are cut from a roll of insulation, in accordance with the size of the cells (lathing step).
- After that, they are attached to the wall with construction foam or silicone glue.
- The resulting protrusions of the polyurethane foam are removed using a clerical knife.
After warming the walls, we turn to the most interesting - the technology of wall cladding with panels.
What is MDF
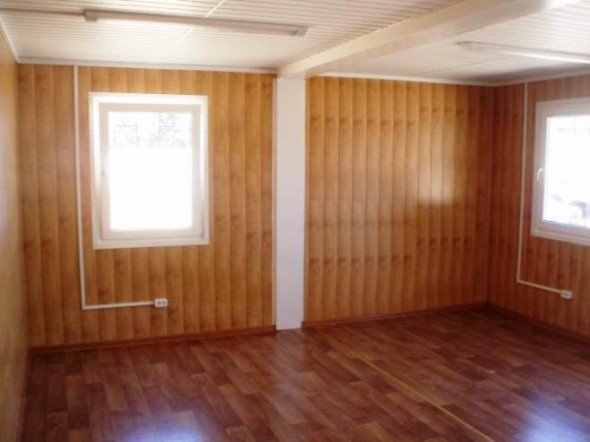
Room with wall decoration from MDF panels
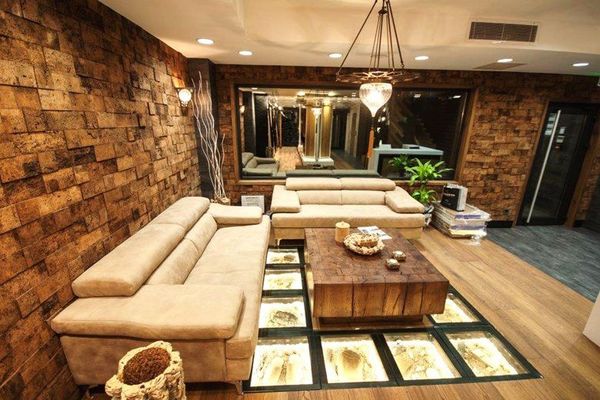
MDF is a panel finishing material obtained from woodworking waste by dry hot pressing of fine chips. When heated, a substance called lignin is released from the wood, which acts as an adhesive. The structure of MDF is reminiscent of wood fiber felt.The main advantage of such panels is their high moisture resistance. As a result, they are often used for cladding walls, floors and ceilings in rooms with high air humidity, for example, in a bathroom or a toilet. However, due to its attractive appearance, such a finish is often widely used in halls and offices. Surfaces lined with MDF in the corridor and on the loggia also look great. The cost of the material in comparison with the tile is low, while the walls will turn out to be perfectly flat.
If you decide to install the panels yourself, then first you need to prepare the necessary tools and materials for work.
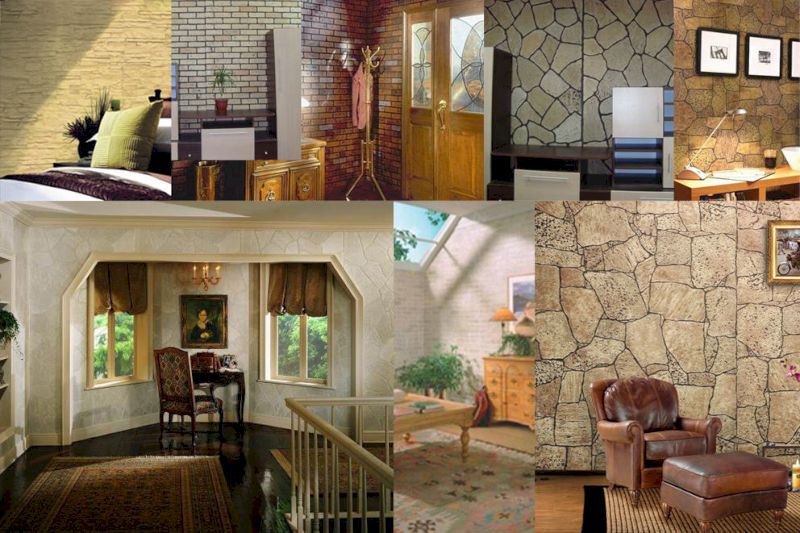
Varieties of wall panels
Finishing types
Depending on the shape, panels of the following types are distinguished:
• slatted type-setting - are oblong planks made of wood, chipboard, PVC, fiberboard or MDF. These interior wall panels are 240 to 370 centimeters long, 12.5 to 30 centimeters wide and 0.8 to 1.2 centimeters thick. The panels have grooves and spikes to connect to each other. Installation of cladding in horizontal and vertical orientation is allowed;
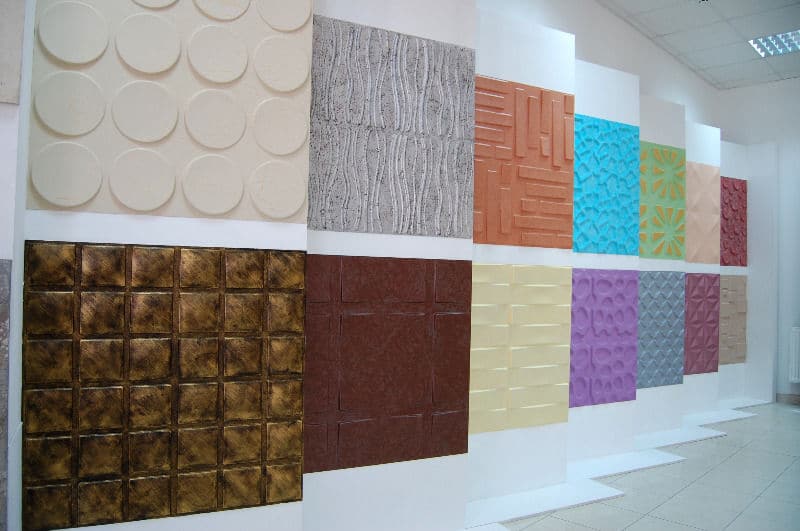
• tiled typesetting - are squares with sides from 30 to 98 centimeters long. Such wall panels are great for creating mosaics, because each of them has its own color and texture. Coating material - MDF, fiberboard, PVC and chipboard. To connect the plates, grooves and inserts are used;
• sheet - better than others have proven themselves when decorating large walls. The dimensions of their sides can vary from 122 to 244 centimeters with a thickness of 0.3 to 0.6 centimeters. Unlike other materials, wall panels are made only of wood or resin-impregnated fiberboard.
Rack type panels of various widths
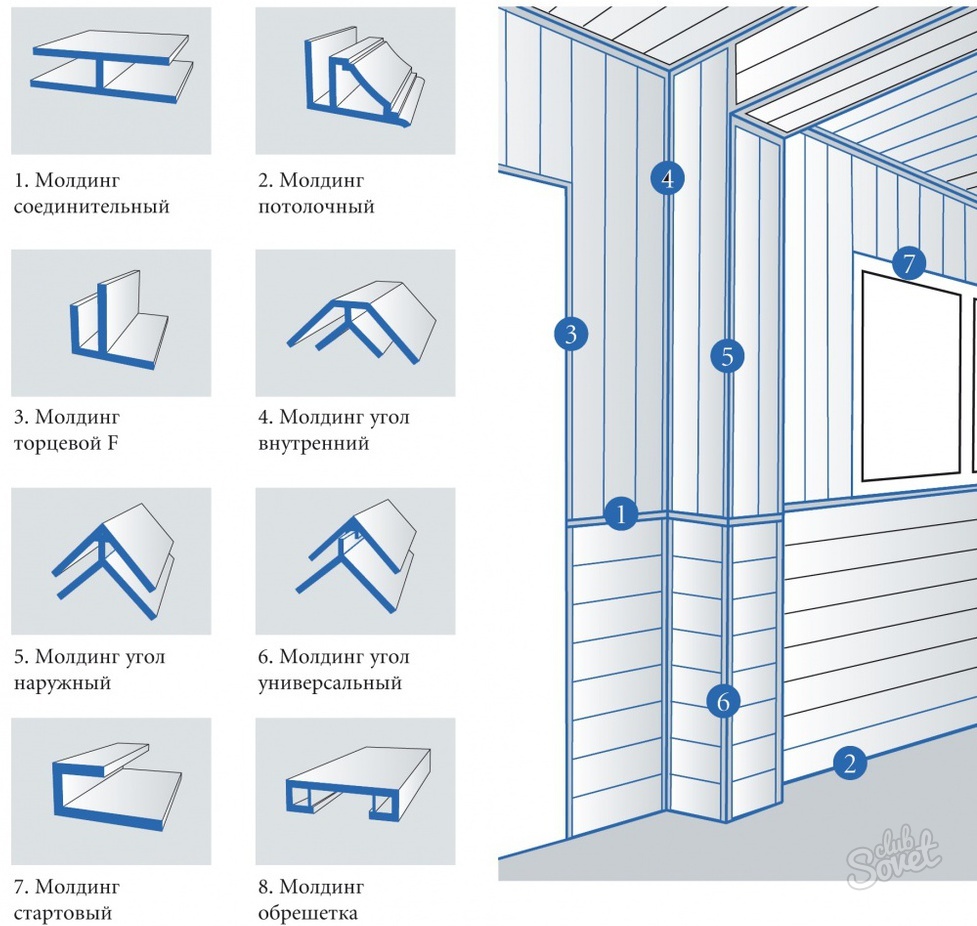
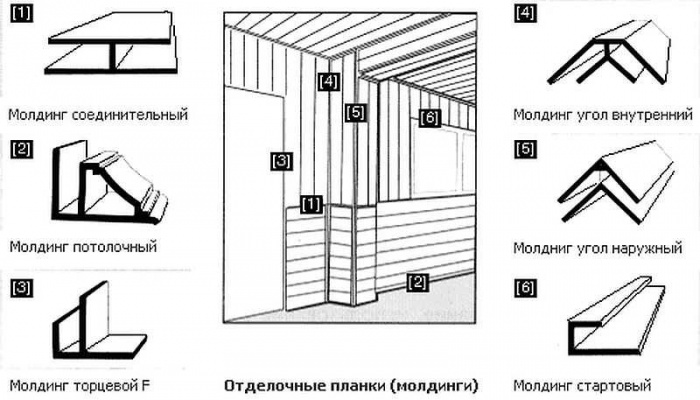
The methods of fixing the plates are different. So, slatted type-setting panels for wall decoration are fixed on the crate, tiled ones - with the help of clamps or adhesive. Glue is also used for fastening sheet panels, and the seams between the covering elements are masked with moldings. How to install PVC on the ceiling yourself? watch the video and read here.
Classic paneling solutions
When finishing with plastic panels with your own hands, you need to take into account not only the type of coating elements, but also the material of their manufacture.
Wooden products are considered reliable, they are made from such types of wood as alder, maple, oak or cedar.
Sometimes the finish has a wax coating, due to which it can be used in rooms with high levels of humidity. Since wood wall cladding panels are environmentally friendly, they are recommended for use in residential areas.
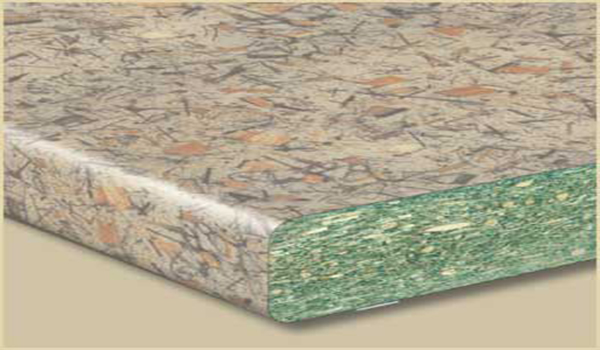
Popular products made of fiberboard - a material consisting of woody plant fibers. They are also safe for human health, resistant to high humidity, but deteriorate in direct contact with water. In turn, facing panels made of chipboard for interior wall decoration are similar in appearance and quality to wood. This is due to the fact that chipboard is a compressed waste from wood production. The disadvantage of this material is the poor tolerance of sudden changes in temperature and humidity conditions.
Panels made of MDF are highly resistant to almost any environmental factors. Fiber boards are produced by using the dry pressing method, so they are not afraid of moisture and mechanical stress. It is recommended to decorate the walls with MDF panels, such as those rooms where conventional materials are short-lived or ineffective.
All mentioned types of panels are recommended for use in residential premises. With proper care, their service life will be more than 10 years.Wooden wall panels for wall decoration have a particularly long service life: if they are made of high-quality wood, they will retain their original appearance for several decades.
Panels from new materials
The panels made from gypsum vinyl are renowned for their reliability and durability. The material of their manufacture is a modification of drywall, and is similar in properties. Plastic panels for walls for interior decoration, which are not demanding on operating conditions and are easy to maintain, also demonstrated their best side.
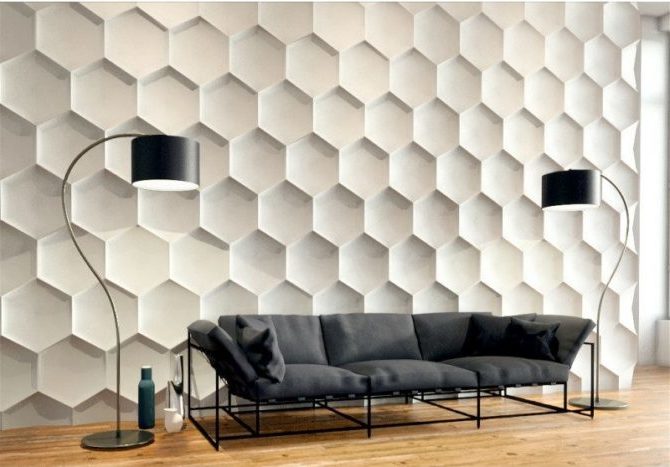
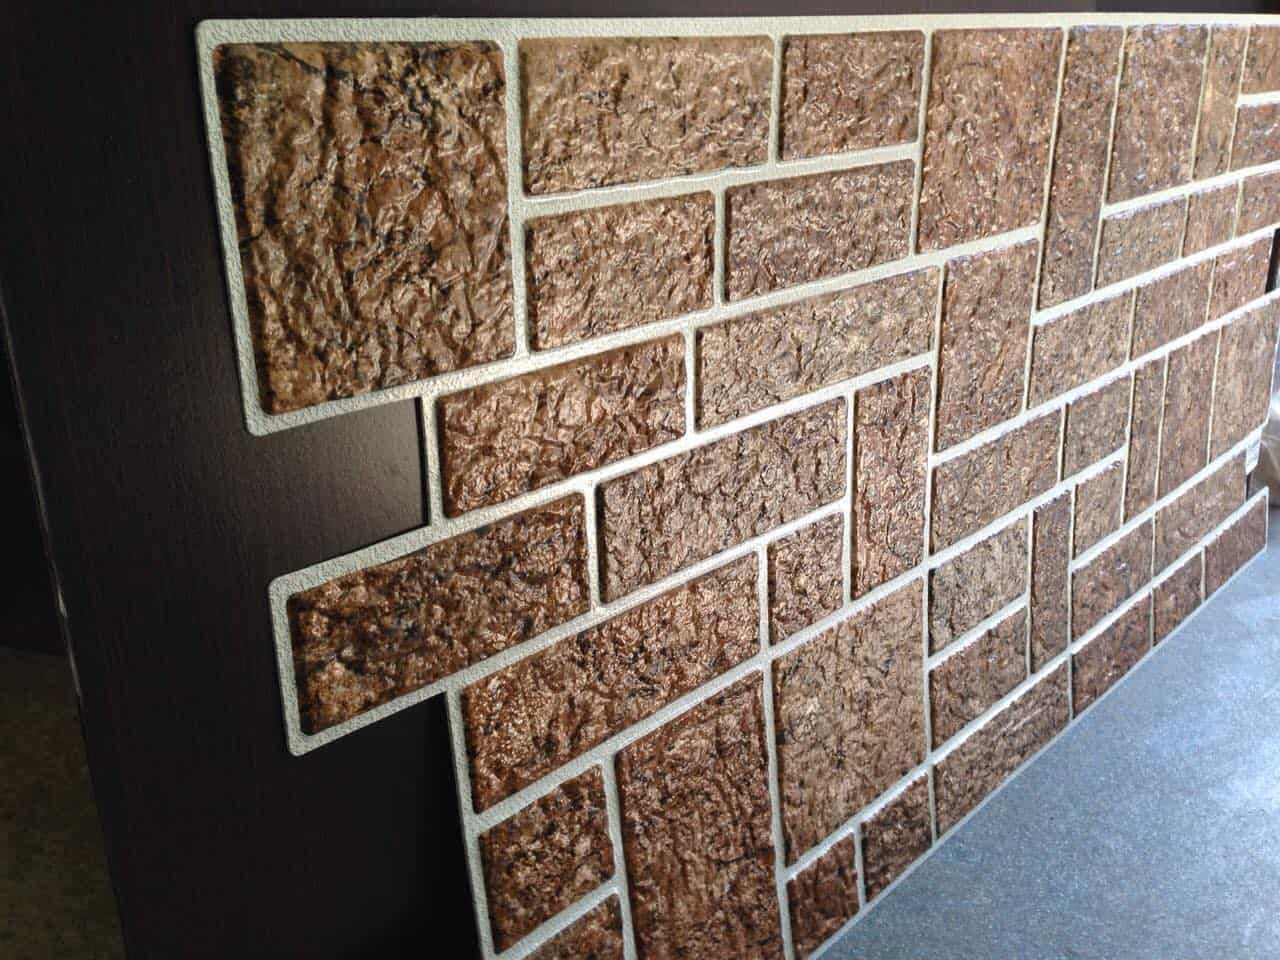
New products on the building materials market are glass panels and 3D panels. The former are intended for applying photographic drawings to the surface of the walls, the latter have an unusual texture with a hypertrophied relief. 3D panels are made from all the materials listed above, as well as from aluminum.
Wall decoration with plastic panels is allowed in residential, commercial and public institutions. This coating is often used in schools and kindergartens because it is considered environmentally friendly. In turn, glass panels are as safe as plastic and are able to withstand significant mechanical stress, but are less common because they are more expensive. The same goes for the increasingly popular 3D panels.
3D panels create an unusual effect
Preparing the walls
Preparing the walls before installing the lathing
Before starting the cladding work, you need to make sure that the room is suitable for installing the panels. If strong swelling of wallpaper, drywall, or peeling of plaster are visible on the walls, then you should first clean them of old finishing materials. Also, do not forget about the baseboards and decorative corners (if any) used to hide the joints of the walls and ceiling.
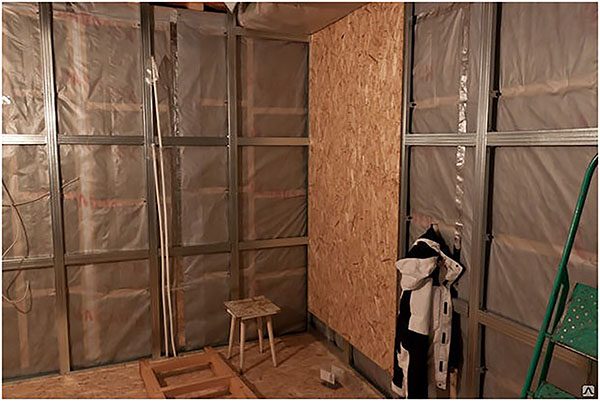
When the walls are cleaned, you can go directly to the installation of the lathing under the MDF panel, but first, let's find out what its varieties exist.
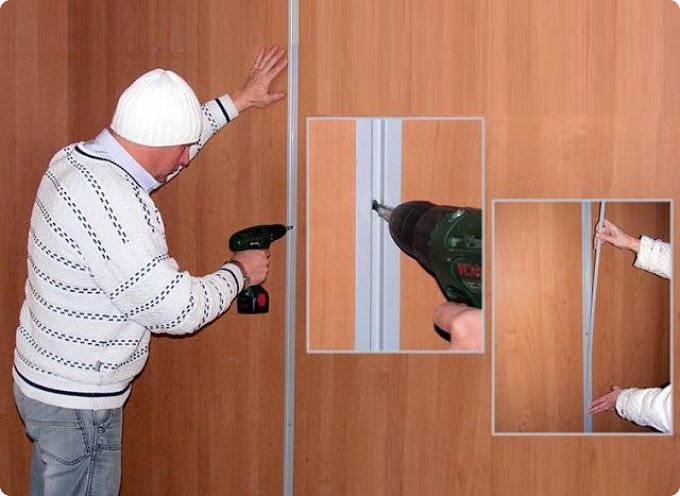
Mounting
The installation of lattice structures made of metal and wood has several differences. For example, when using galvanized profiles, they should be fastened only with powerful and long self-tapping screws. The use of dowel-nails in this case does not make sense - the tenacity between the profile and the fastener itself will be lost.
The most important point on which the strength of the fit of the fastener and the entire structure depends is fixing the body of a self-tapping screw or a dowel-nail (with a wooden crate) at least 35 mm in the wall. For example, if the thickness of the rail or profile is 20 mm, and the MDF panel is 10 mm, then the depth of the groove for the seat and, accordingly, the fasteners should be about 65 mm, or better, more. The diameter of the fasteners is selected in the range from 4 to 6 mm, depending on the density of the wall. The stronger it is, the smaller the diameter of the screw should be. All fasteners are equipped with a special socket. When drilling a groove, the diameter must be compared with the diameter of the body of the seat, and not its cap, otherwise the safety margin will be insufficient.
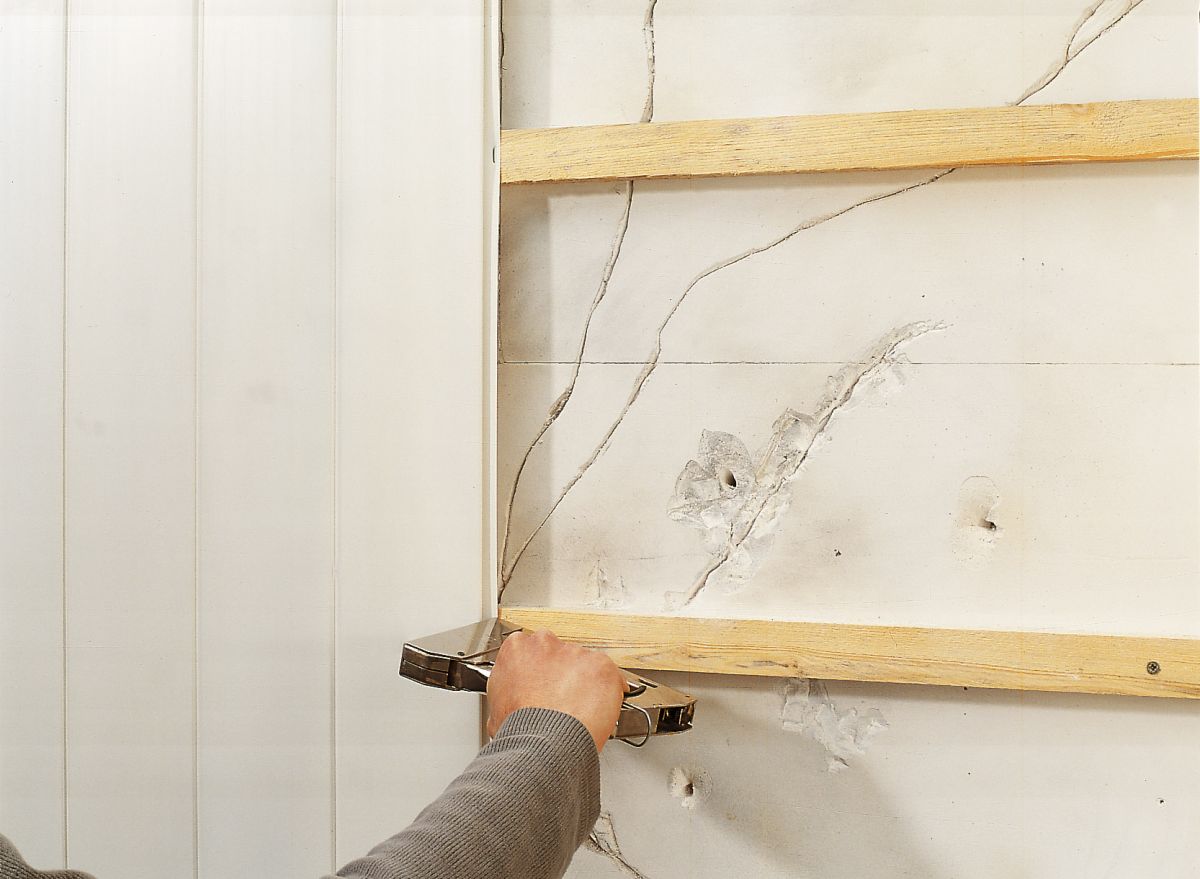
Installation of a wooden structure
Installation of wooden lathing
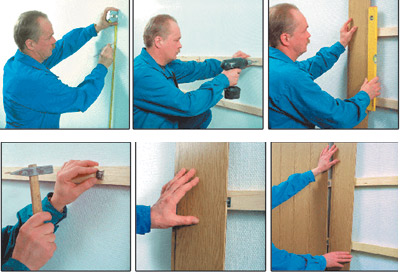
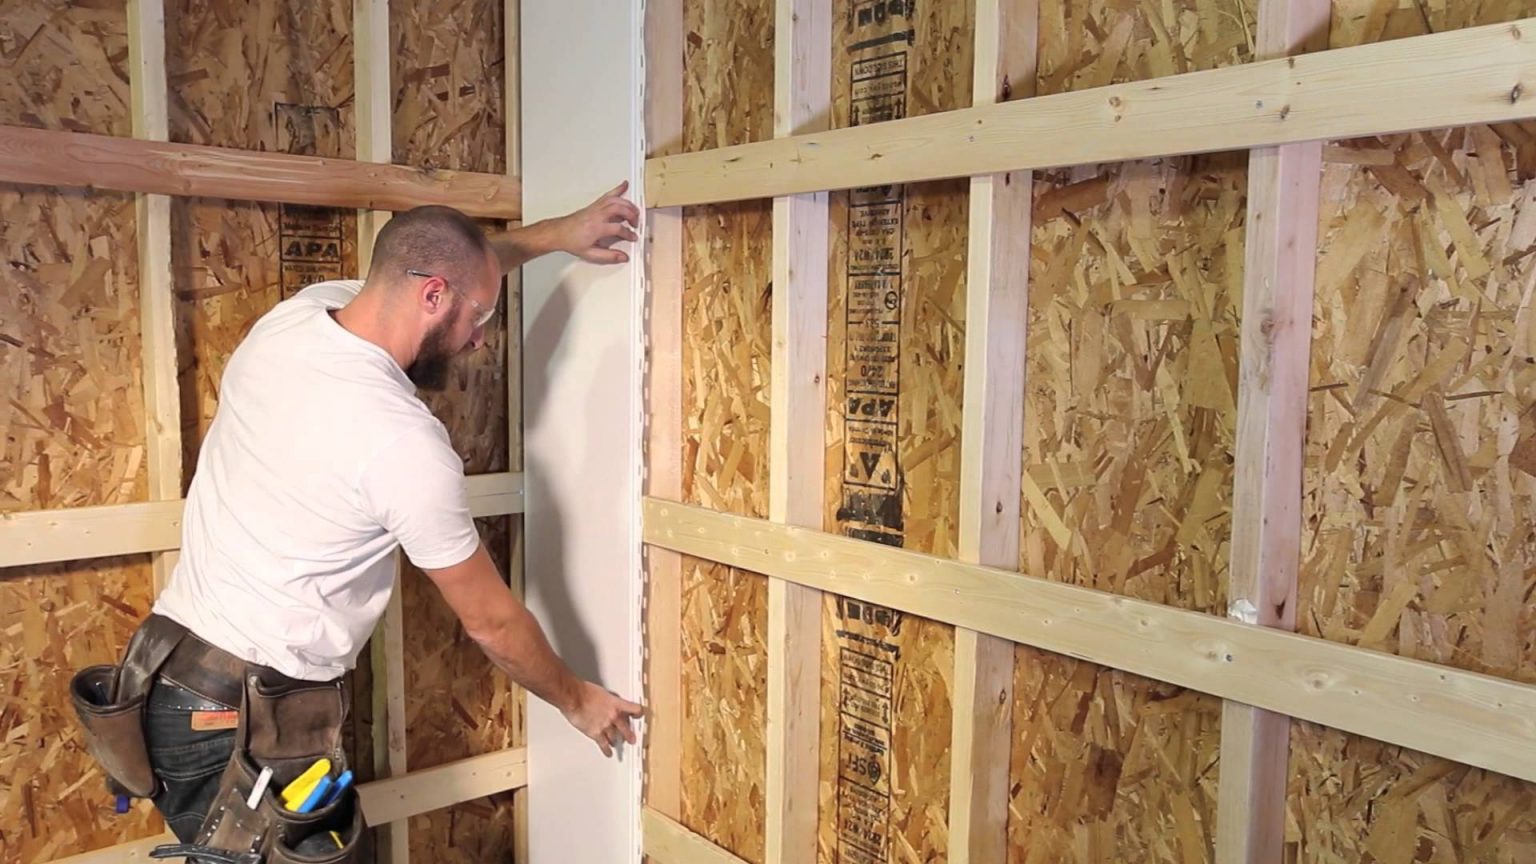
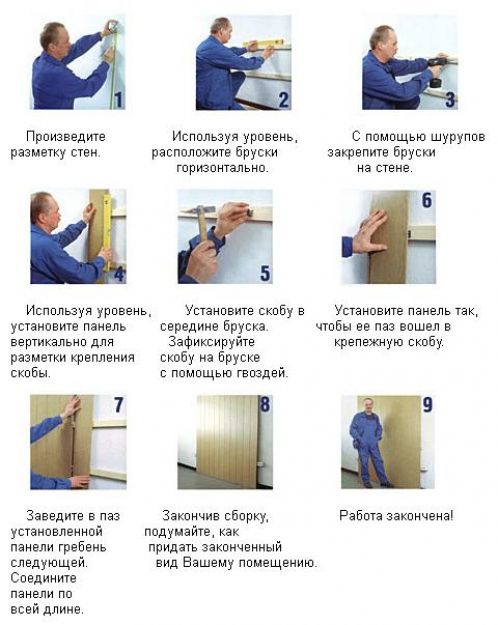
We start with the installation of vertical racks. We install the slats in each corner in pairs - so that they form a right angle, as well as along the edges of door and window openings along the entire height of the room. To make the racks take an exact vertical position, we use a plumb line. Now, in order:
- We attach the rail to the wall and outline it from either side with a pencil or marker.
- We make holes for fasteners using a perforator with a drill for concrete. For structural strength, the drilling step should be in the range from 0.4 to 0.5 m.
- We drive the sockets for fasteners into the holes and make notes of their location on the rack itself.
- We drill holes in the rail with a diameter slightly smaller than the fixing one.
- We install the racks in place using self-tapping screws or dowel-nails.
- Install horizontal bars in the same way. The step remains the same. Do not forget to decorate the slopes with slats.
- At the end, the elements of the ledge at the joints of the structure are removed using a planer.
Fixing the metal base
The procedure for assembling a structure made of galvanized profiles is completely similar to the above. First, the racks are placed in the corners of the room and in the openings for marking the walls. After that, holes are made for fasteners and the installation of vertical profiles. UD profiles are used as racks. In the marked places, in accordance with a pitch of 0.4–0.5 m, horizontal profiles of the CD type are inserted into them. After that, the crossbars are attached to the uprights and the wall. The elements of the metal structure are connected to each other using ordinary self-tapping screws. As mentioned earlier, such a crate must be fastened to the wall only with powerful fasteners (dowel-nails will not work).
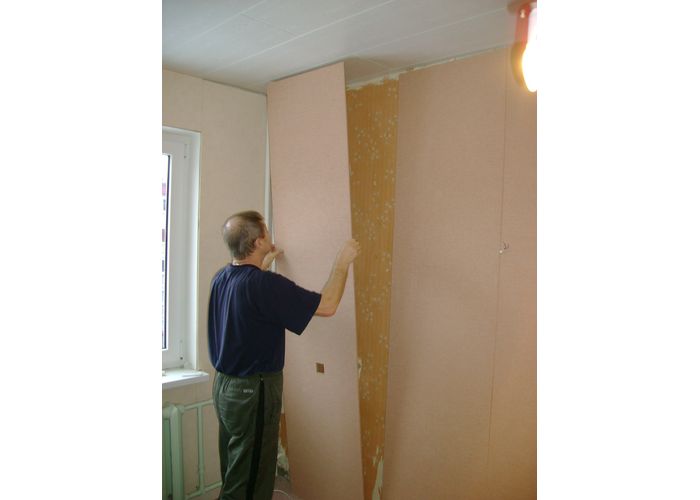
DIY wall decoration
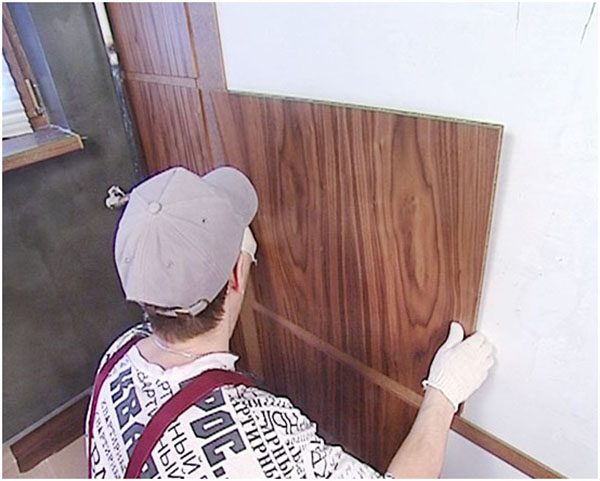
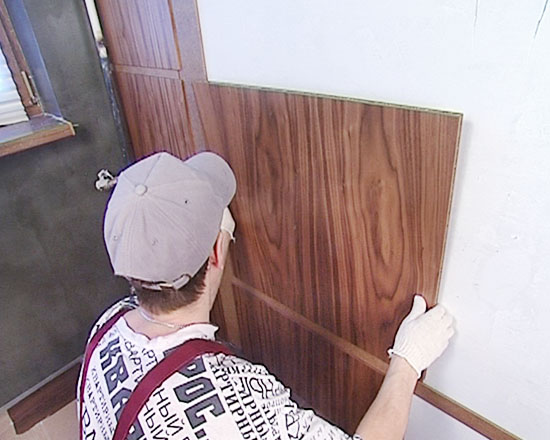
Wooden panels can be cut independently, adjusting to the size of the room, the walls in which are faced.
If you purchased the necessary facing material just before starting work, do not rush too much.
Wooden panels need to get used to the microclimate surrounding it in the room. Therefore, they should be unpacked and left to acclimatize for at least 24 hours.
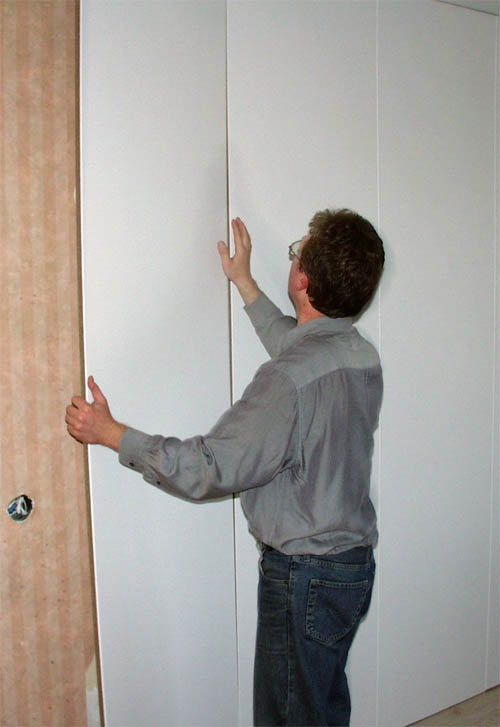
The panels can be fixed in two ways:
- Installation on the lathing with nails, cleats and staples. The lathing can be made either from a metal profile or from a bar. The advantage of this method is that if it is necessary to replace one or another part, it can be easily dismantled and reused.
- With the help of a special adhesive, but in this case it will not be possible to accurately replace one or another part of the wall, and in this case reuse is impossible.
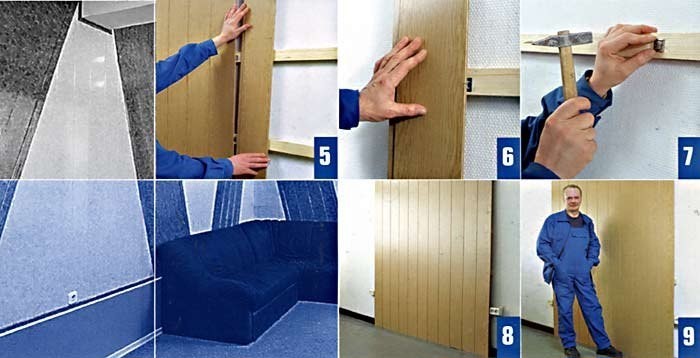
Wall cladding with wood paneling with wood lathing:
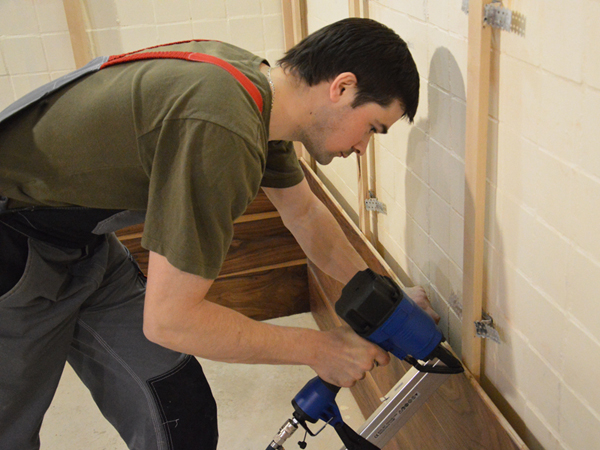
- The same beams are prepared, the size of which is 25mm by 50mm. They will be attached to the walls. To do this, you need to determine the curvature of the walls by resorting to the help of a water level.
- Further, the marking takes place at the same level. Ready-made beams are attached to straight lines drawn under the water level.
- All slats must be carefully treated with a protective agent against moisture before fastening to the wall. They need to be fastened with nails that do not have a cap, construction brackets or mastic. The number of slats will depend on the height of the room.
- The first panel is fixed in the corner so that its section having a longitudinal groove is located towards the worker performing the installation. Headless nails are driven into the bottom of the groove at an angle of 45 degrees. In this case, you need to be careful, since the nails must go into the wood for their entire length, otherwise the next groove will not work.
- The second panel is installed in the same groove and pressed against the first one as much as possible, after which the nails are driven in again.
- To prevent cracks from appearing, each next panel must be lightly knocked out using a piece of timber. Those places where the joints are visible can be decorated with specially designed strips.
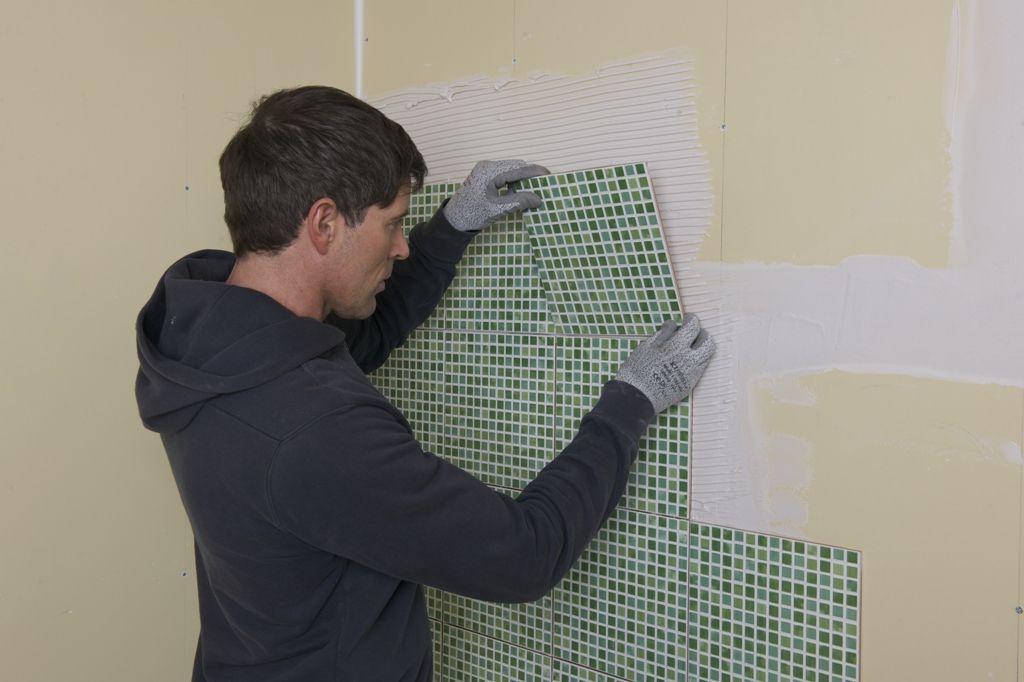
Installation of panels with glue:
- For this method of installation, the walls must be prepared ideally - they must be as even as possible.
- In relation to the corner, using a plumb line, or a water level, mark the place where the first panel will be located.
- Further, with the help of nails, it is necessary to install at least 4 brackets necessary for further fastening.
- The ridge of the first panel should fit fully into the bracket. Each subsequent part is mounted in the same way.
As you can see, the installation of wooden panels is quite simple and does not require special skills.
Installation technology
Fiberboard wall cladding is performed in various ways.
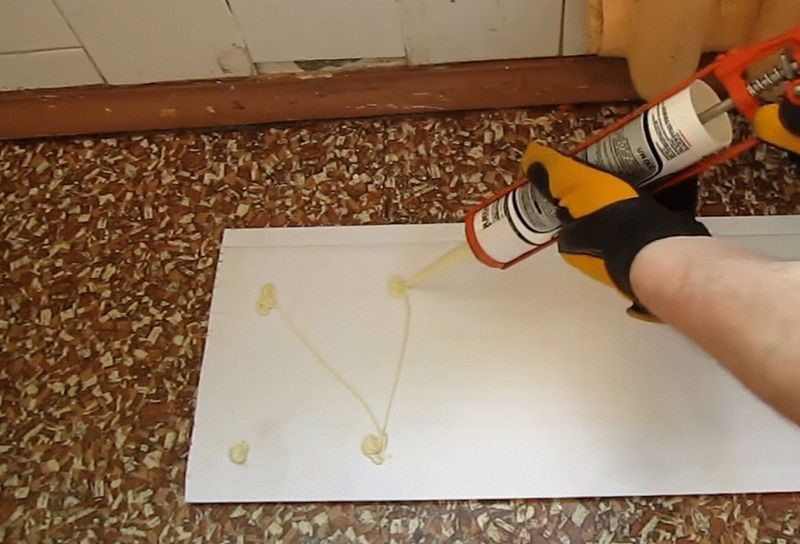
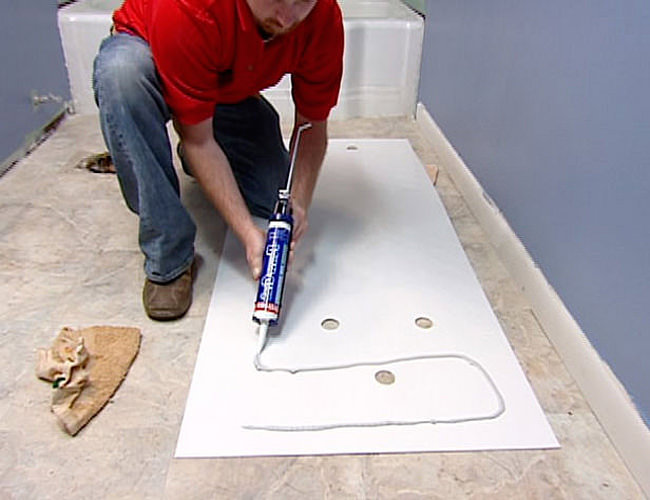
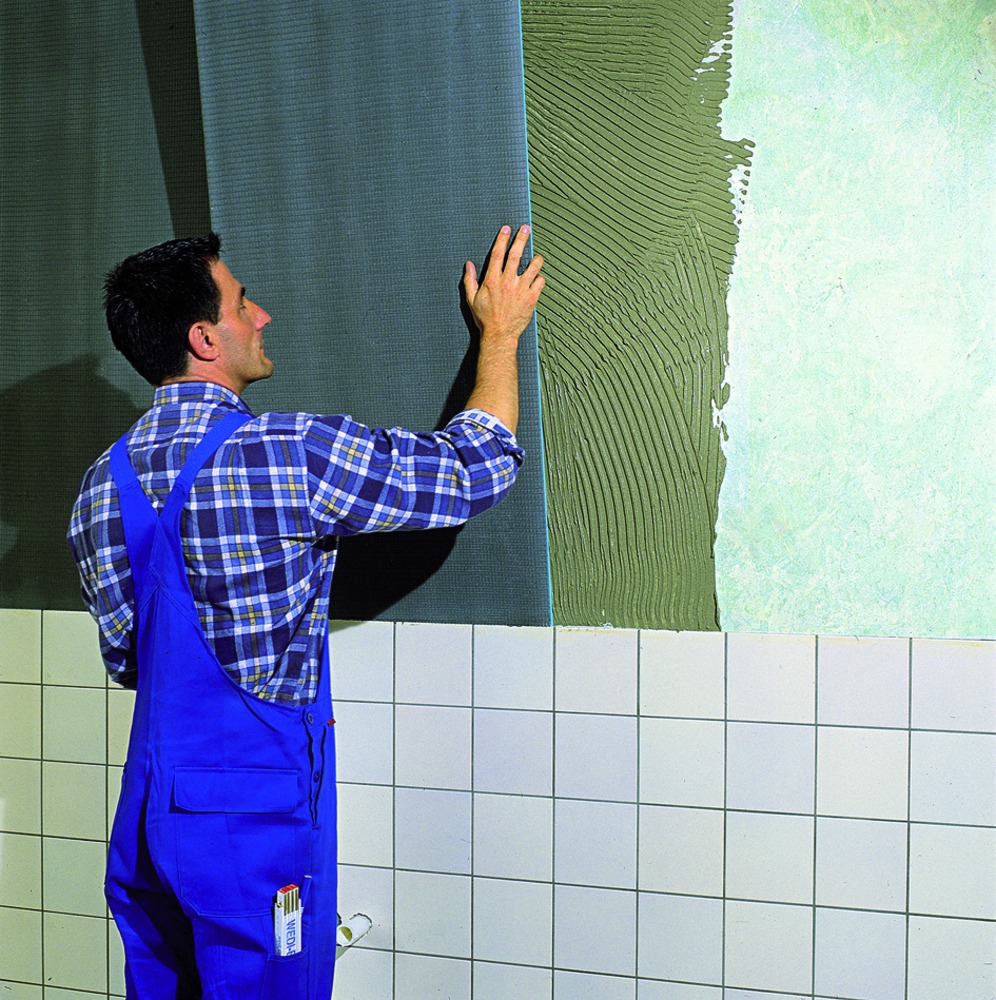
Laying on glue
This method can only be used if there is a perfectly level base.This process is best done in rooms with constant humidity.

Step-by-step instruction:
- The surface level is checked. If the deviation is more than 2 mm by 2 m, then finishing puttying is carried out.
- Priming is in progress. For this, a composition with deep penetration is used. It is recommended to apply at least 2 coats.
- The base is thoroughly dried.
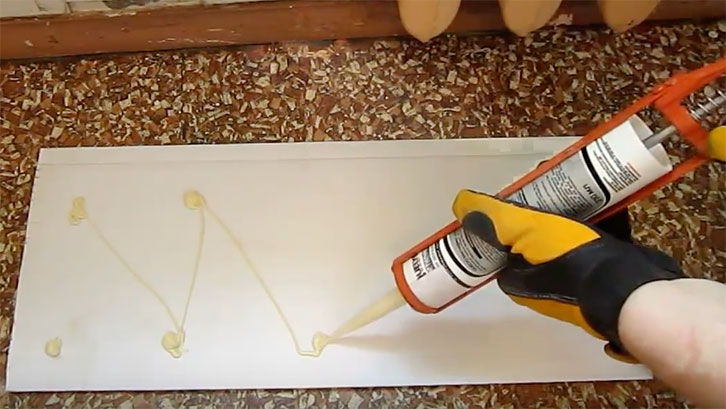
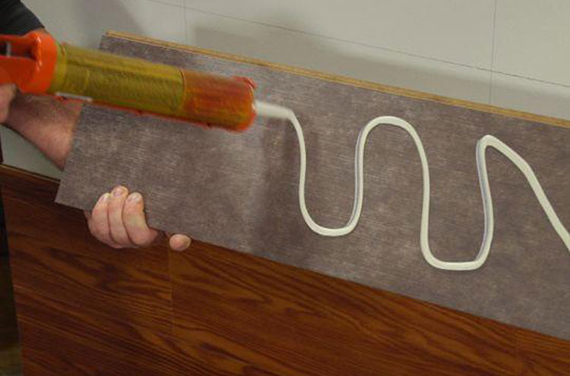
- To glue the panel to the wall, you need a compound with good adhesion. An excellent option is "liquid nails".
- The markup is in progress. The elements are adjusted if necessary.
- If the seamy side of the sheet is smooth, it is pre-treated with sandpaper. This is necessary for a strong grip.
- The solution is applied evenly along the entire perimeter of the part and crosswise. Additional points are placed on empty areas.
- The fragment is set in its place, aligned with the markings and snuggles well.
- The rest of the parts should be glued in the same way.
Particular attention is paid to the joining of the edges: if no overlays are used, then the fit must be extremely accurate
On nails or screws
This method is more reliable even in difficult areas; the gluing of the plates is not always durable.
- Fixation can be done directly on a wooden base. For this, the elements are marked and adjusted to the required size beforehand.
- If the surface is made of concrete or brick, then the parts are pre-drilled at the desired points. Next, the panel is installed in its place, after which the markings for the self-tapping screws are transferred to the wall. Using a drill and a suitable drill, the holes for the dowels are created. The fragment is placed according to the marks and attached.
A significant problem that can arise is the visible fixation points. That is why they should be located in the least visible places or decorated.
 When through-mounting plates on self-tapping screws, there is a problem with the decoration of the cap, in order to avoid this, you can take panels with a thorn-groove connection and fix them with clamps
On the crate
Internal work on the installation of fiberboard on the frame does not require leveling the walls. Such a structure is erected if necessary to create a partition. The space between the racks is suitable for laying insulation and communications.
Scheme of work:
- The base is cleaned of all unnecessary, cracks and cracks are smeared, impregnation with antiseptic compounds is carried out.
- To sheathe surfaces with panels, it is better to use wooden beams for the lathing. It must be thoroughly dried and covered with protective solutions.
- The walls are marked out, the curvature and the need for alignment are determined. Lines are drawn along which the racks will be set. Consider that they should be placed perpendicular to the decorative cladding.
- The first elements of the frame are mounted in the corners. To do this, they and the base are pre-drilled. The fixation takes place according to the level. A spacer is used if required.
- A cord is pulled between the parts, which serves as a guide for the remaining racks.
- Fiberboard is mounted on self-tapping screws; if there is a lock connection, it is better to use clamps. This will provide security and hide the anchor points.
- The set of panels starts from the corner, unless otherwise provided by the design concept. The first element is anchored at both edges. When installing, you need to use a level.
- The rest of the fragments are laid in the same way.
 For a novice master, installation on a wooden crate with the help of clamps is considered the most optimal option.
After the completion of the process, moldings and skirting boards are exposed.
Cork finish
Wall cork panels are made in two layers. For the bottom one uses compressed cork chips, for the top one - pieces of cork and bark, it can also be a whole cork layer. To protect the coating from negative effects, it is covered with wax.
The cork has a honeycomb structure, which provides good sound insulation and heat retention. The finish is lightweight, durable, hypoallergenic. It is not attacked by fungus, it is antistatic. This material is considered ideal for the kitchen - it tolerates moisture and temperature extremes. The disadvantage of the coating is its high cost, due to the peculiarities of obtaining the material.
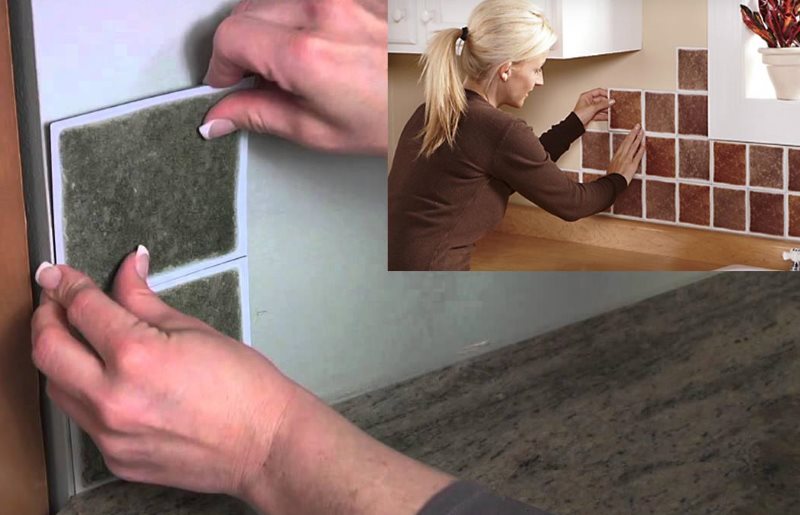
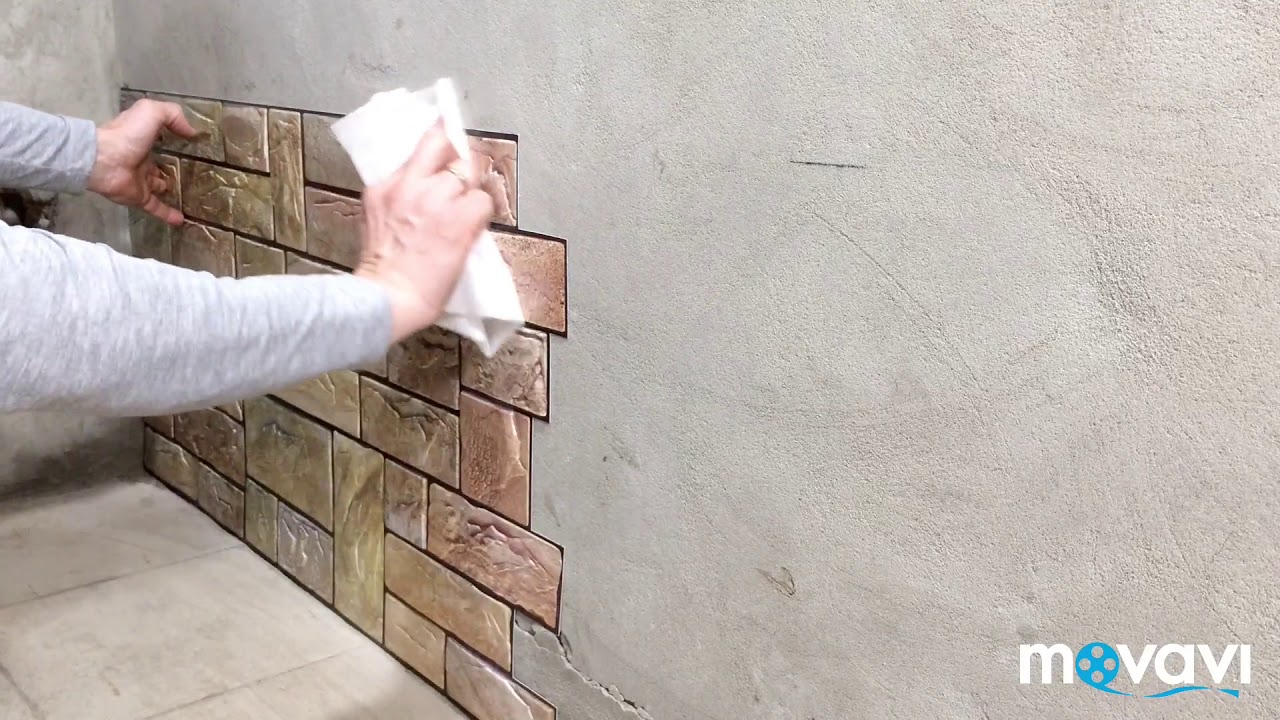
Do-it-yourself installation of cork panels is usually done with glue. Its choice depends on the type of foundation. Before gluing, the cork must be spread out for several days in the room in which it will be installed. Walls must be leveled and cleaned from looseness and dirt. Then they make the markup, defining the center of the room. Gluing starts from the middle of the wall. Glue is applied with a brush to a small section of the wall and the back of the tile. The element is pressed against the base, rolled with a roller to improve adhesion.
To avoid delamination of the plates at the joints, they are tapped with a rubber hammer. Holes are cut out in advance for lamps or other elements. The glue will take several hours to dry. Then the joints are treated with a sealant. To improve the appearance of corners and transitions, decorative elements are used.
Pros and cons of fiberboard-based panels
Material advantages:
- Wide decorative range. The products allow you to create an imitation of other facing products. The resulting coating has not only different colors, but also texture.
- Security. All boards are manufactured in accordance with standards and do not harm human health. The most environmentally friendly is the production of "dry" method.
- Simplicity of styling. The work can be done exclusively with your own hands. Installation methods (glue and frame) are equally popular and are selected based on a specific situation.
- Availability. Fiberboard panels are affordable and widespread.
- Possibility of additional sound and heat insulation. Although the resulting surface is not able to provide a significant reduction in energy costs and completely eliminate the penetration of extraneous noise, it is an excellent addition to mineral types of insulation.
- Durability. Correctly selected wood fiber material with technical parameters suitable for a specific substrate has a service life of at least 8-10 years.
 Decorating with decorative panels based on fiberboard is considered an inexpensive but effective way of arranging interior space.
But this finish also has significant drawbacks:
- Low water resistance. The panels swell with constant exposure to moisture, therefore, for such work, it is necessary to choose special types with additional protective impregnation.
- Deformation due to violation of storage conditions. Details are bent, it is not always possible to completely correct this. Such products can only be attached to the crate with self-tapping screws.
An important aspect of obtaining high-quality coverage is the choice of the appropriate option for a specific situation. Despite the fact that many species have a high density, they are not recommended for use as a support structure in the presence of severe loads.
 By themselves, fiberboard plates are thin enough, so they cannot act as a hard coating, in addition, the material is susceptible to mechanical damage
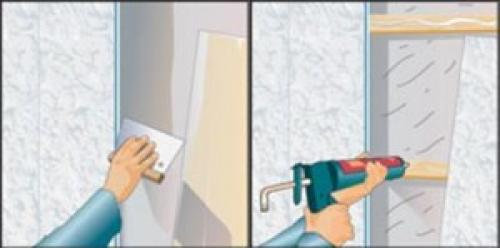
Methods for mounting sheet panels
Pay attention to the choice of the method of fixing the finish - glue, lathing, nails
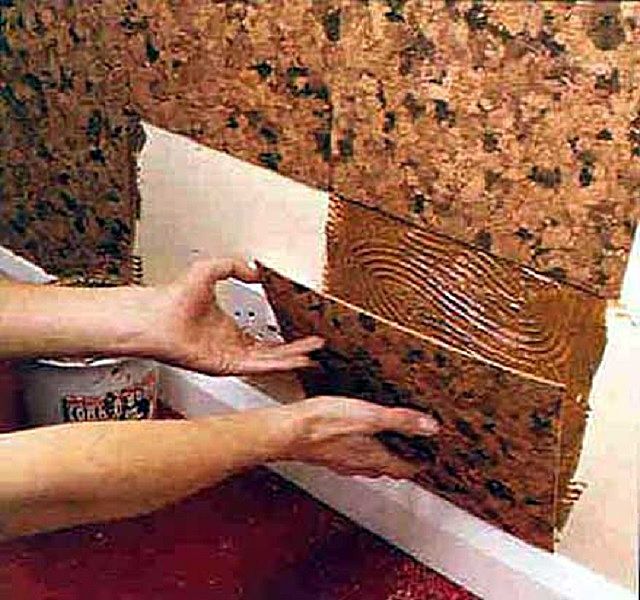
Glue method
Before placing the first panel, the base is cleaned of dust. If necessary, remove minor defects to obtain an even base. Before the start of the repair, laminated fiberboard should lie for several days in the room where they are planned to be installed. This allows the material to adapt to humidity and temperature conditions.


After accurately marking the sheet, it can be cut with an electric jigsaw or an ordinary hacksaw with small teeth, a circular saw. After cutting, the edges are sanded with 180-240 grit sandpaper.
During marking, the gap is taken into account, which should be located at the line of the sheet at the junction with the floor and with the ceiling. It is needed for the thermal expansion that fiberboard experiences after gluing. If moldings for joints are not provided, a gap of 3 mm is left between the sheets. When the assembly is complete, they are filled with sealant. silicone basedresistant to moisture. You should additionally walk the sealant around the perimeter of the wall.
 Glue mounting
To securely attach, press down on the panel, tap it to distribute the composition evenly. It is better to use spacers, which are removed after the glue has completely dried.
If it is difficult to align the wall, then the fiberboard is attached to the crate from the profile or beams.
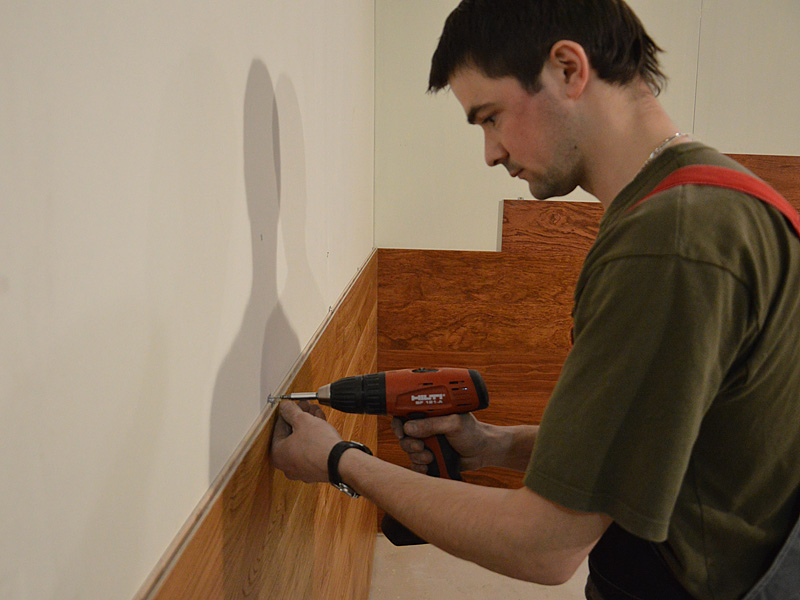
Wall mounting with nails or screws
It is not always convenient to work with glue - over time, after such an attachment, the panels move away from the base due to insufficient quality. Instead of glue, you can prefer mechanical fastening - with nails or self-tapping screws with decorative caps, because they will remain in sight, should not spoil the overall look of the finish.
Marking is applied to a brick and concrete wall. Holes are drilled into which plugs or dowels are inserted, due to which the fastening is performed.
The main disadvantage of this method is the high probability of an unaesthetic type of fastener.
Installation on the lathing
A lathing is a structure made of bars or metal profiles. The crate is attached to the wall with dowels, fiberboard is installed on it.
For wet, cold rooms, choose an aluminum profile. The tree will quickly wear out, deteriorate.
Sheets are attached to the crate with clamps.
 Using the lathing
How to choose the right wall panels for interior decoration
With such a huge assortment, the problem of choosing the most suitable option for a particular room arises. In order not to be mistaken and to make a successful repair, it is necessary to take into account some criteria:
- the purpose of the room and the operating conditions of the panels. For bathrooms and toilets, you should choose waterproof models, and for quickly dirty places, panels with the possibility of washing with detergents are suitable;
- ecological cleanliness and safety for the health of residents. Quality products should not emit toxic substances or have a pungent odor;
- maximum fire safety, non-flammability, resistance to high temperatures. The corresponding special marking on the product packaging indicates the degree of fire resistance. An indicator of high quality is also the absence of the release of toxic chemicals and smoke when burning or smoldering;
- public premises with increased mechanical stress are best finished with more durable and wear-resistant panels;
- technical condition of the walls of the base. Possibility of mounting heavy or large-sized panels, complex surface geometry, bends and corners;
- general style direction of interior design. The cladding should be in harmony with the rest of the interior elements, combined with shades and textures.
Table: comparison of the characteristics of materials for wall decoration
| Material type | Density kg / m³ | Sound insulation coefficient Rw, dB | Swelling% | Dry flexural strength (mRa) | Wet flexural strength (mRa) | Coeff. thermal conductivity W / mK |
| OSB | 640 | 18 | 12 | 28 | 13 | 0,33 |
| Fiberboard | 800–1000 | 20 | 18 | 38 | 4 | 0,4 |
| Chipboard | 735 | 19 | 22 | 17 | 3 | 0,37 |
| Drywall | 650 | 35 | up to 30 | 2 | OD | 1,45 |
| GVL | 720 | 37 | up to 30 | 5 | 0,3 | 1,4 |
| LSU (6mm) | 1000–1100 | 44 | 0,34 | 16 | 22 | 0,14 |
How else can you fix PVC panels on the walls
Although the above method of decorating walls with plastic panels is not very complicated, it is not suitable for everyone. For example, the walls are perfectly flat after plastering along the lighthouses or leveling the walls with drywall. It is clear that the lathing is not needed. It will only take away the area. In this case, go for violation of technology - plastic panels are glued on silicone or on polyurethane foam.
In this case, the starting profiles will still have to be installed, but they will need to be fastened to the appropriate dowels. After that, foam (zigzag) or silicone (islands with a step of 10-15 cm) is applied to the back side of the panel, the bar is inserted into the profiles, pressed, fixed in one or two places with the appropriate fasteners. In the same spirit, they continue on.
The advantage of the method is very fast, the disadvantage is that it only works on even (or almost) walls
But most importantly, it is simply impossible to remove the finish without destroying the plastic panels.
Characteristics of quality wood panels
 The popularity of wood surface cladding is due to the characteristics of the material:
- In addition to the natural wood from which the cladding is made, manufacturers offer boards that are coated with colorless varnish or a suitable paint.
- The cladding made of wood makes the room unusual, disposes to rest, there is a feeling of security.
- Wood is a material without chemical impurities that do not affect human health. Therefore, they are used in children's rooms.
- When installing the cladding on the frame, there is no need to level the surface.
- In the created frame, wires and cables are hidden.
- Easy to maintain wood surfaces.
- Long service life.
- Ease of repair and replacement of parts.
Cons of material:
- do not tolerate very wet rooms;
- if the installation is carried out with the glue method, it is necessary to level the rough surface;
- when fixed on the frame, the room is reduced in size.
Despite the listed disadvantages, panels are used in apartments, country houses, private buildings.
Care
 The wood surface is easy to maintain. It is enough to wipe the surface with a damp microfiber. Then rub with a dry napkin.

If the surface is corrugated, use a vacuum cleaner with a soft nozzle.
Prophylaxis is done once every 6 months. To do this, use wood polishes that do not contain aggressive substances: alcohol, ammonia. Apply polishes with beeswax.
Wooden panels are diverse in their shape - slats, squares. They have a varied palette of colors and shades. And also there are various methods of fixing panels not only to the wall, but also to the ceiling. Each mount is made based on many factors.
Advantages and disadvantages of fiberboard
The advantages and disadvantages of fibreboard depend on its hardness. Hardness is determined by the purpose of using the material. Manufacturers today offer soft, semi-hard, hard and superhard boards. The latter are used in the process of construction and manufacture of supporting furniture structures.
Advantages:
- Fiberboard (hardboard) is made by pressing wood fibers under the influence of high temperatures. It is a durable, swell-proof, fire-resistant material.
- Fiberboard is a sheet product. It is produced by drying, pressing, using a binder. On top of the fiberboard, a wood layer is applied, usually spruce or pine. In order to emphasize the natural wood pattern and add decorative effect to the surface, it is varnished or covered with an artificial patina. Sometimes treatment is done with a stain or tinting agent. The panels are decorated with carving and molding. All these technologies allow to make panels more presentable in appearance.
- Slabs come in a variety of shapes and sizes. There are a large number of shades: from pale beige to red, purple. Products assembled according to an unconventional method, for example, using mirrors, look very effective.
- Fiberboard has excellent moisture resistance. As a result, this material is often used for decorating bathrooms.
- The surface can be easily cleaned with a damp cloth. It is not advisable to wet the panels too much, let alone wash the panels with powder.
- Another advantage of wood paneling is that the walls do not need to be perfectly aligned. The main condition is that the surface must be dry. This will shorten the time required for facing work.
- The low price of fiberboard makes this material one of the most popular in the construction market.
- Correct use of the product ensures its strength and durability.
- The material is easy to process without changing its structure.
- The laminated product is used in the manufacture of furniture.
The only drawback of fiberboard is the small thickness of the sheet, which limits the scope of this material.