Criterias of choice
A spatula with a width of 15-20 cm is rarely used for applying putty, they are usually used as an auxiliary device. They are very convenient to mix the putty, apply it to the working tool and distribute it over its surface. Small tools are indispensable for covering the caps of self-tapping screws on drywall, for sealing small defects and scratches. Narrow blade tools used in conjunction with a wide finishing trowel must meet the following requirements:
- made of stainless steel, blade thickness - not less than 1 millimeter;
- the handle is made of plastic or rubber, has a short length and is durable, in order to avoid splashing of the putty due to excessive springiness;
- width - 10 centimeters, this is the optimal size for picking up putty;
- the blade should resemble a square in shape, that is, the width of the working area should be approximately equal to its length so that the blade does not bend excessively.
If a triangular or trapezoidal tool is used, then it is quite difficult for them to collect putty from a bucket. A tool with one sharpened edge is not suitable for puttying; it can remove old paints and varnishes, whitewash and other coatings.
When choosing a front spatula for putty, you need to be guided by the same requirements - its blade must be made of stainless steel, it must have sufficient elasticity and strength, without damage or defects, the handle must be comfortable. Tools that are too wide will bend under the putty. Facilitate and accelerate the work of a spatula with a mechanized handle.
It is important to take into account the width of the grip clamp so that the working area is no more than twice as long. Experts say that it is very convenient to putty with a spatula with a blade width of 30 to 50 cm
It is desirable that the handle is oblique, rubberized. It must be remembered that the main tool is correctly held in the right hand, and the additional spatula will be located in the left hand, with this in mind, you need to select products in the store.
Puttying with beacons
This is another way to level the walls, which is used for very large irregularities. In such cases, a thick layer of putty can be applied. If it is too large, then a metal painting net is attached before that. It prevents the mortar from sliding off the surface.
With the help of a stretched thread, the most problematic place is determined, beacons are placed along it. They are fixed with dowels or mortar. After that, the walls are leveled. The distance between the beacons should be ten centimeters less than the length of the rule.
First, the mixture is applied from the floor to a height of no more than half a meter. You need to wait until it hardens, then continue on. This method does not allow the solution to slide down, while making the surface even, smooth. Angles between walls, ceiling and floor are made when the mortar has set a little. For this, an angled spatula is also used.
After finishing the finish, after waiting until it dries, remove the beacons. You can fill the holes from them with a solution, and if necessary, go through with sandpaper again.
If you want to level the walls in a house or apartment, then it is more profitable and most convenient to use dry putty for this purpose. You can do all the work without someone else's help, which will save you finances. However, it is imperative to adhere to the recommendations of specialists. Strict adherence to the instructions is a guarantee that your house will have smooth walls and good DIY repairs.
For information on how to level the walls with putty, see the next video.
Advantages and disadvantages
Dry mixes are cheaper than ready-made solutions, but dry faster when combined with water. Therefore, it is advisable to know how much material to use at a time. Such mixtures also differ in the way they are applied and the drying time.
The more additives in the mixture, the better it is.
The components in dry mixtures give the solution elasticity, evenness during application, fire resistance, moisture resistance, durability.
When leveling the putty layer, it is important to use only clean tools, and reuse of the trowel and spatula for these purposes is impossible. For basic work, they do not damage the thin layer, but when leveling the finishing layer it is important that there is not the slightest flaw on the tool.
Important
You should not neglect the proven rules if you need to get a good result. Self-finishing the walls with putty is a good experience and good savings on calling a specialist.
Types of putty
The main purpose of using this kind of coating is to create a special film layer that will smooth out existing irregularities, thereby leveling the surface. The putty contains three special components:
- Pigments. They are necessary for small surface staining;
- Film-forming agents that make the coating more durable;
- Fillers that allow you to create textures.
Different types of putty have different concentrations of their constituents. The main film-forming agents that are used in it determine what name it will have:
- Oil;
- Polyester;
- Sticky;
- Plaster;
- Epoxy.
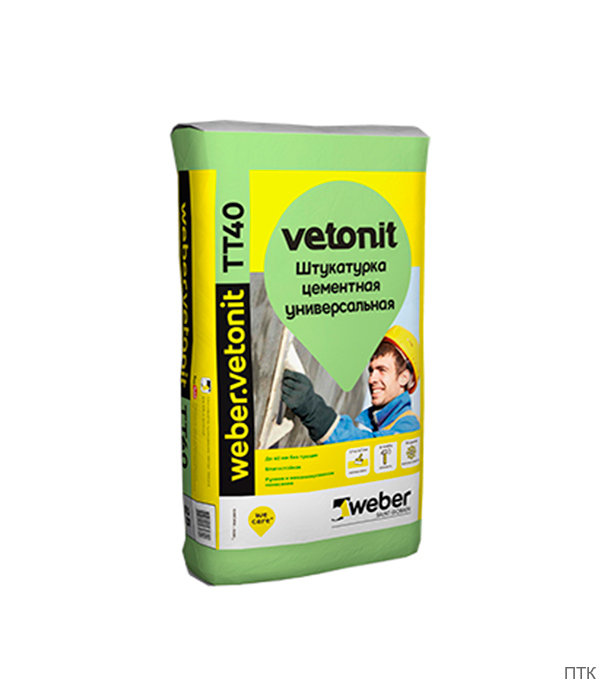
The main difference between all the listed options is the application conditions. So, gypsum options are used for application under light wallpaper, because they are white, and cement options are well suited for use in the bathroom and kitchen, due to their resistance to high humidity and various temperatures.
How to putty the ceiling?
With any repair, especially in new buildings, the owner is faced with the process of leveling the ceilings with putty. However, not many people can imagine how this is done.
The complexity of the work lies in the fact that the master is in constant tension. During the putty, you need to constantly keep your hands up, and this is not at all easy.
It is necessary to apply the putty to the ceiling in step-by-step uniform layers, up to the application of the finishing layer.
How to properly putty the ceiling?
Ceiling putty is carried out during the repair of any new building, and can also be carried out during major repairs in the premises of old houses.
Before applying the first, starting layer, it is necessary to prime the surface. Primer is applied with a roller or a wide brush.
If putty is done in a new building, then initially it is necessary to close up the joints of the floor panels, after that - apply a starting putty. It is executed as a draft layer.
The technology for applying the putty itself is simple:
- We knead the putty in a bucket by adding water and mixing the mixture with a construction mixer with a drill;
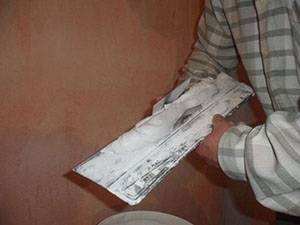
- The finished mixture must be collected on a narrow spatula and applied to a wider one, which will be used for filling, evenly along the entire length of the working surface of the spatula;
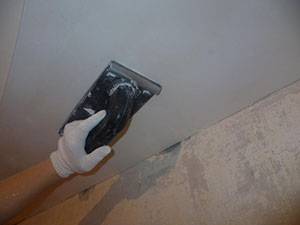
- Then you need to put the putty knife to the wall and with a smooth motion at an angle, pull it along the wall at about 300 until the putty is smoothed out;
- Grooves that appear after application are best removed immediately by re-moving with a spatula. Before re-moving, the excess putty from the spatula can be removed back into the bucket;
- With such movements, you need to continue to apply the putty until the entire ceiling is closed.
After applying and drying the starting layer, you can level the ceiling with a finishing putty mass.For this, it is best to use a ready-made mixture.
What kind of spatula to putty the ceiling?
To carry out puttying work, it is necessary to prepare special tools. These tools are, first of all, a spatula of different sizes. You need to choose high-quality spatulas so that the working surface is not curved, otherwise the quality of the putty will be low.
Required spatulas:
- One large trowel, 47 or 60 cm wide, for direct work on the ceiling;
- One smaller trowel, 10 or 12 cm wide, for applying putty on a wide working trowel;
- One narrow spatula, 4 or 6 cm wide, for work behind pipes, batteries, narrow inaccessible places;
- Electric drill with a mixer for mixing the putty mass;
- Several buckets: one with water for washing the mixer and tools, one for mixing the putty, one for pouring water into the dry mixture;
- Several rags, a respirator and construction goggles.
The process of plastering ceilings is quite laborious. But you can easily do it by filling your hand on the first squares of the square.
How to sand the ceiling after putty?
When plastering the ceiling, there may be times when the layer of putty may be small. If the putty process has already begun, and you see that you have already applied a thick layer, but you are not pulling the level, it is best to finish the putty and go to the plaster.
For this, ordinary cement-sand mortar is no longer suitable. You need to buy ready-made dry plaster and dilute it with water.
It is advisable to choose a white or light shade of plaster, then it can approximately be in the same substance and color with the putty. In addition, the finished plaster adheres very well to the putty.
In order not to peel off one or another material, then before switching to another type of finishing material, the previous one must be pasted over with a mounting mesh, and then plastering.
Also see:
Plaster can be applied immediately in large layers from 5 mm to several centimeters, unlike putty. When the plaster is dry, you need to look at the level. If it is flat enough, you can immediately level it with a finishing putty.
Also watch a detailed video instruction on how to putty the ceiling
Which putty to choose
So what kind of putty to choose? A few words about the composition and frequently asked questions.
Choosing a putty according to its composition
Here I will tell you what putties are in composition and to which of the above types I can attribute them. At the same time I will answer frequently asked questions. I think everything will fall into place here.
Plaster putty
The main composition is gypsum, the rest is plasticizers and all kinds of additives. Gypsum itself has a coarse fraction compared to other types of putties. Therefore, it belongs to the type of starting finishing materials, well suited for preparation for wallpaper, cobwebs and rough decorative finishes.
Acrylic putty
Acrylic is such a versatile material that can be used in the production of all types of putties, both starting dry and finishing in buckets. And also acrylic putties are widely used in the processing of wood, car bodies, etc. Therefore, it is probably not correct to use the term "acrylic putty" for a specific application. In this case, it can be both start and finish. It is very often used in the production of wood putty.
Latex putty
Think for yourself, latex is rubber. Therefore, the putty for wall decoration cannot be rubber, it simply contains a latex component. This putty is very flexible and can be used in damp rooms, although it all depends on the manufacturer.
Polymer putty
Basically, these are all finishing putties, except for gypsum. Acrylic and vinyl are also polymers, so acrylic and vinyl putty can also be called polymer.
Dry putty for walls
It is a starter material, mainly gypsum and acrylic. Again, suitable for preparation for wallpaper, cobwebs and decorative.
What putty to choose for painting
The wall is prepared for painting as follows:
If the plaster is on the wall - 2 layers of starting gypsum putty, primer, if required, we glue the cobweb or reinforcing mesh and 3 layers of finished finished putty, grind and you're done. If you are interested in specifics, then I use acryl-putz starting at the beginning and rotband pasta or sheetrock at the finish. This is with regard to high-quality painting. If high-quality painting is not needed, then you can putty 3 layers of starting putty, grind and paint.
What putty to choose under the wallpaper
Under the wallpaper I use a starter putty, which comes dry in bags. If we putty plaster, then basically 3 layers of gypsum or acrylic starting putty are enough. I can recommend acryl-putz, prospectors, typhoon, knauf. (if they are sold in your regions)
Pay attention to the price, cheap stuff is almost always bad. We'll talk about how to putty the walls under the wallpaper a little later.
Start-finish putty
Positioned as a universal filler. Very well suited for preparation for wallpaper, cobwebs and for rough painting. As a finishing putty on cobwebs, this mixture will not work, I also do not recommend it for finishing for painting ceilings and slopes. The finishing putty should be ready-made in buckets on a polymer basis, not dry. There are no universal putties that perform their function well everywhere.
Best finishing putty
During my long time in the finishing industry, I have tried working with different brands. I used them in different conditions and on different surfaces. As for the finishing putty, I can safely say that you need to take Knauf rotband pasta, sheetrock, Bostik finspakel (it hardens strongly) Often the finishing putty is called "ready putty for walls"
Summing up the selection
Brief selection of putty. For those who are too lazy to read the entire article, who just need to know the number of layers and which putty to buy:
| Preparation type | Work order |
|---|---|
| under the wallpaper | 3 layers starter |
| for painting | 2 layers of starting, cobweb, 3 layers of finishing |
| for decorative coating rough | 2 layers of starting, mesh reinforcement, 1 layer of starting |
| finely dispersed decorative coating | 2 layers of starting, reinforcement, 3 layers of finishing |
| slopes | 2 start, web, 3 finish |
| GKL for painting | finishing of seams with special putties, cobweb, 3 finishing layers |
| GKL under the wallpaper | finishing of seams, finishing of seams with finishing putty |
| loggia | 3 layers of facade (if you really need to putty, and it is damp on the balcony) |
| basement | if it is very damp, facade putty 3 layers. |
| bathroom | although not recommended, I use the same technology as in other rooms. But you can paint it with moisture-resistant paint. |
We will talk about this in more detail in the following chapters.
Ceiling plaster technology
You can check the required degree of density of the mixture as follows: take a little mixture on the spatula and turn it over. If the mixture is too thin, it will quickly drain off the spatula, and if it is too thick, it will simply remain on the inverted spatula.
If the resulting solution smoothly slides down from the spatula, it means that we have achieved the correct consistency, you can proceed to the putty.
- We collect our mixture with a small spatula and put it on a large spatula.
- Next, we put a large spatula to the joint of the surface at a slight angle and slide it along the ceiling with a sliding motion until all the mixture from the spatula is on the ceiling. The thickness of the layer for the starting putty should not exceed 4 mm, for the finishing putty - 2 mm.
- We repeat the previous steps again: we collect the putty and smear it on the ceiling. Make sure that all layers are applied equally, and there are no streaks from the trowel. They must be wiped off immediately so that the ceiling covering is solid.
Tips for plastering the ceiling
Work should start from the corner of the room or from the wall, not from the middle. If you are trying to putty the ceiling on your own for the first time, then the initial section of a couple of meters will become a training section for you. Then you "fill" your hand, and the work will go faster.
When filling, you will need to use a stepladder to reach up to the ceiling. But a table will do too. For a beginner, the table is even more convenient: you can walk on it and place the materials at hand (mixture, spatulas) in the same place.
After you have applied the mixture to the entire surface of the ceiling, it is left to dry. The manufacturer also writes on the packaging the drying time of the mixtures, usually about 24 hours.
After the mixture has dried, the surface is checked for irregularities and "blemishes" using a portable lamp. We just send extra light onto the surface and see how it works. If everything suits us, we proceed to sanding. If not, smooth the surface with the mixture again.
How to sand the ceiling after putty
The ceiling must be sanded after the putty. Even if you have plasterboard ceilings. Or if the work was done by a professional, the ceiling will not look solid and smooth without sanding.
Sanding the starting layer of the putty is carried out using a special device in the form of a trowel and sandpaper. Sanding is carried out in smooth circular movements, without strong pressure, so as not to leave unnecessary chips and stripes. Do not forget to protect your hair with a scarf or cap, your eyes with goggles, and your respiratory tract with a respirator (a pharmacy mask is also suitable).
Now you can start applying the finishing layer of putty to the ceiling.
How to apply ceiling finishing coat
- To do this, you first need to prime the sanded layer of the starter putty again.
- Next, we dilute our finishing mixture (according to the instructions on the package).
- The technique of applying the finishing putty to the ceiling is the same as when applying the starting one. The whole procedure is repeated: we apply the mixture to the ceiling, wait for it to dry, check it with a lamp.
If everything is ok, we grind the ceiling, and you can proceed with the final finishing or painting.
What qualities should the putty differ?
Any defects on the canvas quickly catch the eye, because such a surface forms an open space.
There are a lot of tips on how to level the ceiling with putty with your own hands, but not everyone understands that the putty itself plays a significant role. So how to choose a ceiling putty? If the material was selected correctly, then the work will be done easily and simply.
There are several basic requirements for putty mixtures:
- The structure should be as homogeneous as possible. The presence of large particles in a high-quality putty is not allowed;
- Sufficient time for solidification. Otherwise, there is a risk of simply not leveling the surface on time;
- The presence of elasticity of the total mass, which should guarantee the ease of application of the material;
- The putty should not spread and crumble;
- Significant strength and high adhesion coefficient.
There are several types of putty on the market today. They can differ in four main factors:
How is it easier and easier to align the ceiling? Plaster or plaster?
We suggest that you familiarize yourself with several popular types of putty that will help you make the right choice. So, according to its composition, the putty can be of the following types:
Plaster. Perfectly bridges ceiling cracks. It is used exclusively in dry rooms and can be the basis for future thin coatings;
Cement. It is used for the ceiling in rooms that are characterized by high humidity: kitchens, baths, toilets. Perfectly masks large depressions;
Polymeric.It is used if you need a perfectly smooth surface, and therefore when it comes to how to level the ceiling with a putty with your own hands, and which mixture is best for this, then most experts recommend using a polymer putty.

Also, the putty may differ depending on its purpose:
- Starting. Help pre-prepare the ceiling. The composition of which can be either gypsum or cement. A coarse fraction is used, which helps the mixture adhere well to the ceiling;
- Finishing. They differ in fine grain size and soft consistency, due to which such a putty is very easy to apply. Helps to eliminate small cracks;
- Universal. This is a symbiosis of two materials, and therefore such putties can be used for both starting and finishing works. As a rule, they are used on a surface that does not have large flaws.
Plasterboard ceiling plasterboard for painting - how to do it right, instructions
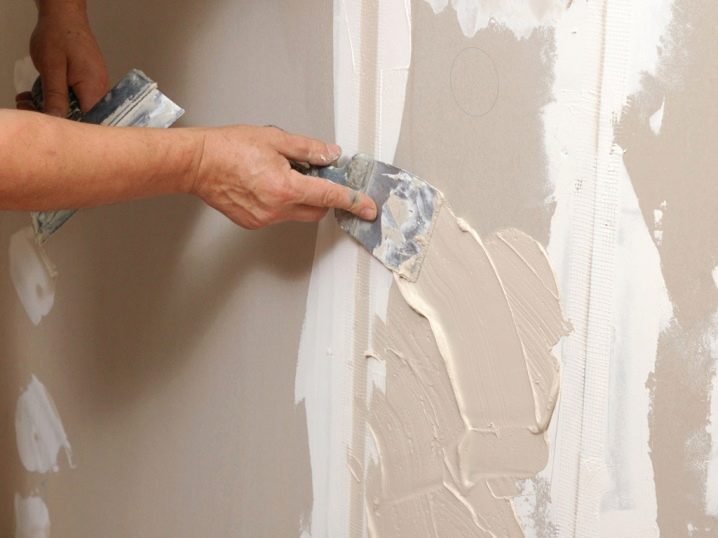
First of all, it is recommended to level the surface, close up the joints of gypsum plasterboard sheets using a serpyanka tape
In addition, you should pay attention to the caps of the screws, they should not stand out on the surface of the ceiling or be too recessed. If, in the process of screwing in, grooves nevertheless formed, it is necessary to cover them with putty
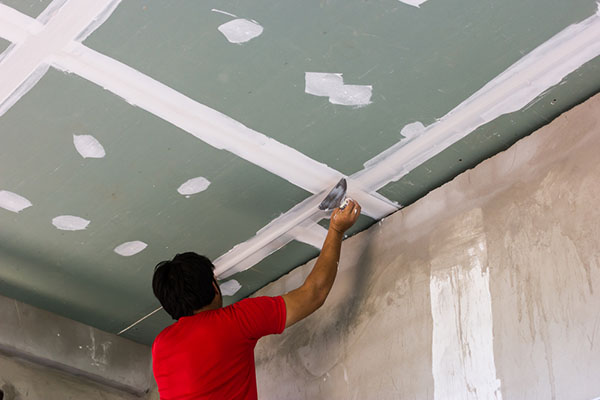
For a high-quality application of a layer of putty on the ceiling made of gypsum plasterboard for painting, it is necessary to close up the joints. To do this, you should adhere to a certain order: Multi-tiered structures made of plasterboard sheets have external and internal corners.
Perforated corners can be used to reinforce the inner corners. Before plastering the plasterboard ceiling for painting, it is necessary to stick a serpentine tape on the corners. It is fixed in the central part of the inner corner and covered with a layer of putty.
Corner joints are leveled with a special corner trowel. To strengthen the outer corners, you can use metal or plastic corners, they should be pressed into a layer of damp putty. Then the corner and the surfaces extending from it are processed.
Putty is applied in layers, waiting for the previous layer to dry before the next application. The steps are repeated until the surface is perfectly flat. The surface of the plasterboard ceiling prepared for painting must be perfectly flat. Otherwise, even minor defects will stand out after staining. Therefore, the process of preparing a plasterboard ceiling for painting requires a final stage, which involves sanding the surface.
In this case, special attention should be paid to problem areas. In addition, the paint lays on the sanded surface more evenly and adheres better to the plasterboard ceiling.
Additional information on the topic:
- How to install an interior door in a drywall partition
- Is it possible to fix the rails for the wardrobe in drywall
- What to attach cable channels to drywall
- Corner shelves in the hallway made of plasterboard photo
- Do I need to glue wallpaper on a plasterboard ceiling before painting
Ceiling plaster technology
The process consists of several sequential stages. Before puttingty the ceiling, it is necessary to prepare and clean the surface. Initially, the old finishing coating is removed, loose areas are cleaned. Wallpaper and whitewash are removed by wetting and then removing the coating with a metal spatula. The base is cleaned from the remnants of dirt and dust.
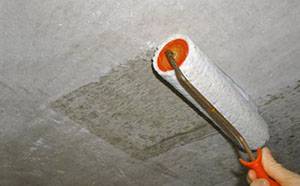 Then, using a roller or brush, the base is treated with a primer in 2 layers. Layers are applied perpendicular to each other. The primer should lie flat, without streaks. To continue the work, they wait until the base dries up. Drawing
After preparing the surface, they proceed directly to the ceiling putty with their own hands. The process can be conditionally divided into several stages. So, how to properly putty the ceiling?
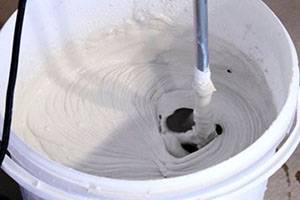 The first stage is mixing the putty solution. To prepare the composition, it is recommended to use a mixer or a drill attachment. In this case, the mass is homogeneous, without lumps.
To prepare the correct solution, follow the manufacturer's instructions for use. The consistency of the solution should resemble thick sour cream.
 The second stage is the application of the first layer to the ceiling. To get a quality finish, you need to know how to properly apply the filler to the ceiling.
For surface treatment, two spatulas are used - a narrow one and a wide one. A small portion of the mixture is taken with a narrow tool and applied evenly over the working part of a wide spatula.
Further, the composition is distributed over the surface of the ceiling with a layer of equal thickness. The layer should be as uniform and thin as possible. The composition remaining on a wide spatula is removed with a narrow tool and sent back to the container with the composition. Instead of a wide spatula, you can use a sander. With its help, work is done faster.
Thus, the entire surface is processed. The ceiling is not touched until the first layer is completely dry. The holding time depends on the composition, and it is indicated on the instructions for use from the manufacturer.
 The third stage is leveling the dried layer. After the first layer of putty has dried, remove all irregularities. Sagging is removed with a spatula or sandpaper. After removing excess composition, the surface is cleaned of dust, as it affects the quality of the subsequent layer. Drawing
The next stage is the imposition of the second and subsequent layers. The number of layers depends on the evenness of the base. The more differences and irregularities, the more composition is required to be applied.
If the differences are no more than 10 mm, the putty is applied in several layers. If the dimensions of the defects are more than 10 mm, then a reinforcing mesh is used to strengthen the leveling finish. It eliminates the risk of cracking. It is allowed to use the mesh with a small layer of putty.
All subsequent layers are applied in the same way as the first. But each subsequent layer is applied only after the previous one has completely dried.
 The final stage is the application of the finishing putty to the ceiling. For the last layer, a special composition is often used.
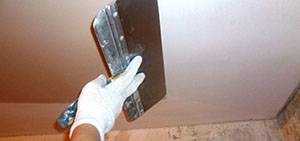
How to apply ceiling finishing coat? The last layer of the composition should be the thinnest. The mixture is applied with a wide spatula. The work is carried out at a fast pace, since it is impossible for the putty to dry out at the edges.
When working, it is recommended to hold a wide spatula practically perpendicular to the surface, which allows obtaining a layer of the required thickness. Excess composition is immediately removed with a spatula. Drawing
If the whole process was carried out correctly, then after the finishing layer has dried, sanding is not required. But if in the future the ceiling is painted, then grinding the surface is a mandatory step. The ceiling is treated with fine grain sandpaper. A carrying lamp is used to identify all defects.
This is the main technology of ceiling putty. However, when working, you should take into account the individual nuances of surface treatment.
Tools and materials
Before you putty the ceiling for painting, you should check the presence of tools:
- drill with kneading attachment;
- kneading bucket;
- roller and brushes;
- spatulas;
- construction trowel;
- construction float with abrasive mesh of different sizes;
- grinding;
- ladder.
Materials should also be prepared:
- deep penetration primer;
- putty mixture (starting plaster);
- finishing putty;
- dye.
Rules for choosing a putty mixture
The starting compound is a mixture with coarse abrasives, designed to eliminate serious defects - chips, potholes. The total thickness of the application is up to 1.5 cm. You can apply the mixture in two layers, pre-drying the previous one and observing the indicator of the total thickness. The kneading should be the consistency of thick kefir, the putty should not be stretched, as well as applied in lumps - applying with a spatula with firm pressure on the tool to seal all defects.

The finishing mixture is a composition with very fine abrasives. Such a putty evens out the plane, giving it a mirror-like smoothness, therefore, the batch should be of a consistency not thicker than fat milk and the mixture is applied in a very thin layer, stretched over the largest possible area.
When choosing which putty is better for a ceiling for painting, you should pay attention to the following parameters:
- Appointment of the premises. A kitchen or bathroom needs a mixture that is resistant to moisture and dirt.
- Ceiling material. For a wooden base, a mixture with a fire retardant should be chosen in order to increase protection against fire, a composition with good adhesion is useful for an old concrete ceiling, and soft mixtures for a surface made of gypsum plasterboard sheets.
- Composition. As additions, components against fungus, mold, protective agents, etc. are added.
Primer selection rules
In addition to the composition, impregnation is needed to level the plane. The primer for the ceiling under the putty is selected for extremely deep penetration
You need to pay attention to the manufacturer's recommendations for the type of substrate for which the impregnation is intended.
There are several types of primers:
- Acrylic. It is used for impregnation of bases made of concrete, wood, gypsum board, foam concrete, plastered surfaces.
- Phenolic. It should be used for metal, wooden ceilings and plasterboard sheets.
- Alkyd. The mixture is applied before coating with alkyd paints, wood can be processed.
- Glyphthalic. Used for metal, wood surfaces. Considered toxic and suitable only for outdoor use or in well ventilated areas.
To choose a high-quality soil, it is better to look for the presence of antifungal components, impregnation with moisture-resistant qualities.

The question often arises - why do we need a ceiling primer for painting? The mixture increases the adhesion of the base to any decorative and finishing materials, protects the surface from biological life forms. If preparing the ceiling for painting with your own hands does without soil impregnation, after a short time the putty will peel off along with a layer of paint and you will have to do the repair again.
Preliminary stage (for critically uneven surfaces): plastering the ceiling
You can plaster any surface: concrete and wood, columns, beams and other structures made of steel. Before applying the plaster to the ceiling, preparatory work should be done.
Preparation
Ceiling made of concrete must be well cleaned of various contaminants
Particular attention should be paid to mold or other stains of fungal origin, which must be treated with a special disinfectant solution. For example, copper sulfate, the German-made Pufas preparation or Homeenpoiste, the Finnish company Tikkurila
If on a concrete floor, the fungus has occupied large areas, the fight against it is carried out using an open fire (blowtorches, plasma welding, etc.). If the ceilings have already been painted or whitewashed, the old coating should be removed.
Carry out a primer with a strengthening compound, and then with a special primer mixture "Betonokontakt".
For better adhesion of priming compounds to the concrete surface, it should be treated with a sandblasting machine that creates roughness. For the same purpose, it can be slightly notched or cut.
On wooden ceilings, as well as on the surface of steel structures, a metal mesh with a mesh size of 10x10 mm is stretched before plastering. It is attached to the surface to be treated, including joints and seams, with special studs, with a wide head, or staples.
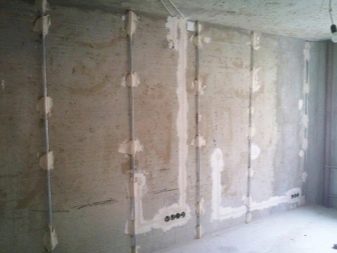
Installation of beacons
Plastering work is usually carried out on lighthouses, the installation of which is the most crucial moment. If installed correctly, you will end up with a perfectly flat plastered surface.
Therefore, it is important that the entire technology of plastering the ceiling on beacons is followed.
- You need to start this work with leveling the room. It is necessary to mark the zero mark on the walls. For this, a paint cord is used.
- The location of the point that is the lowest on the ceiling is determined. This is where the first beacon was installed.
- Under the lighthouses, gypsum marks are applied every 300 mm over the entire surface with small moldings, on which they will be installed. This must be done so that there are as few connections as possible, since it is in them that errors are most often made.
- It is not recommended to lay a layer of plaster more than 5 cm on the ceiling. Therefore, the height of the beacons should not exceed this value. To control them in the horizontal plane, a two-meter level is required. It is carried out after the installation of all beacons is completed.
Lighthouse plaster
When you are finished with the installation of the lighthouses, the plastering of the ceiling can be started using the following technology:
- Prepare a working solution - gypsum, cement or lime. It must be remembered that when using a gypsum-based solution, each subsequent layer is applied 20-25 minutes after applying the previous one; cement - not earlier than two hours later; calcareous - only after the previous layer turns white, preventing it from completely drying out.
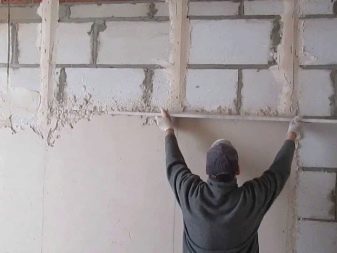
- Apply an even layer of spray without leveling it.
- Several primer layers are spread over the spray, observing the time required for fixing the applied solution. They must be leveled every time, and make sure that they do not exceed the level of the beacons, and also that various defects, such as shells or pits, do not appear on the primed surface. The thickness of the covering layer of the plaster depends on this.
- Remove lighthouses with stamps. This is done after distributing the last primer layer, and the used solution is applied to the places where they were located.
- Check the evenness of the plaster laying, using the rule that is applied, changing the direction. The irregularities revealed in this case are cut off or, conversely, increased with an additional layer. At the same time, it is necessary to close up the inner corners and joints between the ceilings and the wall. This work is done with a half-trowel.
- At the end of the plastering work, apply a cover layer, which is carefully leveled, creating a smooth surface.
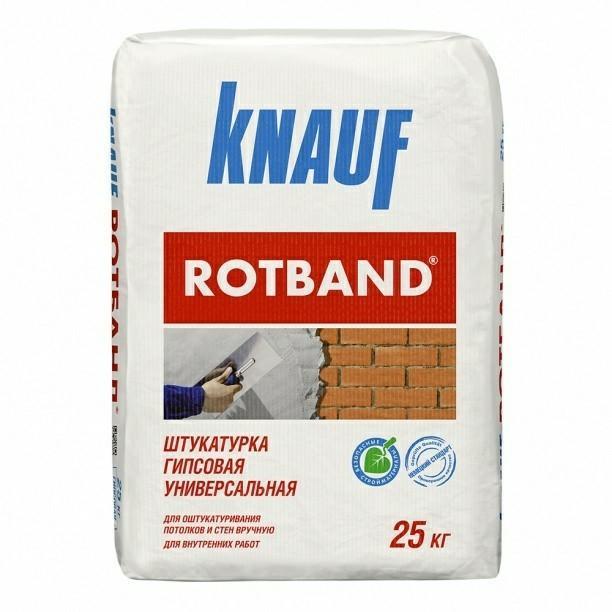
With a difference in the level of the ceiling of less than 5 cm, you can align the ceilings with dry mixes. It is advisable to use them for small volumes of work, in particular for sealing potholes, when the purchase of a large amount of other materials is not financially beneficial. The best of them is considered to be rotband (made in Germany) - a universal mixture for plastering, on a gypsum basis.
After finishing the “rough” leveling with plaster, you can proceed to the final leveling with putty.