Putty for concrete repair. Putty for concrete floor - is it necessary and which one to choose
Greetings dear meeting. Need advice on a concrete floor. Renovating an old apartment on the first floor. I opened the floor covering to the very base, I plan to insulate the floor. In the rooms - logs and mineral wool, in the bathroom - expanded clay under a dry screed. But the concrete is cracked. Tell me, do I need a putty for a concrete floor in my case, if a film vapor barrier is laid under the insulation?
If necessary, which one is better to take so that it is suitable for all premises?
Thanks for the answer. Ivan.
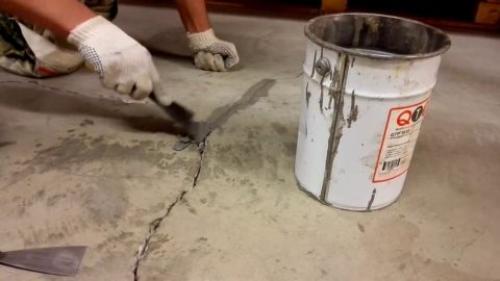
Sealing cracks and filling concrete floors
And we welcome you, Ivan. And we answer your question in the affirmative: yes, it is very desirable for a concrete floor, in your case. Of course, if you want to make a quality renovation and not return to it in the coming years.
Why do you need putty
The point is not that some kind of instruction is required to seal errors in the base before it is insulated and finished. This is a time-tested technology, the implementation of which will allow you to be confident in the quality of work and will lead to a long-term and trouble-free operation of the floor.
What gives such confidence? What is the treated surface:
- Acquires high wear resistance;
- Resists erosion better;
- Becomes resistant to moisture and mechanical damage;
- It is leveled, which facilitates the further installation of materials.
If there is a basement under the house, dampness can pull from there through the cracks. A common consequence of this is black mold. Insects can also enter the apartment through them.
In short, it is better to repair the base. It's easy to do it yourself, but which mixtures to use is up to you. Our job is to tell you about their features.
Types of putties
Concrete floor putties differ in composition and method of application. They are basic, finishing and universal.
Advice. Since you just need to patch up gaps and potholes without leveling, finishing materials may not be considered. The best option is universal formulations.
So, how to putty the concrete floor, the mixture on which basis to choose?
Gypsum
The advantages of gypsum putty are the absence of shrinkage after drying and a low price. But it is not suitable for the floor, as it is afraid of moisture.
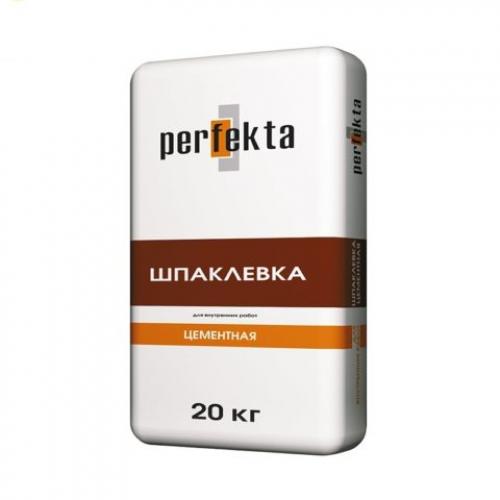
Cement
The most common material for repairing such surfaces is a dry mix based on cement.
It has the following advantages:
- Affordable cost;
- Strength;
- Resistant to moisture;
- Resistant to temperature extremes.
These are exactly the properties you need. And even the shrinkage of the cement mixture after drying in your case is not a significant drawback that affects the quality of the finish. All the same, the surface will not be visible.
Cement mix
We can stop at this - the suitable material has been found. But there are others that are more convenient to work with or used in difficult cases. Let's talk about them too.
Polymer
It is made on the basis of synthetic resins and contains, in addition to them, cement, marble chips and other components. It comes in a ready-to-use form, which is very convenient. But it's expensive.
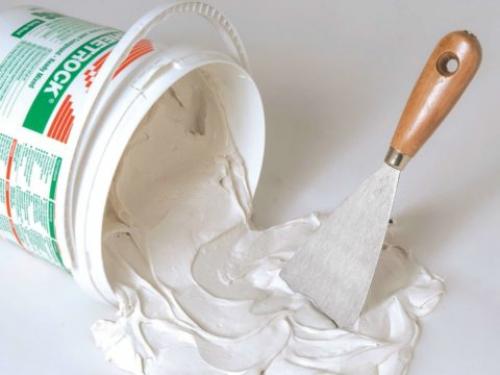
Ready-to-use polymer putty
Advice. Before you putty the floor, assess the amount of work to be done. If a lot of material is required, it is hardly worth spending a large amount on an expensive putty.
The advantages of polymer formulations:
- Convenient form for use - ready-made plastic mixture in a plastic container;
- High speed of hardening;
- No drying shrinkage;
- Water resistance;
- Waterproofing properties.
Epoxy
The epoxy mixture consists of two components - base and hardener, which are mixed before use.
She possesses:
- High adhesive properties (adheres well to the surface);
- Resistant to chemicals, moisture, mildew and mildew;
- Durability.
Thanks to these qualities, such a composition fills even large gaps and voids very efficiently, creating a wear-resistant coating. It is used when the base is badly damaged, there are voids on it from dismantled pipes and fittings, joints between plates, etc.
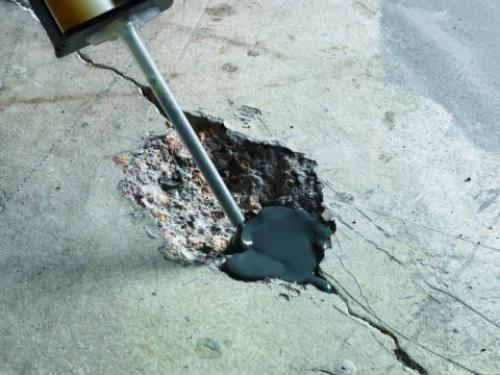
The photo shows the filling of potholes with epoxy putty
Epoxy putty literally pulls the concrete in damaged areas, strengthening such areas well.
Conclusion
How to apply floor putty, you will learn from video in this article. As for the choice of material, then the decision is yours. Cement compositions are the most affordable and versatile. Polymer - easy to work with, plastic. And epoxy ones are indispensable for serious surface damage.
We hope that now you yourself can choose how to putty the concrete floor.
Views
Putty is used in order to eliminate minor imperfections and level the floor surface. Modern manufacturers offer a large number of filler materials.
Various options are suitable for wooden surfaces:
- Acrylic - this type of putty mixture will eliminate unevenness and imperfections in the floor surface. The putty is no less good for grouting. The composition of acrylic is moisture resistant, fireproof, elastic and durable. The main requirement when working with acrylic putty is a carefully prepared, clean and dry surface. After the floor is dry, it will have a smooth and shiny texture.
- Putties based on various kinds of solvents, which include wood dust. Indispensable when working with wood massifs, even rare ones. Suitable for filling parquet flooring. Solvent-based mixtures are good for treating surfaces equipped with underfloor heating systems. Dry very quickly.
- Oil - the basis is oil, chalk and water. High strength and durable composition. The oil composition dries for a very long time. If this is not critical, then you can be sure that the coating will be of high quality and durable.
- Polymer - the base is water, good for filling holes and smoothing irregularities. Dries quickly, eco-friendly, durable. The advantage of polymer putty is that dust does not accumulate on the surface treated with it and the processed edges of wooden boards are not clogged. However, it cannot be used for filling cork floors.
Regardless of the type of putty chosen, it must have a number of qualities:
- be uniform in texture;
- have good adhesion (adhesion to the surface);
- dry quickly;
- do not have any impurities and additives in the composition;
- cover the floor qualitatively.
Putty mixture is the best leveling agent concrete floor... The best is a putty composition based on PVA glue, and you can either buy it or make it yourself. In the second case, it will cost several times cheaper.
The advantage of working with this type of putty is that the mixture is ready immediately, you do not need to pre-mix it. The solution is very malleable, so it is quite easy to apply. It has excellent adhesion, so it "adheres" well to the floor surface.
Once the floor is dry, there will be no cracks, pits, unevenness or bald spots. Also, this type is not subject to shrinkage. The surface will turn out to be smooth, beautiful, with no air bubbles, bundles and other troubles.
Very often, when faced with a rather high cost of putty mixtures, people prefer to make it on their own from materials such as PVA, drying oil, cement, sand and other components. With some skills and everyday ingenuity, you can make a composition no worse than a factory one.
There is another type of putty mixture - waterproofing. It contains a three-component polyurethane compound consisting of a semi-finished product, a hardener and a dry mixture. It can be used either alone or with other putty materials. It is very durable and resistant to all kinds of mechanical stress.
Features of the polymer mixture
What is a polymer putty and why has it become so quickly more popular than its gypsum counterpart? Let me tell you about its benefits.
Advantages and disadvantages of mixtures

The composition is very easy to apply.
- Elasticity and ductility. Thanks to these qualities, the material can be spread in a very thin layer. The plasticity of the mortar makes its application easy. The mixture can be smoothly leveled over rough concrete and plastered surfaces. Using parquet mortar, you can fill thin joints with it.
The finish can be applied in a very thin but durable layer.
- The material has good hiding power. A coating applied in the thinnest layer has the same strength as a thick layer.

Having filled the joints of the wooden base once, the putty will not crumble out of them.
- Reliable adhesion to the surface. The mixture effectively interacts with the base being processed, adhering rigidly to it. Even with hardwood floors, which can deform due to temperature changes. The dried composition does not bubble, swell or exfoliate.
- The coating does not shrink. Therefore, the wall putty does not crack or flake off. Due to its elasticity, the coating does not collapse during the shrinkage of the building.
- Temperature resistance. The film, which covers the putty after hardening, is resistant to high temperatures. It does not melt or burn.
The safety and quality of the material is confirmed by the certificate of conformity.
- Environmental friendliness. The material does not emit toxic substances.
- The coating is vapor permeable. The manufacturer's instructions indicate that this prevents the reproduction of harmful microorganisms. This quality is especially valuable for wet rooms.
- Possibility to choose a ready-made or dry mix. The convenience of the finished formulation is that you do not need to measure out the right amount of dry material and thinner. And then mix them. But you cannot make the consistency more liquid or thick.

The dry mixture can be diluted in the amount you need.
With a dry mix, you won't have this problem. You can make it, taking into account the desired consistency, the state of the base and the amount of material you need.
- Long service life. The service life of the coating is 15–20 years.
All types of putties on polymers have water repellency properties. Thanks to them, such formulations can be used in damp rooms. The moisture resistance of the coating is achieved due to the formed film, which acts as a moisture barrier.
The result of using plaster in a damp room.
When thinking about which filler to choose polymer or gypsum, keep this in mind. Gypsum material is not moisture resistant. Although now manufacturers have begun to produce improved plaster putty with polymer additives. It is waterproof.
The only drawback of acrylic and latex compounds is that they are expensive.
When comparing which plaster or polymer putty is better, take this into account
Production cost

The downside of acrylic material is that it is expensive.
Polymer-enhanced putty costs differently due to the different composition and form of release.
- Acrylic is the most expensive coating. Its price is 320-400 rubles for a container of a ready-made solution weighing 4.5 kg.
- Latex trim costs 350–500 rubles for a 16 kg bucket of finished trim.
- The polymer-cement composition is the cheapest. A bag of such a dry mixture, weighing 20 kg, costs 350 rubles.
> Conclusion
Polymer-based putty will allow you to get a solid and even base for further finishing. This modern material has the best characteristics among analogues.
Peculiarities
Putty is called a repair building mixture, the purpose of which is to seal holes and cracks, as well as to eliminate minor defects in the floor, walls and ceiling. In the case of floor treatment, its layer is intermediate between the primer and the application of the finish - paint, laminate, linoleum. The better the mixture covers the unevenness of the surface, the longer the floor will last.
Floor putty is slightly different from the same procedure on walls or ceilings. For the floor, the putty is not kneaded as thickly as for the ceiling or walls. The ratio of composition and water is 1: 5. The floor surface is pre-primed.
In addition to the above, the floor surface requires the application of more layers. The coatings that are laid on top of the putty are also different: substances such as drying oil or wood stain are not used to cover wall and ceiling surfaces.
In addition, puttying of different types of floors - wood, concrete, expanded polystyrene - has its own characteristics.
What functions should the putty perform on the floor
- In the case of a wooden surface, the material allows you to hide joints and cracks in the boards, giving the floor a monolithic presentable appearance. At the same time, the use of putty can prevent squeaking, if any;
- Wooden floors with putty can also be protected from moisture if the appropriate compound and primer are used;
- Regardless of the type of floor (wood or concrete), the putty performs leveling functions. Linoleum, laminate, parquet and other types of flooring should be laid exclusively on a flat floor, which is what the putty composition allows to achieve.
Leveling the floor with plywood
Today it is the most popular way to prepare a wooden floor. It allows you to fulfill all requirements and achieve a perfectly flat surface suitable for any floor covering, be it laminate, tile, linoleum or other fashionable options.
Most often, this method is used to prepare a high-quality coating for laminate flooring. To level the wooden floor, experts advise using a grade of FC plywood, a class of at least 4/4, with a thickness of at least 12 millimeters. If the surface of the base is sufficiently flat, then it is allowed to use plywood sheets with a thickness of 8-10 millimeters. For leveling the floor on the balcony, see here.
As in other methods of leveling the floor, the process begins with the installation of beacons, which are used as self-tapping screws located over the entire surface at a certain height. Lighthouses are usually installed at the corners of squares with sides of 25-30 centimeters.
Laying logs for plywood
Using a screwdriver and a level, the beacons are set to the desired height, after which they begin to lay logs, which are made of plywood in the form of strips 30-40 millimeters wide.
On the floor surface, the logs are fixed with wood glue (for example, PVA-moment, PVA-joiner and other types of special glue) or using self-tapping screws. Plywood pieces smeared with glue are placed in the voids formed between the boards and logs.
Section lag depending on the size of the span
| Room span size | Section lag |
| 2 m | 110 x 60 mm |
| 3m | 150 x 80 mm |
| 4 m | 180 x 100 mm |
| 5 m | 200 x 150 mm |
| 6 m | 220 x 180 mm |
Now you can start preparing the plywood sheets for laying on a wooden base. Usually, plywood sheets are pre-cut into equal squares with a side size of about 60 centimeters.At the same time, there is practically no waste, since such squares are obtained by cutting a standard sheet of 125 by 125 centimeters into four equal parts. Leveling the floor with joists is an alternative way to level the floor.
After sawing, you need to carefully inspect the ends of each square for delamination, which is usually not visible in whole sheets of plywood. Plywood squares with bundles must be replaced. Then they begin to lay the plywood sheets on the lag mesh. At the same time, make sure that the joints of the squares fall exactly on the logs.
Optimum plywood shape: square
Laying is carried out with an offset (like brickwork), avoiding the intersection of four seams at one point
Advice! To cut plywood efficiently while saving material, effort and time, lay the sheets on the floor BEFORE installing the lags... By marking the exact joints of the plywood sheets with chalk, you can install the joists exactly where you need them.
Plywood squares are attached to the logs with self-tapping screws, be sure to countersink the attachment points. After laying the plywood, we get a floor that is suitable for any kind of coating.
If you plan to lay tiles, then the plywood is sanded roughly, especially at the joints of the sheets and in the areas of attachment to the joists. After grinding, varnish is applied to the surface.
If the coating is processed under the laminate, then it is advisable to immediately lay the substrate on the plywood. Foamed polyethylene or cork sheets are usually used as a backing.
Requirements for floor putty
Putty for wooden surfaces can be used not only when installing a new floor from parquet or board, but also in case of its cosmetic repair. With its help, it is possible to easily wipe all the seams between the elements of a freshly made coating and make its surface even and smooth. When updating an old coating for the purpose of its subsequent painting, covering with linoleum or tiling, putty on wood can hide grooves from board wear, voids from fallen knots, holes from removed nails, cracks in the surface and small gaps in the floor.
Depending on the type of these works, wood putties may differ in their composition, but they all must meet general requirements, which include:
Sufficient elasticity that allows the mixture to spread evenly over the surface and fill all its holes and crevices.
- High degree of adhesion of the putty to wood, which guarantees long-term operation of the coating without swelling or delamination.
- The uniformity of the composition, excluding the presence of foreign impurities or separate large particles of filler, which, when processing the floor, can leave scratches on it.
Construction putty for leveling the wooden floor of terraces, gazebos and other objects located in open areas, in addition to the above requirements, must have additional properties, including:
- Frost resistance, allowing you to work with the material and use the resulting coating without losing its quality at low temperatures.
Water resistance, which protects the floor wood from penetration of moisture through atmospheric precipitation, which can lead to premature destruction of the flooring from decay.
The speed of drying of the mixture, on which the duration of work on finishing the wooden floor largely depends.
A putty intended for the treatment of indoor floors must have other additional properties:
Environmental friendliness, which guarantees the safety of using the material during its application and subsequent drying.
Antiseptic properties that can protect wood floors from the appearance of fungus, mold and the growth of bacteria that are harmful to wood.
Fire resistance, which guarantees the safety of the putty layer at high temperatures or contact with an open flame.
Fulfillment of all requirements for wood putties is ensured with the help of modifiers - special chemical additives that are part of plastic materials and calculated by manufacturers separately for each type.
We offer you to familiarize yourself with Installation of plastic windows in a wooden casing
Gypsum mix
To quickly choose a putty, most buyers do not pay enough attention to the characteristics of the composition, but prefer the most popular option of all. Gypsum mix is the most popular floor putty.
Main advantages:
- There is no shrinkage;
- Extremely low price;
- The ability to make a perfectly flat screed for linoleum flooring and other coatings.
Only one layer of the selected gypsum mixture is able to solve all finishing problems. The only drawback is that the materials cannot be used for rooms where it is always very humid. These are bathrooms, toilet, kitchen.
Application method
It should be said right away that PVA putty is intended for finishing and is applied over the plaster or base putty. The fact is that, due to technical features, it will be rather difficult to create a thick leveling layer from it. For more information on the properties of this mixture, see this video:
Preparation of the base
The better the base is prepared, the less putty will be consumed
Before starting work, the supporting base must be carefully prepared. First of all, its surface must be leveled using cement or gypsum plaster.
If necessary, it is also possible to apply a base cement putty, intended for sealing small defects of the plastered surface.
It should be borne in mind that the higher the quality of the base finish, the smaller the layer will have to apply the finishing plaster, and this is a significant saving of time, effort and material.
The next step is to clean and prime the leveled surface. The base is thoroughly cleaned from dirt and dust. To do this, use a vacuum cleaner and a damp sponge.
If it is necessary to remove greasy and oily dirt, the wall should be treated with organic solvents (white spirit, acetone, gasoline, etc.).
After that, we proceed to the application of the primer, which is intended to increase the adhesion between the treated base and the putty mortar.
The primer-composition is applied to the base to be treated with a paint roller or brush. At the same time, in order to achieve a greater effect, it is recommended to make a primer in two or three layers. In this case, each subsequent layer should be applied after the previous one has completely dried.
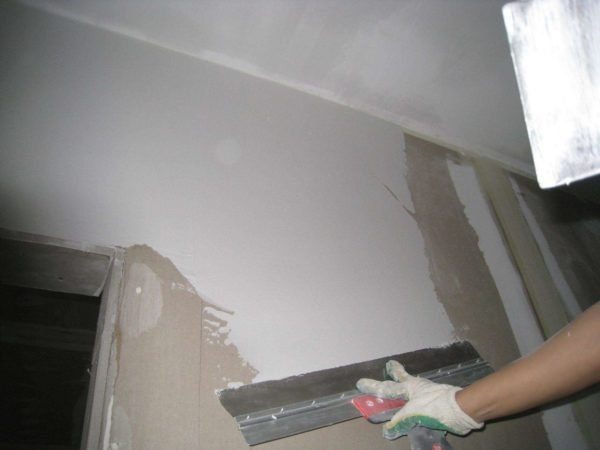
Putty application
To apply PVA putty to the base to be treated, you will need the following tools:
- Wide and narrow trowel for spreading mortar over large areas.
- Assembly gun - for sealing deep cracks and cracks with a sealant.
- Plastic wrap and masking tape.
- Construction mixer.
Before starting work, cover the floors, windows and doors with plastic wrap and secure it with masking tape. The fact is that PVA tends to be deeply absorbed into the surface, and it can be difficult to remove unwanted stains from putty drops. For the same reason, we glue the door frames, etc. with masking tape. For an overview of glue-based putty, see this video:
Deep cracks on the surface to be treated should be widened and cleaned out with a sharp trowel. Then they are sealed with a sealant or glue solution "liquid nails". This will prevent an increase in cracks, which would otherwise lead to cracking of the putty surface.
Store mixes are stratified, so you need to mix them thoroughly.
Before applying the putty, the finished composition should be thoroughly mixed with a construction mixer. Being in a store warehouse, the finished mixture will inevitably stratify: heavier components will sink to the bottom, and a watery solution will rise up. Stir well to restore the homogeneity of the mixture.
After that, the solution is completely ready for use. We apply it to the surface to be treated using a wide metal spatula.
Using a narrow spatula, spread the mixture over a wide
To do this, the solution is taken from the container with a narrow spatula and evenly distributed over the entire length of the wide instrument. The solution is applied to the plane with wide, sweeping movements
After that, you should wait until the putty surface is completely dry and only then proceed to its further processing. First of all, it will be necessary to prime the layer of PVA-putty again, and after that proceed to painting it or pasting wallpaper. See the main points of proper filling in this useful video:
Types of putty for wood floor
Today, a large number of different putties for wooden floors are offered on the construction market, which, in terms of composition, can be divided into several main types:
- solvent-based putty mixtures;
- acrylic blends;
- oil putties;
- polymer mixtures;
- hand-made mixtures.
- Solvent-based mixes contain fine wood chips as the main component, which is considered a reliable coating for all types of wood flooring. The main positive characteristics of such a composition are the ease of use and quick drying of the mixture, which significantly speeds up the process of laying or repairing the floor.
Solvent based blend.
- Acrylic parquet putty also has several positive qualities and is indispensable in the work on the elimination of minor wood defects. It is often used for grouting joints between wooden strips of coating, since it is environmentally friendly and does not emit toxins when exposed to high temperatures. The main quality is elasticity and resistance to various mechanical loads. Also, acrylic significantly increases the water-repellent qualities of wood and significantly increases its service life.
Acrylic mixture for parquet floor putty.
- Oil formulations contain components such as oil, water and ordinary chalk, which makes it possible to use it on any type of wood. The putty has a very long service life, however, due to the presence of oil in the composition, it dries for a very long time, which significantly reduces the speed of work. Do-it-yourself parquet putty using oil mixtures requires strict adherence to the instructions for use, which is indicated on the packaging from the manufacturer's factory.
Oil mixture for parquet flooring.
-
Polymer solutions are environmentally friendly, usually used in rooms with increased requirements for sanitary conditions. It is used on any type of wood, except for cork coatings. The main advantages of polymer putty mixtures are the following features:
- filling small voids and cracks;
- smoothing irregularities and other natural defects;
- protection of the end edges of the tree;
- does not settle after drying;
- does not create static electricity, which prevents dust from sticking.
Polymer mixture for wood floor putty.
- Very often, it is practiced to putty parquet from self-prepared solutions, which allows you to significantly save money and make exactly the composition that is necessary for a particular case.
Homemade putty mixture
First option
In order to prepare this mixture at home, you need the following ingredients:
- 500 grams of drying oil;
- 100 grams of animal glue with 10% concentration;
- 125 grams of varnish kerosene or turpentine;
- liquid desiccant 25 grams;
- liquid soap;
- regular chalk in a powder consistency.
Hot animal glue.
Animal glue is heated in a metal container over a fire, stirring constantly. In a heated state, the remaining components are added to the glue and mixed until a mixture is formed, which in consistency will resemble thick sour cream. Such a solution is mainly used as a putty for parquet: oak, aspen or pine.
It is important to remember that the mixture must be used only in a warm state, maintaining its constant temperature during operation.
Option two
The second option is a simpler, but no less effective way of cooking.
To do this, you need to take regular PVA glue and add wood dust to it, which remains after processing your parquet. The dust is mixed with glue to a thick mass (photo) and applied to the surface with a spatula. This type of putty will provide a natural color when sealing joints, but it has its drawbacks. When dry, the glue settles and hardens.
Self-prepared putty from PVA glue and wood dust.
Putty process
Before puttingty the parquet, it must be thoroughly vacuumed and, if possible, wiped with a damp cloth. Puttying is used in all types of work, both when installing a new parquet, and when repairing or maintaining an old one.
The putty is applied to the parquet floor using a conventional metal trowel in circular or semicircular movements, in order to fill all seams and small cracks as much as possible. After the mixture has set, the floor is ready for polishing.
Parquet puttying.