What is putty for?
The question of how what the putty is needed for, how and where to apply it, is quite common and interesting for both beginners and professional builders. Today we will try to reveal this issue to the maximum. We will describe most of the very commonly used tools, and a few of the basic, common types of putty.
So what is putty for? Each of us would like to see our home beautiful and well-groomed. But for this, high-quality finishing work should be carried out. And here it is worth asking the main question - what is the putty for? Most people either confuse plaster with plaster, or confuse their purpose. Putty is a special mixture that is applied with a thickness of 1 to 5 millimeters. This is the final part of the finishing work, followed by the redecorating itself, that is, painting or gluing wallpaper.
By the way, the materials for the putty are selected in such a way that the final layer, which will already be visible, ideally lies on the putty. So, special materials for putty can perfectly get along with absolutely all types of final coatings, which makes the putty simply irreplaceable before the finishing coat.
And now a little about plaster. It is applied in a layer up to 60 millimeters, it has a coarse-grained base, as a result of which, after it, the surface remains uneven and rough.
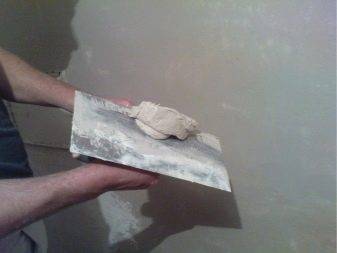
Next, let's talk about putty tools. Putty tools are specialized and often unique tools that can only work with putty. You can buy them at any hardware store. So they are not on the hard-to-find list. The most basic tool is the putty putty knife. Typically, they are sold either one at a time or in a set of five. Putty spatulas differ from each other in the size of the working surface. The smallest size of the simplest, stationary spatula starts at 4 centimeters and ends at 45 centimeters. Therefore, you, for sure, will find exactly the one that you need. The second, no less common tool in working with putty is a putty gun. This is a special device designed for airborne putty application. That is, the putty gun sprays the putty in an even layer.
And now directly about the types of putty themselves. So, the first of them is a putty for models. As a rule, it is very actively used in the production of souvenirs. Model putty can be seen on papier-mâché dolls. The second type is furniture putty. This type of putty, just like the usual type, is intended for puttying and painting the surface. But putty for furniture is slightly different from the usual in its composition and properties. The third type of putty is chipboard putty. In fact, it is not very different from the previous type of putty, but, nevertheless, there are differences. Chipboard putty has a very strong solution. Plywood putty is also almost identical to the two previous examples, but again with its own nuances. Plywood putty is used, for example, for repairs or for
covering up false walls. And also, there is a special putty for laminate flooring.
Initial operation of the oven
The use of high-quality materials (brick, mortar) does not guarantee long-term and reliable functioning of the stove or fireplace, if they are incorrectly “put into operation”.The fact is that solutions based on kaolin clay dry for a long time. Therefore, the first furnace must be made no earlier than three days after the end of the work.
Do not load the maximum amount of fuel during the first fire. It is necessary to load the stove to 60 - 70% and heat for 5 - 8 hours. At the initial stage of operation, you should continue to heat the stove in a gentle mode. With prolonged heating, the seams will be hardened due to sintering of kaolin clay, and the structure will acquire the necessary strength.
Sometimes, after the first furnaces, a white bloom may appear on the brick in areas of strong heating. This should not be feared. For the first times, the plaque is removed with a damp cloth, and then, as the oven warms up, the appearance of plaque will stop.
One more tip. Before finishing work, plastering or overlaying with finishing stone, tiles, the stove needs to be operated for several weeks.
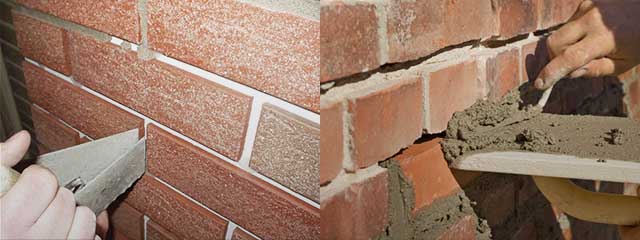
How to putty properly
| Illustrations | Recommendations |
| We clean the surface. If the structure is old, then the plaster must be removed and the gaps between the bricks must be cleaned about 10-15 mm deep. Then we sweep away the dust. | |
| We heat it up. The mixture will lie better if the oven is slightly heated beforehand, you should not be too zealous, 30–50 ºС on the surface is enough. | |
|
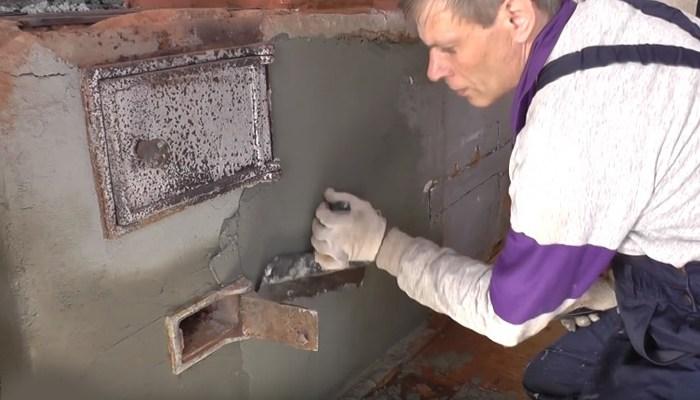
Reinforcement. In order to securely fix the putty on the masonry, the surface must be reinforced somehow.
Option 1. We just drive self-tapping screws with a length of about 75 mm into masonry joints and other problem areas. It is not necessary to screw in completely, the cap should look 10-15 mm. |
|
|
Option 2. With the same self-tapping screws, only with a washer, we attach a steel or fiberglass mesh to the masonry. The maximum cell size of such a grid is 10 mm.
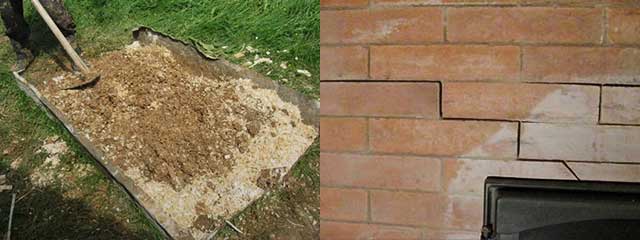
The second option is more suitable for relatively flat surfaces. If the masonry is strongly curved, as in the photo above, then it is better to do with self-tapping screws alone. |
|
|
We apply the primer. According to the technology, before filling, you need to prime the masonry, and so, if you use the factory composition, then do not skimp, buy a normal heat-resistant soil for it.
If you decide to putty with a homemade clay-sand mortar, then it will be enough to moisten the masonry well with water before applying. |
|
| Start layer. Now take a spatula with a blade width of about 10 cm and apply the primary starter compound, it is needed to fill in the gaps and pre-level the plane. | |
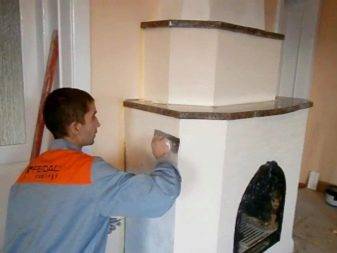
| Align the plane. When the starting layer starts to set, sprinkle it with water and apply the finishing layer of putty with a wide metal spatula. | |
| Option with lighthouses. If the stove is large, then it will be more convenient for you to fix a couple of beacons with a solution, then put the putty on the plane and align it with the beacons as a rule. Everything is shown in more detail in the video in this article. | |
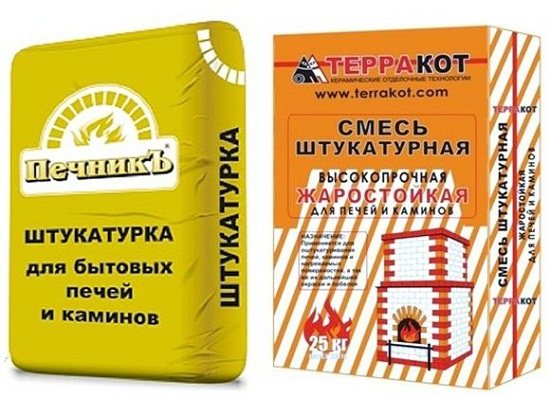
Painting. After the putty, it is advisable to paint the oven, naturally we also take heat-resistant paint:
|
The stove is so indispensable in a private house for its practicality of use, autonomy from gas and electricity, but it still has its drawbacks. We will not list all of them, but according to the thematic feature of our article, one of them is the exit of exhaust gases through fittings, slots, etc., which, as a result, leads to the settling of soot on its walls.
and this can get dirty on the stove, the stove also loses its attractive appearance knocking out of the interior of the house. The solution to this problem is to whitewash the oven.
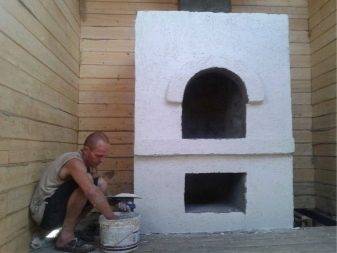
In fact, whitewashing a stove is not such a difficult procedure, it is similar to whitewashing a ceiling. The difference is that it is usually even more convenient to whitewash the stove, but with the peculiarity of applying a thicker layer of whitewashing to certain parts of the stove.
The first step is to remove the part of the surface layer where most of the soot has settled.If we do not remove the soot and start whitening, then it will begin to show through, it will not work to whiten this place to the original whiteness. The top layer is best removed with a metal washcloth or metal brush, but the brush needs to be done more carefully, as it is harder and can lead to deep scratches on the stove.
Next, you need to wet the oven with water. It will be difficult to apply whitewashing on a dry oven surface, as the whitewash will roll into balls and poorly absorb. The stove can be soaked in water in parts, in accordance with the whitewashing speed and the places planned for whitewashing. When doing this, try to rinse off any remaining soot if possible.
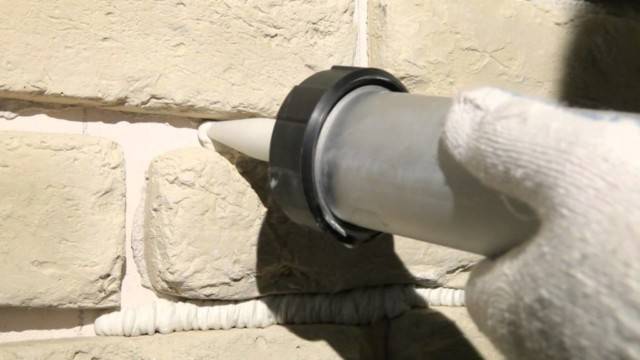
Now it is necessary to inspect the stove and if there are cracks, or plaster has crumbled somewhere, then it is necessary to restore it. A brush can be used to apply the putty. Its advantage in application is that it follows complex surface contours, filling cavities and chips with a filler from the hairs. Or use a more traditional putty knife. For whitewashing and putty, you can use a putty. More detailed information about the spakryl can be found in the article "Spakryl".
We dilute the whitewash solution. You can apply lime or spacryl which we mentioned earlier. Spakryl is diluted with 1 part of the spacril and 2 parts of water. Stir the whitewash until smooth, so that there are no solid inclusions in the liquid.
Apply whitewash to the damp oven surface with a brush or foam sponge. If, after drying, the oven does not break through (dark spots appear), re-whitewash these areas.
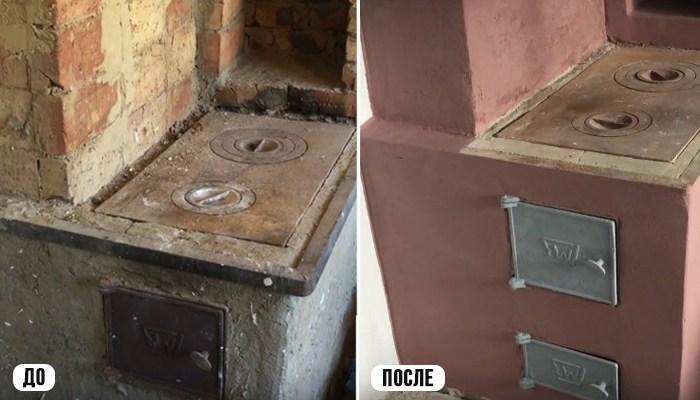
We are waiting for the drying of the whitewash of the oven. Now the stove has a completely different look.
Application Tips
Professionals recommend performing a kind of algorithm when applying Emelya putty.
- The composition should be applied from top to bottom. This application option will make it easy to track and eliminate all irregularities in the layer of the applied composition.
- The layer thickness in one application should not be more than five millimeters. Otherwise, the treated surface will dry for a long time.
- Keep track of the layer thickness. Its drops can cause uneven drying of the applied layer, which will adversely affect the properties of the composition and lead to cracking.
- The putty adheres better to slightly damp surfaces. Before finishing work, you can spray the surface with a spray bottle.
- A special spatula will help you to make the corners perfectly even. No need to suffer and try to make a perfectly beautiful corner with an ordinary spatula. Use a special trowel for inside or outside corners to save time and hassle.
A smooth surface can be achieved in two ways.
- A damp surface is advised to level. To do this, use a wooden or polystyrene foam float. It is necessary to make circular movements until the surface is completely leveled.
- If the composition has already set, it must be moistened with a spray bottle. Mashing should be done carefully, wetting the surface if necessary. As in the first case, use wood or polystyrene foam floats.
Putty "Emelya" is suitable for the subsequent application of a decorative layer on it. It can be ceramic tiles or decorative heat-resistant imitation of a stone. It just depends on your choice. The result declared by the manufacturer can only be achieved by fully observing all the rules.
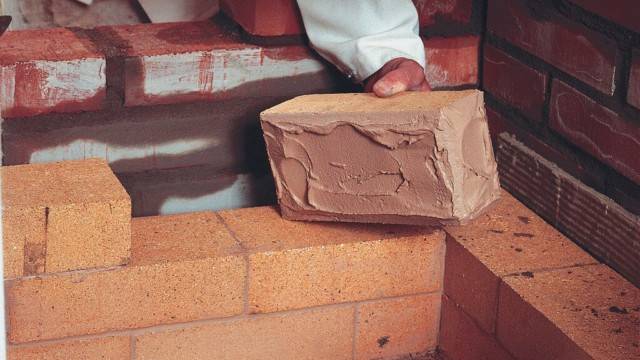
The hearth is a symbol of home comfort, it warms the body and soul. A high-quality stove will protect against any kind of bad weather, create a comfortable atmosphere at home, therefore it is extremely unpleasant to find cracks on the stove surface. Stove putty is the only way to restore their original appearance.
Composition of materials and mixtures for the oven
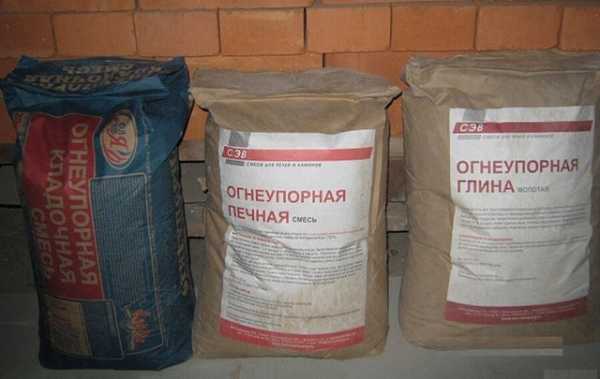
Refractory mixture for stove puttying can be bought ready-made
The walls of the stove get hot during operation, so the usual mixture will crack and crumble after a few months. The raw materials for kneading refractory putty for the furnace are sand, cement, gypsum, lime and clay.
Recommendations for preparing a solution:
- it is preferable to use lime or clay in the composition, but it is imperative to add asbestos;
- complex mixtures based on cement can be used, but asbestos or other fibers remain an additional component;
- straw or hemp can replace asbestos.
Store dry putties are mixed with water in accordance with the instructions on the package. Ready mixtures are pre-mixed in buckets. The amount of solution is prepared, which is used before hardening and loss of plasticity.
Materials (edit)
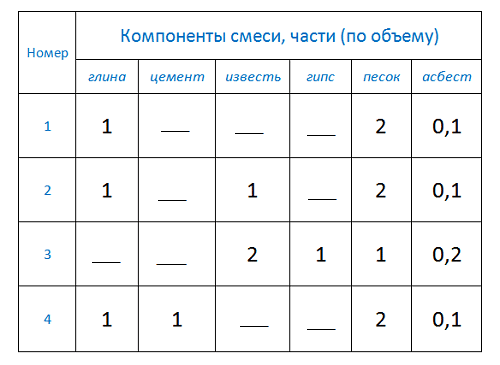
Options for the composition of the mixture for puttying
Sand is a loose structure of sediment, almost entirely composed of silicon dioxide. For the solution, river, sea and quarry types can be used. The grains of sand formed in water bodies are characterized by a rounded shape with a smooth surface.
Clay is a sedimentary rock that includes kaolinite, when dry, it is dust, becomes plastic when moisture is added. The porous and waterproofing material is characterized by sinterability, refractoriness, viscosity, and shrinkage.
Lime is obtained artificially by burning carbonate rocks and includes a large amount of calcium, magnesium, dolomite. Lime dough or slaked variety (boiling pot) is used.
Asbestos refers to mineral filaments from the silicate group, which naturally form flexible fibers. Refers to carcinogens, has high heat resistance, does not dissolve, but fluffs up in water. In stove putty it serves as a binder and dispersed component.
Cement is an artificial inorganic binder. When moistened, it forms a plastic mixture, which subsequently hardens and gains strength not only in air, but also in water.
Refractory mixtures
Competitive brands of the Russian market of refractory putties
Factory refractory compositions are versatile and designed for high quality work. Manufacturers abandoned the use of asbestos due to its carcinogenic effect and replaced it with harmless components.
Common ready-made formulations:
- Plitonite. The line of Russian-German manufacturers includes materials of the Super-Fireplace brand for household and industrial hearths. The scope varies depending on the composition.
- Mastic Titan. The solution is prepared on the basis of stone flour with polymer additives. Heat-resistant stove putty firmly adheres to the surface and withstands up to + 1300 ° C.
- Terracotta. Gray plaster sets quickly, breaks down at + 400 ° C, can be applied in a layer up to 8 mm. Prepared on the basis of kaolin fireclay clay.
- Thermo +999 PRO brand. The composition is suitable for top application and for refurbishment of the fuel compartment. The reinforced mortar withstands + 1000 ° C, sets in 1 hour, but fully gains strength within a day.
The coating for Emelya's stoves and fireplaces is made on the basis of white heat-resistant clay and kaolin. The dry mixture is diluted with water, after hardening it prevents cracks and shedding of the layer.
Choosing a heat-resistant paint
Heat-resistant paint can be applied both on a metal or brick surface, and on a preparatory layer of putty or plaster. The use of paint protects the surface from corrosion and helps to give the equipment an aesthetic appearance. The paint for the oven must have sufficient elasticity so as not to crack when heated and cooled, there should be no color changes, burnout, fading due to high temperatures.
Important! Furnace paints cannot be made on the basis of oils that emit toxic substances when heated, therefore mixtures are made on the basis of acrylic, epoxy, silicone. The consistency of the paint must be uniform and evenly applied
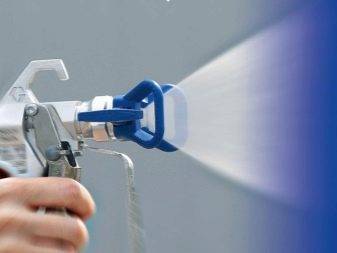
Sometimes spray guns and ready-made aerosols are used - in this case, the consistency of the composition is more liquid (for example, this is how heat-resistant enamel is applied)
The consistency of the paint must be uniform and evenly applied. Sometimes spray guns and ready-made aerosols are used - in this case, the consistency of the composition is more liquid (for example, this is how heat-resistant enamel is applied).
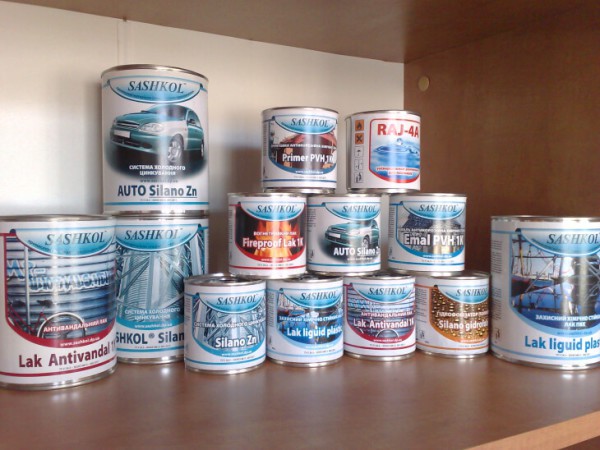
Famous manufacturers of thermal paints, photo
- Tikkurila. Finnish manufacturer, presented a line of paints of various heat resistance (up to 1000 degrees).

Photo 2. A can of black heat-resistant paint. The manufacturer is the Finnish company Tikkurila.
- "Certa". Various types of heat-resistant anti-corrosion paints and varnishes are available. Withstand heating up to 650 degrees.
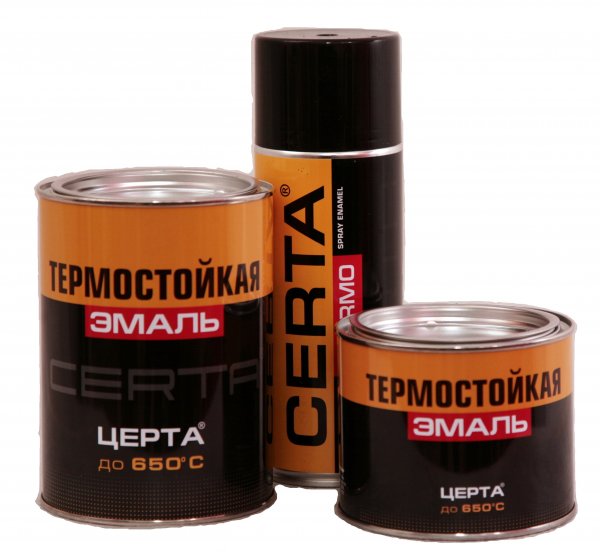
Photo 3. Three cans of heat-resistant enamel that can withstand temperatures up to 650 degrees. Producer "Certa".
- "New Ton" is produced in cans, suitable for processing metal parts of the furnace (doors, chimney). Well withstands heating up to 800 degrees.
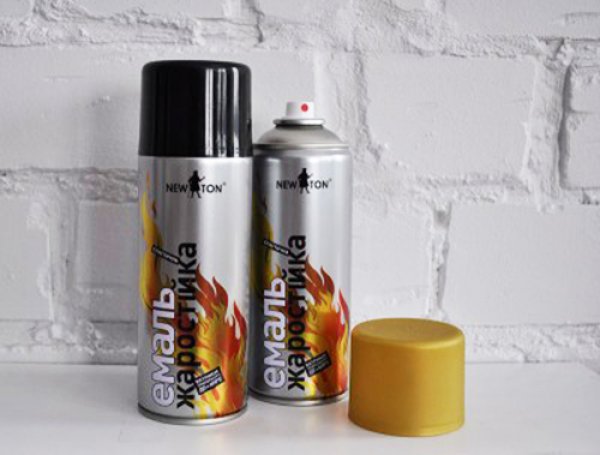
Photo 4. Two cans of heat-resistant paint in black and gold. Producer "New Ton".
A layer of paint must be applied to a surface prepared in strict accordance with the manufacturer's instructions, usually it is cleaned of dirt and dust, and degreased. It is also recommended to preheat the oven (this will help dry the surface of the walls before painting).
Why plaster the oven
Stoves are made from clay, bricks or iron. Fireplaces are made of brick, stone or made of concrete. These are different materials in terms of thermal conductivity, thermal expansion, and the quality of the resulting surface.
You can, of course, leave the stove without finishing, but then the solution that crumbles out of the seams does not make the best impression. And the clay oven periodically requires smearing due to the appearance of cracks. Of the options for finishing the furnace sides, cladding with fireclay or ceramic tiles, plastering are better known.
Furnace plaster is used for protective, strengthening or aesthetic purposes if:
- the laying of a new brick oven is sloppy;
- it is required to increase the tightness;
- the coating of the old furnace cracked, in places it falls off, revealing an unsightly picture;
- the need to give the heating device a new look due to the change in the interior;
- insects settle in the seams filled with natural materials;
- it is required to strengthen the masonry, to increase the strength of the surface of the furnace walls.
Fireplaces are usually made in living rooms. Therefore, their appearance is a special concern of the owners. It is possible, after leveling with a solution for plastering the stove, to plaster the fireplace box with decorative compositions with the effect of travertine, marble (Venetian plaster) or others.
Plastering is preferable as it:
- accessible and easy to perform;
- suitable for finishing stoves made of any material;
- economical;
- blocking access to carbon monoxide, increases fire safety;
- increases the thickness of the furnace wall, thereby increasing its heat capacity, the duration of heat retention;
- suitable for the restoration of an old brick stove, fireplace box;
- provides the possibility of further finishing with whitewash or painting.
Putty materials
The resourceful people are ready to give advice on any occasion, including the choice of materials for the repair of stoves. The recommendations should be followed carefully, separating the wheat from the chaff.
A mixture of clay and sand
The compositions of the putty are known, which have been repeatedly tested over time. You can use them without any doubts.
It is customary to cover the stoves with clay.The material definitely inspires confidence, but first you need to check what kind, grade of clay is suitable for making a mechanically strong, heat-resistant putty. The stove should be covered so that it does not crack later.
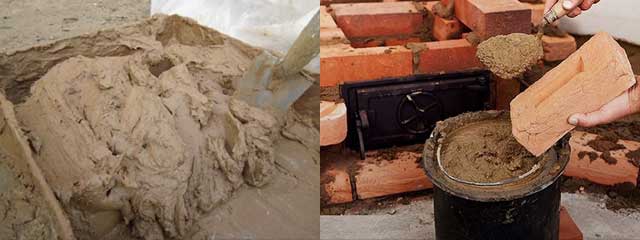
The composition is prepared by mixing equal parts of clay and sand. Both components must first be sieved, separated from large impurities. Due to the fact that the clay composition in different deposits is very different, it is advisable to check the strength of the mixture.
It is advisable to toughen the verification requirements, throw dried cakes from a low height. If they have not collapsed, have successfully passed the tests, the chances of making a high-quality repair of the furnace increase.
In the process of preparing homemade putty, monitor the condition of the wooden stirring paddle. The gruel should not stick to it. If clay sticking is noticeable, it is better to increase the amount of sand in the mixture.
Of course, if possible, it is advisable to take a special type of clay - chamotte. It is distinguished by its fire resistance and strength. You can buy it in the building materials departments. Before use, fireclay raw materials should be kept in water for a couple of days.
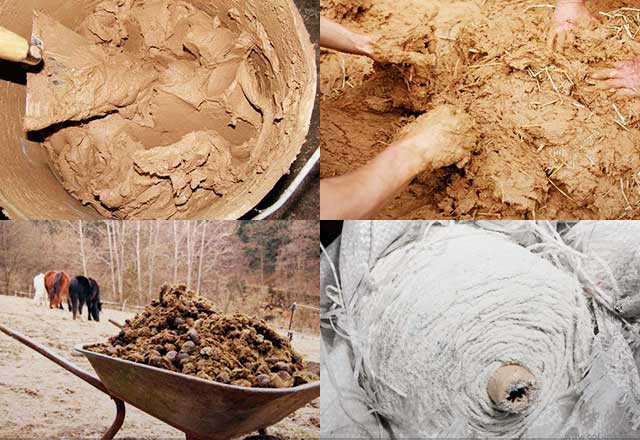
Adding straw and horse manure
A popular folk method for preparing grout for stoves is to add chopped straw or chaff (husk, chaff) to a mixture of clay and sand. You need a lot of it. So, if 4 buckets of clay were taken, one bucket of sand will be needed, and straw - from 40 kg to 45 kg. You can hear tips about the benefits of adding salt to the grout at the rate of half a glass to a bucket of mixture. It is recommended to determine the quality and quantity of additional components according to the situation on site.
In some places, people recommend covering the stoves with a mixture of horse manure. Now it is not so easy to find it; it makes no sense to insist on such technology.
Special formulations
If there are building materials stores nearby and are willing to spend money, it is better to buy ready-made adhesives: soft or hard. It is convenient to cover small cracks with a viscous solution. Full plastering of the oven can be performed with solid compositions. Sometimes the cracks in the masonry are sealed with a special heat-resistant sealant, small cracks are clogged with asbestos fiber.
With the correct preparation of a solution or pasty mass, competent performance of the work, the result is guaranteed by the manufacturer
Release form and prices
The terracotta oven mix is supplied in four-layer paper bags of 20 kg and 25 kg. The shelf life of the product is not limited.
It is desirable to store the oven composition in dry rooms. The storage temperature does not play a special role. The mixture can be stored at temperatures from -40 to + 40 ° C. She is not afraid of freezing and moisture. After defrosting and drying, it fully retains its properties.
The Terracott company has a wide network of representative offices, which covers most of the regions of the country, as well as Belarus, Kazakhstan and Kyrgyzstan. You can find out the location of the nearest dealer on the company's website. As for the prices for the described product, at the time of writing the material, a twenty-kilogram bag cost around 340 rubles.
How to make do-it-yourself oven mastic?
For some customers, the issue of price is very important, so such people do not want to spend large sums of money on the purchase of specialized mastic for decorating fireplaces. Fortunately, there are some simple and effective recipes that really help you save money. DIY mixes can be created from:
- Clay and sand;
- Concrete mix.
The first option is preferable, since clay is a versatile material that can easily withstand high temperatures. This recipe has long been used for the construction of furnaces, so there is no need to doubt its effectiveness.
To prepare mastic with your own hands, you will need actual clay and yellow sand of small and medium dispersion in a ratio of two to three. These materials are mixed with each other until a homogeneous consistency, and then water is added. The finished material must have a fairly thick consistency. If too much water is added, the adhesion properties will be reduced, making work more difficult.
Why paint brick stoves
There are several reasons for painting brick ovens:
- The owners' craving for aesthetics. If earlier the stove in a village house was the only device for heating, now fireplaces and stoves serve as interior elements that need to be harmoniously fit into the home.
- Finishing the surface of the stove with paints prevents the appearance and then the increase of cracks in the bricks. makes the surface smooth.
- After painting, the heat transfer to the room increases.
Tip: It should be borne in mind that the operating mode of the stove in the country or in the house is very different from the stove in the bath. The coating technology will be different: the materials for treating the oven in the bath may not be at all suitable for the oven in the country.
How to paint a brick oven
Suitable materials for painting ovens include:
Natural drying oil. The coating does not change the color of the brick, but changes its shade to a darker one. It can be used to cover stoves in a bath.
Tip: When using natural linseed oil for a brick oven, after lighting it, you can only operate it for a few hours. You should not experiment with drying oil in the house: different modes of combustion in the oven can prevent drying oil from drying.
Silicone enamels. Its technical characteristics:
- excellent adhesion to all materials;
- high strength;
- moisture resistance;
- durability.
- the ability to withstand up to 200 cycles of changing positive and negative temperatures.
The disadvantage of organosilicon enamels is a small selection of colors.
Varnish PF 283. When using varnish, it is mixed with turpentine in equal proportions, which increases the strength characteristics of the material. After drying, a transparent, glossy layer of high quality forms on the surface of the oven.
The peculiarity of using varnish is the ability to add dry gouache, which will allow you to get the painting material of the desired color.
Heat-resistant paints (see Thermal insulating paint: material features). This is almost ideal. Its advantages:
- a huge selection of colors;
- withstand temperatures up to 600 ° C;
- protects brickwork from oxidation;
- increased strength and endurance;
- ease of application, without preliminary priming of the surface;
- maintains performance up to 10 years.
During the operation of the oven, efflorescence may appear on the brick. This occurs from exposure to high temperatures, when moisture begins to be displaced from the brick along with salt. Heat-resistant paints will not lose their characteristics from this.
the presence of an aggressive chemical composition;
unpleasant odor;
dries up for a long time;
when working, care must be taken due to the presence of toxic substances in the mixture.