Views
Nevertheless, planken is quite popular in the market, so it makes sense to consider all its varieties. The aesthetic value of such a board is slightly higher than that of a lining.
Straight
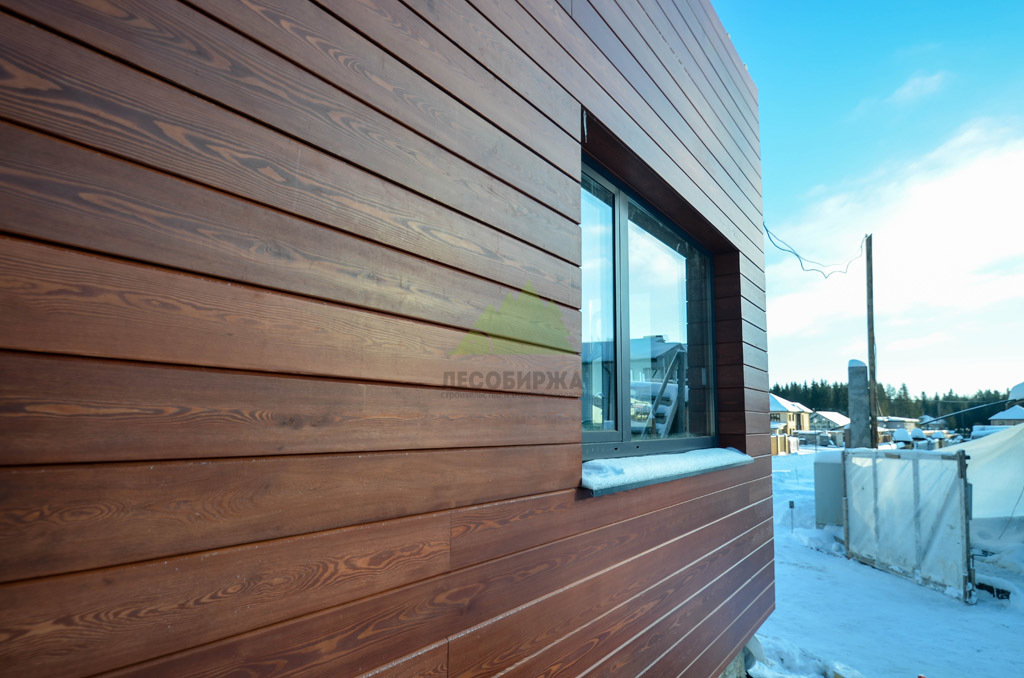
Straight planken is the most common board treated with an antiseptic and varnished. But, in fairness, such boards look quite impressive, giving the buildings the look of a Scandinavian mansion.
Such planken is used to create fences, furniture, awnings and decorative lattices. The scope of any planken is limited only by the imagination of the builder or designer.
For all the aesthetic value, from the point of view of practice, such a planken has the worst performance properties. The joints between the boards are not covered by anything, and therefore they quickly become clogged with dirt and dust. Because of this, constant maintenance of the board is required. But when installing the facade, rarely is anyone going to wash and clean it once a month, so the value of this type of planken is rather doubtful.
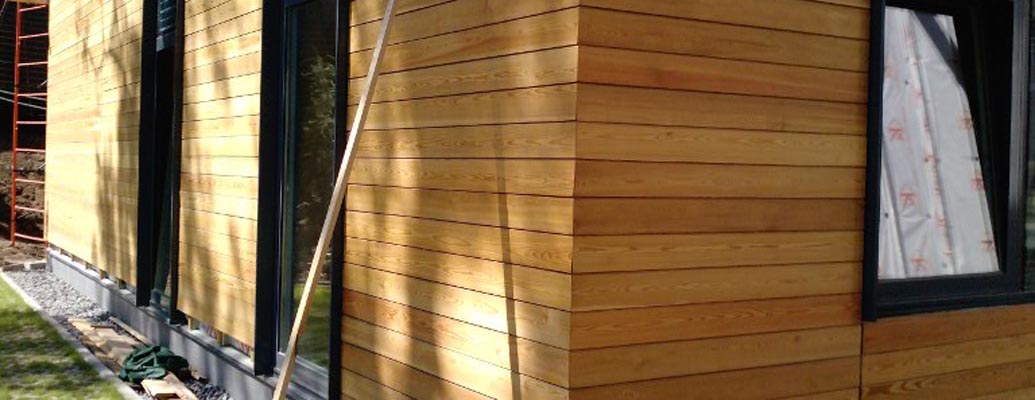
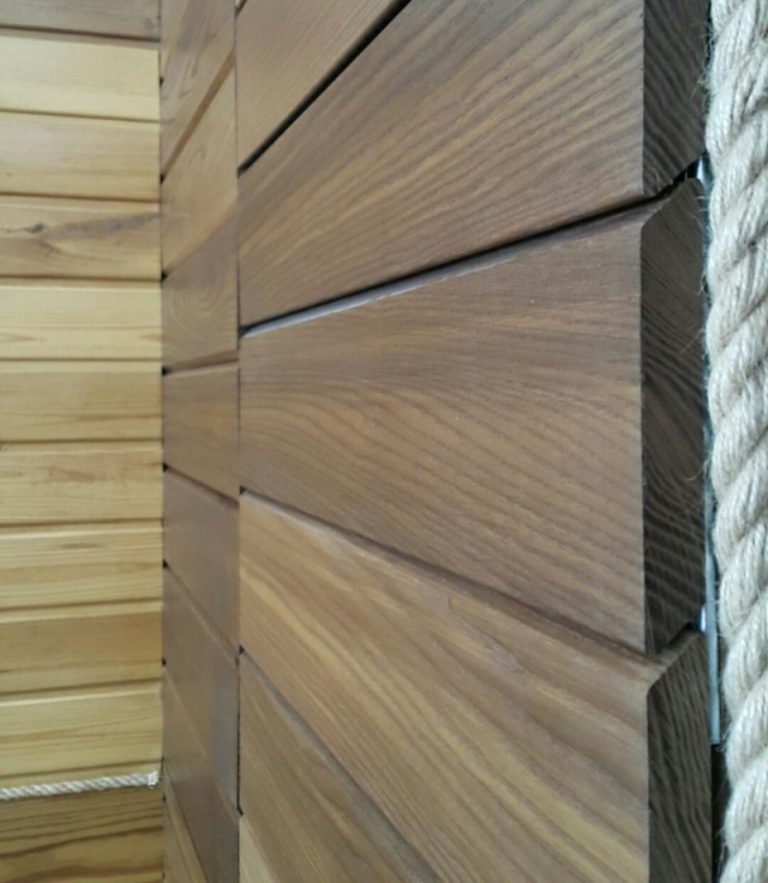
Beveled
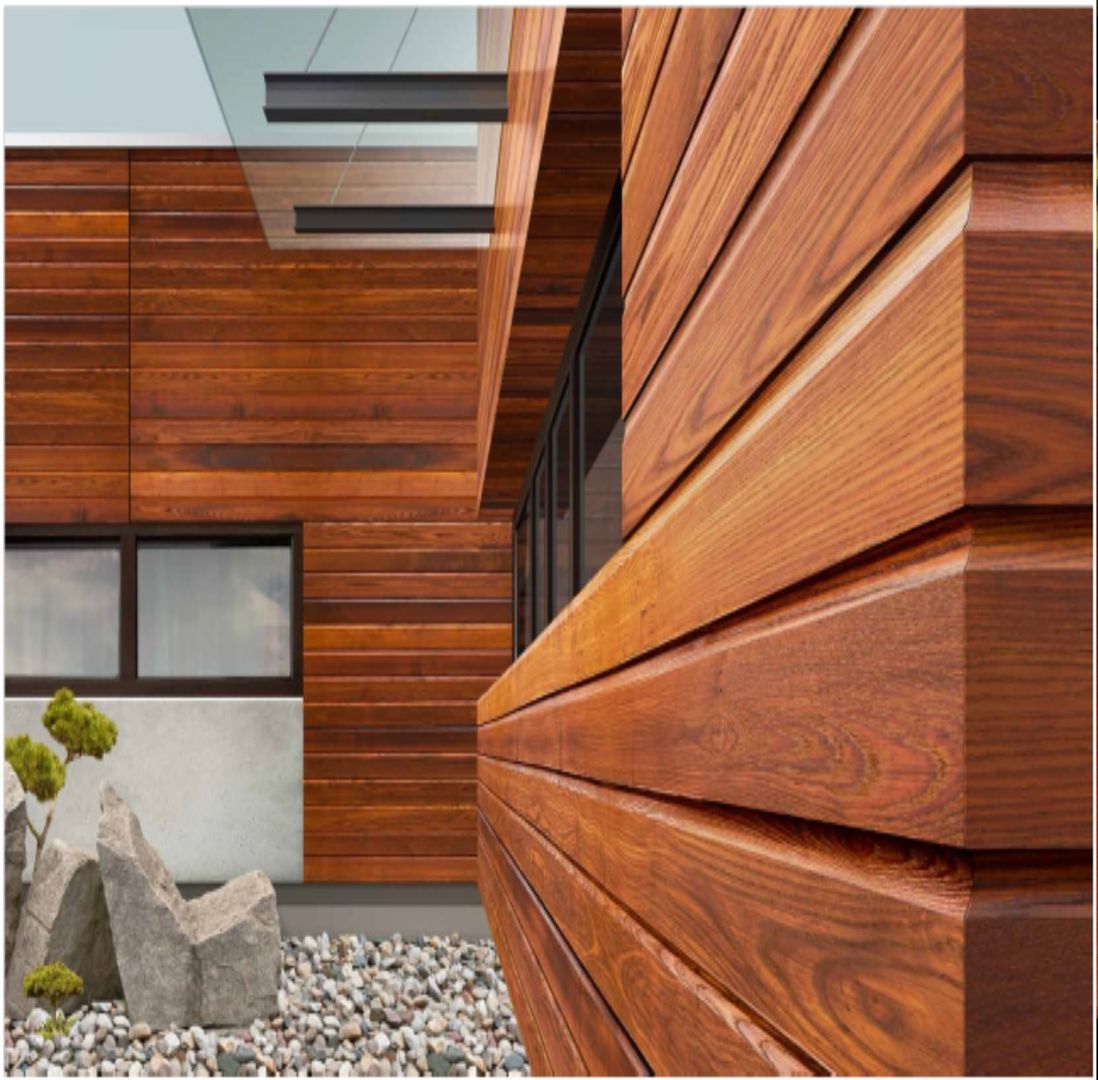
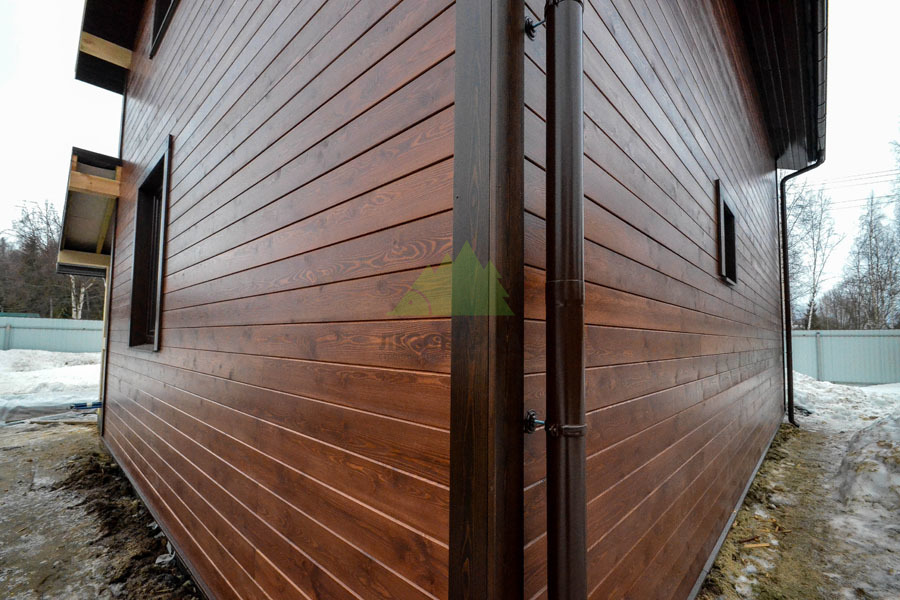
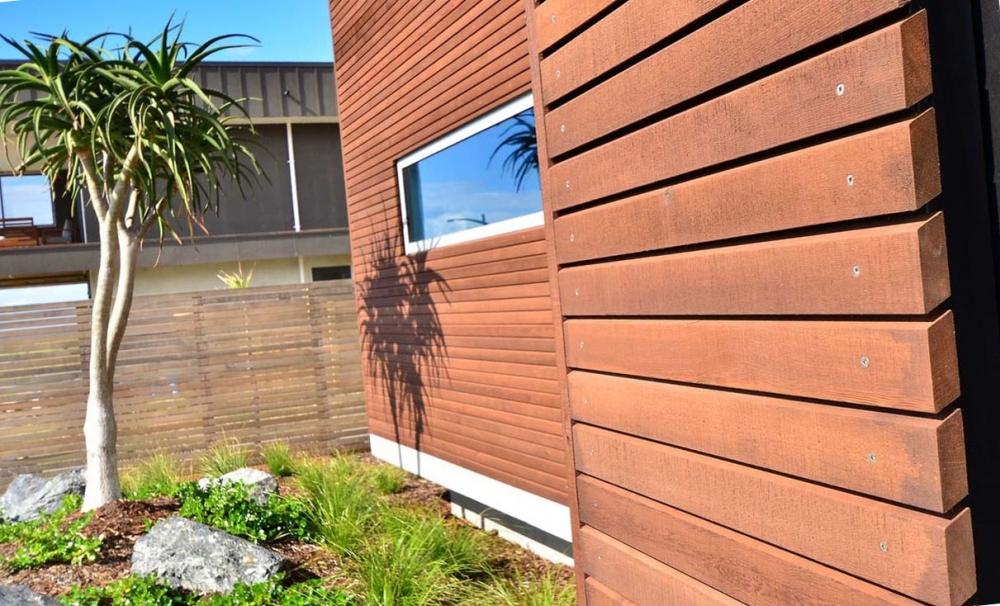
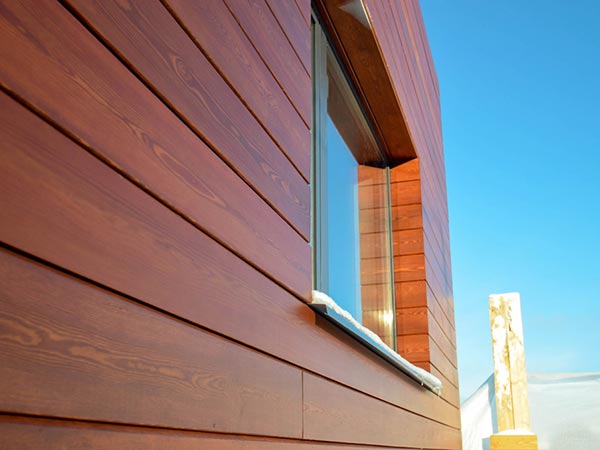
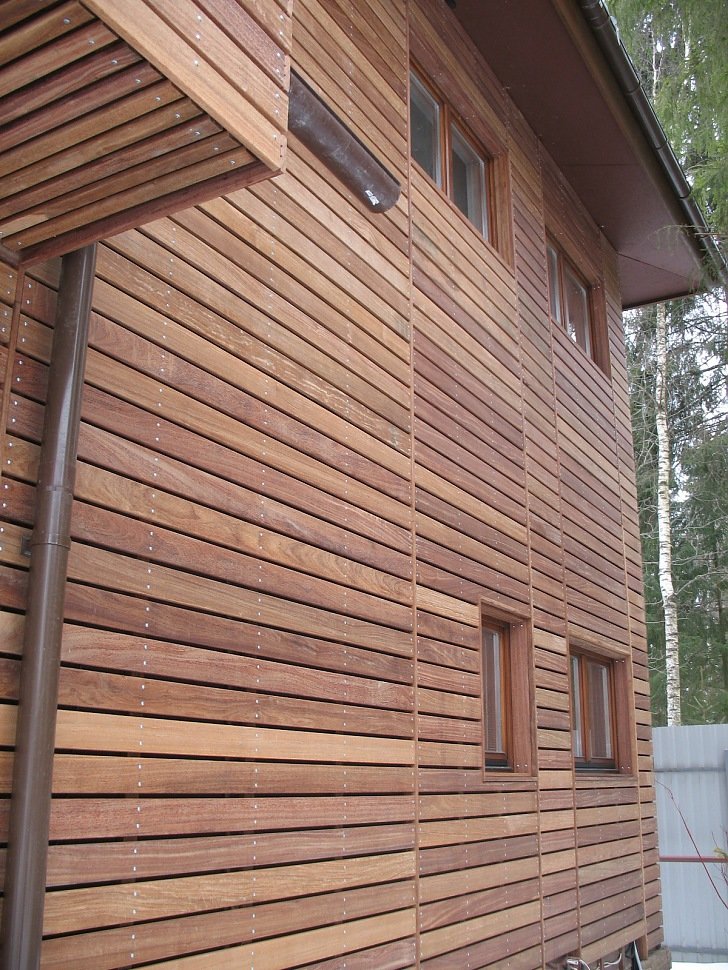
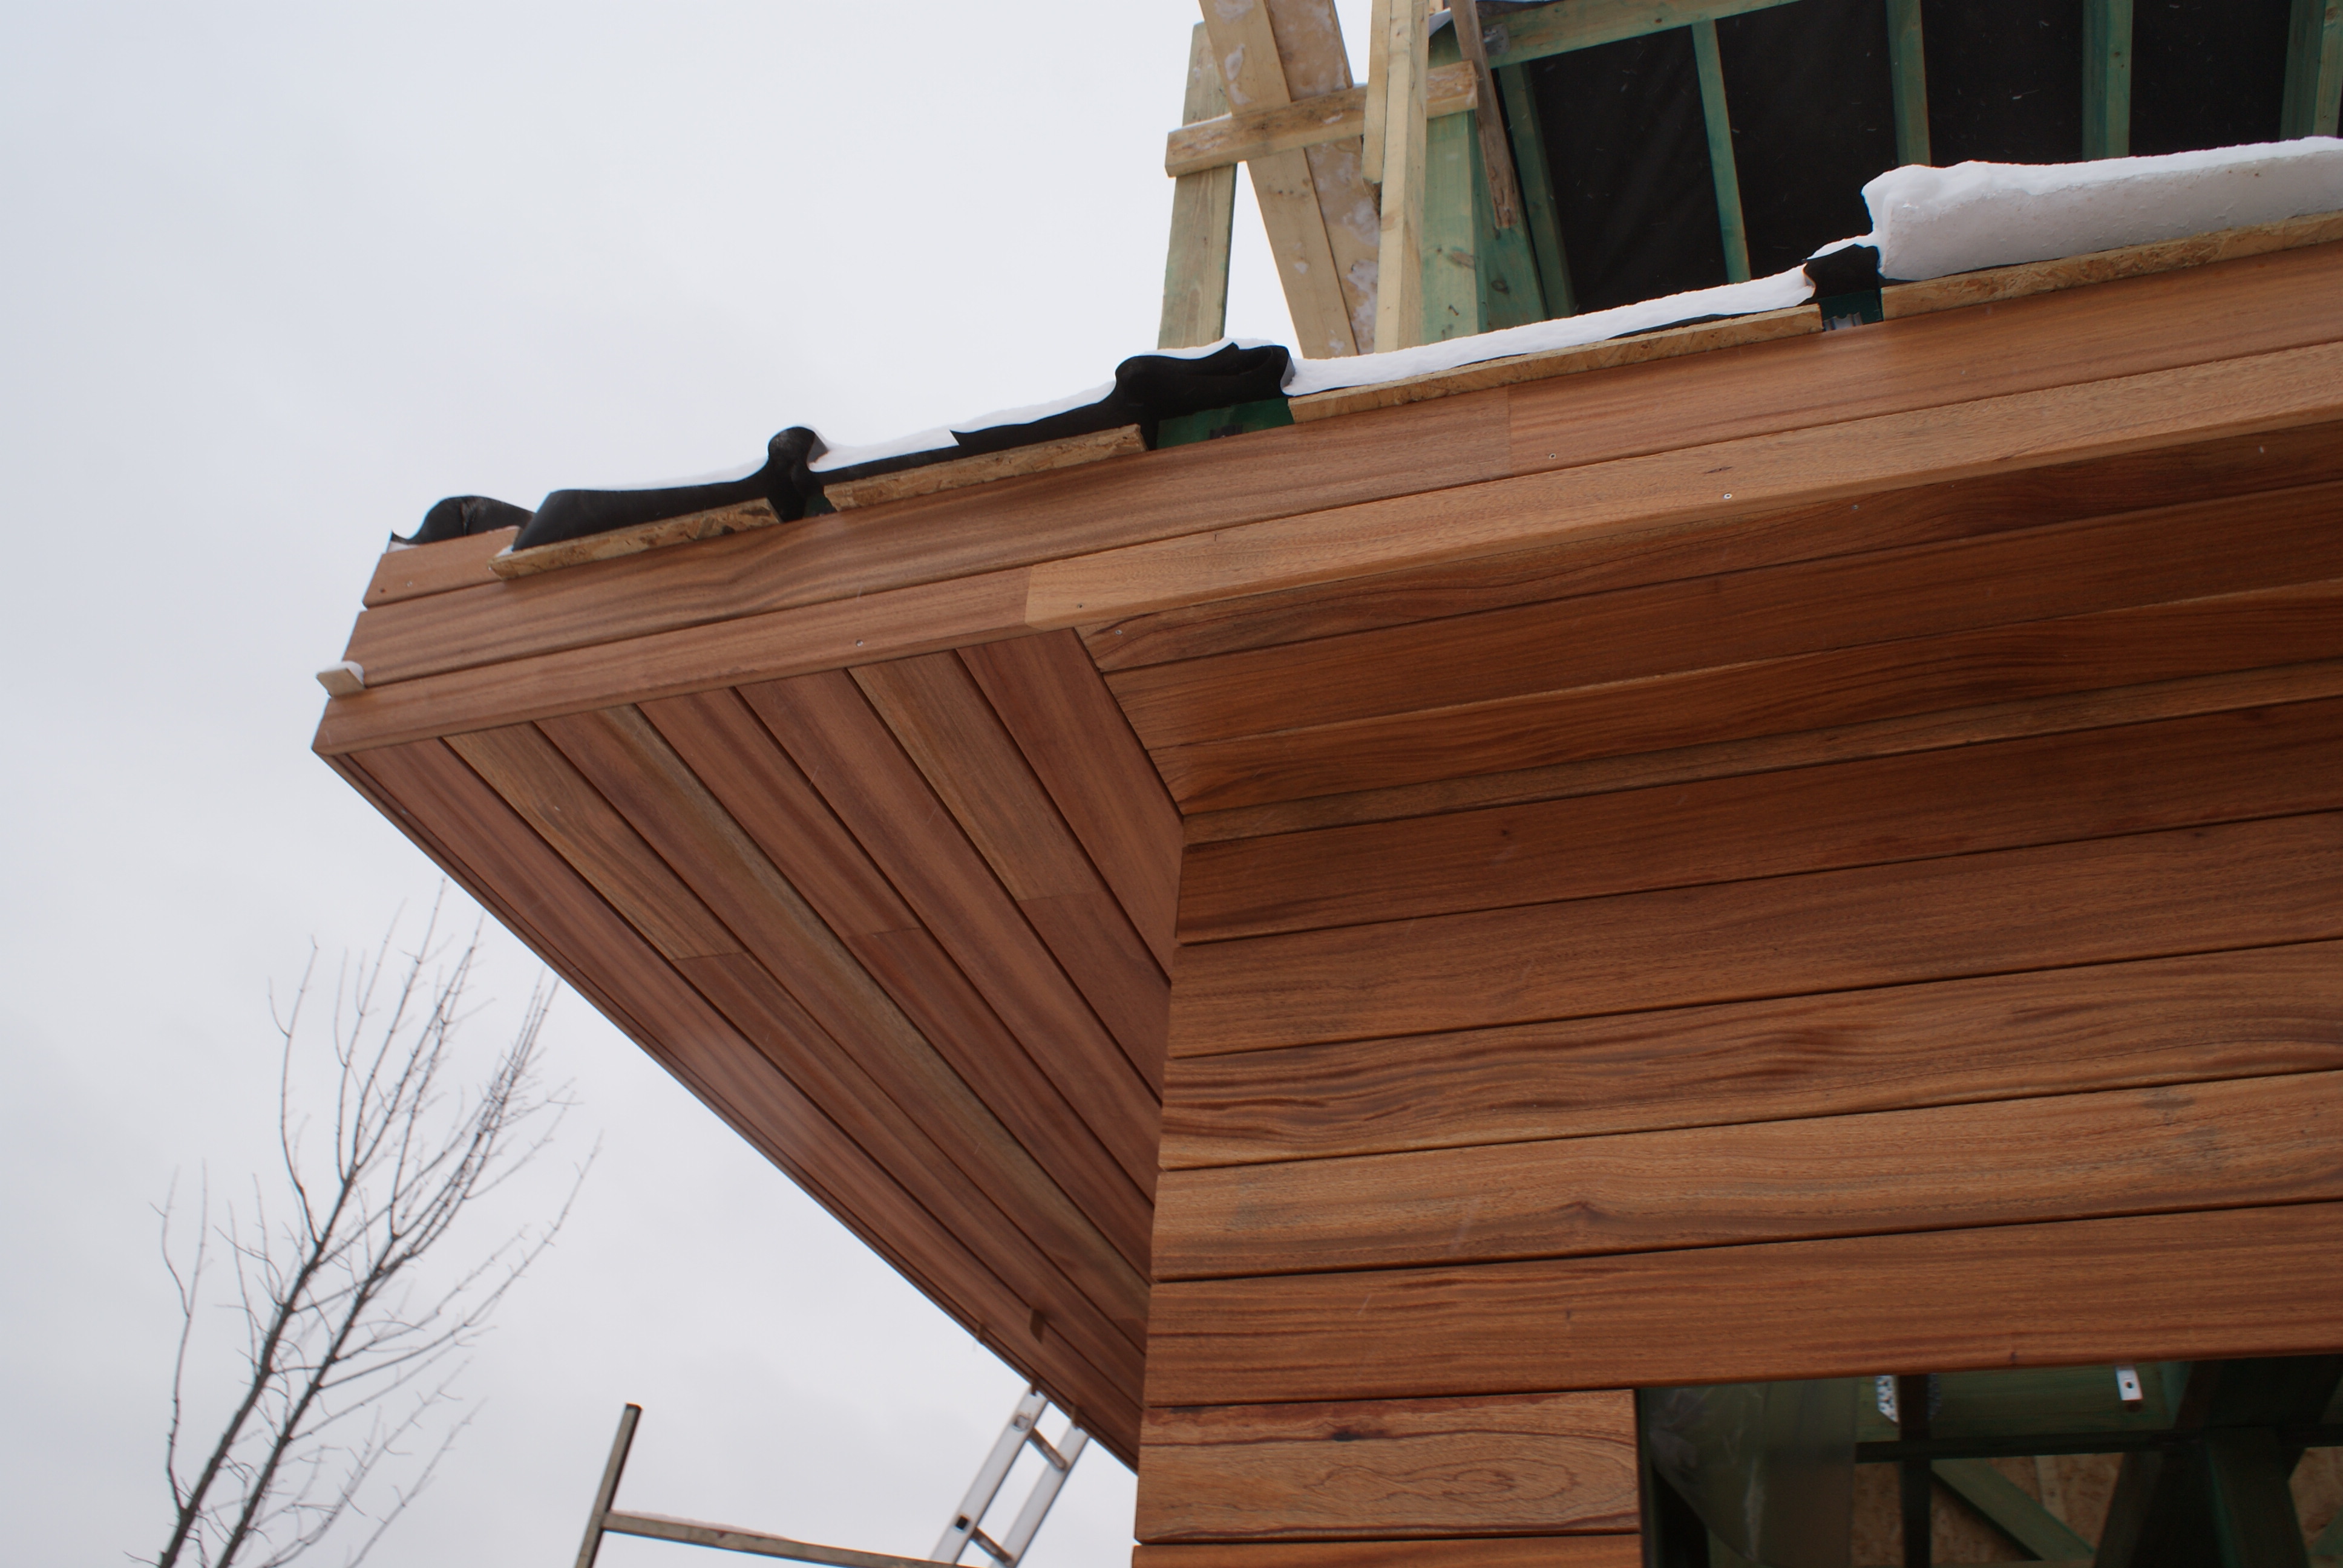
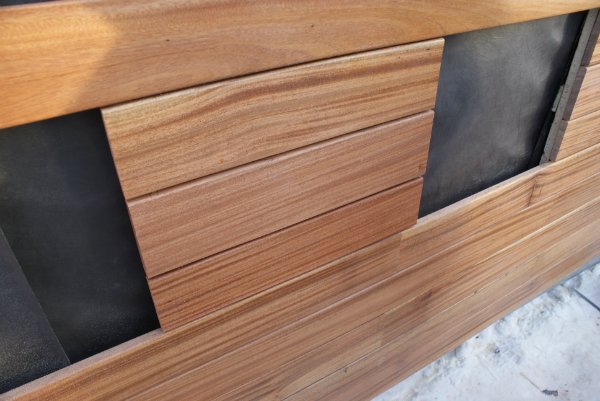
A beveled plank is a plank with edges trimmed at 45 degrees. The section of such a board is a parallelogram. The use of such boards makes the house look like a ship from the times of the great geographical discoveries.
 Beveled planken
The beveled edges prevent dust from entering the edges of the board, making the plank more practical. In addition, such a section facilitates the hidden gasket, which pleases many Russian designers.
Building cladding is most often made of such planken.
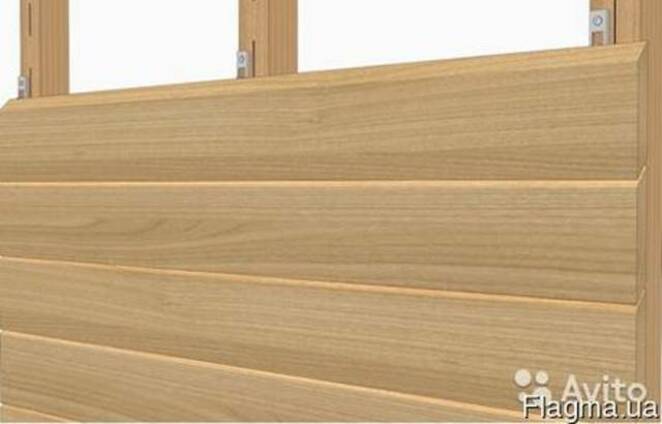
Straight plank with grooves
The straight plank with grooves combines all the advantages of the previous types. It is beautiful enough, while it has grooves for quick installation. Dust cannot get in and will be fixed in the grooves due to the tight fit of one board to another.
FACADE FIXING FACADES AND TERRACE FIXING FASTENERS
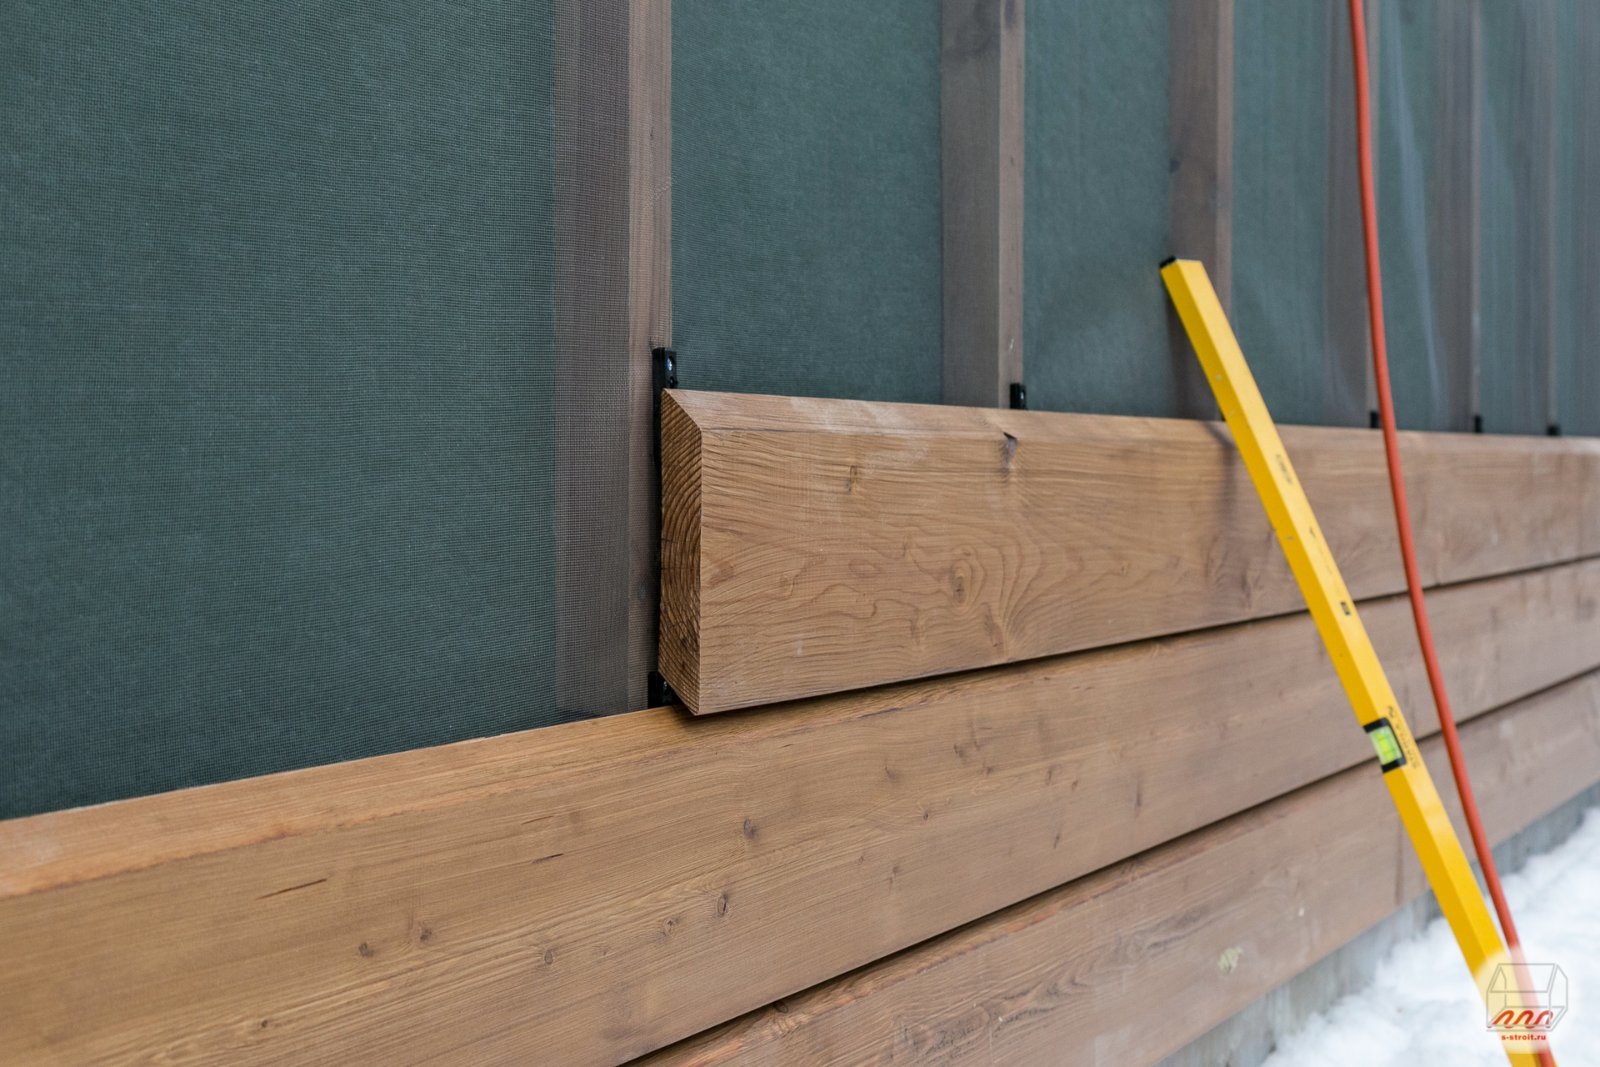
We have developed and manufacture the entire range of snake fasteners. Fasteners Snake - Universal, Snake - Boat, Snake - Atlant, Snake - Bridge and Snake - Channel (hereinafter referred to as the Snake) belong to the category of hidden or invisible fasteners, to the type of lock fasteners. Using this fastener, you will get a flat facade of the house and a terrace near the house without visible fasteners. Moreover, if you want to close the facade of the house with a beveled (oblique) planken (this profile is called a parallelogram or rhombus), then the Zmeyka fastener is the only patented fastener in the Russian Federation, with which it is possible to perform hidden fastening of the facade with a beveled facade board. This instruction can be used for mounting both with the DecTay fastener Snake - Universal, and with the help of the DecTay fastener - Snake-Boat, Snake-Atlant, Snake-Bridge, Snake-Channel.
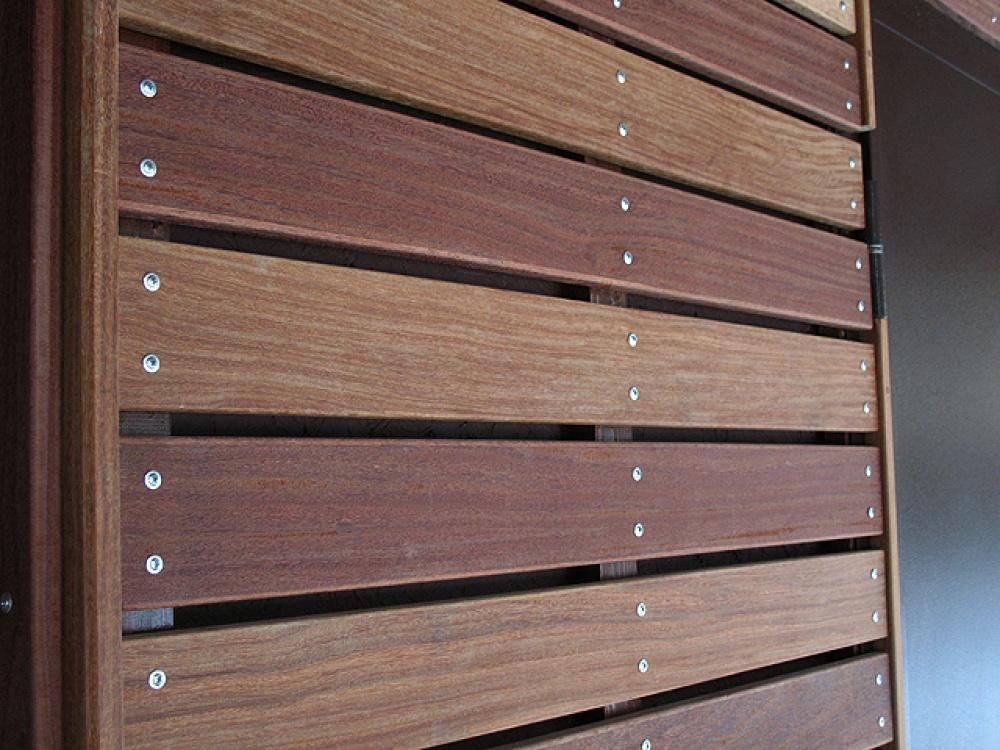
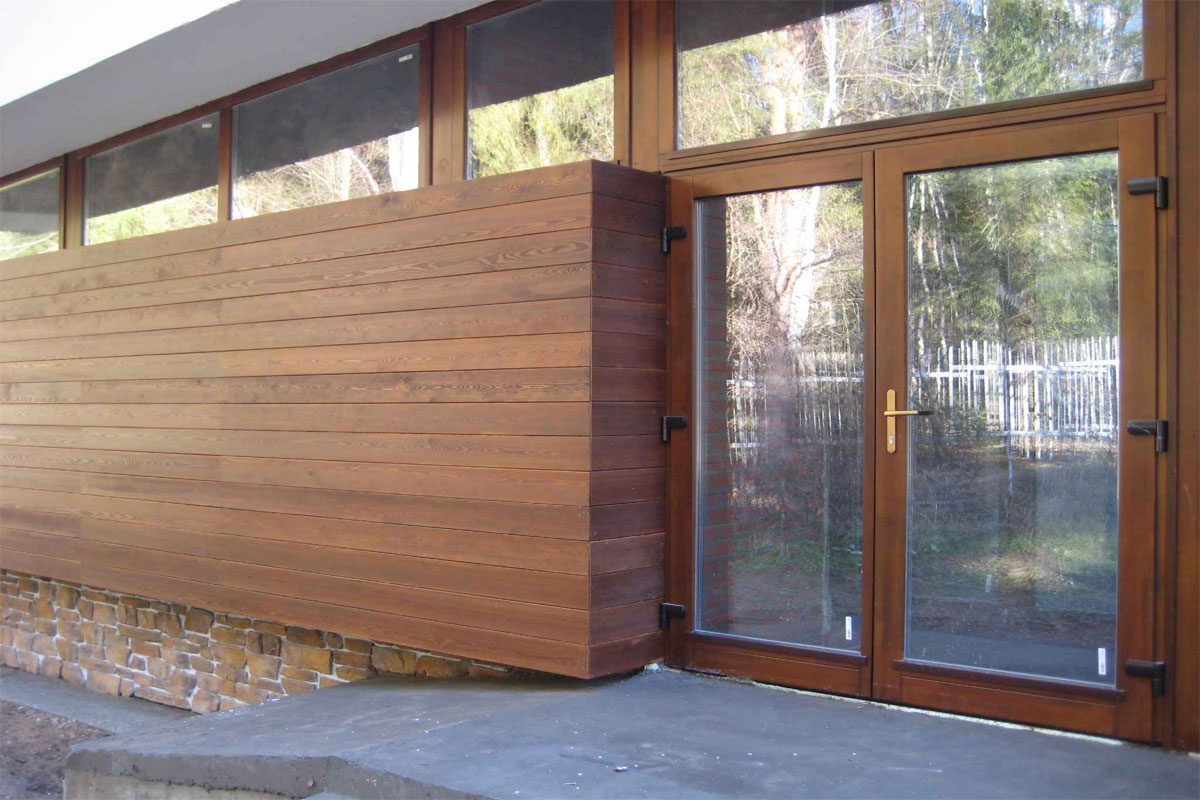
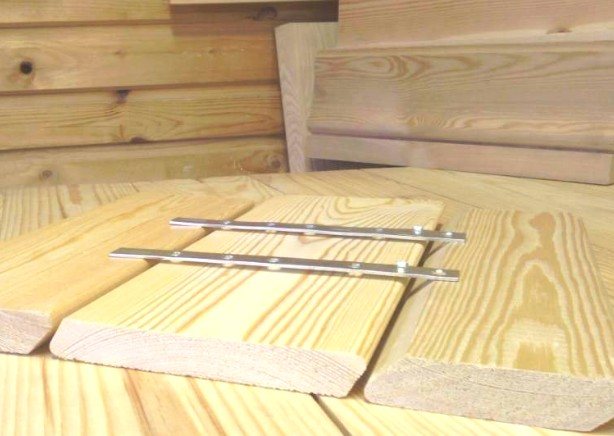
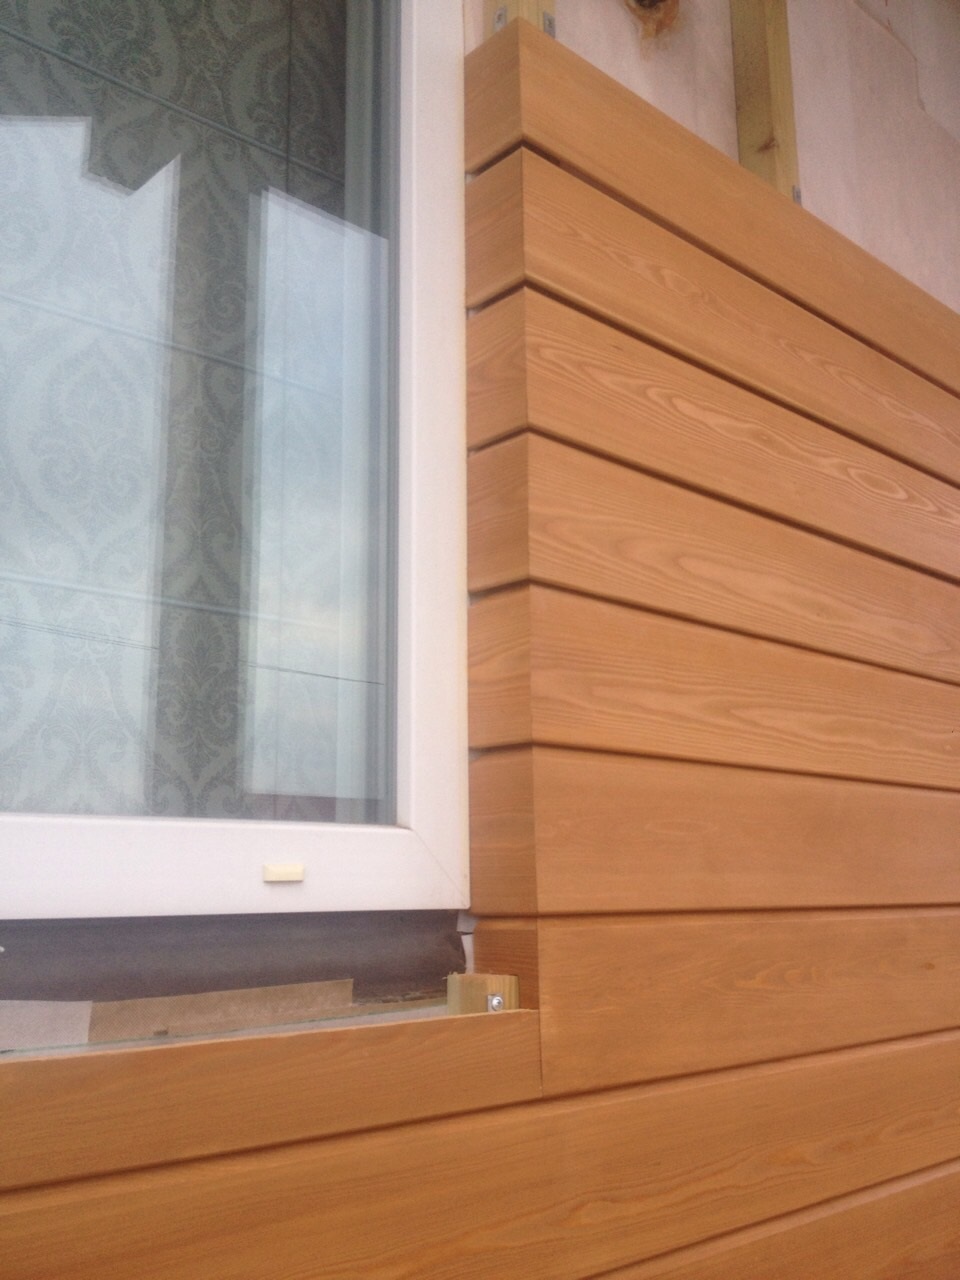
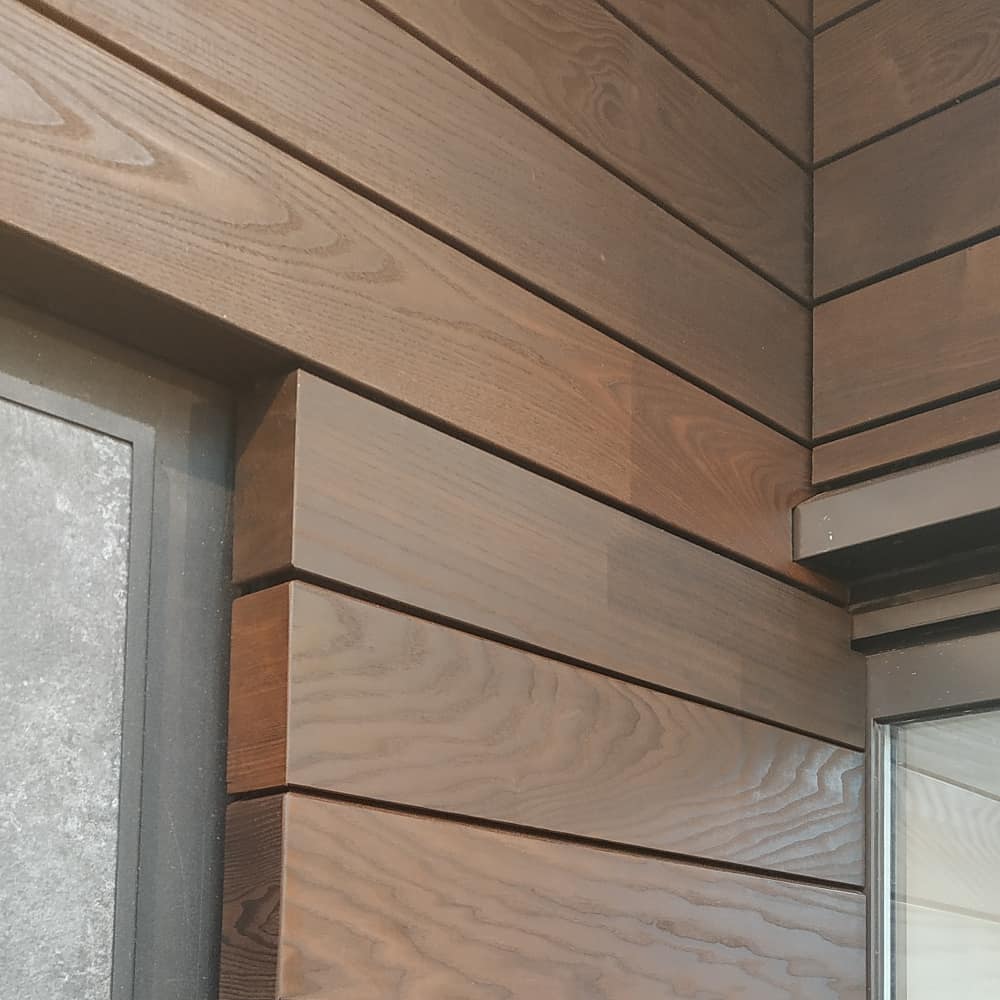
The photographs show the Zmeika - Universal fastener, the ventilated facade of the house made of beveled planken larch 20 * 140 (120), fixed with the Universal Snake 190UTSS. The photo on the far right shows the Snake-Boat L190TS fastener. Features of installation of wooden ventilated facades using planken and Snake fasteners can be found here.
Depending on the profile (section), we produce 5 types of snake fasteners. They can be viewed on the "Planken Fasteners" page.
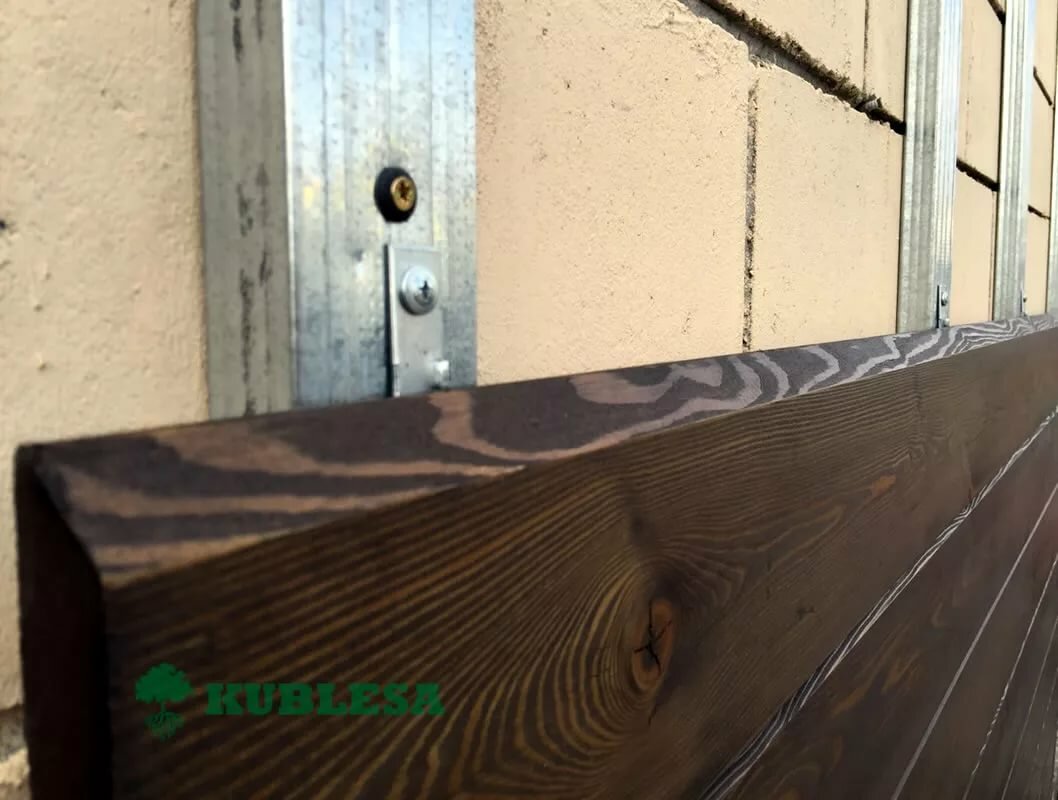
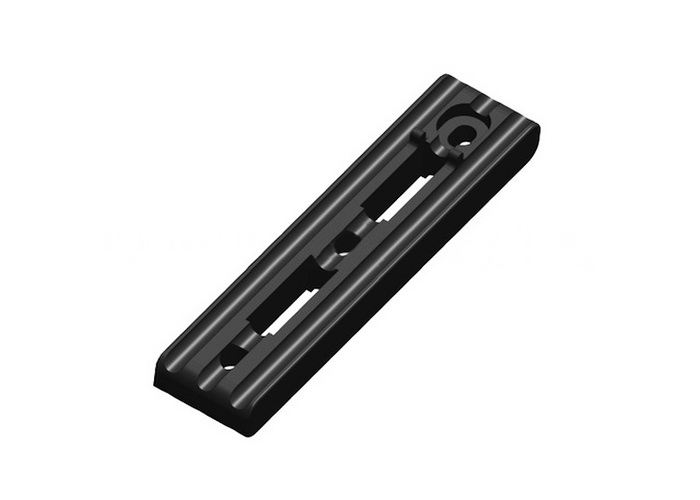
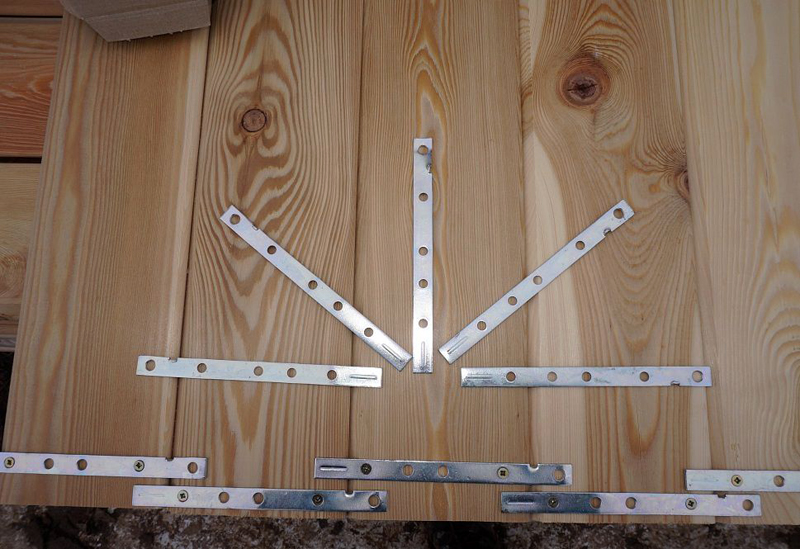
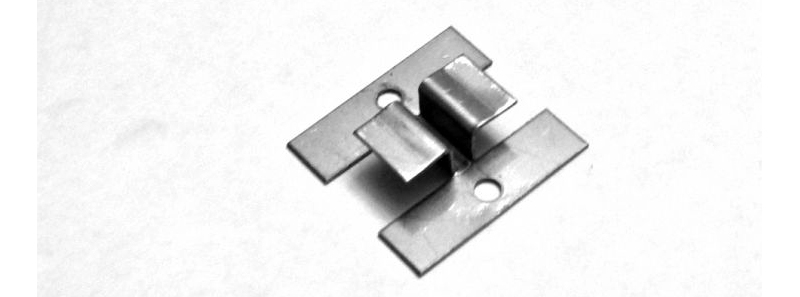
Fasteners The snake is a metal plate with several screw holes. One hole (we will call it the hole for the OH guide) is made 10 mm from one edge of the fastener. The rest of the holes (we will call them a hole for a facade board or a terrace board-OD) are made closer to the center of the plate. The holes are made with countersinks, and the countersinks for the OH and OD holes are made on opposite sides of the Snake.
Through OD, the Snake is fastened with 4.5 mm screws to the flooring board (terrace or facade board). Through HE, the snake is fastened to a guide or lag.
Snake mounting width 15 mm, length 145 mm or 190 mm, thickness 2 mm. Terrace (front) boards should be mounted on logs (guides), the width of which should not be less than the double width of the fastener, i.e. not less than 30 mm, preferably not less than 40 mm. This is due to the fact that 2 snake fasteners are placed on one front (terrace) board, and parallel to each other.
Snake 15 mm / 145 mm intended for fasteners boards with a width of 70 mm -110 mm.
The snake 15 mm / 190 mm is intended for fastening boards with a width of 110 mm -150 mm.
How to perform facade fastening?
How to install decking?
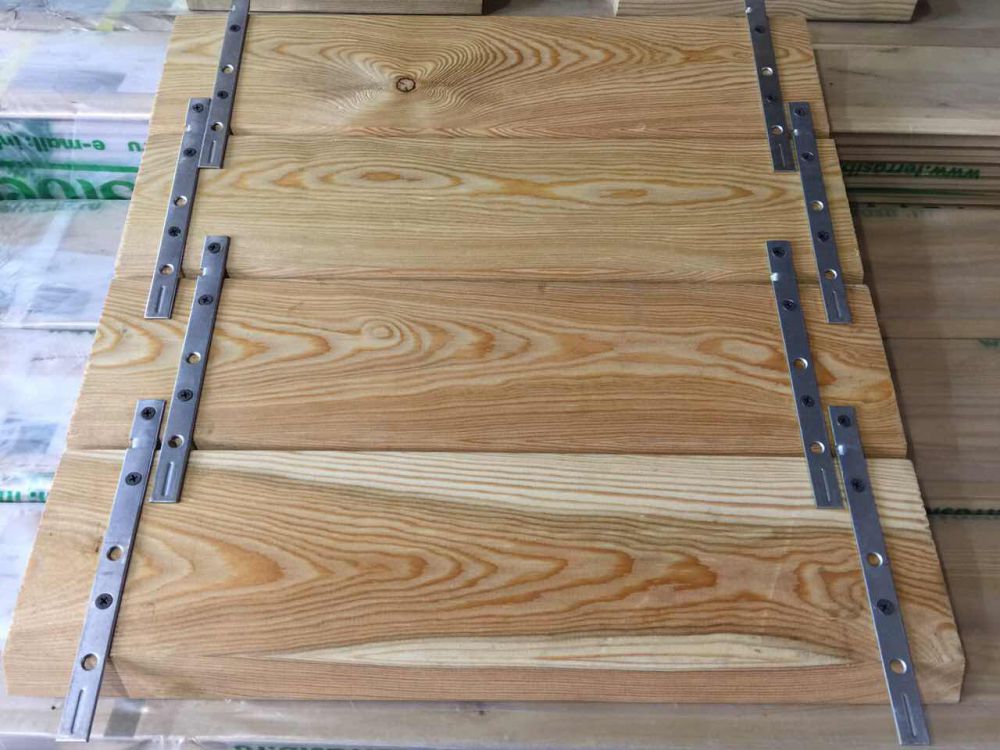
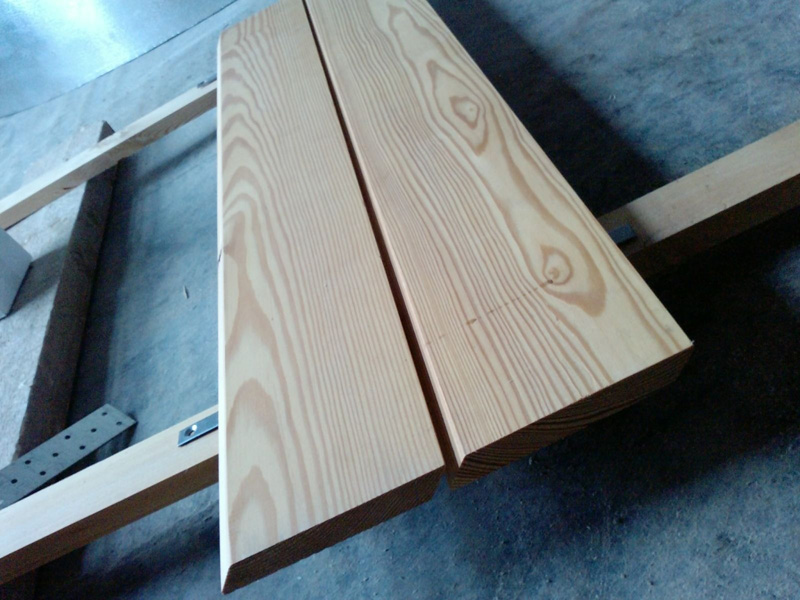
1. Lay out the facade / terrace boards on a flat surface with the back side up and mark the mounting locations for the fasteners. Fasten the snake fastener to the back of the façade / decking board. Fasten so that the ends of the plates protrude from both sides of the board
Important: the ends of the fasteners protrude beyond the ends of the board by more than 1 cm. The fasteners are installed at all points of intersection of the board with the log / guide.
Layout of the facade board and installation of fasteners
2. Turn the boards face up and mount the boards (boards are installed not by a shield, but one after another) along the guides / logs in accordance with paragraphs. 3, 4 and 5
3. Install the very first façade / terrace board. Mount all boards, except for the first one, in accordance with clauses 4 and 5.
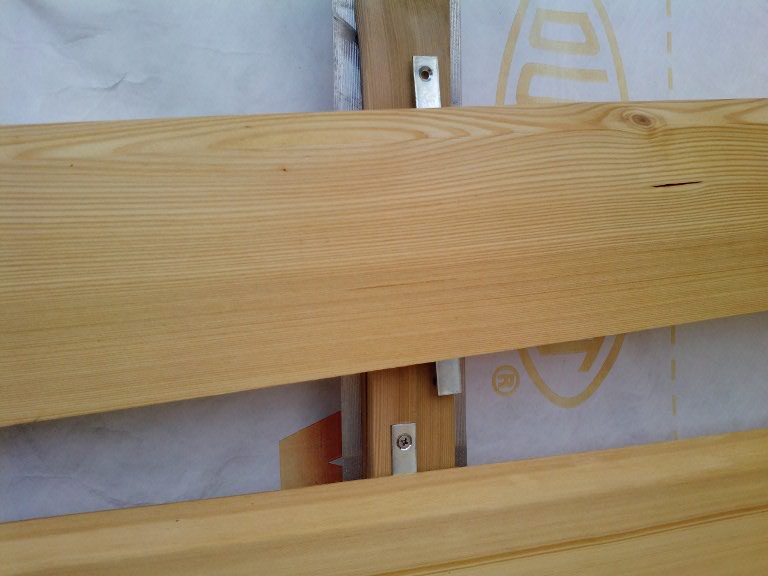
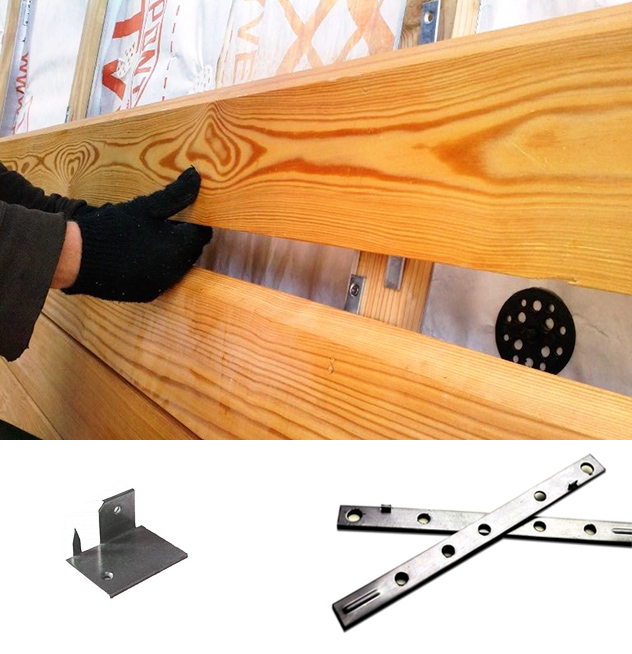
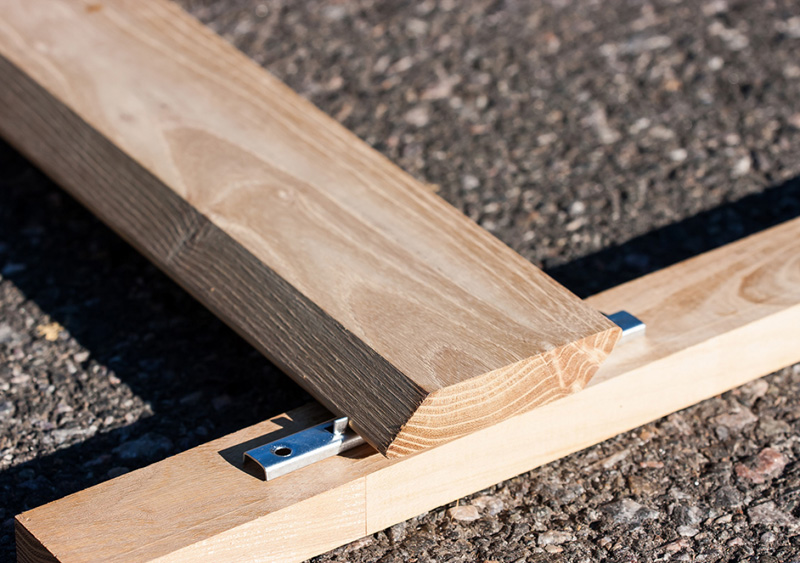
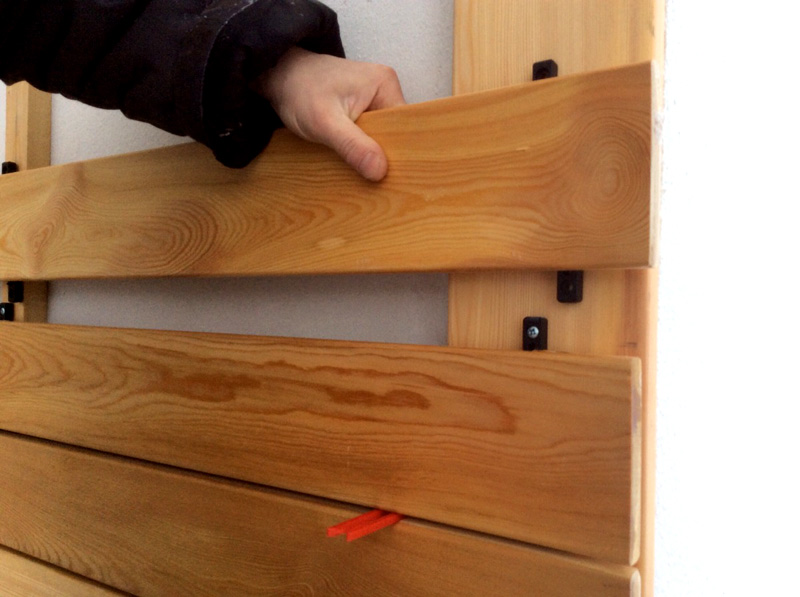
4. Place one end of the mount (there is no screw hole on it) under the previous board (which you have already attached to the log / guide) into the gap between the board and the log / guide.
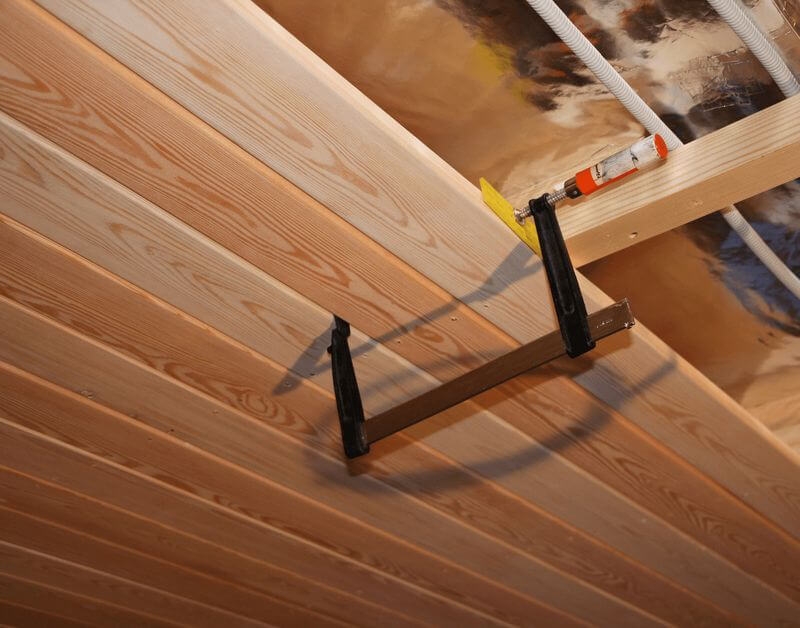
Installation of the beveled plank on the guides.
Step1 - supply of fasteners under the previous board.
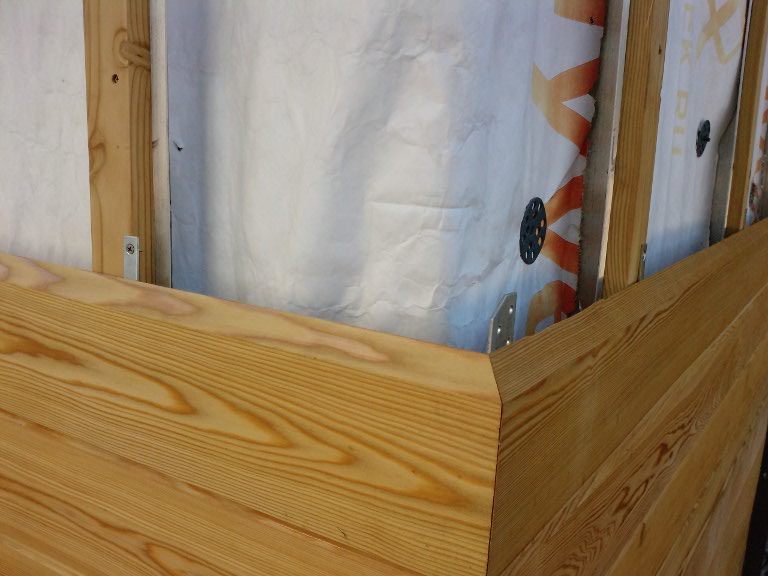
When installing the plank on the corner of the building, not one board is simultaneously raised on the facade, but two corner boards at once, previously connected on the ground with a corner.
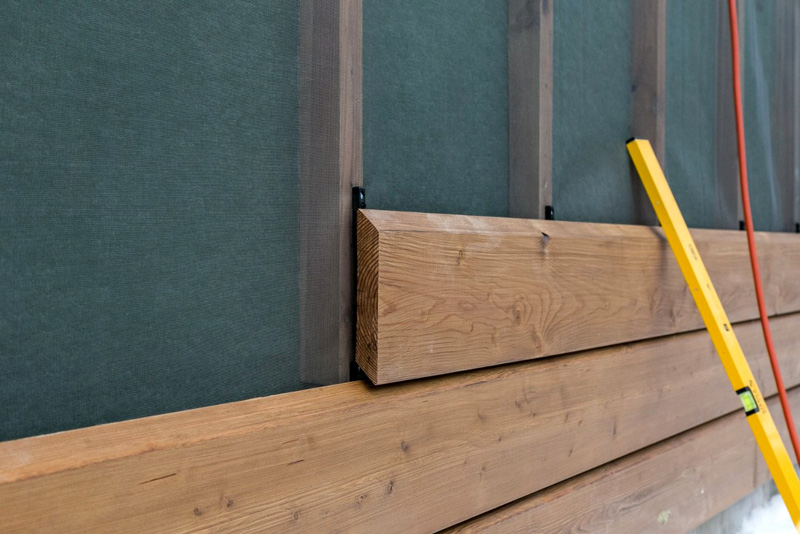
5. Screw the other end of the Snake through the hole in the tip of the Snake to the lag / rail. Do this with all the following boards.
Installation of the board on the guides.
Step 2 - fix the end of the Snake on the guide with a self-tapping screw.

Due to the thickness of the fasteners between the lag / guide and terrace / facade board a gap of 2 mm remains.
Be sure to leave a gap of 5-8 mm between the decking / facade boards, the width of which depends on the wood used and the width of the board. When installing a heat-treated board, a gap of 2-3 mm is allowed.
Below is a photo of the hidden fastener DecTay Snake - Boat.
In our article you can find out how to calculate the amount of fasteners that you need when installing a terrace, facade wall.
Page # 1-How to mount planken?
Page # 2-What fasteners do you need for a facade board?
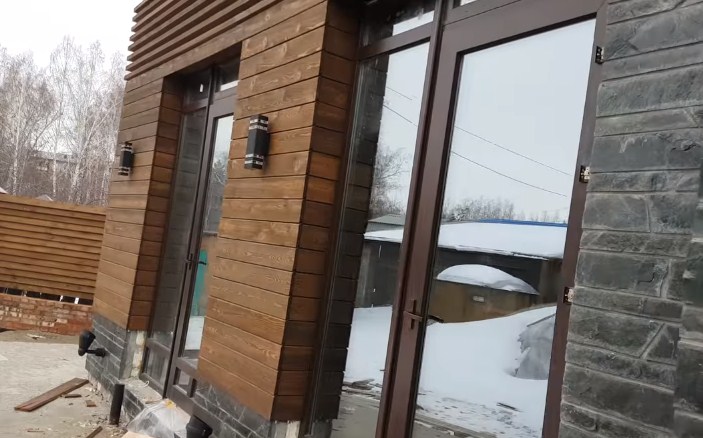
Where is larch planken used?
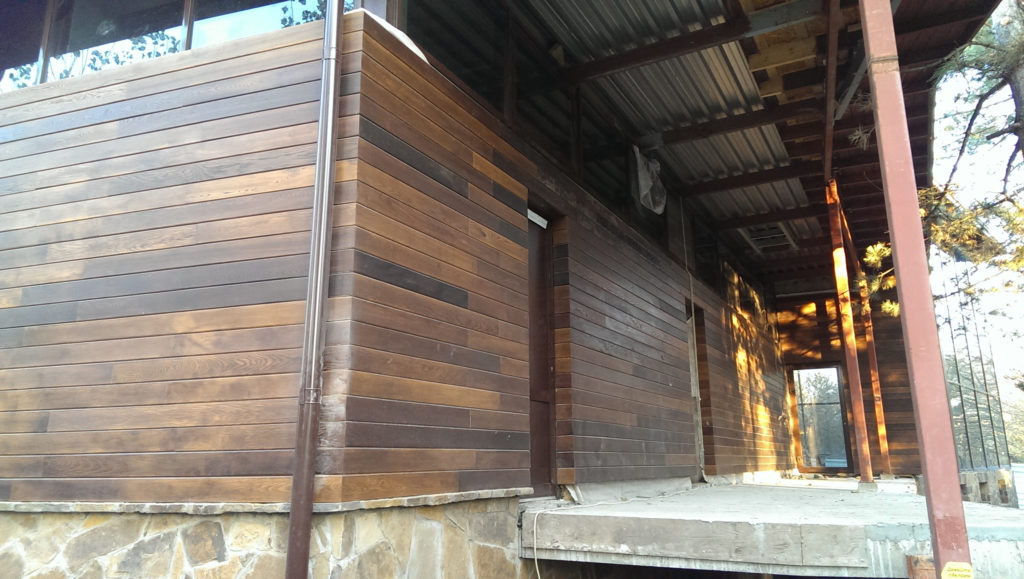
Larch material, as well as oblique planken from pine, is often used for outdoor decoration. High quality indicators allow using such cladding to provide reliable protection and improve the appearance of the facade. In addition, straight and oblique planken (larch, oak, pine) can be used for interior decoration. Such decorative elements will not only decorate the room, but also create a cozy atmosphere thanks to the pleasant aroma of wood.
Also, straight and oblique larch planken is used in the construction of small architectural forms and additional structures:
- gazebos;
- baths and saunas;
- terraces;
- verandas;
- fences.
The elements can be used as decorative details inside the room; niches decorated with larch planken also look original in the interior. You can use the material when facing a loggia or balcony, as well as when repairing stairs and floors.
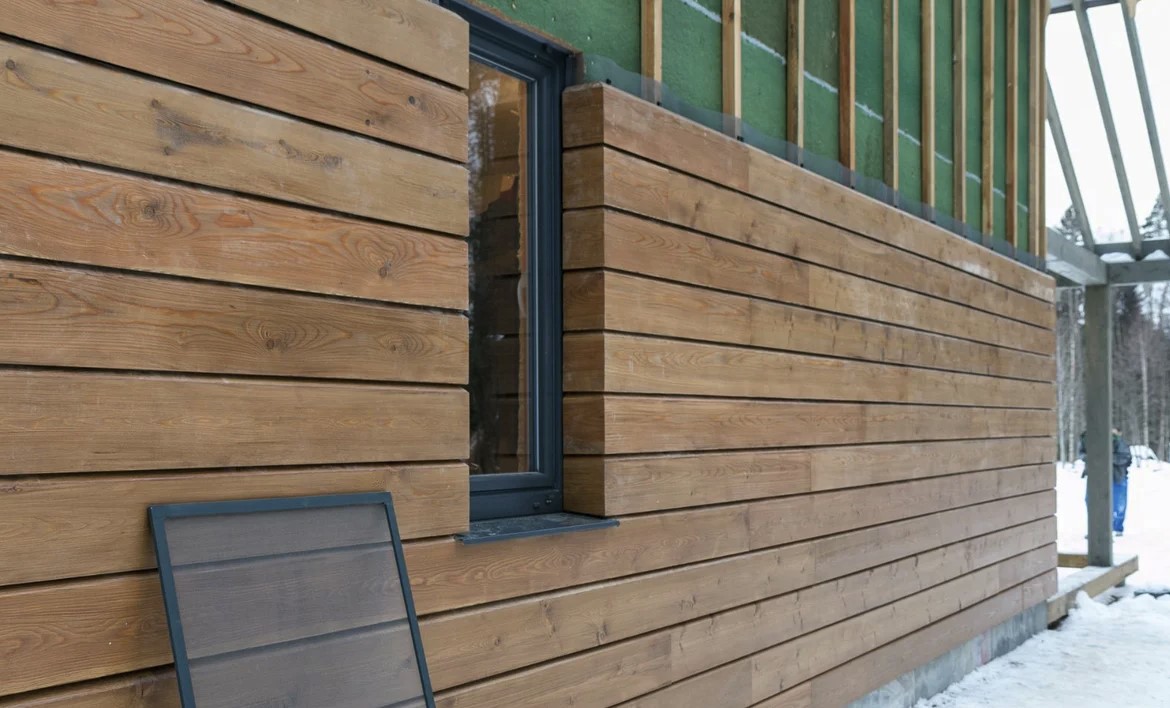
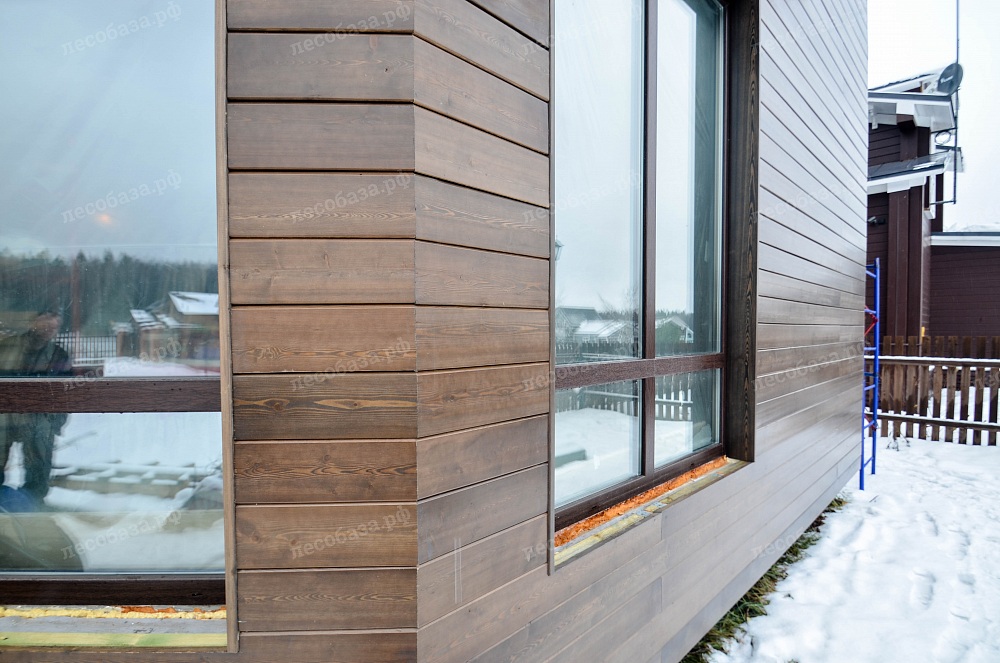
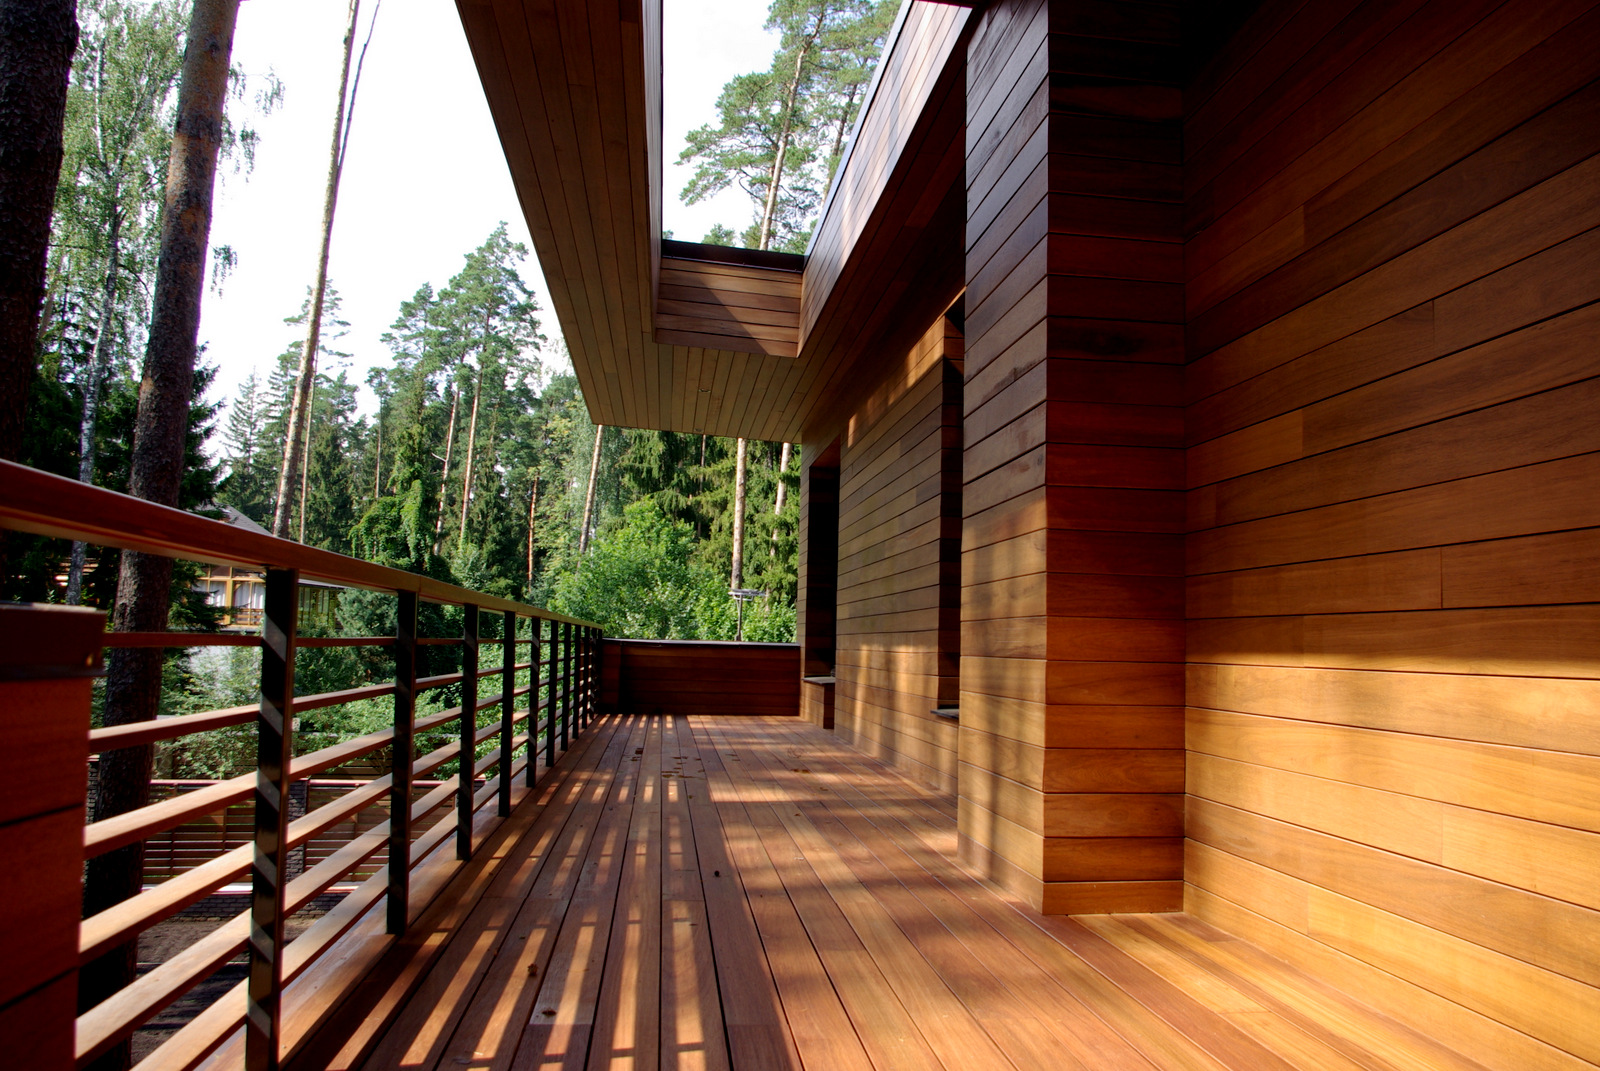
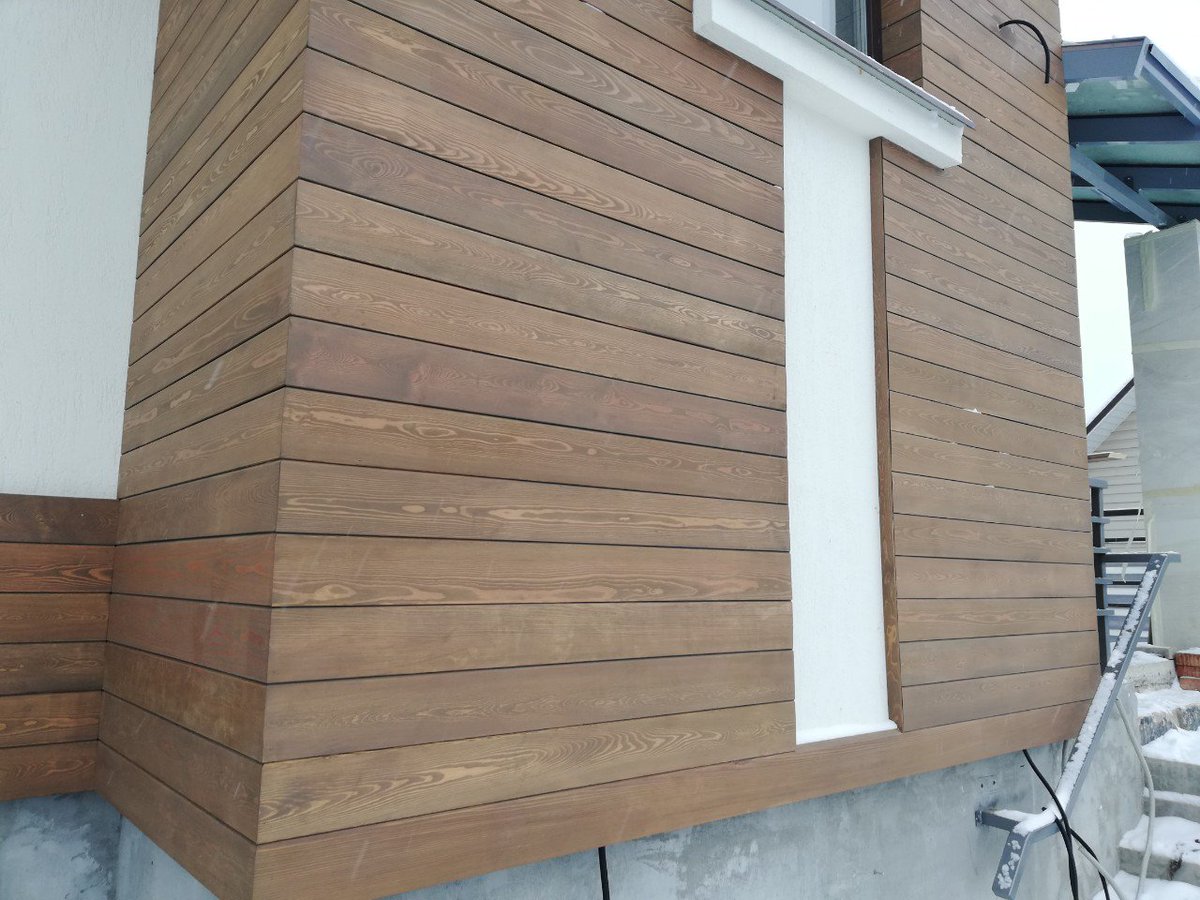
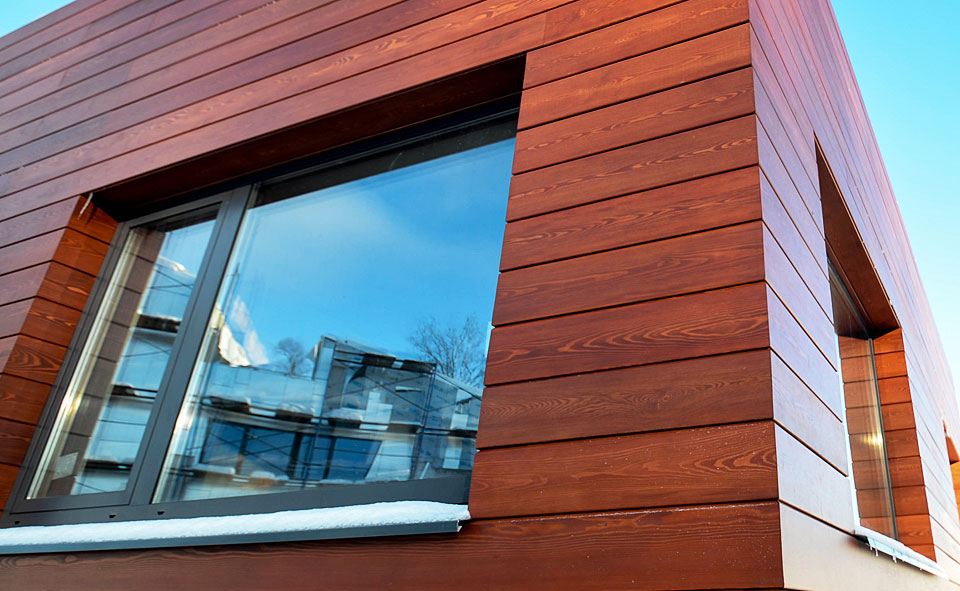
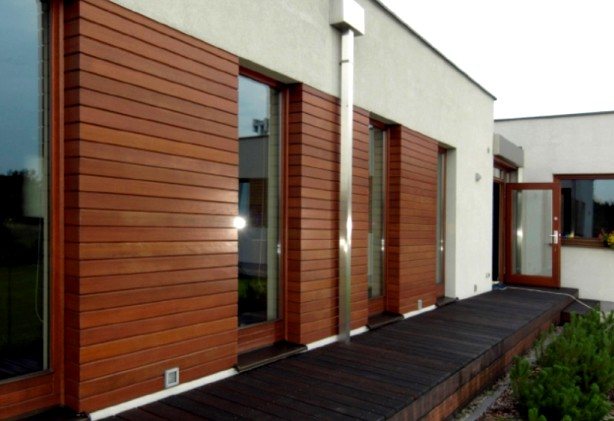
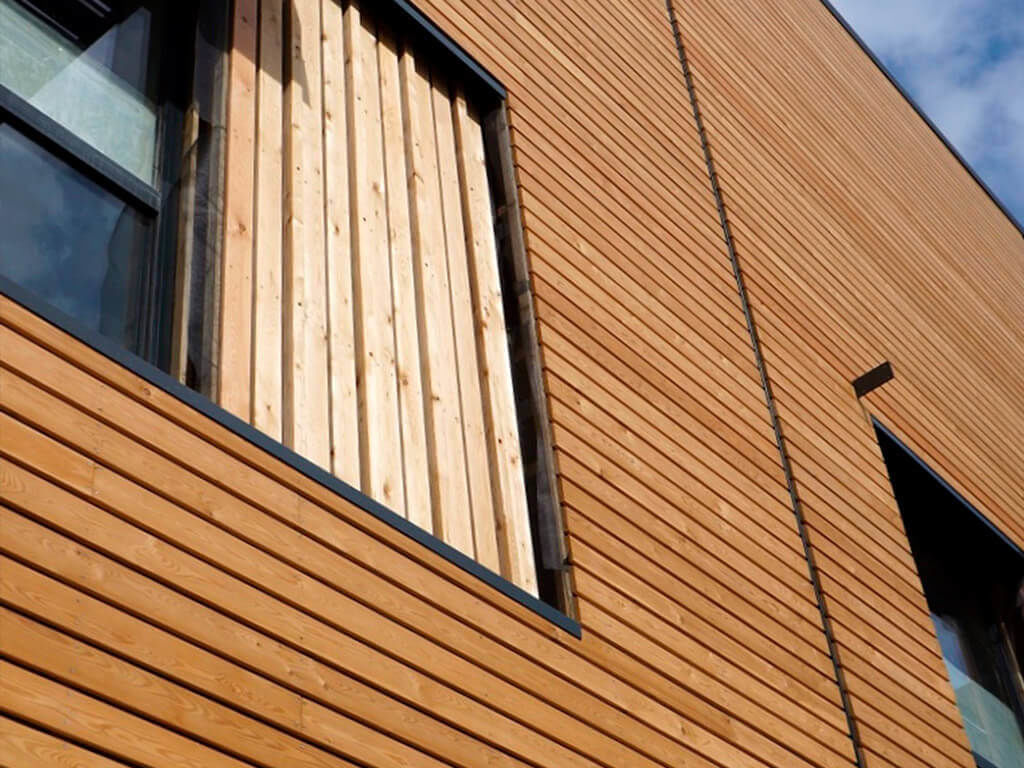
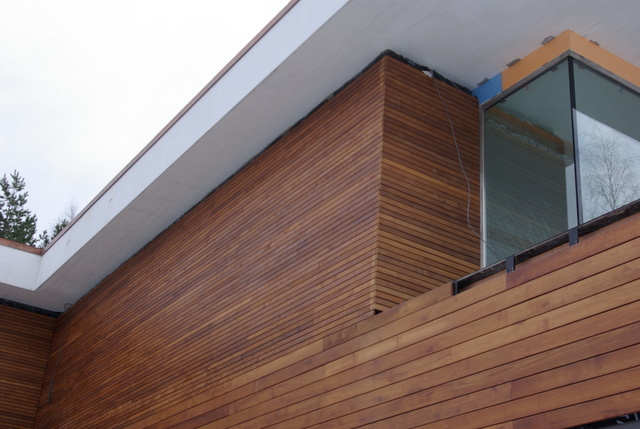
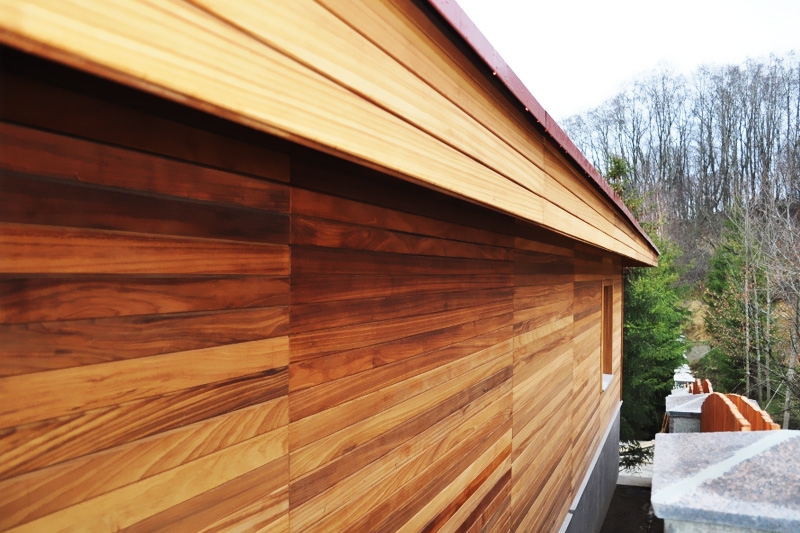
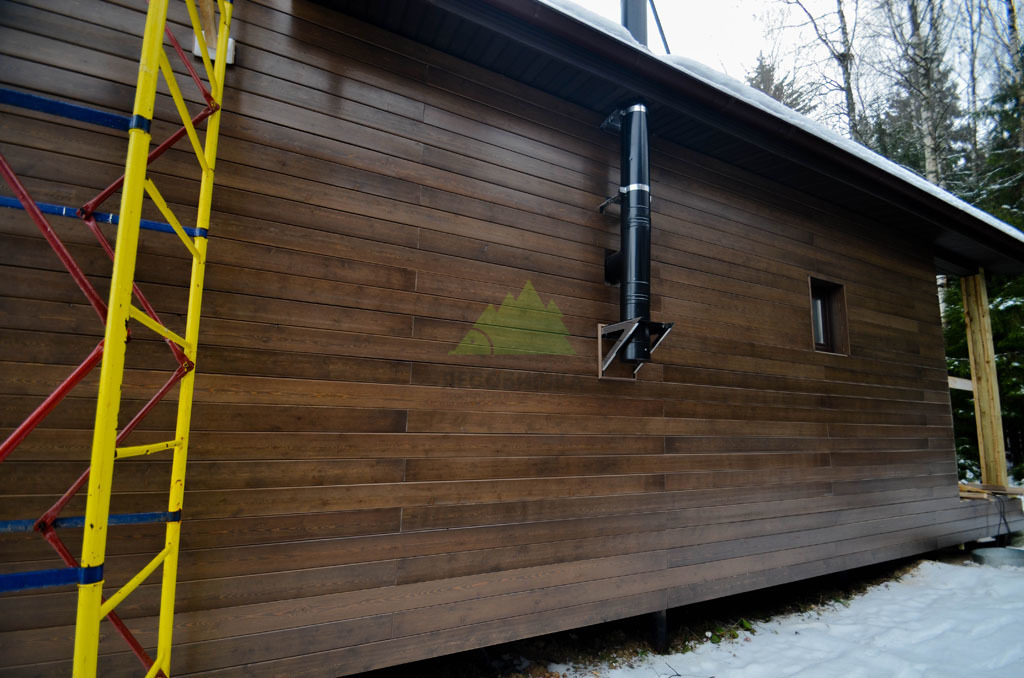
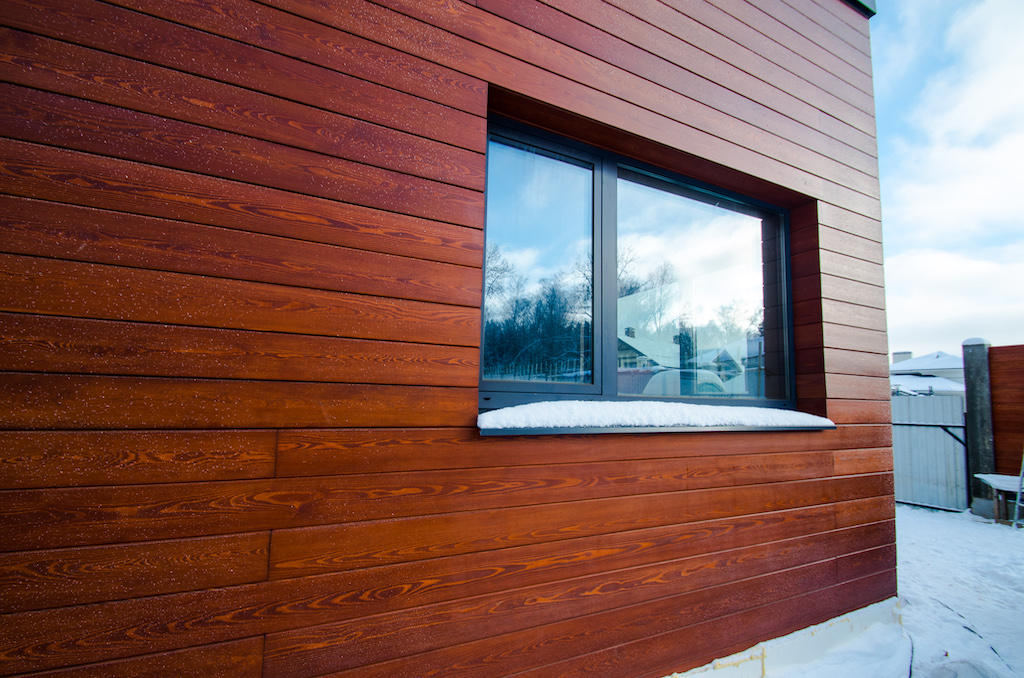
Facade finishing of a residential building
This is possible due to its high strength and ability not to deform under heavy loads, since in the manufacture of such material as straight and oblique planken, larch is used, which has a high hardness index.
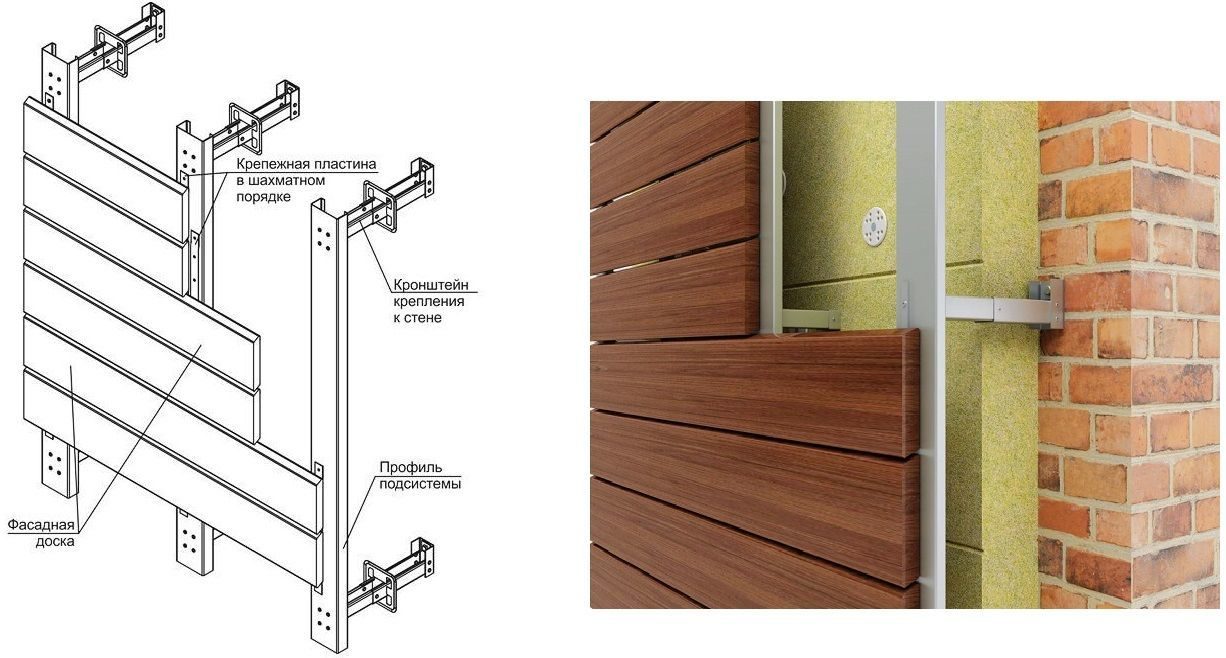
Features of planken mounting. Ventilated facade
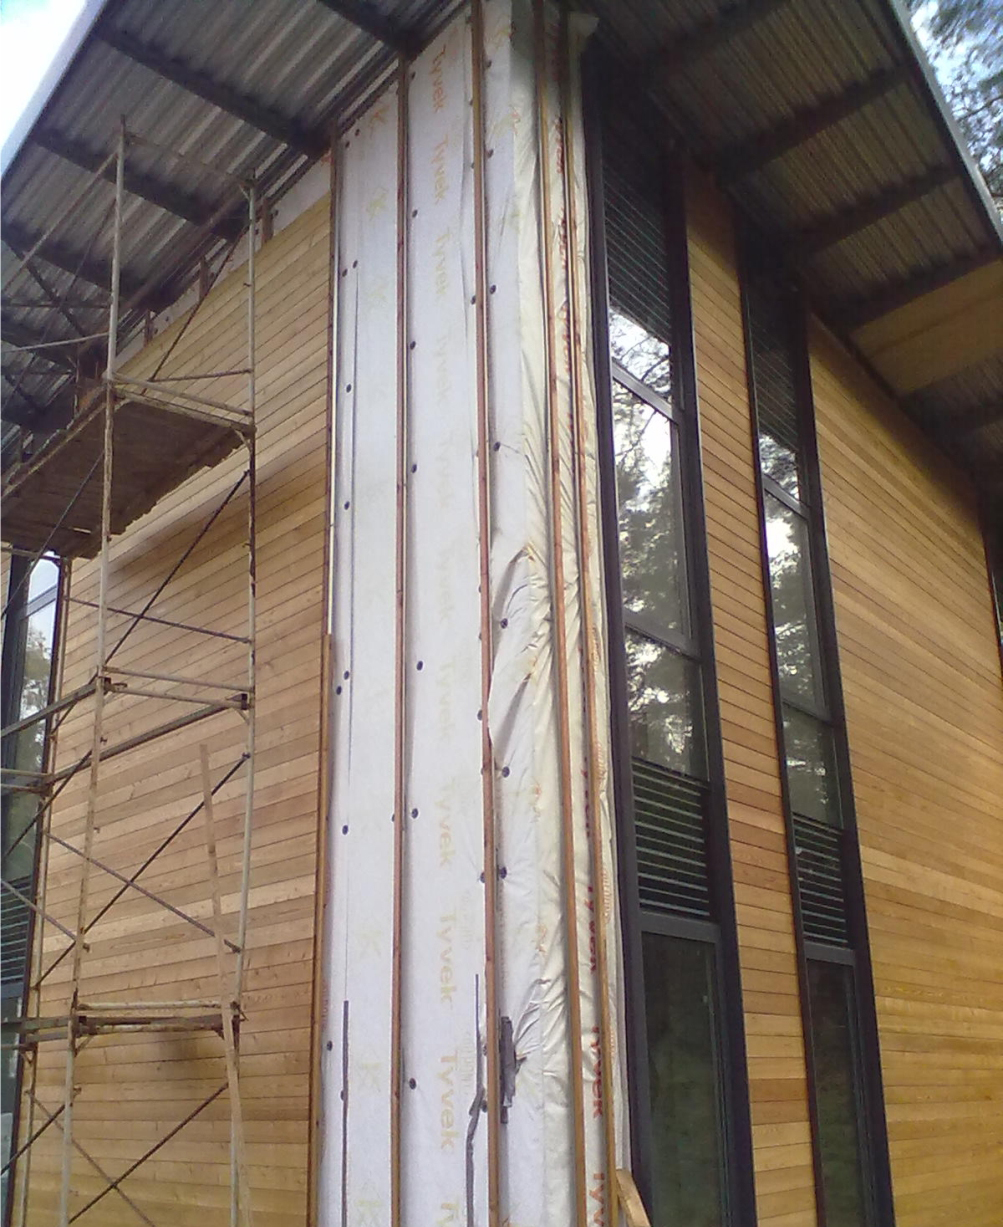
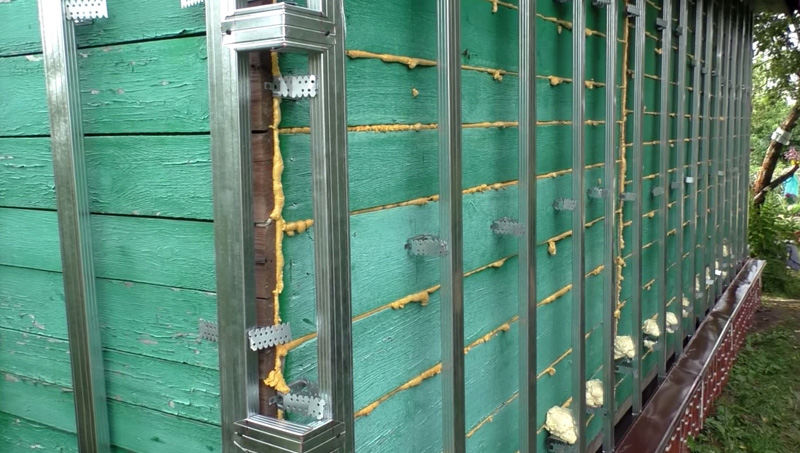
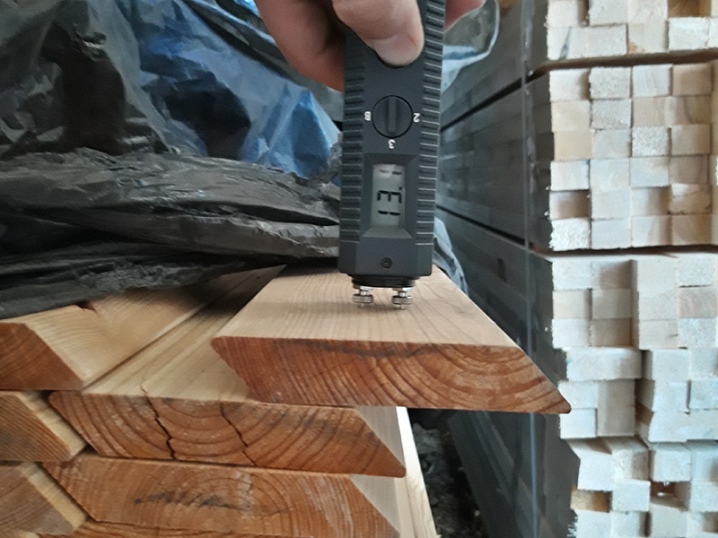
Planken is often mounted on a wooden hinged ventilated facade. Thanks to this type of installation, it is possible to ensure free movement of air between the wall and the cladding. In this case, it is necessary to take into account some of the nuances. So, in order to ensure the durability of the coating, it is necessary to ensure that the crate and plank are dry. It is better to additionally treat them from fire with special compounds, or paint them.
Also, the cladding of the facade of the house with planken is accompanied by insulation work. This is especially true when houses are located in northern latitudes. In this case, it is worthwhile to carefully approach the choice of insulation material. The thickness of the insulation is taken into account when creating the lathing. So, for example, if mineral wool with a thickness of 60 mm is used for insulation, then the gap between the sheathing profiles should be 58 mm. This will allow the insulation to be tightly and securely laid between the beams.
The bars, in turn, should have a thickness slightly greater than the thickness of the insulation. If these indicators are equal, then it will be necessary to arrange an additional row of rails. This will ensure normal ventilation of the facade.
After the installation of the beams is completed, insulation material is placed in the space between them. On top of the insulation, a windproof facade film is laid, which has a high density. It will also fulfill the property of a vapor barrier for the facade. For fixing mineral wool, special dowels are used.
Hidden and visible way of fixing the plank on the facade
Installation of the plank on the facade of the house can be done in a closed or open way. For cladding the facade in a closed way, boards with a length of 145 or 190 mm are mainly used. The thickness of the material is 15 mm. As for the width of the material, it can be different. It should be borne in mind that the type of fastening strips used will depend on this value. So, for example, if the cladding will be carried out using a 150 mm plank, then 190/15 mm strips are used for this. Basically, the fastening strips are installed in a cross-mounting method.
Before proceeding with the facing work, you need to prepare all the necessary materials and tools. So, for this you will need not only the planken itself, but also the basement strip, fasteners and others. Facing boards are laid out on a flat area. A lathing scheme is carefully applied to their surface. In the future, this will greatly simplify the decoration of the facade of the house.
As for the open method of mounting planken, it is much faster and easier. In this case, the facing material is attached directly to the joists. Self-tapping screws are used for fastening. The peculiarity of this installation method is that it can be used to reliably fix the facing material on the crate.

Preparatory work for self-installation
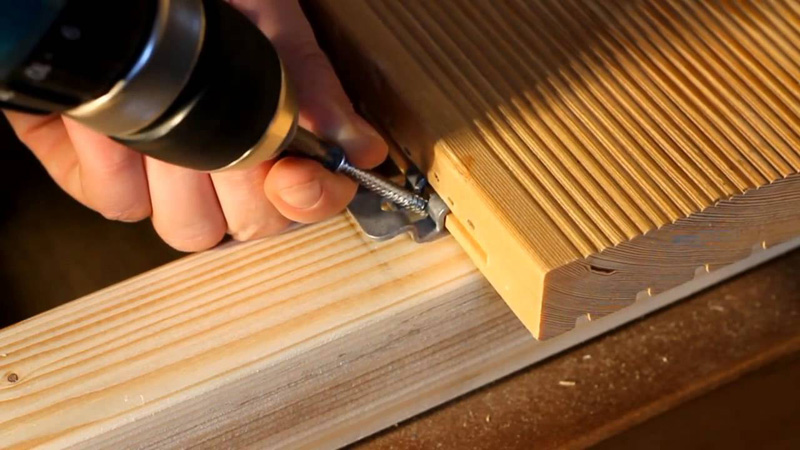
Let's consider how to fix the beveled larch plank yourself. First of all, you need to decide on the type of fasteners, for example, "wave", they are mounted with secret screws, using a screwdriver or drill.
The area of the front walls is determined. The boards are fixed at a distance of 0.5-0.6 meters. Accordingly, the number of rails and the required fasteners is calculated. Then on the facade you need to mark the places for fastening. After that, the slats are mounted on the wall. Along the edges of the wall, next to door and window openings, 2 slats are mounted in a vertical position, at a distance of no more than 10 cm from the corner
It is important that the lower ends of the rails are located on the same horizontal line, because the bottom row of the first edge is attached to the ends of the rails
At the final stage, this place will be closed. To check the level, you can pull on the rope and trim the ends if necessary.
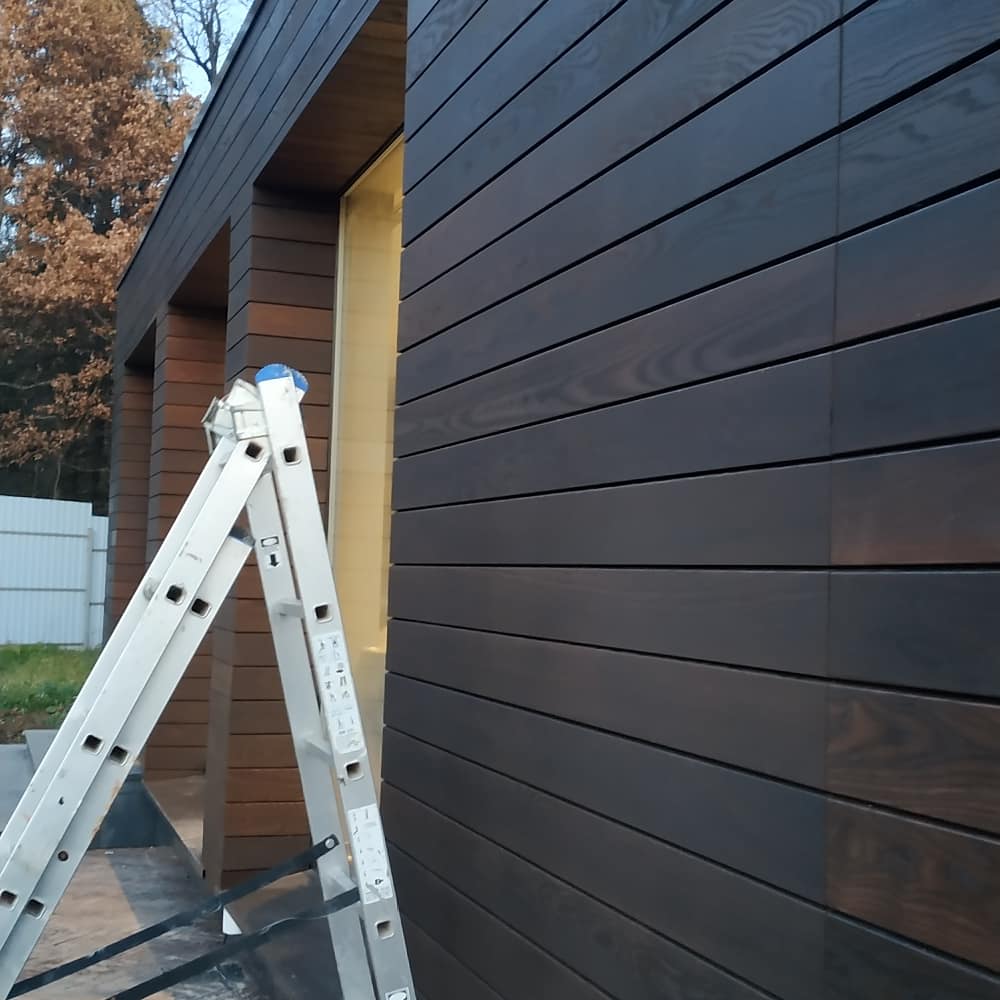
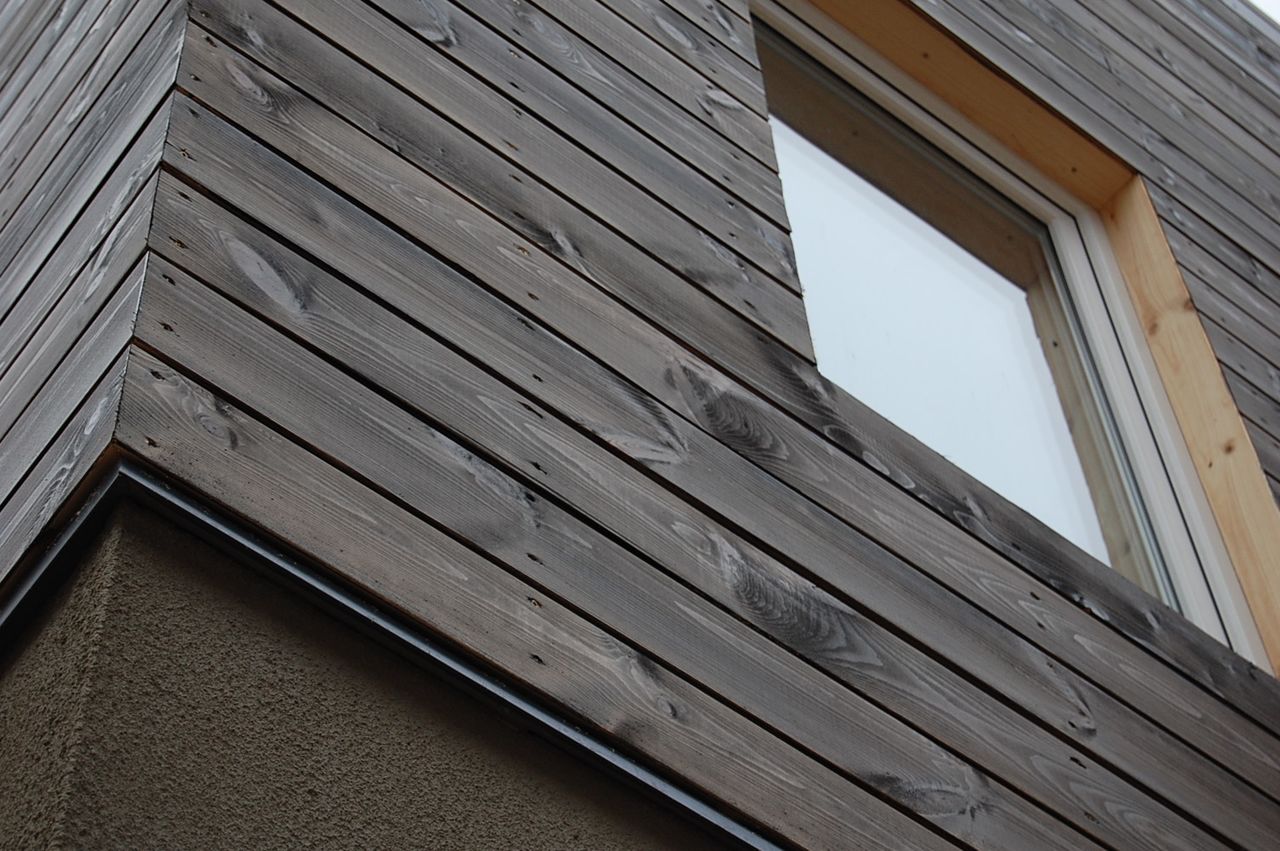
Then all other rails are installed. After that, beveled larch boards are attached in a horizontal position. When joining the bevels, the upper board should cover the lower one.
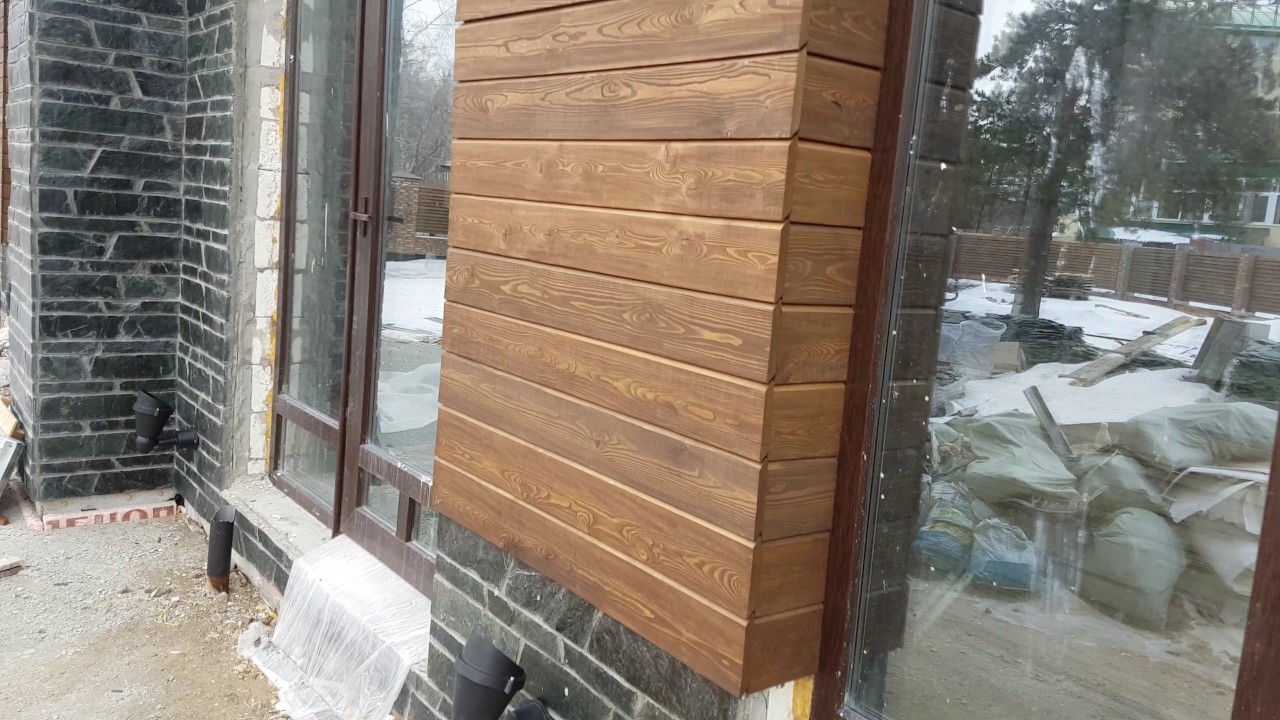
Installation of a beveled plank on the facade
Planken on the facade is mounted with nails or any of the above types of fasteners.
The following subtleties are important:
- Installation starts from the bottom up. The starting rail is installed first. This is necessary for the precise assembly of the façade cladding.
- If the fasteners used are without restraints, guide cords and a-spacers must be used. The spacing between the slats will be the same.
- The back side is impregnated with protective compounds in advance.
- The distance between the plank and the wall on which it is mounted should not be less than 50-60 mm (this allows for effective ventilation).
- If thermal insulation is attached to the wall, its coating with gas and water protection should not be higher than the crate.
Fastening the plank to the facade with nails
Nails are affordable, inexpensive fasteners. They are used to fix the plank on the crate, when sheathing the facade of the building. It is necessary to choose those nails, the heads of which, while remaining in sight, will not spoil the appearance of the coating. A rectangular or wedge-shaped (rhombic) look is suitable.
Fastening starts from the bottom. After carefully adjusting the horizontal position (with a building level), the first board is nailed. Two nails are hammered in the places where the plank crosses the battens, one above the other.
To keep them on the same line, use a purchased one or make a rectangular template.
The method does not require other fasteners. Planken is fixed to the façade in an open way. There is a second method of using nails - the closed method.
It consists in piercing the boards of fasteners made of galvanized sheet steel with nails in the right places. They have two holes for nails and a stopper spike. The latter facilitates a level installation.
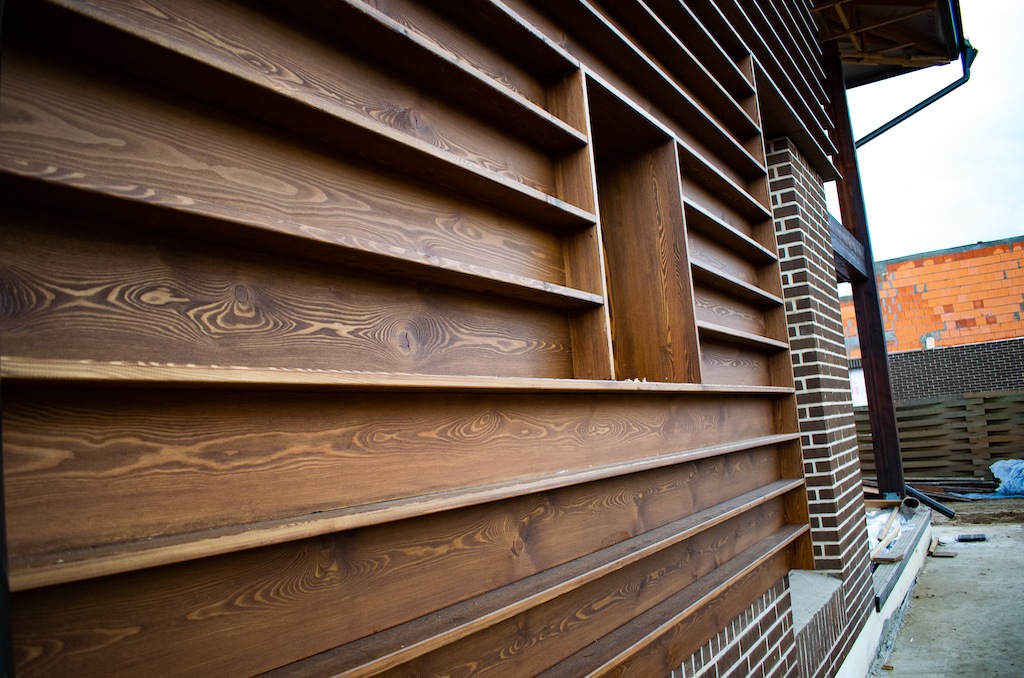
Fastening the planks to the facade with an overlap
For rectangular and rhombic planks, an overlap mount is used. It is carried out from the bottom up. Use screws. They are screwed in with a screwdriver at the top of the board, where it intersects with the crate. The next strip is attached in the same way so that its lower edge hides the screws screwed into the previous strip.
The fastening impresses with its simplicity and efficiency, and leads to increased material consumption. It makes up 20-25% of standard methods. It must be remembered that overlapping boards require ventilation slots at the very bottom and top of the wall. If this is not done, damage to the sheathing and lathing will begin.
Brief instructions for the exterior decoration of the house with planken
Before you start cladding the facade with a similar type of finishing material, you should prepare the surface. If the planking board will be used for revealing a wooden structure, experts advise treating the wall with an antiseptic compound. This will prevent the reproduction of various insects on it. Having made this simple procedure, you can start facing.
We prepare the tool and material: what is required for work
To work, you will need the following tools:
- drills;
- screwdriver;
- screws or self-tapping screws;
- square, ruler, pencil;
- gap plastic elements 3-4 mm thick, 3-4 cm long and 0.5-1.5 cm wide. They are sold in all hardware stores.
 The main thing in such work is attentiveness and accuracy.
We mount the crate: nuances and additional features
The lathing for planken is made of wooden bars or a metal profile for gypsum board. Here the choice is entirely up to the master, however, experts advise using the first option.The bars are fixed on the wall with a pitch of 40-60 cm in a vertical position.

At the request of the master, a heat-insulating layer can be laid between the lathing bars and covered with a waterproofing film, but this is not necessary. However, it is worth remembering that even if it is decided to use thermal insulation, there must be a gap between it and the planken boards for unhindered air circulation.
 Experts do not recommend making a crate from a profile, however, it also has a right to exist
We install the planking board on the crate
The installation process for various types of fasteners is different from one another. Therefore, here we will only mention that, in fact, it is no more complicated than cladding with PVC panels or clapboard. As for the specific nuances of fixing to one or another fastener, the instructions for each are available on the packaging.
Unique features and other benefits
Planken is famous for a number of unique characteristics and positive qualities.
It is customary to divide the material according to the type of profile. Today, there are three types of planken, each of which is interesting in its own way.
Namely:
- There is a straight planken. The installation of this material is carried out in an open way;
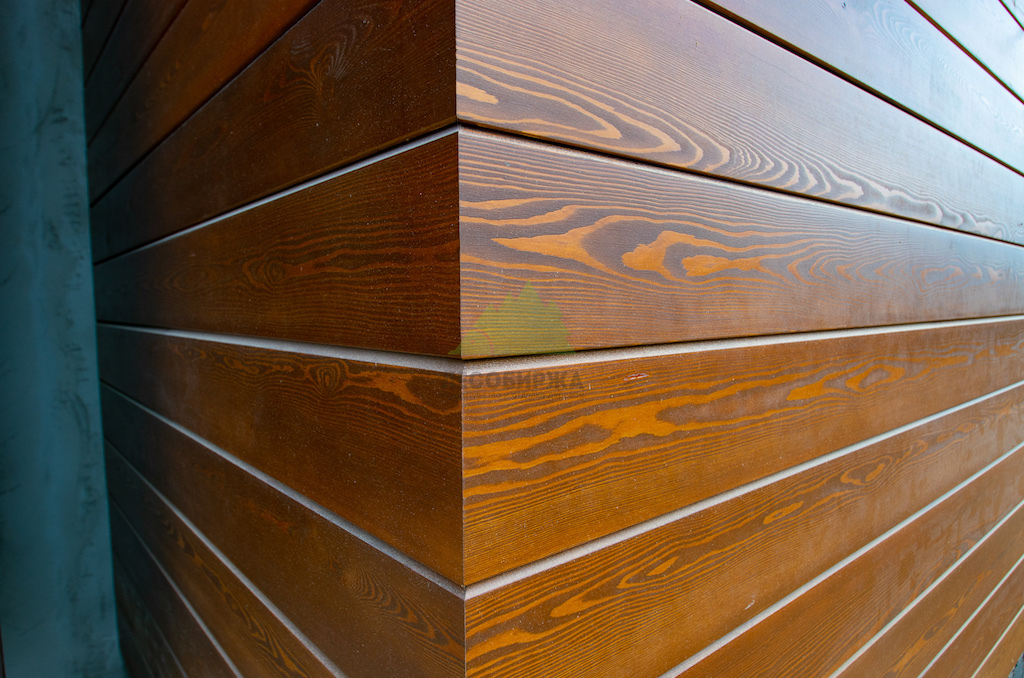
- Beveled or oblique material is also common. The main advantage of using such a profile is that the edges are beveled, due to this, the joint gaps are hidden without problems. Due to this feature, moisture will definitely not get inside the facade, respectively, the cladding will keep its original appearance for a long time and perform its functions.
If you compare plank with some other material, lining immediately comes to mind - although there are many interesting proposals for facing facades. For its connection, the “tongue-and-groove” method is preferable. In the case of planken, everything is different - it is more convenient to work here, there is more choice.
All work can be done independently - especially if you have some experience in construction
The lining often swells, dries out - as a result, the material begins to warp, twisting of the elements is also possible. That is, this type of attachment does not cope well with humidity and temperature changes. Another drawback is that if you need to replace any part of the lining, it will be difficult.
Planken does an excellent job with drying out or swelling, and if necessary, any detail in the facade cladding can be replaced without problems on its own.
Changing plank parts is actually very easy - there are a minimum of difficulties here, especially if the fastening method is open. The hidden method will also not cause problems, unless you have to disassemble the part of the cladding that is higher than the board that needs to be replaced.
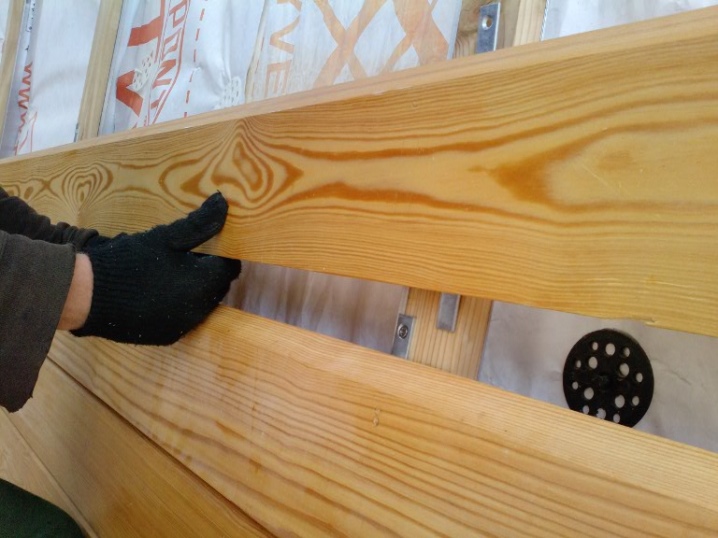
Products are ready for installation work and are waiting in the wings
In ecological terms, planken is completely safe. Condensation does not accumulate in the gaps, so the service life is not reduced.
The material has high waterproofing and thermal insulation performance. Easy to install. In stores there are solutions with different textures, the color palette is also rich.
Thanks to this, it will be possible to choose the desired shade even for those buyers who are very demanding and are looking for something specific to implement their design ideas.


Planken mount: technology and materials used
It is not worth talking about the open method of fixing, everything is clear here. But we will now dwell on the hidden in more detail. Dear reader already knows that the plank can be straight, beveled or grooved. So, each of the types is attached according to its own technology.
Fasteners for fixing this finishing material are quite diverse. It can be "Snake", "PLANfix", "Crab", "Bridge", "Key", "Cobra" and many others. The choice of the fastening element will completely depend on the type of planking board chosen for cladding.
 The most common fastener "Snake" - you can make this yourself
Working with ordinary straight planken: fastening the finishing material
For straight planken, 2 main types of fasteners are used - these are "Snake" and "PLANfix. "Snake" is a galvanized steel plate in which holes for self-tapping screws are already made, 15 mm wide and 2 mm thick. The length can vary from 15 to 19 cm. An additional advantage of the "Snake" fastener is that it prevents the board from twisting. This is especially true when using large width pine planking in the decoration.
 The PLANfix mount is perfect for straight planken
How the grooved plank is attached: fixing features
For this type of finishing material, there are special fasteners on sale called "Crabs". Installation with their help is quite simple. How such a fastener looks like can be seen in the photo.
 "Crab" fasteners are convenient for boards with grooves
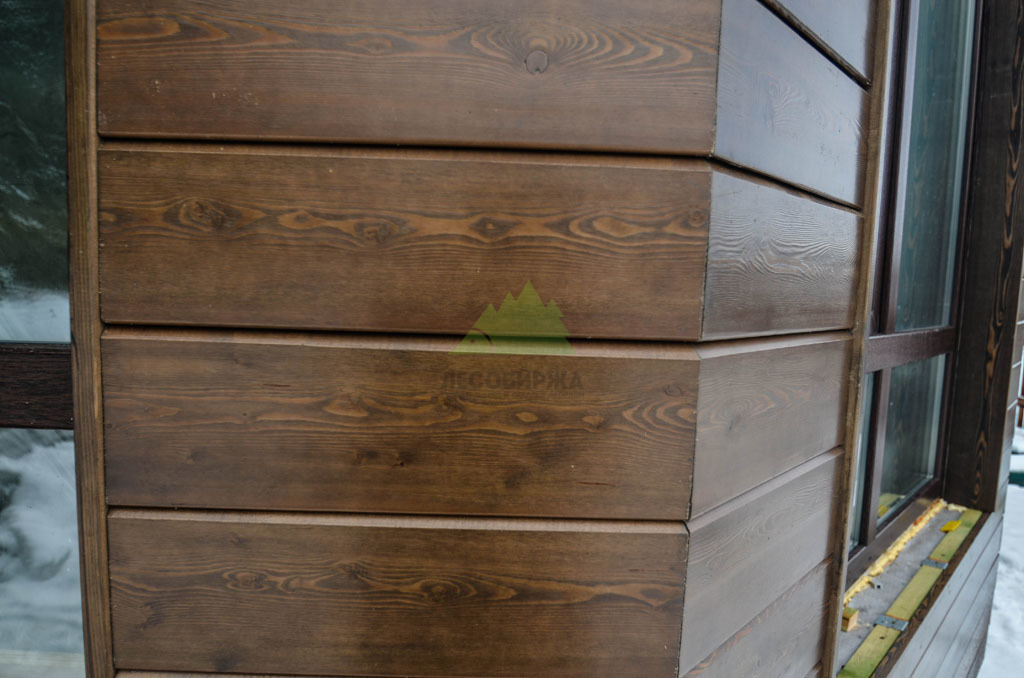
Beveled plank and options for its fastening
Fastening of the beveled plank can be carried out on the "Snake", as well as straight planking of the board. For this type of "Snake" is even better suited. It is very easy to master the fixation technology, everyone can do it. Such cladding takes very little time. We suggest that you familiarize yourself with the photo of the oblique plank fastener.
This is how the oblique plank cladding is mounted:
Mounting
The simplest way of fixing an oblique plank is recognized as fixing with decorative nails. In this version, there are 2 fasteners per 1 board - and the connection turns out to be as reliable as possible. Experts sometimes advise using vertical rows of nails, but other craftsmen disagree. The final choice of how to fix it is up to the owner. The preference for one approach or another affects only the decorative parameters, and the quality of the finish does not change.
Nails or screws (self-tapping screws) can be fixed with heads visible from the outside. In this case, they talk about an open installation method. Despite the worst aesthetic qualities, this method also has an attractive property - it simplifies repairs. With a closed fastening technique, special fasteners are needed. They are fixed to the inner surface of the plank, and the other edge is attached to the facade.
For your information: to obtain the planken itself, special cutters are often used in industries. Regardless of this, it is recommended to use Swedish Essve screws with a unique coating such as CorrSeal for fixing it. A special anti-corrosion coating reliably prevents the formation of rusty streaks. The head of the screw is unobtrusive against the wood background, and the notches are designed so as not to unduly damage the material. The appearance of burrs, wood scoring is excluded.
An alternative solution is snake fixation. Professionals recommend laying the finishing board with an overlap, as already mentioned, but only the "snake" allows you to install beveled planks in a hidden way. A facade or terrace board is placed on such plates only along the logs. The width of the rails should be at least twice the width of the fasteners themselves. Boards are first laid out on a flat surface with the back side up.

Next, carefully mark the places where the fasteners will be installed. It is attached to the intended positions. The extension of the ends of the plates beyond the contour of the board by at least 10 mm is required! Fasteners are placed wherever there is an intersection with the guiding parts of the lathing. The end of the fastening without a hole for the self-tapping screw must be brought under the previous board into the gap, the corner block is pre-assembled on the ground, tying the boards with a metal corner.
You can find out how to install a beveled plank on the facade of a house from the video below.
Summarize
A finishing material such as planken will be a good solution for cladding facades or interior decoration.However, it should be understood that there are two options here: save now and face the need to replace the coating in a few years, or immediately purchase a quality product from good, strong wood, and then forget about repairs for many years. The answer is obvious.
We hope that the information presented in today's article was useful to our Dear Reader. If you have any questions or some parts remain unclear, you can summarize the essence in the discussion below. The editors will be happy to clarify the misunderstood points as soon as possible.
Have you worked with similar material yourself? Then we ask you to share your experience - it will be very useful for novice home craftsmen. Write, ask, share, communicate. And finally, we bring to your attention a short, but very informative video on today's topic.