Fastening sections
The method of fastening the chain-link to the posts depends on the selected material. For wooden or concrete supports, various fasteners are used.
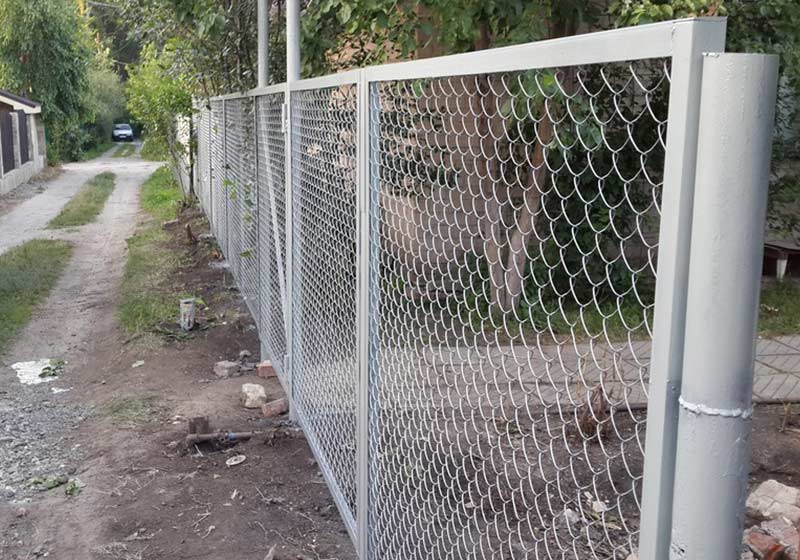
Metal pipes must be equipped with special brackets, hooks or plates on which the chain-link can be easily attached. They can be welded. Attachment to metal pipes is possible with small perforated steel plates. Large threaded pins are threaded into the prepared holes on the plates and fastened with nuts through special holes in the pipes.
The mesh is attached to the concrete posts with thick wire or clamps. The wire should be selected from stainless steel. Concrete poles have no holes, hooks or plates, so the net is attached with large clamps or tied tightly. To do this, take a strong steel wire.
The mesh is put on hooks, which are then folded with a hammer. The chain-link is attached to wooden posts with staples or nails, it can be screwed with steel wire. It is better to fix it in several places.
Which wire arrangement is best?
In the process of pulling the wire, it is necessary to take into account the frame format: Dadan or narrow (Ukrainian). There are two ways to pull the wire: horizontal and vertical.
Horizontal - suitable for the Dadant frame. If a vertical tension is used for such a frame, then on radial honey extractors, the honeycomb can break away from the lower bar and, flattened, move along the upper bar. This will deform the top of the honeycomb. If you use a chordial honey extractor, the result will be the same, but to a lesser extent. Usually the deformation of the honeycomb occurs when the rotor of the honey extractor stops or starts abruptly. Therefore, the vertical method is more suitable for a narrow-high frame.
Let's analyze the advantages and disadvantages of both types of wire arrangement:
| Horizontal | Vertical | ||
| + | – | + | – |
| The standard size of all planks and bars, which allows you to purchase them in any specialty store | Greater sag | Less sagging of combs and minimal probability of rupture of combs during pumping | Standard sizes of bars and planks will not work |
| Easier cleaning as there is no wire on the top bar | Sometimes all the weight is on the side rails where the top bar mount is. | Not only the side bar can support the weight of the full frame, but the wire itself. | Slight inconvenience when cleaning on the top bar |
| If the tension is too strong, the side strips may bend. | The side frames do not break or bend under the influence of the wire |
If the apiary is nomadic, then the honeycomb may break, especially when the honeycomb is freshly built or the frame is full. In addition, there is a possibility that the honeycomb may break during honey pumping.
How to tie grapes
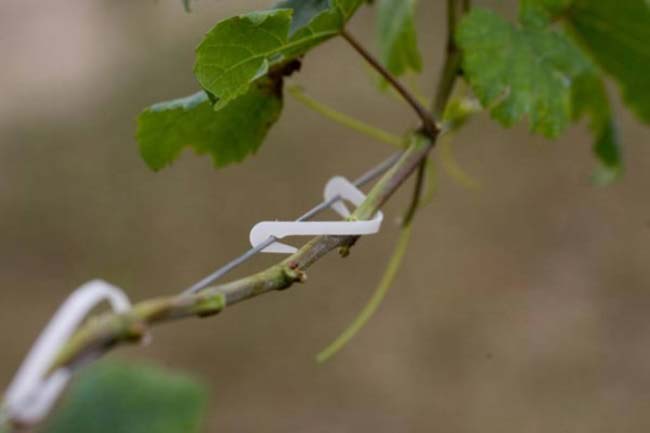
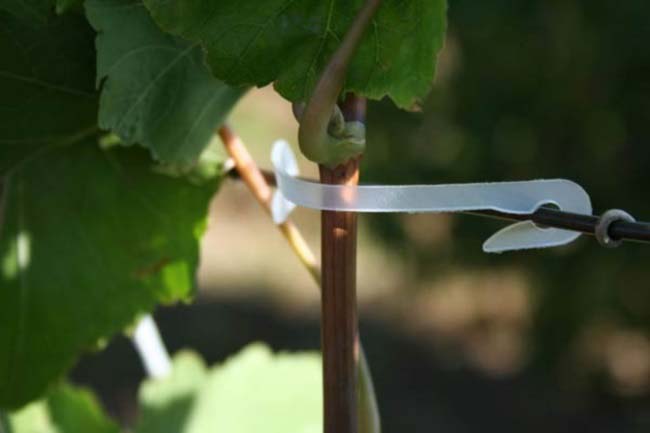
In the spring, gently bend the branches of the plant to the supports and fix the replacement knots. Repeat the operation with young shoots in the summer. For tying, use a soft material: rags, old nylon or nylon stockings. There are special tapes on sale in shops for gardeners.
Nylon and nylon are the best tying materials because as they grow, the vines stretch without damaging the shoots. Skip the material during the procedure with a "figure eight": this prevents the branches from rubbing against the wire. Lay the vines horizontally or in an arc. Tie the lower shoots loosely, and the upper ones tightly.
Tensioning methods
To facilitate work in the apiary, many devices have been developed. Some of the most used are stainless steel wire tensioning machines.Their use significantly speeds up the process, and the wire for the frames is tensioned more efficiently. Manual production of frames is too laborious and is only suitable for small farms.
Industrial fixtures include:
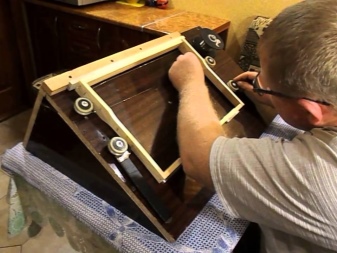
- Wooden machine. It consists of a plywood base, a metal spool holder, 4 replaceable steel wire wheels, 3 stop corners and a deflection screw. To tension the mesh, the already assembled frame with drilled holes on the sides is installed in the fixtures of the machine. With one side bar, it should be between the stops, and with the opposite one, it should bend slightly under the influence of tightening the screw. Next, you need to consistently thread the wire through all the holes in the bars, and when cornering, start it behind the nearest wheels of the machine. It is this design feature that avoids entanglement during the process. Having passed the wire through all the holes, its edge is fixed and stretching begins. To do this, the wire is removed one by one from the wheels of the machine. Having pulled all the sections of the frame, the wire is cut off from the skein and this end is fixed. For final tension, loosen the deflection screw to align the side bar.
- Metal machine. Its design is completely similar, only this version has a reliable stainless steel or painted metal frame. Unlike its wooden counterpart, this device is equipped with a convenient floor stand that can be installed and fixed in the chosen place. The system of the machine and the quality of the finished product is the same.
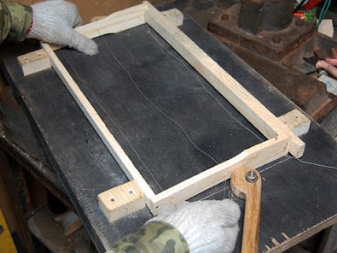
Inventive beekeepers have found a solution to how to pull the wire, spending a minimum of money. Handicraft device - wire tension table. To make it, you will need a board of 47 × 22 cm with a thickness of up to 3 cm.At one of its ends, stepping back 3 cm from each edge, two nails are driven in, their height should be at least 2 cm.They will be used as a stop for the side bars.
The second edge of the board is equipped with a 3 cm bracket, protruding 2.5 cm above the surface, with a screw hole. Its role can be played by a screw from a meat grinder with a movable washer or just a bolt and nut. The frame located on the structure is compressed by slightly turning the screw, after which the wire is manually pulled. Additional tension is achieved when the product is released from the screw.
Video: machine for broaching and pulling wire on frames.
There are also alternative methods, for example, without using stops, the frame can be squeezed strongly by winding a thick fishing line around it. You can also pull only 2 wires instead of the required 4, stepping back 30 mm from the edges, and then tighten the entire frame in the middle with a transverse wire. In this way, greater rigidity is achieved, and even with secondary waxing, the frames do not require overtightening.
Tensioning methods
Currently, there are different options for tightening bee frames. The most often used option is with four rows, less often - five or three. There is also a zigzag stretch, W-shaped.
In amateur apiaries, where there is a small amount of bee frames, the wire can be pulled even on the knees. Many beekeepers carry out this kind of work with an awl, piercing holes in the side strips of bee frames. In this case, the wire is inserted into the holes, as a rule, in four rows, and its end is fixed by the upper stud.
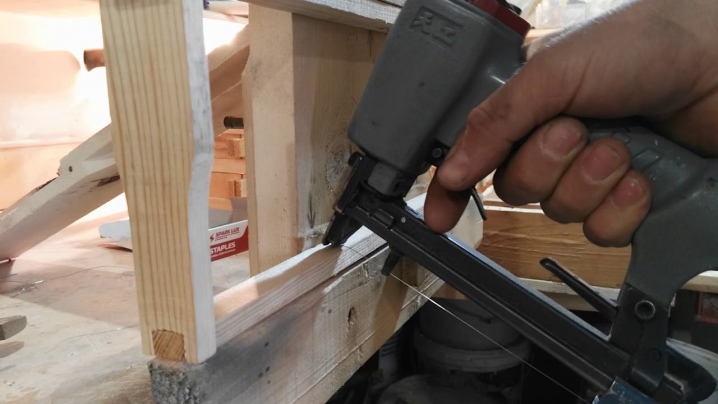
With large volumes of work, there is a need for mechanization, which will speed up the assembly of the frames themselves and the tension of the wire. So, instead of a hammer, it is recommended to use a stapler. A simple device - the hole punch will speed up the punching - of the wire holes in the side strips of the frame. In addition, such a device makes the distance between the holes the same. A special machine will help to tighten the frames faster, and the tension on it will be of better quality.
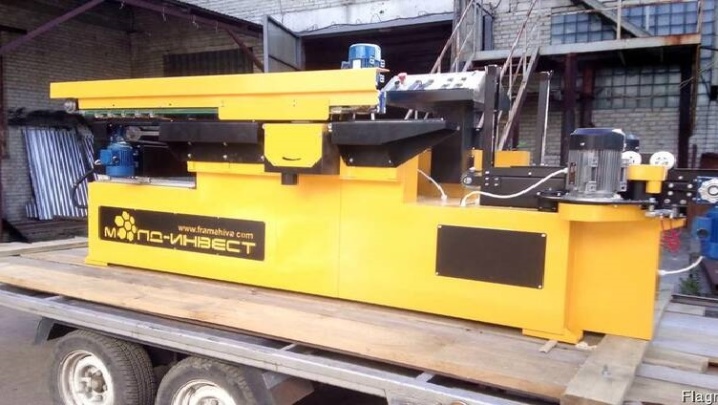
For information on how to make a bee frame with your own hands, see the next video.
Anchoring
It is very important to secure the material with high quality. You can do this in the usual way, which is used to twist an electric drive.
After stretching, it is wrapped around the bar, and then threaded into the inside. Then it is already wrapped around the string - about 10 turns in a spiral, the excess is bitten off with pliers.

Can be secured with wire and studs (10 mm). They are clogged against the holes made. It is pulled with pliers, wrapped around the nail, and then hammered with a hammer. We do the same with the second side. Ready!
Installation errors
Before installing the wire, you need to familiarize yourself with the most common mistakes made by inexperienced installers:
- Poor fixation of supports in the ground.
- Incorrect choice of the size of the clamp, due to which the wire hangs or the lock of the latch does not close.
- Reuse of clamps. All fasteners of the self-supporting insulated wire system are disposable, but this is often forgotten. The use of old and incorrect clamps is very difficult to detect at the stage of line construction. Problems begin to appear already during operation.
- Wires not fully clamped. Novice installers are afraid to break the clamping devices and do not tighten them completely.
- Excessively loose or too strong tension. The error occurs due to the lack of tables and a dynamometer, as well as the inability to use them.
- Rolling the self-supporting insulated wire on the ground.
- Incorrect wire entry into the room or shield, which can damage the insulation.
- Skipped mounting brackets.
- The wire touches the roofs of the premises due to calculation errors.
- The use of fasteners from different types of self-supporting insulated wires.
- Lack of marking on the supports (serial number, width of the security zone, contact telephone of the line owner).
Preparatory stage
Initially, it is required to purchase a sufficient amount of a chain-link mesh, measuring the perimeter of the site allocated for the installation of a mesh fence. To this end, pegs are driven in at the corners of the site, and then a cord is pulled, the length of which will tell the total amount of material.
Among other things, it is necessary to take into account mesh overlaps in the presence of joining areas. After determining the total length of the fence, the number of support pillars is calculated, the distance between which is most often 2.0-2.5 meters.
When choosing a mesh, it is recommended to give preference to a material with traditional galvanizing or with a high-quality polymer coating, which reliably protects the erected fence from high humidity or the formation of corrosive changes.
Support pillars for mesh fence-Rabits can be concrete, metal or wood, but only the first pair of types is the most preferable, due to the risk of wood rotting as a result of negative external influences.
Security measures
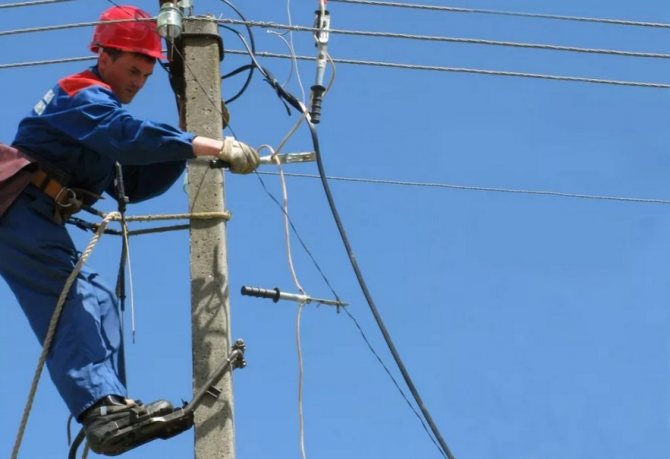
Before fixing the wire, you should stock up on a mounting belt. There must be people nearby for safety net. Works are carried out only in dry weather.
Long-sleeved clothing and pants are required for the work. Shoes should have good rubber soles.
Without fail, the voltage is turned off; if present, installation work can be life-threatening. Before lifting onto the support, check its stability, do not grab onto the pins and hooks present on the support
When choosing a ladder, you need to pay attention to the fact that its length does not exceed 5 meters, and the angle of inclination is from 70 to 75 degrees. When working with the carrycot, be sure to wear a helmet and a belt fastened
Note! If you manage to turn off the electricity, then you need to post a warning sign and close the substation or switchboard. Next, you should check the absence of voltage using a probe
In conclusion, it should be noted that the material of the SIP brand is the next generation of wires for overhead power lines, significantly increasing their efficiency. In domestic use, it is mainly used for laying lines from a transformer to a consumer and making branches from them. One of the main advantages in use is the ease of installation and operation, which allows a person to operate it without much experience in such work. But in any case, one must remember that qualified electricians must install and pull electrical wiring to the network.
Tying rules
Tying the vine is an indispensable procedure in the cultivation of grapes. Only a competent garter will help to form the vine correctly and will contribute to obtaining a good harvest.
It is necessary to carry out tying very carefully and very carefully, because although the vine is quite flexible, especially at the very beginning of the period of sap flow, there is always a risk of breaking it
There are two types of garters that are performed at different stages of grape cultivation.
"Dry" garter of fruiting shoots and replacement knots
When tying the vine in this way, you should very carefully bend the vine branches to the lower wire row on the trellis and direct them horizontally. Knots are fixed on the supports, which grow directly near the stretched wire
"Green" garter of young grape shoots
It is produced when the shoots reach a height of 35-40 cm. Tying is carried out in a vertical direction or at an angle and promotes uniform illumination of the plant. As soon as the shoots reach the next highest wire, the next garter is carried out. During the summer period, the procedure should be repeated several times.
It is worth remembering that before tying the vine, you should prune all old and damaged vine shoots.
Views
The wire used for bee frames comes in many different types. This material may vary in weight, composition.
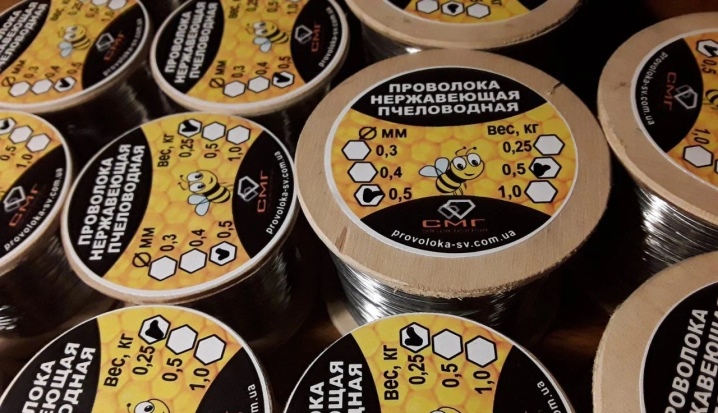
Typically, bee frame wire is sold in spools. Coil size and weight may vary:
- for large ones - up to several tens of kilograms;
- small or standard ones - from 500 to 400 and even 250 grams.
Many beekeepers, trying to save money, purchase large rolls, and then rewind them into smaller rolls.
By material
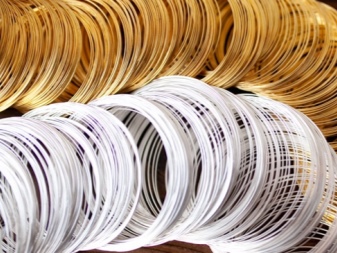
Wire made of different materials can be used to tension the bee frames.
Stainless steel products. The most common use of this particular option. It is offered to beekeepers by domestic and foreign manufacturers. The difference lies not so much in quality as in the price of the product. For example, products from India or China are often cheaper. Stainless steel serves for a long time. It is suitable for food use and does not oxidize.
Fechral wire
It is made from an alloy of a number of metals and, which is important, is cheaper than stainless steel, while surpassing it in a number of indicators. Beekeepers have only positive reviews about this wire.
Nichrome wire
It is a quality material with good characteristics. It costs more than other options, and it is not always easy to find it.
The cheapest, but also less quality, is iron (or black) wire. It is not resistant to erosion, does not last long, stains hands, and often honey.
By characteristics
When choosing a skein, you need to pay attention to its diameter. Often the tensile strength depends on the thickness.
First of all, this applies to stainless steel. Its thickness should not be less than 0.5 mm. The domestic industry produces these products with a diameter of 0.56 mm. Stainless steel from India and China, as a rule, is produced in diameters of 0.5 mm, 0.4 mm, 0.33 mm.
Nichrome wire also has high tensile strength.Its diameter can be 0.37 mm. Such a thickness allows for a more accurate naschivanie frames, and bees on such a foundation quickly build up the honeycomb.
Fechral products also do not stretch, which allows using a small diameter for pulling the frames.
But the iron should be thick - at least 0.55 mm in diameter, because it is most susceptible to stretching.
How to properly pull the self-supporting insulated wire between the posts
Overhead power lines with self-supporting insulated wires are called VLI. Their installation traditionally begins with clearing the area from trees, shrubs, and other possible obstacles that interfere with rolling and pulling the wires on the supports.
Important! The construction of a new power line requires wire brackets to be attached to the pole. It is more convenient to do this work on the ground before laying it.
The brackets are mounted to the supports with a clamp made of corrosion-resistant steel tape. After the excess tape is removed.
Instructions for designing an overhead power line will allow you to perform all actions without error:
- A post with mounting brackets is installed and the laying of overhead power lines is started.
- Installation of self-supporting insulated wire on supports is carried out using components at an outside air temperature of at least +20 degrees.
- The self-supporting insulated wire installation technology has its own peculiarity associated with wire rolling. It protects the insulation from damage.
- The stretched wire is rolled from the drum installed on the machine.
- On the supports, the self-supporting insulated wire is distributed using rollers and a tension rope - the leader.
The technology of unwinding from a self-supporting insulated wire coil provides for manual execution of the process, provided that the site is limited to one hundred meters, and the cross-section of the phase conductors does not exceed 50 sq. mm. Manual wire rolling is allowed in settlements where the span length does not exceed 50 m.The manual rolling technology has the following sequence:
Near the first anchor support, where the power line will begin, a drum with a wire is attached. Its distance to the pillar should be no less than the height of the support itself. A rope is attached to the end of the self-supporting insulated wire with a mounting stocking.
On each intermediate post, rollers are installed, while the rope is laid in them. Under the control of an electrician, the wire is pulled along the supports. The laying takes place smoothly without jerking with simultaneous rotation of the drum and pulling the rope. The maximum speed of manual rolling should not exceed 5 km / h, while excluding the contact of the self-supporting insulated wire with the soil and any building structures.
Important! On the last pole of the power line, the zero core is fixed with a clamp to the anchor bracket. A free ledge of veins is left behind it for further connection
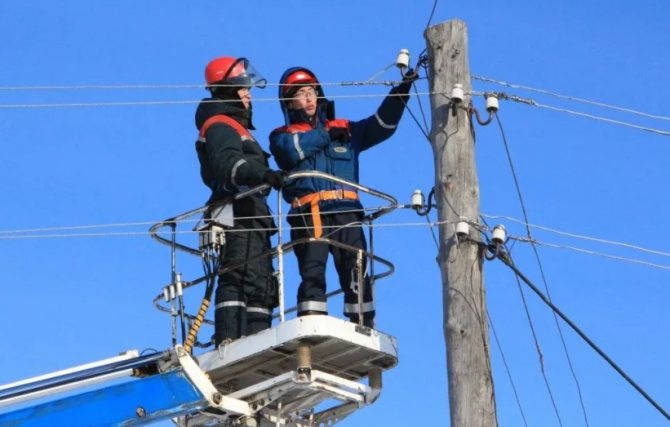
After fixing and laying out the self-supporting insulated wire wires on the support, they begin to stretch. A winch with a measuring device - a dynamometer is fixed to the first pillar. The broaching is carried out with a certain force indicated by the dynamometer. After stretching the entire power line, you need to insulate the wire, which should hang for a while.
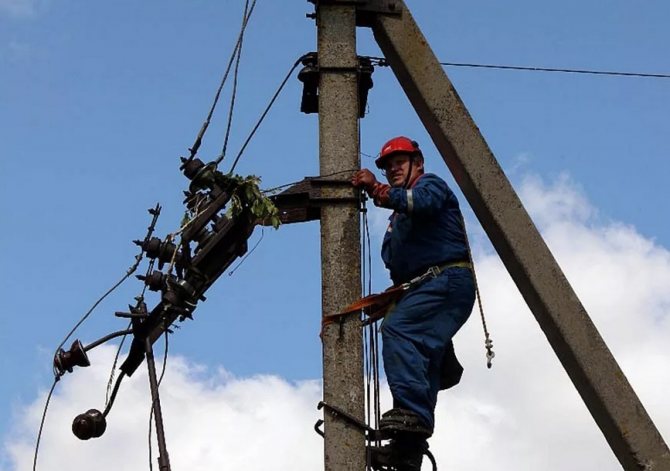
Further installation on the first post provides for fastening to the clamp bracket and fixing the zero core in it. The wiring harness is pulled together with clamps, the winch and the transport roller are removed. The self-supporting insulated wire is cut from the bay, leaving the ends of the required length.
On the intermediate post, the wires from the roller are transferred to the clamp. Plastic wedges separate the carrier from the phase conductors, at the same time securing it with clamps in the clamp. After removing the rolling roller, all cores are tightened with clamps at a distance of 150 mm from the clamp on both sides. An intermediate clamp is used to tighten and fix the phase conductors under the clamp.
Purpose and device
The main purpose of the wire is reinforcement. It serves to strengthen and provide additional strength of the honeycomb, and also creates a support for the sheets of foundation when nesting beekeeping nest frames. The process of waxing is complex and time-consuming, requiring the use of special devices, devices and tools.
For small amateur apiaries, it is enough to use the simplest tools:
- wooden frame;
- wire;
- awl - for piercing holes in the side strips of bee frames;
- pliers - they fix the ends of the wire;
- carnations - directly serve as clamps;
- hammer - for hammering them.
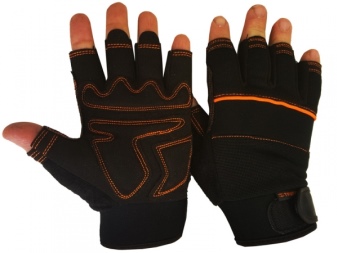
To avoid cuts while working, it is worth using special fingerless gloves.
It should be noted that large apiaries require the use of special tools and devices.
How to choose
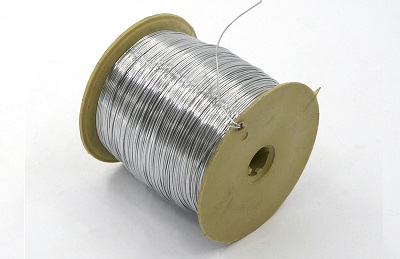 When choosing this apiary accessory, you need to proceed from two main criteria:
- Economic expediency.
- Thickness.
It does not matter which species is preferred, in any case, with proper use and storage, it will last for many years. Therefore, when choosing, it makes sense to act for economic reasons.
The seeming cheapness of a skein is deceiving, because if you have to buy material in order to reinforce 1000 frames, this can significantly hit your wallet.
Bees do not care what material they will have contact with, they care about its thickness. If a too thick wire passes through the cell, then the queen continues to sow in them, but the bees do not seal such cells
The thickness of the skein should not exceed 0.4 mm. Ideally, it should be 0.2 mm. This wire is almost invisible.
Choice of wire for frames
The wire used as tension strings for bee frames needs steel. The use of thick line or wire made of non-ferrous metals is not recommended:
- the soft structure of the material has a tendency to stretch over time;
- complex process of fastening on the intermediate wall of the frame;
- the use of such materials does not guarantee the safety of the strings if the honeycomb is removed with a knife.
Consider the possible types of wires:
- Nichrome or tungsten - do not corrode, perfectly workable and do not take long to heat up. The disadvantage of this option is the very high cost.
- Plain black steel wire or high alloy stainless steel.
The best option for the price / quality ratio will be traditional stainless steel:
- can be pulled without fear of breaking;
- holds foundation well;
- a frame with stainless steel fittings can be safely placed in an electric honey extractor;
- long operational life.
Good wire does not oxidize, which is important when storing honey. The required wire can be found in any specialty store.
The wire is sold in three types in spools with a mass:
- 0.25 kg;
- 0.5 kg;
- 1 kg.
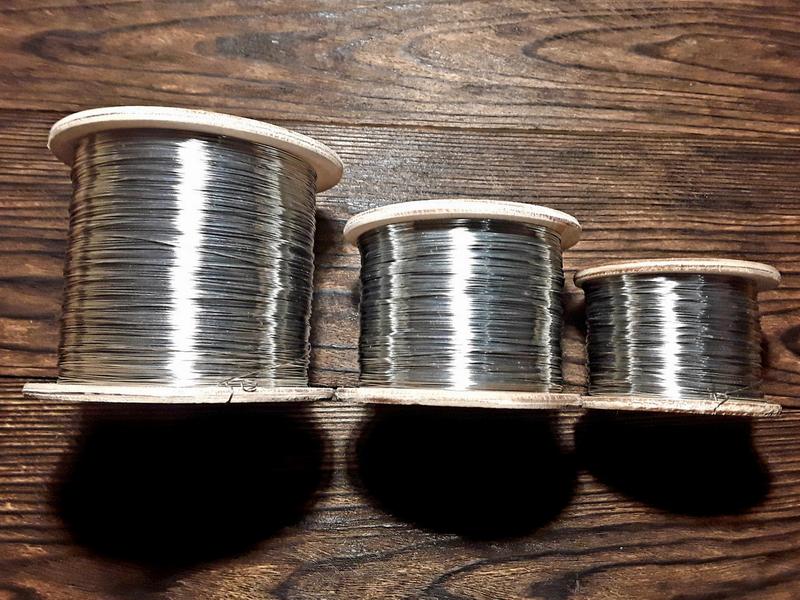
Wire coils differ only in length, all have the same diameter - 0.5 mm.
Types of grape trellis

Modern supports are beautifully shaped and decorate the garden. Trellises allow you to zone the site or create a hedge of grapes. Structures are divided into columnar and arched. Supports are made of plastic, wood or metal. There are one- and two-plane trellises.
Single-plane trellis
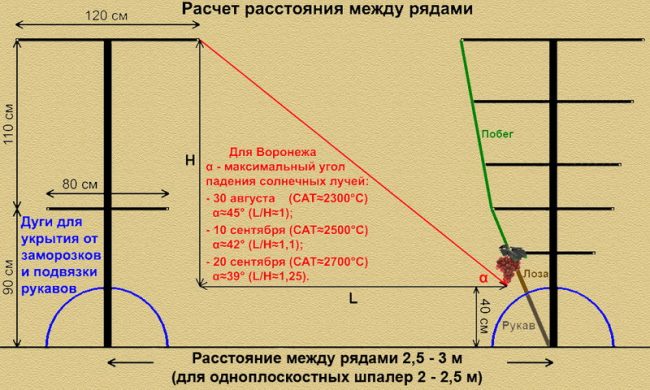
The simplest type of construction. Single row grape supports are suitable for northern climates and regions with short sunny days. The structure consists of 1 plane, on which all the green mass is located. Supports are concrete pillars, wooden beams. For better durability, single-plane trellis are cemented to a depth of 0.5 m. The side supports are fixed with inclined beams.
Features of one-plane structures:
- low construction costs;
- easy access to shoots for pruning;
- airing and lighting the plant;
- purpose (for small grape varieties);
- the ability to place between the rows of beds with vegetables or flower beds;
- the need for timely pruning, otherwise the plant will quickly thicken.
Double row
Used for growing a large number of vines. Two-plane supports are suitable for regions with moist and fertile soil.A grape trellis consists of 2 parallel planes designed to grow one row of bushes.
V-shaped trellis
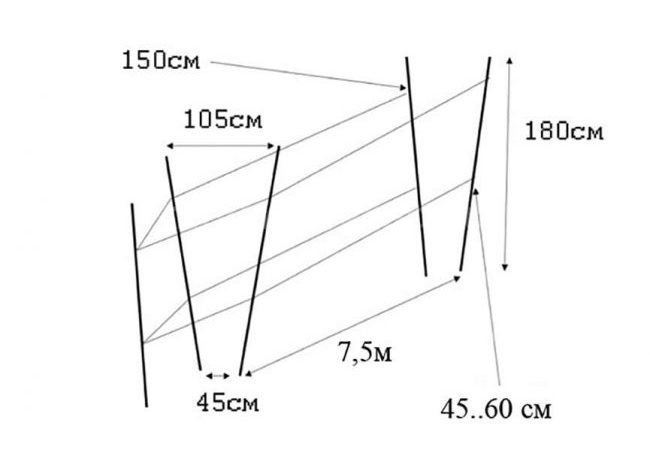
It is erected by analogy with a one-plane structure. The supports are installed at an angle of 45 ° opposite each other. The base of the pillars is combined. The distance between the supports in the lower part is up to 50 cm, and in the upper part - up to 110 cm.The recommended height of the supports is 2 m.
L-shaped or semi-arch
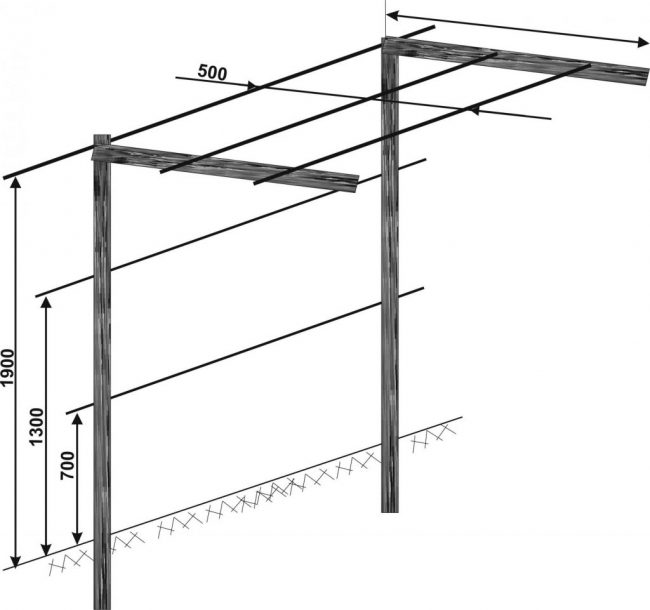
The structure is called a pergola - it is a canopy made of crossbeams and supporting pillars. L-shaped supports are made of wood or metal. The semi-arcade takes up little space, therefore it is suitable for zoning a site. The minimum height is 2.5 meters. Pergolas are difficult to design and build on your own.
Y-post
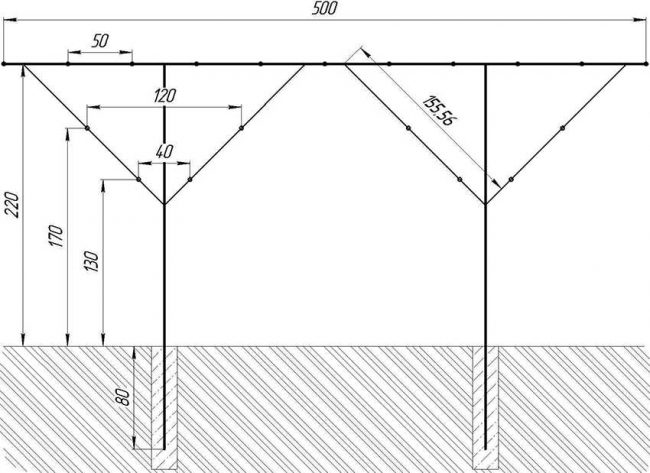
This grape support is made of metal or wood. The lower part of the structure is in one plane, and then the pillars diverge at an angle of 45-60 °. Racks are suitable for well-lit garden beds. The distance between the posts at the top is up to 90 cm. The design is suitable for growing grapes in all regions of the country.
Features of Y-post:
- vines are constantly ventilated;
- suitable for growing vigorous varieties;
- creates a shade for the soil.
T-shaped design
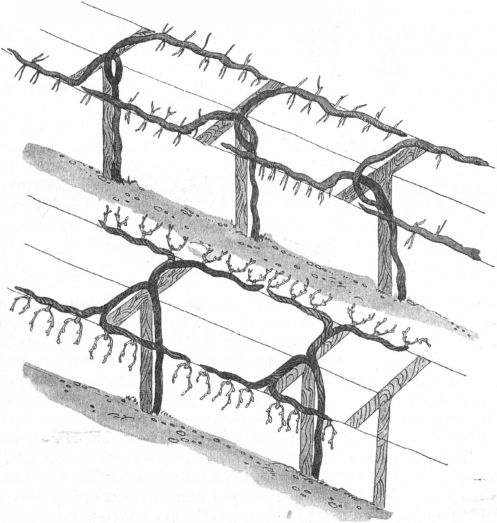
The structure is suitable for productive varieties of plants. The attached vines are distributed between 3-4 tiers, which contributes to uniform illumination of the foliage. The upper support strips are fixed at an angle of 90 °. The recommended height of the posts is 160-200 cm, and the total length of the horizontal slats is 150 cm, 3 meters are left between the rows.
Advantages of the T-shaped design:
- good ventilation of the bushes;
- the garter provides free access to wasps, bees, bumblebees to the plant;
- high density of growing bushes;
- abundant shade from plants (the soil is always wet).
Arch support
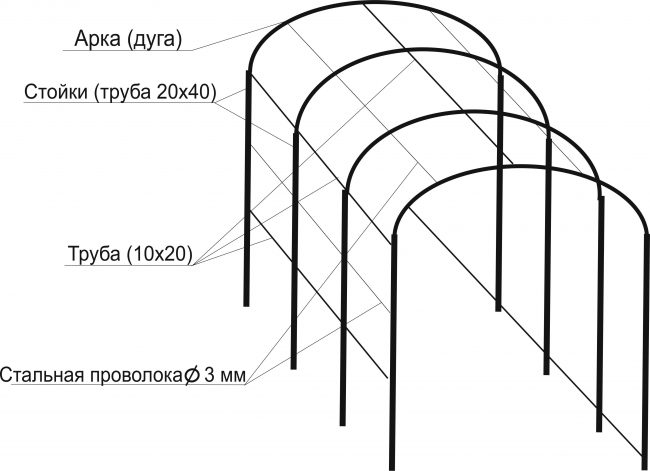
Several varieties of plants can be grown at the same time. The arches take up a lot of space, and you will have to use a ladder to harvest from the arches. It is better to grow frost-resistant grape varieties on such structures. Arches are assembled from fittings, wooden planks, shaped pipes.
Features of arched supports:
- suitable for fast growing varieties with heavy and bulky deciduous mass;
- well illuminated by the sun;
- are expensive.
Decorative trellis for grapes
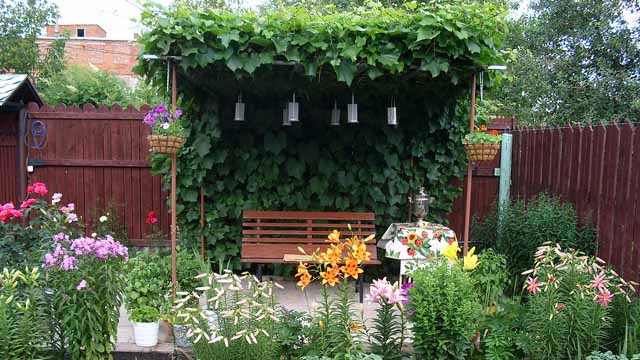
Constructions equip a recreation area in the country. Trellis are placed along walls, fences and other fences to give the buildings a more beautiful look. Decorative supports are made of wood. They grow wild grapes that do not need pruning.
As they grow, the runners are tied to the structure. Wild grapes are watered regularly. The construction scheme can be any. Forged structures are considered more durable. Metal grilles are coated with a primer and paint to protect them from rust.
