Panel-to-wall mounting technology
The technology of each of the methods is significantly different. It is necessary to consider in more detail how to fix MDF panels in each individual case.
 Fastening MDF panels to walls is done in two ways
Material gluing
The time it takes to complete this procedure can be completely different. Everything will depend on the general condition of the surface. The general preparation procedure is as follows:
- The walls are cleared of all unnecessary. Anything that sticks out or protrudes is subject to dismantling. The old decorative layer is removed completely. You need to know that it is impossible to stick high-quality material on surfaces on which a layer of whitewash, wallpaper or untreated areas of paint remains.
- The plaster is checked. It should adhere well and not show signs of crumbling. Any defects indicate that the wall will have to be plastered again.
- After preliminary preparation, a lot of dust and dirt remains. Everything is removed with a damp cloth and vacuum cleaner.
- The surface is primed.
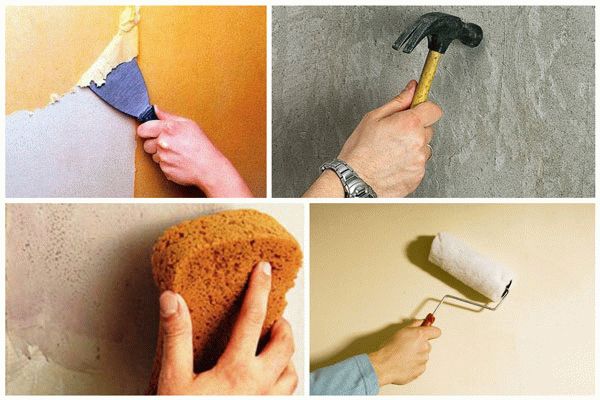 General requirements for the preparation of walls before installing panels
Installation is carried out as follows:
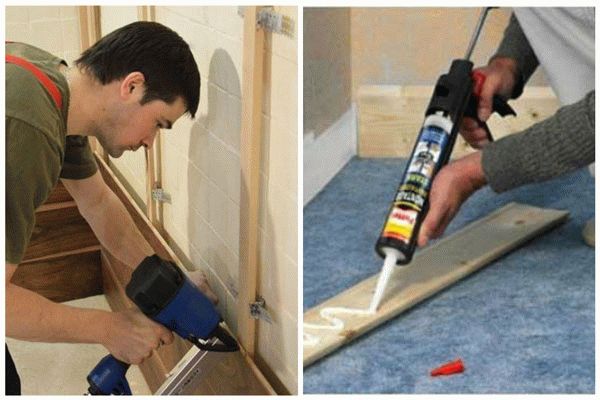
Glue is being prepared. "Liquid nails" that are sold in tubes are great
They are applied using a special pistol. For independent work, the simplest tool is suitable, the cost of which is usually equal to the price of one tube of glue.
It is important to take into account that the panels are brought into the room and unpacked in advance. They need time to mature
This will help the material to adapt to temperature and humidity conditions.
The walls are marked. Lines allow you to navigate faster.
The first element is laid on a flat base. The glue is applied in waves to the wrong side.
The fragment is applied to the surface and slightly pressed. The correctness of the installation is checked by the level, which is measured in several planes.
Wait for the glue to set well. Sometimes, for example, with a horizontal scheme, the panels can be fixed on dowels. This is done in the place where the skirting board will be installed.
When the first element seizes, the second fragment is coated with glue, inserted into the groove and pressed against the surface. Further, you can not expect gluing, but completely veneer the surface.
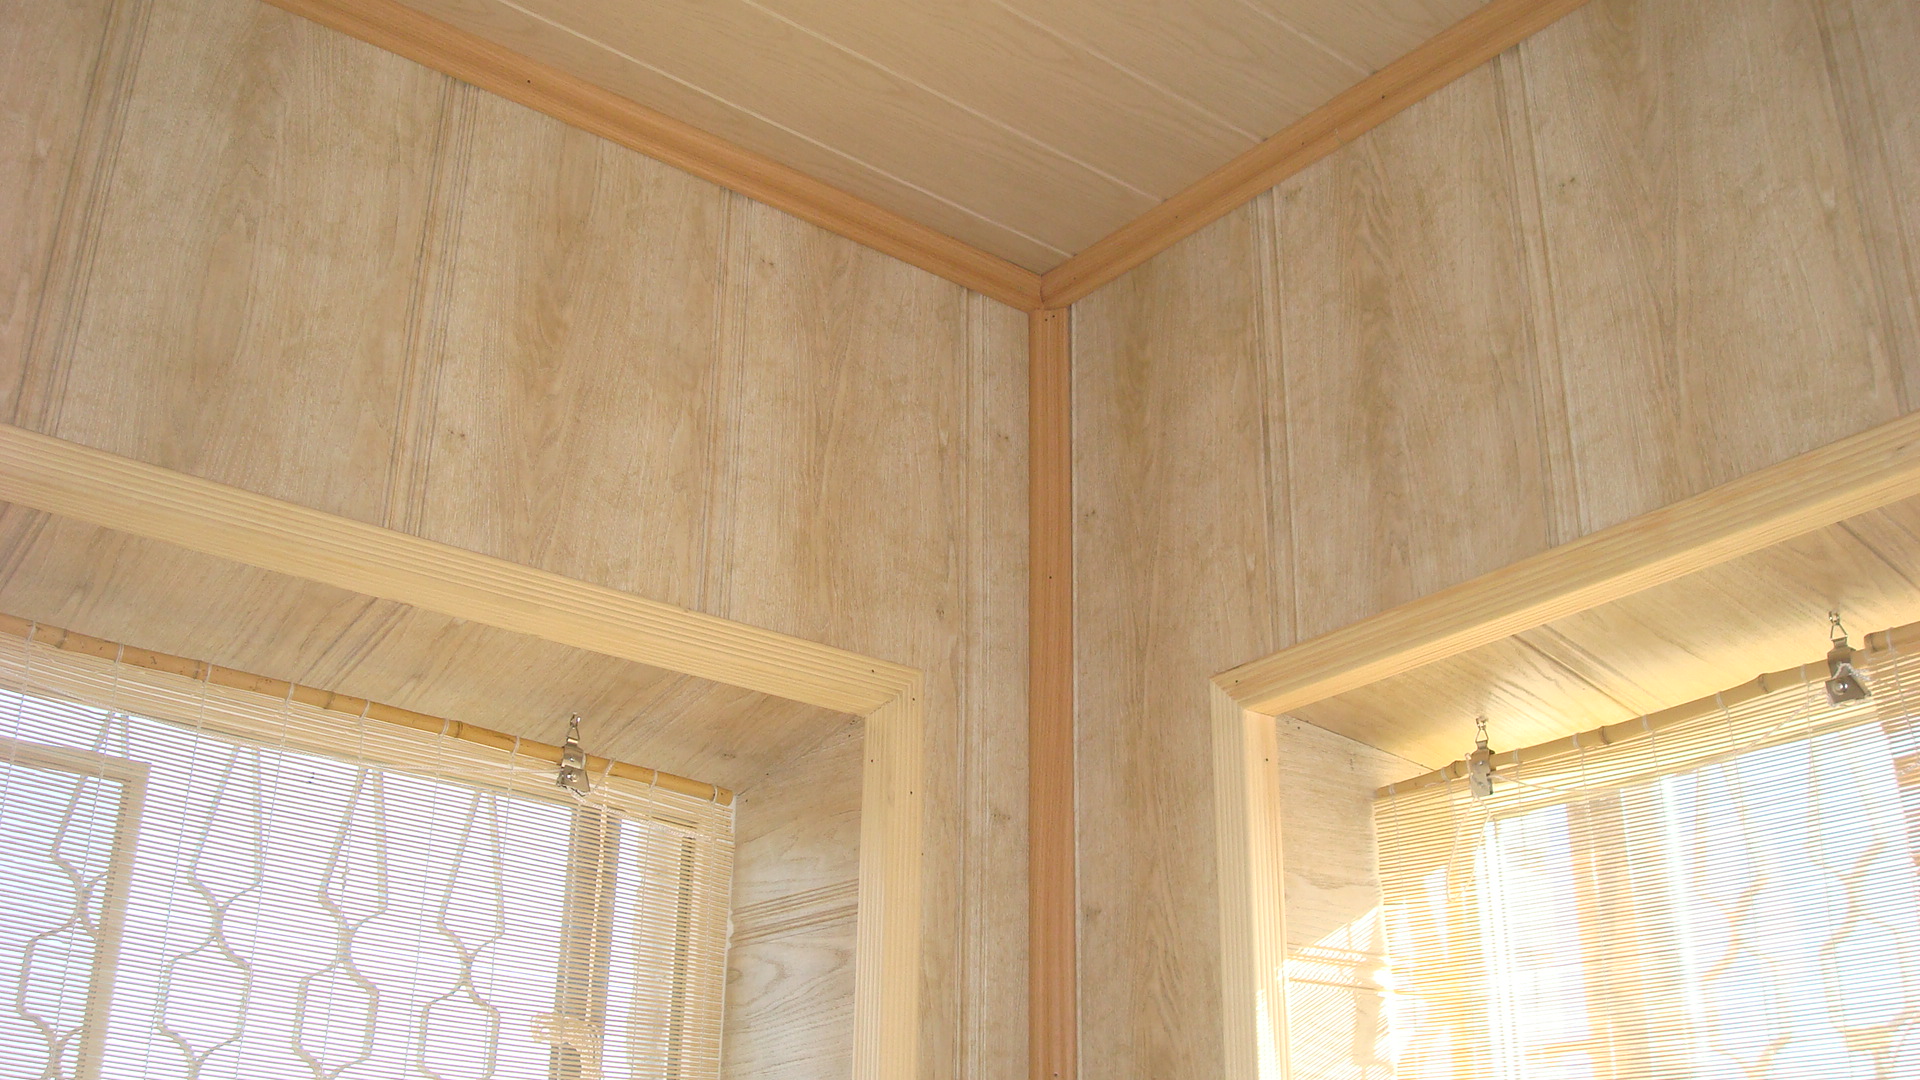
To hide transitions, joints and corners, MDF overlays are used, which are also glued.
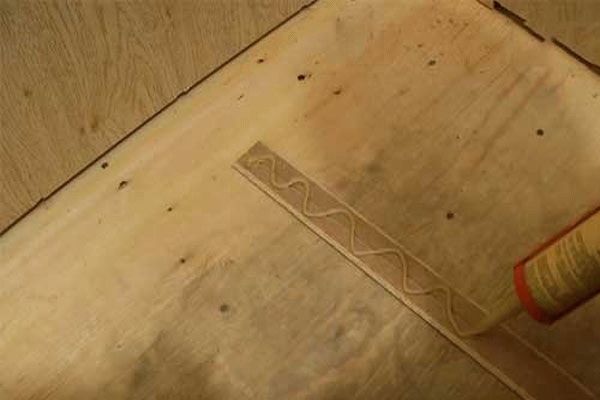 Additional elements that hide joints and transitions are also glued
Wireframe creation
How to properly attach MDF wall panels to the lathing? It is worth noting that the technology for erecting the frame resembles working with gypsum boards, but is more simple.
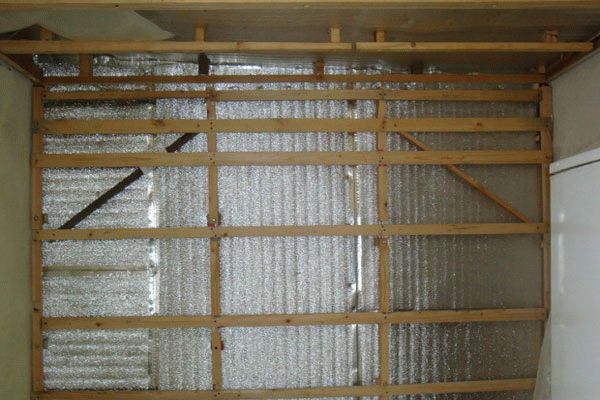 Ready-made wooden lathing for laying MDF
Installation is carried out according to the following instructions:
- It is preferable to use a wooden beam as guides. The optimal size is considered to be 30 * 50 mm. The metal frame and suspensions are used when the defects are so large that it is necessary to install the profile at a great distance (more than 10 cm).
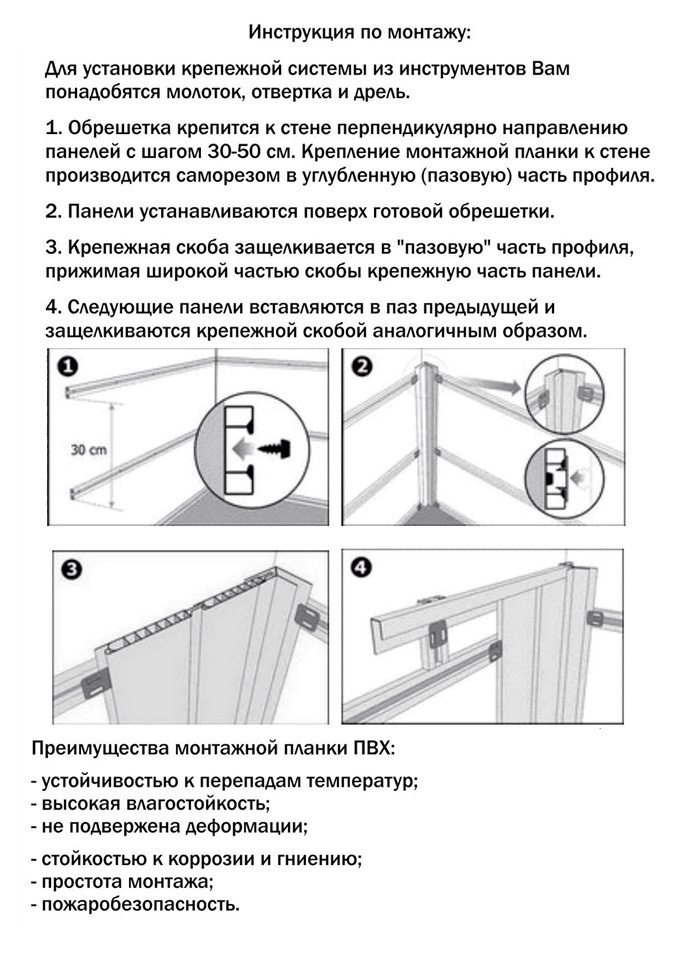
- The beam fits in the required plane. It depends on the scheme according to which the panels will be fixed. That is, the MDF element and the profile (rack) must be perpendicular to each other.
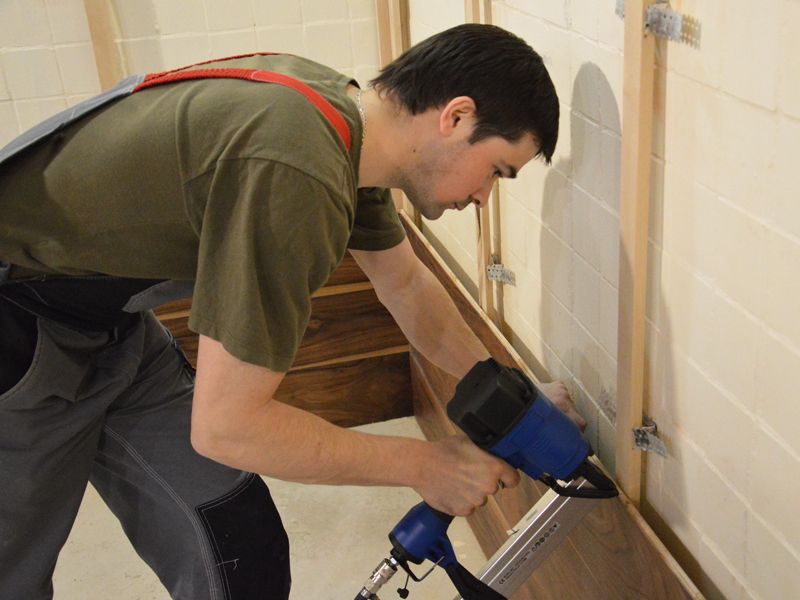
- The slats are attached to the wall with dowels. The alignment of the timber takes place by lining OSB or sawn boards. It is necessary to strictly align the profile so that it is in the same plane.
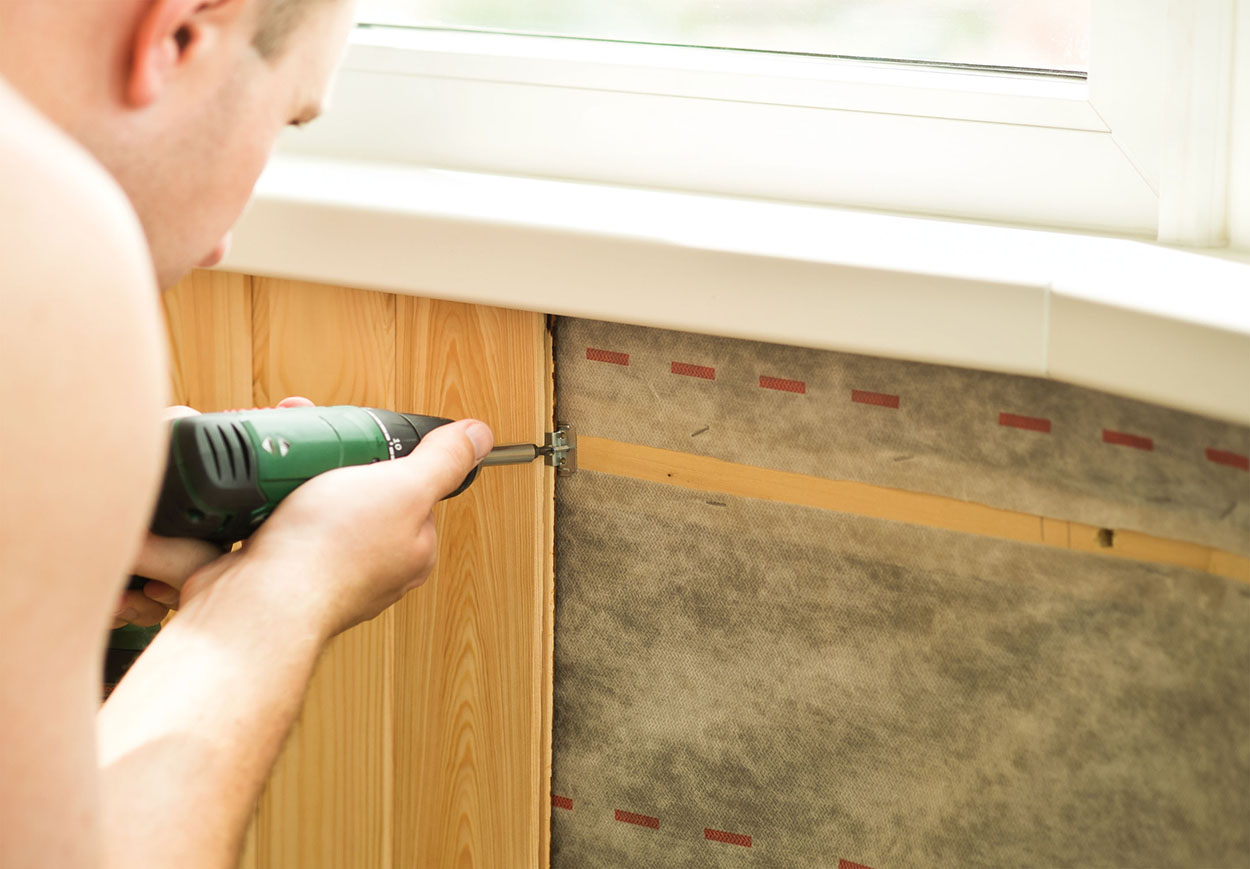
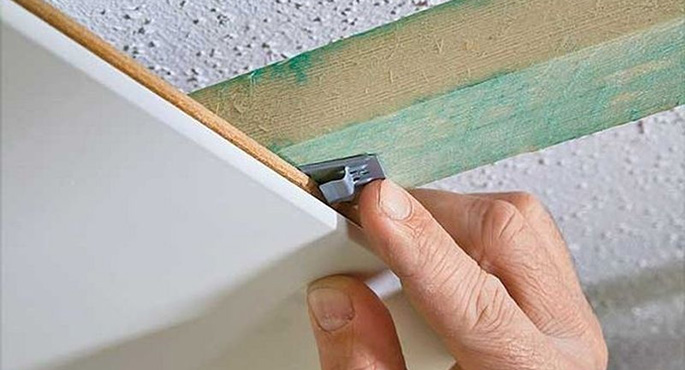
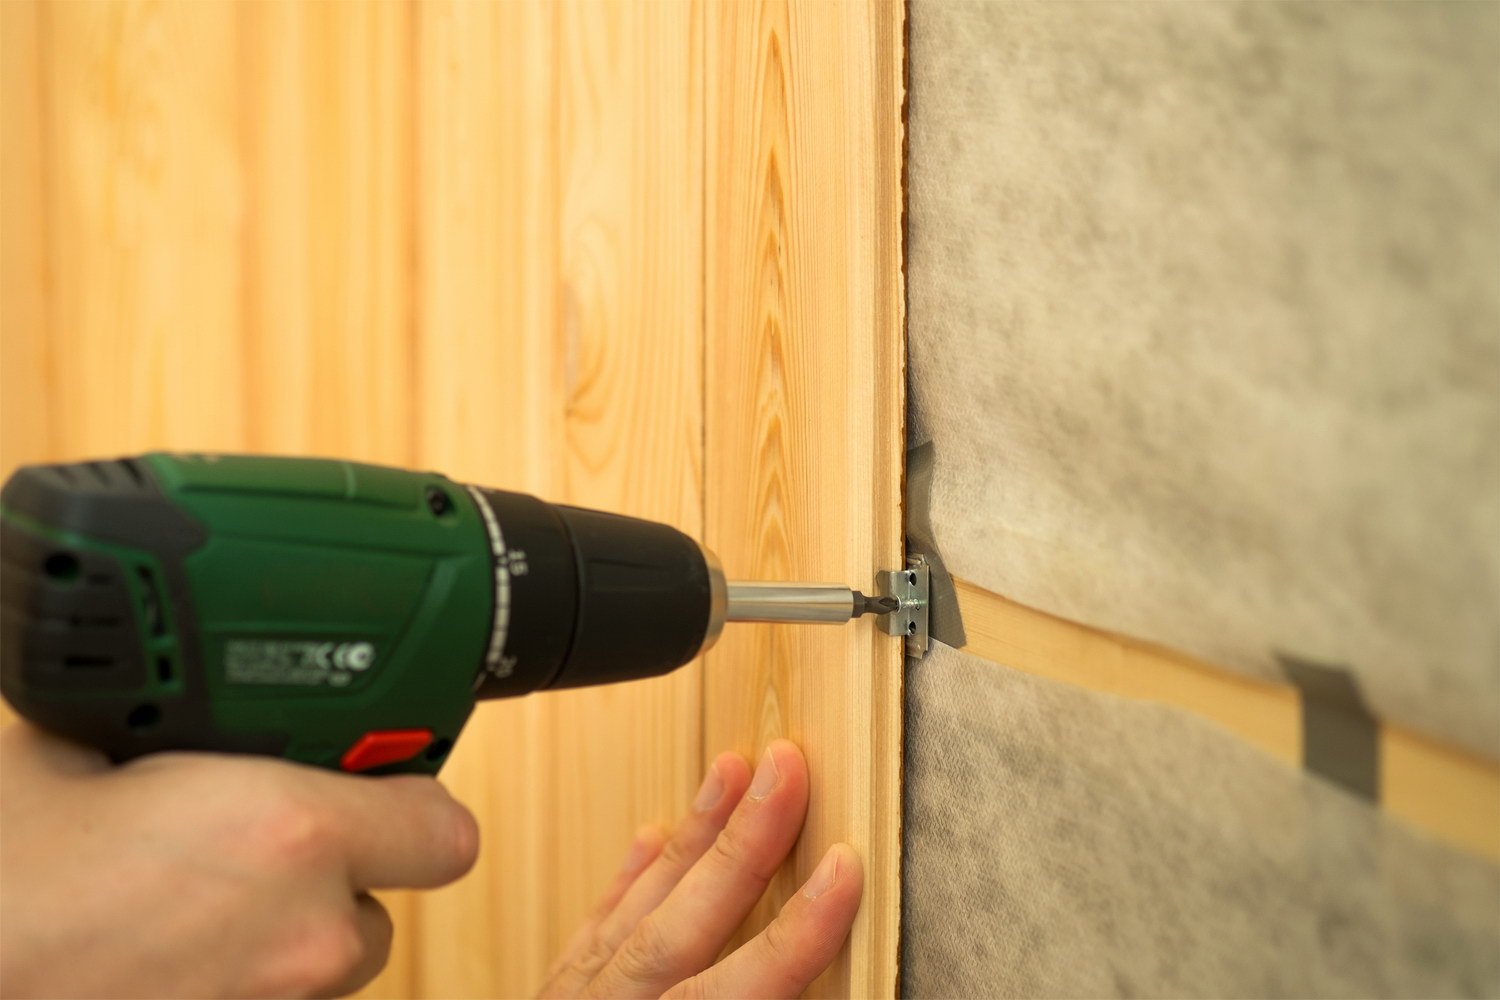
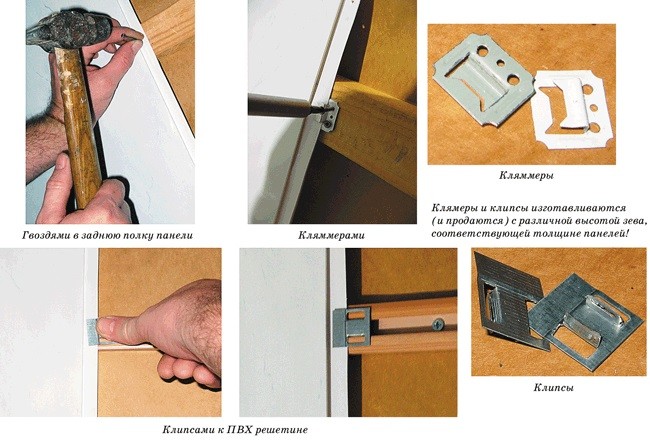
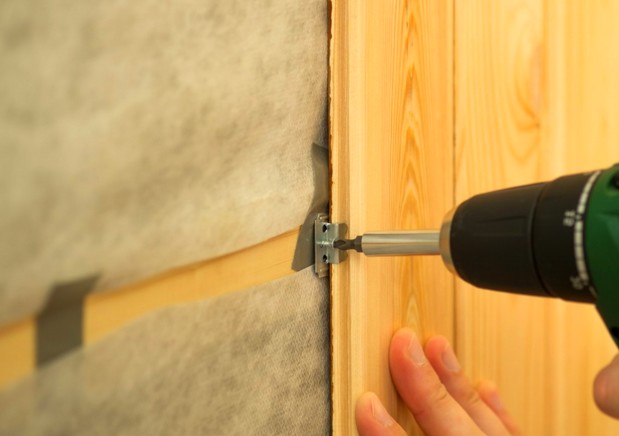
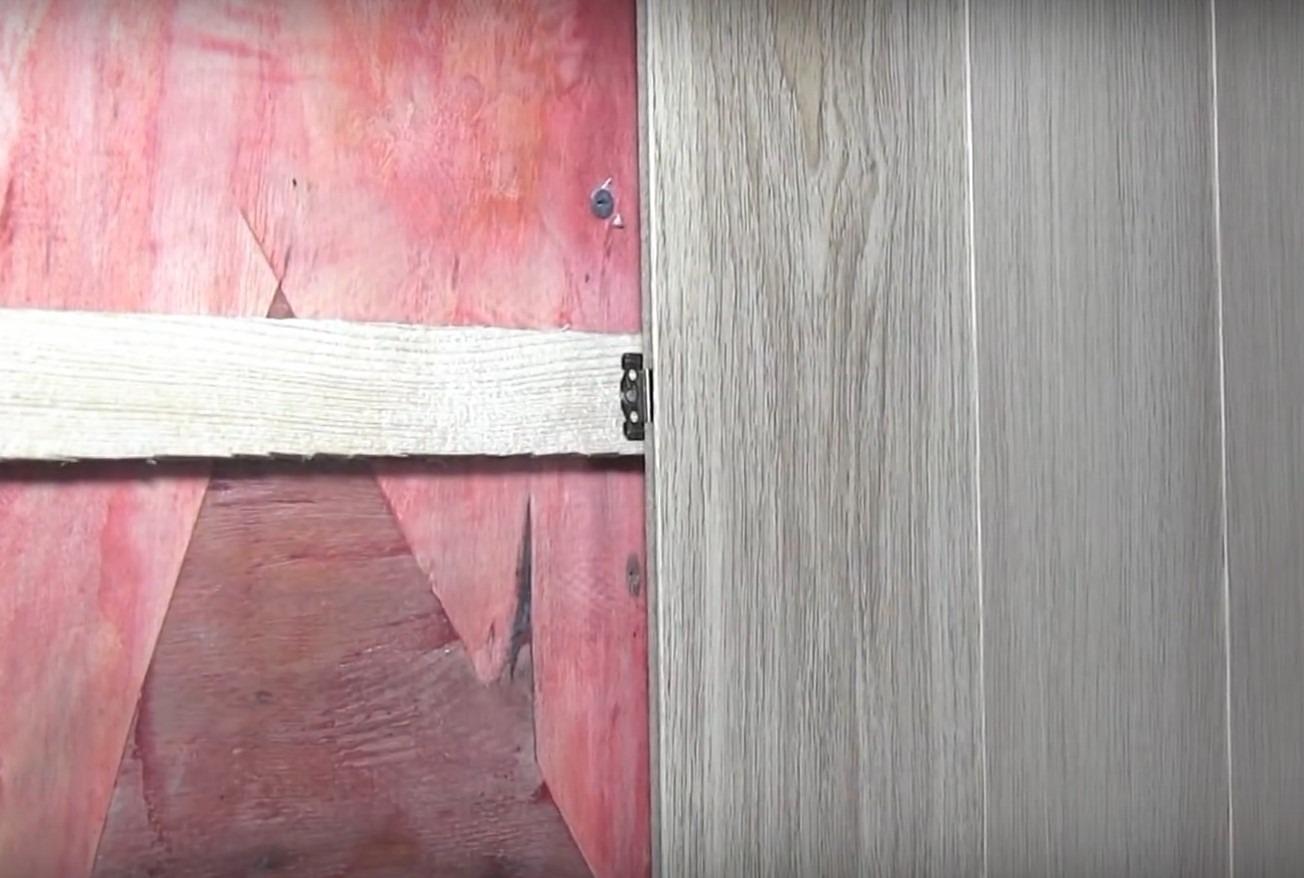
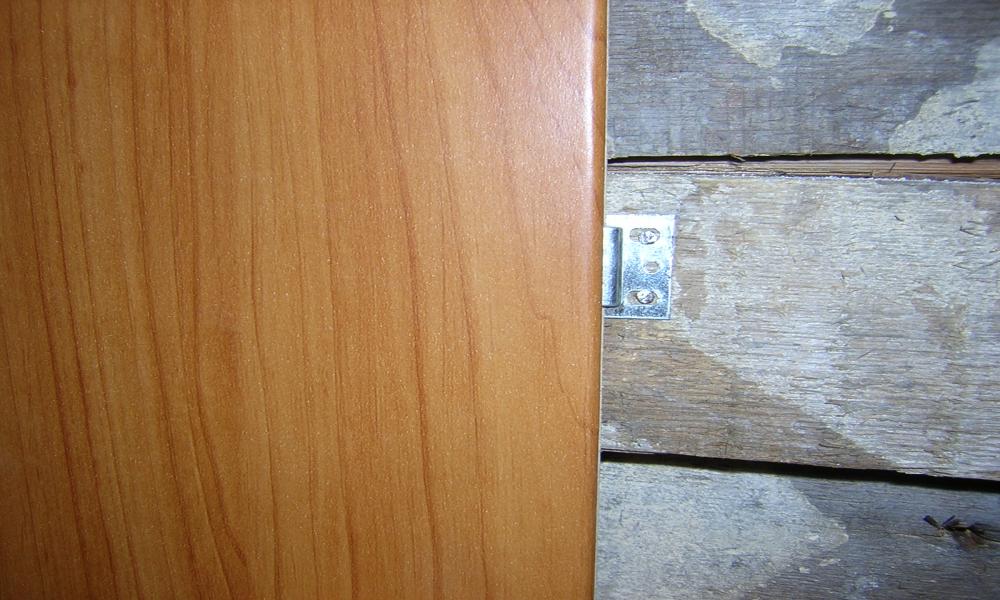
- The panels are fastened with clamps that resemble staples.This element has a hole for self-tapping screws, through which it is fixed with a wooden stand.
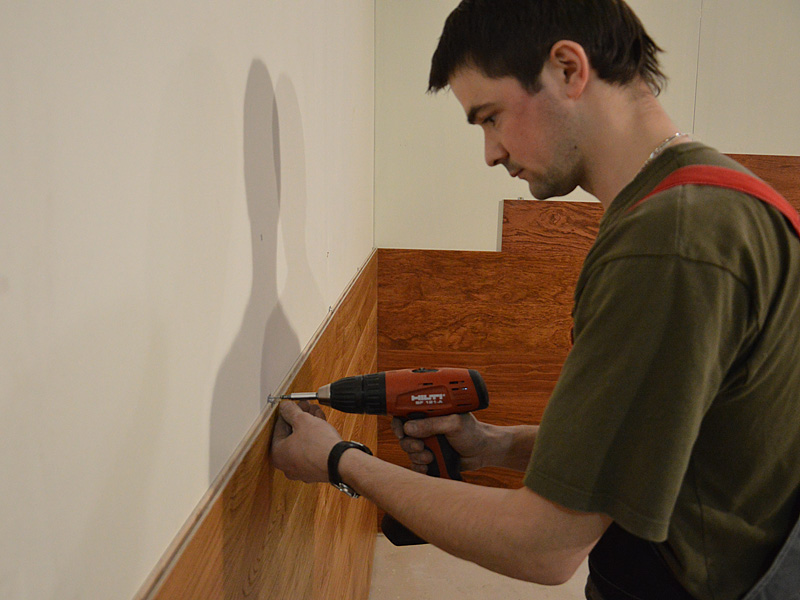
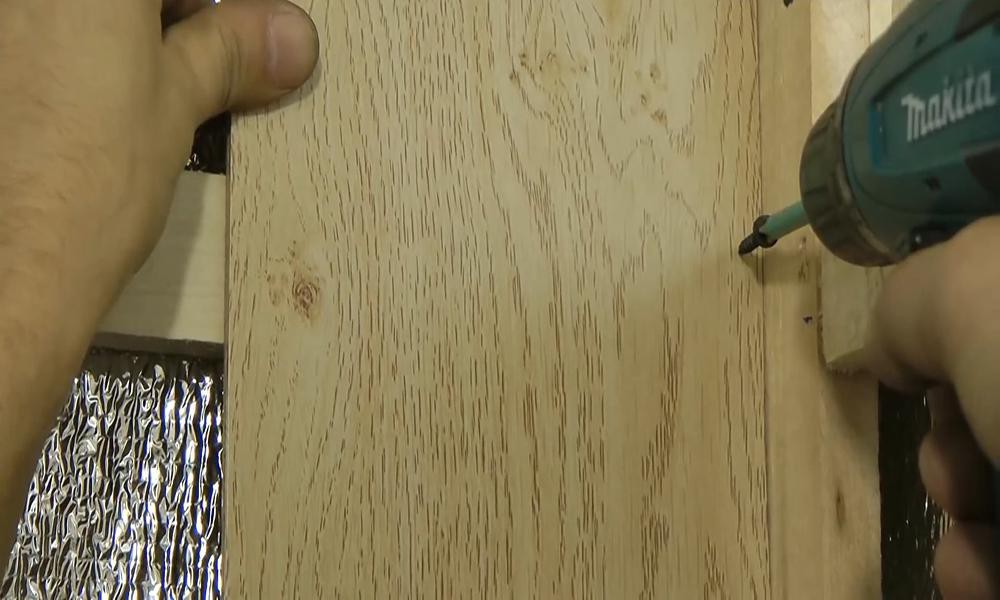
- The first fragment is fixed directly, strictly along the edge. The screw is completely recessed. Then the pads will hide this defect.
- The remaining products are attached.
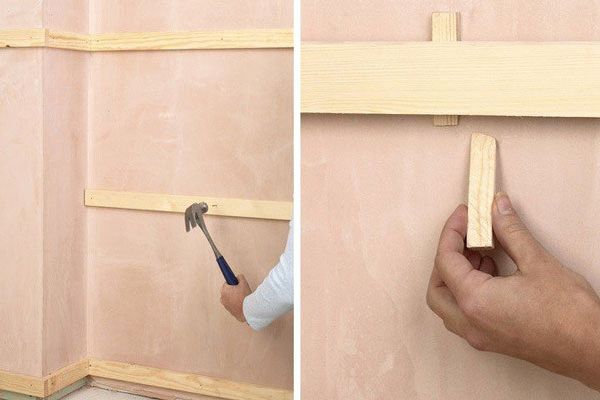 Alignment of timber for wooden lathing under MDF panels
Thus, everyone chooses the option for the walls that is more preferable in terms of installation, a combination of advantages and disadvantages.
Method one. Installation using lathing
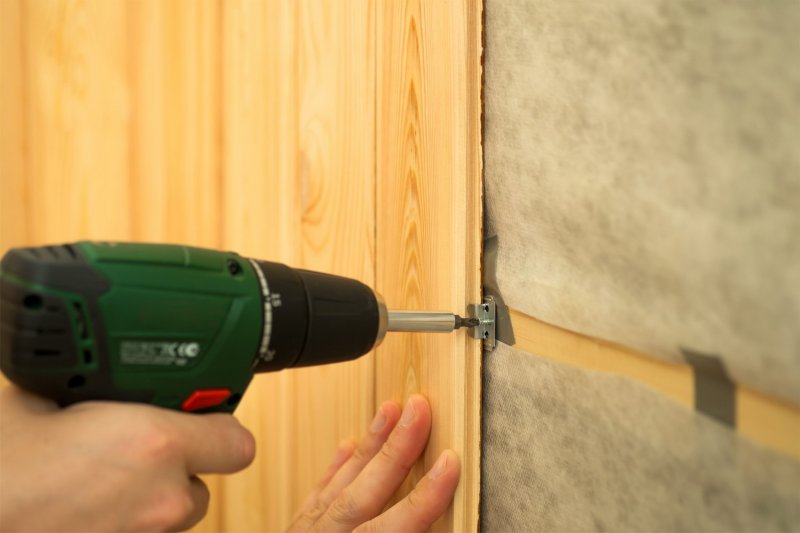
- recommended in cases where the base surface has strong irregularities that cannot be corrected manually;
- for rooms with high humidity, it is best to use metal profiles rather than wooden slats as a base for the frame;
- the method using the lathing is indispensable in cases where additional wall insulation is planned.
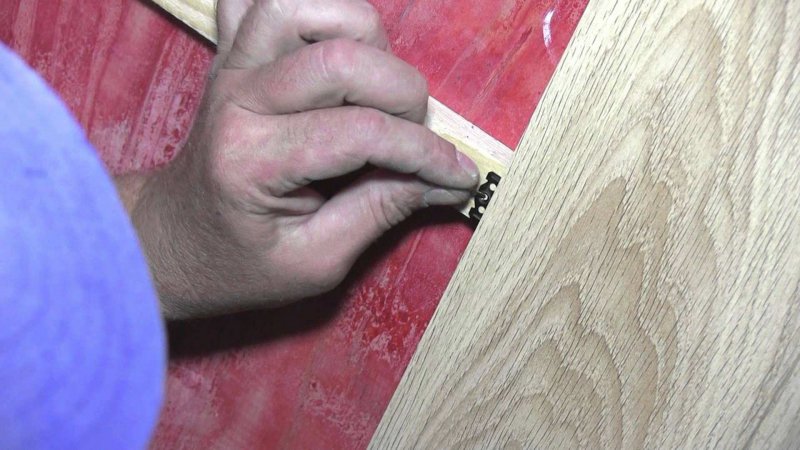
The main disadvantage of this option is the need to install the frame, which slightly lengthens the duration of the work. In addition, the frame takes up a certain number of centimeters of free space. Are you ready to put up with such "arbitrariness"? Very often you simply do not have options, because it is far from being possible to achieve the perfect surface every time you need it.
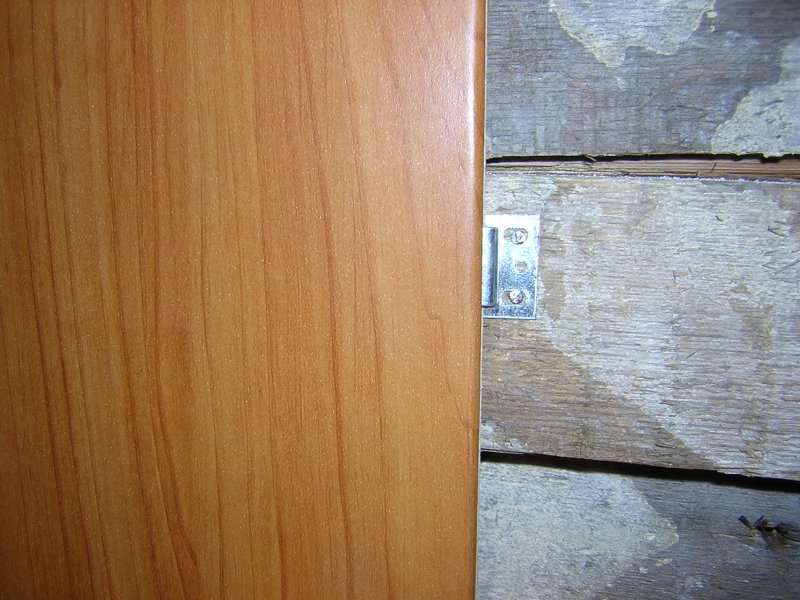
Sheathing device
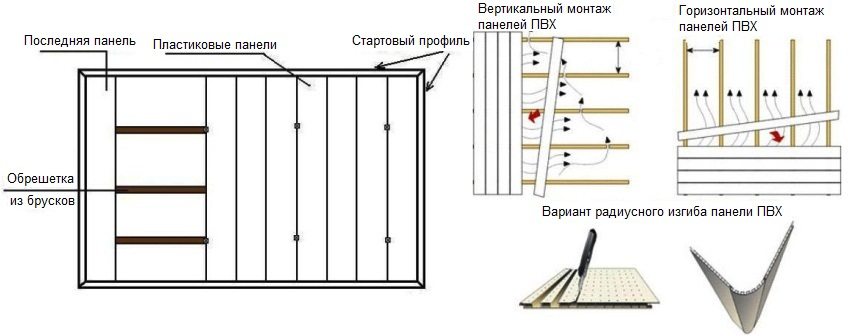
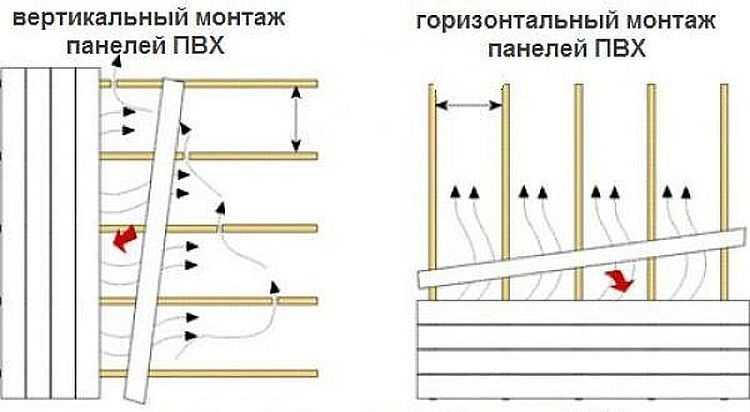
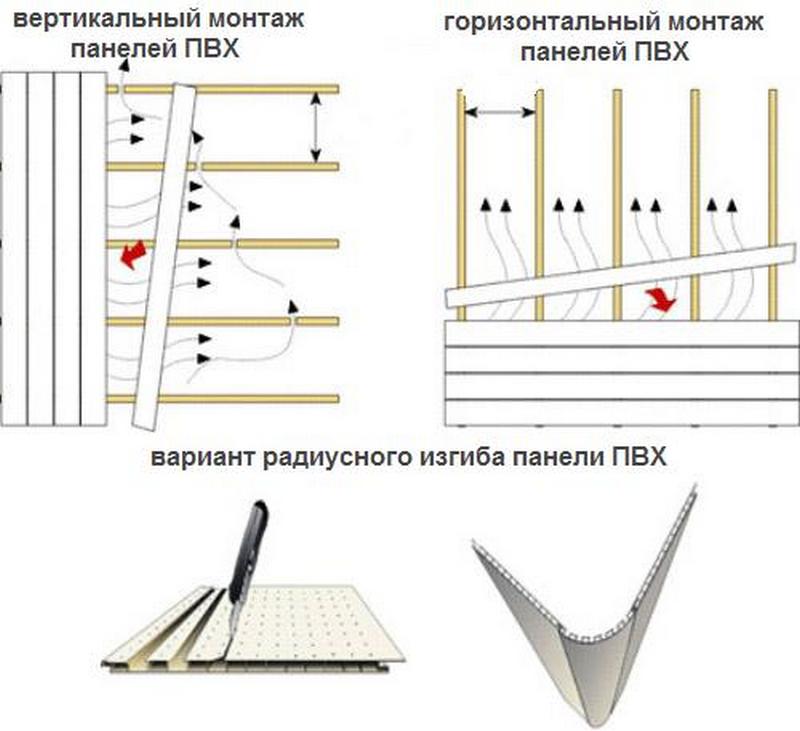
A very important point is to know how to attach mdf panels to the wall: vertical or horizontal... The nature of the structure of the auxiliary frame directly depends on this.
- horizontal arrangement of mdf panels - vertical sheathing scheme;
- vertical arrangement of MDF panels - horizontal lathing scheme.
As you can see, everything is quite simple - it is unlikely to be confused!
Some points to pay attention to:
- before installation, you should treat the slats with an antiseptic - this way you will protect the wood from the appearance of microorganisms;
- the length of the rail should be at least a few millimeters less than the actual distance from the top to the bottom of the structure.
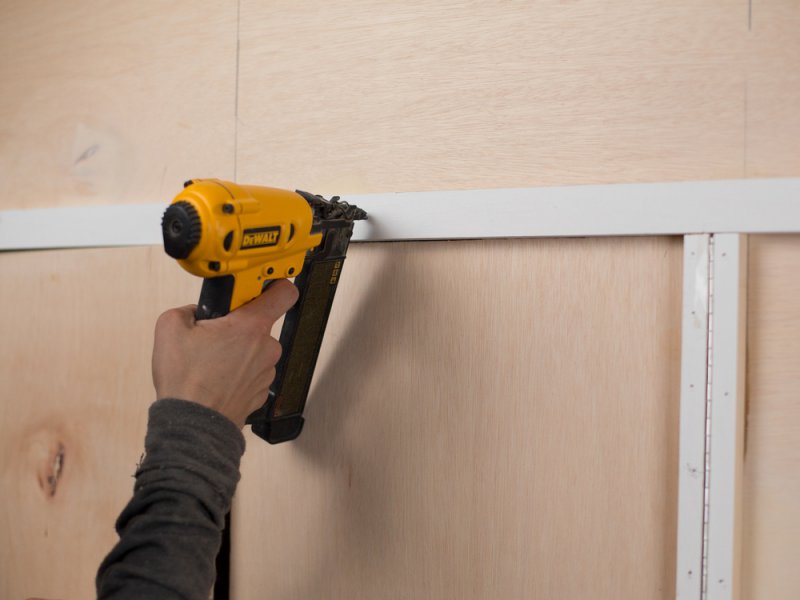
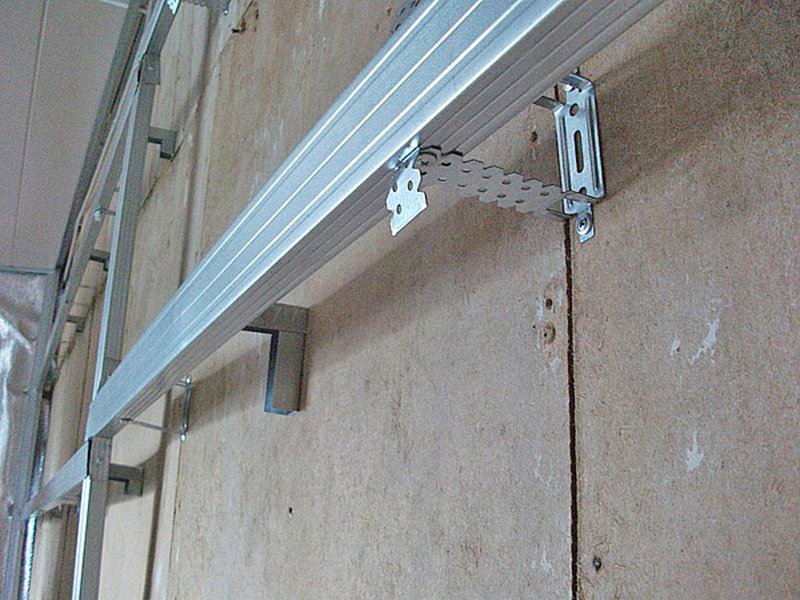
Subsequence
- no matter what type of frame you are going to design - metal or wooden, in any case, first of all, you need to fix the corner posts, and then the transverse ones and those that will be located in the openings;
- a step of 50 centimeters is optimal for all types of lathing;
- for fixing narrow and wide metal profiles, it is best to use self-tapping screws, since the so-called dowel-nails are less reliable for this kind of fastening.
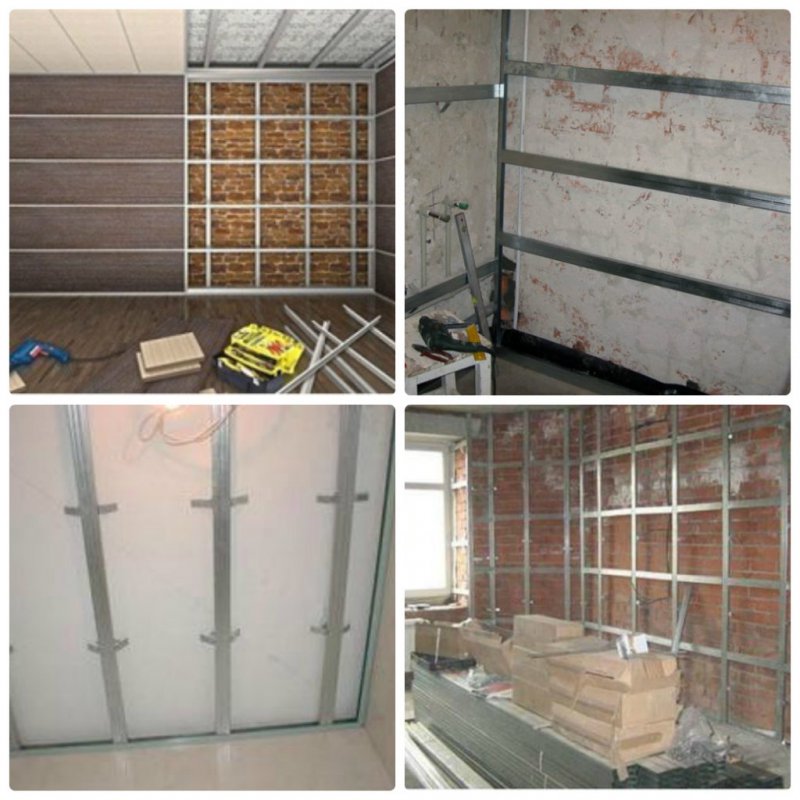
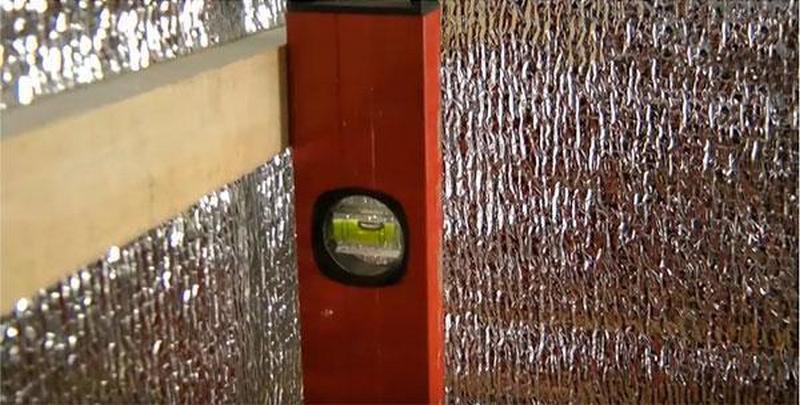
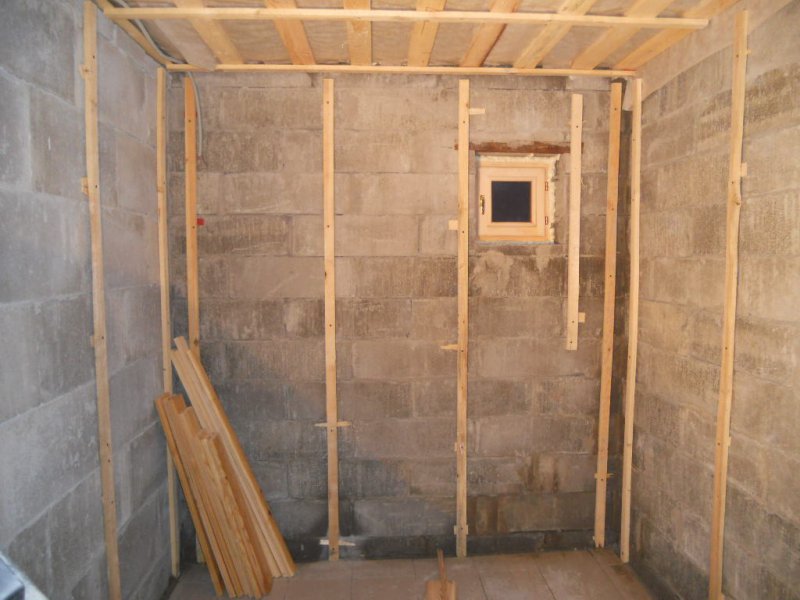
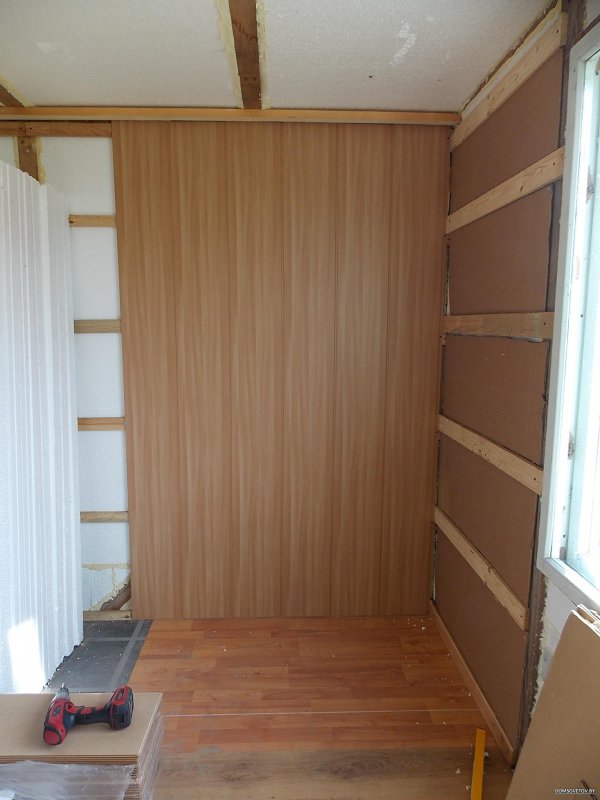
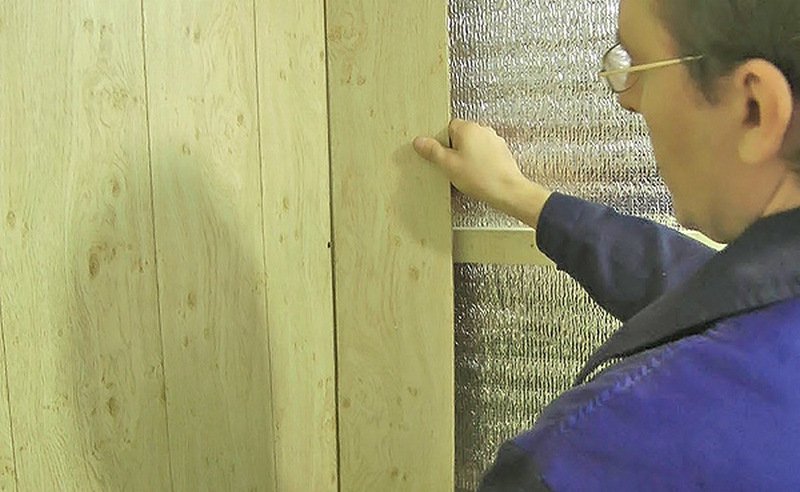
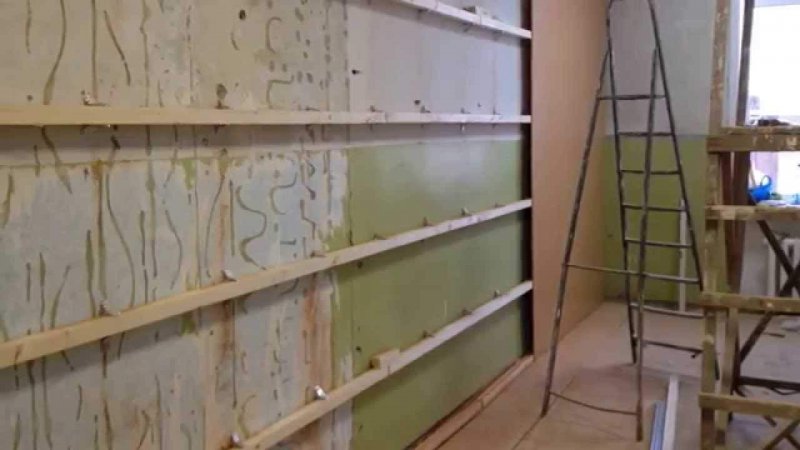
The whole process of installing the frame is in the next video.
Fixing panels
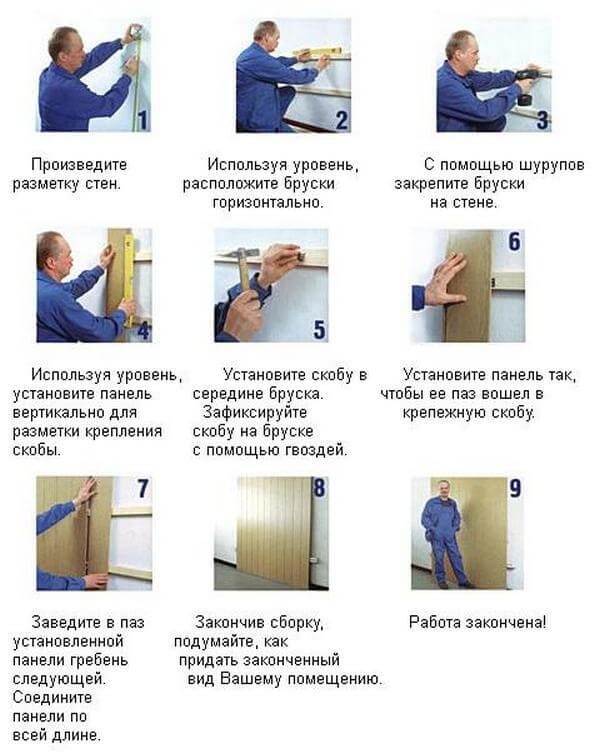
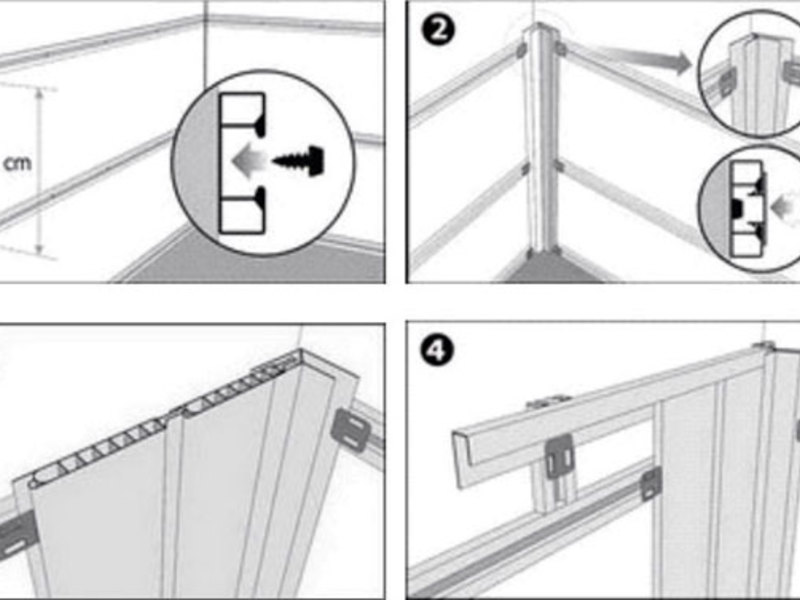
- cut off the ridge at the first panel and clamp it with the same side to the crate of the adjoining wall;
- we fix it to the horizontal slats with self-tapping screws, do not forget to retreat 1 centimeter from the very bottom;
- each subsequent panel is inserted in the same way into the groove of the previous one and fixed with nails or clamps;
- the most difficult element is the last one: it is cut to the desired size, inserted and fixed on the vertical frame of the frame with self-tapping screws.
A video detailing the key points of the operation is below.
How are plasterboard wall panels used?
A new generation of finishing material is gaining popularity and demand. Today wall panels are used with great success for cladding various surfaces. The material is environmentally friendly for humans, and has high technical characteristics. This is fire resistance, moisture resistance, as well as sound and heat insulation, high quality plastic with wine silt coating and other raw materials. The main purpose of drywall panels is to create partitions in a living space or office. And also, wall cladding, load-bearing structure or other interior elements.
How to Install - Installation Options
How to install an apron in the kitchen from mdf sheets? And although the process of mounting an MDF apron is quite simple, there are several points that a novice fitter may encounter. On the Internet there are many videos of installing an apron in the kitchen from mdf material.
Below is a step-by-step installation of an apron in a kitchen made of mdf panels. Here is a list of the preliminary work before installing a mdf apron. Take correct measurements of the working area. Thanks to the ease of processing mdf panels, you will give the desired shape to the apron. Much depends on how long you plan on the apron.
Some owners want the space from the bottom of the cabinets to the floor to be covered with mdf sheet. In this case, you need to measure the space from the bottom of the wall cabinet to the floor.
And additionally add another 20 centimeters to the value so that the panel goes a little under the hanging cabinets. This approach will provide additional design aesthetics.
This method is effective if the bottom of the kitchen unit is not solid. Otherwise, you will overpay for extra meters of material, which no one will see anyway, but the strength of the structure will be much higher.
It is almost impossible to carry out interior finishing work without puttingty. Here you will find out how long the putty dries.
Partial fastening method
Another option for attaching an MDF kitchen apron is partial. You do not overpay for extra meters and only attach the visible part of the apron between the table top and the shelves. Fasten the MDF panel with a margin of about 25 cm, this will additionally fix the apron plate.
Horizontal measurements are also important, especially if there are sockets or switches in the kitchen in the apron area. To do this, make a template with marked places where the sockets are.
How is the installation in the kitchen
How to hang an apron in a mdf kitchen? After the preliminary work necessary for the correct attachment of the apron, you can install the MDF sheet itself.
The work carried out using the frame structure takes more time, but they provide additional reinforcement and a longer service life without defects. How to fix an MDF apron in the kitchen using the frame method? The work area assembled from the parts allows you to quickly assemble the apron.
How to install on self-tapping screws
How to attach an MDF kitchen apron to self-tapping screws? Here you will also need strips on which the entire structure will be held. It is also necessary to treat it with special antiseptics. Then, in the marked places along the perimeter of the strips, they are attached to the MDF dowel sheet.
Fastening an apron made of MDF for the kitchen is best done with help in order to avoid defects. Below there is a video on how to attach an apron in the kitchen made of MDF with self-tapping screws.
For more information about installing an MDF kitchen apron, see the video:
How to install?
There are two main ways to mount MDF wall panels:
- glue;
- put on a metal or wooden frame.
In the first case, you need a glue suitable for working with wood products. They can not only glue, but also align the grooves in the places where the screws are screwed in. The glue can be colored or transparent.
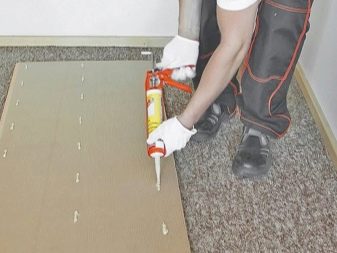

In the second case, a wooden lathing or metal structure is applied to the wall. The advantage of wood is ease of installation, environmental friendliness and the use of fewer hardware and fittings. But wood is more expensive than metal, so this method is less affordable. Installation of a metal frame has its own difficulties - it requires a certain skill and the acquisition of special tools.
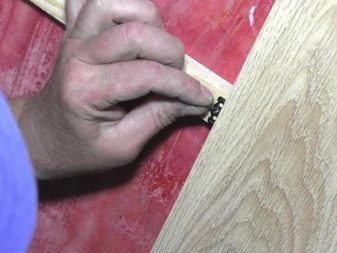
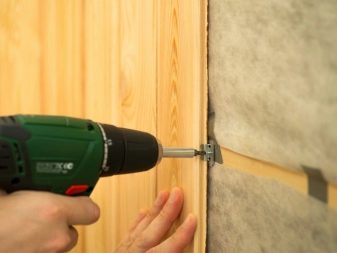
Let's take a closer look at the process of fixing MDF wall panels to a frame base in more detail.
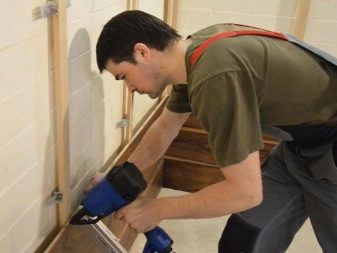
- The working wall needs to be prepared. Remove baseboards and switch and socket boxes. Take care of the output of the wires for the sockets, which will be located on the panels.Damaged wall cladding must be cleaned off to the ground.
- The wood slats or blocks that you will be using must be pre-treated to make them resistant to mildew, mildew, or pests.
- Additionally, you need to take care of fastening the planks to the wall. For wood, you can use screws or dowel-nails.
- We start with angled vertical battens. They are placed in pairs to form an angle. Having made the markings, we drill holes in the wall for the hardware (with an average step of about 7 cm) and put plastic sockets from the screws in them.
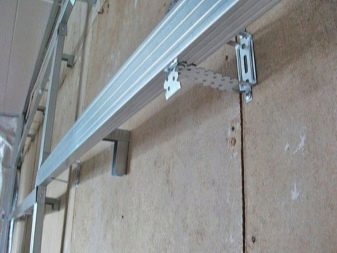
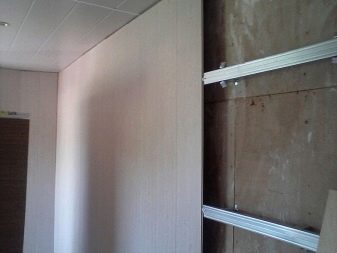
- We apply the rail to the wall, transfer the markings to it and drill, connect it to the wall.
- Horizontal parts are attached in the same way.
- Door and window openings deserve special attention. The slats are fixed along their perimeter, regardless of whether they have a step mark on them or not.
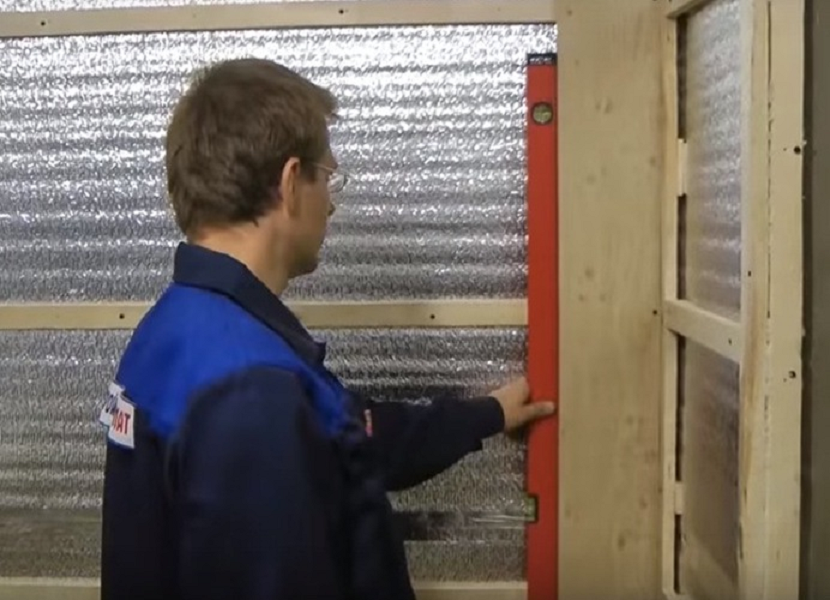
- The evenness of the vertical battens and crossbars is checked using a level or plumb line. Irregularities at the joints of the rails must be sanded with a plane.

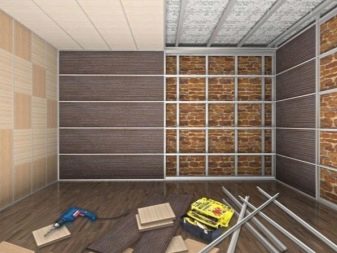
The technology of mounting a metal frame has its own characteristics.
- The process itself is similar to installing a wooden one. However, for a metal structure, you will need CD profiles and UD rails.
- CD profiles are inserted into vertical posts (UD) and pushed in to the required place.
- Then we drill holes in the wall by analogy with wooden logs. Long self-tapping screws are used for fastening to the wall surface. And the profiles are connected to each other by short ones. The CD profile requires connectors (also called ears).


After installing the frame, the panels are laid.
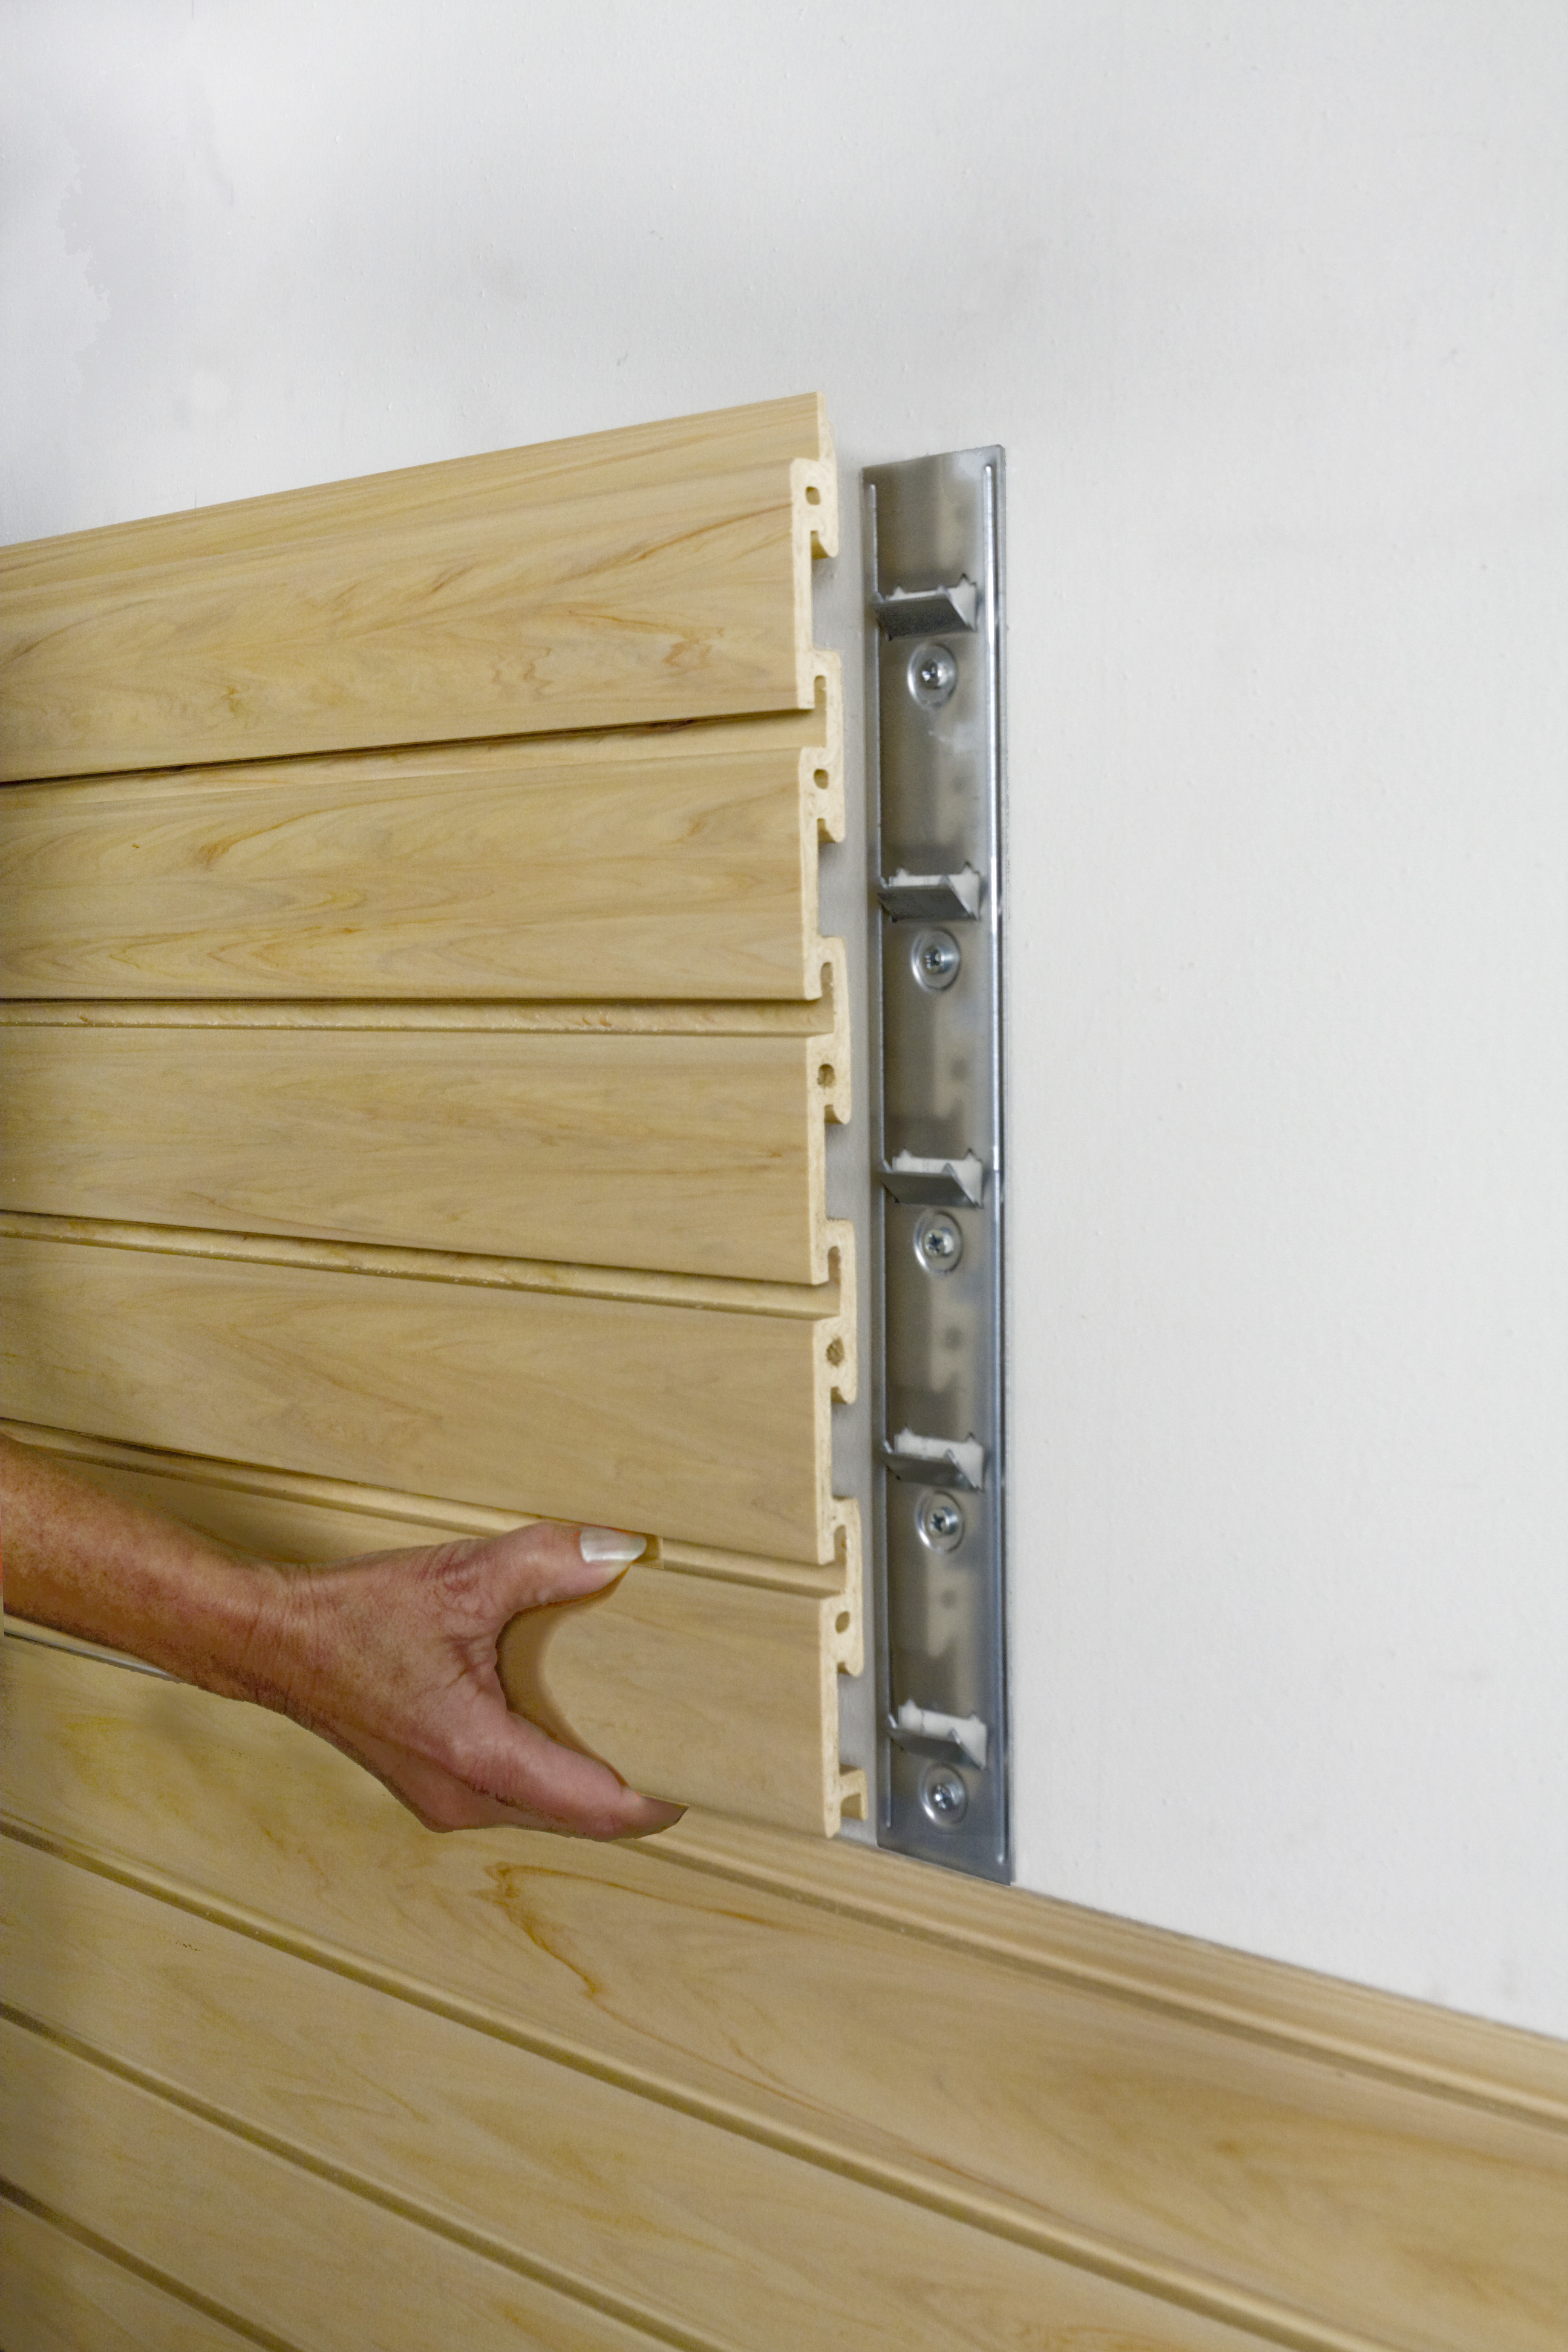
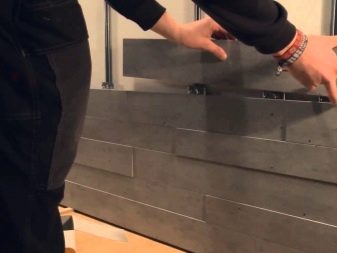
- You should start from the corner. The panel with the sawn-off ridge is placed first, and the next one is attached to it with the help of a lock, in which the ridge of one workpiece is aligned with the groove of the other.
- The panels are fixed with small nails (if the frame is wooden) or with clasp brackets (if metal).
- To attach the last two panels correctly, the last one needs to make the ridge less wide. Then join both at an angle and press on them, straightening the joint.
- The last blanks should be tightly pushed together and fixed with screws to the frame.
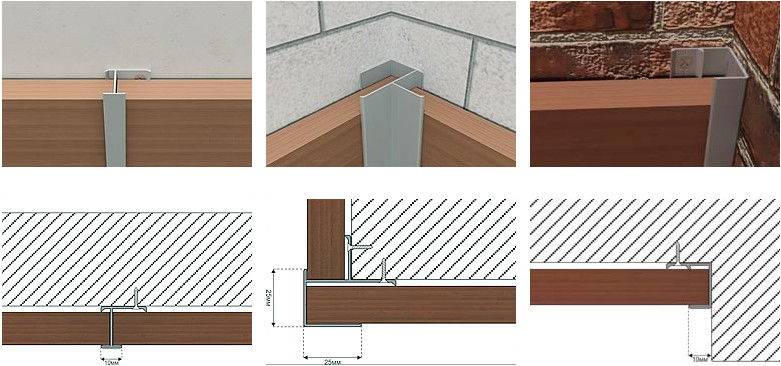
- The slots in the corner, as well as between the wall and the floor (ceiling), are closed with corners and decorative skirting boards (they can be glued).
Decorative wall panels GKL
Products based on drywall sheets are used as a budget option to level or decorate walls. And also, install soundproof partitions in the room. They are made using a hot press from plaster and construction paper, so they are mainly used for interior decoration of the room.

Thanks to a special coating, the panels retain their appearance for a long time. They facilitate maintenance. To install them, no special knowledge or skills are required. Everything is easy and simple. Moreover, due to the environmentally friendly material that is used for production, gypsum board panels are used in kindergartens and schools.
Panel features:
- High quality coverage;
- Reliability;
- Original interior solutions;
- Providing fire safety.
To create an interior, you don't have to paint walls or glue wallpaper. It will be enough to install plasterboard decorative panels. They are highly popular in the construction industry as a cladding material. Thanks to the automation of the process, the installation of decorative cladding panels is carried out quickly.
Soft lathing
Double-sided foam tape
Installing plastic panels on a soft crate seems flimsy, but in fact, it is precisely such skins that have come out of the hands of the greenest, but neat beginners, and stand for 10-15 years without signs of damage. Why? The soft crate is made of double-sided foam tape, see fig.In terms of thermal deformation properties, it exactly corresponds to PVC, and its adhesive layer is very viscous and elastic: it stretches behind the board, and then returns it to its place.
In order for the sheathing on the soft crate to come out really reliable, three conditions must be met:
- Clean the wall from wallpaper, paint and level with a rough, durable putty (Hercules, Prospector, etc.) with an accuracy of half the thickness of the adhesive tape, 2-4 mm. Sharp shallow protrusions and depressions are acceptable, so the putty, which is not complicated anyway, is still simplified.
- Stock up on a high-quality finishing profile, without it, sheathing on a soft crate cannot be made. However, see the penultimate section.
- As much as possible, to an instant, reduce the contact time of the adhesive layer of the adhesive tape with air. We need to talk about this in more detail.
Installation of lathing
The lathing pattern is the same as for the others. The width of the tape is best taken from 25 mm, and best of all - from 60 mm. Technology:
-
From the initial end of the adhesive tape in the roll, 300-350 mm of the upper (outer) protective tape is removed, and the adhesive tape with the lower tape is cut off, as shown in the figure;
- The master (it is he!) Presses the initial end to the wall, and the assistant pulls the final strip;
- The master peels off the lower (adjacent to the wall) end of the protective tape and carefully pulls it out from under the tape, immediately pressing the tape against the wall;
- At the final end, a tail of the upper protective tape 100-120 mm is left;
- The remaining strips of adhesive tape are applied in the same way.
Installing profiles
The principle is the same - the shortest possible contact of "naked" scotch tape with air:
- The long tails of the protective tape are pulled back and attached to the "back" of the strip with ordinary, narrow and cheap, stationery tape;
- The upper installation profile (horizontal) is applied, the protective tape is carefully pulled out from under it by the tail, immediately by pressing the profile, the assistant supports it;
- The lower installation profile is also glued;
- A starting profile (vertical) is applied, the assistant holds, and the master pulls out the protective tape from under the profile, immediately pressing the profile to the tape, the operation goes from bottom to top so that the profile does not hang on the tape even for a short time;
- The finishing profile is also installed.
Panel mounting
Panels are mounted similarly to profiles, but with some subtleties:
- Trim to size must be very clean and precise to avoid jamming.
- The next panel is brought to its place by hands in concert at two ends; you cannot use a mallet and the rule.
- The tails of the protective film are re-glued after installation of each board, and too long, so as not to interfere with the work, are cut off.
How to fix the wall panel in the kitchen to the crate
The workflow is divided into three stages. Starting point - marking.
Markup
Using a spirit level, tape measure and a pencil, trace the surface of the wall where the crate will be located. Usually, the main frame is screwed along the perimeter, and horizontally or vertically located slats are attached to it. The distance between the jumpers should be 50-60 cm for MDF, chipboard and 30-40 cm for PVC elements (this allows you to increase the strength of the structure, the plastic will not bend too much).
Cutting and assembling the frame
Most often, the frame is made of wood, since it is more economical than plastic or metal profiles. Fastening of wall panels in the kitchen is carried out on slats with a cross section of at least 20 * 20 mm, without bends and other defects. Before installation, they must be treated with an antiseptic and water-repellent impregnation. After the tree is dry (it will take about one day), you can start working. The distance of the bottom part from the floor should be 1-2 cm.
- Install the base - four planks around the perimeter. If necessary, bars are placed under it for leveling.
- Attach additional guides with self-tapping screws or screws. Do not feel sorry for the fasteners to keep the structure reliable.
- If thermal insulation was provided, place the material in the resulting cells. MDF can be insulated with polyurethane foam and polystyrene.
Metal lathing is considered the most reliable. It is made according to a similar principle, but the process is more complicated. This video shows a detailed example of how to install such a profile.
With plastic rails, as with wooden ones, everything is quite simple. According to preliminary marking, they are attached to the wall with dowels. The elements should be located perpendicular to the PVC sheets.
The creation of the frame is the most time consuming stage. When it is completed, you can proceed to the final part of the work.
Sheathing
The planks can be fixed to the frame horizontally and vertically. The experts advise starting the installation from the bottom and from the corner to the window or doors. If the upper part has to be cut, then it can be hidden behind the wall set.
Instructions step by step
- Cut the sheets if necessary.
- Attach the corner element with self-tapping screws and close it with a corner.
- The plastic corner strip is inserted into a pre-set corner and attached to the frame with a stapler.
- Insert the second sheet into the groove of the first one and attach it to the profile with clamps, self-tapping screws, glue or staples.
At the final stage, the floor plinth is mounted. The video shows a visual principle for installing the frame and PVC strips.
Installation of panels on a crate
This method involves the installation of a frame for PVC panels. It simultaneously serves as a supporting structure and a product for leveling walls. Before fixing PVC panels, you should prepare all the necessary tools, fittings and materials, as well as carry out some preparatory work.
What you need to carry out preparatory work
Fastening PVC panels to the wall implies the following things:
- wooden or metal profiles, from which the frame will be made;
- building level and plumb line - to determine the angle of inclination and location of the main elements of the crate;
- dowels - for attaching the rails to the wall;
- screws - for connecting structural fragments;
- tape measures - to measure the distance;
- material for the substrate under the guides - wooden beams or thick plywood;
- screwdriver and drills.
Tools and materials needed to create the lathing under PVC panels
As additional tools, you may need metal scissors (in the case of aluminum profiles) or a saw, chisel and mallet if you plan to create a wooden base.
Wireframe creation
To answer the question - how to properly attach plastic panels to the wall by means of a crate, you must first consider the principles of creating a frame.
The installation of the lathing begins with the marking of the working surfaces. To do this, find the most protruding point of the wall in its lower part, after which they draw a strictly horizontal line, which is constantly checked by the building level. The first profile is screwed strictly along the line. Then they move on to marking the upper part. To do this, two vertical profiles are installed in the cavity of the lower profile at both ends, after which their verticality is checked with a plumb line. The upper points are connected in one line, along which it will be necessary to attach the upper profile.
Screwing the profile to the wall
Using a drill, the profile is drilled through, partially drilling into the wall, after which the slats are screwed to the surface with dowels or screws and a screwdriver. Fasteners must be fixed every 25 cm for timber frames and every 20 cm for metal slats.
After that, you need to set the internal jumpers.
It is important to remember how the PVC panels will be fastened: horizontally or vertically. The fact is that plastic products should be fixed perpendicular to the frame rails.
After installing the frame and checking the correctness of its installation, you can start screwing the panels.
Creation of a frame for vertical installation of plastic panels
What is required for basic work
To carry out work on the installation of plastic panels, it is recommended to prepare the following:
- PVC panels - they need to be given time to acclimatize. To do this, they must lie down in the room where the finishing will take place for at least 24 hours;
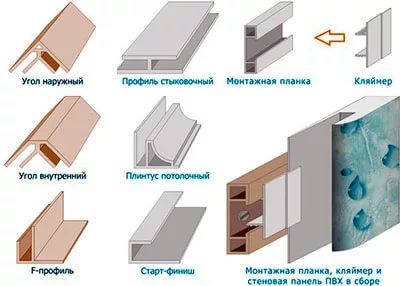
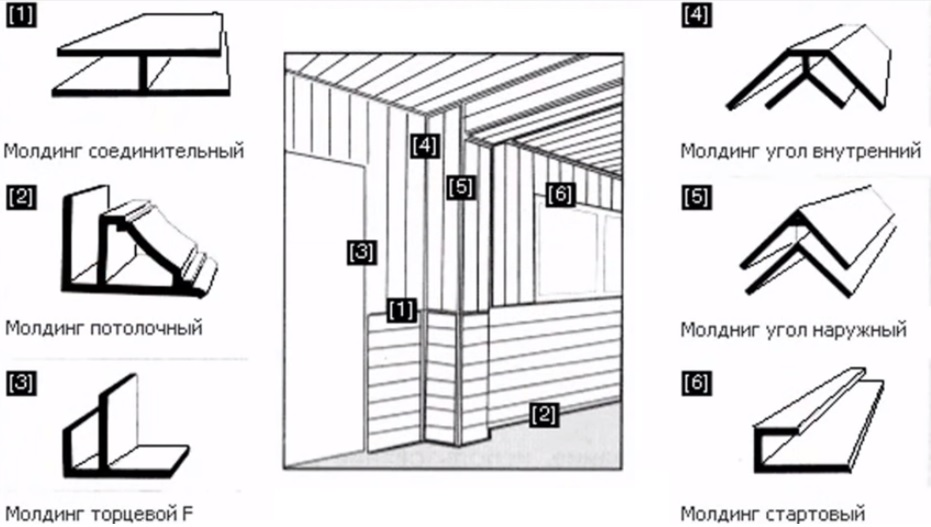
- moldings - special angle profiles that provide tight and reliable contact;
- clamps - metal staples used to fasten panels to the crate;
- building level - with its help it will be possible to accurately determine the location of the first plastic panel on the crate, which is a reference point for subsequent installation;
- a special knife for metal - required for cutting PVC panels.
Step-by-step instruction
Installation of PVC panels on the walls
You need to fix wall panels using the following technology:
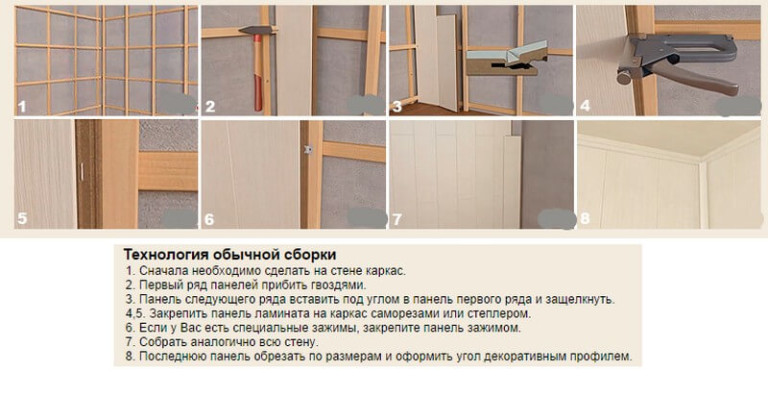
- Step one is the installation of moldings. Further editing takes place from them.
- Step two - installation of the first PVC panel. The spike of the product is inserted into the profile cavity, and fixed on the crate with clamps. Subsequent panels are placed in the groin of the previous ones and so they are gaining the entire wall.
- Step three - completion of the work. The last planks are trimmed so that they fit neatly into the inner corner.
If it is necessary to hide the moldings, then do-it-yourself installation of the panels takes place in the reverse order, with the first plank fixed to the corner, and then cut it off so as to remove the spike, after which the entire surface is recruited.


