Assembly
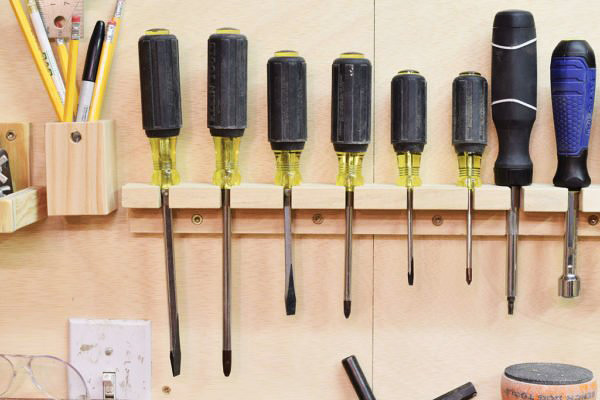
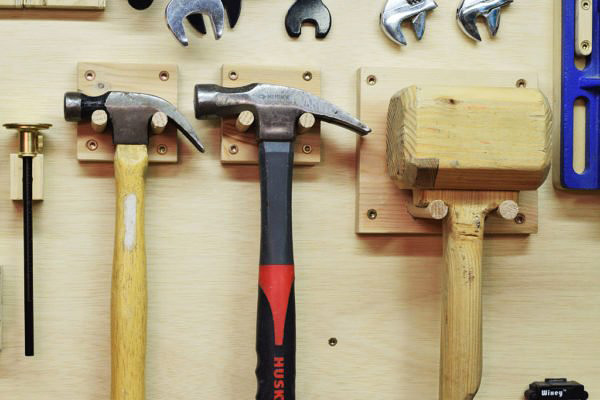
First, the rack frame is assembled, then wooden shelves are attached to it with self-tapping screws. The shelves of the rack are filled with pull-out baskets, organizers, containers and other holders. Hooks, magnets and magnetic tapes are attached to the perforated panel. Tools are placed on them. For convenient fastening of the pliers on the perforated panel, a mount in the form of a crossbar is installed. The containers are filled with small fasteners and tools. Garden tools, bicycles, tires and wheels, skis, skates and sledges are hung on holders or racks, or placed in containers.
Varieties
The modern construction market presents hundreds of models of roomy organizers for placing fasteners, which can be grouped according to the purpose, method of planning the interior space, parameters and design features.
Organizers differ in form factor.
Compact portable box (box) with horizontal layout, but without carrying handles.
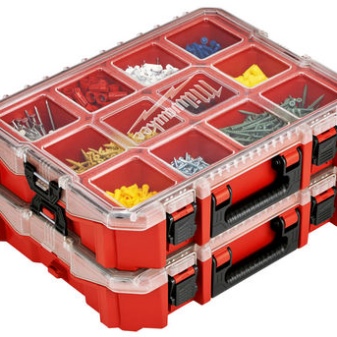

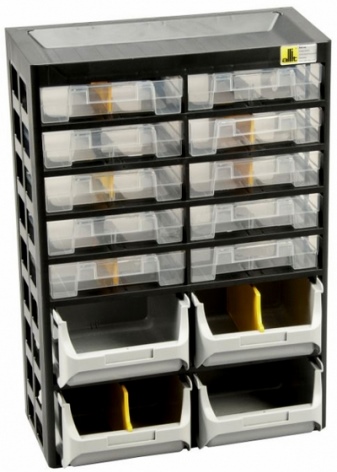
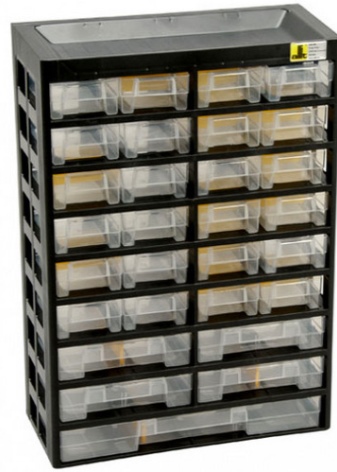


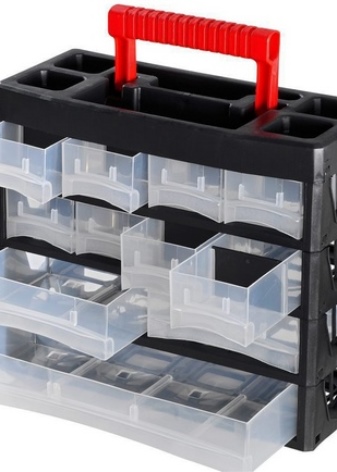
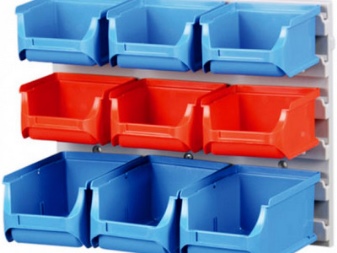
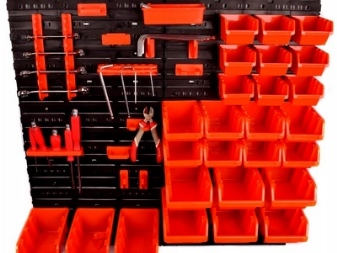

Containers can be equipped with:
- stationary and variable compartments in the form of movable walls;
- removable or sliding sections like drawers and trays;
- combined interior design.
In the first version, the boxes have a wall at the back (to prevent the boxes from falling out), in the second it is located in the middle. By type, such boxes are both stationary and portable. The latter are transported by the handle, the compartments in them are distinguished by a special design that holds the trays in place during the transfer or tilt of the box. Also, such a storage system contributes to better access when searching for the desired fasteners.

The design of organizer covers differs from each other:
- completely removable;
- reclining, with plastic hinges;
- no cover - with vertical layout.
Difference in purpose:
- for sorting small items in the workshop, in the trunk of a car, etc. - standard plastic containers of compact dimensions;
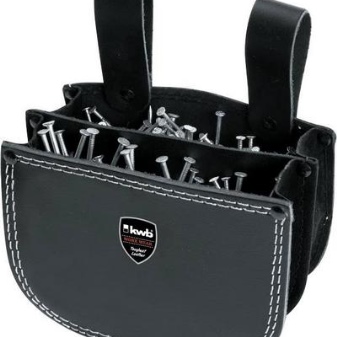
- for sorting and carrying fasteners to the work site - cases (boxes) with handles, belt options, boxes from prefabricated systems;
- for numerous types of fasteners and all kinds of accessories stored at the workplace - large-sized vertical cases.
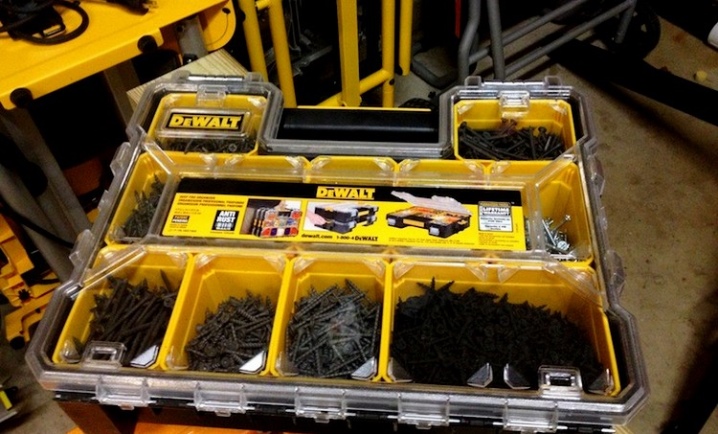
Repair parts boxes can range in size from the smallest to the largest. The size range of this category of products is measured in inches. The most popular organizer sizes are from 7.5 to 24 inches.
In most cases, the box is made of a transparent material - polycarbonate or opaque plastic. Inside, the space is divided into equal or different compartments. Above there is a tightly closing lid with locks or latches, which prevents the contents from spilling or re-sorting, protects the parts from the negative influence of the external environment.
Magnets

metal parts
Continuing the topic, we will tell you about anywhere.
Tell me honestly, how do you store your wood tools, saws, drills, clamps, nuts, washers and a bunch of other small things you need in your garage or workshop? I think many will answer: in plastic paint buckets or cardboard boxes. Moreover, "small things" are usually stored in the form of a kind of "assorted" and when you finally need some small wrench or nut, you need to spend a fair amount of time to find them. Sometimes it's easier to buy new parts than to find old ones.Are you familiar with this situation? If yes, then I propose to make some simple and inexpensive devices for storing all the little things, so that it is always in sight.
tool storage
In this article, a few tricks will be translated that will help you keep your workshop not only clean and tidy, but also always know what is where.
The first trick
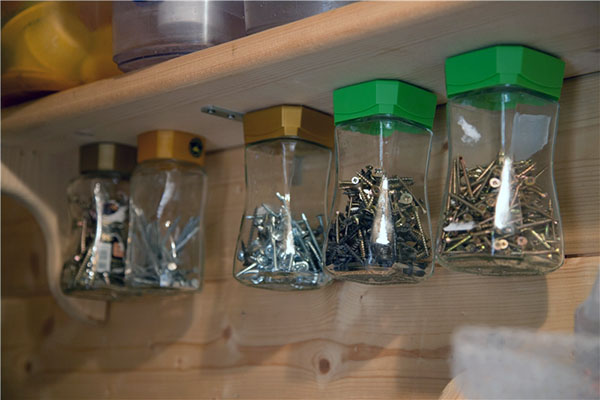
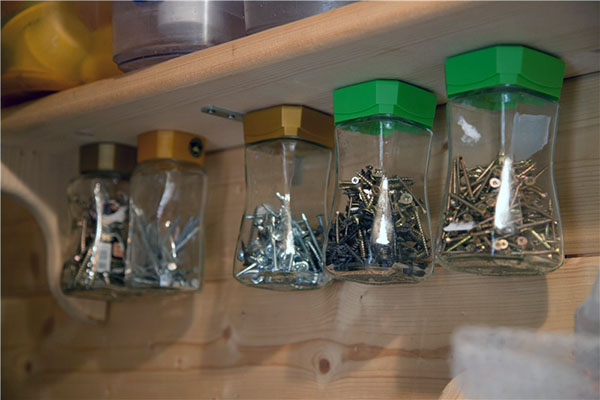
Self-tapping screws, screws, nails are best stored packaged in several jars with threaded lids. Just screw the lid to the bottom of a shelf and screw the jar with the contents into it. This saves you space and allows you to always recognize the parts that are in the bank. Moreover, they do not take up much space, and each small bolt, screw or self-tapping screw can be packaged in size, diameter and length.

Storage of nails and every little thing
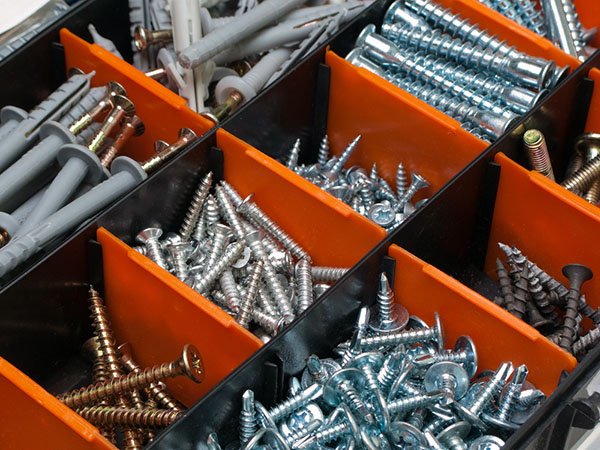
Storage case for screws
Second trick
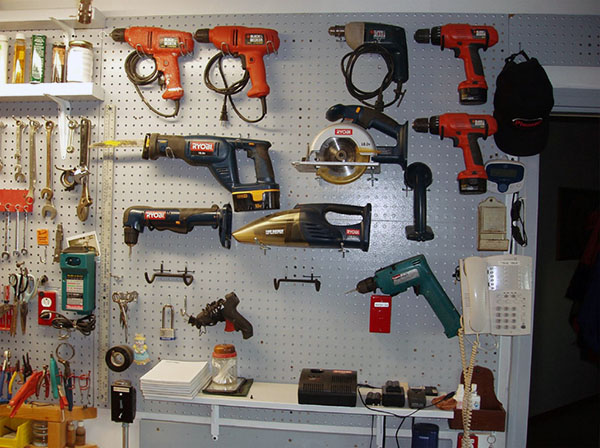
To store keys, scissors, nuts and washers, you will need a sheet of hard fiberboard (preferably perforated) and wire. Hooks are made of it, the ends of which fit tightly to each other. Nuts and washers are strung on them. Keys and other tools can be marked on hooks made from the same wire.
Tool storage in your own workshop
The third trick
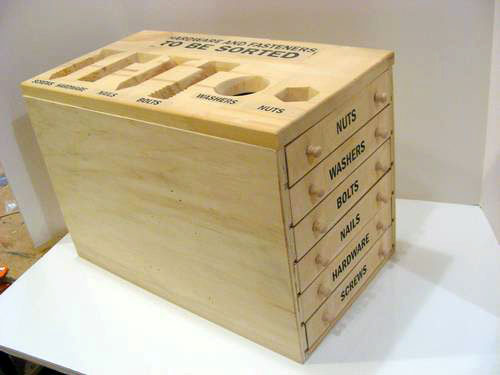
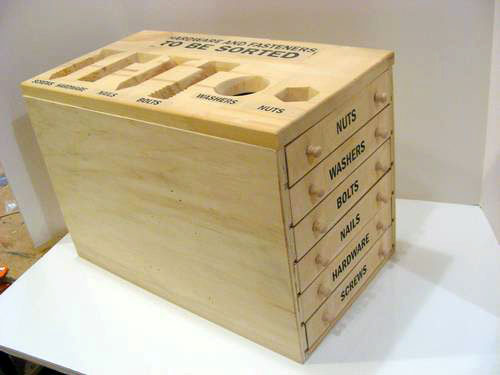
For storing nails, screws or self-tapping screws, you can make a three or four-story box. The bottom will be molds from cupcakes or other confectionery products, and the walls will be made of ordinary plywood.
Homemade storage box for nails and screws
The fourth trick
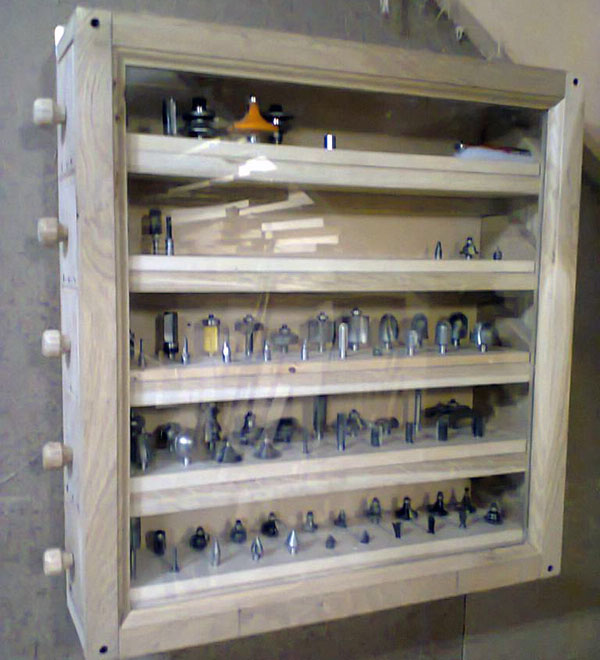
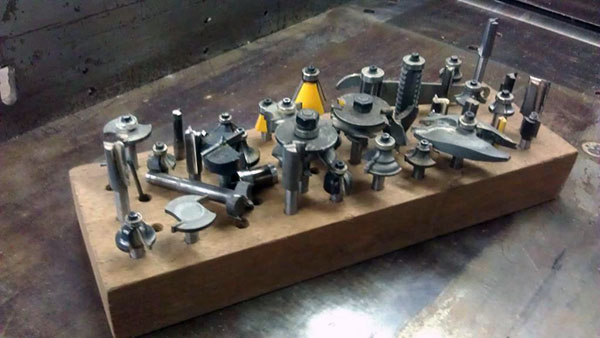
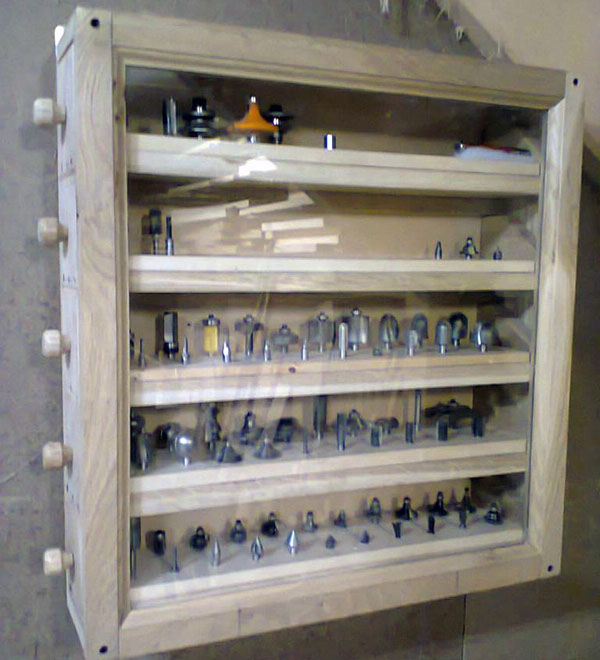
For storage of cutters and drills, it is best to use a sheet of polystyrene or foam that is attached to the wall. Holes of the required diameter are made in it for drills and cutters. Due to the excellent elasticity of the foam or polystyrene sheets, the tools are firmly fixed and do not fall out. Moreover, it is not difficult to extract them. With the help of such an uncomplicated invention, you can store not only drills and cutters, but also screwdrivers of various shapes, polyhedrons, drill bits for a hammer drill.
Cutter storage stand

Cutter storage box
Drill storage stand
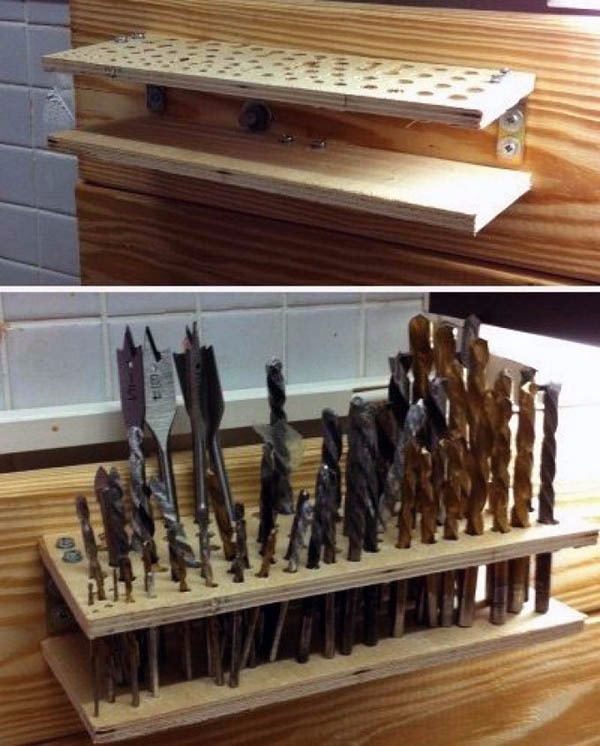
Drill box case

The fifth trick
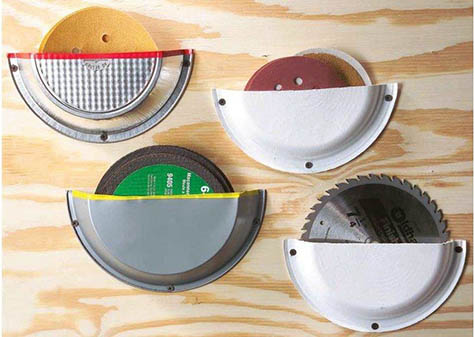
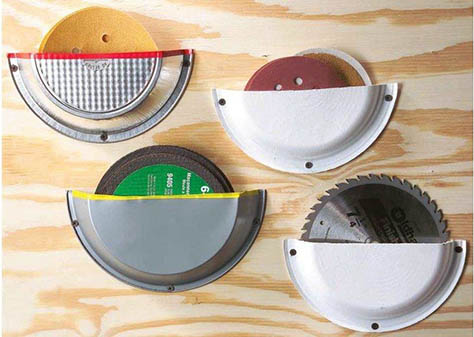
With the help of disposable plastic plates, you can make pockets for storing wheels and all kinds of sanding discs. The plates must be cut in half, screwed to the wall with self-tapping screws. It is best to use plates of different diameters. Thus, you can immediately recognize which circle and what diameter you need.
Plastic plates for storing tools
Sixth trick
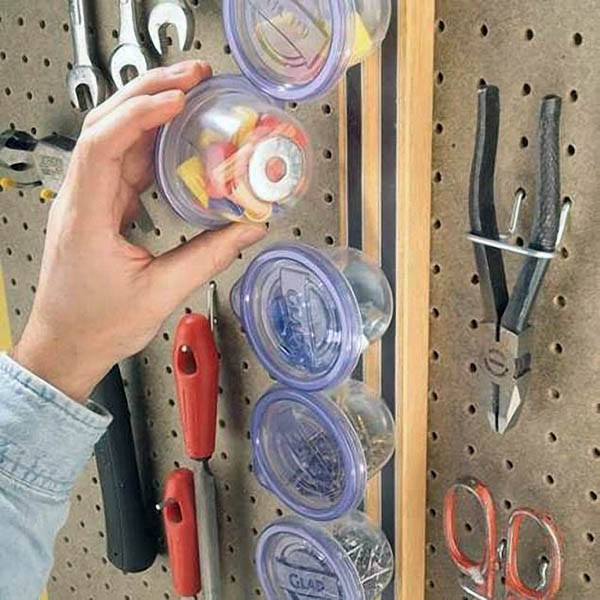
To store all sorts of small parts, you can make boxes that will be attached to the wall using magnets. To do this, you need small plastic containers (preferably with a tight-fitting lid), on the bottom of which washers are glued. At the same time, you need to attach the magnetic tape or magnets from the speakers to the wall.
Boxes on beckons are suitable for storing small things.

Seventh trick
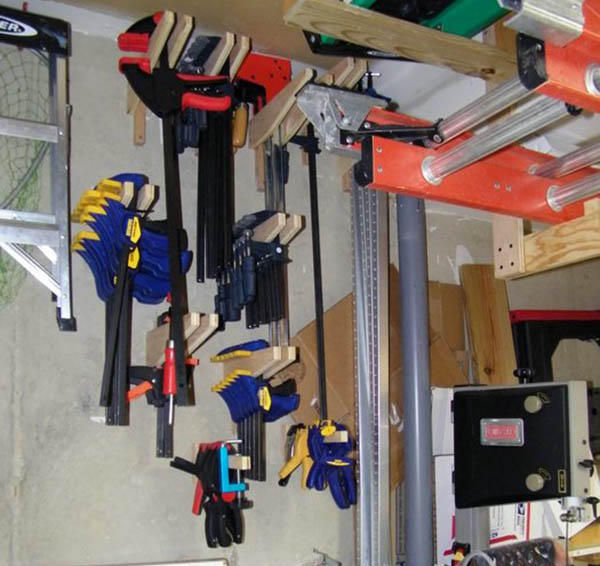
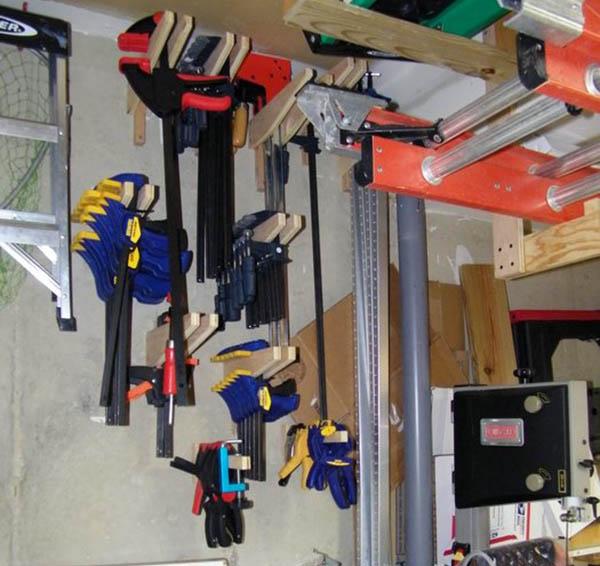
To store the clamps, you can make a narrow rectangular box. With one side, we attach the box to the wall in such a way that the handles of the clamps are inside, and the second part simply hangs in the air.
Eighth trick
In every shed or workshop, in addition to tools, you can also find all kinds of building materials that are afraid of moisture. It is precisely for their storage that folk craftsmen have come up with one simple little thing. First, we need to make a one square meter box from bars and plywood. The walls and bottom of the finished box are sheathed with polystyrene from the outside. On the inside of the wall, it is desirable to sheathe the geotextile. All this is done so that moisture cannot penetrate to the stored dry mixtures, and the one that did get inside does not remain on the walls of the box, but evaporates through the natural fabric.

Ninth trick
If you have a lot of all kinds of plumbing parts in your workshop, it is best to make a multi-storey box with shelves for them. To do this, we make a cube from plywood and bars and close it on three sides. Inside the box, using furniture nails, we fix several shelves made of the same plywood.
Here on them we just have all kinds of plumbing components: taps, joints, tees, half-inch bends - to the first shelf, all the same components, but only three-quarters of an inch - to the second shelf, and we put the inch ones to the very bottom, so how their weight is much higher than the previous ones.
If you have larger radius components on the farm, then you will have to slightly increase the storage space and make several additional shelves. Thanks to these tricks, there will always be order in your workshop and it will not be difficult for you to find any tool that you need in your everyday life.
The easiest tool box
Joinery beginners are offered a simpler tool box design - a regular box with a handle, but without a lid. The advantage of such a box is that it is suitable for tools of various sizes, if desired, even a water level or a perforator can be placed here, or you can make a miniature box for an "apartment" master.
Such a box consists of only six parts:
- two long side elements;
- two short sides, the height of which should exceed the height of the long sides, since the handle will be attached here;
- the bottom, which should be made from a single piece of wood, since it is the bottom that takes the load from the weight of the tools;
- handles, the role of which can be played by a bar, bar or piece of circular cross-section - the choice depends on the size of the box and the estimated mass of its contents.
If desired, the design can be supplemented with internal partitions or complicate it with compartments with covers or doors.
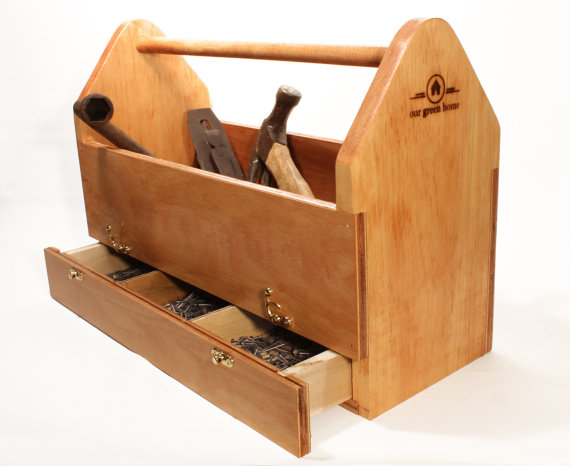
All elements are assembled into one structure, fixed with wood glue, then additionally fastened with self-tapping screws
Particular attention should be paid to the fastening of the handle - it must be strong and reliable
You can independently assemble a toolbox not only from boards, depending on the arsenal of tools, plywood, chipboard, OSB, galvanized metal or sheet aluminum can be used.
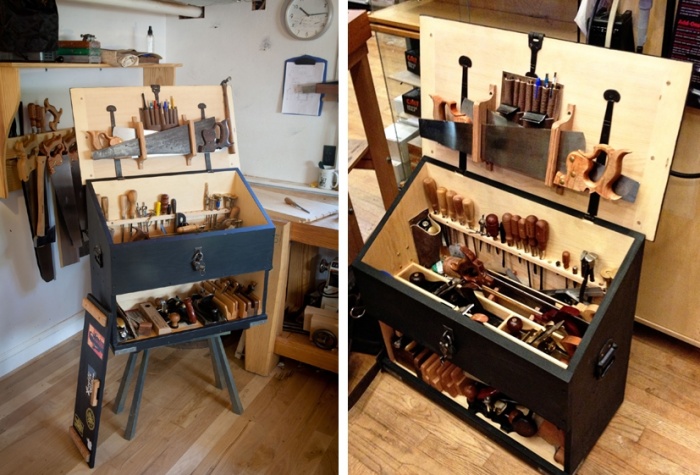
There is nothing difficult in the manufacture of such a box, and the advantages of the product are obvious: the tools and fasteners will be in a certain place, at any time it is enough to get the box out of the closet or garage and carry out the necessary repairs.
For quick access to tools, you need to properly organize the storage system. An organizer and a tool box help to cope with this. They are made with their own hands from solid wood, plywood, chipboard, various types of plastic and tin.
The material is selected based on the size of the product and the skills of the carpenter, each has its own advantages and disadvantages.
Material preparation
All the necessary material is prepared for creating a rack, according to the prepared project:
- For the main panel of the holder, you can use a perforated panel.
- If the rack is made of wood, it is recommended to purchase oak or pine lumber without cracks or knots.
- Wooden boards up to 2.5 cm thick are required for the shelves.
- Shelves can be made of plywood and laminated plywood.
- The vertical racks of the frame are made of a 10 × 10 cm bar.
- It is recommended to pre-treat wooden boards with anti-mold and mildew agents, paint.
- To assemble a metal frame, a rectangular profile and corners (up to 2 cm) are required.
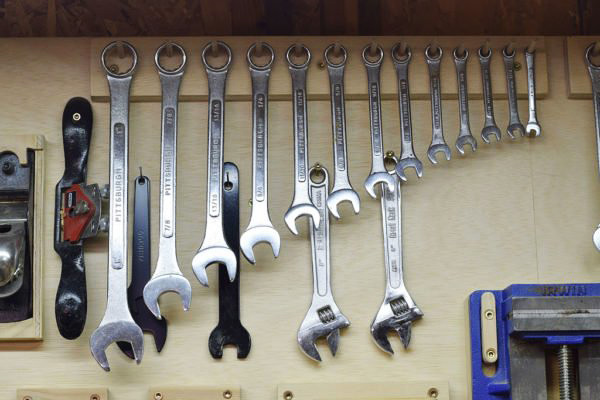
Tool storage: little tricks to make the DIYer's life easier
So, let's move on to those tricks that will allow you to always have all the necessary tools and materials at hand.
The first trick: a haven for dowels
To disassemble all the cogs-nuts by category and conveniently store them, it is enough to fix the lid of a plastic can on the back of any shelf. The jar with the contents can be simply screwed into this primitive but very reliable holder.
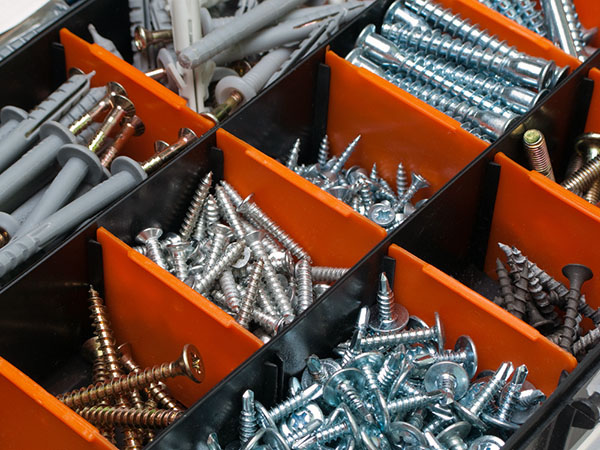
But this version with a nail-screw-containing suitcase even gives off some intelligence :).
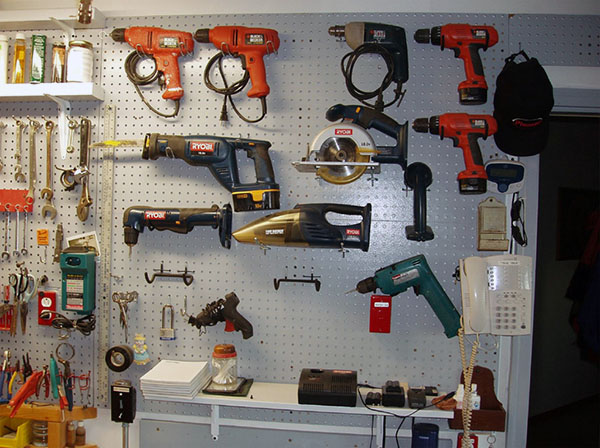
The second trick: we organize the storage of instruments between heaven and earth
Various tools, nuts, washers can be simply suspended. To do this, you will only need the wire necessary for bending hooks and hooks of various shapes, and, as you can see in the photo, a fiberboard sheet, preferably perforated. We don't even talk about the details of the creation of this "masterpiece": it seems to us that this is understandable even for a hedgehog :).
Trick three: multi-story dormitory for nails
Such a multi-storey plywood box for storing hardware can be made by any more or less handy home craftsman.
Trick four: a safe haven for the milling industry
Thinking about arranging devices for storing the necessary tools with your own hands, you can build elementary storages for drills or cutters of the following types:
Trick five: eternal life of disposable plates
Why waste disposable plates? For storing various tools in your garage or workshop, cut them in half and screw the halves to the wall - and you have great storage pockets for just about anything!
Trick six: using the power of gravity
A magnetic tape on the wall, a plastic can, a metal washer attached to the bottom of this can - and before you is a convenient and at any time modifiable storage for various little things, which should always be at hand.
The pendants shown in the photo are suitable for storing big-headed tools - clamps, hammers and the like.
Trick eight: say NO moisture
We will describe this simple little thing in a little more detail. Tool storage is great, of course. But do not forget about some materials and accessories that also need to be stored and which are afraid of moisture. For them, you can build a plywood box, the inner surface of which is sheathed with geotextile, and the outer one with foam. Shelves can be arranged inside the box, and stored "valuables" can be placed, for example, in old plastic canisters, having previously prepared them accordingly.
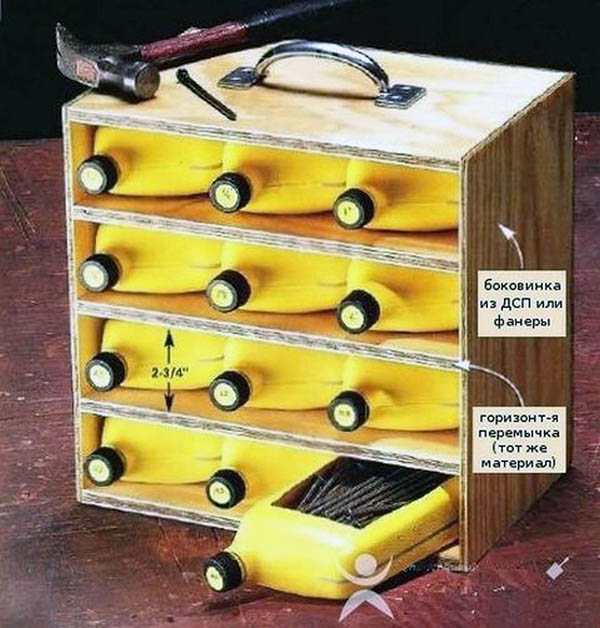
So, we have outlined everything that we have managed to find for you at the moment. Of course, these are far from all the tricks and tricks that will allow you to provide convenient storage of tools and materials. We hope that the options we have proposed will open up wide opportunities for your personal imagination. As the great Samiznaetekto said, comrades for work! Move your convolutions and arms!
Nuances of choice
When choosing an organizer box, you should decide for what purposes it will be used, what is supposed to be stored there, in what conditions it will be used.

This design is very popular among hand-made craftsmen to store decorative items, sewing accessories and other handicraft items. They are also used with pleasure by radio amateurs and just home craftsmen who need something compact to keep their desktop in order.
The most versatile cases of all types and parameters are suitable for both home craftsmen and specialists in various fields. In everyday life, cases are suitable for standard design, approximately 14-16 inches in size, equipped with a small number of compartments. Oversized cases with many compartments are more suitable for professionals.

If you need to store a wide variety of mounting positions and other accessories in small quantities, a practical solution would be to purchase a double-sided practical case with a series of small compartments. In principle, in this case, it makes sense to use boxes with many compartments.
Often, professional craftsmen have such situations when the fastening set is periodically changed, transporting some small tool or accessories to the place of work. A suitable solution in this situation would be an organizer with removable compartments with movable walls and mobile trays. Thus, it is possible to divide the space of the box into the required number of compartments of certain sizes, changing the configuration depending on the purpose.
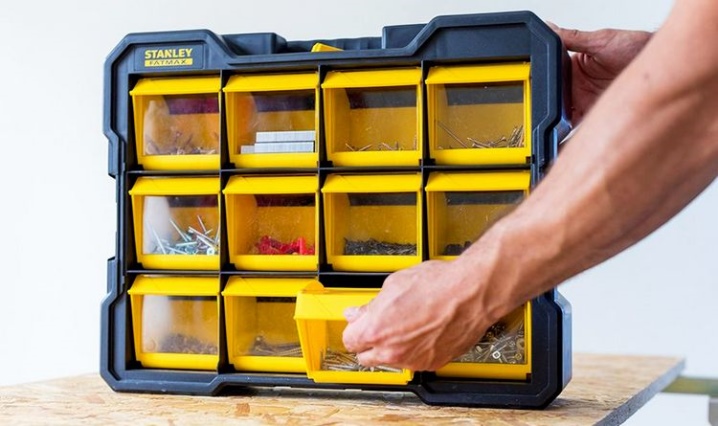
When, in addition to fasteners, it is necessary to store or carry a tool, you should pay attention to large box-boxes. In general, they are endowed with the same functionality as cases, but need more space.
These boxes are interesting for both professionals and amateurs.
When used at home, this is often the best solution - all the necessary accessories will be in one place.
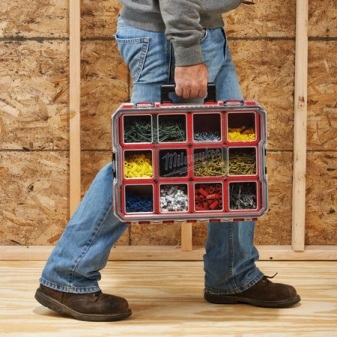

The organization of fasteners and the distribution of all sorts of accessories on site is facilitated by systems with a vertical layout, with drawers of a pull-out type. In such a practical case, you can place a lot of little things, if necessary, having free access to them. This solution is the best option for professional applications. And portable organizers will allow you to carry a mini-workshop with you for performing a number of different works.
For work at height (stepladder, attic), it is necessary that all accessories are at hand. An alternative to the belt can be a plastic or textile holder for a box with screws. It is attached to a standard belt. It does not restrict movement and saves time when searching for the desired part.
How to choose an organizer, see the video.
Description
The organizer is a box (case) with many sections for sorting fasteners of different calibers and purposes. This storage option is optimal for placing inside accessories for tools and various small items.
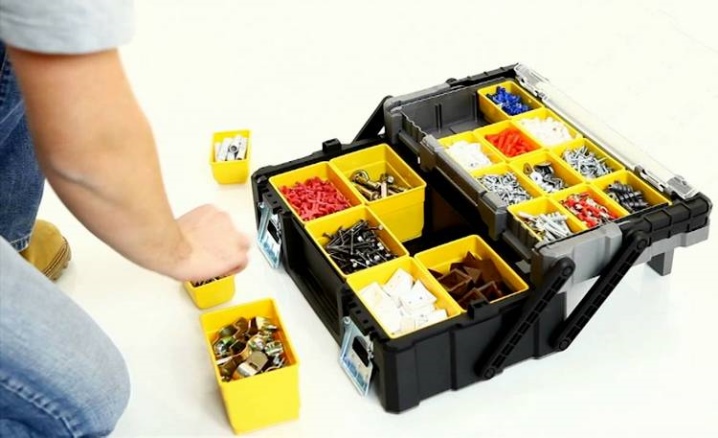
An organizer for screws, screws, nails and other things is a very functional item that serves for the following purposes:
- organization of fasteners according to individual characteristics with quick access as needed;
- elimination of loss of content, protection of it from destructive influences from the outside and damage;
- ease of transporting fasteners to the work site and storage during the period of non-use;
- maintaining order in the workshop, reducing the time to select the required part.
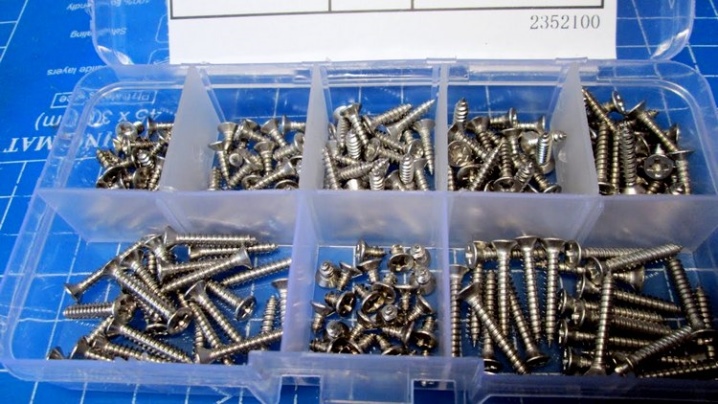
Component manufacturing
The procedure for manufacturing the rack and accessories is as follows:
- According to the specified dimensions, vertical racks from a bar and boards or plywood are cut into shelves, a perforated panel is prepared. Outline shelf spaces.
- For the manufacture of a metal frame, workpieces of the required height are cut with a grinder and the locations of the shelves are outlined. The frame is assembled using fasteners, corners. Apply a primer, then cover the parts with anti-corrosion paint.
- Shelves are assembled from boards. They are pressed tightly against each other and hammered together with nails or self-tapping screws.
- Shelves from boards are assembled by laying the elements across the frame, so they can withstand a lot of weight. If the shelves are assembled by laying the boards along the frame, then there is a possibility that they will sag under the weight of the tools.
- The structure is assembled with self-tapping screws, nails and wood glue.
- The joints of all parts are additionally reinforced with metal corners.
- The entire structure is mounted to the wall and secured with metal brackets.
- Shelves with saws, holders, magnetic tapes, racks, containers and organizers are manufactured separately in the required quantity.
- You may need a small work table with a wood plank vise. It can be attached to the wall system as a fixed or folding surface using metal or wooden holders.

Classic drawer options
This kind of DIY tool case is easy to perform.The accessories of the basic set are in sight, each in its place. It will come in handy for transferring outside the workshop. Tool carriers are heavy and should not be made large or completely out of boards. Some parts can be replaced with plywood.
Open with partition
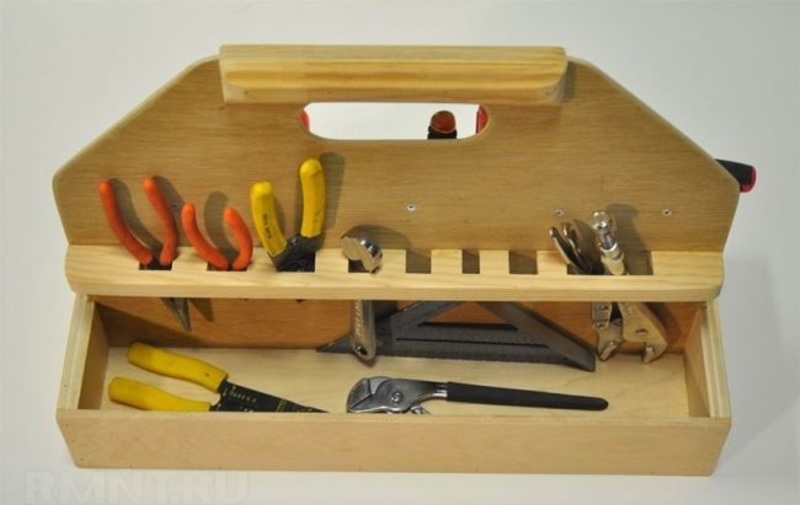
Before starting work, make sure that the material for the workpieces is dry. For the manufacture of the first option you will need the following materials and tools:
- pine boards;
- plywood;
- thermal or PVA glue;
- nails and screws;
- hacksaw, jigsaw or grinder;
- drill or brace and drill for wood;
- hammer;
- chisel;
- tape measure or ruler;
- pencil or marker.
As a material, plywood or pine trims are suitable. According to the drawing, markings are made and blanks for the body are cut out. Special grooves are cut out in which the partition will stand. To organize them, you will need a milling cutter or a hacksaw with a chisel.
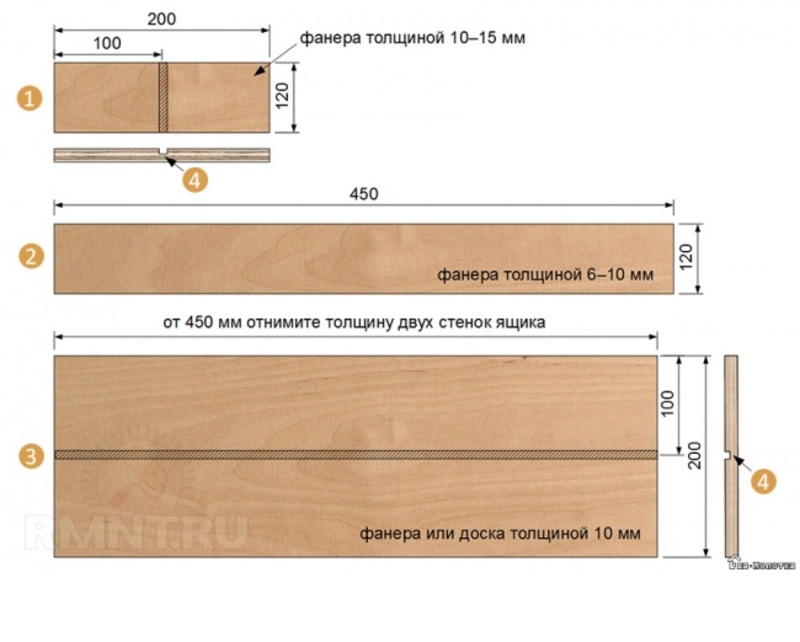
The drawing shows the classic dimensions, which are optimal for the assembly of the box. All blanks are cut according to the scheme, when changing one parameter, it is necessary to proportionally subtract or add from the rest:
- transverse walls - 2 pcs.;
- sidewalls - 2 pcs.;
- partition groove.
Grind all prepared elements, assemble a rectangular box. To prevent the structure from falling apart, the attachment points and the ends of the blanks are coated with glue. Additionally, the box is knocked down with small nails or twisted with screws.
Lining for the handle is made from the blocks. The corners of the workpieces are processed with a planer and sandpaper, fastened with glue or nails. From wooden slats, cut to the size of the partition, you need to make holders that are placed horizontally on the partition. For screwdrivers, suitable holes are drilled with a drill. Pliers, wire cutters, etc. are placed in the rectangular grooves.
The entire structure must be covered with a protective compound. To do this, you can use varnish or paint and varnish material with special additives.
Organizer in a stool
With this design of the organizer, you can transfer the tool to the desired place and sit on it and reach the place that is slightly higher than the height. Materials and tools are the same as in the previous case. Cut out from plywood:
- Cover 550x380 mm with a cutout in the center 140x40 mm.
- Longitudinal drawers 470x150x540 mm and a bevel angle of 75 °.
- Two sidewalls 306x380 mm.
- Legs and a handle are made of bars 385x40x50 mm. Saw off the bevels at an angle of 15 ° at the ends.
Homemade carrying type
If you want to craft something a little more graceful with the embossed shapes of the side racks, this homemade toolbox is just the right thing. First you need to take boards with a thickness of 16 mm. Make parts from them, as in the diagram, and take a round aluminum stick or other metal tube.
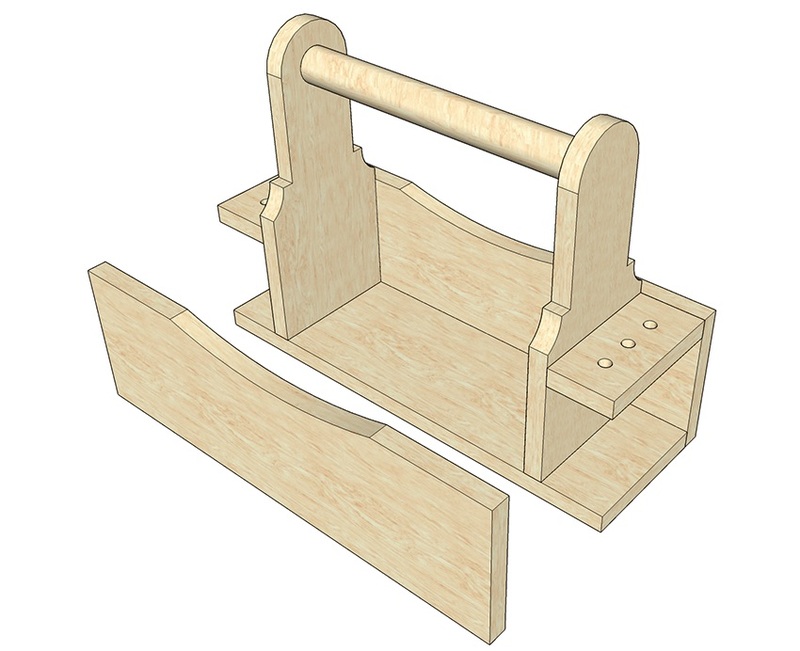
Along the lines parallel to the edges, holes are drilled on the side walls for self-tapping screws to fasten the structure. Use a sanding paper or an electric machine to remove burrs and smoothen sharp corners. After that, the prepared parts are assembled: the bottom and sidewalls are fastened with glue and screws.
By the same method, vertical posts are installed by marking, between which a horizontal handle is fixed. Screwdriver holders are screwed on with self-tapping screws. The entire surface is cleaned of excess glue and dust.
Practical storage systems for your garage or workshop.
For many, a garage is not only a place to store a car, but also a real car, locksmith and carpentry workshop.
Therefore, it is important that everything is always at hand and in the right place. But sometimes it is so difficult to understand the variety of screwdrivers, pliers, scissors, drills and other utensils that are stored in the "man's Eden"
This roundup provides simple yet effective ideas to help you create near-perfect storage systems in your garage.
DIY technology for creating a wooden tool rack in the garage
Before you create a do-it-yourself storage rack, you need to decide on the total number of tools that you need to place.
The tool should be placed on a vertical stand in a safe position.
Project creation
To make the wall system convenient, they draw up a plan-drawing of the future structure on paper, which takes into account all the requirements for the system:
- Calculate the height and width of the rack - it is better to use the entire wall from the bottom to the very top.
- The recommended depth of shelving niches is up to 65 cm, and the width between the vertical supports of the shelves is up to 1 m.
- Determine the required number of shelves, including how many shelves-holders with cuts for the tool.
- At the bottom, spacious floor shelves and racks are made for tires, wheels and for large carpentry tools.
- Mark out places for magnetic tapes, hooks, holders.
- They calculate how many organizers and containers are required, what sizes, and also determine their location.
- Sort the tool and all small fasteners and storage parts.
