Types of furniture edges
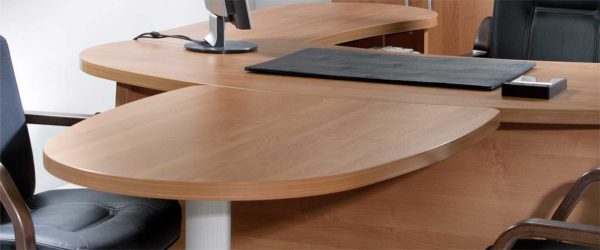
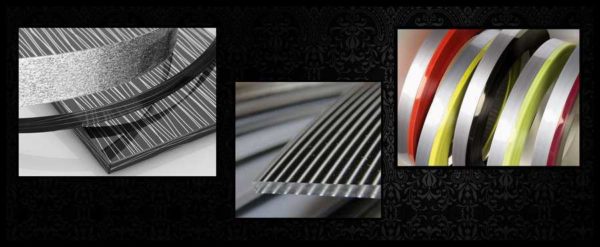
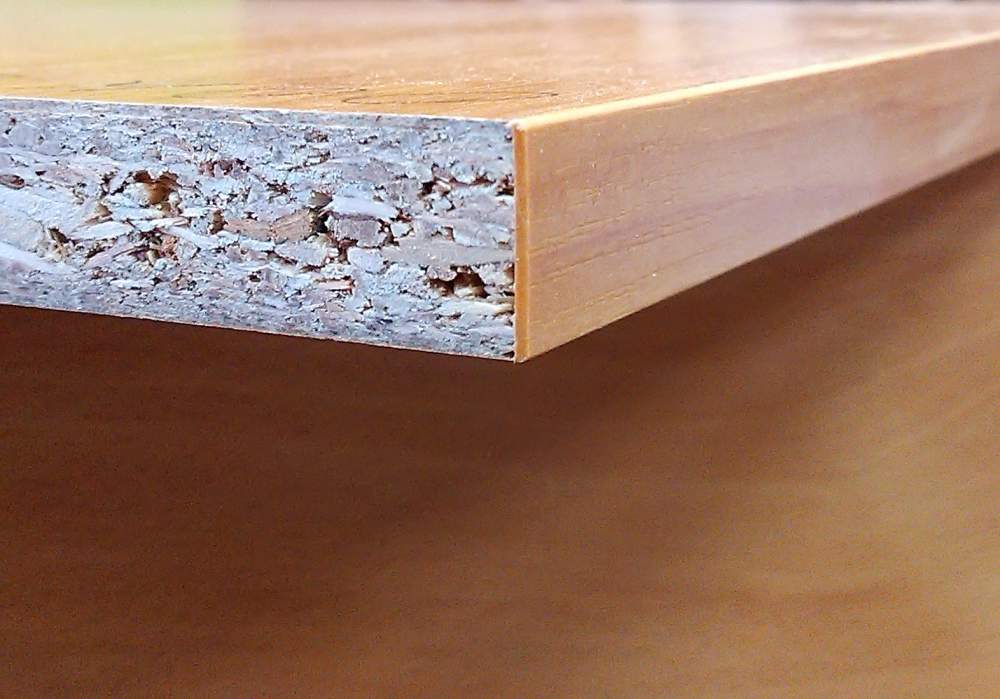
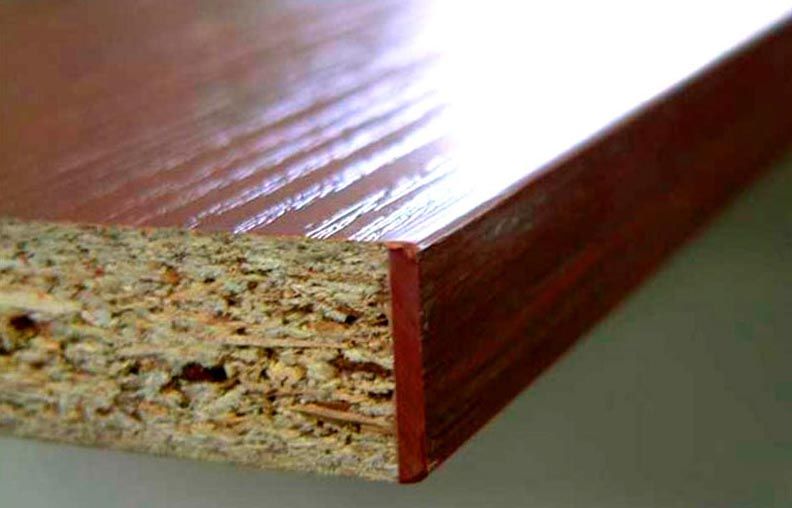
One of the most popular materials for making furniture is laminated chipboard. Its disadvantage is the ugly edges that remain when the part is cut. These edges are masked by the furniture edge. They make it from different materials, respectively, it has different properties and prices.
You can also get such an edge yourself.
Edges paper or melamine
The cheapest option is melamine-impregnated paper edging. The paper is taken with a higher density, impregnated with melamine to increase strength and glued onto papyrus paper. Papyrus can be single-layered (cheaper) and double-layered. To prevent the melamine coating from being erased, everything is covered with a layer of varnish. To make it more convenient to trim the parts, an adhesive is applied to the reverse side of the melamine furniture edge. When working, you only need to slightly warm this composition and press it well to the end.
Paper or melamine edging is the cheapest, but also the most short-lived option for finishing furniture ends.
The thickness of paper edging tapes is small - 0.2 mm and 0.4 mm are the most common. There is no thicker sense to do, and it will be expensive.
This type of edge differs in that it bends very well, does not break when bent. But its mechanical strength is very low - the edge wears out quickly. Therefore, if it is used, then only on those surfaces that are not subjected to stress. For example, on the back of shelves, countertops, etc.
PVC
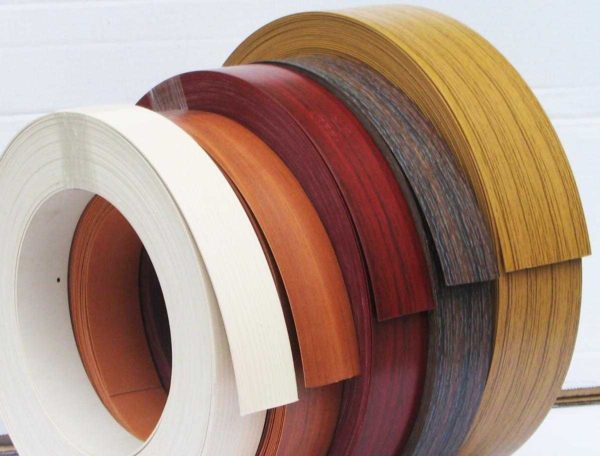
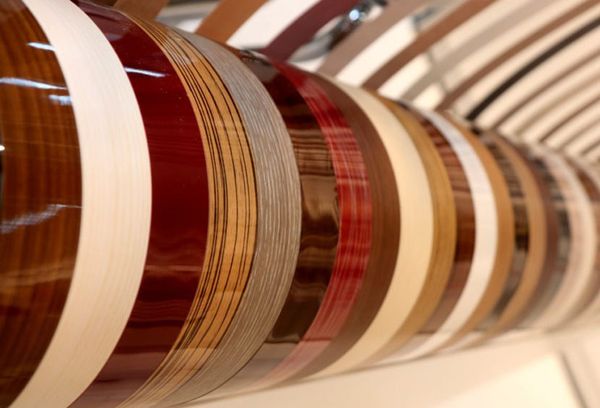
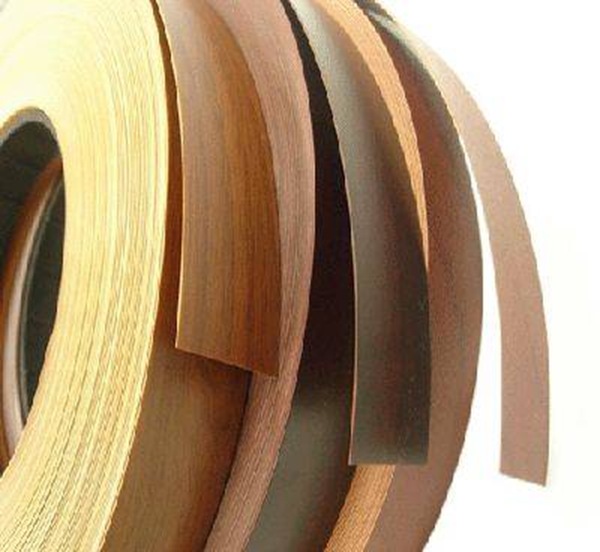
Polyvinyl chloride, which has recently become widespread, is also used in the production of furniture edgebands. From the mass dyed in a certain color, a tape of a certain width and thickness is formed. Its front surface can be smooth, monochromatic, or it can be textured - with imitation of wood fibers. The number of colors is large, so it's easy to find the right one.
PVC furniture edging is the most popular material used by both DIYers and professionals. This is due to the relatively low price and good performance properties:
- High mechanical resistance.
- Withstands exposure to chemicals (household chemicals, for example).
- Moisture-proof material protects the ends of the product from moisture.
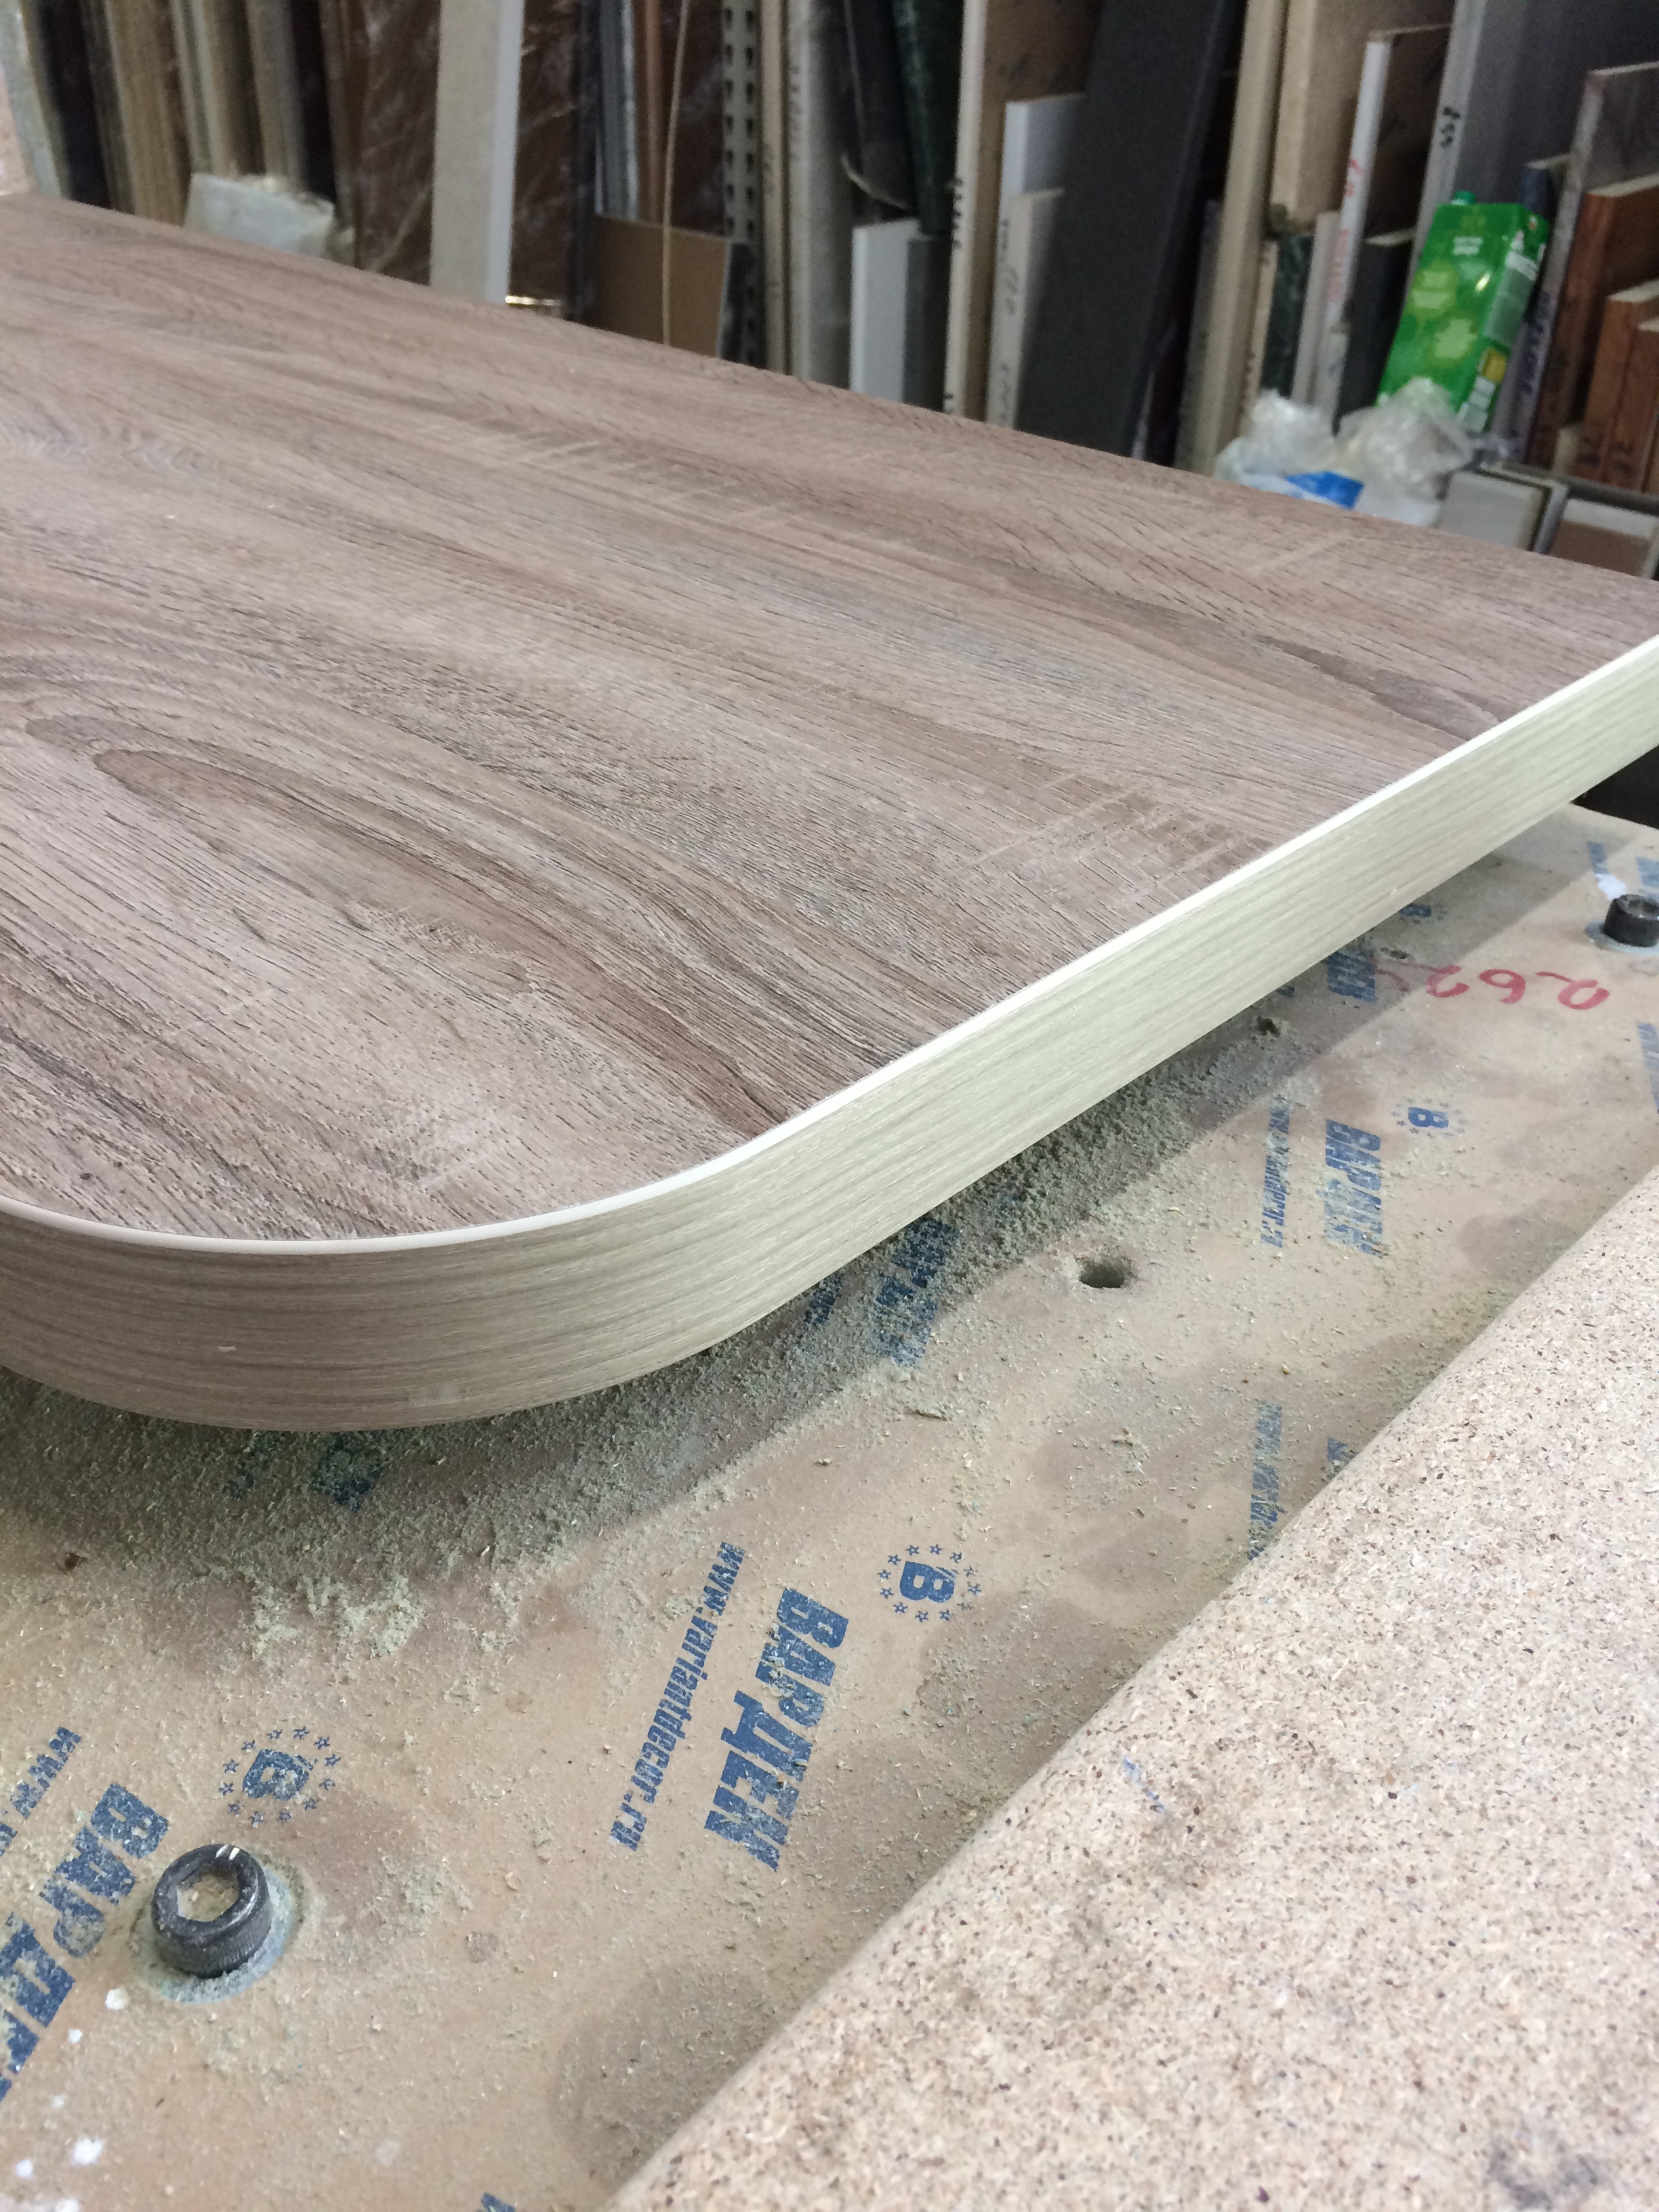
- PVC is an elastic material that allows processing curved surfaces.
- It is well processed with simple tools, which allows you to get a good result even at home.

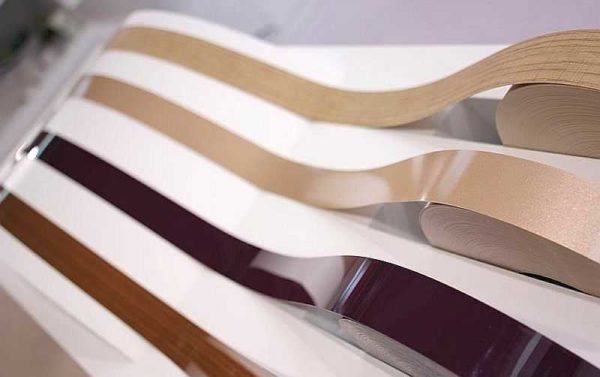
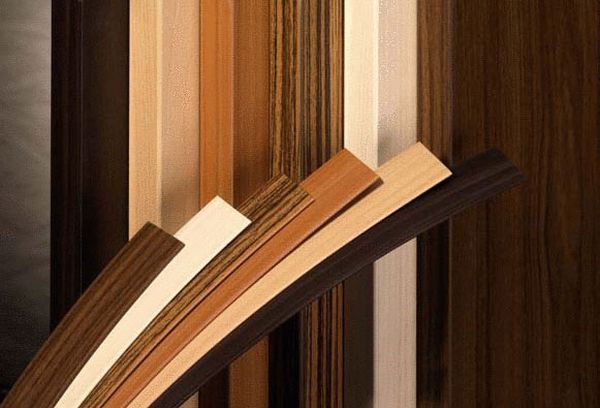
Different edge thicknesses look different
PVC furniture edge is available in different thicknesses and widths. Thickness - from 0.4 mm to 4 mm, width from 19 mm to 54 mm. The thickness is chosen depending on the expected mechanical load or appearance, and the width is slightly larger (at least 2-3 mm) than the thickness of the workpiece. There is a PVC furniture edge with an applied adhesive, there is - without. Both can be glued at home (more on that below).
This type of edging material has its drawbacks: not very wide temperature range: from -5 ° C to + 45 ° C. For this reason, furniture on the street in winter cannot be left, and also when pasting with heating, one must be careful not to melt the polymer.
ABS (ABS) plastic
This polymer does not contain heavy metals and is highly durable and durable. The disadvantage can be considered a high price, therefore it is used extremely rarely, although it has excellent properties:
- Resistant to high and low temperatures, therefore, when gluing, you can use glue with any melting point. Small shrinkage on heating - about 0.3%.
- High mechanical resistance.
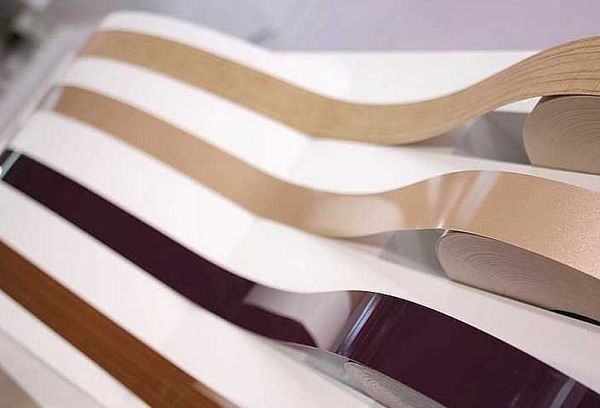
Several options for the ABS plastic edging tape
This type of edging can be matte, glossy, semi-glossy.There are also options that mimic different types of wood. In general, this material is more convenient to work with and more durable in use.
Veneer edging
Veneer is a thin cut of wood, dyed and shaped like a ribbon. This furniture edge is used in production for pasting veneer sections. Working with this material requires certain skills, and the material is expensive.
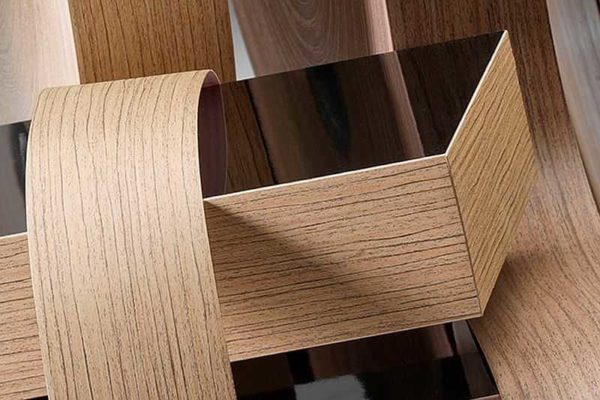
Veneer is not the most popular material for edging
Acrylic edging or 3D
Made from clear acrylic. A drawing is applied on the reverse side of the strip. The polymer layer on top gives it bulk, which is why it is called a 3D edge. It is used in the manufacture of furniture in an unusual design.
Acrylic gives the picture three-dimensionality
Chipboard end for painting
In this case, the cut can be carried out without much fear, since chips and defects can be easily corrected with a putty. If we work with laminated chipboard, but still want to paint it, then we apply primer to the entire product. Soil GF-021 or Otex from Tikkurila is suitable. If a sanded chipboard is used, then priming is not necessary, although it is desirable. We putty the butt. I use a fine filler acrylic filler. Skins. We should get a smooth rectangular edge. Sometimes this requires several iterations of sanding - putty. When the edge suits us, it needs to be fixed, otherwise it will break off or crack. Putty - the material is not very durable and reliable. We glue the edge with a construction bandage 4 - 5 cm wider than the butt end. We use PVA glue. We bend the bandage so that it sticks to the end of the chipboard and goes onto the upper and lower planes. See picture. After the glue has dried, putty the construction bandage with a fine acrylic filler. Usually one putty is used for all these jobs.
We especially pay attention to the strip where the bandage ends and the chipboard itself begins. Here it is necessary to putty especially carefully so that after sanding and painting the transition is absolutely not noticeable
We dry the putty, skin with fine sandpaper, paint.
Despite the monstrous view on the diagram on an enlarged scale, in reality, the presence of a bandage and putty on the end of the chipboard, if everything is done correctly, is completely invisible.
Unfortunately, errors are periodically encountered in articles, they are corrected, articles are supplemented, developed, new ones are being prepared. Subscribe to the news to keep up to date.
If something is not clear, be sure to ask! Ask a question. Discussion of the article.
More articles
Arc welding with your own hands. Electric welding. Self-study guide. Weld seam…. How to learn welding on your own….
How to make a reliable waste oil burner? Diagram ... Let's make a reliable heating burner on our own. Homemade o ...
We glue tightly, firmly, correctly. We choose, we select the good, the best, ... We will learn to choose the right glue and glue. The best glue is the right one ...
Homemade ladder. With your own hands. Prefabricated, collapsible, sk ... How to make a reliable folding ladder yourself ....
Close the joint of the bath + wall, tiles, tiles. Glue, glue, glue b ... How to reliably and permanently close the joint between the bathtub and the wall? If the wall is made of panels, slabs ...
How to paint varnished furniture. Table, wardrobe, shelves ... There is old lacquered (polished) furniture seriously scratched, varnished according to ...
The reasons for the extinguishing of the flame, weak or too strong burning of the stove .... Overview of malfunctions of the kitchen gas stove. Weak or too strong burning, ...
Welding, electric welding, apparatus, welder. Transformer, straighten ... How to choose a welding machine ....
PVC profile
Furniture edges of this type are usually made of high quality PVC plastic with a special high-strength coating.
Specifications:
- the presence of a wide range of colors (wood with structures, metallic, glossy, monochromatic);
- can be applied to chipboard, the thickness of which, as a rule, is sixteen by thirty-two and a half millimeters;
- the material can be both soft and hard.
There are several types of PVC profiles:
- П - shaped (overhead). They can be flexible and rigid.
- T - shaped (mortise) with or without girth.
Due to the presence of special "sides", they have the ability to ideally hide a chip or unevenness on the end surface, the cut of which was made poorly or with the help of poorly sharpened saws. In some cases, for example, with design ideas, they can also be decorative elements.
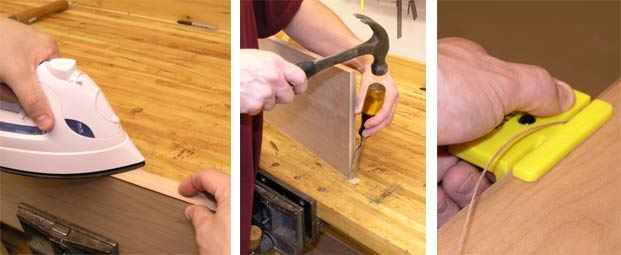
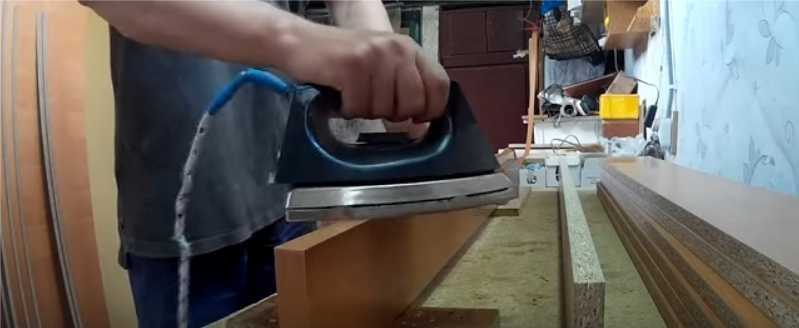
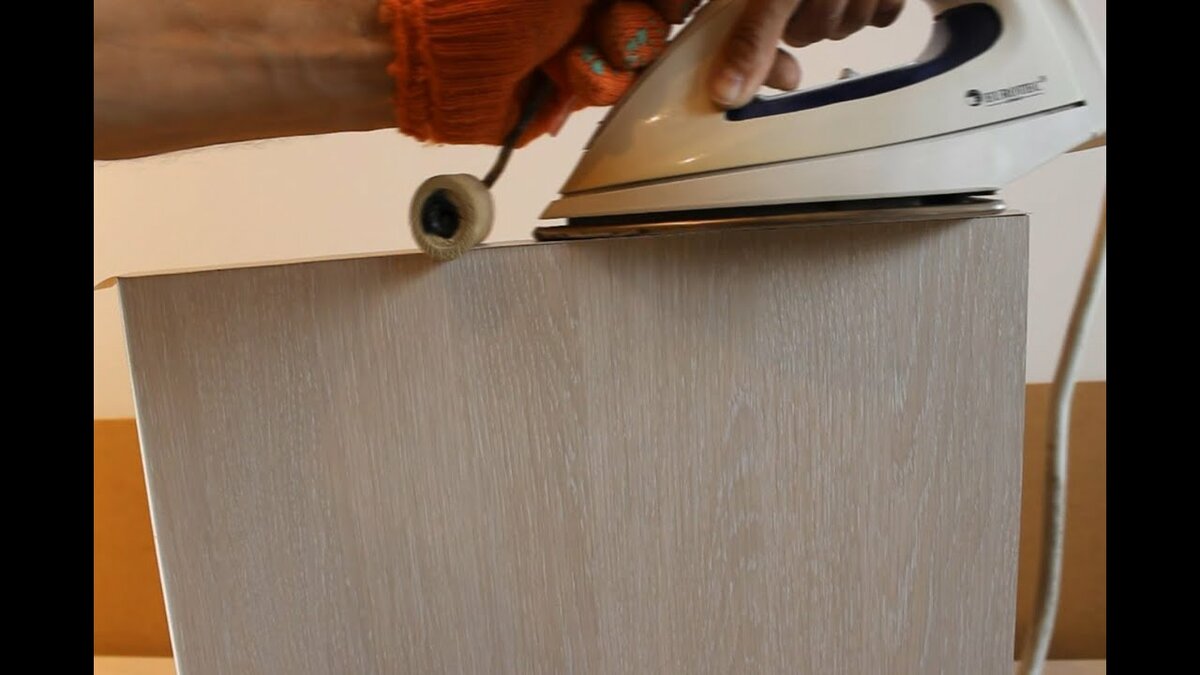
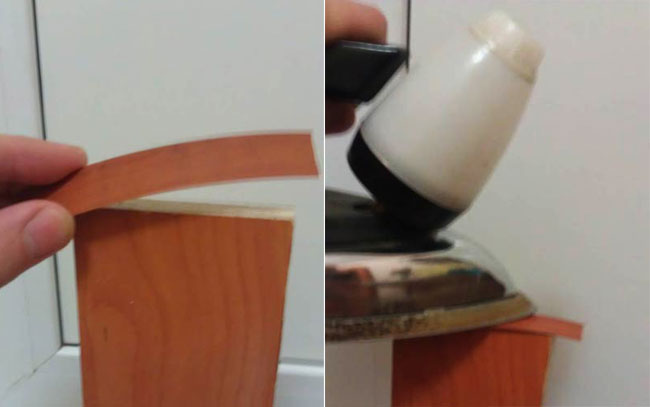
How to glue the edge on the chipboard at home? Pretty simple. For this work, it is necessary to use a tape on which an adhesive composition has already been applied. The sticker is carried out using an ordinary household iron. This is done as follows. A suitable piece of edge is cut off with a small margin, placed on the end to be processed and smoothed with an iron.
 Good day to all readers and visitors of the site ""!
As you understood from the title of the article, we will talk about how to glue the edges of laminated chipboard with an edge on your own at home without special equipment.
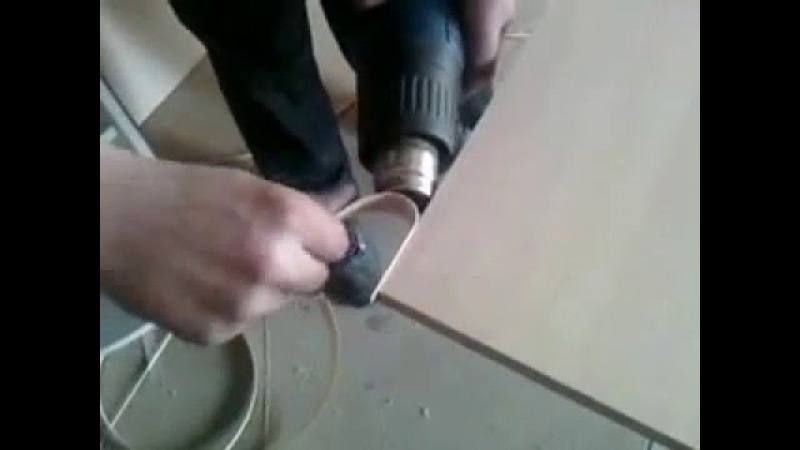
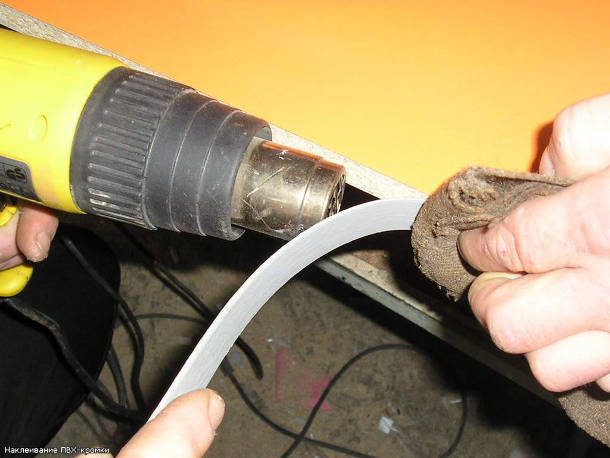
Until recently, this was very problematic for DIYers. Mostly at home it was possible to work with a regular paper edge on a self-adhesive backing. It was glued very simply, using an iron or a hair dryer by heating. I also processed a lot of furniture with paper edging. But everyone knows that the paper edge is not resistant to mechanical and other influences. In order to correct this state of affairs, they began to replace it with a plastic one.
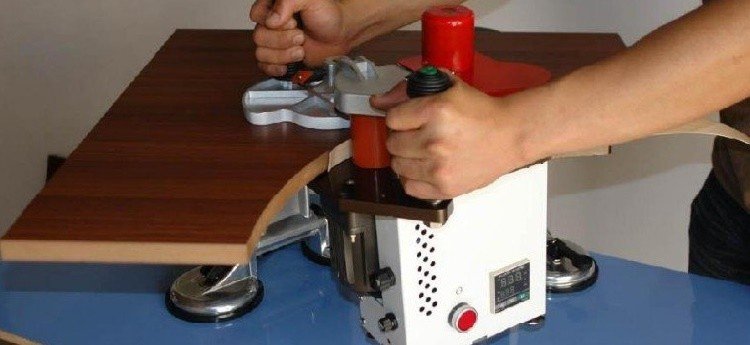
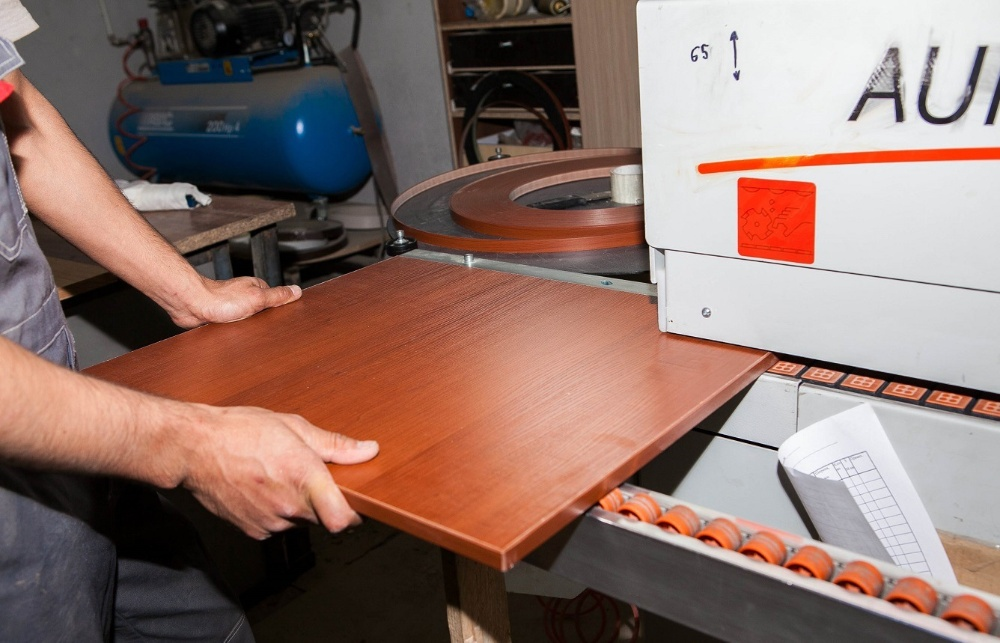
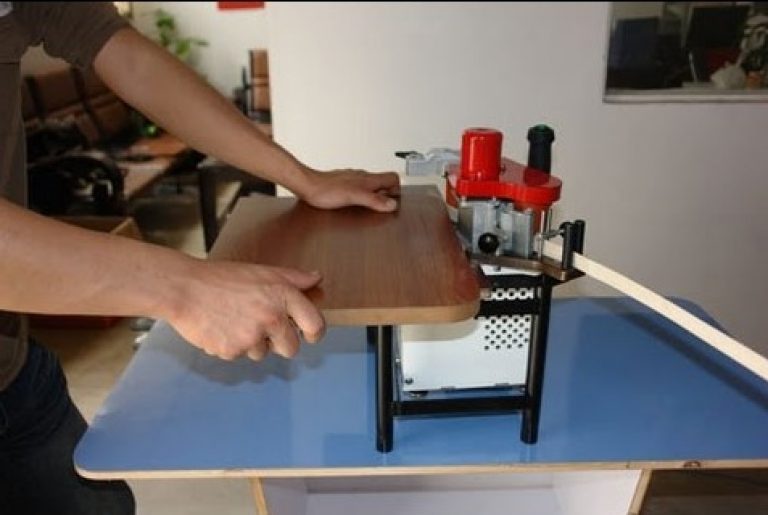
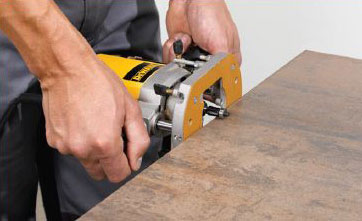
But in order to glue such an edge, you need to have a special edge machine (stationary or manual) and a router with a special cutter for processing the edge and removing excess. All this equipment is not cheap and therefore it makes no sense to purchase it for the piece production of furniture.
However, everyone wants a cabinet made in a homemade way to look no worse than a cabinet made in a furniture workshop.
Therefore, I want to share with you a method of pasting with a plastic (PVC) edge of chipboard parts using the example of a small wardrobe with a built-in mezzanine for the hallway.
I use this method myself and it is quite good. For the manufacture of a wardrobe, we need such details.
Made of laminated chipboard (16 mm).Mezzanine.
- 580 × 400 mm - 2 pcs. Lateral for mezzanines.
- 1120 × 400 mm - 1 pc. Top detail of the mezzanine.
- 1088 × 290 mm - 1 pc. Mezzanine shelf.
- 1088 × 300 mm - 1 pc. Bottom detail of the mezzanine.
- 300 × 290 mm - 1 pc. Stand-support for the mezzanine shelf.
It is required, you need it, because the shelf is very wide (1088 mm) and can bend without support.Cupboard.
- 1960 × 420 mm - 2 pcs. Side for the main cabinet.
- 1944 × 320 mm - 1 pc. Partition of the main cabinet.
- 1120 × 420 mm - 2 pcs. Bottom cabinet detail.
- 1088 × 320 mm - 1 pc. Top cabinet detail.
- 550 × 320 mm - 1 pc. Shelf for the left compartment.
- 521 × 320 mm - 1 pc. Shelf for the right section.
- 521 × 312 mm - 2 pcs. Shelves for the right section.
- 350 × 320 mm - 1pc. Additional rack for the device of drawers.
Drawers.
- 413 × 130 mm - 4 pcs. Transverse details.
- 300 × 130 mm - 4 pcs. Longitudinal details.
- 150 × 465 mm - 2 pcs. Facades.
Details from fiberboard.
- 595 × 1115 mm - Back wall of mezzanine - 1 pc.
- 1972 × 1115 mm - Cabinet back wall - 1 pc.
- 440 × 295 mm - Bottom for drawers - 2 pcs.
Components.
- Confirmation.
- Microlift 300 mm long - 2 pcs.
- Adjustable plastic supports 50 mm high - 6 pcs.
- PVC (plastic edging) - 10 m.
- Sliding system for two compartment doors + upper and lower guides.
- Furniture ties - 2 pcs. For attaching the main cabinet to the upper mezzanine.
- Telescopic slides for drawers 300 mm long - 2 sets.
The procedure for the preparation and assembly of a wardrobe with a built-in mezzanine
olya.
The preparation of the parts actually includes pasting with the edge of the ends.
Chipboard end for painting
In this case, the cut can be carried out without much fear, since chips and defects can be easily corrected with a putty. If we work with laminated chipboard, but still want to paint it, then we apply primer to the entire product. Soil GF-021 or Otex from Tikkurila is suitable. If a sanded chipboard is used, then priming is not necessary, although it is desirable. We putty the butt. I use a fine filler acrylic filler. Skins. We should get a smooth rectangular edge. Sometimes this requires several iterations of sanding - putty. When the edge suits us, it needs to be fixed, otherwise it will break off or crack. Putty - the material is not very durable and reliable. We glue the edge with a construction bandage 4 - 5 cm wider than the butt end. We use PVA glue. We bend the bandage so that it sticks to the end of the chipboard and goes onto the upper and lower planes. See picture. After the glue has dried, putty the construction bandage with a fine acrylic filler. Usually one putty is used for all these jobs.
We especially pay attention to the strip where the bandage ends and the chipboard itself begins. Here it is necessary to putty especially carefully so that after sanding and painting the transition is absolutely not noticeable
We dry the putty, skin with fine sandpaper, paint.
How to make a reliable waste oil burner? Scheme…
We will make a reliable heating burner on our own. Homemade o ...
We glue tightly, firmly, correctly. We choose, we select the good, the best, ...
We will learn how to choose the right glue and glue. The best glue is the right one ...
Homemade ladder. With your own hands. Team, collapsible, sk ...
How to make a reliable folding ladder yourself….
Why are the wires and their connections hot? How to reliably connect ka ...
We carry out electrical wiring reliably. What affects the reliability of electrical wiring, ele ...
Close the joint of the bath + wall, tiles, tiles. Glue, glue, glue b ...
How to reliably and permanently close the junction between the bath and the wall? If the wall is made of panels, slabs ...
Homemade picture frame. How to do it yourself, how to reduce the purchased one? ...
How to make a frame for a picture or photograph with your own hands, or to fit a purchase ...
How to paint varnished furniture. Table, wardrobe, shelves ...
There is an old lacquered (polished) furniture seriously scratched, varnished according to ...
To extend the service life of the furniture, chipboard is edged - applying PVC edges to the ends of the parts. Our company offers you edging, additives and other chipboard processing services at affordable prices.
2 thoughts on “Pasting with plastic edge on chipboard ends. "
As far as I know, PVC edge is thermally glued. There are specials in the workshops. machines that heat and press the edge to the end of the part. And at home, they often use an ordinary iron, and not any liquid nails, and waiting for a day. Maybe I'm wrong and PVC edges are different, and there are those that are glued to liquid nails? But I don’t know such people. In general, well done that you are not afraid and do everything with your own hands. Nowadays, not everyone decides to do something himself.
I agree that an iron, but only a paper edge.
I tried plastic (PVC) 0.5 mm as an experiment, glued it with liquid nails and I did it. To make it faster, I sometimes use a hairdryer, but where am I in a hurry, so I left it for a day.
I wrote about this in the article.
You probably haven't read it carefully.
Of course, it is possible and necessary to glue on machines, and with this I agree with you - this is indisputable!
But not everyone has such an opportunity, and not every workshop will take such an order in the amount of 2-3 parts, so my method can be used as an alternative. Or you may not use it.
I do not impose it on anyone, and even more so I do not force anyone, but simply tell how I do it. That's all.
Varieties of edge
You will have to choose the most suitable from the variety of edges.
Melamine
It is made in the form of a self-adhesive tape made of decorative paper impregnated with melamine resins. It is used, as a rule, for interior decoration of furniture. This is a budget option for chipboard edging, which is not characterized by high quality. It has a short service life, is susceptible to moisture and often disappears by itself over time.
The undoubted positive property of melamine edging is the ease of gluing it, this can be done at home on your own using an ordinary iron. The second advantage is the absence of a side, a curb protruding above the edged surface, which sometimes annoys, getting under the hands when working with the keyboard, and also interferes with sweeping away small debris, for example, crumbs from the dining table in the office.
PVC edging
It is a flexible tape with curved edges that form a side. This edging is made of PVC (polyvinyl chloride). The types of edging differ in width and profile: in cross-section, the edge resembles either the letter "t" (T-shaped), or the letter "p" (U-shaped).
The latter is easier to attach, but less reliable; masters do not recommend using it on surfaces that are often subject to friction: on the seats of stools or benches, on the front edge of a computer table, which is constantly in contact with the forearms.
PVC edging increases the durability, wear resistance of furniture parts, reliably protects edges and corners from damage.
ABS plastic
The edging is similar to the previous type of edging tape, but more environmentally friendly. Made of chlorine-free plastic. It has been successfully used in furniture production due to its heat resistance and impact resistance.
Options for edging, chipboard edge design
The options for processing the end (edging) depend, first of all, on how the sheet itself will be finished. If the sheet is laminated, and it is planned to use its laminated surface completely, that is, not to paint or cover with anything, then on the visible edges it is necessary to glue the edge tape corresponding to the type of the laminated surface, and fill in the hidden edges and glue it with a construction bandage. If the sheet is laminated or sanded, and it is planned to paint it, then the sheet itself must be primed, its edges must be puttied, sealed with a construction bandage with an approach to the plane of the sheet, the bandage must be putty and painted.
So what do you need for gluing?
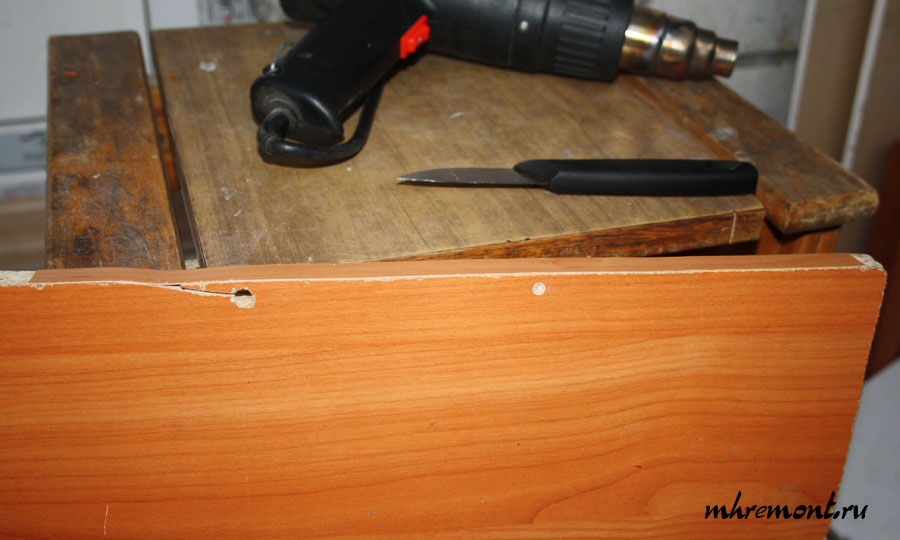
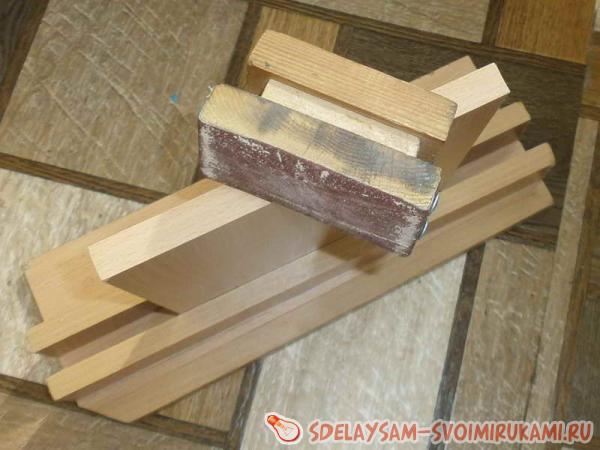
First, you need special stops into which the part is inserted.
They are usually made from chipboard waste on their own (they can be clearly seen in the photographs).
There should be at least two of them, in case the part is large.
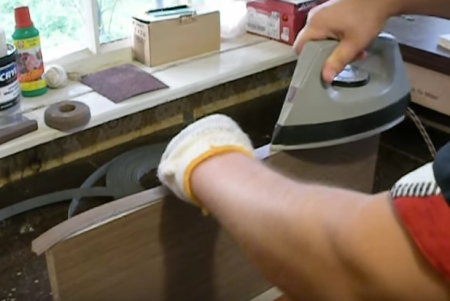
Secondly, you need an iron.
It should be heavy and spiral (old versions). In this case, he will keep a high temperature for a long time (it is measured visually, with a finger on which saliva).
Such irons can be bought at flea markets.
Warm it up and taste it.
It should not burn the edge, but it should also melt the glue that is applied to its back side well.
The yardstick for all this, of course, is experience. You need to try a couple of times, and everything will become clear.
 Next, you need to have either a sharp knife, or a scalpel, or a razor, etc. They cut off the excess edge hanging from the edges of the part.
And the last thing that will be needed is a block on which a small "leg" is stuffed. The processed ends are smoothed to it.
This is done so that the glued edge cannot be accidentally torn off.
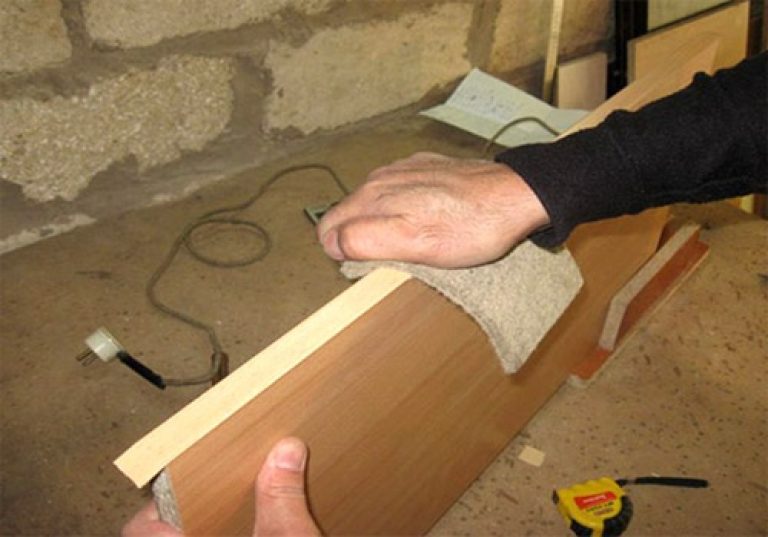
Yes, I forgot. We also need a piece of felt, which presses the newly glued edge.
 And the process itself is quite simple.
 And the process itself is quite simple.
The part is installed on the stop.
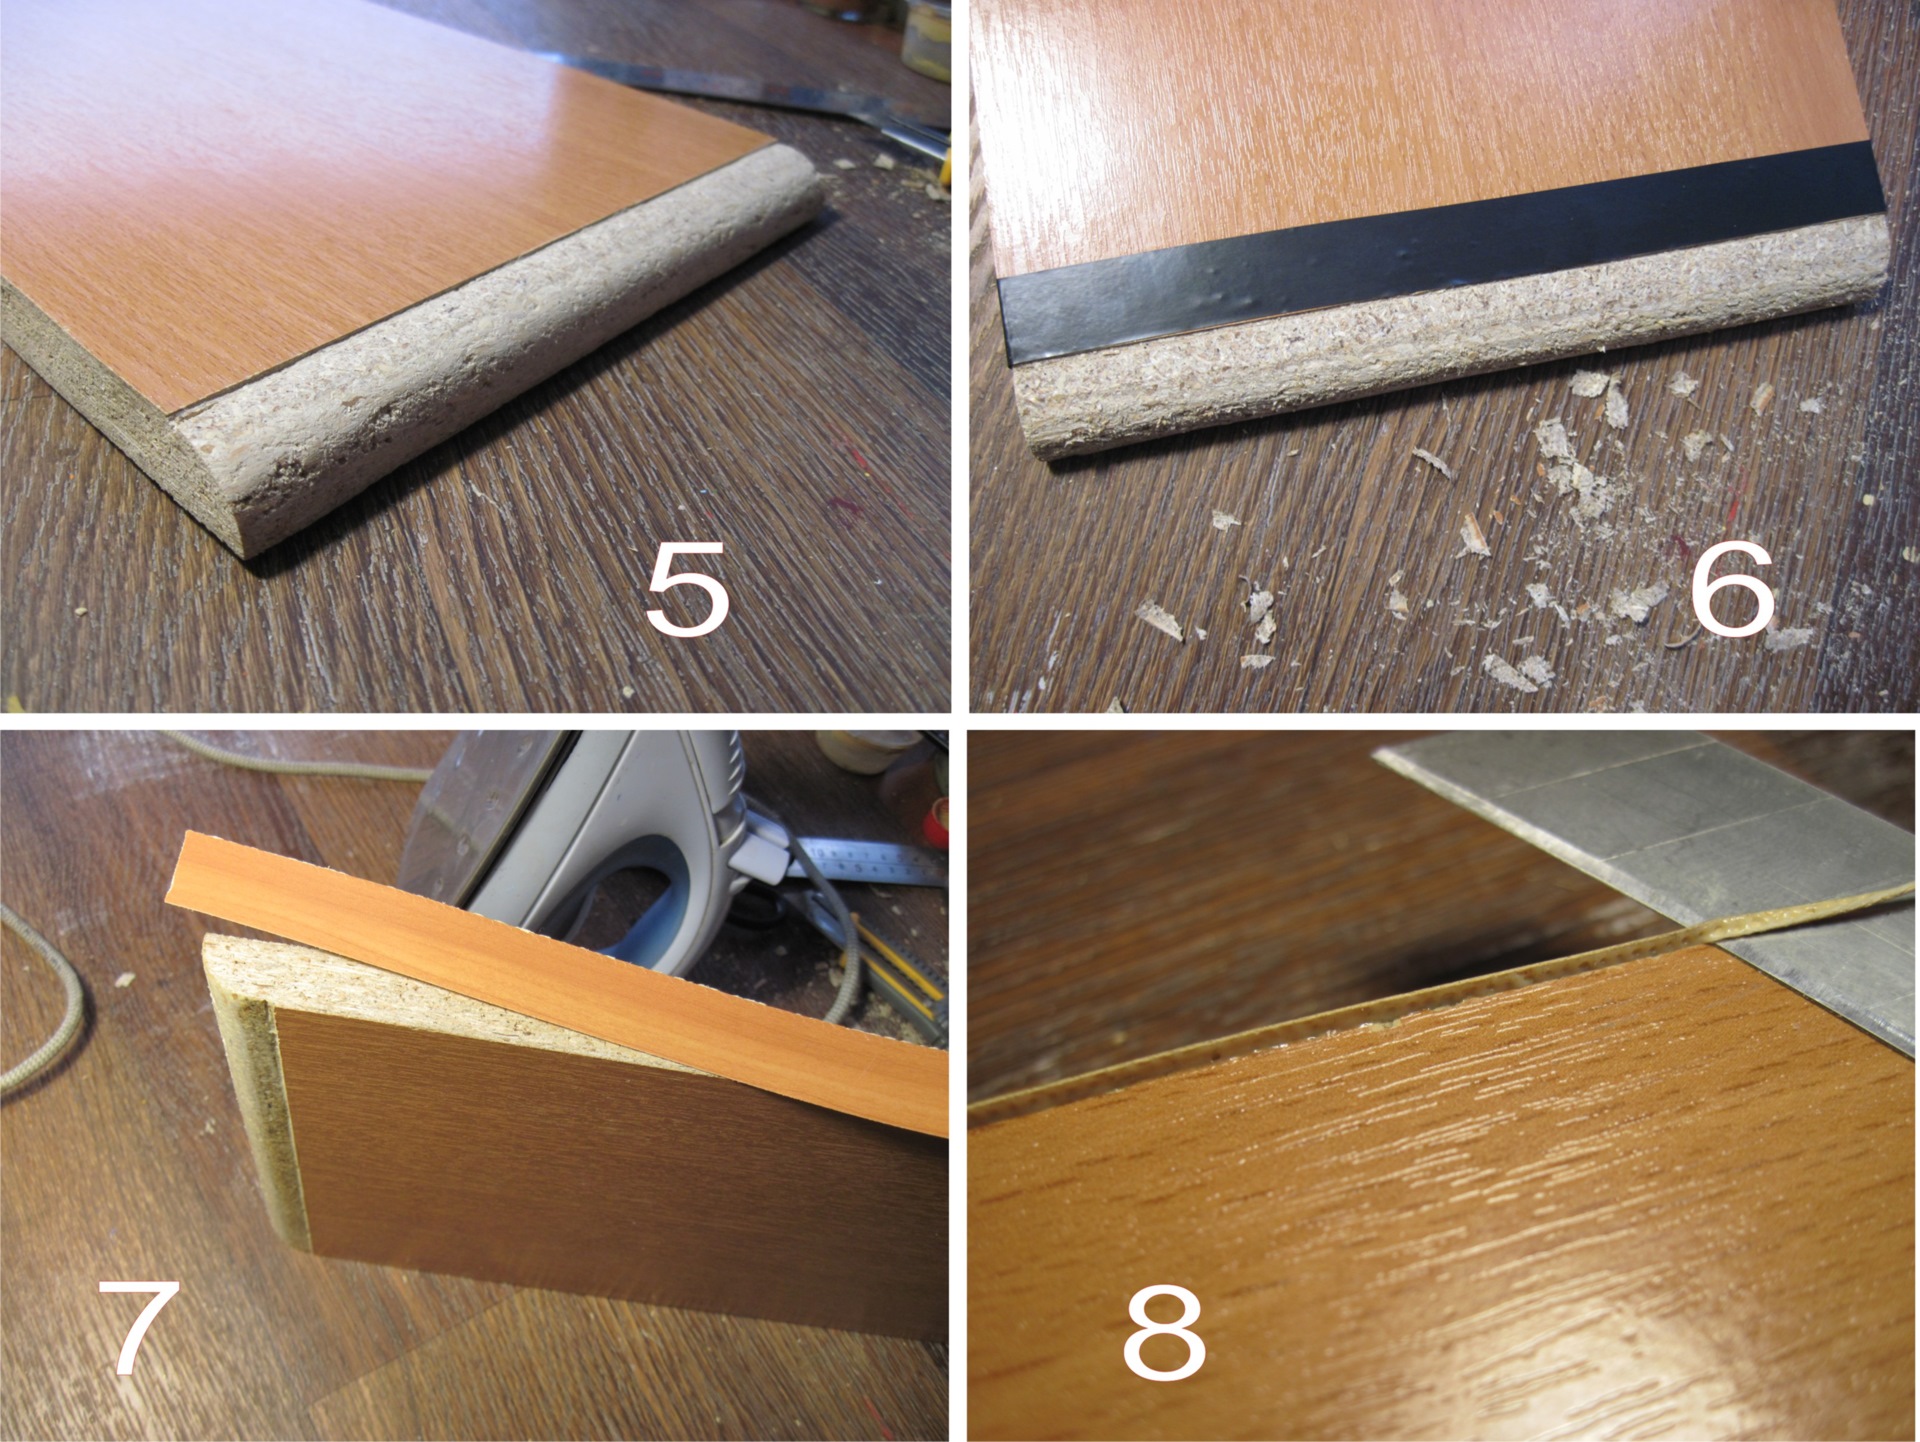
According to its size, a piece of the edge is broken off (cut off) (with a small margin) and lies on the desired edge.
After that, it is carried out on it with a heated iron "under pressure", at the same time, rubbing with force the glued part of the part with felt.
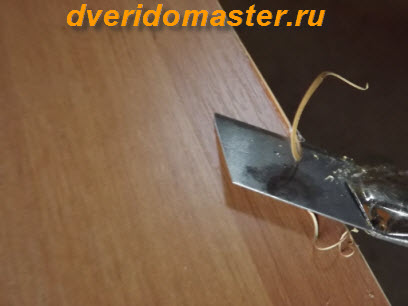
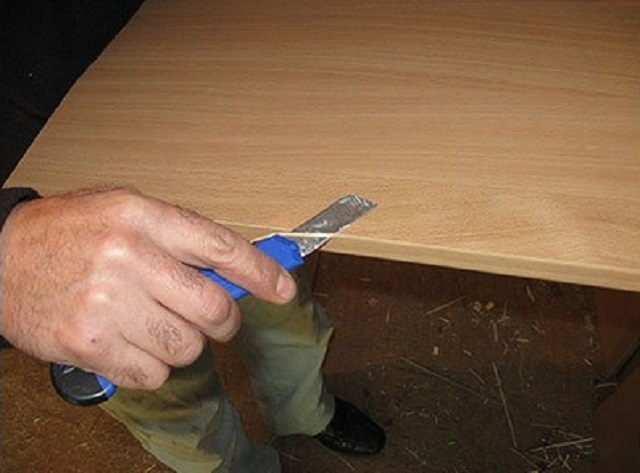
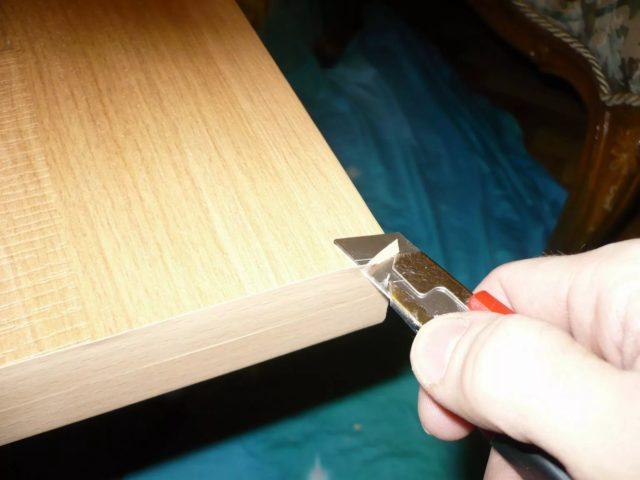
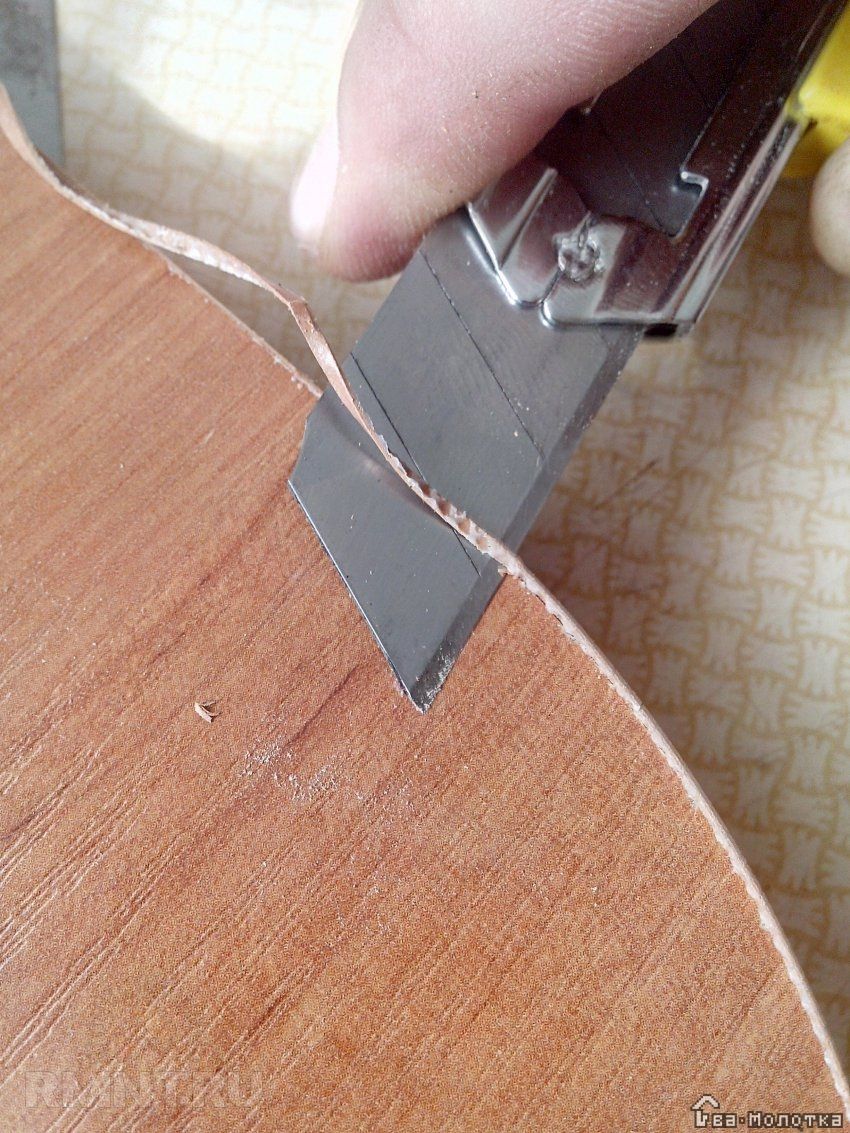
When the edge is "seized", it is cut with a knife.
This operation must be done correctly.
The blade of the knife should go along the plane of the part, thus, evenly cutting off the protruding part of the edge.
If it goes at an angle to the plane of the part, it will constantly "cut" into the corner face, and this will leave chips.
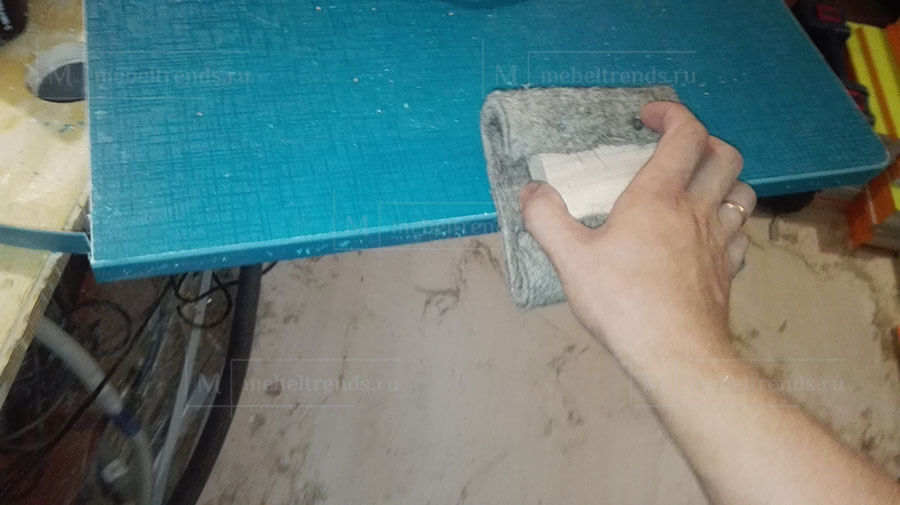
After the leftovers are cut off from the part, all edges along the edges of the part are rubbed with a "foot".
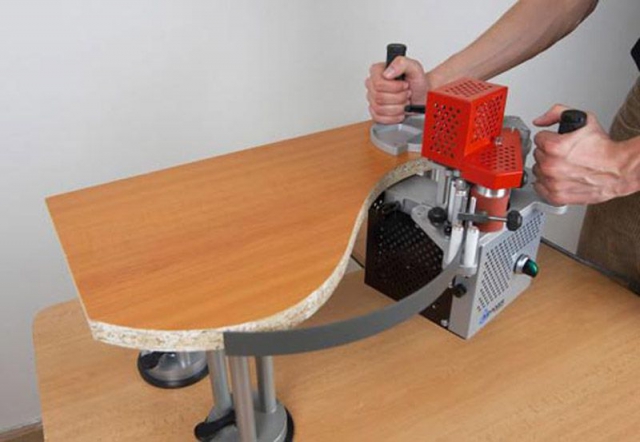
If the detail, or with rounding, then the situation is more complicated.
First, you need to process such a part with a milling cutter so that it has the correct edges, and only then proceed to gluing.
But in this case, the whole procedure, of course, will be more complicated.
Therefore, I will repeat: these things should be ordered “on the side”.
That's all.
The edge in furniture production is necessary to protect the end edges of the product from chips, cracks and other damage, and it also protects against moisture and formaldehyde vapors.
You will learn about the types of edges, as well as the methods of gluing them and how to glue the edge with an iron and a hairdryer, from this article.
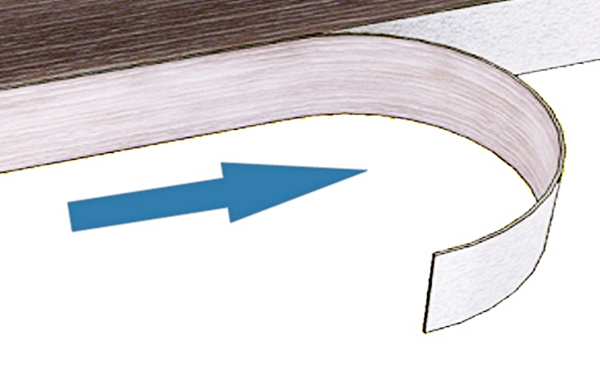
The process of pasting the edgebanding is carried out in stages.
After unwinding the coil, attach it to the end of the part, leaving a little edge for trimming. In the standard, the width of the edge is 2.1 cm, and the chipboard, as a rule, has a width of 1.6-1.8 cm, so there will also be a margin for trimming and rubbing the edges. In order not to do unnecessary work and not to cut the edge lengthwise from two edges, it is better to align it on one side, and then cut off the excess only on the other side.
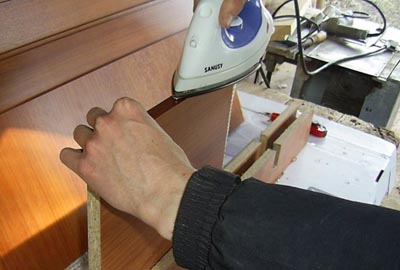
After attaching the edge to the facade, start heating and ironing it with an iron
Particular attention should be paid to the edges of the ends - there it is necessary to iron it most carefully.
Details of small lengths are ironed entirely and immediately, while longer sections should be heated and ironed in parts - in sections of 40 centimeters. The end is cooled with felt or a damp cloth.
Based on the quality of the tape used, the heating temperature of the iron is selected and regulated
If everything is set correctly, then the iron glides directly over the surface, does not cling to anything and does not scratch the edge. If the heating is correct, then the adhesive under the edge will spread evenly. And if you overdo it too much and overheat the edge, then bubbles will go and the edge will have to be removed and thrown away.
If you nevertheless spoil some area, then in order to remove the spoiled material, you need to heat it up again and pry it off with a knife. After cleaning the surface, you can start gluing again.
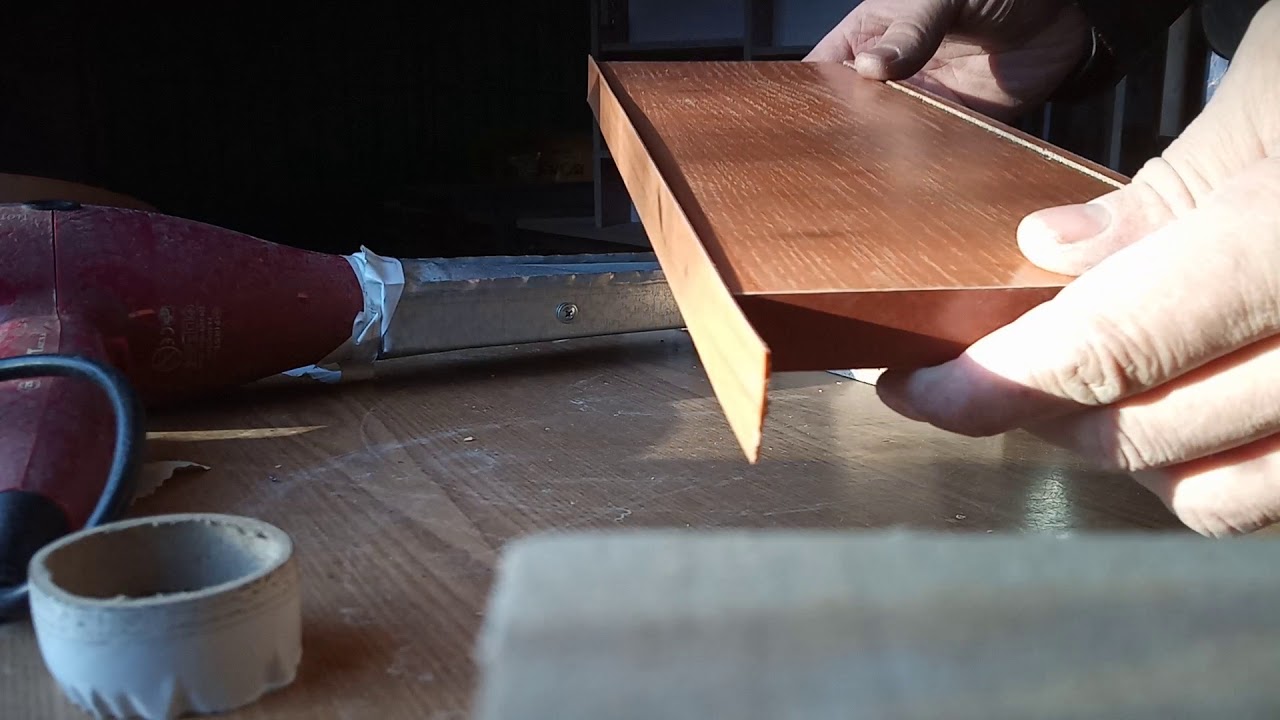
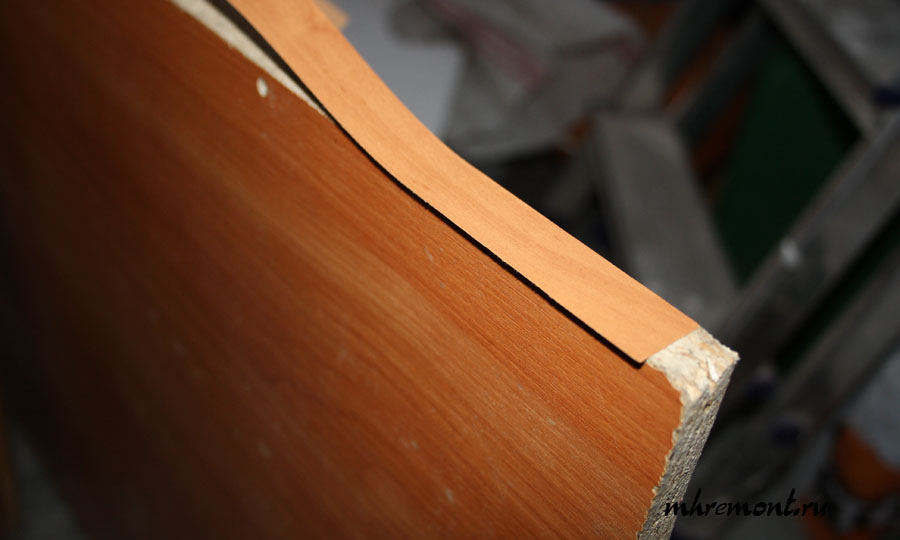
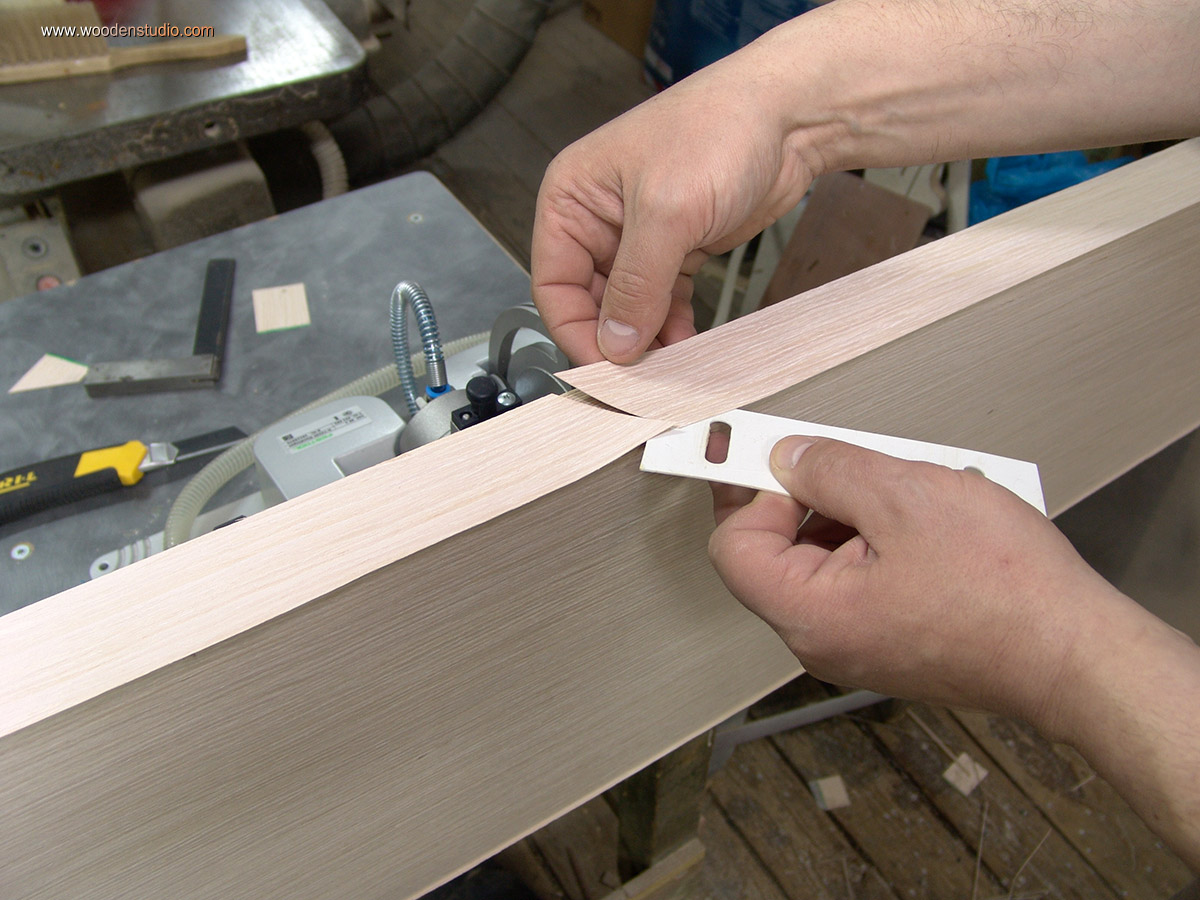
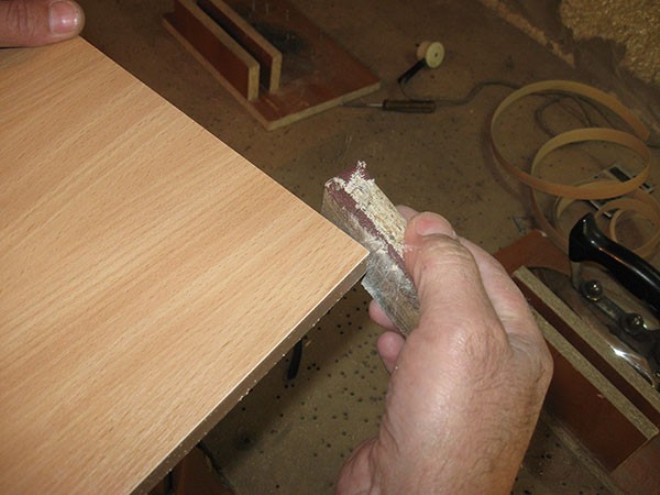
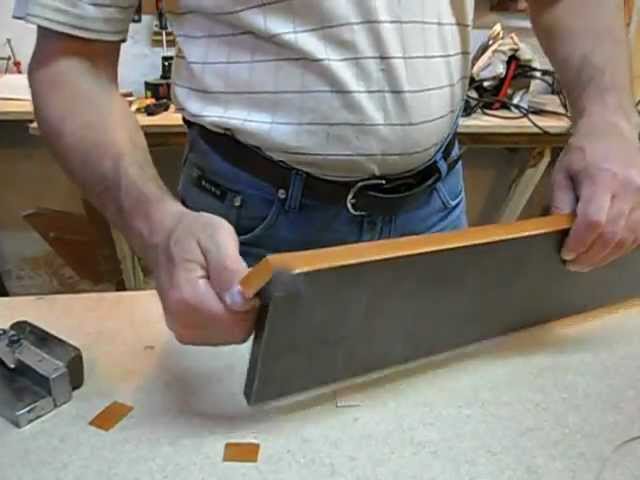
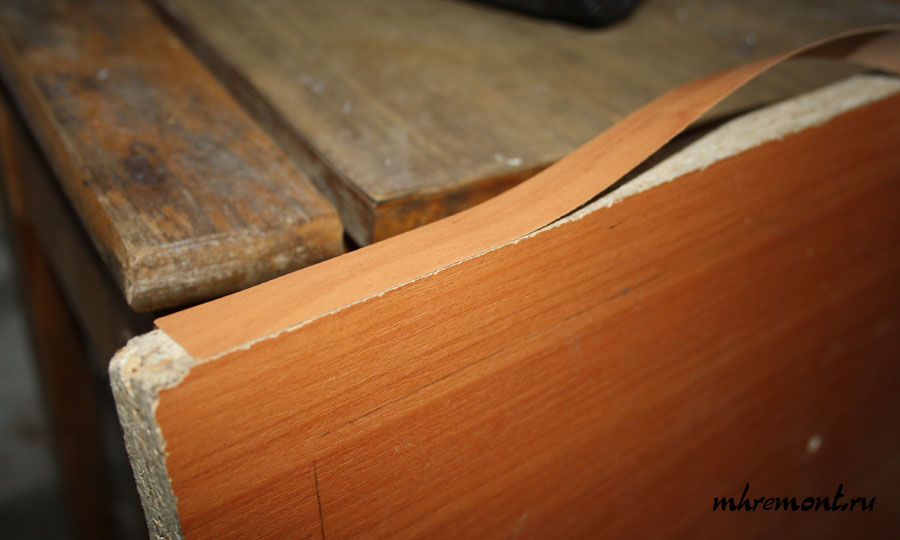
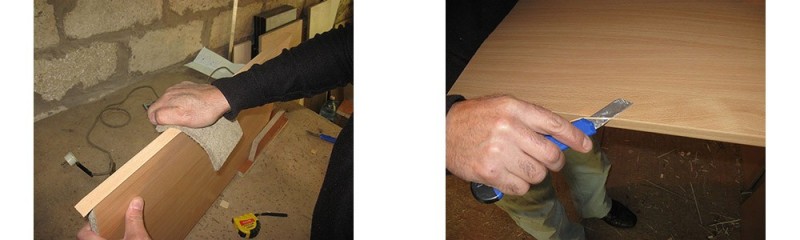
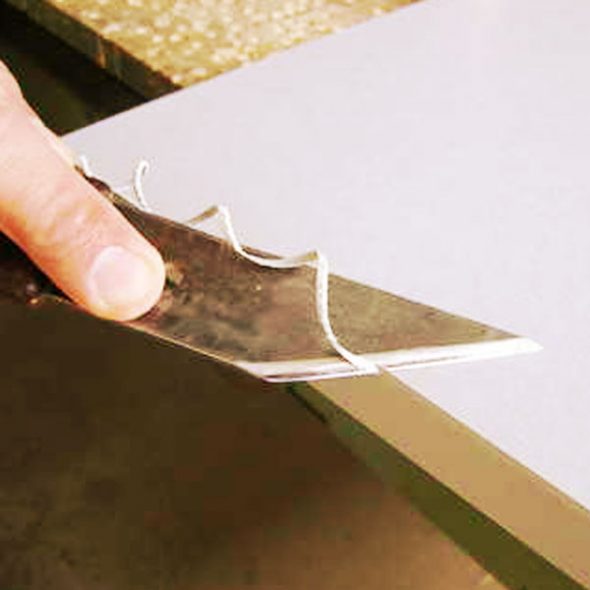
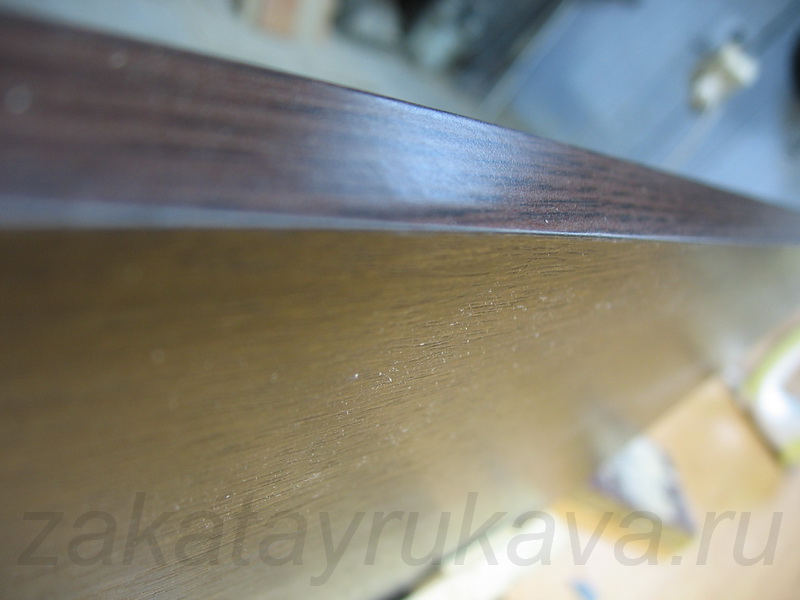
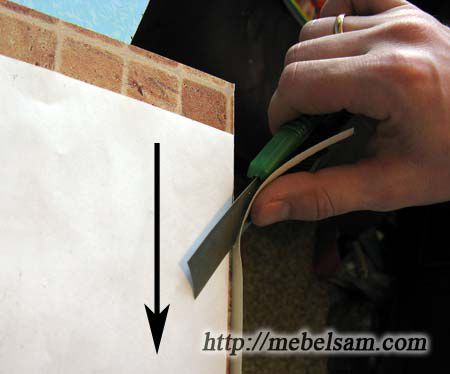
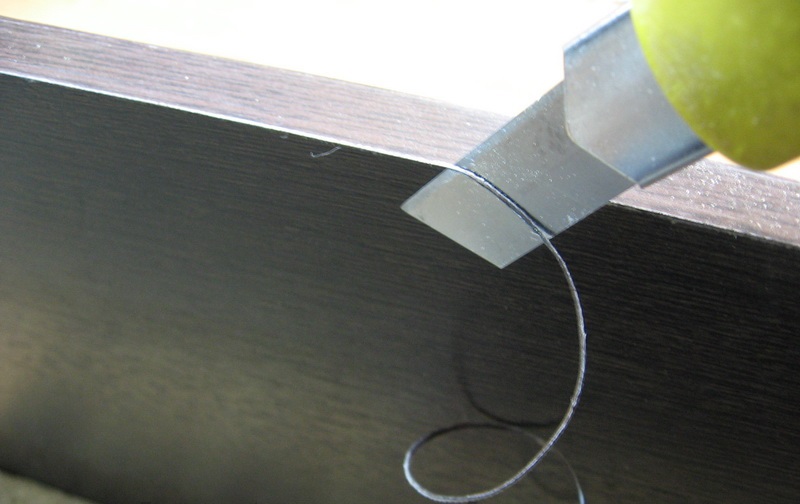
If the edge is of high quality, then it will stick only after it has completely cooled down. Having found that the edge has completely cooled down, you can start trimming the excess. You can cut correctly by bending the edge, rubbing it with a bar until a white chamfer is visible. Having seen the backing, you can already cut off unnecessary material.
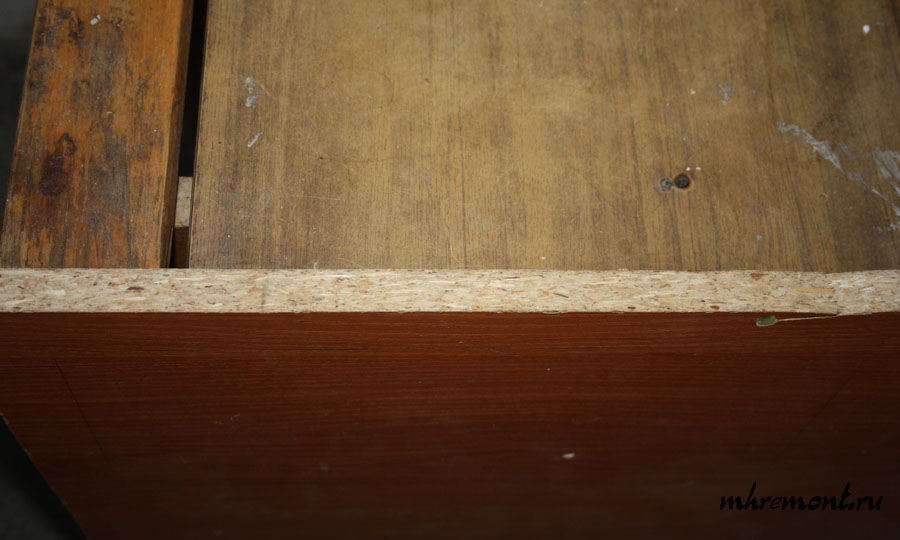
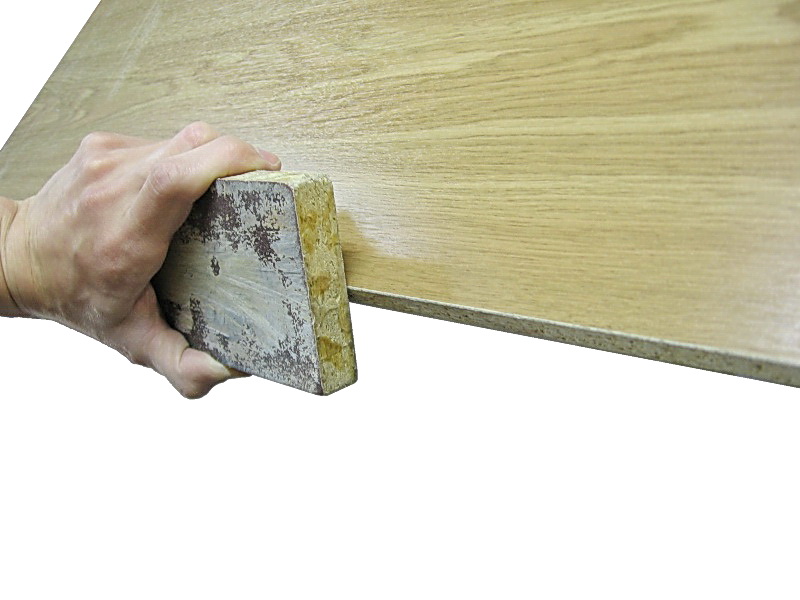
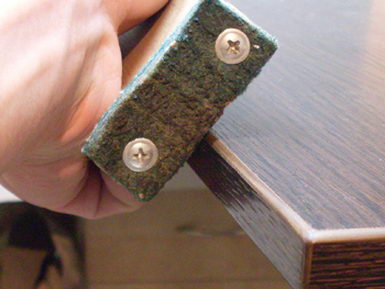
After trimming, all edges are carefully and thoroughly rubbed with a bar with sandpaper. At this stage, the gluing of the melamine edgebanding is finished. And you can safely start installing the handles.
How to glue the edge with an iron
Edging in production is carried out with a tape with a clean base. The adhesive composition is applied to it during installation at a high temperature, which ensures the formation of a thin even layer. In order to glue the edge, several rollers are used, pressing it tightly to the base of the chipboard. Then special cutters cut the tape to the size of the part, remove the remnants of glue and base material and grind the joint until a smooth and beautiful surface is obtained.
You can also glue the edge at home. To do this, you need to use a tape with an already applied adhesive. Further, the process largely repeats industrial edging, since it is carried out in the same way:
You can find out more about the process of gluing the edge on chipboard in the video below:
It is somewhat easier to glue the U-shaped profile on the end of the chipboard. We have already discussed this method earlier. Such an edge is much stronger than melamine, it bends quite easily and reliably protects against damage.
Chipboard edging, of course, is best done in the factory. In production, you can order a tape from any material, including plastic, PVC and other modern composite materials. Edging on the machine will provide ideal evenness and accuracy of applying decorative facing, but it requires certain costs. If the main task is to keep within a predetermined small budget, applying melamine tape with your own hands will allow you to combine acceptable quality and minimum price.
You might be interested to know
This article, most likely, will not be of interest to professional furniture makers. But for amateurs who, for some reason, do not have access to a PVC edge with applied glue, but really want to revet their furniture with a PVC sheath, it will have to be "in the cashier". Moreover, you can mold not only 2 mm, but also 0.4 mm PVC edge.
Today we will talk about the process of gluing this type of edge not to traditional hot melt glue, but to contact glue.
I use glue, but you can use the traditional moment.
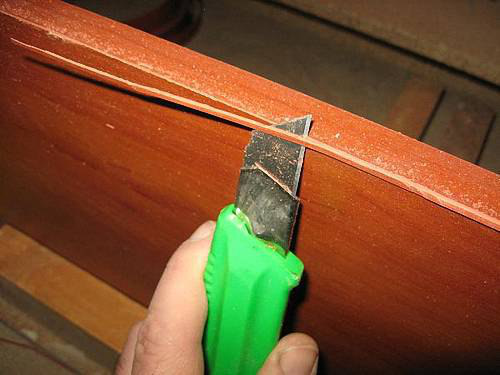
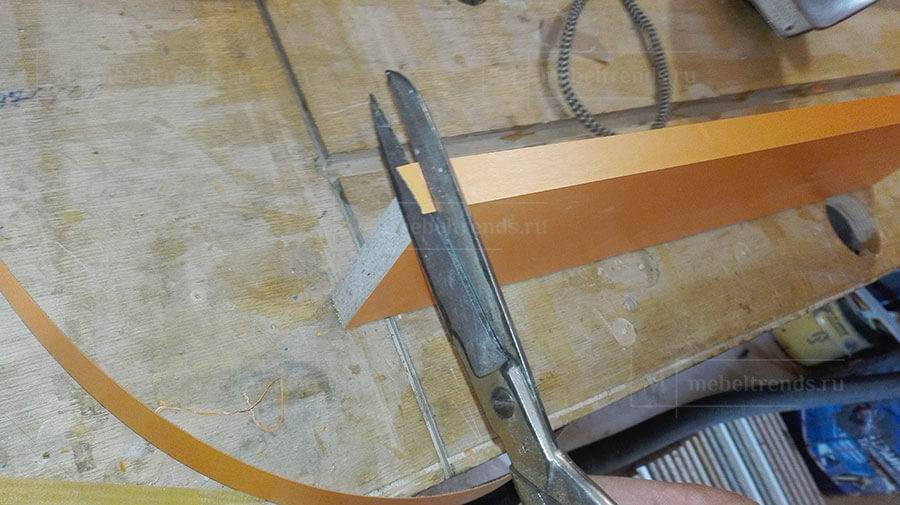
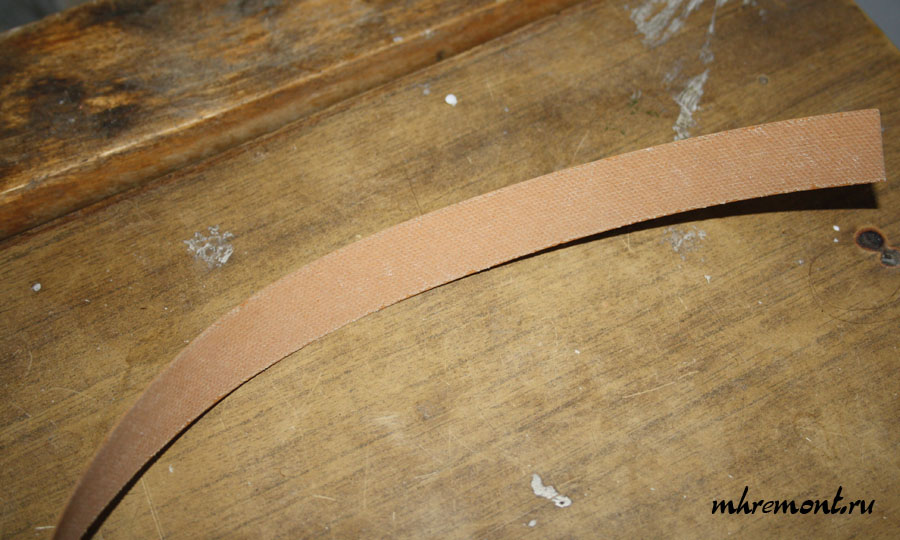
We cut the edge into pieces slightly larger (about 10 mm) than the length of the part to be glued (I will glue the ends in the photo). A garden pruner is great for cutting, but you can simply scratch the edge with a sharp object - it will break exactly where the scratch was.
We apply glue to the part (some adhesives imply application to both glued surfaces - read the instructions).
Then we turn the part over and lay it on the edge, pressing it to a flat surface.
Now the part must be fixed before the glue dries.
For this, you can use specialized edge clamps. I use them - they are screwed onto regular F-shaped ones.
It is better to press through a wooden block for a more even distribution of pressure.
The second option is to use special clamps. I made one out of a couple of pieces of plywood and hairpins.
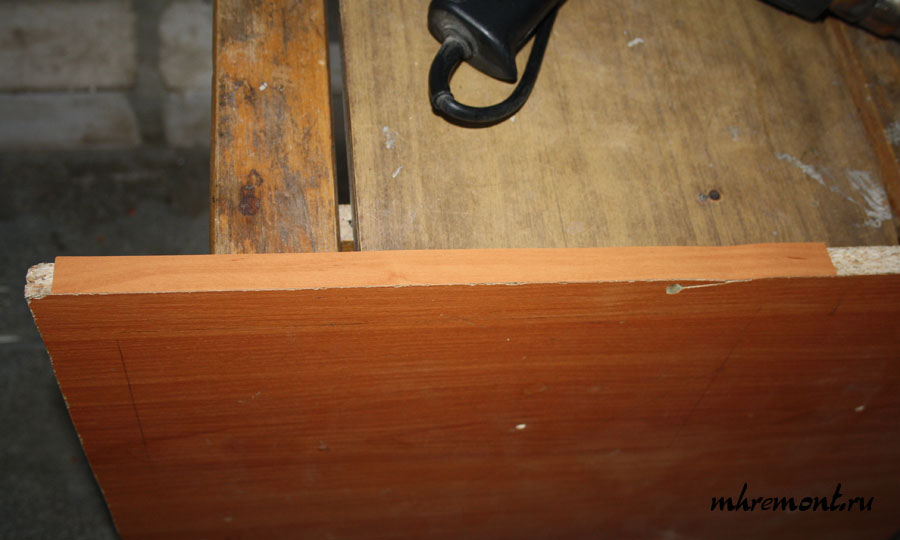
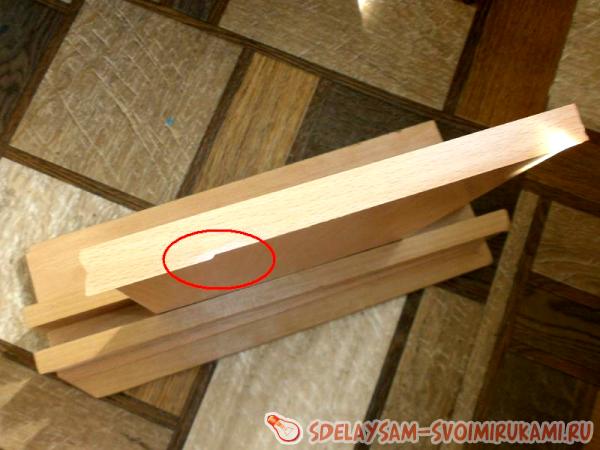
After the glue has dried, we release the parts from the clamps and cut the ends. This can be done either with the same pruning shears or again by scratching and breaking off.
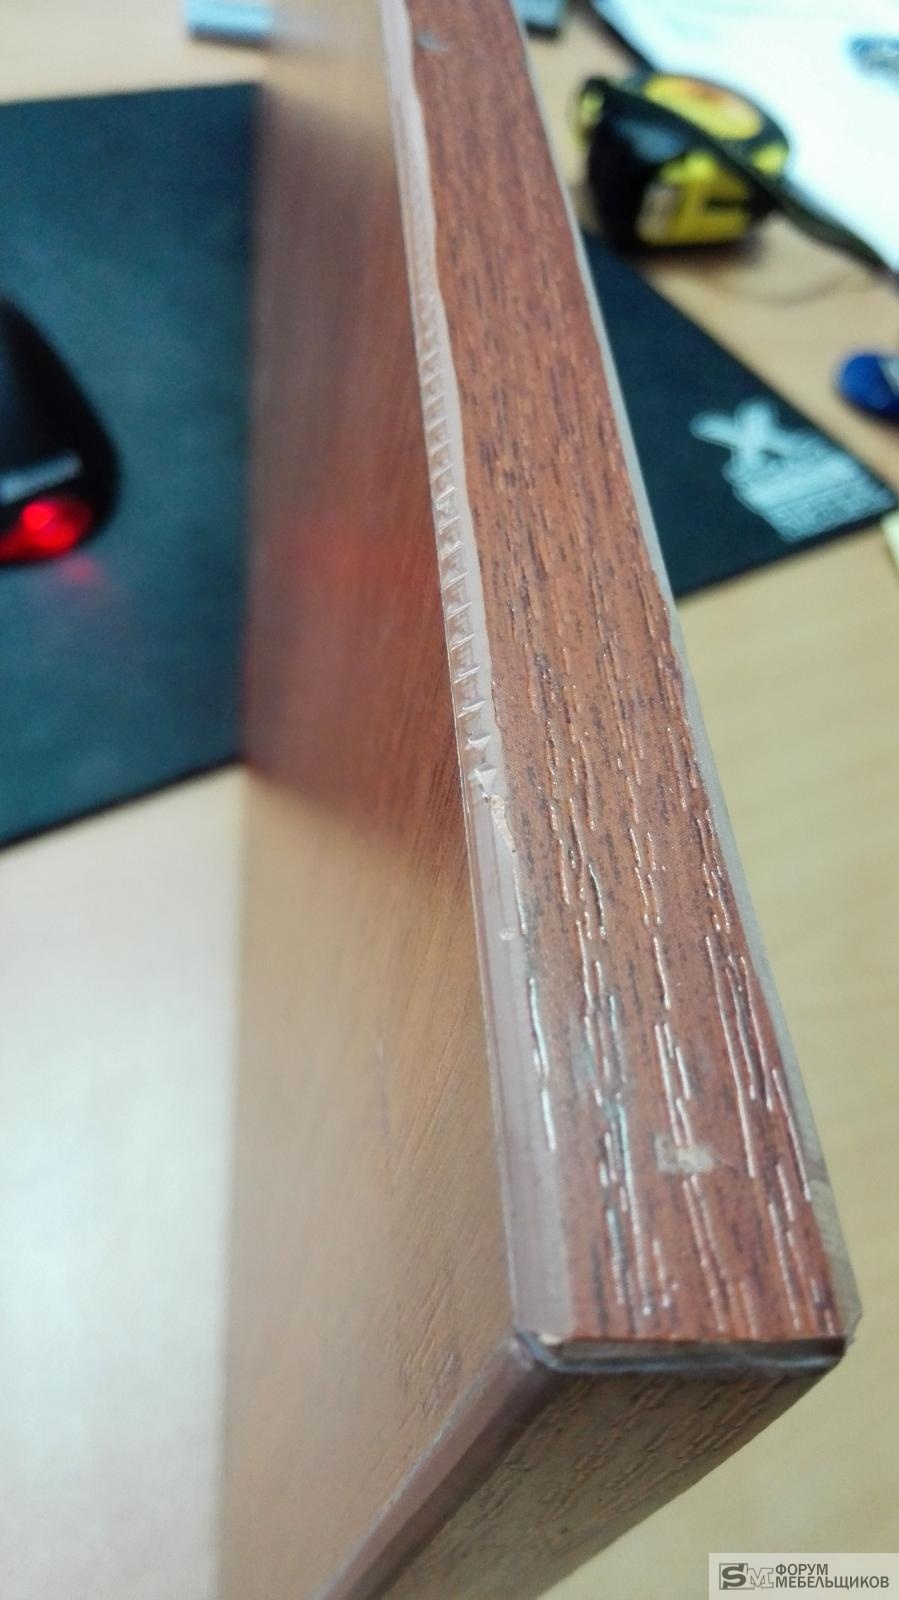
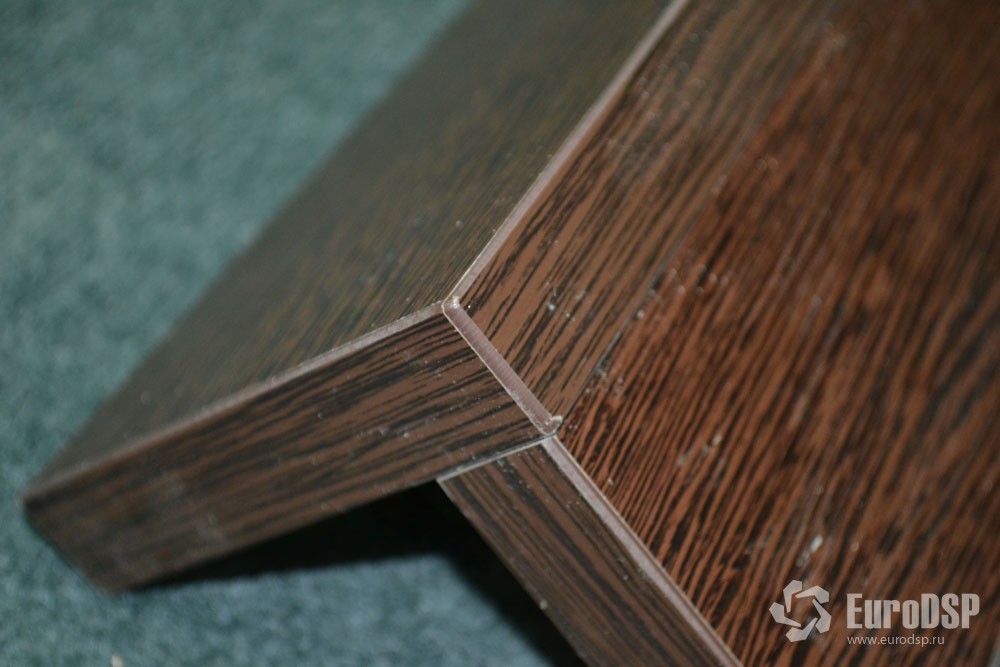
In both cases, you get such a cut, which sometimes you have to finish a little with a fine sandpaper on a block.
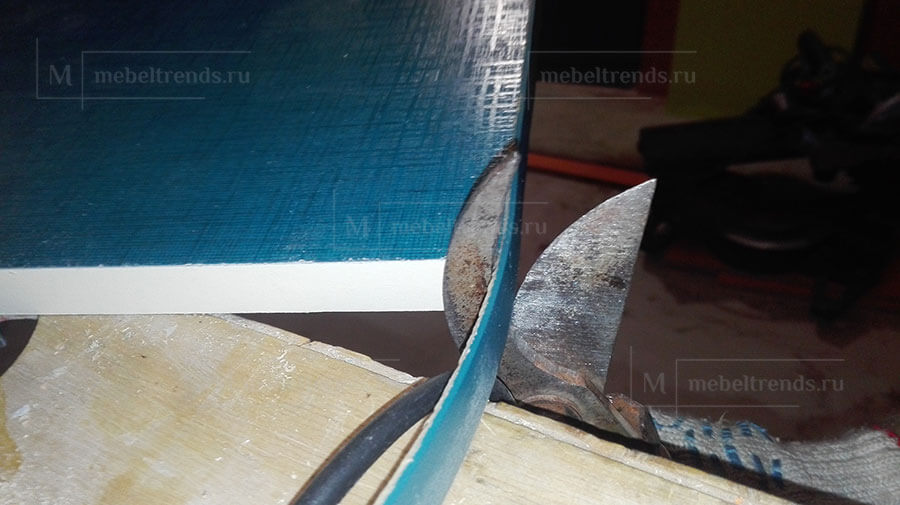
Now let's move on to removing the overhangs from the edges.
Process steps
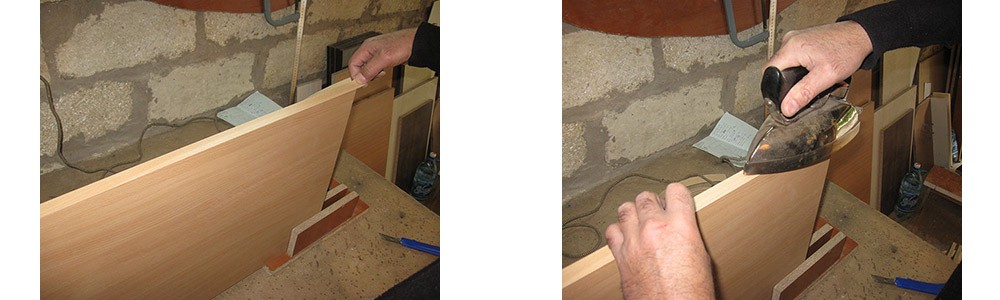
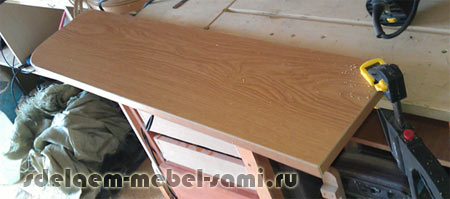
To glue the tape, you need to position the part correctly. That is, vertically. In this case, the end that is being processed must be at the top. Keep the sheet in a stable position so that it does not move. In this case, you can use a special device.
Then prepare the required piece of edging. To do this, it is carefully measured and cut off from the common tape. Moreover, its length should be 3-5 cm more than the side that is being processed.
It is necessary to start gluing from the middle. The tape is laid on it, while the edges should be as even as possible. Then, holding it with one hand, smooth it with the other with an iron that has been preheated. Choose its temperature experimentally. As practice shows, a high one can lead to the appearance of bubbles on the edge, and a low one does not provide adhesion.

Do not put too much pressure on the iron, as the edge in this case may budge. As a result, the gluing will be crooked. But if you press lightly, then it will not stick. Moderate force is required.
You can also determine the quality of gluing in the process. During the ironing of the surface, glue should be squeezed out from under the tape. Particular attention must be paid to the ends of the product and the place where it comes into contact with the surface that is pre-laminated, since these areas adhere worse than others.
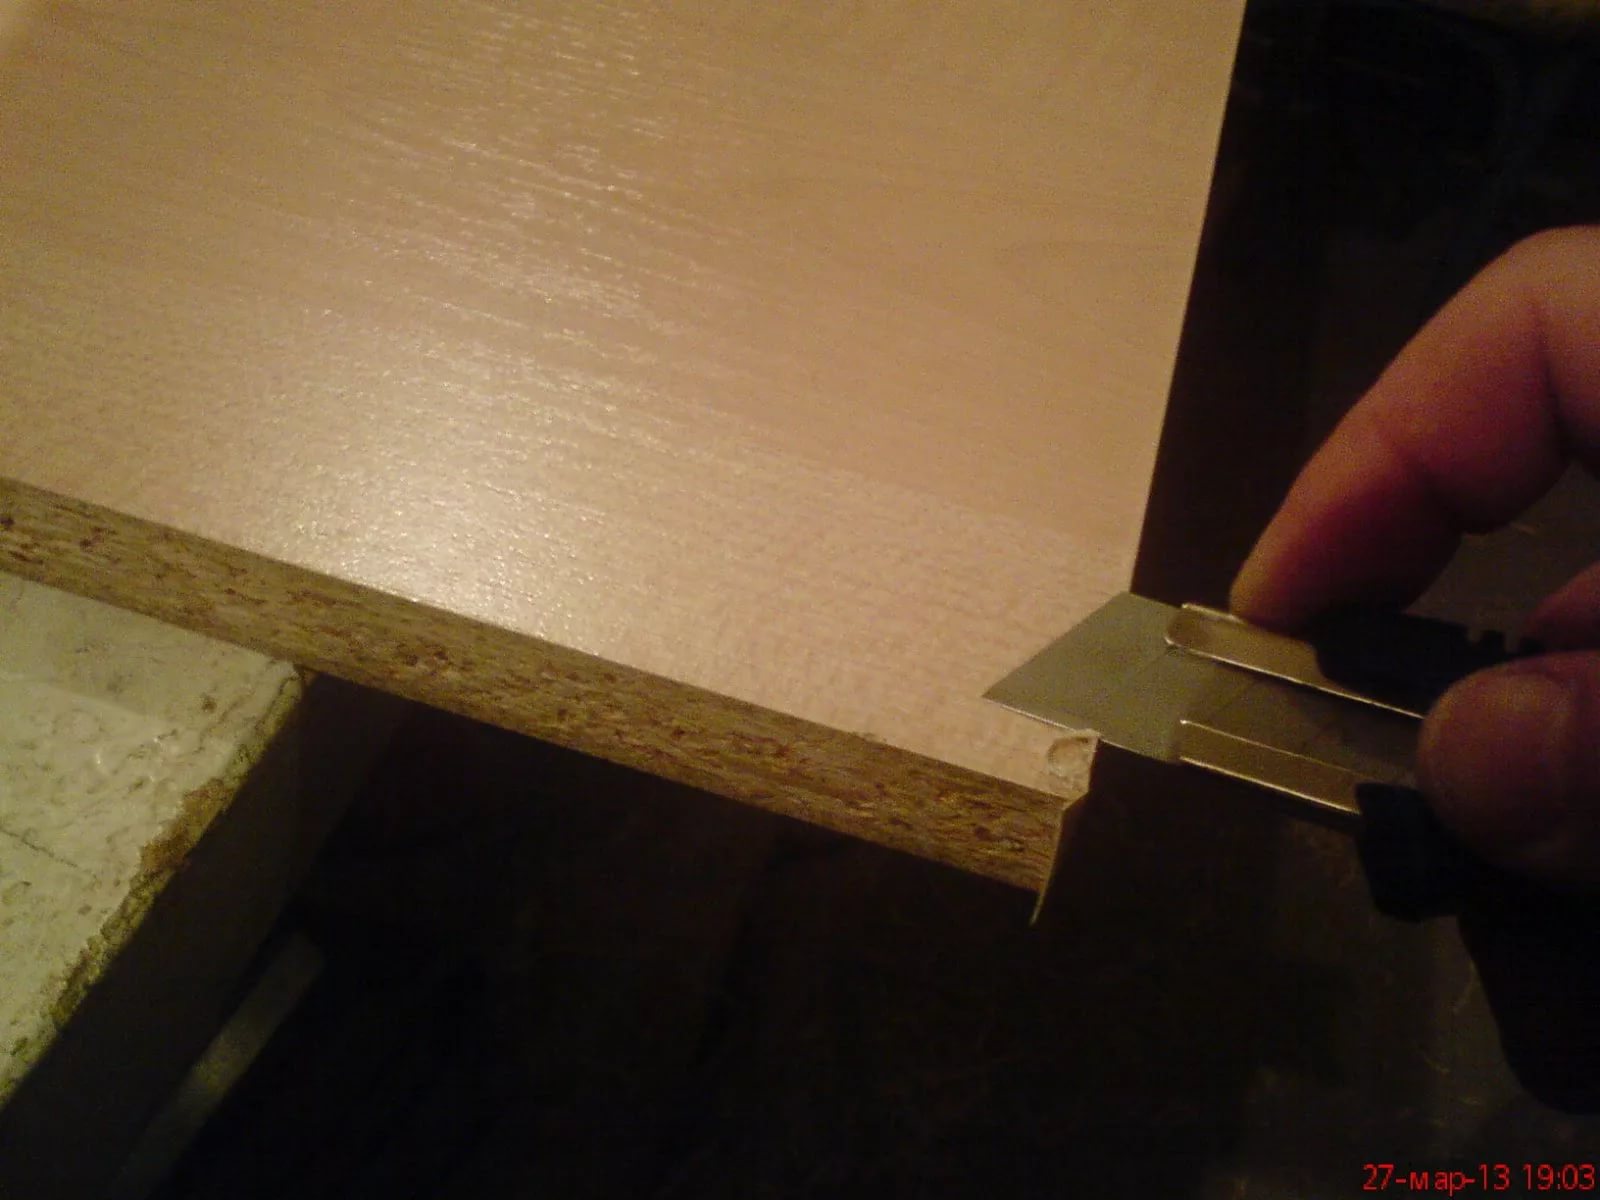
Now you need to leave the edge to cool. At this time, you need to smooth the surface with a rag. Thus, the tape will not peel off when it cools. The duration of this procedure is short. As soon as the base reaches a temperature of 50 degrees, you can remove the excess that has formed at the edges.
Start at the edges.The ends that remain in the end must also be removed. Since the material has become hard, they will easily break off. Then take a bar with sandpaper and process them. This will give the timber an attractive look.
If you take a responsible and attentive approach to this work, then the quality of its implementation will be at a high level. Moreover, it will be impossible to distinguish the result from the one that is obtained using special edging equipment.