Fittings for plastic panels
To assemble a suspended plastic ceiling, you need special fittings. Fittings, like PVC panels, are made in accordance with the relevant GOST, which proves its safety in use.
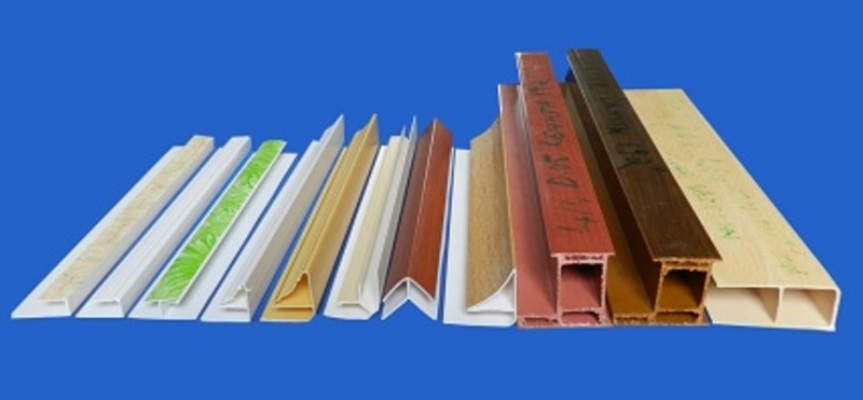
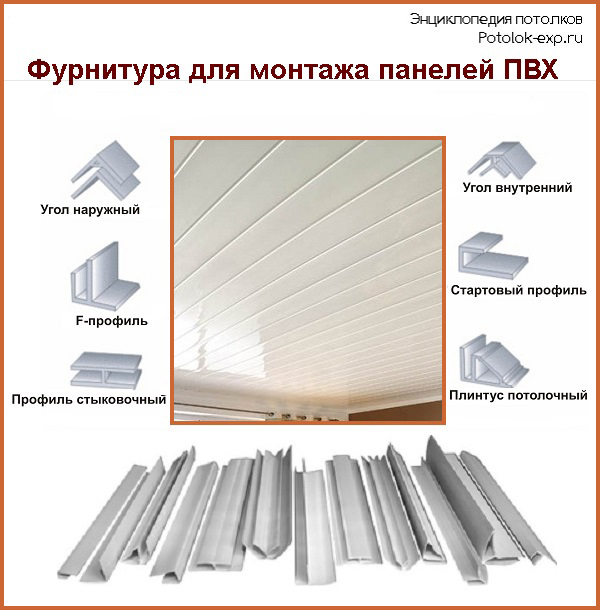
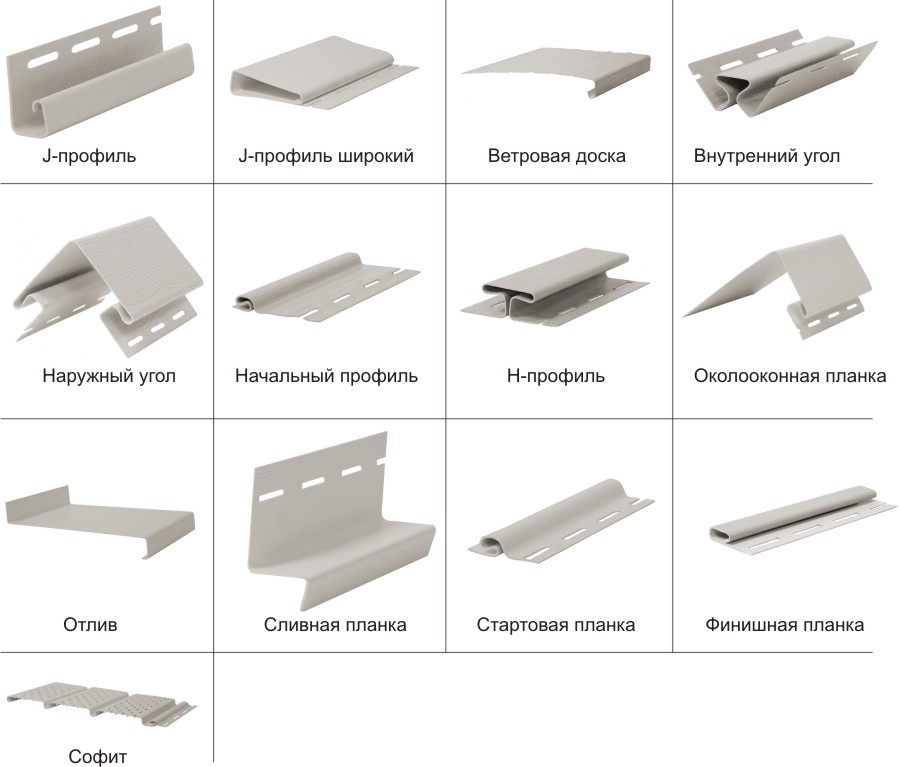
To organize a plastic connection, you need the following fittings:
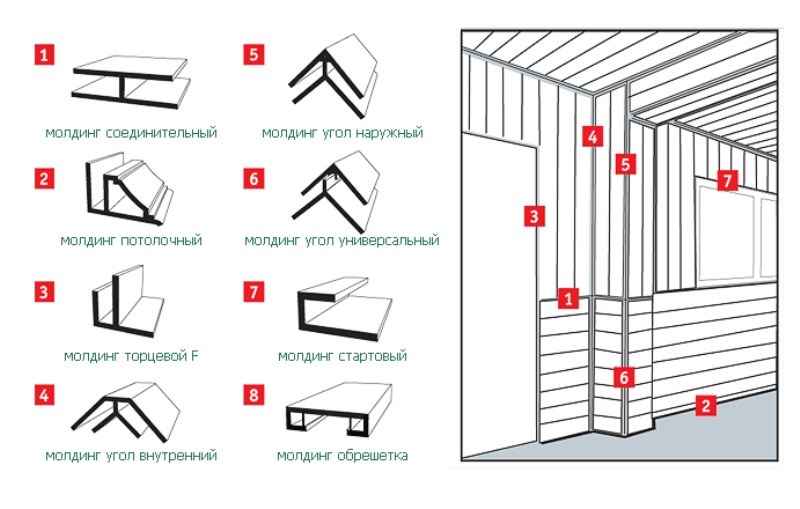
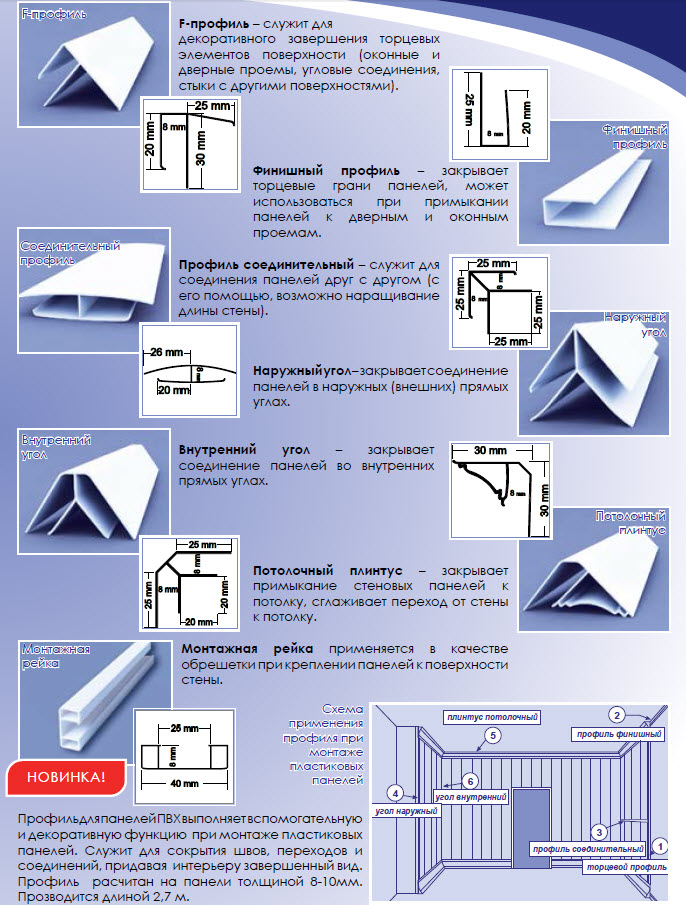
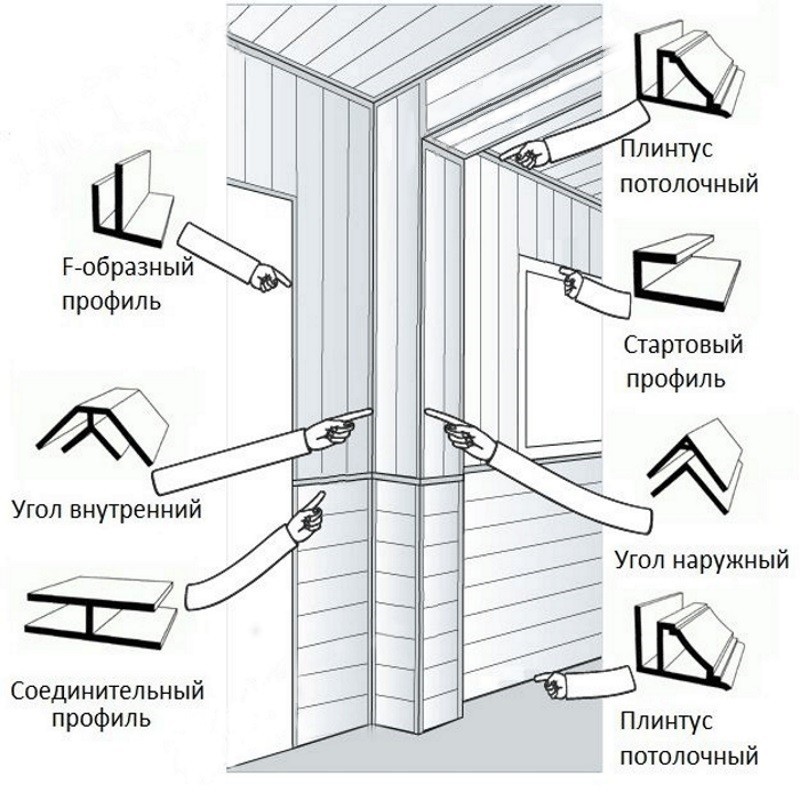
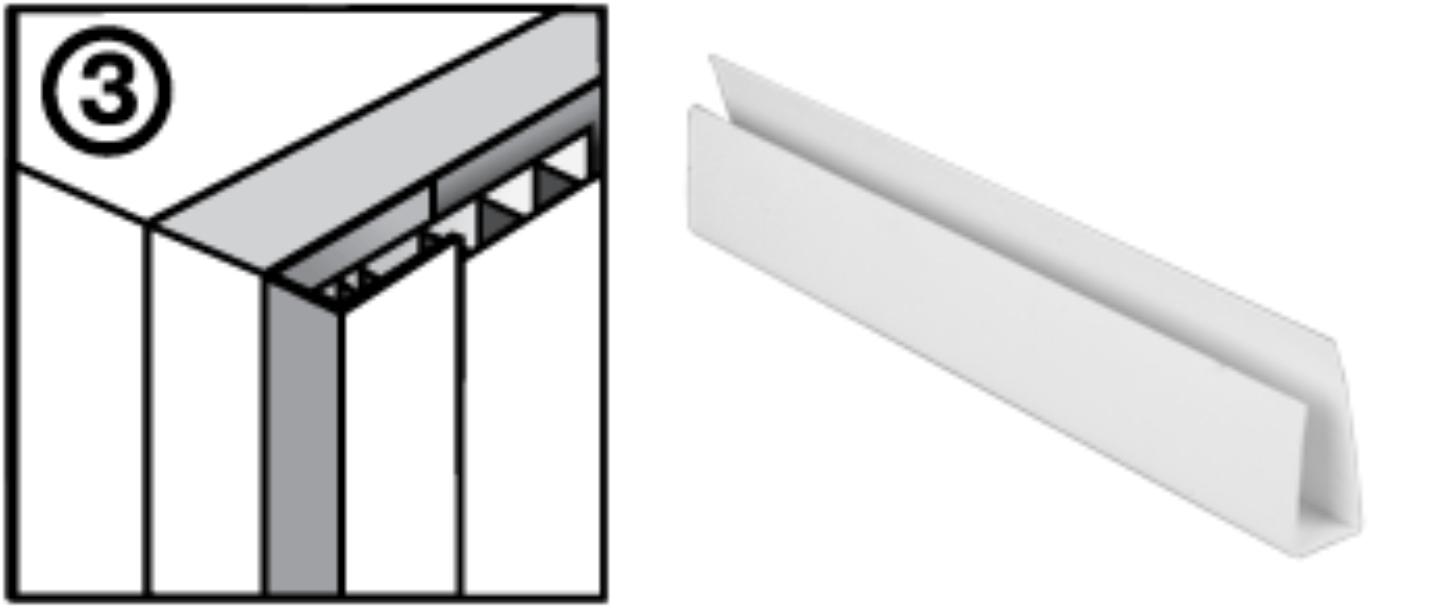
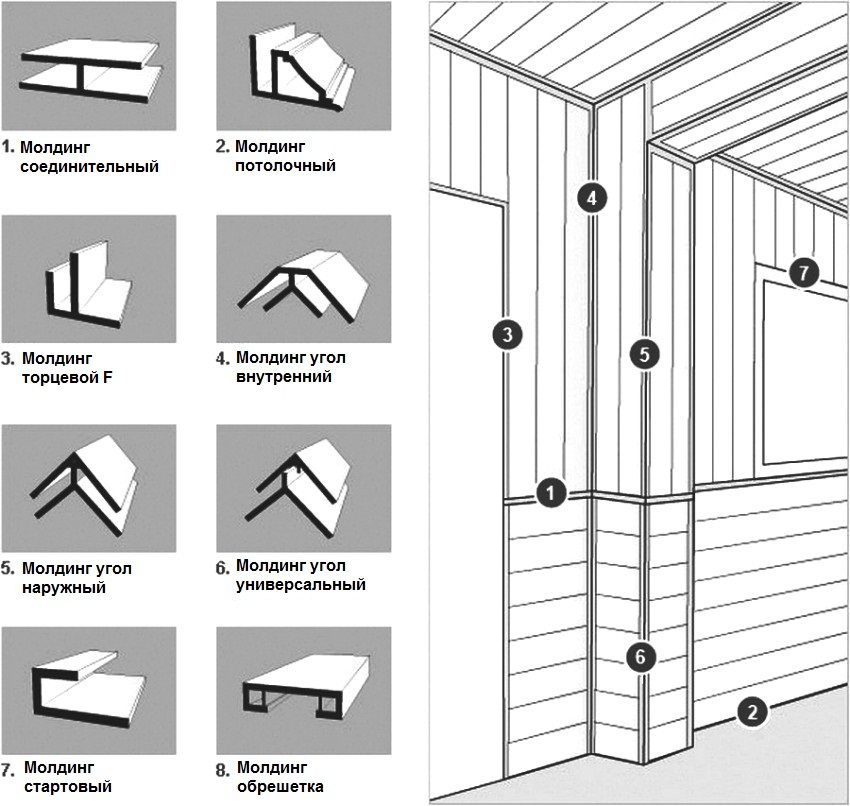
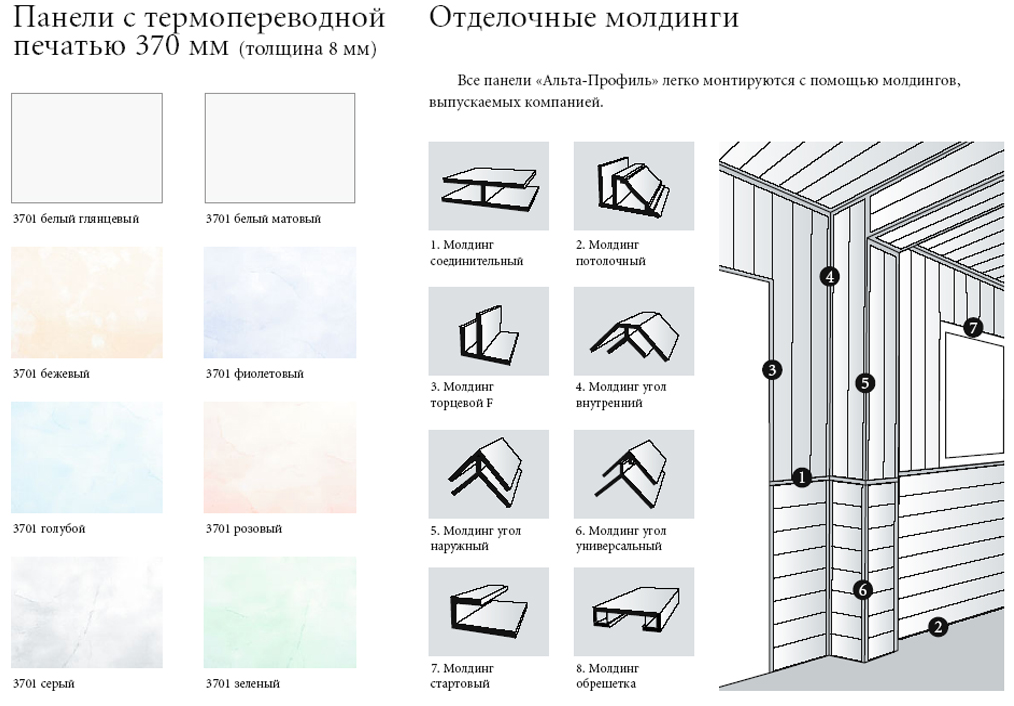
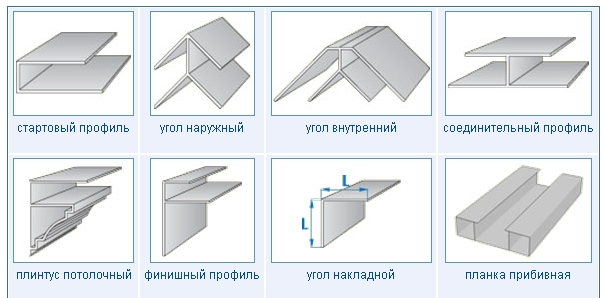
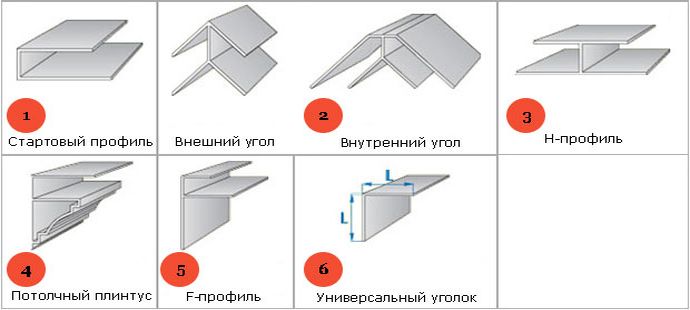
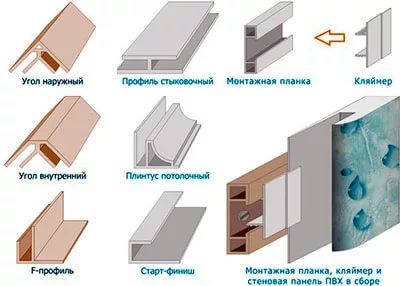
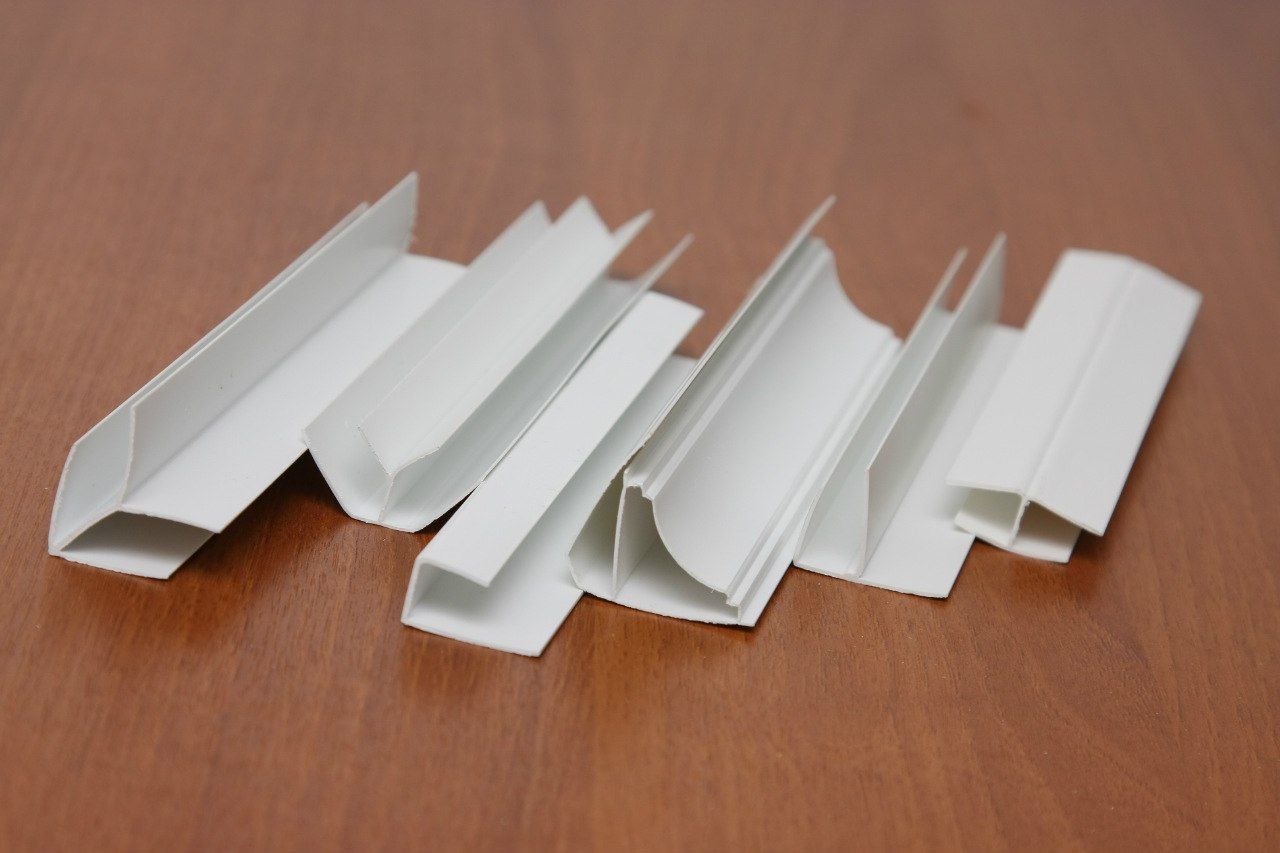
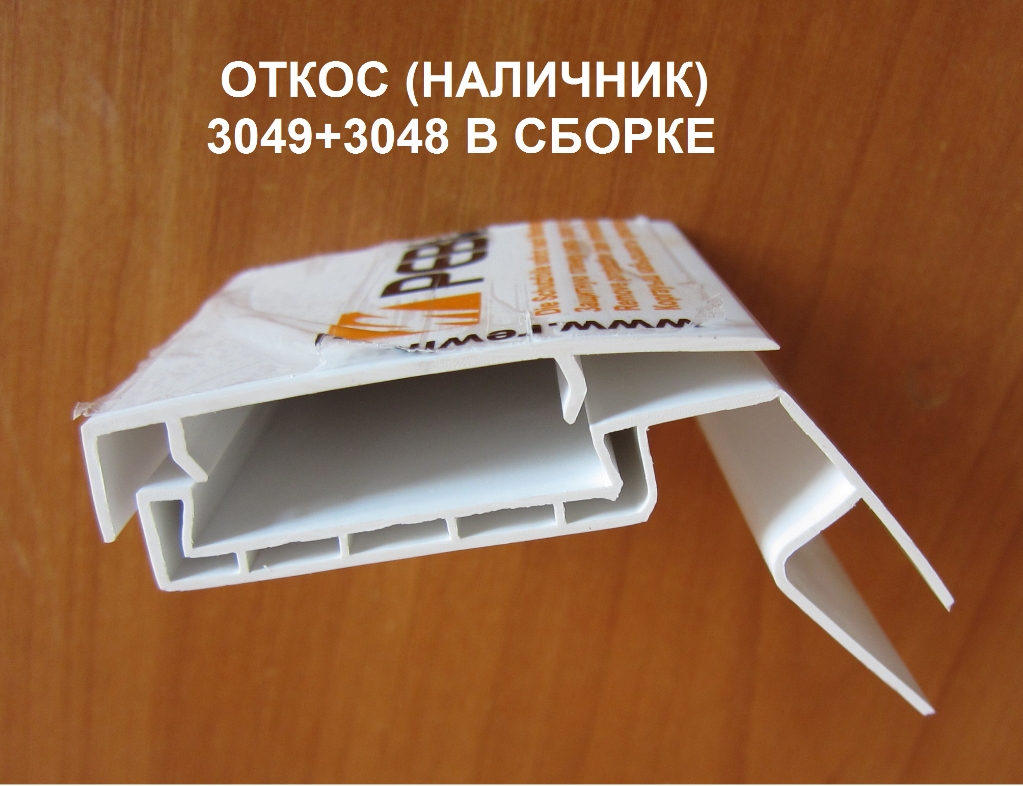
- Starting bar (finishing) - U-shaped molding in common people peshka, with which they begin to lay the plastic ceiling and complete it, it closes the end of the panel. When installing plastic panels on walls, the starting profile is used to decorate door and window openings.
- F profile - end molding, which is used for decorative design of corner joints, as well as joints of plastic with other materials and for decoration of window and door openings.
- Docking profile - H-shaped molding, serves to connect the plastic panels to each other along the length, if the length of one panel is not enough to cover the ceiling space.
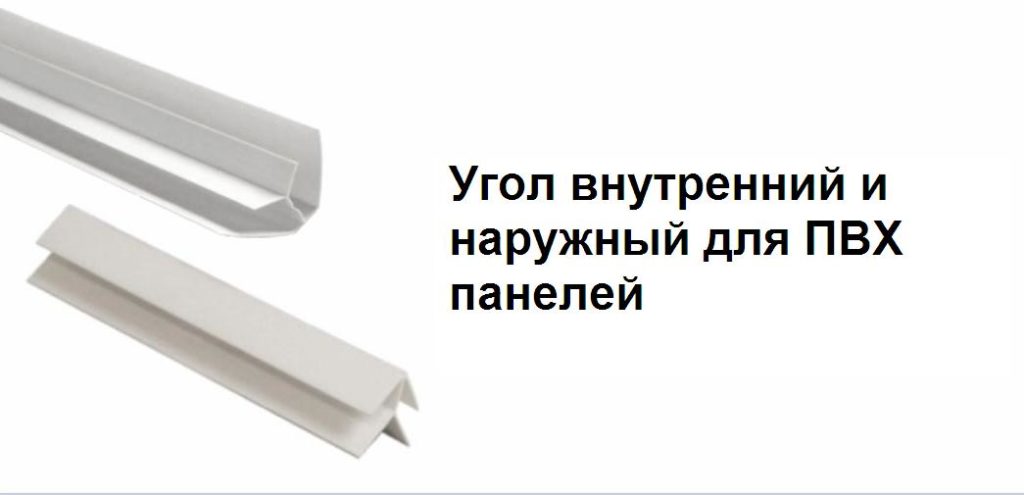
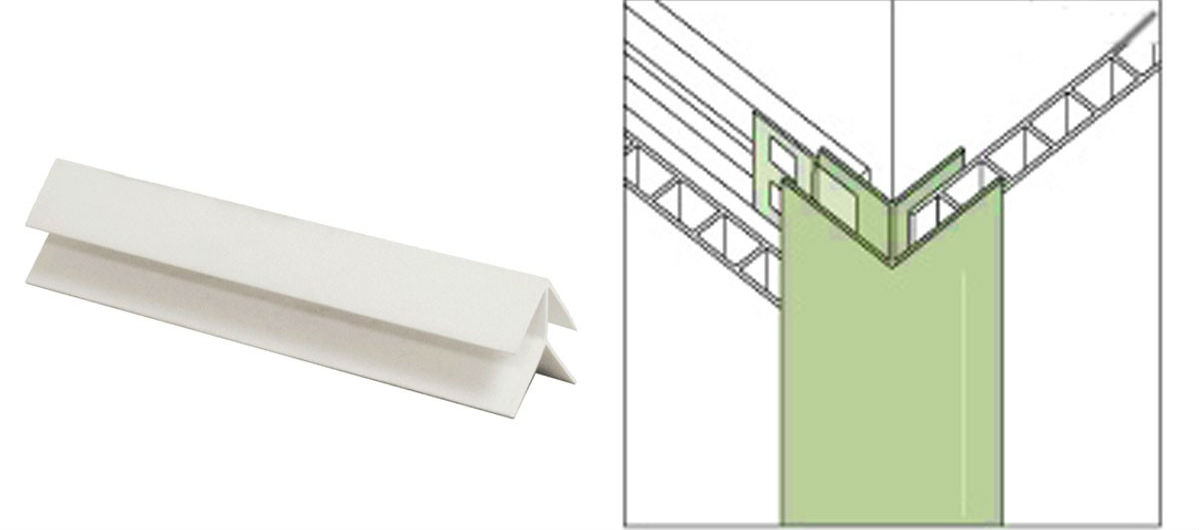
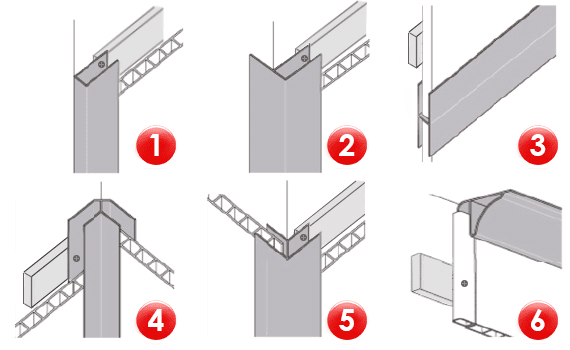
- External corner - hides the joints of plastic sheets in the outer corners of the room.
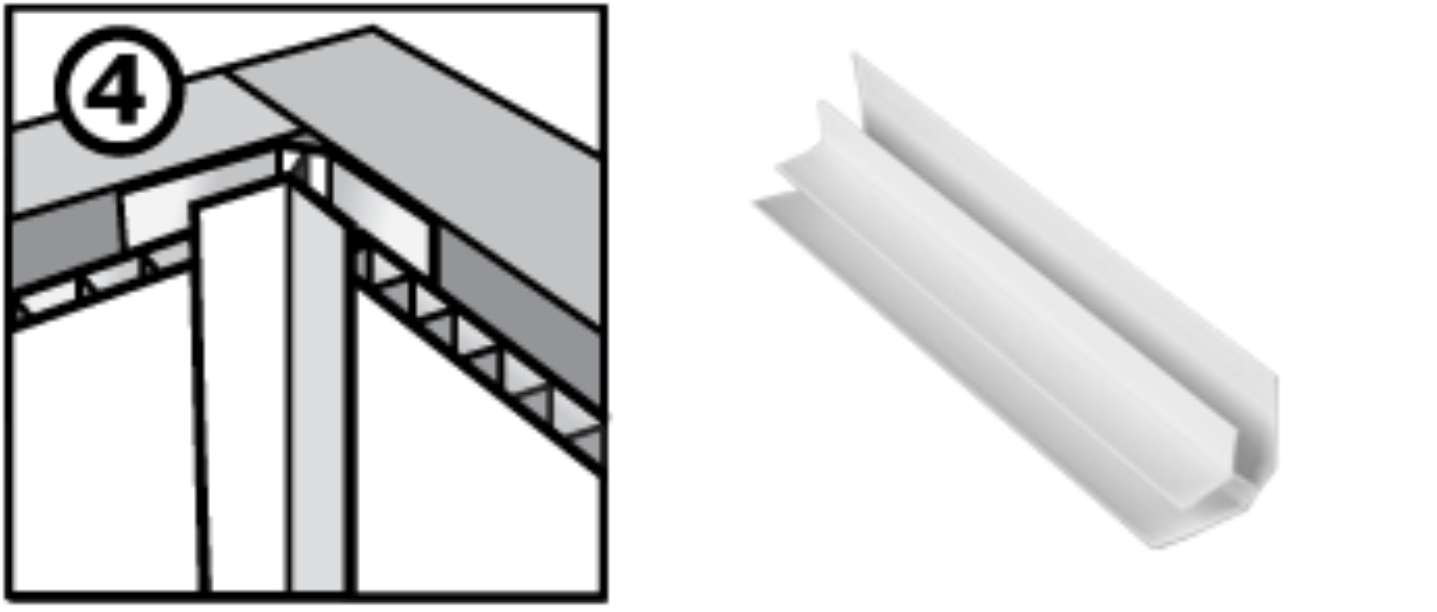
- Inner corner - hides the joints of plastic sheets in the inner corners of the room.
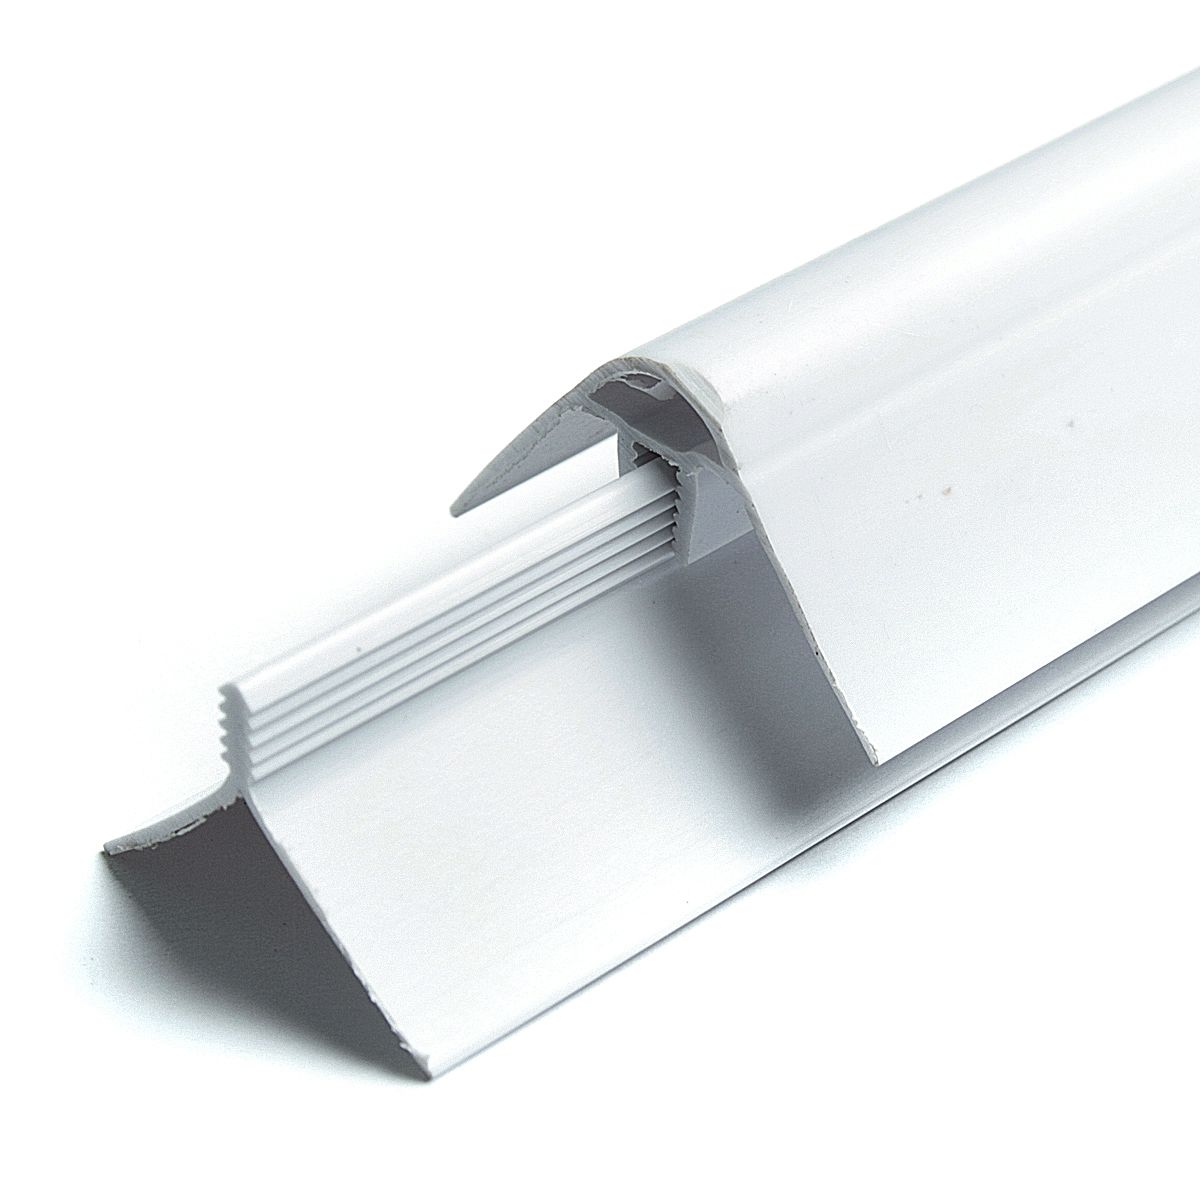
- Decorative corner - a universal corner, with the help of which the outer joints of the canvases are closed at right angles.
- Universal corner - decorative molding, which, due to the ability to bend at any angle, is used for both internal and external corners.
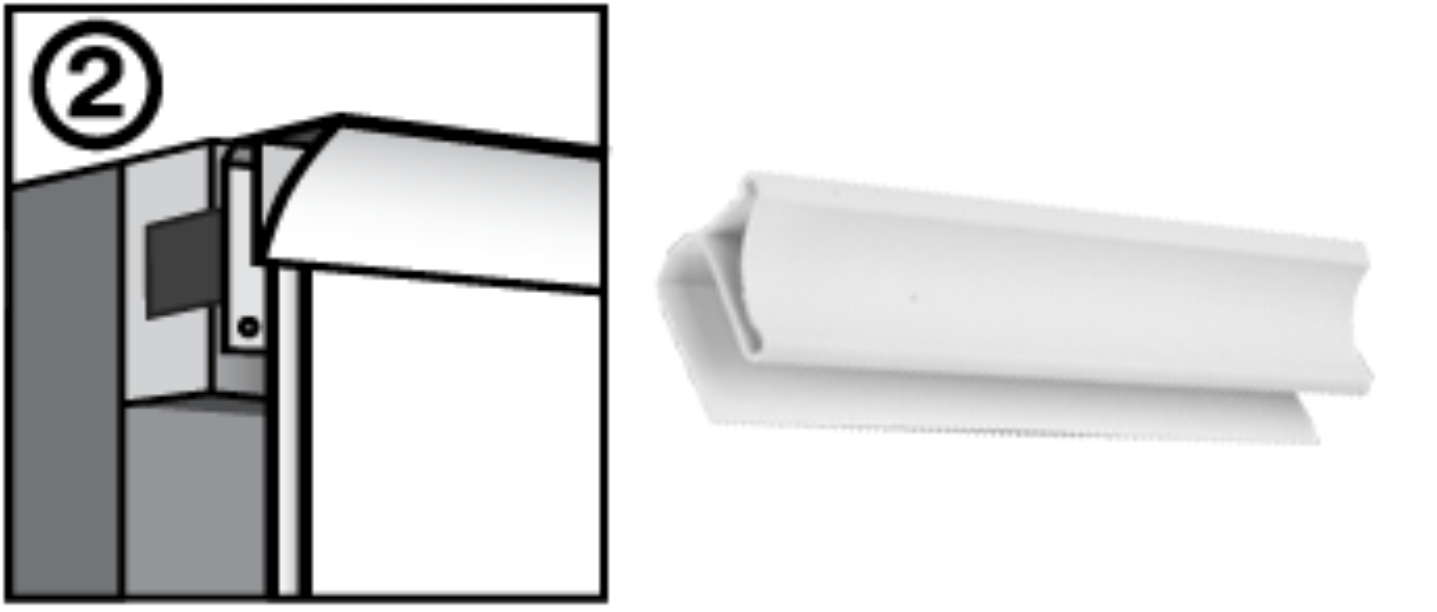
- Fillet is a ceiling plinth that helps to smooth the transition from ceiling to walls, and also hides the joints.
- External corner for skirting boards - hides the joints between skirting boards in places of projections, beams, columns.
- Inner corner for skirting boards - covers the joints of the skirting boards in the inner corners of the room.
- Skirting board connector - connects the skirting boards together when one skirting board is not enough to finish the entire length of the ceiling.
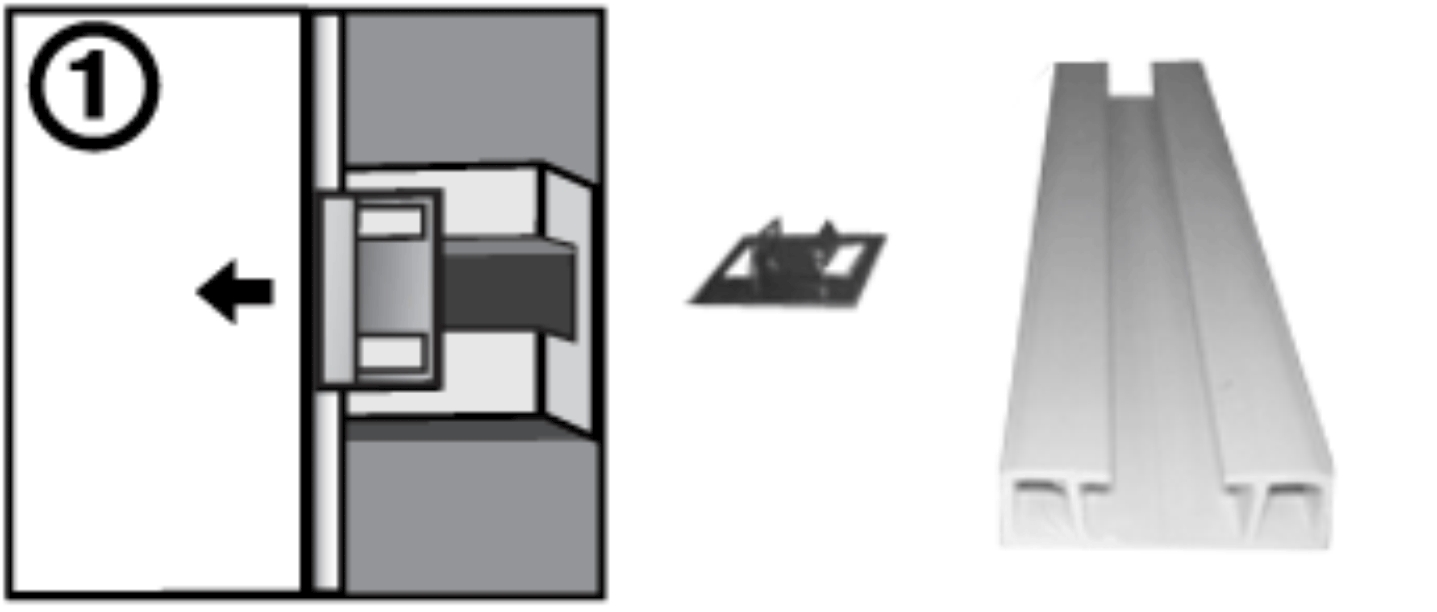
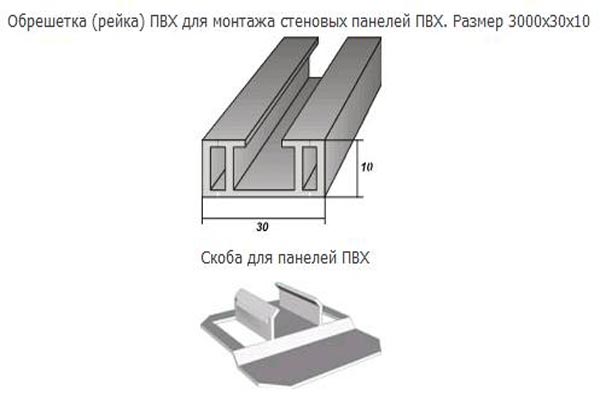
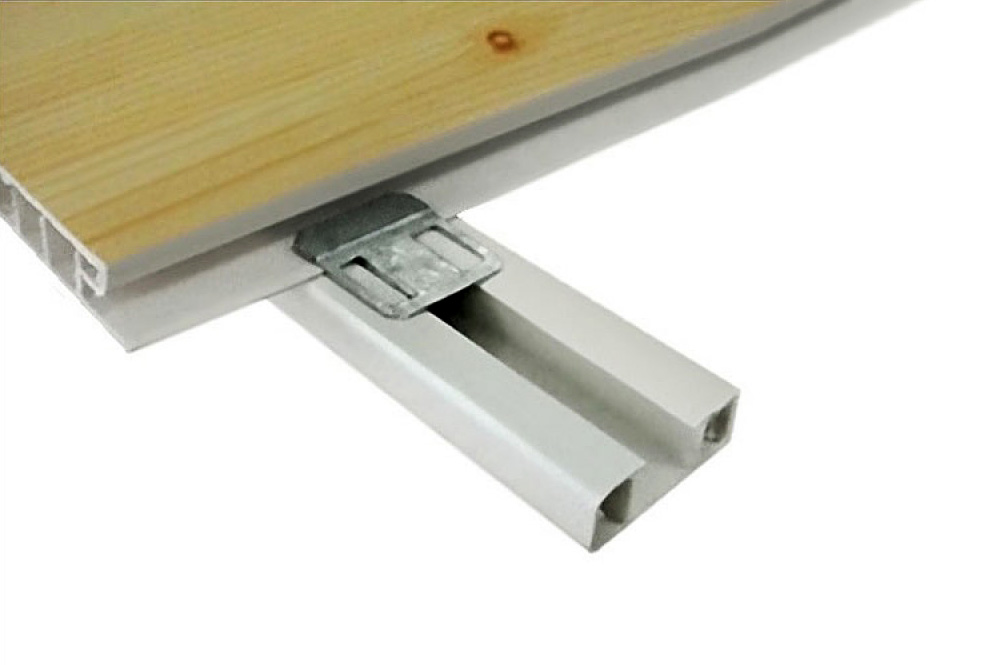
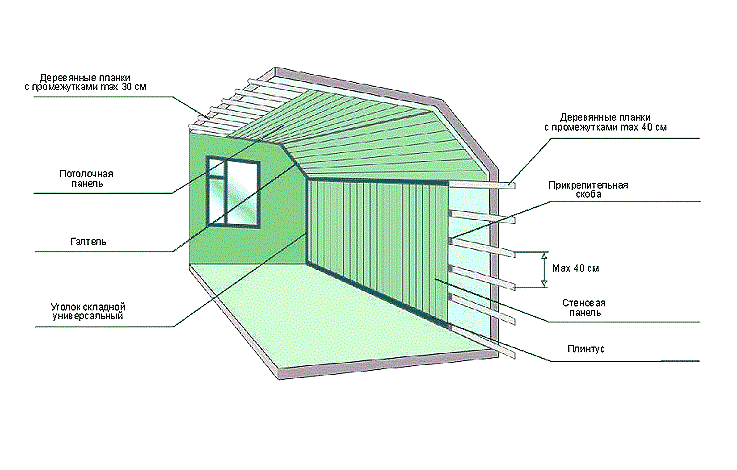
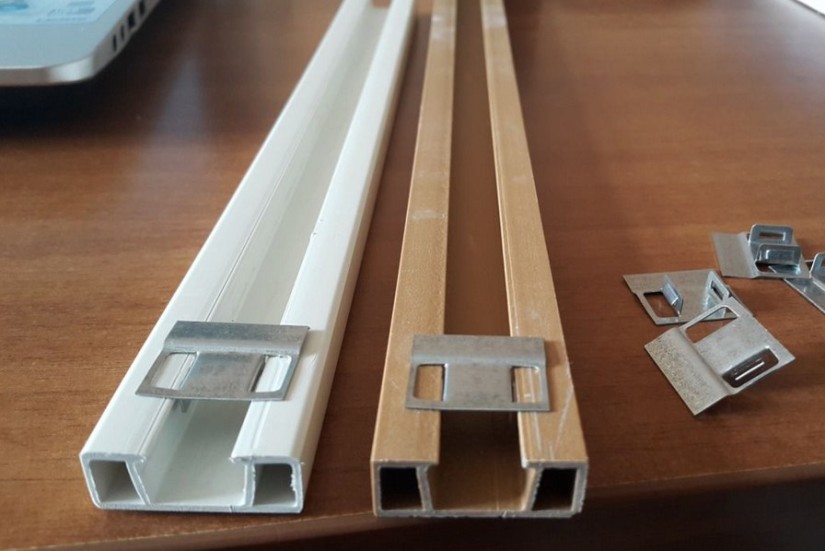
- Fastening strip - a plastic strip serves for the lathing under the ceiling panels.
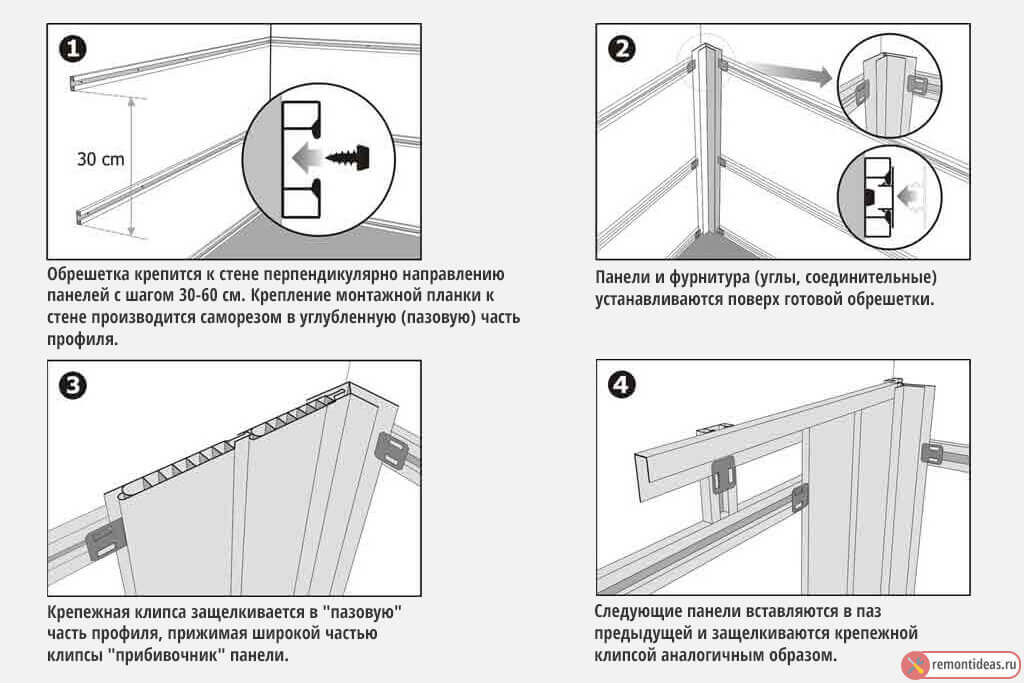
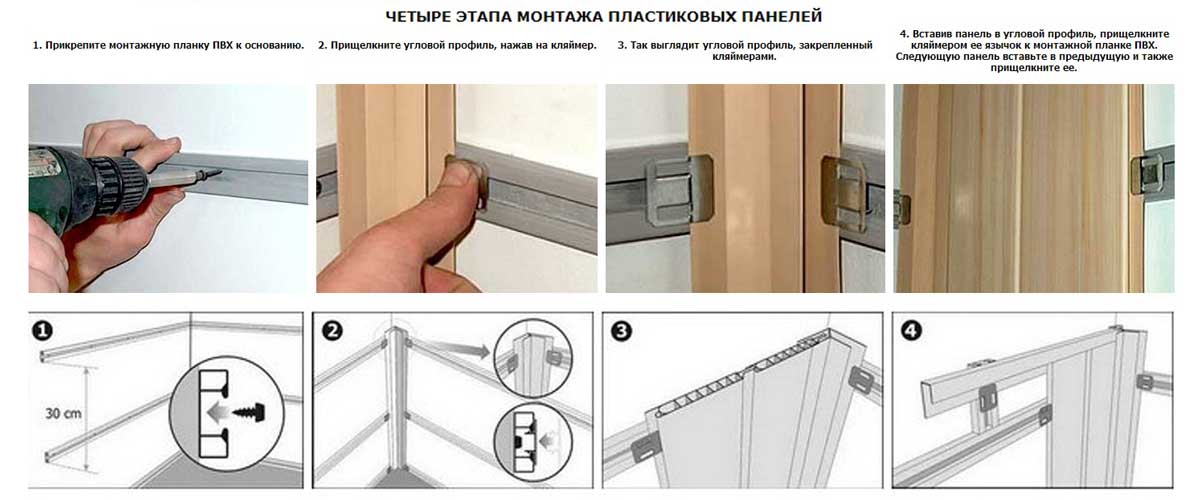
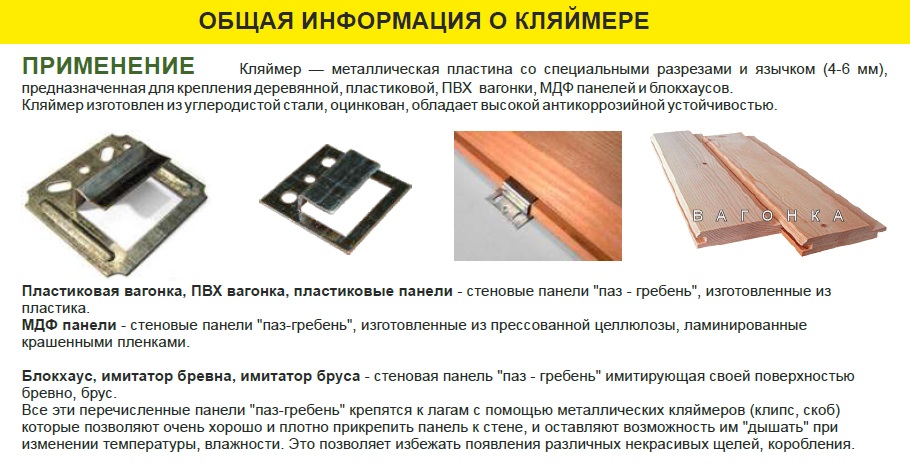
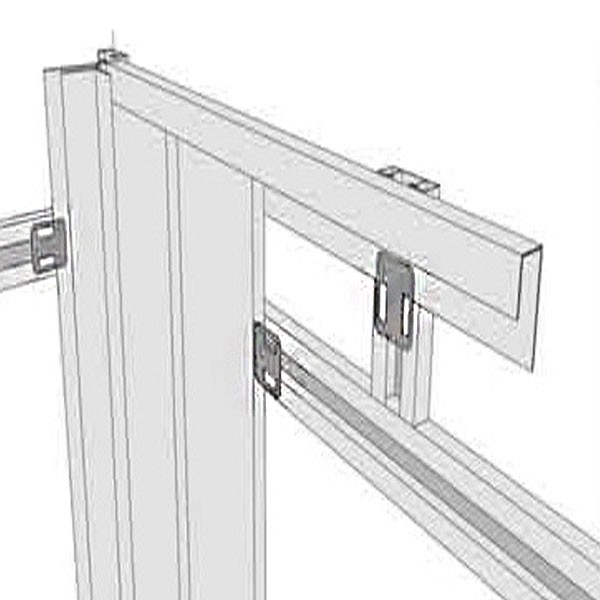
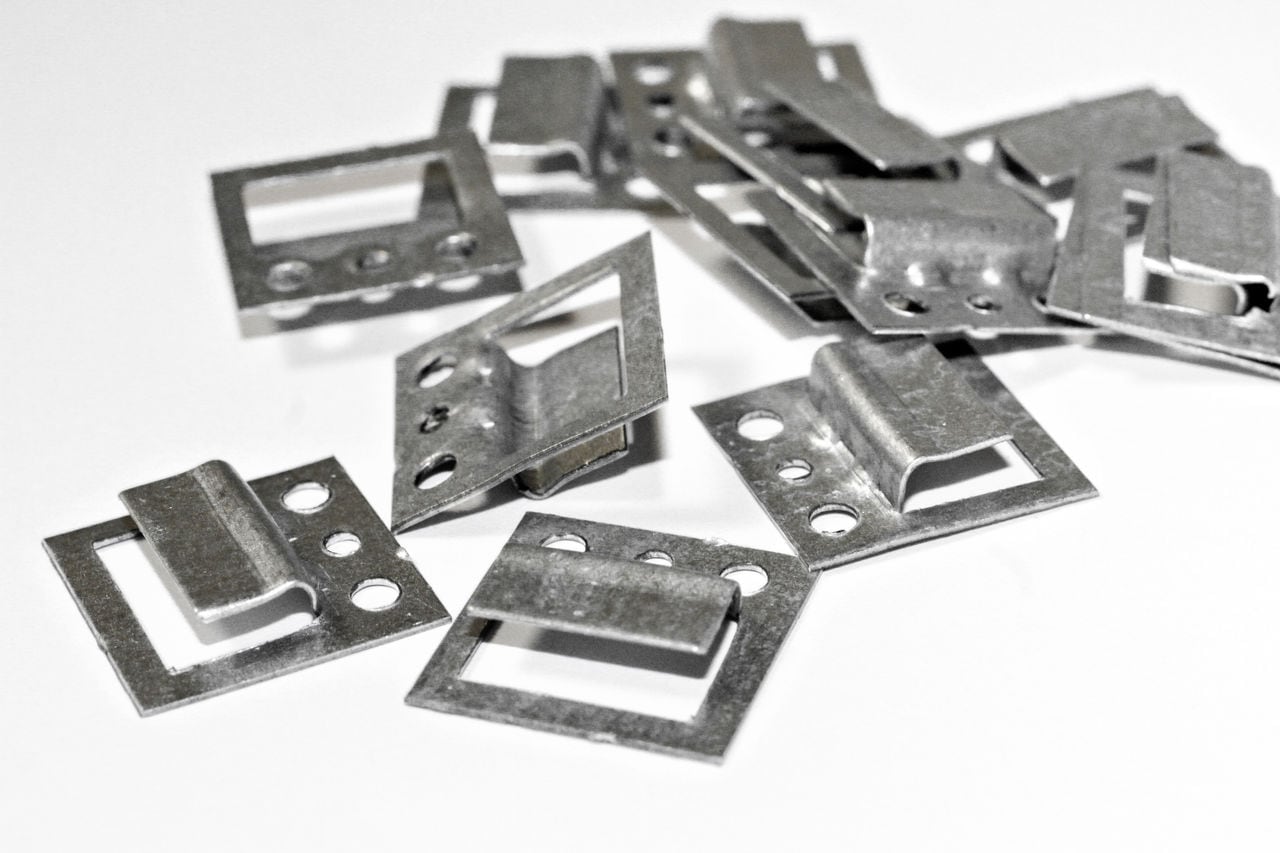
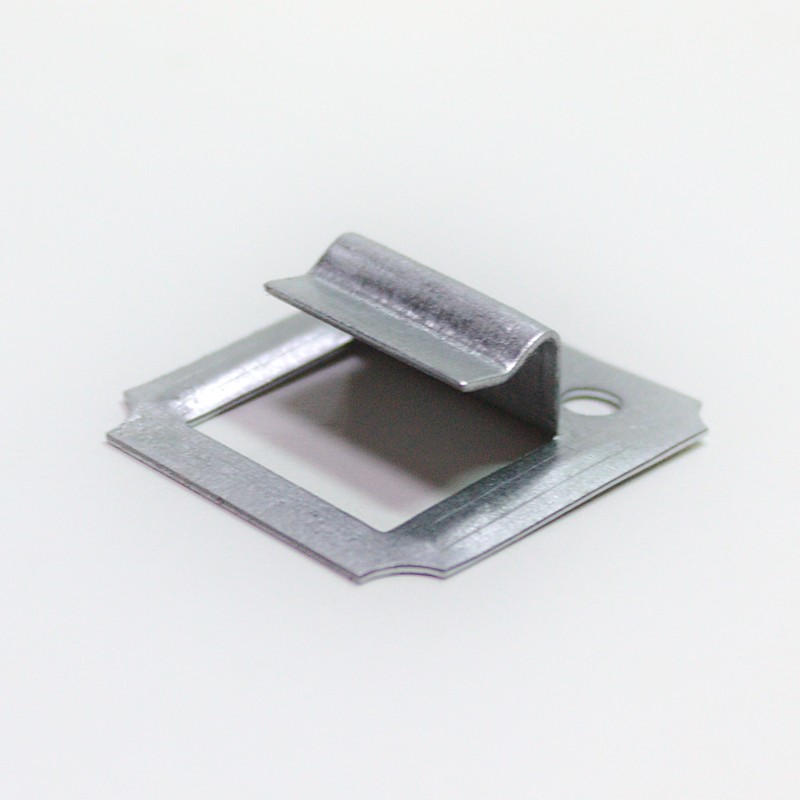
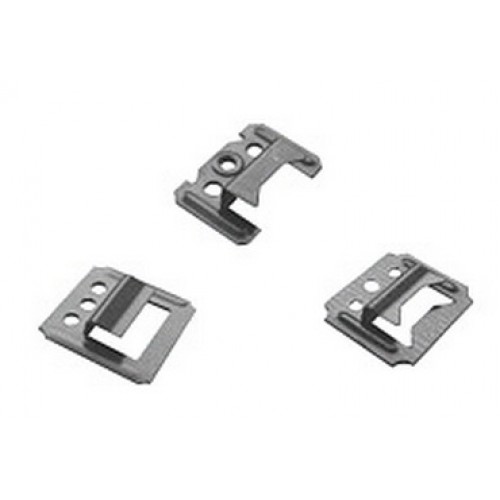
- Cleamers are versatile parts, unlike nails, they do not damage the joints and panel locks, they adhere tightly to the surface and provide high quality assembly.
The use of components during installation
To install PVC lamellas, you will need a jigsaw, a flat screwdriver, a level, a metal saw, a tape measure, a screwdriver, clamps, self-tapping screws ("bugs").
Work algorithm:
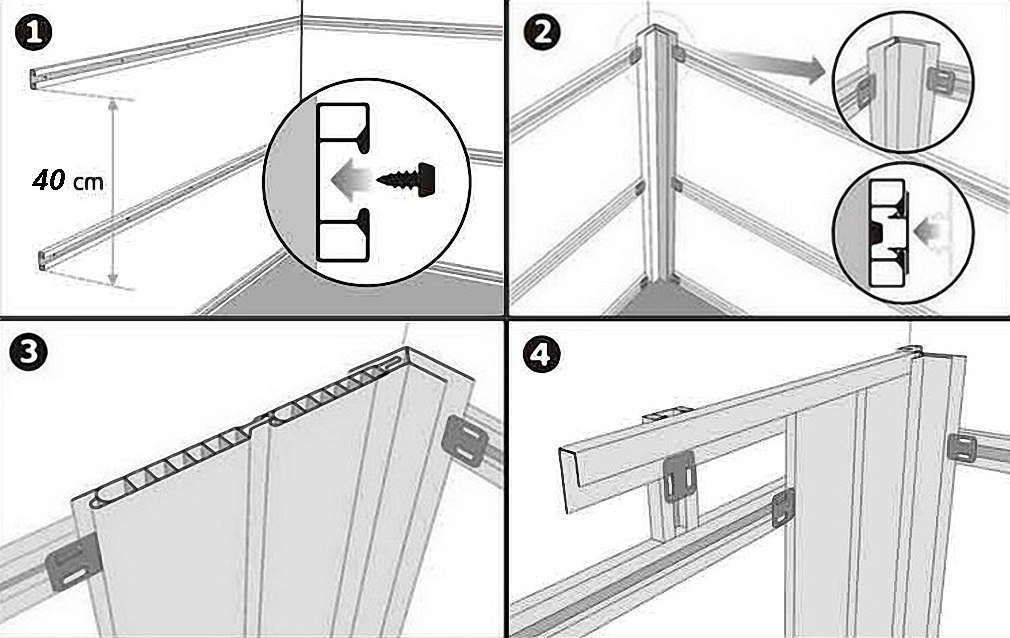
- first, a crate is made - it can be made of metal profiles or a bar with a section of 2x2 cm;
- the guide strips are fixed to the base of the walls or ceiling by means of nails made of galvanized steel or self-tapping screws, an indent from their edge must be left;
- if there are irregularities, then the structure should be leveled with wooden lining;
- the starting profile is fixed in the left corner, from which the assembly begins;
- a panel is started on it from the bottom corner and fixed with self-tapping screws so as not to damage the plastic, the fasteners cannot be tightened too much;
- the next sheet is tightly inserted next, it is desirable that there are no gaps between them.
In order for the plates to fit organically to each other, it is necessary to correctly connect them - the panel is inserted into the corner with a thorn, so that the groove remains open for the next sheet
If there is a gap near the thorn, it is carefully trimmed
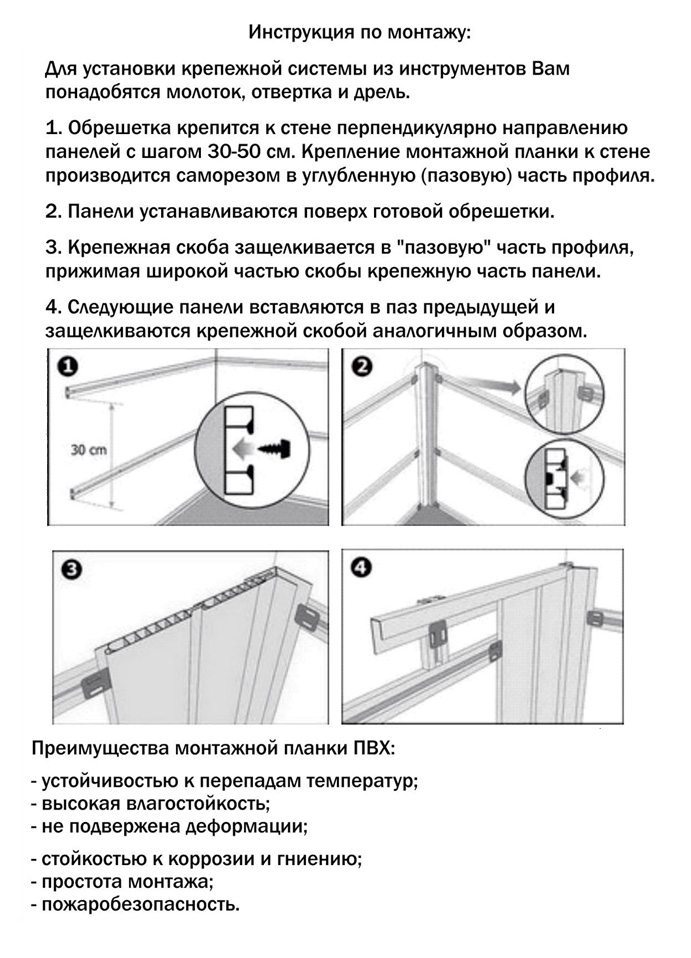
Then you should fix the lamella on the crate and now you need a kleimer - its hooks are put into the groove, then the element is pressed tightly. The fasteners are fixed with special screws. For plastic use staples up to 2 mm high.Four of these parts are enough for 2 meters in length, however, with a large perimeter, their number can be increased. When working with a screwdriver, it happens that the "bug" turns the mounting clip, but it can be pressed and held with a screwdriver.
When installing PVC, it is important to focus on some points.
- Since the assembly begins with the installation of the box, it is necessary to correctly install the rails. Especially carefully, using a level, the position of the panel installed first is checked.
- In the course of work, you need to monitor the accuracy of the fit of individual sheets of material. There should not be large gaps between them. That is why the plates must be compacted as much as possible.
For plastic panels, you should choose high-tech fittings, and, of course, do not proceed from its appearance or cheapness. With such a task as the construction of a reliable crate, savings are inappropriate. In addition, you always need to focus on the compliance of products with quality standards and GOST.
Video instructions for the installation of PVC panels are presented below.
What is required?
Starting work with the formation of a ceiling from PVC panels, first of all, it is worth using the starting type of plank. This is the name of the P-shaped molding, which locks the panel from the end. Similar planks are used when the panels are laid on the walls. But there they are already needed for another task - a more elegant design of door openings and windows.
At the ends, a profile in the form of the letter F is necessarily placed, it is needed in order to more beautifully file the corners and joints between PVC and other materials. This profile is also used in the design of recesses for doors and windows. Docking is done using a molding like the letter H. It is used when you need to tie the short edges of the panels due to the fact that one of them is not long enough to cover the ceiling space.
The outer and inner corner are needed, respectively, to mask the joints in different corners. With the help of the universal decorative corner, you can cover the outer intersections of the canvases that converge at an angle of 90 degrees.
Ceiling skirting boards can intersect:
- on the ledges;
- next to the beams;
- near the columns.
In all three cases, the outer corners of a special type are very valuable (they are called that - for ceiling plinths). Do not confuse such products with structures similar in name directly for panels.
Interior skirting corners help to seal the intersection points farther from the entrance. Sometimes the skirting boards do not have enough length, and then a special connecting element helps to solve the design problem.
Slats (guides) are an important part of the fittings for plastic ceilings, it is from them that the crate is formed
Material selection
Currently on the market there are profiles made of plastic and metal. Plastic moldings are cheap but not high quality. It will be simply unreasonable to use them for serious tasks, therefore, they are most often chosen as a decorative addition.
In general, if we talk about how the PFC panel and the profile are connected, then it turns out that the panel is partially "placed" in the profile itself and is fixed there. Therefore, in order to ensure the reliability of the fastening, preference should be given to a metal molding, which can be steel or aluminum.
Purpose of fittings for plastic panels
Wall and ceiling panels made of PVC are a functional and durable coating, it is presented in a large palette of colors, has a different texture and is ideal for decorative finishing of residential premises. Sheets are made from a polymer mixture using special equipment - a plasticizing machine or an extruder.The cut lamellas are painted with organic dyes, and on top of the canvases they are covered with an antistatic agent and a protective varnish - that is why the material looks good and has high performance.
However, for installation, it is not enough to choose a perfect plastic coating - you will need to purchase fittings and fasteners, which are currently not just a set of separate parts, but also a multifunctional and technological mechanism that performs different tasks.
Purpose of components for PVC assembly:
- fixing panels to ceilings, walls and floors;
- connection of trim segments with different thicknesses;
- design and connection of joints at different angles;
- formation of structures of any scale and shape.
The main material for the production of fittings is high quality steel, although some parts can be made of alloys based on magnesium, titanium, aluminum, processed by pressure. Polymer elements are used more for decorative framing than for creating a durable sheathing.
A characteristic feature of the profiles used is ease of use - they can be easily adjusted to the required dimensions, cutting off with an ordinary construction knife. In some cases, it is better to fix the outer molding with adhesives, thanks to which the panels are not subject to damage and deformation.
Types of plastic panels
The building materials market offers a huge selection of plastic panels for interior decoration, which differ in size, color, design features.
According to the area of application, PVC panels are divided for the ceiling and for the walls. Ceiling material is more fragile and lighter than wall material
Therefore, the ceiling of PVC panels should be mounted carefully so as not to damage them accidentally with sharp objects. Wall plastic is stronger and less flexible because it contains more PVC
According to the type of decorative layer, PVC panels are divided into matte and glossy. The surface of a matte canvas is without any coatings, so they are cheaper than glossy ones. Glossy canvases are covered with special varnishes on top, which additionally protect the plastic from the sun and moisture, so it is much easier to care for them.

What is PVC panel
Plastic panels vary in size: width, height and thickness. Plastic panels with widths of 125 mm and 250 mm are more often used, since they are easier to install. Larger canvases are less flexible, making them more difficult to assemble a suspended ceiling. The thickness of the panels for walls and ceilings is different. So, for the ceiling, panels with a thickness of 6 mm and 8 mm will be the best choice, and for walls - 10 mm and 12 mm. The length of PVC panels is standard - 5.95 mm. On the building materials market, panels are often sold with a length of 3 m, this suggests that they are cut into pieces.
Fixing elements for plastic
The method of installing PVC panels, that is, attaching them to the walls and ceiling, depends on the characteristics of the room - the level of humidity, the curvature of the working surfaces, the availability of communications and temperature bridges. In each case, certain fasteners are used, which will be discussed.
There are three ways of fixing.
The most inexpensive and simplest means of fastening plastic is silicone glue or "liquid nails". You need to choose a special heat-resistant type of product. Silicone dries quickly, has high strength, allows the panels to be assembled in a short time, however, it can be used with a perfectly flat surface of the walls, moreover, during repairs, this method does not allow replacing damaged PVC lamellas.
Cleamers are universal parts, unlike nails, they do not damage the joints and panel locks, they adhere tightly to the surface and provide high quality assembly.Despite the strength of the fastening with brackets, minimal curvatures remain, making it possible for the walls to collapse with the integrity of the panels.
Installation
Installation of a profile for PVC panels is not a difficult task. Almost anyone can handle it. Before attaching the guides, there are several preparatory steps should be performed.
Leveling the surface. Initially, the walls or ceiling are analyzed for damage. If the surfaces have large cracks or drops, it is advisable to eliminate them with the help of special mixtures.
But you can also construct it from special metal structures.
The profile fixing algorithm consists of several sequential steps.
Installation of starting elements. They are located along the perimeter of the finishing surface (ceiling, wall)
Fastening of starting profiles is carried out using brackets or special self-tapping screws
Here it is important to correctly align them horizontally and vertically. The installation of panels in the future depends on this.
Installation of corner elements. In this case, both internal and external elements are used. In most cases, they can act as starting points. You can fix them according to the same principle as the previous type.
Fastening of internal intermediate profiles. Systems of this type are installed on walls that are too long, where it is impossible to find the right panel size.
Plastic panels can expand or contract with temperature changes. Therefore, it is necessary that when installed in a profile, a small gap remains between the wall and the material. It is advisable to take it into account when designing the entire system. Before fixing all profiles, it is advisable to choose the direction of laying the sheets.
During the installation work, you need to carefully measure in order not to get errors
Not every experienced specialist can do this right away.
When the frame is formed from the profile, you can start installing and fixing the panels. The installation technology is selected individually and depends only on external conditions. In most cases, you just need to insert the end of the product into the profile groove. The panel is then leveled and nailed or glued to the frame.
Profile for PVC panels are versatile products that allow not only to speed up installation, but also to extend the service life of the entire system.
Features of PVC ceiling decoration
When decorating the ceiling with PVC panels, only the frame method of fastening is used, which makes it possible to hide communications, as well as install any recessed lamps in the ceiling.
Suspended ceiling construction: plastic panels are fastened with fittings to profiles attached to the rough ceiling. Therefore, you can assemble such a ceiling yourself.
Metal lathing for mounting plastic panels on the ceiling in the bathroom
Since plastic is the lightest material for suspended ceilings, you don't have to worry about the ceiling collapsing on your head. To install plastic panels, you can use lightweight profiles, for example, aluminum or even plastic. Such profiles can easily withstand plastic sheets and high humidity in the room, so they can be used to install the ceiling in the bathroom. But for rooms with a normal level of humidity, you can use wooden profiles with a bar thickness of at least 5 cm.
To make a flat plastic ceiling, before installing the lathing, it is necessary to correctly mark the area under the suspended ceiling. To do this, measure the height of the ceiling in all corners of the room, starting from the side of the window, where the ceiling can be visually uneven due to a large amount of light. The angle of the room where the ceiling height is the smallest is taken as an orientation. From this height, 5 cm is measured down and a mark is put, which will be the level for attaching the starting profile. The resulting elevation is transferred to other walls.According to the marks of all the walls, with the help of lacing, the level is bounced off, along which the guide profile will be attached.
If the room has built-in lighting, then after the formation of the lattice frame, immediately lay the necessary communications, and only then mount the panels.
Note
You can place the panels on the ceiling in different ways, but it is best to focus on the shape of the room and lay PVC canvases perpendicular to the length of the room, this arrangement of plastic panels will visually expand the room.
Begin the installation of plastic panels from the far corner of the room. The canvases fit tightly into the lock to each other.

