Materials (edit)
To create a fence you need:
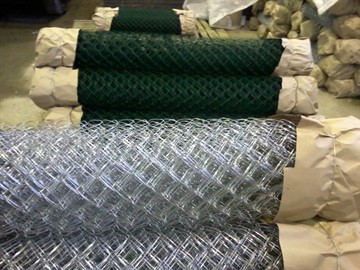
- Rabitz. Basically, rolls of 1.5-meter width with a mesh of 40 or 50 mm are used;
- pipe for the manufacture of posts. It is better to take a profiled one - it is easier to weld to it. Acceptable size - 60x60x2 mm or 80x80x2 mm. Especially for the device of mesh fences, racks with hooks welded to them are produced. An alternative option is wood or concrete posts. But they are not popular. The former are due to their short service life, the latter are due to their bulkiness;
- cement, sand, crushed stone. If the soil is dense, the posts can be left without concreting: due to the full blowing capacity, the mesh fencing is impervious to wind force. In soft soil, it is better to fill the supports with concrete;
- depending on the design features of the fence, an angle, wire or bar may be required.
The mesh is available in three versions:
- without anti-corrosion coating. The cheapest modification, but it will have to be painted every two years. It is advisable to purchase this material only for temporary structures;
- galvanized. It is more expensive, but you don't need to take care of it;
- with polymer coating. This option is not only resistant to corrosion, but also attractive: the plastic protective film can be of any color.
If you plan to build a permanent fence, then you should give preference to the option with a polymer coating.
Tightening and fixing methods
Fastening the netting by the tensioning method can be done:
without the use of any additional elements;
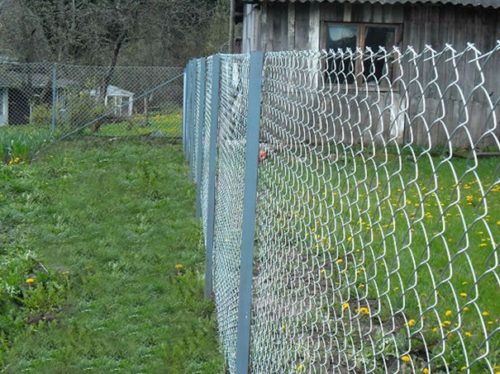
Installation without fixing elements
using a metal bar, which is passed through the mesh and subsequently fixed to the posts. You can use either one bar, which will be located in the upper part of the fence, and two bars at the top and bottom of the fence;
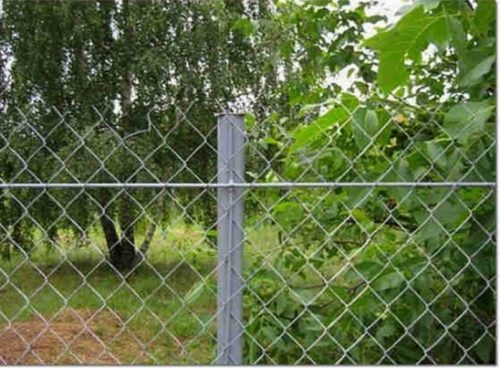
Stretching using a metal bar
using metal plates that replace the bar. This method of stretching is considered the most acceptable, as it allows you to firmly fix the mesh on the fence and get a pleasant appearance.
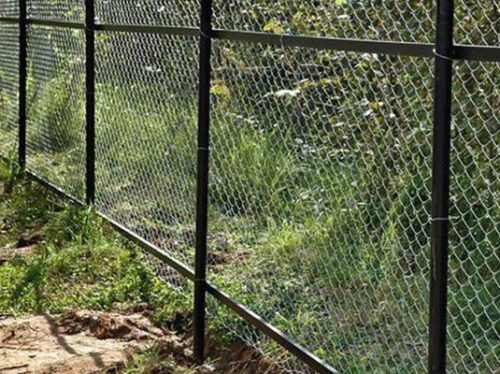
Fastening with plates
Fastening the chain-link mesh to the posts without the use of additional elements is carried out:
metal clamps, which are installed on poles by welding or fixed with fastening plates;

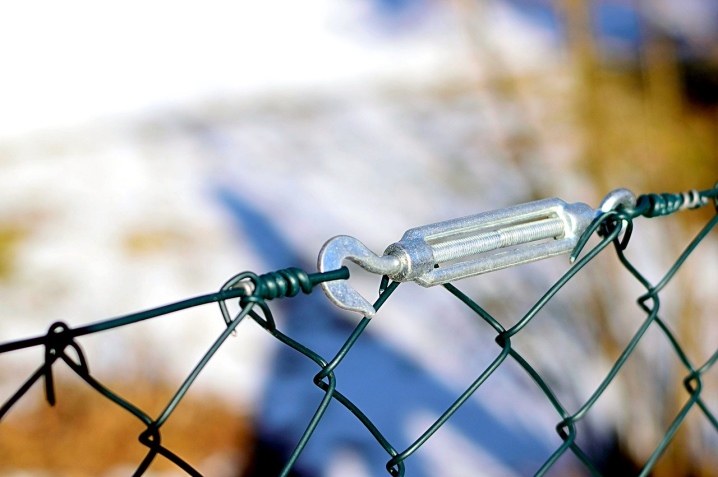
Fastening with a threaded clamp
ordinary wire. This method is less reliable, since with any load on the mesh, the wire will weaken;

Using metal wire for fixing
hooks that can be welded to the posts or installed with self-tapping screws.

Welded hooks for fixing
Tension metal plates can be attached to the posts in the following ways:
- welding. The most durable method that is available only to people who have a welding machine and know how to use it;
- threaded fixation. In terms of its strength, this method is not inferior to welding, but it does not require special equipment or skills to complete it.
The technology for threaded plate locking is simple:
- a hole is drilled in the post through the tension plate;
- a bolt or self-tapping screw is screwed in, securing the plate.
The metal bar, which is used to stretch the chain-link mesh, can be fixed on the post in any of the indicated ways, but most often the technology is used with the installation of tension couplings:
- tension couplings are installed on poles using bolts, wire or special fasteners, which can be made in the form of sliding hooks or special body mechanisms;

Hook-shaped take-up disc
- the tension cable is passed through the mesh and secured to the couplings;
- by adjusting the couplings, the final tension of the mesh between the fence posts is made.

Fastening with tension sleeves and wire
How else you can fix the Rabitz mesh, see the video.
Whatever method of fixing the chain-link mesh in the manufacture of fences is not chosen by the builder, it is important to correctly and reliably fasten, which will allow the fence to serve for a long period of time
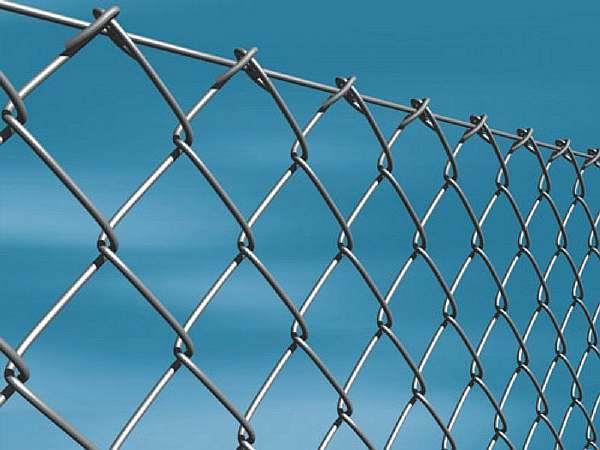
Fastening the netting of the chain-link to the profile pipe is carried out in various ways. A mesh fence is the most economical fence option for summer cottages. Read more about where to apply and how to attach the mesh to the metal supports.

Installation of pillars

Pole installation methods
In order for the supports to be in line, the installation order must be followed:
- Corner posts. Since when pulling the mesh, they will experience the maximum load, the corner supports are reinforced with spacers
- Pillars on the breaks of the fence contour (if the site has a complex geometric shape)
- Supports of gates and wickets (must be concreted for reinforcement)
- Intermediate supports with the same pitch on straight sections
The lower part of the wooden pillars is treated with an antiseptic and waterproofed before installation. To protect wood from moisture and decay, you can use waste engine oil, heated bitumen, bitumen-polymer mastic. You can burn wood at the stake - this also protects against decay.
When building a fence on a site with a strong slope, terracing of the relief is required. Supports of greater height are used, to which the mesh (or sections) is attached at different levels so that the fence goes in steps.
At metal supports, the lower part is cleaned from traces of rust and treated with a compound that protects against corrosion, covered with a primer or a layer of bitumen is applied. A plastic plug is put on the upper end or a metal plate is welded on.
Work progress
In places where the location of the pillars is marked, pits are prepared with the help of a drill or a shovel. The depth depends on the level of freezing of the soil in the area, but it should be about a meter so that the fence does not squint under loads. An exception is dense clay soil, not prone to heaving, supports can be immersed in it by 80 -90 cm. For heaving, as well as loose soils, the bottom of the pit should be 15-20 cm below the freezing point - this will protect the supports from being pushed upward.

Shooting and concreting
A 10 cm layer of sand and a 10 cm layer of gravel are poured at the bottom of the pit, both layers are well rammed - this is a drainage that promotes water flow. Then a prepared post is installed in the pit.
The free space between the support and the walls of the pit is filled with crushed stone and small stone, alternating with layers of soil, and each layer is well rammed. If a sectional fence is being erected, the weight of which is noticeably higher than the tension because of the welded frames, the supports are additionally concreted by 40 cm of the pit height, or they are completely poured with concrete instead of backfilling.
A temporary fence on metal supports can be erected without concreting. The pillars are driven into the ground with a sledgehammer through a piece of thick board (to protect against deformation). To make it easier to maintain the verticality of the installation, they dig a pit half the required installation depth and finish off the support to the desired level.

Terrace attached to the house: 150+ Best photo ideas | DIY step-by-step arrangement
1 Types and characteristics of the chain-link mesh
For the first time, the world heard about this structural material in 1878. The name of the netted fabric was given in honor of the inventor Karl Rabitz, who patented a special machine for weaving it.
There should be no questions about the appearance, the word "grid" explains everything. It consists of many tetrahedral cells, and is obtained by screwing wire spirals into one another.To prolong the life of the material and ensure the required qualities, a protective layer is applied to it. These can be polymeric substances or zinc. After production, the mesh is rolled into rolls, in which it is stored and transported, taking up a minimum of space.
 Polymer coated chain-link
Before talking about the methods of fastening the netting of the chain-link, you should familiarize yourself a little with its types in order to choose the right material. It is divided according to the shape of the cells. There is a rhombic and a square one. In the first case, the upper and lower angles are 60 degrees, and in the second, all the faces are perpendicular to each other. The size of these cells can also differ and range from 25 to 70 mm. The smaller the section, the greater the strength of the material and the higher its cost.
Another classification is carried out depending on the protective coating. The cheapest non-galvanized mesh, but it should be covered with paint immediately after installation, otherwise it will rust in the near future. Galvanized steel does not have such a disadvantage, since the zinc layer does not allow moisture to penetrate deep into the metal. More recently, plasticized meshes have appeared, their main difference is the presence of a plastic shell. They cost, of course, they are much more expensive, but the performance characteristics cannot be compared with the previous types. In addition, it becomes possible to purchase a colored mesh. But the methods of fastening the chain-link mesh do not depend on these parameters.
 Cheap non-galvanized mesh
Now we will consider all the features of this canvas, why is it in such demand even among summer residents? Mesh is a fairly cheap material. At the same time, its strength remains at a very high level. Therefore, if you just need to designate the boundaries of the territory and fence it off from the penetration of unauthorized persons, animals and not damage the family budget, this option will be the most acceptable.
The next plus is excellent visibility, does not block the penetration of sunlight and air. Unlike bricks, profiled sheets, cinder blocks and other alternatives, the grid only fences your site, but does not in any way interfere with the view of the surrounding area. True, some attribute this quality to disadvantages. But here you should be guided by the circumstances and desired goals. And thanks to the excellent air circulation and the absence of shade in the garden area, the most favorable conditions for green residents are created.
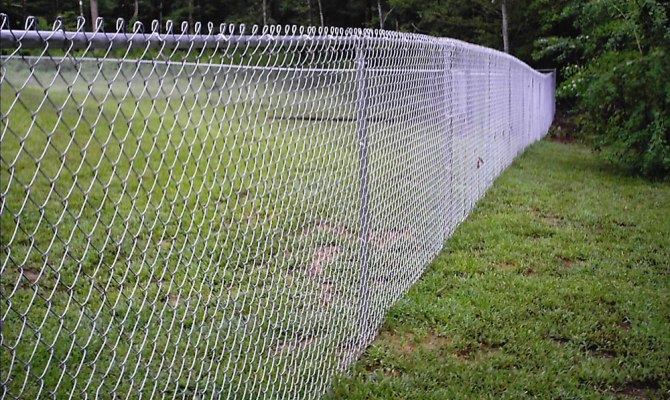 The advantage of this fence
It should also be noted the ease of fastening the netting of the chain-link, as well as its operation. Almost everyone can build such a fence. Then it does not require special care, it does not need to be painted, of course, if a high-quality product is preferred. And if you decorate the grid with climbing plants, you get a very original hedge that will delight the eye.
Making a tension fence
This is the simplest mesh fencing design. It will require minimal financial and labor costs. Further, each stage of construction is considered in detail.
Site marking
Pre-designate on the site of the location of the supports:
- in the area of installation of the fence, large plants and debris are removed, depressions and bumps are leveled;
- markers (stakes) are driven into the ground at the corners of the boundaries of the site;
- a cord is pulled between them;
- along the line from the side of the entrance to the site, mark the position of the pillars of the wicket and gates with pegs;
- measure the distance between the corner markers, and from the corners to the installation site of the gate posts.
Then, for each side, the length of the span is selected from the range of 2-2.5 m, so that an integer number of them fit in the gap between the markers, and they themselves are approximately equal along the entire perimeter of the fence. It remains to place markers along the string with a step equal to the accepted span length, thus indicating the location of the supports.
Preparing pits for pillars
It is more convenient to make pits for posts with a garden drill.The depth is 10-15 cm more than the buried part of the column. At the bottom of the excavation, a sandy or sandy-crushed stone pillow 10-15 cm thick is arranged. The material is tamped in layers of 5 cm, previously watered with water. This is a drainage cushion: it does not retain moisture, so the sole of the post stays dry.
Installation of load-bearing pillars
The supports are installed in the following sequence:
- a "heel" (a square plate for support) and hooks are welded to the posts, then they are primed and painted, and the buried part is also covered with bitumen or polymer-bitumen mastic;
- arbitrarily choose one of the sides of the future fence and install the extreme supports. Each column is brought to a strictly vertical position using a plumb line and temporarily fixed with wooden wedges or brick fragments;
- using the water level, it is determined at which rack the top is located below. Sand is poured under it until both racks are the same in height;
- having removed the wedges, concrete is poured into the pits with the racks installed or a mixture of soil and sand is poured with a layer-by-layer rammer. The cavity of the rack is filled with the same material;
- between the supports, the cord is pulled strictly horizontally, for which equal distances recede from the tops. A thick wire is laid between the cord and each stand. Without this, when installing other racks, they would have to touch the cord, which could lead to its imperceptible curvature.
Then, one after another, intermediate racks are installed, observing the conditions:
- strictly vertical position (controlled by a plumb line);
- the distance from the top to the cord is the same as that of the extreme supports;
- the gap between the post and the string is equal to the thickness of the wire laid under it on the corner posts.
Methods for installing fence posts
All vertical parts are welded on top with plugs. They also practice hammering the column into the ground. A small depression is drilled, a support is installed, a glass is put on top to protect the head from flattening and hammered with a sledgehammer. This option is acceptable for dense soil.
Fastening the mesh-netting
The easiest way is to unfold the net and hook it onto the hooks of the supports, after pulling it properly. You can do without hooks - just tie the canvas with wire or clamps. But such a fence will soon sag.
It is more correct to use wire guides with a diameter of 4-6 mm, there are two mounting methods:
- wire "stitching" the panel, passing it through each cell, then mount the canvas, pulling the stretch with tensioners or ties. This is ideal, but it is laborious, especially since at least two strings are required, and preferably three;
- first, stretch wire ties between the posts, and then screw the canvas to them with wire every 20-30 cm. This is an easier installation method.
Stretch braces give a significant load on the corner posts, therefore it is recommended to make them from a pipe of a larger diameter.
But on the other hand, the step of installing the supports can be increased to 3 m. The most durable fences are on logs - crossbeams made of profiled pipes welded to the supports. It is allowed to use a steel bar or reinforcing bars with a diameter of 10 mm.
They do it like this:
- roll out and strengthen the mesh on the posts using hooks or clamps;
- a rod is passed through the cells;
- the rod is welded to the vertical structural members.
In order to evenly stretch the mesh, a rod is threaded through the cells and the panel is stretched together from above and below.
Installation of fence posts
Methods of mounting a fence to a professional pipe are different. But, one way or another, this is a crucial stage - marking the site and fastening the chain-link mesh to the support.
Fence installation diagram
Selection of section and dimensions
Before you fix the netting to the posts, you need to clearly, taking into account the documentation, measure the fence under construction, calculate the location of the gate and wicket. The site for building a hedge must be cleared of debris.
Next, you should drive in wedges made of wood or reinforcement in place of the corner posts. To find out the location of the intermediate supports, you need to stretch a strong rope or cable between the wedges, and then measure the distance.
Mounting schemes
It is best to install supports from a professional pipe every 2 meters. That is, the resulting length of the fence will need to be divided by 2, rounding up. This method allows you to determine the total number of posts.
Areas of future racks also need to be marked with stakes. Taking into account the type of land, the thickness of the professional pipe and the type of fencing, several methods of installing the pillars are chosen.
Fixing sketch with cable
The board support is short-lived, concrete fence posts can create difficulties during the fastening of the chain-link. The solution is a round or rectangular pipe with a section of 50x50 or 60x60 mm.
The photo shows metal pillars from a professional pipe.
Metal fence in the village
Installation of pillars
Installation of a professional pipe for a fence is done in the following ways:
- partially or completely fill in concrete in previously dug holes;
- zabout - set in the hole and cover with stones;
- drive into the ground.
Installation diagram of a fence post made of metal
This takes into account the type of soil, the level of groundwater and soil freezing. But for the installation of the chain-link, the probable movements of the racks in a couple of centimeters are insignificant in length and width.
In practice, the rule is applied - at least 30% of the professional pipe must be buried in a pit. So, the pillars of 2.5-meter professional pipes must be buried 80 cm for any installation option.
Installation drawing of fence posts
Useful Tips
It is imperative to leave a gap between the ground and the mesh. On contact with the ground, the latter will rust, even if it is galvanized or covered with a polymer layer. With such a low edge location, the lower cells will be clogged with debris: foliage, branches, dead grass and others.
The biggest problems usually arise with corner stanchions. It is they who are subjected to heavy loads, therefore it is recommended:
- bury them deeper than ordinary pillars, at least 50 cm;
- it is on them that two rolls of the netting mesh should be joined, laying them overlapping with respect to each other.
And one moment. It concerns the joining of two rolls of material, regardless of the location of the joint. So, we will answer the question of how to connect the mesh netting to each other.
The thing is that the mesh is an interlacing of two spirals of wire: one with a right-hand screwing, the other with a left-hand one. Therefore, to connect two rolls together, you must use the same method. For example, if the edge of the net roll ends in a right-handed spiral, then you need from any other Unscrew the left-hand piece of material.
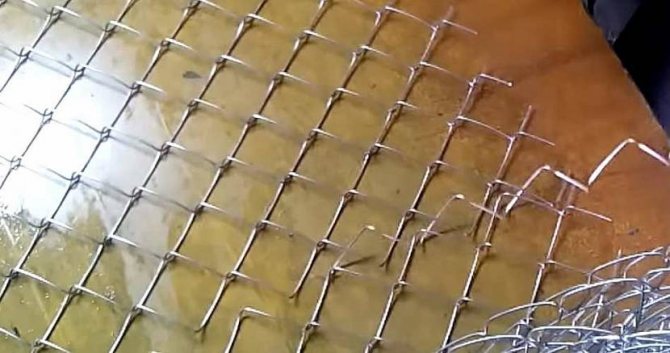
Connecting two meshes to each other
After placing one roll on the posts next to the edge, the second roll is placed vertically. Its edge is brought to the edge of the first one so that they practically join. Then a prepared spiral is screwed between them. And this will be the strongest connection.
What to do if you need to connect the netting with different cells. And nothing is complicated here. To do this, you need a bar or reinforcement, which is inserted vertically into the cells of the coils to be connected alternately. That is, the reinforcement in this case replaces the spiral.
These are two correct options for connecting the chain-link mesh. Often you can find when two rolls are fastened together with wire twists. Not the best way. As practice shows, when the second roll is tensioned, the twists begin to disperse, which leads to the formation of a visible gap between the mesh sections.
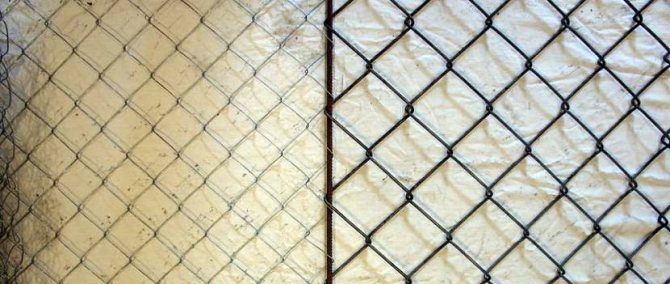
Connecting two different mesh netting
Fastening the netting of the chain-link to metal posts
Fastening the netting of the chain-link to the professional pipe is carried out using self-tapping screws and a hook or with a welding machine. In any case, the fence supports must be secured carefully.Since they play the role of a skeleton that allows you to connect all composite nodes with each other.
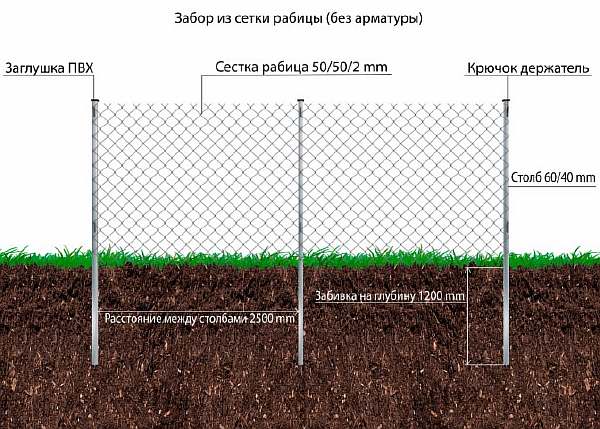 Drawing for the installation of a fence
Methods for making sections
A roll of mesh for the fence is laid out on the ground, measured about 2 meters and carefully cut off with a grinder, taking into account the selected size. Further, reinforcement rods are installed in the extreme rows of links
Metal rods do not need to be connected to each other.
You can also make a frame from a 40x40 mm corner and attach a chain-link to it. To make the frame, you will need welding. This mounting method will be more costly.
The photo shows a fence made of shaped pipes in the country.
 Metal fencing from a professional pipe
How to fasten sections to pillars from a professional pipe
The chain-link is laid out on the frame and welding is used to attach the upper part of the reinforcement to the inside of the corner. Then the mesh is carefully straightened from below and the lower rods are welded. Next, the side parts are installed.
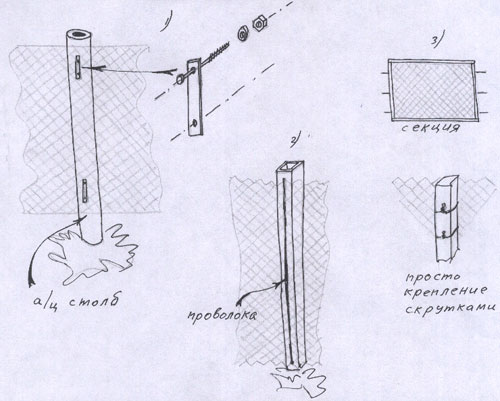 Installation sketch
The prepared structure is installed vertically to a post made of a professional pipe and fixed to steel plates or corners. It is possible to fasten the fragment with screws, making a hole of the required size.
During the installation of the next element to the professional pipe, it is necessary to ensure that the extreme sections of the adjacent frames are in the same plane. Even a difference of a centimeter is noticeable, this will give the fence an untidy look. At the end, the mesh is primed and painted. So the interconnected sections can be easily installed to any length.
The photo below shows a fence in the country.
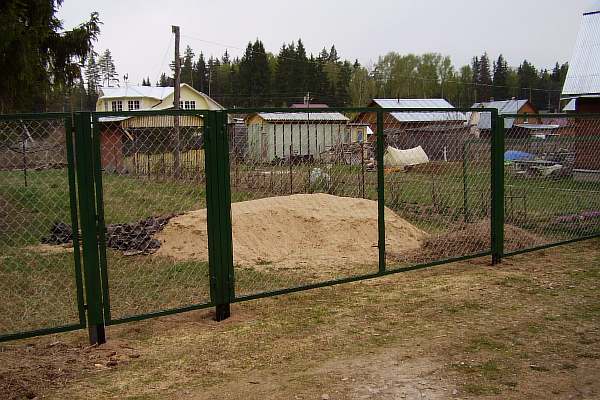 Sectional fence option
Fastening the chain-link to the pipe using a tension method
To ensure the rigidity of the mesh fence during attachment to the professional pipe, a cable with a section of 5-7 mm is pulled from above. This is necessary to resist the wind and prevent the chain-link from sagging. It is possible to fasten to metal posts and tighten such a structure in any way, but better with special tensioners.
 Fastener examples
During the installation of a chain-link fence and a professional pipe and fastening with the help of stretch marks, the distance between the supports can be made larger, up to 3 m. It is required to increase their strength, in contrast to racks with a conventional hedge.
You can fix the mesh netting to the metal post using the through-flashing of the professional pipe in width. But this is laborious, and with an increase in the cross-section of the wire, the complexity of the fastening increases.
 How to attach the canvas in a tension way without welding
That is, in practice, at first, the strings are fixed to a metal professional pipe, after which the mesh is installed and fastened in the manner described above. Further, with an interval of 20-30 cm, the chain-link is tied to the stretch marks with a wire with a diameter of 1.3-1.75 mm.
 Fastener diagram with clamps and cable
The video provides instructions for installing the canvas in a tensioning way.
Mounting on hooks and hanging features
This method of attaching the mesh is used in summer cottages, if a fence from a professional pipe is installed to delimit the site with neighbors. Hooks must be welded on the supports so that the top of the chain-link is clearly horizontal. That is, the upper parts of the fasteners must be placed in a level.
 The scheme of fastening to a metal corner and to wooden veins
To make the correct installation of the netting of the chain-link, you need to fix one hook from above on the corner supports from a metal professional pipe, measuring the height, and stretch the rope.
But it is necessary to observe the nuances:
- This installation takes more time, especially if you use metal rods and staples to fasten the chain-link mesh.
- Fastening by this method implies the presence of free space, since you need to unwind the roll to a great length.
- Independently in this way, the fence from the chain-link cannot be fixed to the professional pipe.
In the picture below you can see the types of hooks for attaching the chain-link to the professional pipe.
 Crochet hooks at the corner
Tension fastening method
This option is the most popular in the version with guides. It allows for the creation of a more aesthetic and attractive fence. Horizontal guides are welded to the main supports in 2 or 3 places, the metal profile will be the best choice for them, but wood can also be used. This design is well suited for all types of soil, except for heaving.

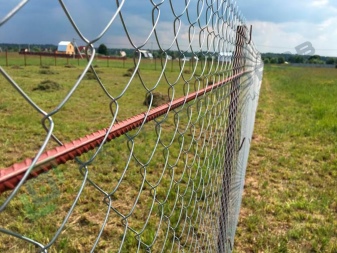
The fastening of the netting to the profile pipe with horizontal guides must be carried out in a certain sequence. Installation of pillars and markings is similar to that performed when installing a sectional fence. The rest of the steps are performed step by step.
- Fixation of horizontal guides. It is performed on each pillar, above and below. If wooden slabs are used, they are fixed with through fastening with bolts. Metal are welded. The primitive solution is pulling.
- Installation of the first section of the fence. A reinforcement bar passed through its edge reliably helps to fix the mesh on the corner post. It is he who is welded at 4 points to the base. It is better not to use a wire or clamp twist. The optimum thickness of the steel bar is 4 mm or more.
- Installation of the remaining sections. Each is fixed from pillar to pillar, in addition to fastening on vertical supports, additional fixation is performed horizontally. It can be carried out by the welded method using wire twisting or self-tapping screws.
It is worth considering that, deciding to attach horizontal guides to a rigid welded joint, you can get deformation and rupture after the first winter. The burial of the pillars below the level of soil freezing helps to avoid problems. And also wire tension can be applied.
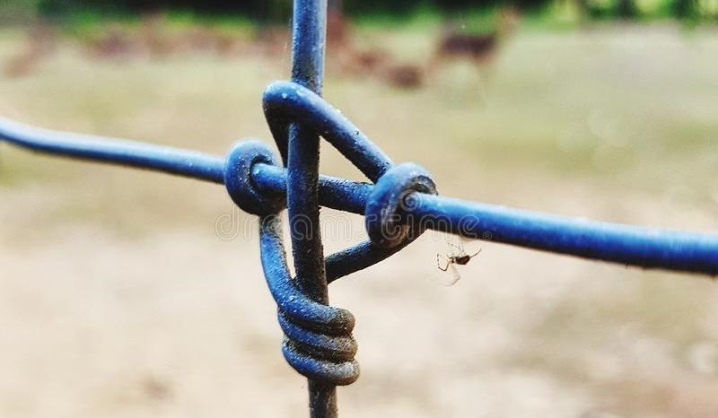
It is quite easy to pull the net in this way. It is enough to throw a wire loop over 1 post, then pass it along the top of the net, after 2-3 supports, wrap it again several times. Work continues until the end of the span. At this stage, sagging is still possible. It is eliminated by threading the bar and making a twist. Such a lever with minimal physical effort will give maximum efficiency, you can repeat the action for each span.
Views
The welded mesh, which is used for self-installation of the fence, is initially made of wire of different cross-section. This thin steel is welded into a single sheet. The result is a tough (or not so) material that is spot welded together. Let's find out what types of steel wire can be used on your site.
Non-galvanized wire is the cheapest, readily available type. This mesh is made of steel wire with a cross section of 1.3-10 mm. The product is not additionally protected by any coating or material. And this is a minus, since the service life of the future fence is reduced. After a few years from the moment of installation, the wire will lose its original appearance. It is susceptible to rust (corrosion) due to external factors such as precipitation and the scorching sun. Suitable as a temporary option or a fence for a summer residence.
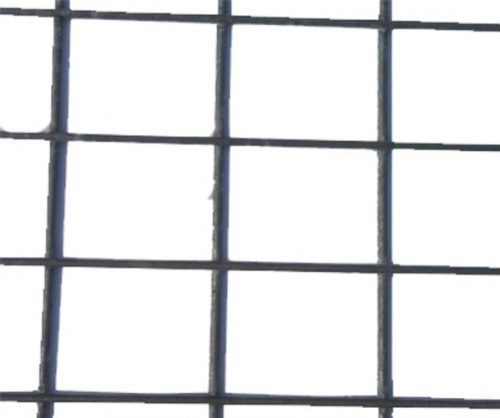
Galvanized welded mesh. Kolchuga Photos
Galvanized wire is considered more suitable. It will last much longer. The manufacturing method is similar to the previous version. A wire with a cross section of 1.3-10 mm is point-connected by welding. But on top it is covered with a zinc layer. This is a necessary measure in order to protect the product from external factors. Metal processing with zinc is also carried out using a special electrolytic technology. By purchasing such a mesh, you will not spend a lot of money, but you will get a high-quality fence that can last for more than a dozen years.
PVC coating. This type of wire, connected in a welded mesh, is characterized by durability in contrast to the previous versions. The wire is reliably protected from corrosive processes.As a result, fences made of PVC-coated wire can withstand external factors for several decades. At the same time, they do not lose their attractiveness. Most often, these products are made in a green version. A protective coating in the form of polyvinyl chloride is applied after the elements of the future section have been welded together.
A double coating is a zinc electrolyte coating applied, followed by a polyvinyl chloride layer. If you decide to purchase just such a mesh, then it will delight you with its quality and longevity.
At the same time, there is another classification of wire for fences. Rolled mesh is a one-piece material, twisted along its entire length for convenience. Ideal for quick installation of a fence.

Grid welded roll galvanized in PVC 50x100x2.0. Anker Photos
The sectional grid is divided into separate segments. It is made for ease of installation of the fence from separate parts. The sale is carried out by segment, and not by area, as in the previous version. See in more detail Sectional mesh fence.
The welded 3D mesh has a beautiful design, which has volumetric (curved at the top and bottom) longitudinal bars. Fences made from this mesh are great for territories for different purposes.
Sectional
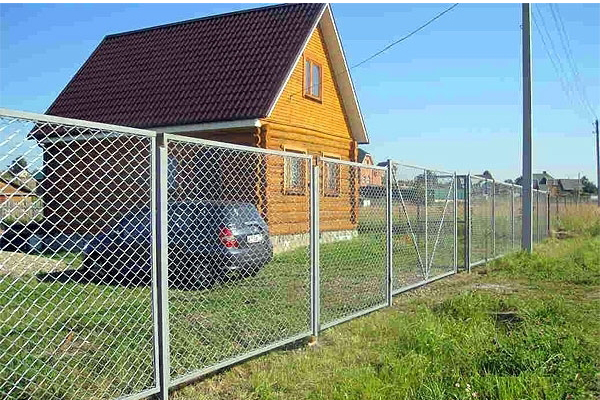
This is another answer to the question of how to fasten the mesh netting. There are two ways to achieve your goal:
- In this method, not the last role is also given to the steel bar. First, the mesh is cut strictly according to the measurements of the frame. A rod is passed along the perimeter of each structural element. Its thickness is not so important, the main thing is that it passes freely into the cells. The mesh, "refined" with a rod, is placed in a frame made of a corner. Then the rod is welded to it.
- Hooks are used here. The chain-link is prepared for installation in a similar way: by passing pieces of a steel bar along its perimeter. Hooks are welded to the frames inside. With the help of them, the chain-link with a rod is attached to the sections. The hooks are folded or welded in the same way.

Fastening the frames to the posts using bolted welded plates is the third option for accomplishing this task. Which one is more suitable for the owners of the site.
To the question of how to fasten the mesh netting, one can find more and more answers every year, since there is no human limit to the imagination. One of the potential options can be seen in this video:
