Brands
The most famous brands in the construction world are Knauf, Sheetrock and Vetonit. Consider these and less popular companies with all their features:
Knauf, the most popular construction brand, produces a huge variety of fillers for a wide variety of purposes and situations. So, for example, Knauf-Rotband Pasta Profi is a finishing putty with the addition of vinyl, which the manufacturing company can be proud of. Snow-white, resistant to cracking, has increased elasticity, which allows you to close even the smallest cracks and rough irregularities. Easy to freeze.
- oil composition that facilitates the application process;
- low mortar consumption per square meter;
- has a snow-white color before application, and after drying it acquires a slightly beige tint;
- after processing, the surface becomes smooth and pleasant to the touch.
- Ready mix Danogips SuperFinish from the Russian manufacturer has a pasty form and polymer composition. Basic putty for dry rooms. Possesses high frost resistance and pliability during mechanical and manual sanding.
- The most economical option today is considered to be a filler based on PVA "Economy" of another domestic manufacturer "Leningradskie Kraski". Ready mix, which just needs to be slightly diluted with water before use. Most suitable as a starting layer for painting or wallpapering. The surface is matt, the consumption is 750 grams per square meter.
And in order to be guaranteed to be in front of that very brand for that very case, you should read the reviews, of which there are a lot of them on the network.
Self-preparation of the mixture
It is known that putties can be prepared at home. There are quite a few such recipes today, but any of them have the same basis. So, the main components include: chalk, drying oil, varnishes, sifted gypsum, as well as carpentry or animal glue.
- Gypsum-chalk putty mixture is suitable for use in dry rooms, in order to level drywall sheets and concrete surfaces. In order to prepare such a mixture, you will need a mixing container, three kilograms of chalk, one kilogram of gypsum, five percent carpentry or animal glue. For mixing, you need a spatula, or even better, a drill with a special nozzle. In addition, you should purchase a respirator or at least a gauze bandage that protects against gypsum-chalk dust.
- First, you need to carefully sift and mix the chalk with gypsum. They should be gradually introduced into the container with the adhesive solution. Mix everything thoroughly until a homogeneous mass is obtained. The amount of the mixture to be prepared should be sufficient for work, but no more. The fact is that this putty quickly hardens, because of which the excess will have to be thrown away.
- If it is necessary to prepare the surface for painting with oil paints, prepare an oil putty, which will require 100 grams of desiccant, 1 kilogram of drying oil and 2 kilograms of chalk. This mixture can be used to coat surfaces subject to frequent temperature changes, such as window frame surfaces.
- If the surface is to be coated with glue, then a glue putty is prepared. You will need 25 grams of drying oil, 2.5 kilograms of sifted chalk and 1 kilogram of 10% glue solution. The glue solution must first be warmed up, then mixed with drying oil and brought to a homogeneous consistency. Then chalk is gradually introduced until the desired density is obtained. To improve the spreading of the putty, finely chopped soap should also be added to the mixture.
How to make a composition with your own hands?
How to make yourself from chalk with nitro lacquer?
To prepare such a mixture, you will need to take chalk, previously well crushed to a state of dust, and small sawdust, which must be dry in order to measure the correct amount of them for the volume of chalk. The resulting mixture is diluted with nitro lacquer.
Such a putty mass is suitable for repairing wood and chipboard items. It is good to putty all the plank walls with it - external or internal.
To get the color of the putty necessary for the work, you need to paint it with building pigment or gouache. Add a drop of solvent No. 647 to the dye, pour putty into the composition. To stir thoroughly. Can be used immediately.
This solution dries quickly on the surface. But there are significant disadvantages - it has a pungent specific odor and slight toxicity. Do not use it in living rooms.
How to use PVA glue for making?
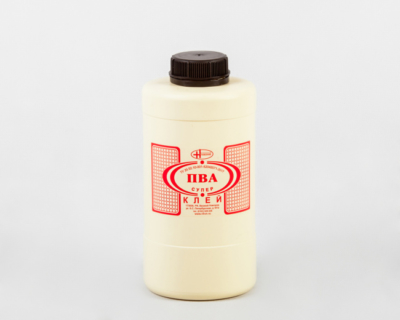 PVA glue is an excellent binder for putty. It is used for work related to the puttying of wooden surfaces. The chalk is diluted with glue, the mixture is brought to the consistency of thick sour cream.
If significant defects (irregularities, cracks) are visible on the treated surface, then wood dust or crushed sawdust is added to such a solution in a ratio of 3: 1. The wood putty prepared on the basis of PVA glue acquires the qualities necessary for the material.
The only drawback is slow drying. You must wait at least a day to continue finishing work.
Chalk with acrylic varnish
For preparation, you should take a measured amount of chalk and any acrylic varnish. Mix everything to a liquid paste. With a strong density of putty, it is allowed to dilute it with a small amount of water. The color of the mixture is adjusted by adding a small amount of color for water-based paints.
Important
Acrylic varnish is elastic. Putty on such a basis perfectly protects the wooden base from various external influences
One of the advantages of such an acrylic compound is its protective function against sudden changes in temperature and humidity.
No. 7. Major manufacturers of putties
The market for putties is oversaturated today - you can find a mixture of any composition, for any type of surface and, most interestingly, at almost any price. We all love to save money, especially when it seems that there is no difference at all between two similar products. When it comes to putties, saving does not seem such a sensible thing, because hardly anyone wants the putty layer to crack and fall off along with the paint after a few months. Trusting the products of large manufacturers is better:
- Knauf is a large German company with factories located all over the world, incl. in Russia, which allows us to buy quality products at more affordable prices. Knauf putties are presented in cement, gypsum and polymer compositions, sold in dry and ready-made form. There are solutions for all areas of use. A special solution of the company is a gypsum plaster with components that protect against X-ray radiation;
- Ceresit is a product of a large concern that is very popular all over the world. Ceresit brand sells cement and polymer putties;
- Tikkurila is another well-known concern that, among other things, produces putties. The company offers acrylic moisture resistant and gypsum compounds. Also in the assortment there is Euro Filler Light putty, which is distinguished by its ease of application and the absence of the need to sand - the surface itself becomes even. The color of the composition can be chosen from 15 offered. The company also offers Spakkeli wood putty, which is suitable for the treatment of doors, furniture and other wooden surfaces indoors;
- Vetonit offers polymeric, cementitious and organic bonded fillers. There is a composition that will not only align the seams on drywall, old painted surfaces and wallpaper, but also allow you to create a textured decorative surface;
- Kreisel is a German company with factories in 20 countries, incl. in Russia. Putties are represented by cement and gypsum compositions;
- "Prospectors" - home-made putties. The quality is not bad, the prices are reasonable. The assortment is represented by gypsum, cement, polymer-cement and polymer compositions, which are suitable for starting and finishing works in dry and wet rooms, as well as for outdoor work;
- Volma is another domestic manufacturer that has proven itself well. The range of compositions is very wide. There are gypsum and polymer putties with different particle sizes. There are solutions for any situation.
You can also recommend the products of "Ural building mixtures", "ARMstrong" and "Eurogypsum".
When buying, do not forget to inspect the integrity of the packaging, pay attention to the expiration date and, if desired, ask for certificates of conformity - any responsible manufacturer and seller should have them
Useful video
Aligning the walls and preparing them for cladding is one of the most difficult operations, the quality of which determines the durability of the repair and the appearance of the room. For this purpose, putty is used. The modern market offers ready-made mixtures that can be immediately applied to the surface, but they are quite expensive, therefore dry compositions are used for large-scale work. In this article, we will look at how to dilute the putty for high-quality preparation of walls and ceilings.
To carry out really high-quality work, the putty must be elastic and plastic, at the same time the mixture must lie well on the surface, spread over it and easily lag behind the spatula. The consistency should be uniform, without lumps or other solid formations.
On the packages of dry mixtures there are instructions for their dilution, which must be followed, but in some cases a more liquid or, conversely, thick solution is required, so you should be aware of some rules for diluting the mixture.
Dilution for rough finishing
This operation can be carried out in two ways, the first of which is a bit like kneading dough and is used when there is no mixer attachment at hand, as well as a power tool.
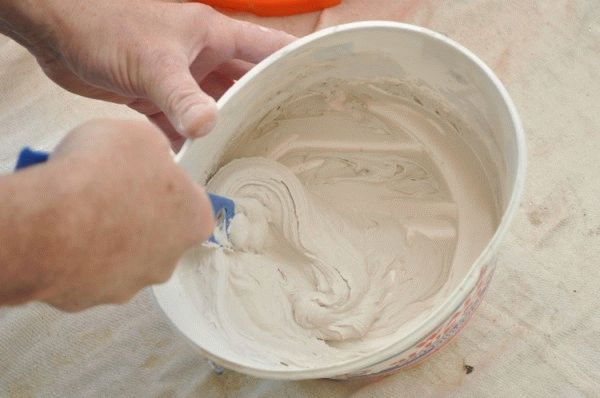
Let's consider in stages how to dilute the putty:
- First you need to prepare a plastic container - wash it, dry it, and then pour about 7 trowels of dry putty.
- Then add some water and mix well. Tools and containers must be reasonably clean, as dirt entering the mixture will cause it to dry prematurely in the container or crack on the walls and ceiling after drying.
- After obtaining a homogeneous solution without lumps, add the remaining dry material and water, and then mix everything again.
At the end of mixing, let the putty brew for 3 minutes, then mix again and apply to the walls or ceiling. The amount of material should be sufficient for 20 minutes of continuous work. In order to prevent the putty from cracking after drying, the surface must be carefully prepared and proportioned during preparation.
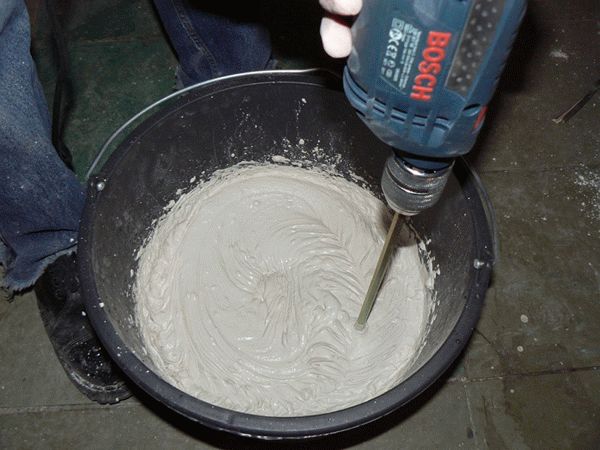
The second method involves the use of a screwdriver or mixer attachment on an electric drill.
- Pour water into a clean plastic container, then add the dry composition there. The required proportions, as well as other information on how to dilute the putty, can be read on the packaging.
- Then you need to turn on the power tool and knead for 2-3 minutes.
- When the solution acquires the required consistency, it must be left to swell for about 15 minutes, and then mixed again with an electric drill or screwdriver.
Dilution for finishing
The preparation of such a mixture is practically no different from working with a starting putty. Only in this case are the requirements for re-mixing and instrument cleanliness higher. The fact is that it is applied to the walls in a very thin layer, so all lumps or other formations will be visible to the naked eye.
Especially these defects will be visible with the subsequent application of finishing materials of a glossy texture with side lighting of the room. It is better to stir the finishing mixture several times, taking breaks for its swelling. The mixing tool must be washed before each procedure.
The container also needs to be washed every time, you cannot leave the remnants of the previously prepared mixture and start preparing a new one in the same place. Also, do not add any residues collected from the mixer to the solution, as this will lead to the formation of lumps.
Application
Polyvinyl acetate-based putty is used for interior walls and ceilings. This material can be used not only for wallpaper and paint, but also as a cladding. The finishing material is convenient for its versatility: there is no need to buy different compositions for each type of surface.
PVA putty is suitable for almost any material:
- brick;
- wood;
- cellular concrete;
- expanded polystyrene;
- drywall;
- plaster;
- paints and varnishes;
- MDF;
- Chipboard.
In addition to standard applications, the putty mixture can be used for the manufacture of decorative elements.
How to fix topiary in a pot with plaster cast
Differences between alabaster and gypsum
Alabaster is a fast-hardening type of gypsum, it is used only in construction: a tire cannot be applied to a broken leg, but alabaster is ideal for fixing topiary in a pot.
Method I. Filling with liquid solution
In a separate container, knead alabaster or gypsum with warm water until a homogeneous mass without lumps is obtained, the proportion is 1: 1. We glue any holes in the pot, fix the trunk at the bottom with plasticine or stones. If a flexible cable is used, then we twist a loop at the end and set it to the bottom. We fill the topiary pot with gypsum to the required level. We recommend this method if there is time to wait for the fill to dry completely.
❮❯
The method is very convenient, the plaster will probably not have time to grab, so you can slowly fix the barrel in the desired position, and also remove the drips and wash everything
Method II. Filling with thick mortar
We fill up the gypsum in the topiary pot, slightly below the calculated level for pouring. Slowly pour in water, stirring the solution thoroughly, until a thick sour cream consistency is obtained. Immediately insert the barrel in the right place and, without delay, wipe off the drips, remove the excess solution.
❮❯
The method is universal, and most importantly, it allows you to fix the topiary in a pot very quickly: alabaster hardens completely in 2-3 hours. In this case, everything must be done very quickly, because the solution sets in 1-2 minutes. This filling method is not very convenient for small, deep and narrow pots: it is difficult to quickly knead the solution to the desired state. We recommend using a thick fill only when it is necessary to continue the decoration of the tree of happiness as quickly as possible.
How to dilute the finishing putty
Consistency of ready-to-use finishing putty
The finishing putty differs from the starting putty in finer grain, it is more elastic. It is used for the final leveling of walls, and its consistency should be more liquid than plaster or starter mortar. To dilute the finishing putty, you must use a dry, clean container. A powdery mixture is poured there, but you should not immediately pour water in so that lumps do not form.
This is very important because the finishing compound is applied in a very thin layer (1 mm) and any lumps will be visible. The correct dilution ratio of the finishing putty is seven trowels and a small amount of water.
After that, the composition is thoroughly stirred, then the rest of the powder and water are poured into the resulting homogeneous mass. The mixture is left to swell for three to five minutes, then mixed again. The resulting composition should not be too liquid, but not thick either. For mixing the finishing putty, it is better to use a mixer with a spiral nozzle; the mixing process should be smooth.
If it is necessary to knead a repeated batch, you should use a different container so that the remnants from the previous mixture do not get into the new batch, or use a different dish.
Material characteristics
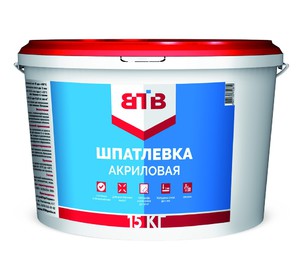
Acrylic is the basis for acrylic putty. It is a synthetic substance whose parameters can be adjusted. Acrylic interacts remarkably with the rest of the putty based on it, due to which the entire mass has a uniform appearance, after drying, forming a smooth, dense surface with a uniform texture. Of the main advantages of acrylic material, the following stand out:
- Ease of application. In order to process the surface, you need an ordinary spatula or, if the composition is very liquid, a spray gun.
- The acrylic coating can be sanded with ordinary sandpaper without any problems, even if it is slightly inferior in this parameter to gypsum.
- High ductility. This is due to the fact that the coating of this material can withstand mechanical stress and tangible temperature changes, without any complaints keeping in frost and heat. Due to this, it is not subject to shattering and cracking.
- Good water repellency. It is they that reliably protect the base base from the negative effects of moisture, as well as from the formation of fungus and mold.
- High efficiency of thermal insulation.
- Fast drying.
- Excellent adhesion to dissimilar materials.
- Fire safety.
- Compliance with environmental safety standards, cleanliness and harmlessness to humans.
In addition to all this, this material does not shrink, it is resistant to ultraviolet radiation and has long-term operational potential.
The putty with an acrylic base is not devoid of disadvantages, which include:
- High price.
- When sanding, it is advisable to protect the respiratory organs, since, despite the safety of the acrylic coating itself, its fine dust, if inhaled, can pose a threat to the lungs. In order to protect yourself, a respirator is suitable.
- Water vapor permeability is far from ideal, impairing the natural circulation of moisture.
- Fast adhesion. This can be attributed to the merits, but there is a downside to this quality: if you do not work with this material promptly, the coating will harden before it is acceptable.
- Dependence on temperature during work. It is very undesirable to work with it at subzero temperatures.
Acrylic solutions are used in the decoration of various types of facades of buildings and premises. With the help of acrylic, coatings are created for such bases as brick, metal, wood, concrete, drywall, as well as for various plaster. However, much in the matter of a suitable surface for it will depend directly on the type of putty.
Views
The puttying process does not take very long, but leaves an indelible impression after itself. More precisely, smoothed out. The putty, like a magic wand, will correct all the unevenness and roughness of the walls, close all the cracks and humps.
There are tools for indoor and outdoor work.
However, they differ not only in the field of application:
Latex putty for interior work. It is based on latex, which leaves the product in a liquid and plastic state for a long time. Sold in buckets with tight lids.
Of the minuses - fragility: gypsum can simply break off or crumble. That is, such a putty is ideal for rooms with a small crowd of people, a calm atmosphere and minimal temperature changes.
- Polymer putty has high elasticity and durability. Therefore, the price tag for this type of mixture is comparatively higher than the others.
- Acrylic putty is suitable for both indoor and outdoor use. It behaves perfectly in all temperatures and weather conditions. Easily adheres to any surface. It is often used as a finishing touch - a finishing layer, applied with a thickness of no more than 1 mm. Excellent for wood processing, does not crumble over time and does not smell.
- Based on PVA. It can be recognized from a thousand: by its peculiar smell. The main feature of this species is its use in wet rooms without fear of being at the mercy of fungus, mold and harmful microorganisms.
- Decorative, design. It can be colored and textured. The required shade can be achieved by tinting, while the choice of texture directly depends on the design solution of the room.
It is also necessary to distinguish between starting (basic, basic) and finishing putty. The first is necessary to correct the visible imperfections of the walls. The second is to give the object a complete look.
How to choose the right one?
Among other recommendations for the selection of putty, the correct setting of the goal is important: why putty is carried out
After answering this question, pay attention to the following points:
- For painting walls, it is worth choosing ready-made mixtures, while for wallpaper, experts recommend using dry types of putties.
- Universal mixes are perfect for beginners who decide to make repairs on their own. This is exactly the case when the putty can be both basic and finishing.
- No matter how expensive and well-known the mixture is, before buying, check if there are any excess impurities in the bucket: stones, dust, straw - debris, in a word.
- European-made putty is considered one of the highest quality. But its price is much higher than any other on the building materials market.
- It is better to glue the wallpaper on a white base.
Comparison with latex putty
 It happens that sellers are advised to buy latex instead of acrylic putty. In this case, the question arises about the advisability of such a replacement. In order to decide which one is better, you need to know some of the features of putties and on a latex basis. However, in terms of composition and many parameters, these two types of putty materials are very similar. For example, putties with a latex base are also used for all types of finishing work, both interior and facade.
The latex-based material contains plastic polymers and artificial hardeners, and its coating gives the walls antiseptic properties, protecting them from fungi and mold, no worse than acrylic. If desired, the material can be given any shade. But the most significant difference between latex mixtures is that after drying, their surfaces can be easily processed without cracking or crumbling. There are no other fundamental differences between these two putties, and if you wish, you can replace one of them with another, if the conditions and tasks for internal work are comparable.