Cement grouting
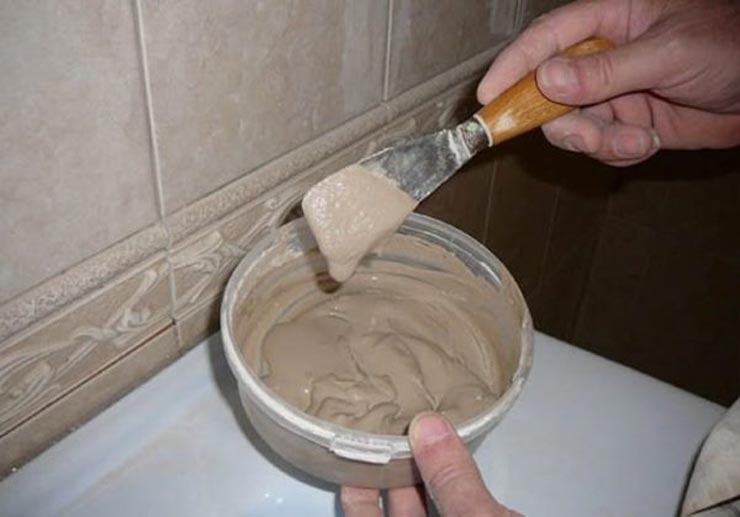
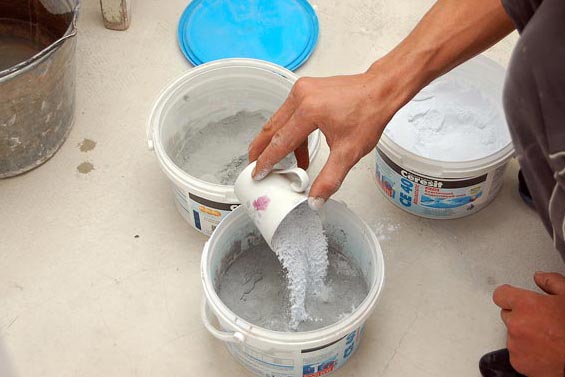
We dilute the dry mixture with water according to the instructions. There are dye crystals in the colored grout, which dissolve only after a couple of minutes. Therefore, after the first mixing, you need to wait 5 minutes and re-mix the mixture. Otherwise, it will turn out as in the photo:


Do not knead too much mixture, especially the first time. The packaging says how long the tile grout dries. For example, at a temperature of + 15-25 ° C and normal air humidity for Ceresite, the setting time is at least 60 minutes, and the veneer can be used only after 24 hours. But the seams will gain full strength only after 28 days, like concrete.
Fill the seams tightly with a trowel / rubber trowel in a cruciform motion.
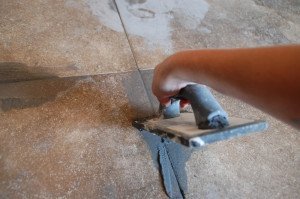
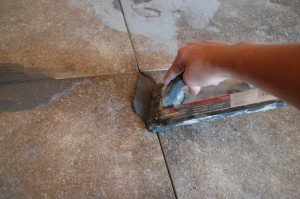
Immediately after that, we form the seams with a wet sponge with transverse movements. Try not to wash the mixture out of the seams, but only to remove the excess. On a large square, to speed up the work, you can replace the sponge with a squeeze mop with a rope cotton.
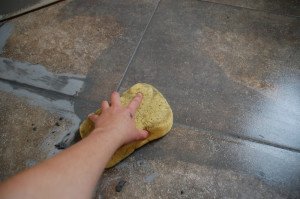
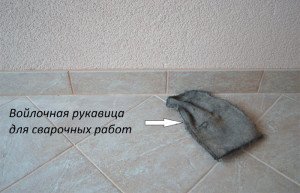
We leave the cladding to dry and then brush off the white coating with a dry clean cloth. It is most convenient to do this with a felt mitten.
Features of grouting seamless tiles
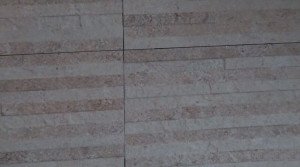
Even seamless tiles show seams
Some tile collections do not have a small rounding around the perimeter, because they were not made by casting, but by cutting a large slab into pieces. This is mainly rectified porcelain stoneware or small 10x10 tiles.
Such a tile is laid with minimal seams, but it cannot be laid completely without seams. With the standard approach (grouting ceramic tiles and washing off the excess with a sponge) it is difficult to make the joint flush. Usually it falls through and a groove is formed in which dirt and moisture will then collect. In addition, sharp corners will be the site of potential chips.
To avoid these problems, grouting with a cement mixture is done using the following technology:
- Seams are filled with a rubber float as usual. The mixture should be applied flush with the tiles or with a small bump.
- We remove the excess from the glaze of the tile. To make this easier to do, the surface of the tile is pre-moistened with a sponge (moisture should not get into the seams).
- We are waiting for the grout to dry. We pass along the seam with transverse movements with a piece of corrugated cardboard. Excess will be erased and get a flat plane.
Practice on a small area before using this method. If the tile is coated with a soft glaze, micro-scratches from cardboard may remain on it. In this case, you need to rub it in the old fashioned way in 2 passes.
Diy grouting technology
If mistakes are made during the filling of the joints between tiles, the life of the coating will be reduced. Seams crack, and moisture penetrates the adhesive structure under the tiles, which leads to the destruction of the cladding.
Tools for the job
You will need:
- rubber spatula;
- container for solution preparation;
- notched trowels of different sizes;
- embroiderer - for the formation of seams;
- sponge;
- rags.
You need to work with gloves. If you make your own grout mix, you should use goggles and a respirator.
Surface preparation
Work begins 2-3 days after the tiles are laid. During this time, the glue will dry. If you need to keep within a shorter time frame, it is permissible to start grouting in 1 day. The mixture is applied to the joints between the tiles only if the surface is prepared: cleaned, dried. No glue should remain on it. It will be much more difficult to remove it after drying, so the tiles need to be cleaned as the installation proceeds.
When using grout mixtures containing pigments, it is recommended to apply a special compound before starting work to protect the cladding from staining. Thanks to it, a film is formed over the pores of the ceramic coating. After treatment with this material, grouting can be performed after 2 hours. Especially often the composition is used for white tiles. Such a product is not applied to glass and polymer lining.
Pigmented grout.
Preparation of working solution
It is necessary to fill the seams in areas of no more than 1 m², moving through the room. If you prepare a solution in a large volume, it will quickly solidify, it will be impossible to work with it. In this case, you will have to knead the fugue again.
First, a small amount of water is poured into the container, then dry components are added in accordance with the instructions. The solution is stirred with a spatula of small width, the remaining amount of water is poured in a thin stream. In this case, you need to constantly stir the fugue. You should leave the finished mixture for 8-10 minutes, and you can start working.
Grouting
The solution is spread over the seams with a rubber spatula. The recommended tilt angle is 30 °. Apply moderate pressure to the trowel, trying to fill the joint over the entire height and width. The cement grout is applied after the surface has been moistened to ensure high adhesion.
Method of grouting.
Sealing
In rooms with a high level of humidity, another type of grout is used - silicone material. It is applied over the treated seams. This is done to ensure that the coating is protected from water.
Wet surface cleaning
Remove excess grout after no earlier than 20 minutes. This is enough time so that the seams are not damaged, but at this stage the fugue is easily cleaned off. A moistened sponge is used for this purpose. Finish cleaning of the coating is carried out when the material has hardened. In this case, you need to moisten the entire surface, then wipe it dry.
Dry cleaning
This method should be used at the initial stage of drying the grout mixture. While the material is still wet, contact with water droplets may cause loss of properties. Use a dry rag to wipe off excess solution immediately after application. In this case, you must first remove the mixture with a flexible spatula. Then the surface is cleaned with a cloth.
Usage Tips
When containers of substances are opened, it may appear that the epoxy is too thick and this will affect its application. However, in the process of combining this material with a hardener, the consistency gradually changes. The resin becomes less viscous. It is recommended to follow the instructions for connecting grout components. This will provide a material with excellent properties. It is necessary to work with gloves. As a result, contact of the grout with the skin can be avoided.
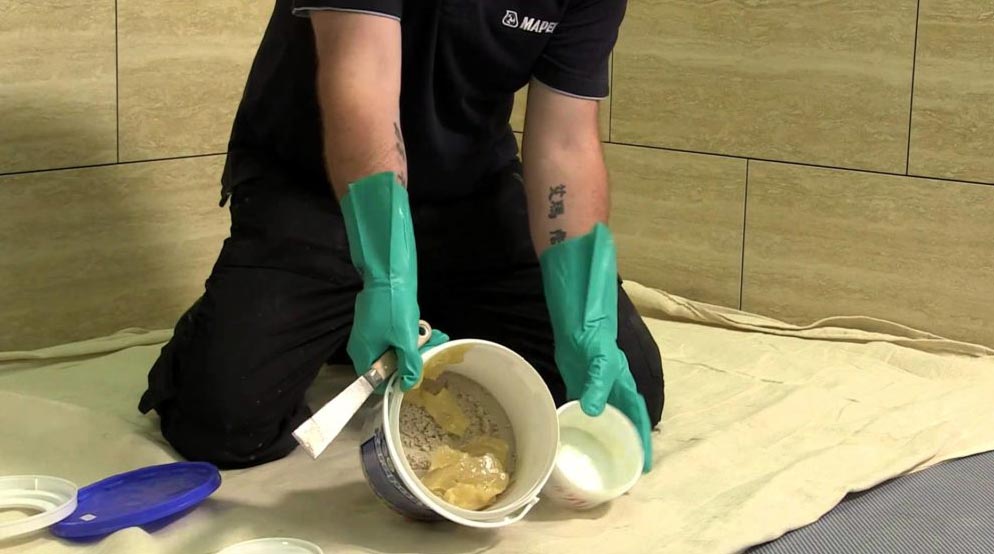
How to dilute?
Take a plastic container. The components must be connected in accordance with the proportions and manufacturer's recommendations. So, mixtures are produced in different quantities, which makes it possible to prepare the required volume of grout. As a result, the material will not dry out. The likelihood of this increases when a large amount of grout is prepared at once. It will not be possible to use it all, which will lead to an increase in the cost of finishing work.
The grout hardens completely after 60 minutes. The mixture begins to set immediately after mixing the main components. For this reason, it is best to first prepare no more than 300 g of the substance. This amount can be used for a short period of time. The mixture is prepared using an electric drill with a special attachment.
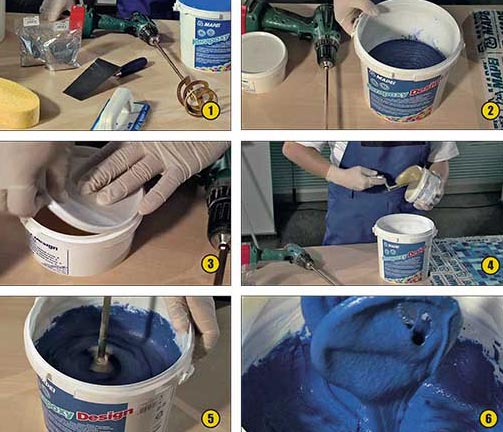
Moreover, a construction mixer should have as few blades as possible. The quality of the mixture will depend on this. If a nozzle with a large number of blades is used, and the speed of the drill is high, then the material will be oversaturated with oxygen.This will lead to a discoloration of the grout, and will also cause the heterogeneity of its structure.
How to apply?
Transfer the solution to a clean container before use. Such a measure avoids disturbing the structure of the material. In the process of mixing near the walls of the container, the mass may be less actively saturated with the hardener. This leads to a decrease in strength and loss of the basic qualities of the mixture.
At the next stage, the process of grouting the seam joints begins, since the material hardens immediately. In this case, a harder rubber spatula is used. With its help, a sufficient amount of the mixture is placed in the inter-tile space.
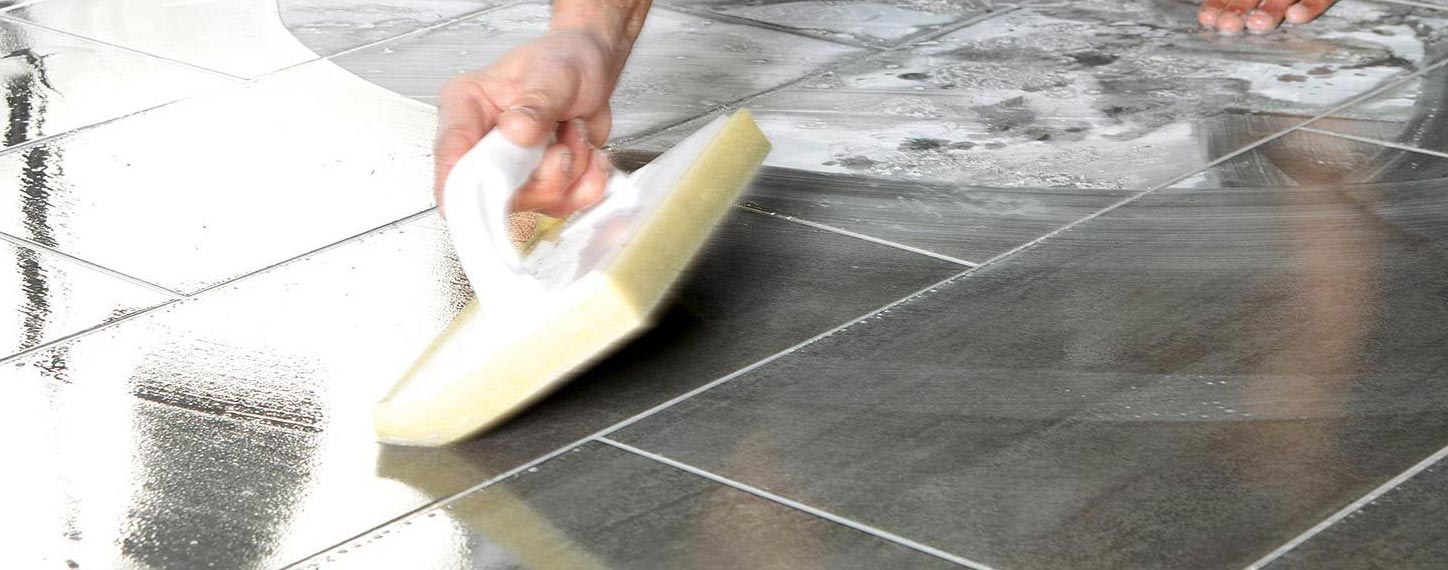
How to clean?
Litonet Litokol solvent is widespread. This is a special agent for removing epoxy mixtures from the surface. Its main characteristic is alkaline pH. The substance can be applied to different types of tile flooring. It is a concentrated solvent and can be thinned to reduce consumption. Still, this measure allows you to reduce the degree of aggressive impact on the tile. The tool is versatile.
The substance can be applied at temperatures within + 5 ... + 35 ° С. The duration of exposure to the surface is up to 15 minutes. A container with a volume of 1 liter is enough for cleaning 10-15 m²
Whether the work is planned to be done in a garage, workshop or living space, it is important to ensure efficient ventilation.

The substance is diluted according to the manufacturer's instructions. The concentration of the solution depends on the degree of complexity of the tile soiling. The more time has passed since the seams were filled, the more difficult it will be to remove stains from the surface. After applying the solution, you need to wait 10-15 minutes, then remove the rest of the substance and wipe the tiles.
When it is not possible to use a solvent, you need to prepare the water. If you use a special sponge (of increased rigidity), you can remove fresh dirt immediately after grouting the seam joints. It is possible to simplify the cleaning process. To do this, the tiles are pasted over with masking tape around the edges.

What is grout for?
First of all, such mixtures have an effect on the appearance of the coating. Tile adhesive is characterized by white or gray color, which often disturbs the overall picture of the interior.
Trowels are used to change the tone of the tile adhesive. They contain a pigment that allows you to improve the external characteristics of the cladding: to obtain a more solid coating or, conversely, to highlight the tiles.
When laying tiles in a toilet or bathroom in areas near plumbing, the probability of surface contact with water and hot steam increases. As a result, moisture penetrates under the cladding, contributes to the loss of the properties of the tile adhesive (if a hygroscopic composition was used).
In the presence of a protective layer in the form of a grout, the service life of the cladding is increased.
In addition, the treatment of tile joints protects these areas from rapid contamination. The grout is characterized by a fine-grained structure. This results in a smoother surface between the tiles. As a result, dirt is less actively retained on the coating
Another reason for using grout is its ability to strengthen the cladding. Most of the modern compositions of this group are distinguished by increased strength, a sufficient indicator of elasticity, withstand changes in temperature and moisture. This allows you to further strengthen the coating.
Such properties of grouting compositions as the ability to prevent the formation of fungus on the surface are also noted. Thanks to this, it becomes possible to use the tile covering in rooms with high humidity. Trowelling mixtures of this group do not allow fungi to develop, which is due to the structure of materials, their composition.
Such mixtures are used to improve the properties of the subfloor and cladding.Tile adhesive is characterized by moderate strength, but does not withstand constant exposure to negative factors. For this reason, the base begins to collapse faster. Cracks appear in the inter-tile space, the coating deforms with the constant expansion of the base material.
How to rub seams correctly?
Grouting mixtures are available dry and ready-made. The convenience of the powder is that it can be used as needed and it can be stored for a long time. However, when diluting, it is rather difficult to calculate the amount of dry mix required.
Ready grout is the most convenient option. It is an elastic mass packed in cans or buckets. However, an open container has a short shelf life. Therefore, if you decide to rub the seams with your own hands, purchasing dry mixes will be financially beneficial.
It is possible to grind the seams, as a rule, a day after laying the tiles. Before you start processing the gaps between the floor tiles, you will need the following tools:
- Water;
- Brush;
- Capacity for mixing the solution;
- Paint mixer or drill with a special attachment;
- Small trowel or rubber spatula;
- Foam sponge or clean rags.

The grout mixture is mixed in small portions, so in order to achieve its uniformity, you can do with a spatula or trowel. If you need large volumes, then you need a mixer.
Before grouting, the tiles must be cleaned of glue, dust and dirt. Seams are cleaned with a damp cloth, and right before processing, they are moistened with a foam sponge to reduce the absorption of liquid from the grout. Also, experts advise treating the seams with an antifungal agent.
The next step is to dilute the powder (if a dry mixture is used) according to the instructions on the package.
It is important to remember that the grout must be plastic. If it turns out to be too liquid, the strength will be significantly reduced.
After mixing, the solution should stand for about 10 minutes, then it can be applied.
Work is being carried out from the far corner of the room to the door.
Grouting ceramic tiles is carried out with a flexible trowel. For a more accurate application of the solution, you can use a piping bag. The seam must be completely filled with the mixture so that no voids remain inside, the excess is removed. The boundaries of the grout must be in line with the tile surface. When the solution dries, it should be slightly moistened with water to prevent cracking. It should be borne in mind that when the solution dries, it may "sag", so it is required to grind the seams twice or three times.
The places where the tiles adjoin the wall are sealed with silicone sealant. This is an additional protection against water leakage and the appearance of fungus.
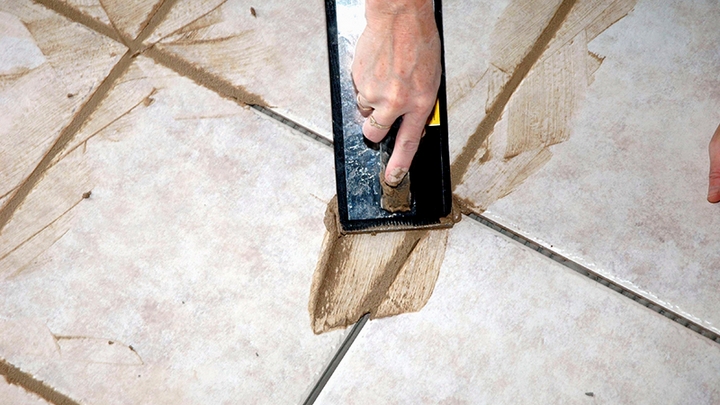
To process 3 sq. m of the floor with your own hands, it will take about 20 minutes.
Grouting decorative stone
For this type of cladding, cement-based materials are used. There are some subtleties in grouting decorative artificial granite. A distinctive feature of this material is its embossed surface. When penetrating into the stone, the grout mixture is very poorly washed off and remains in its pores for a long time. In addition to the insulating function, the intervals between the ends of the cladding are also decorative. Brick or stone joining is performed on artificial granite tiles. Therefore, the technology for performing such activities is somewhat different than simple grouting of ceramic tiles.
For finishing artificial decorative granite, it is recommended to use a construction gun or a cone-shaped bag. After cleaning the granite from dust and dirt resulting from laying, it is necessary to prepare a working solution and fill it with a syringe.Then you need to carefully fill the entire space with the mixture, there should be no voids and irregularities between the tiles
In this case, it is important not to stain the stone or brick itself. It is most inconvenient to cover the seams in the corners.
Therefore, so that you do not have to adapt to them every time, it is better to start work correctly with them, filling the space between the tiles from top to bottom. If the mortar gets on the brick, it must be removed from the surface immediately.
 Grouting decorative stone
It is highly undesirable to cover the seams of the decorative coating with a spatula. As a result of such actions, not only the surface will get dirty, but also the sealing will be broken, which is undesirable in the case of using drywall.
When the grout dries a little (after about 20-30 minutes), smoothing and joining of the brick cladding is performed. To do this, you can use a spatula or a special spatula. After the tiles are completely dry, use a medium-hard brush to remove all grout residues.
As you can see, creating a decorative interior in a bathroom made of tiles and drywall, joining brick or stone cladding and grouting tile joints with your own hands is not too tricky. Performing these works on your own will allow you to save money, enrich yourself with practical skills and knowledge, become a tiling master, and after many years enjoy the result.
- Bath Tile Grout, Recommendations and Review
- Removing old grout from tile joints, best methods
- How to install tiles on drywall in the bathroom
Cleaning methods
For grouting the joints between the tiles, various materials are used, which can be wiped off with certain substances. When cleaning after renovation, you should know what type of grout was used for finishing work.
For cement trowel
The cement mass is most often used for finishing tile joints. Fresh cement can be cleaned from the tile by treating it with warm water, wiping the surface with a sponge. When the mass has time to solidify, it is necessary to apply more radical methods.
Acidic solutions
After hitting the surface, highly active acid-containing solutions begin to soften the cement grout. Among such solutions, you can use:
- Liquid concentrate that is suitable for all types of tiles and fills uneven surfaces, simplifying the workflow.
- Powder to be diluted. This option does not apply to porous and marble surfaces.
Highly concentrated acidic solutions must be used according to the attached instructions. For reliability, it is recommended to test the product in a small area in order to first make sure that the result is safe and there are no negative consequences.
Whitewash liquid
This substance is designed to effectively remove plaque, traces of cement and other building materials. The liquid is diluted with water and applied to the tile joints with a brush, roller or spray.
Special remover for cement deposits
A specially developed cement mass remover is widely used after finishing and repair work in residential buildings and in production. The composition not only helps to eliminate grout, but also concrete splashes, tile adhesive and other types of contamination. The solution can be used indoors and outdoors. The action of the wash is 2-3 minutes; a sponge or a spray bottle is used for application.
Based on epoxy resins
Epoxy Residue Solutions are used to remove streaks, stains and other contaminants from tiles after working with grout and other epoxy-based materials.
Special cleaning solution
A two-component remover, most commonly available as a spray, removes stains within 12 hours of application. The cleaning solution has the following advantages:
- removes epoxy residues after a single treatment;
- does not leave streaks on the tiles;
- disappears quickly after application.
Mechanical impact
It is not always possible to wash off the dried grout with the help of various solutions, therefore additional mechanical action is required. In most cases, sponge treatment with a rough surface helps.
At the same time, it is important not to damage the tiles during work.
Fresh
You can remove fresh grout from ceramic or glass surfaces with a standard spray remover. You can use the substance immediately after installing the tiles or after completing the grouting work.
How to fill the seams correctly
To fill the seam, you must perform the following sequence of actions:
- Spread the grout over the area with a spatula, spreading it evenly in the chosen place.
- Wash the seams with a sponge and water, not reaching the end of the treated part, so as not to wet the non-rubbed area.
- Half an hour after these actions, moisten the seam with a pulverizer and smooth the surface with your finger.
- Wash the seams with a sponge and water.
- Apply the substance again and follow the same steps.
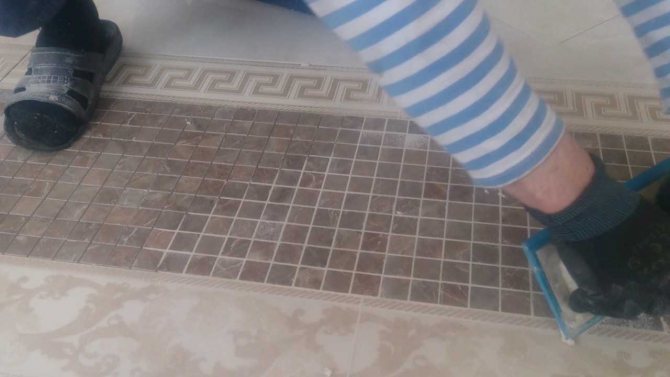
Adhere to the manufacturer's grouting technology One day after applying the material to the tiles, remove any residual plaque from the joints. It is necessary to treat the material with a special substance, wait a little and clean the surface with a vacuum cleaner or a well-absorbent sponge. If small pieces remain on the tile, they can be removed with a cellulose sponge. If you have used a flooring grout, do not load it for 5 days.
Grouting process
If, instead of linoleum, it is planned to lay tiles on the floor, the installation is carried out in stages. After the end of the work, the inter-tile space must be decorated in accordance with the color scheme of the room. In addition, the grout also has a protective function. For this reason, it should be applied in accordance with a number of rules.
If the technology is violated, cracks may appear during operation, the resistance to moisture and strength decreases.
Tools you need to get started
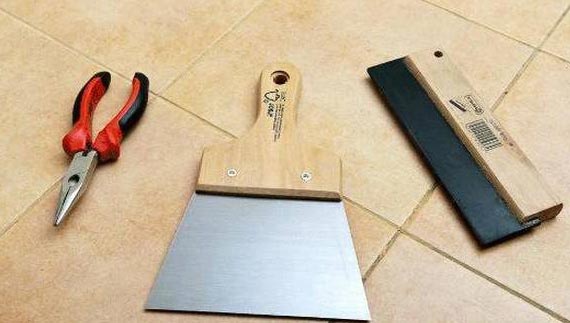
Before, how to rub the seams between the tiles on the floor, you need to prepare the tools:
- a spatula-shaper to give the seams the desired shape (a uniform depression along the entire length) or use any cable of sufficient diameter;
- sponge, rags;
- rubber spatula;
- container for solution preparation;
- brush;
- a construction mixer or a wooden spatula - tools for mixing the solution.
Surface preparation
At the initial stage, you need to tidy up the treated coating. To do this, it is necessary to remove dust, using a brush, remove dirt from small cracks in the inter-tile space.
The degree of adhesion of the materials depends on how well the coating is cleaned.
It is not recommended to apply the mixture on a dry surface for various reasons. So, if you pre-wet the coating, adhesion is improved. This increases the service life of the material.
In addition, the treatment of seams with a liquid will avoid a situation where the adhesive will draw moisture from the grouting mixture. This can lead to cracking.
Additionally, it is recommended to use an antiseptic solution.
Mix preparation
If you use a ready-made grout (polyurethane), it is enough to remove the lid from the container. Then they immediately go on to work. Cement-epoxy, cement-sand, cement, epoxy compositions are prepared according to a more complex scheme. For example, water is used to make a cement-based grout.If you plan to use an epoxy analog, then the kit includes a sufficient number of components that are contained in separate packages.
The instructions for preparing each of the funds are different. A general condition for the preparation of different mixtures is the need for mixing the solution in a small amount. In the process, you can use a spatula. However, if it is planned to process a large room, and the work will be performed with assistants, then it is permissible to immediately prepare the mixture in larger volumes. Then use a construction mixer.
Joint filling
Grouting is sometimes done several times. This is due to the addition of the material. At the initial stage, the seam is filled up to the upper edge of the tile.
It is necessary that the mixture is flush with the tile floor.
Seam surface formation

If it is necessary to make a recess in the inter-tile space, use a special tool. This is a shaping spatula. If it was not at hand, you can take a cable with a large cross-section. It is applied to the seam, which has not yet hardened, slightly pressed. The result is a depression.
Surface cleaning
The best way to avoid stubborn stains is to remove excess grout from the tiles as soon as the grout is applied. Gradually the mixture hardens more and more. Fresh stains can be removed with a damp cloth and soapy water.
If the grout has frozen, use a mechanical method, special chemicals and improvised means.
Finishing tiles
First you need to check if the grout is frozen. This is done with a damp sponge: it is carried out along the tile joint, if the solution remains on the sponge, then you should wait with subsequent processing. When the mixture does not linger on the sponge, you can proceed to applying the top coat - an antiseptic solution. The suture joints are reprocessed. No antiseptic is applied to the tiles. Then it remains to remove the remnants of dirt.
Types of grout for tiles in the bathroom

When faced with the choice of grouting tiles in the bathroom with your own hands, consider a lot of subtleties. First of all, the color of the tile is taken into account, and, accordingly, the design of the entire interior
It is important that it converges in tone and, moreover, harmonizes with the tiles, becoming an integral part of a single composition. The physical properties of the material are also taken into account:
- Appointment. Each manufacturer indicates on the packaging not only the method of application, but also the place and conditions for working with it, therefore it should be written on it that the grout is suitable for sealing joints in wet rooms.
- The degree of hardness. In addition to water resistance, the mixture becomes hard after hardening, which will also cause abrasion resistance. Elasticity may also be indicated, which is typical for polyurethane grouts.
- Shrinkage rate after drying. This point is important if a high-level decorative finish is being carried out. If it is large, then you will have to re-pass the seams.
- Substrate adhesion. This is the degree of adhesion to the subfloor and tiles that will determine the mechanical strength and durability of the finish.

You should also pay attention to the basis of the material. There are several of their varieties on sale, depending on the main binder component:
- Cement - made, respectively, on a cement basis, are versatile and have a characteristic matte shade.
- Epoxy is an effective, mostly decorative joint compound that is used in conjunction with glazed and polished tiles, emphasizing their impeccable appearance with a silver or shiny joint.
- Polymer - a common type of mixture for decorating joints between ceramic or porcelain tiles in various rooms.
- Furanovye - black grout of exclusively black color.
- Polyurethane is a universal product that fills the joints between ceramic tiles, porcelain stoneware and natural stone. Possesses unique properties.
Cement grout
Choosing a grout in the bathroom for do-it-yourself work, the easiest way is to work, perhaps, with a cement-based material. It is easy to apply, remove residues from the face of the veneer and smooth to the desired condition.

Mixes made on the basis of Portland cement are the most popular, which is primarily due to its low cost, wide range of shades and ease of use.
But the material does not consist of cement alone, it contains additional aggregates that contribute to the acquisition of optimal viscosity, acceptable flowability and required elasticity. Recommended for sealing joints up to 5 mm wide.
The tool has the following features:
- Versatile, can be used not only in the bathroom. It can also be used for various types of tiles with or without glazed coating.
- It well insulates the seam from moisture if a moisture-resistant component is added to the solution.
- To give better elasticity, which is necessary when sealing curved joints, a latex plasticizer is added.
- The material is available in two colors: white and gray. Add any color, if necessary.
Epoxy grout
Epoxy grouts are ideal for high quality gap sealing because the epoxy resins in the substrate are moisture resistant and have excellent adhesion.
If you create a special effect in the room, white sand painted in a certain color can be added to the composition. Creates a glossy finish with a transparent structure.

The advantages of such means for high-quality sealing of seams include:
- resistance to the aquatic environment. Also, the material is able to withstand the negative effects of acids and alkalis.
- Many manufacturers add metal dust and dyes like silver or gilding to the mix to give it a special look.
The peculiarities of this material include the fact that it is very difficult to apply it to the joint, which is associated with high viscosity. It can be adjusted by the amount of hardener, but the mixture should be mixed exactly according to the instructions.
Working with epoxy resins requires a certain amount of experience and practical skills. Also, the material takes a long time to set. For convenience and better application, it is better to use a special gun.
