Benefits of epoxy and how it differs from epoxy glue
Despite the fact that the name contains the word "resin", you will not find natural ingredients in its composition, because it is a completely synthetic product created in laboratories for many areas - from construction to handicraft.
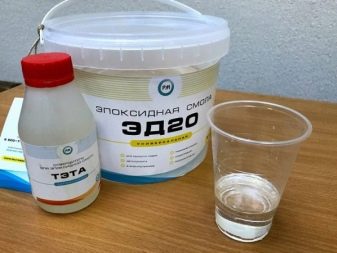
Epoxy is a mixture of two components: a hardener and the resin itself. Depending on the ratio parts of hardener and resinincluded in it can be thick, liquid or even dense
Therefore, it is very important to follow the instructions on the labels when mixing epoxy at home.
Epoxy resin properties
Epoxy resin is great for making jewelry, decorative items and even covering large surfaces. It has the following properties:
- it is very durable
- not subject to abrasive wear,
- transparent,
- well waterproofed,
- absolutely non-toxic after curing.
Do not forget that you can also find epoxy glue on store shelves, which is completely unsuitable for us. To begin with, the glue itself is a resin derivative. It contains not only epoxy resin, but also a solvent, plasticizer, hardener and filler. Therefore, it is also durable, not subject to wear and tear and firmly holds the parts to be glued.
Differences between resin and glue
There are significant differences between resin and glue, which reveal disadvantages that are unacceptable for our purposes:
- The glue has a specific cure time that cannot be controlled, while the cure of the resin can be accelerated.
- The resin retains its transparency for a long time, while the glue begins to turn yellow rather quickly.
- Epoxy is less elastic and hardens faster, while resin is more malleable and allows you to work with it more accurately.
- Glue can only be used for joining parts, and resin is suitable for making beads and other shapes of a given shape.
- Depending on the proportion used when mixing the resin and hardener, we can get the right consistency that suits our needs, the glue is sold as a ready-made mixture.
Sanding and finishing
After removing the watch from the mold, I used my orbital sander to sand down some of the spots where bubbles had formed in the resin. I just used 60-grit sandpaper. I wiped off all the gummy dust with a damp cloth, let the blank dry, and then poured another thin layer of epoxy on top. To prevent the resin from dripping or hardening on the sides, I glued masking tape along the bottom edge. This way the droplets travel down the entire tape, and when the resin is completely solidified, you simply peel off the tape with the hardened droplets. I made the top coat on the front and back of the watch.
I don’t throw away my old stockings. Also useful for flowers, vacuum cleaner and other 6 purposes
During his travels, the king of the Netherlands himself sits at the helm of the plane.
You can make your own sugar body scrub: you only need 3 ingredients

Rules for using epoxy in the manufacture of crafts
In order for crafts made from epoxy resin with their own hands to come out of high quality and delight the eye for a long time, you must remember the basic rules for working with this material. Namely, correctly knead the resin with a hardener. The correct proportions are usually indicated in the accompanying instructions, and each manufacturer can recommend their own data.In the classic version, for 10 parts of a resinous substance, 1 part of a hardener-catalyst is taken
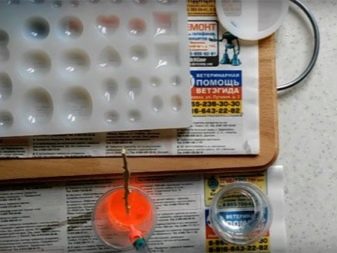
Attention should be paid to the use of forms for filling.
Using molds
An epoxy master class is often held using molds. Basically, these forms are used in the manufacture of small souvenirs or jewelry. The use of molds (special forms) helps to shape the epoxy into the desired shape. To do this, the prepared substance is poured into the mold and left to solidify.
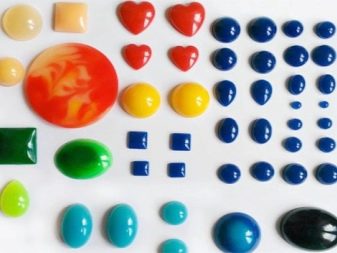
Advantages of Moldovans
It is very easy to work with ready-made forms, and jewelry and small souvenirs are obtained in perfect form. But remember that for molds such materials are used that do not stick together with epoxy. Considering that the walls of the forms are smooth, future products are subjected to minimal finishing.
Ready-made silicone molds can be purchased at specialized stores. These components are presented in a wide variety of shapes and forms. But if necessary, you can make such forms yourself. For work, it is better to take a two-component silicone liquid base (for example, Siliflex, Pentasil, Elastolux or Copipasta). Platinum is used for additional catalyst.
Molds give shape to products
Options for pouring resin into molds
There are several options for pouring a liquid substance into a mold. The most common are two methods:
- Design elements are pre-laid in the mold. They are carefully filled with prepared epoxy. This option is best used if strict ordering of elements is not required, but their chaotic arrangement is envisaged by design.
- If the additional inclusions are quite heavy (for example, chains, coins, metal plates, etc.), resin is poured into the mold first. And then the design elements are laid. They are straightened and arranged according to the conceived sketch (using toothpicks or wooden sticks).
The use of silicone molds greatly facilitates the work of the master and improves the appearance of the finished product. But they are used in the manufacture of small parts and jewelry. And what to use if you are conceived to create massive products from wood and epoxy resin? In this case, using frames will help.
Using frames
There is another type of pouring resinous substance in the manufacture of beautiful crafts. For example, large pieces and decorations made of epoxy resin and wood are made using frames. In this case, the mass is poured onto a horizontal surface.
Ready-made frames
Various epoxy crafts can be of such a conceived form for which you cannot pick up a ready-made mold. In this situation, various resin frames and frames come to the rescue. Thanks to them, the epoxy can be placed in an original and unusual frame. For pouring the mass into ready-made frames, it is better after they have been previously glued onto an adhesive tape. This will prevent the substance from spilling over the limited limits.
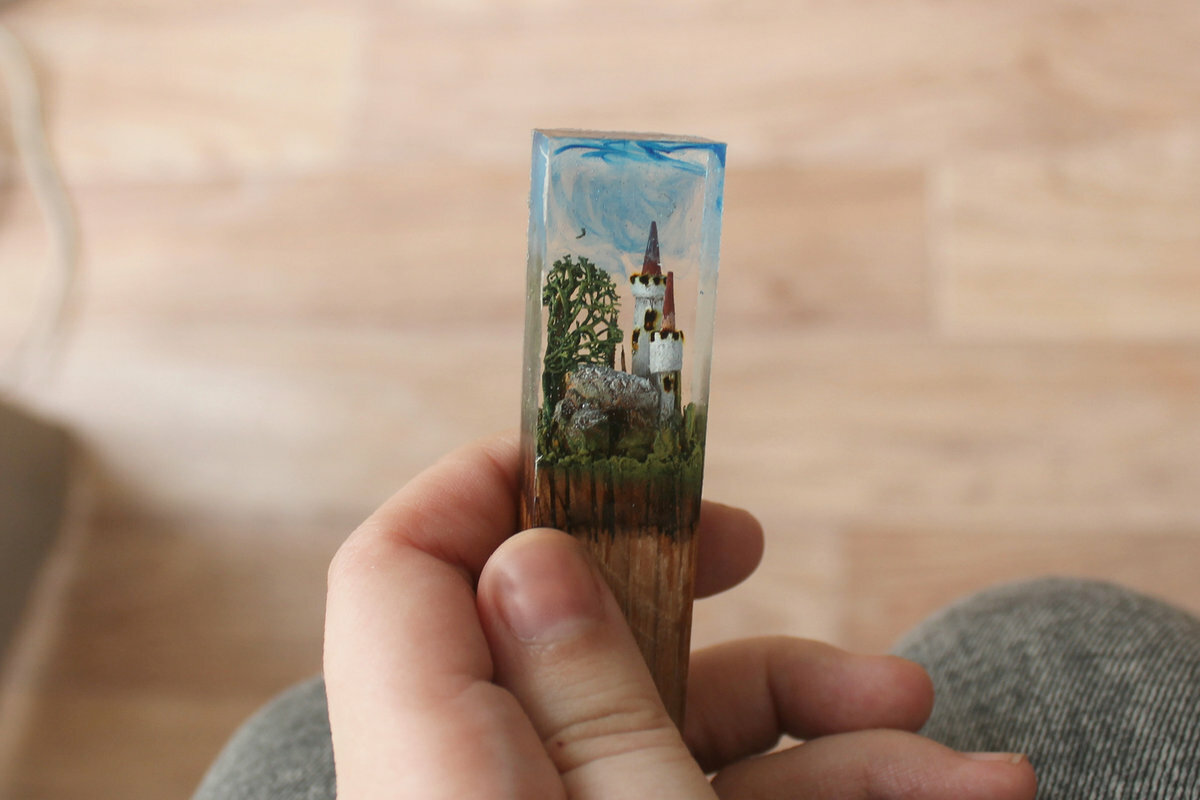
When working in the center of the frame, you can put any addition. Even a photograph or drawing. The result is exclusive pendants and beautiful jewelry. You can buy ready-made frames for work at any craft store.

Homemade frames
Hand-made frames allow the craftsman to reach a new creative level when working with epoxy. This option is actively used when creating works with the inclusion of wooden parts. True, this requires certain skills and various tools for woodworking. Various materials are used for the frames, such that epoxy does not work.
Beautiful examples
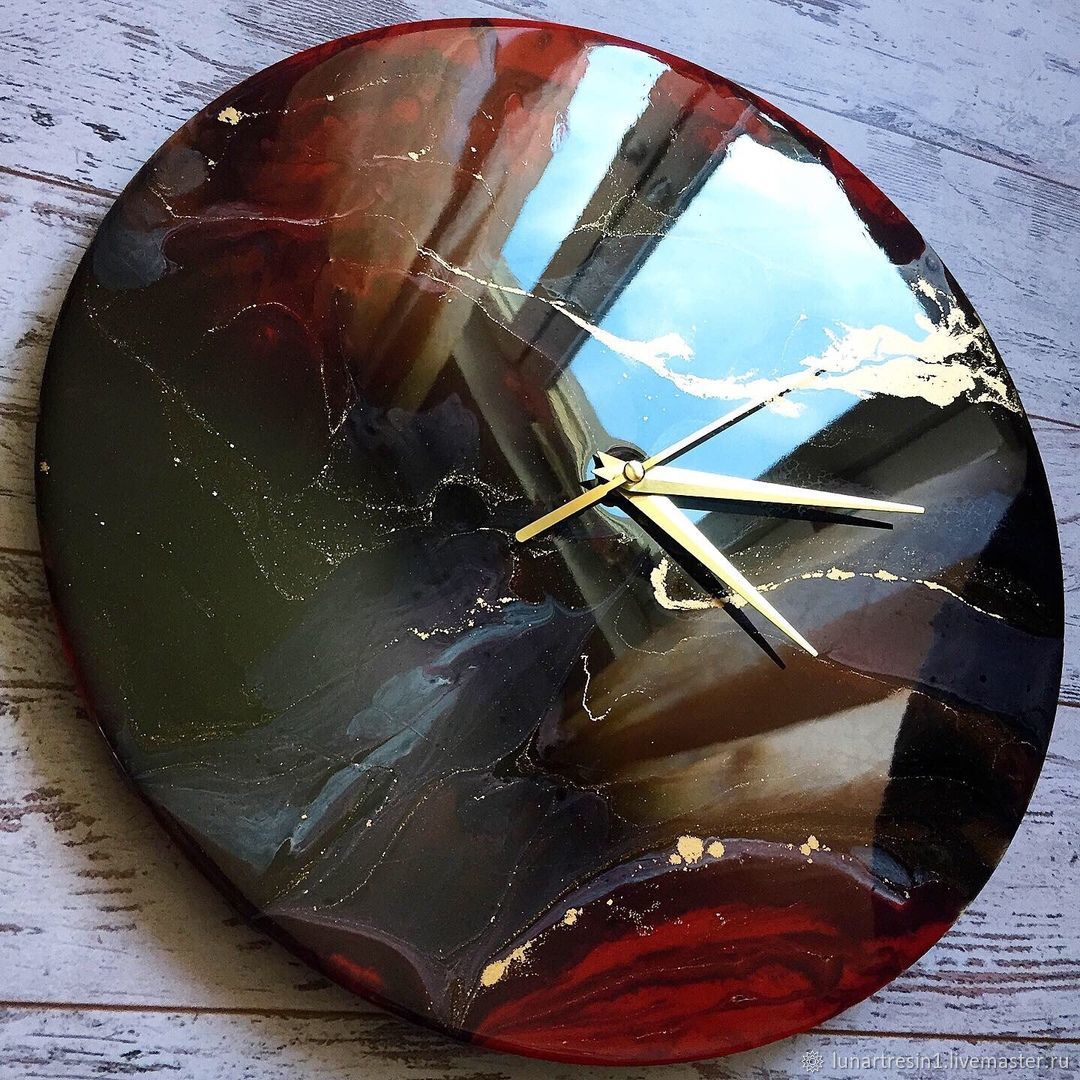
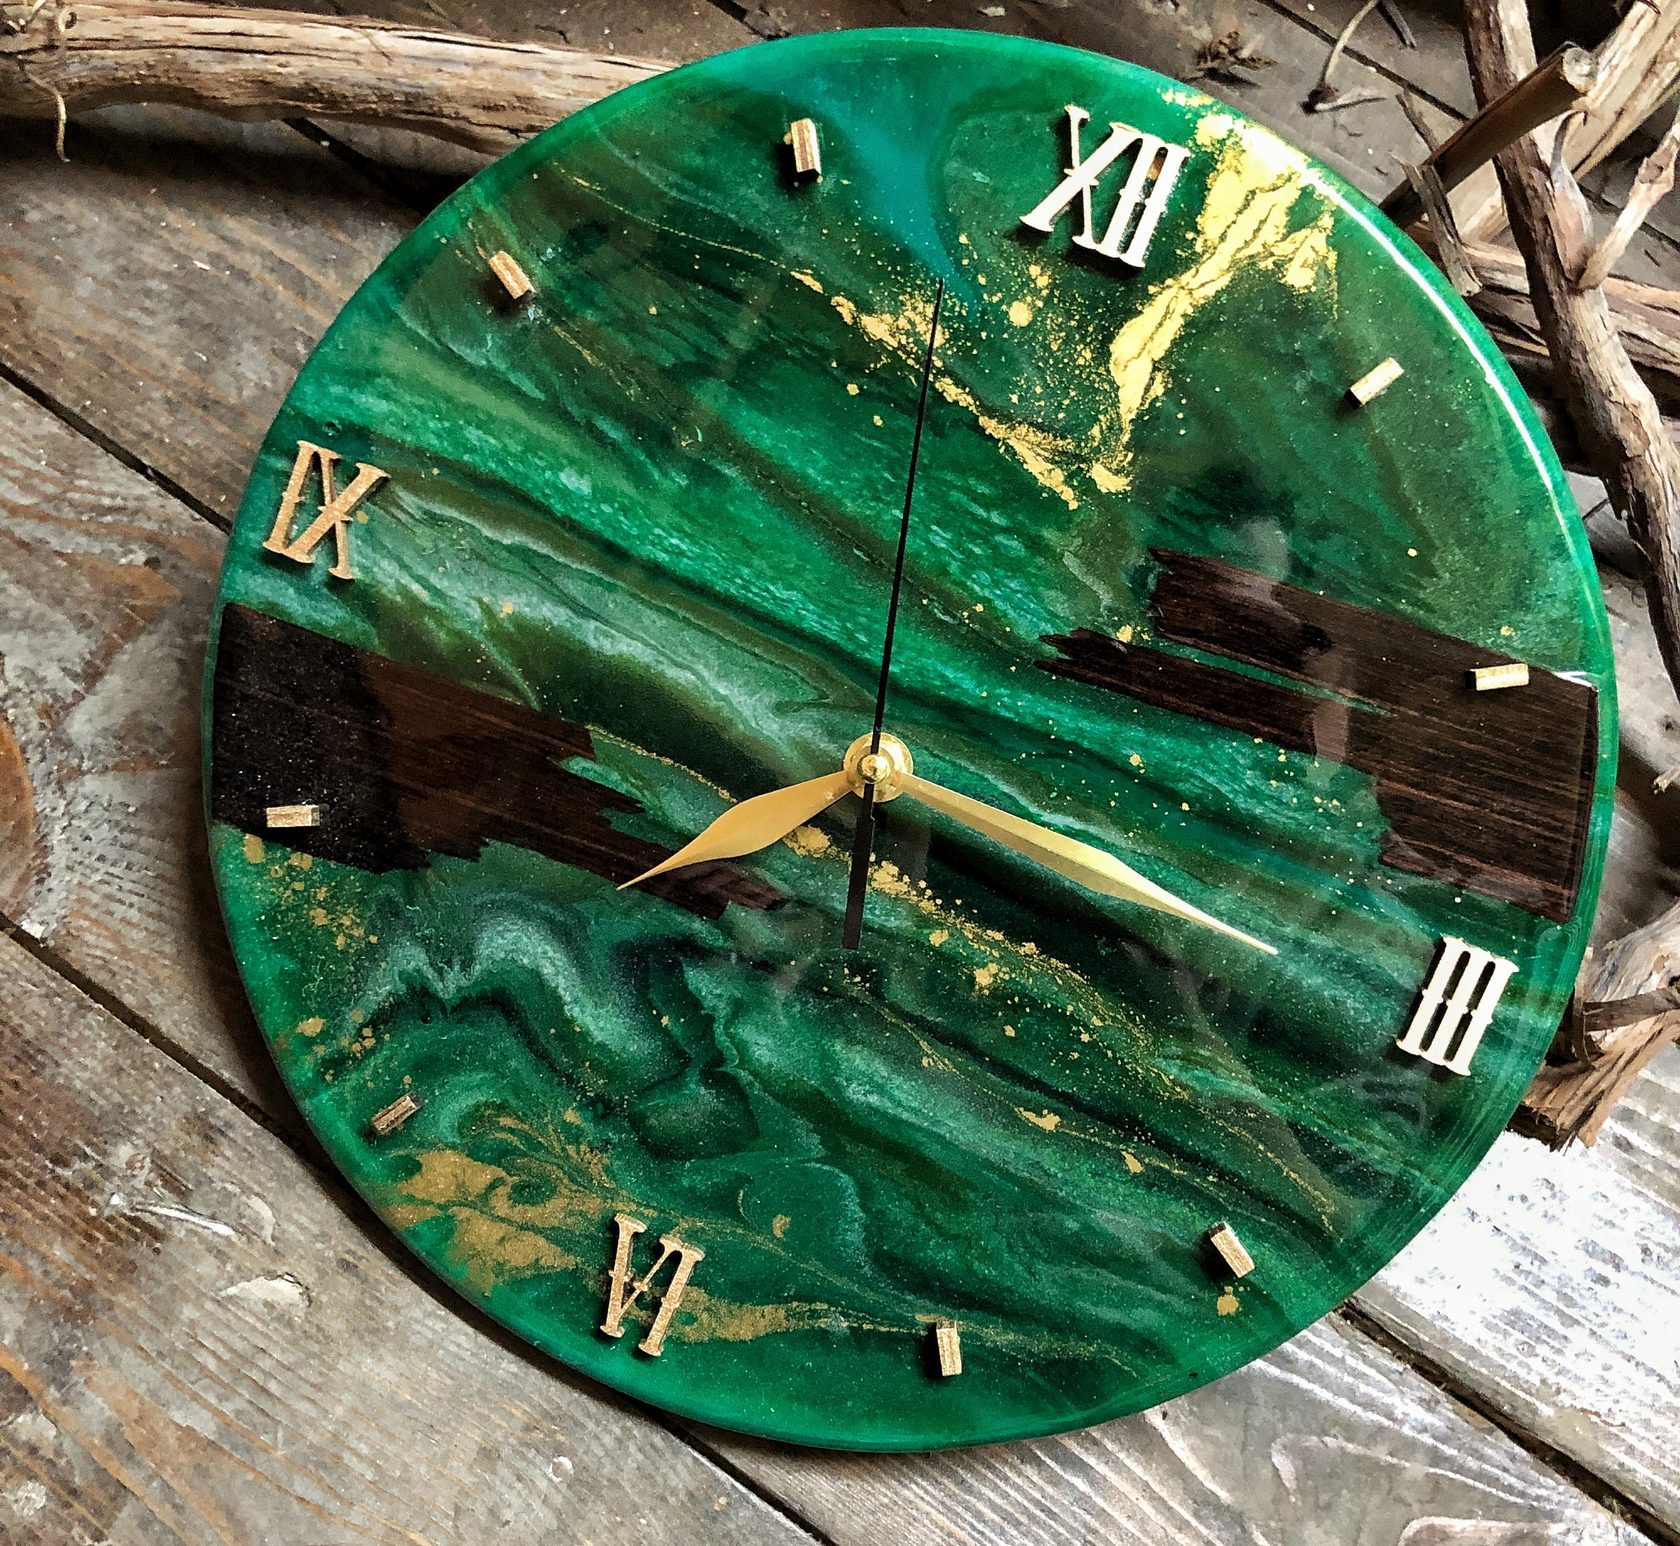
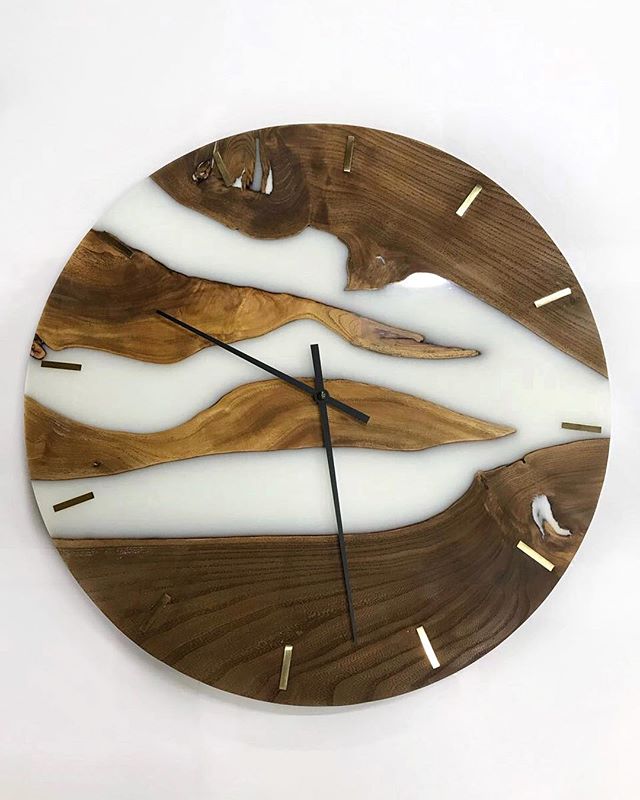
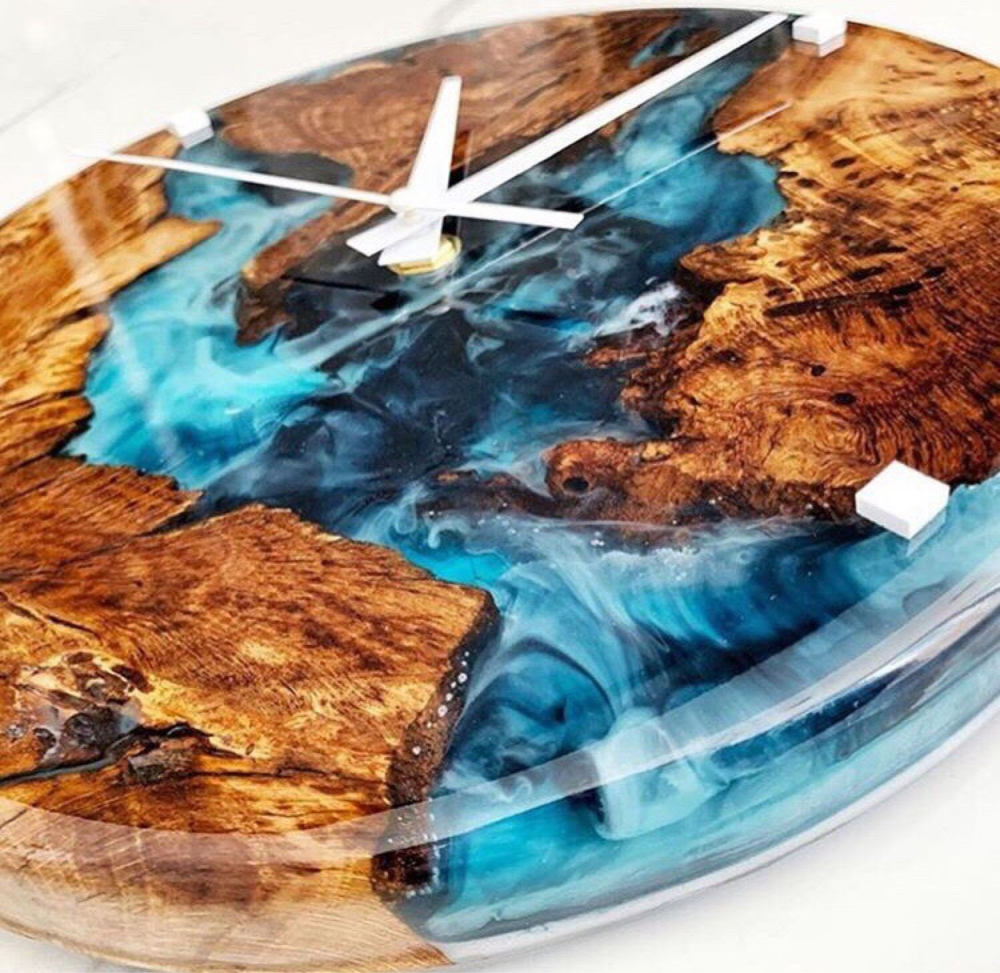
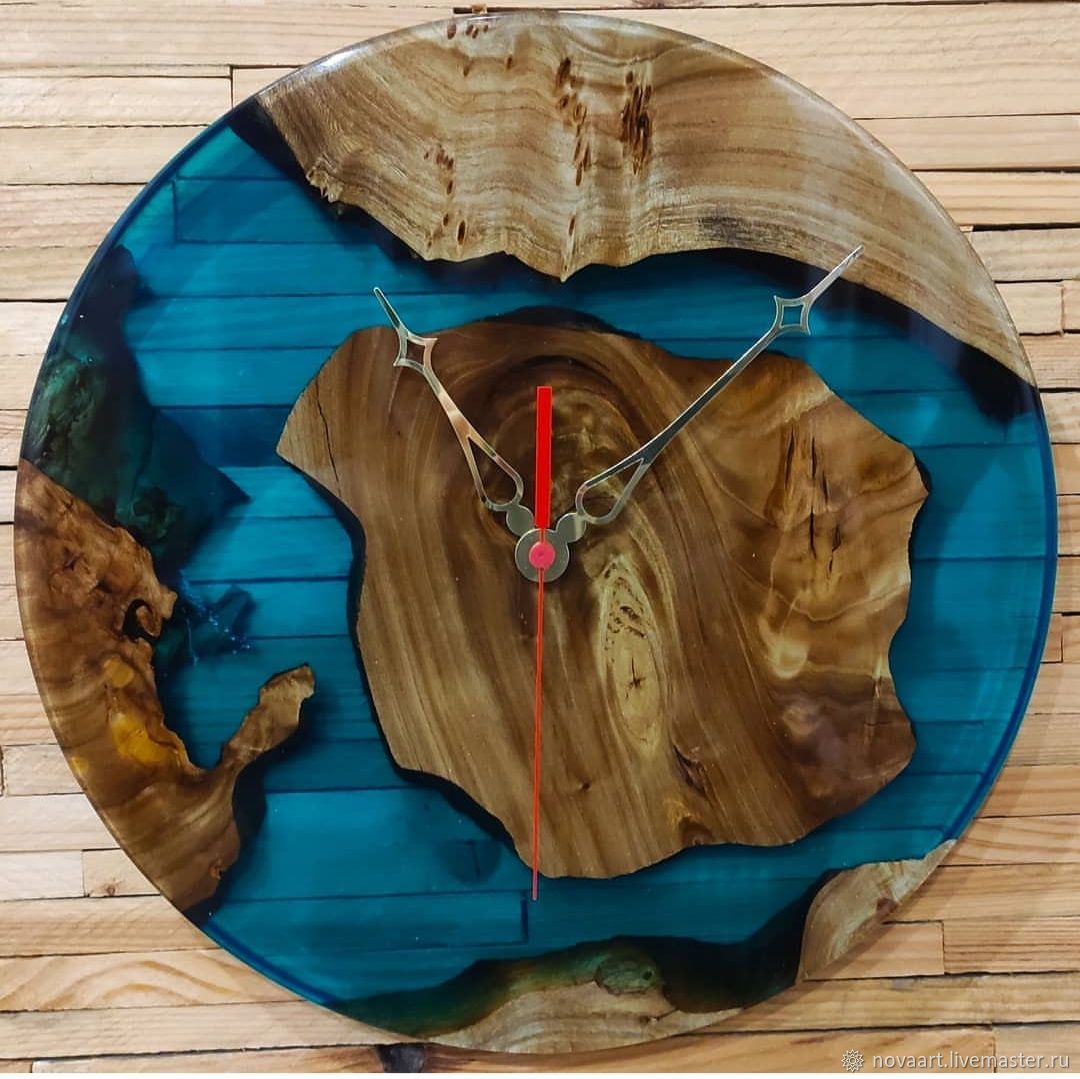
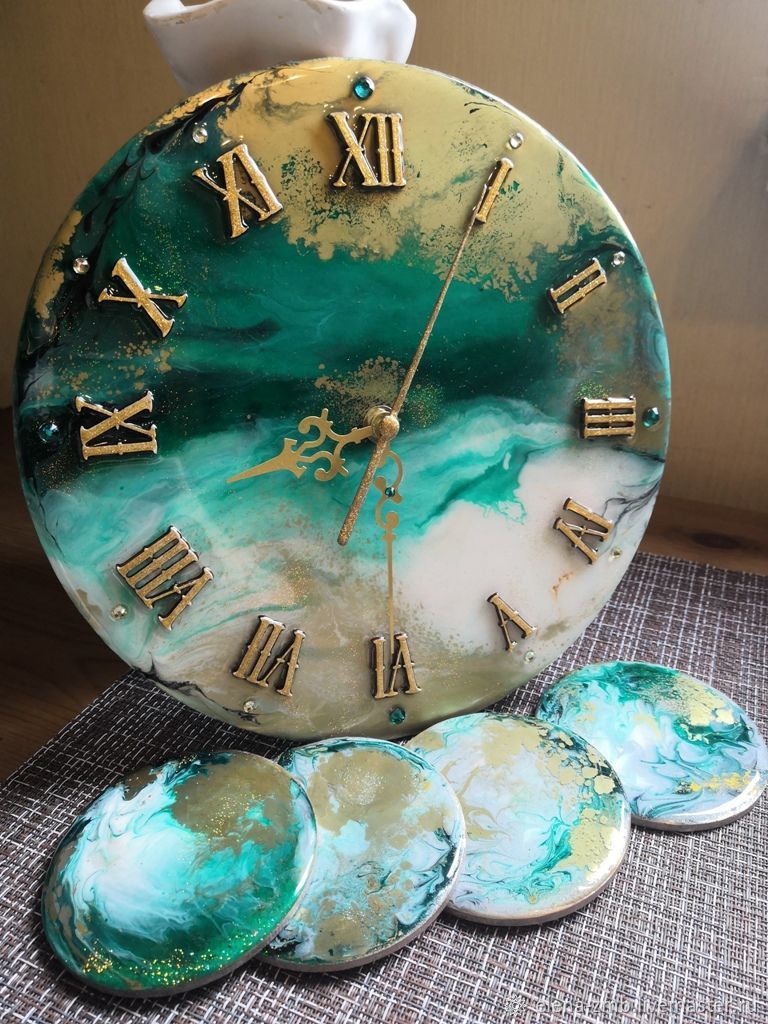
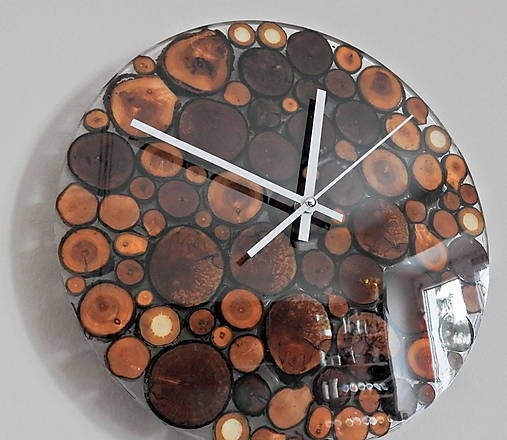
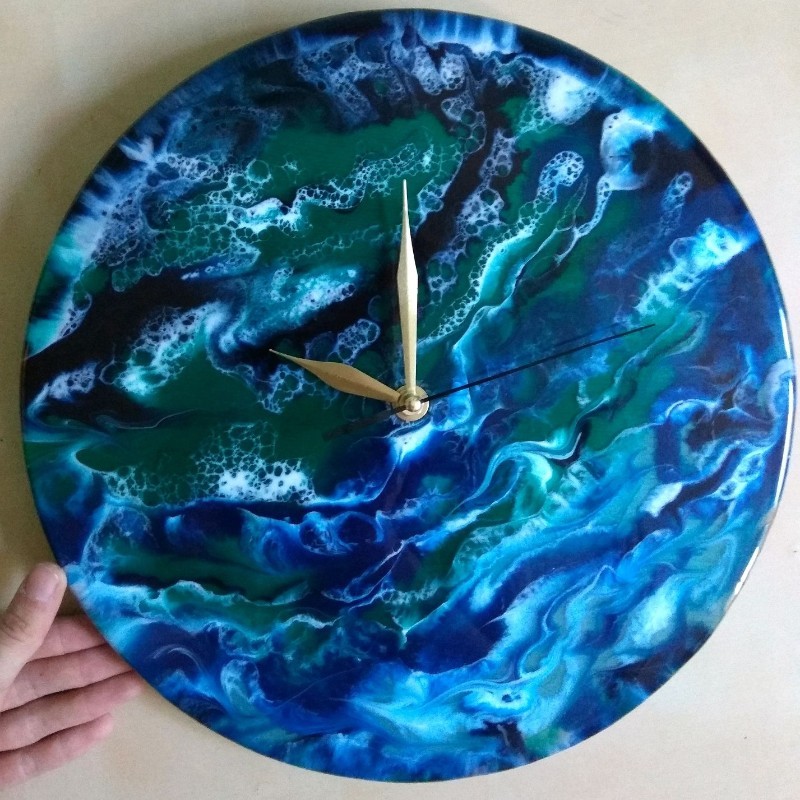
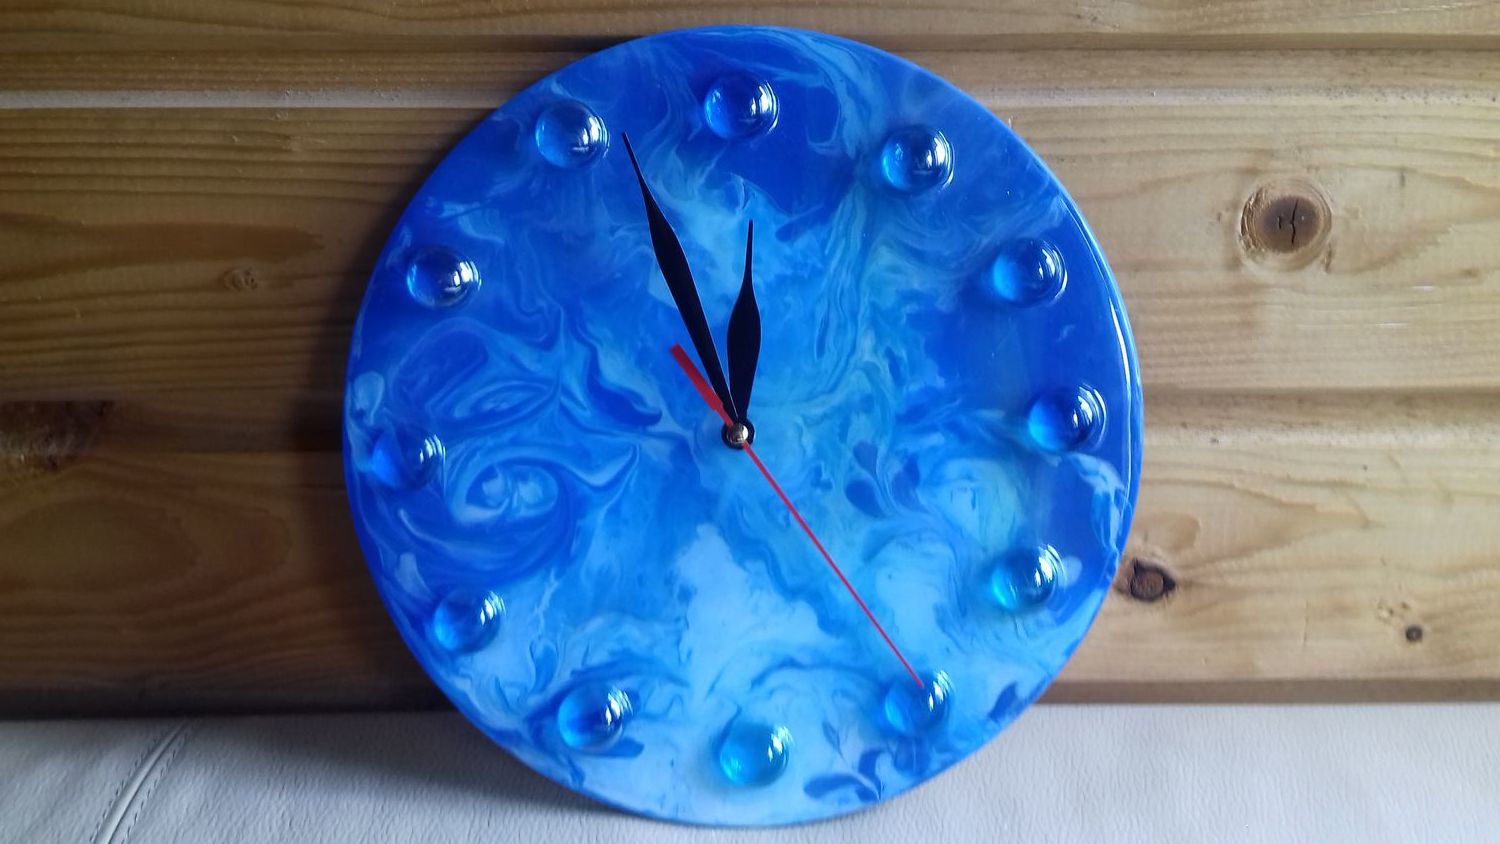
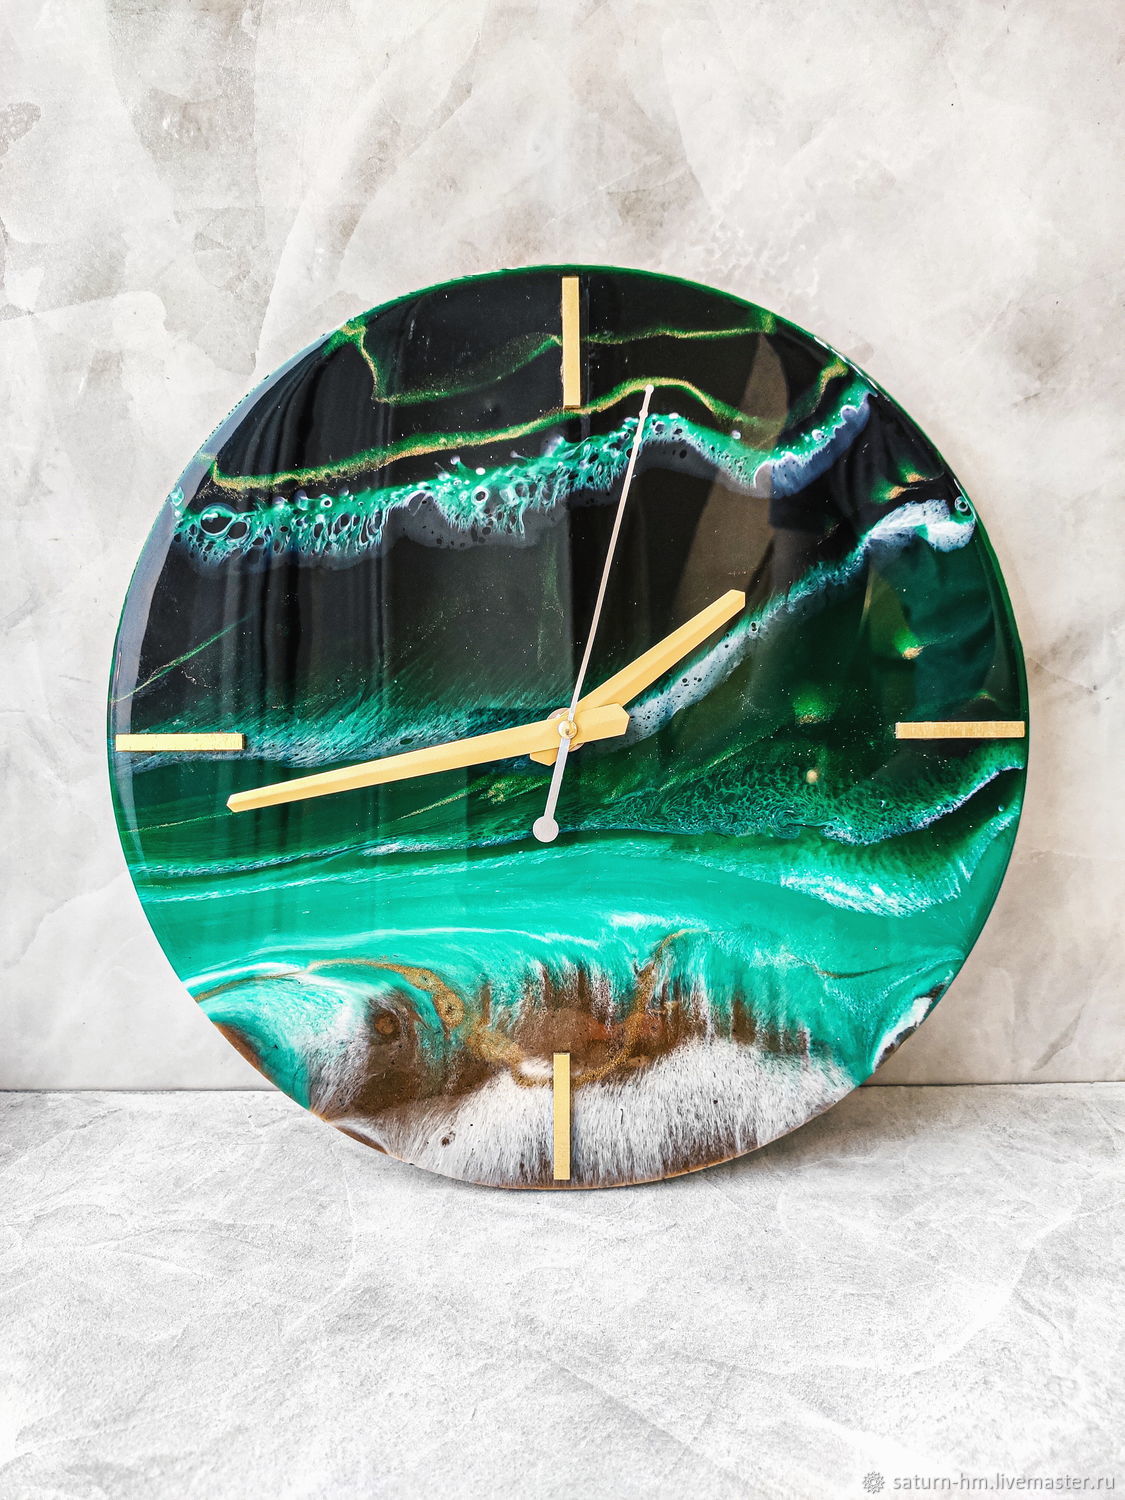
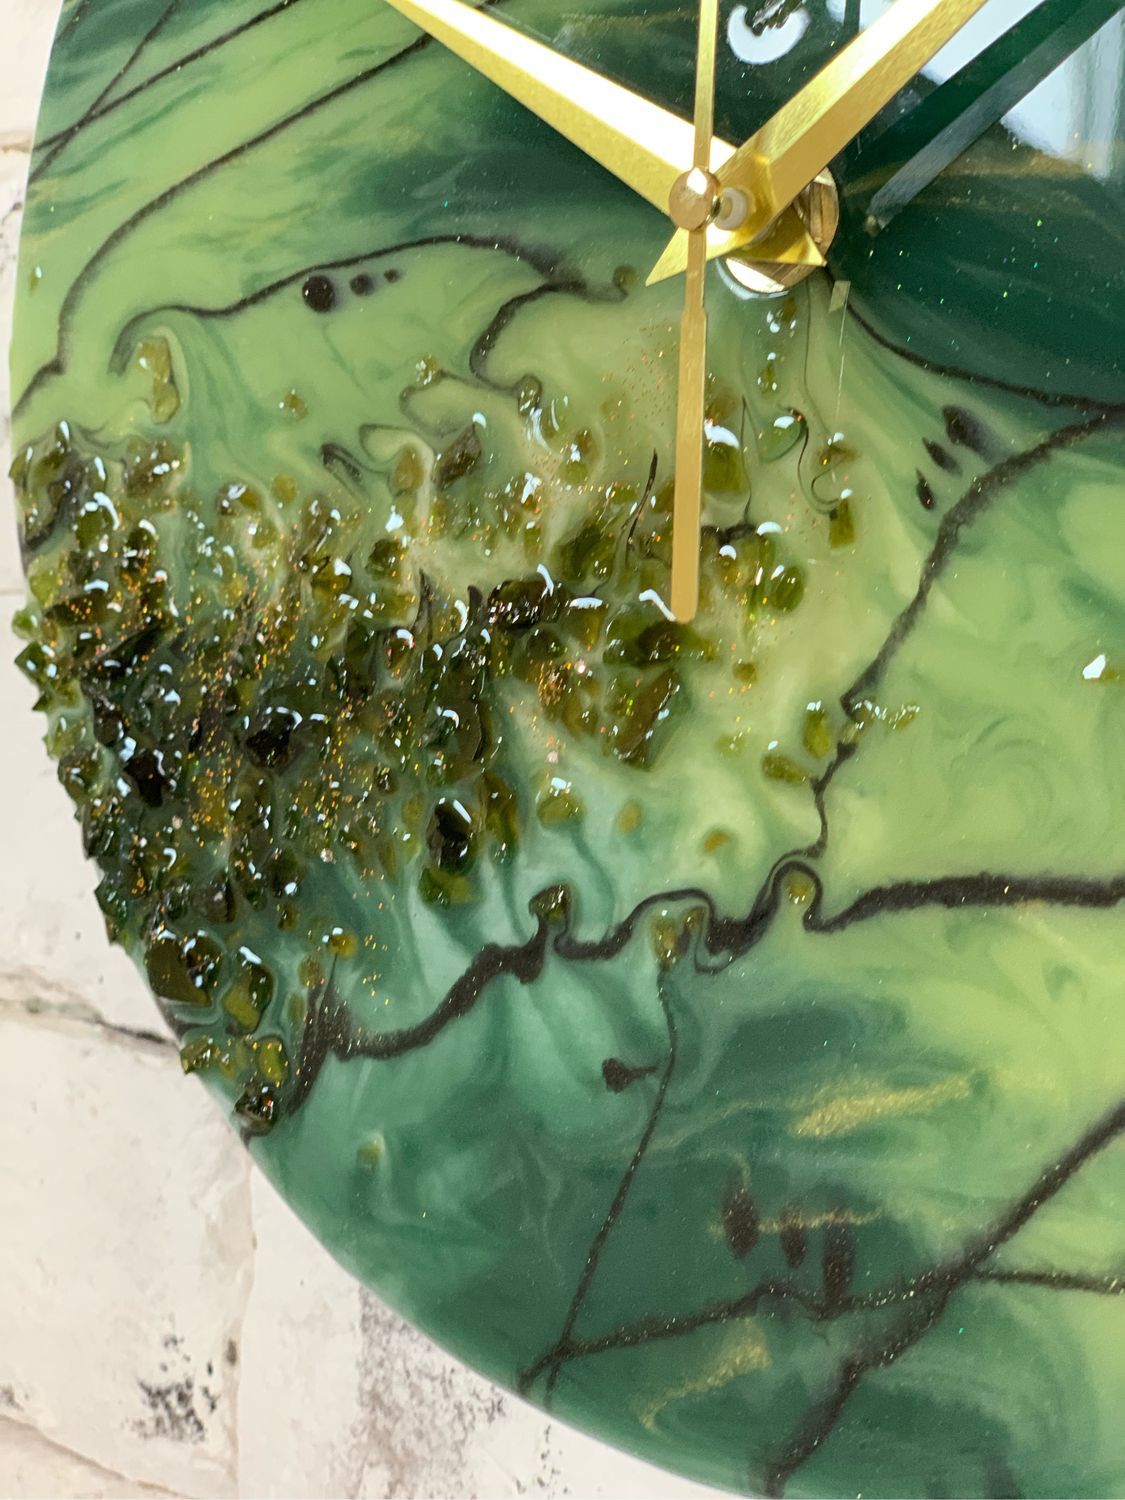
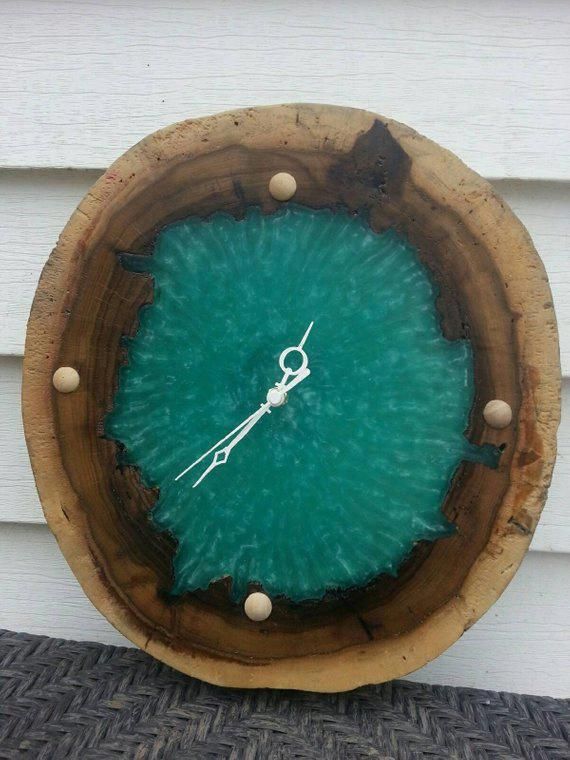
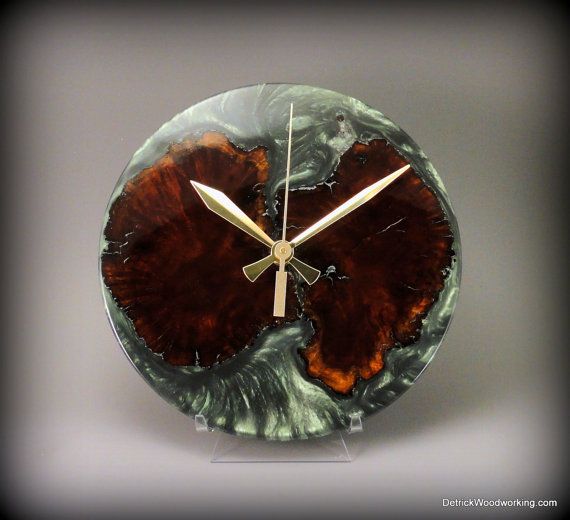
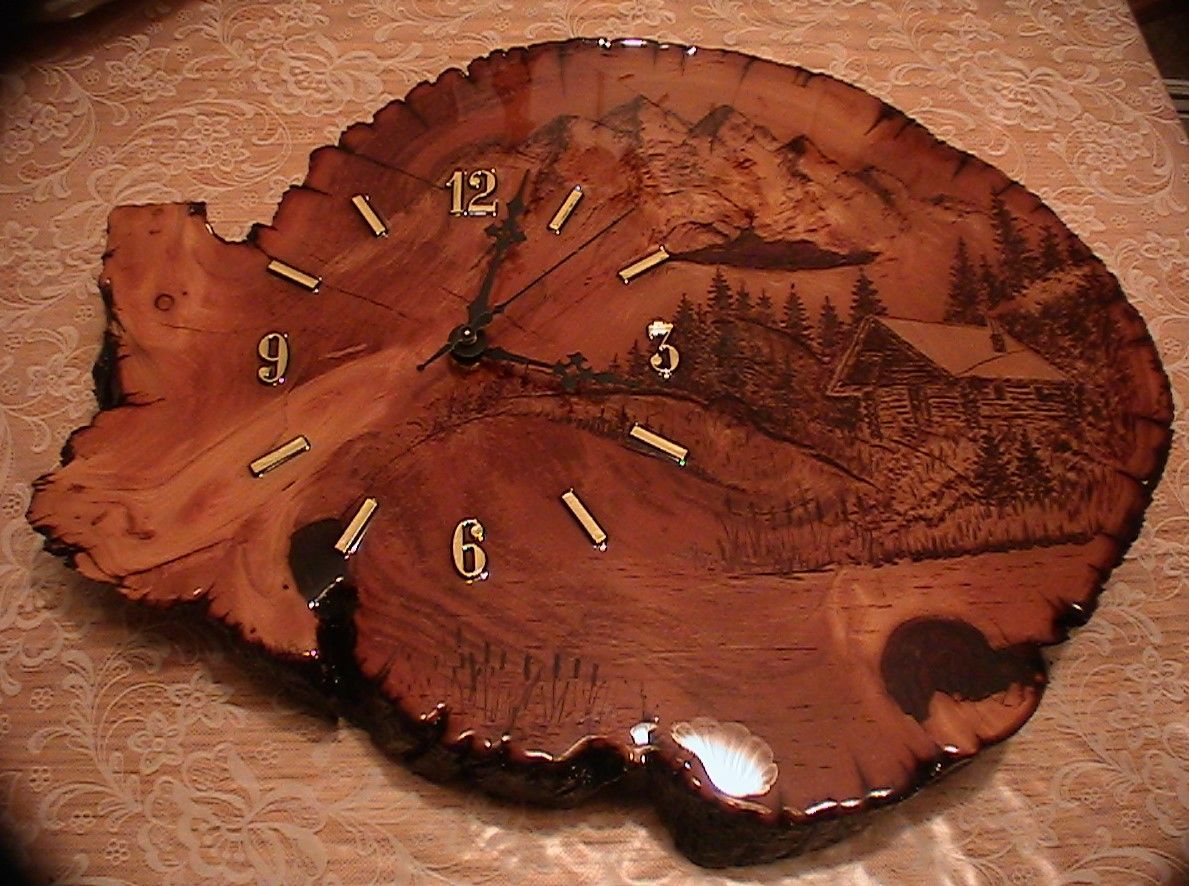
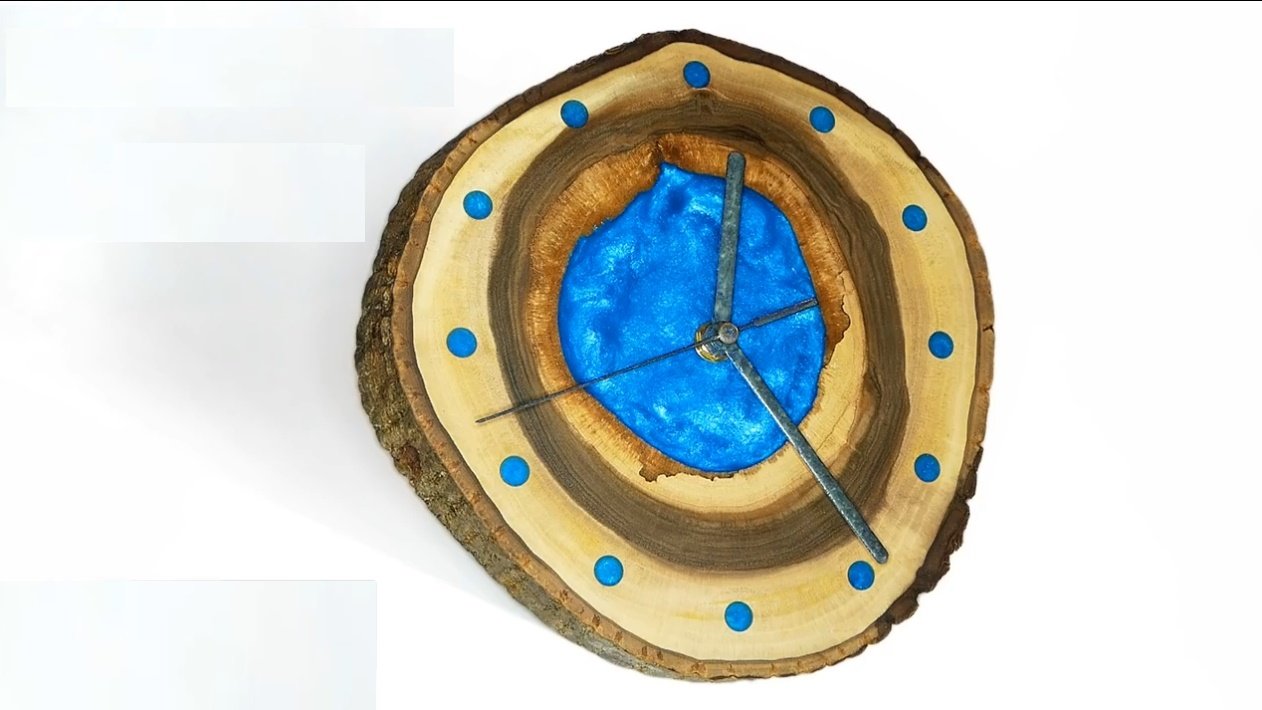
A clock decorated in an emerald color with a slight addition of golden pigment will look unusual in the interior of the room. In this case, arrows and numbers can be made of any material, covering them with golden paint.It is also permissible to thin the surface of the product with a small amount of black pigment.

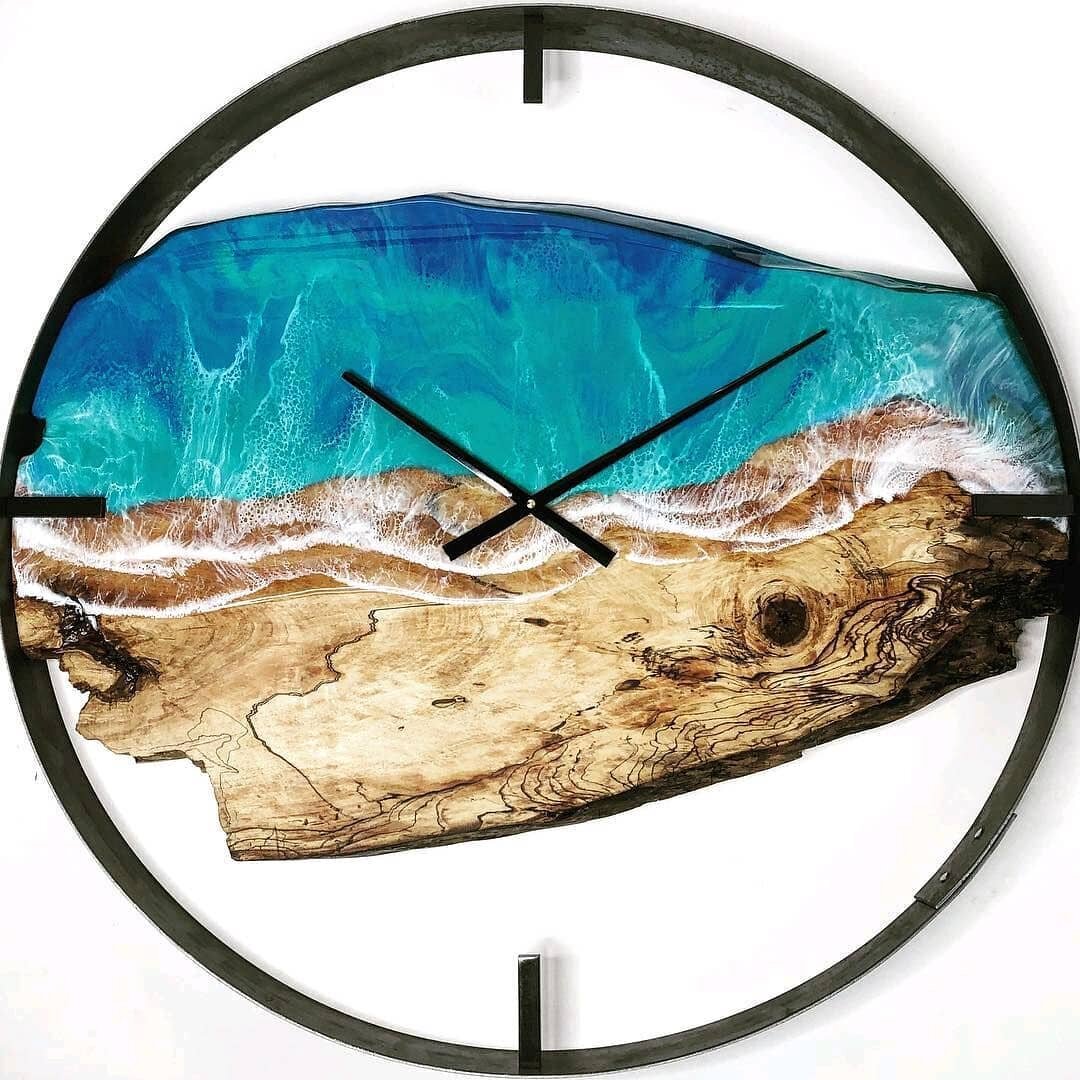
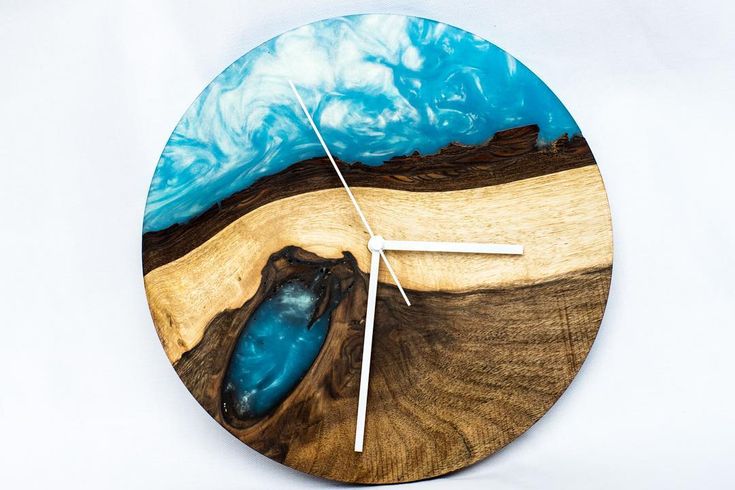
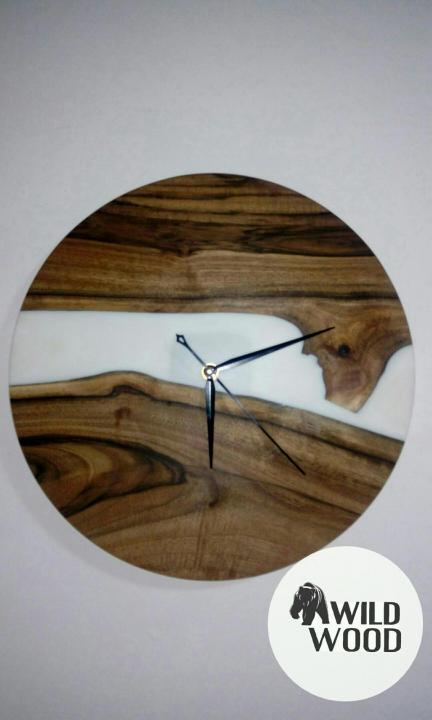
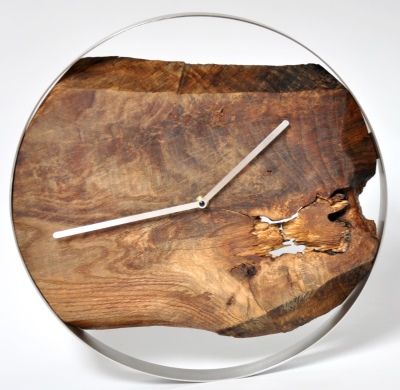
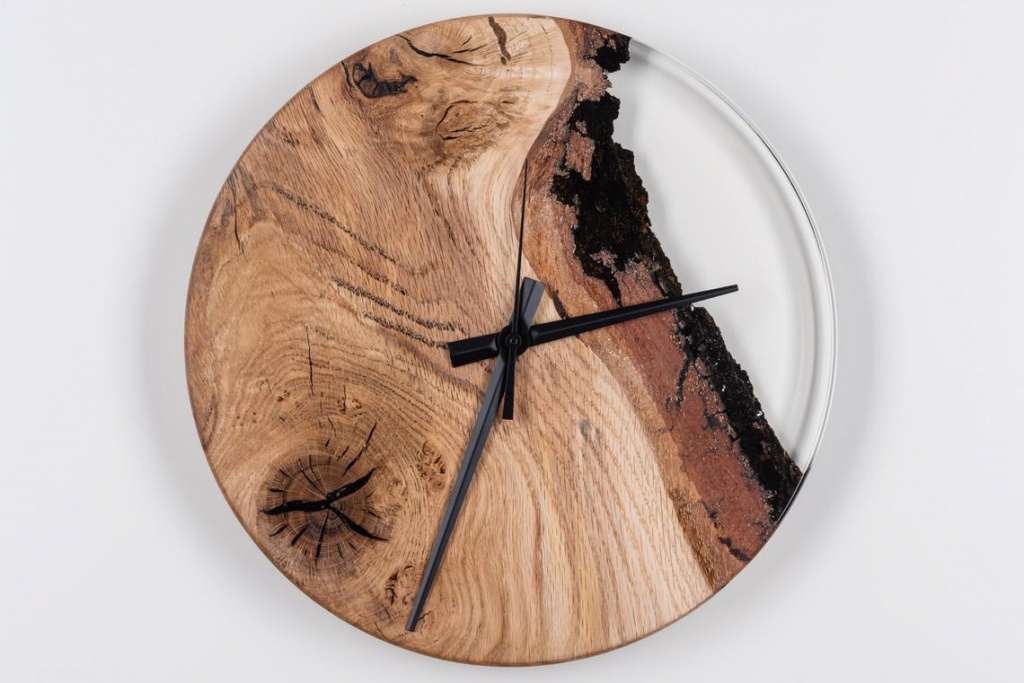
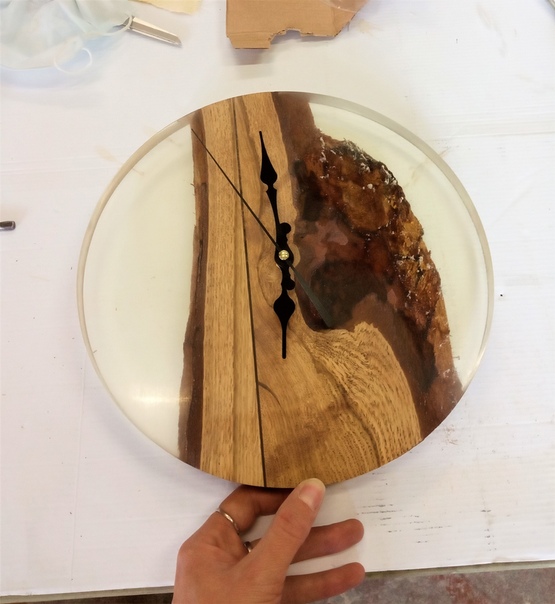
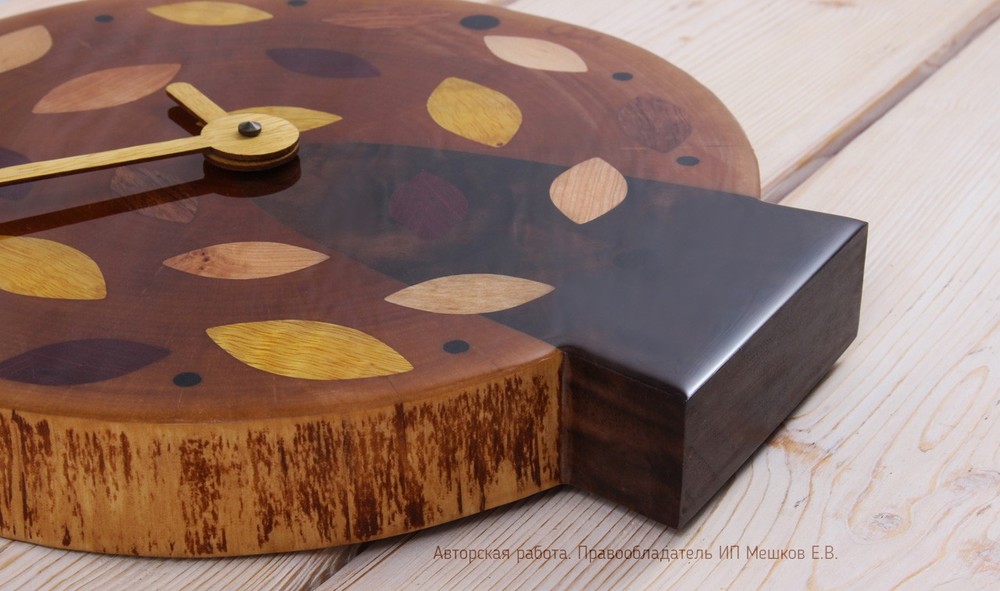
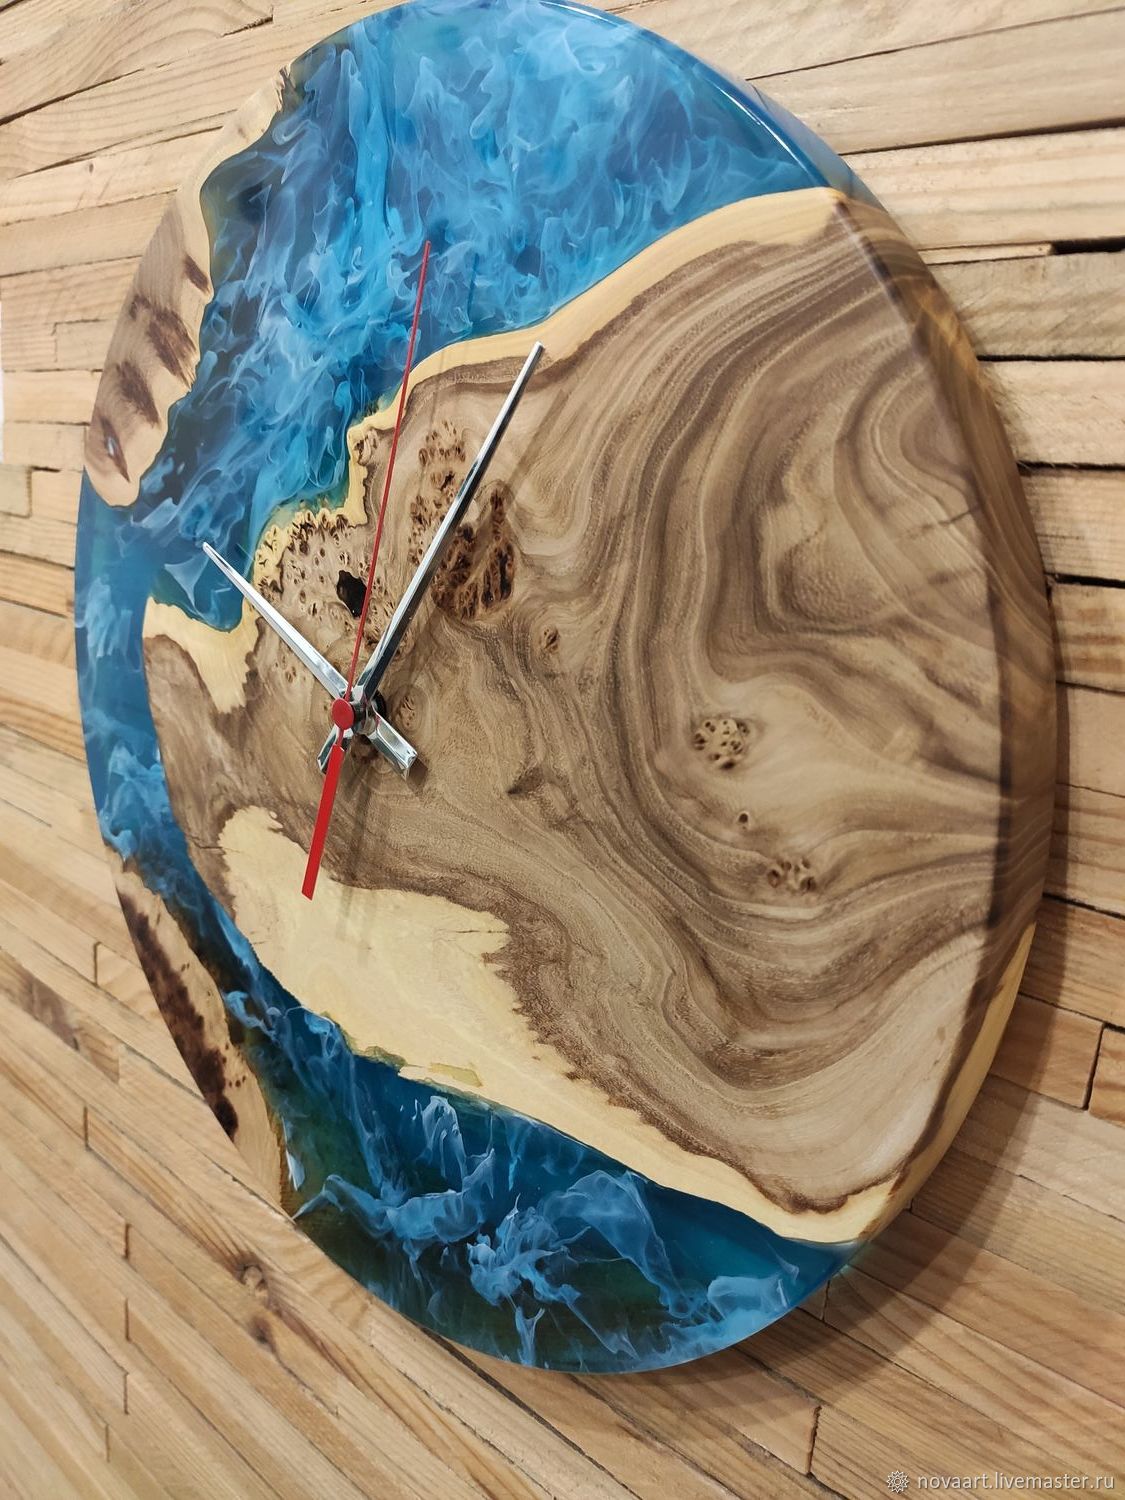
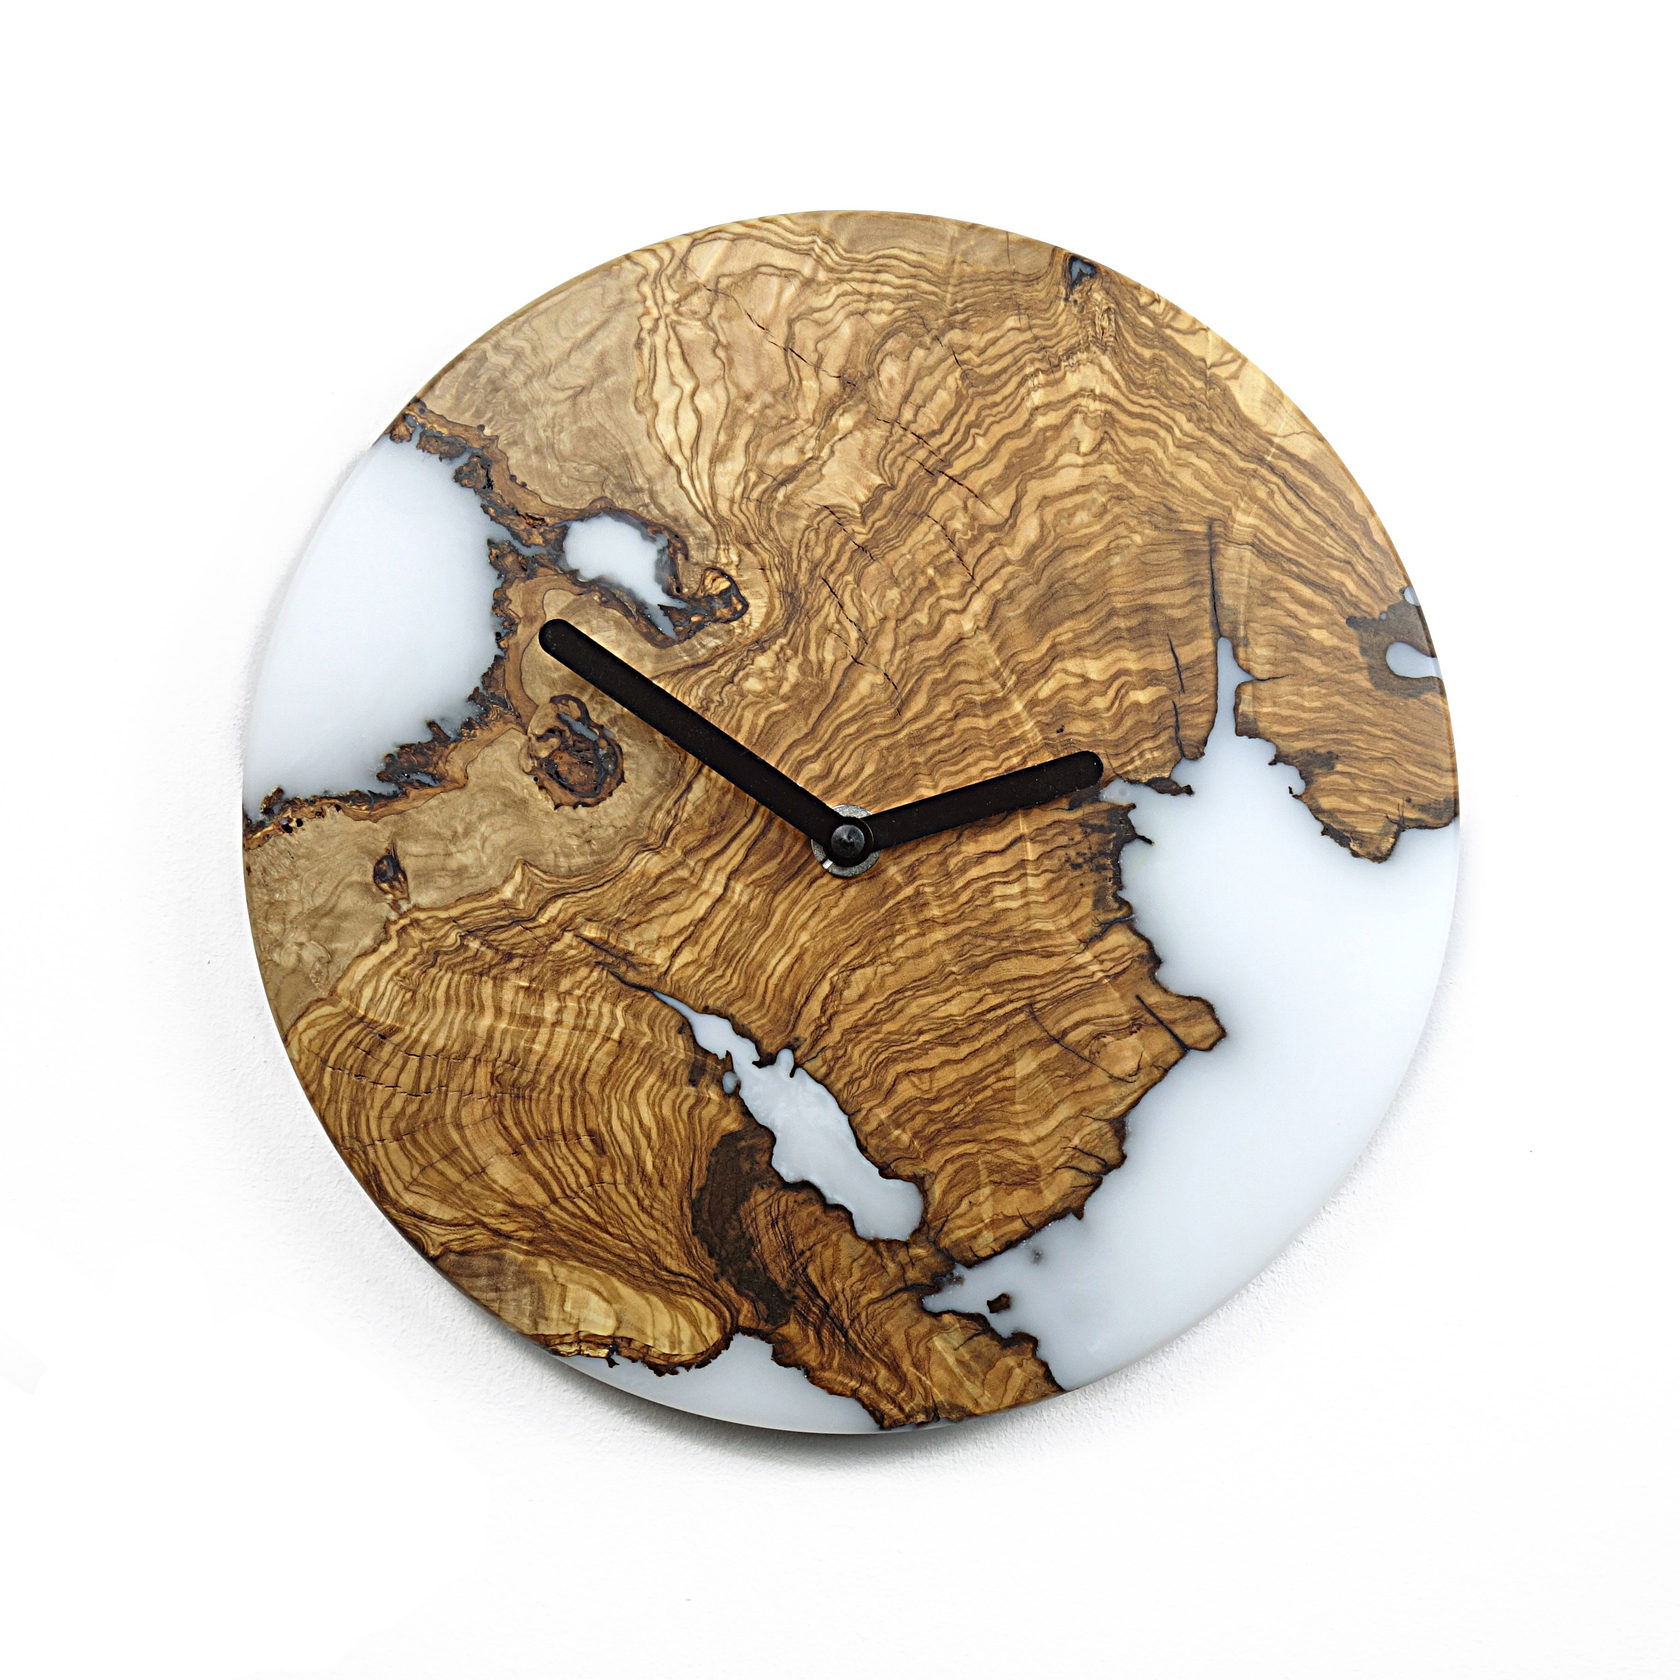
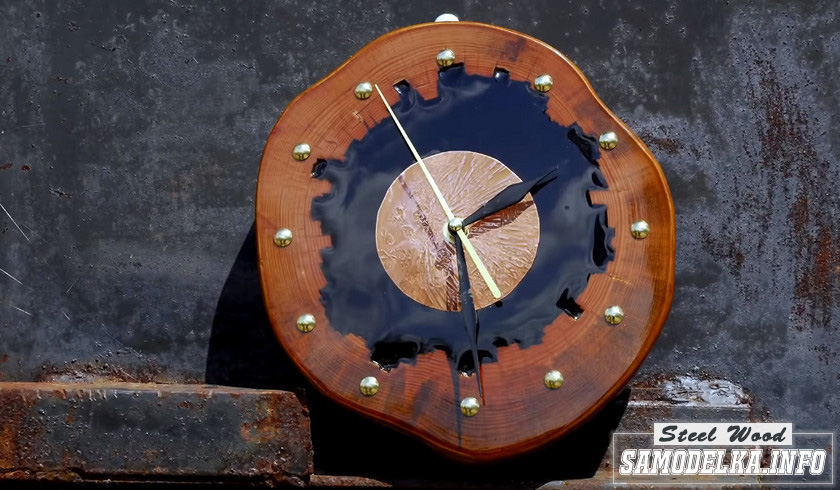
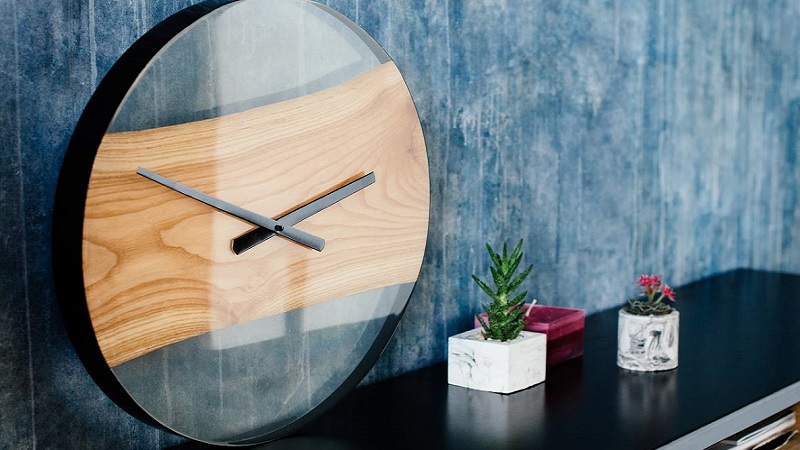
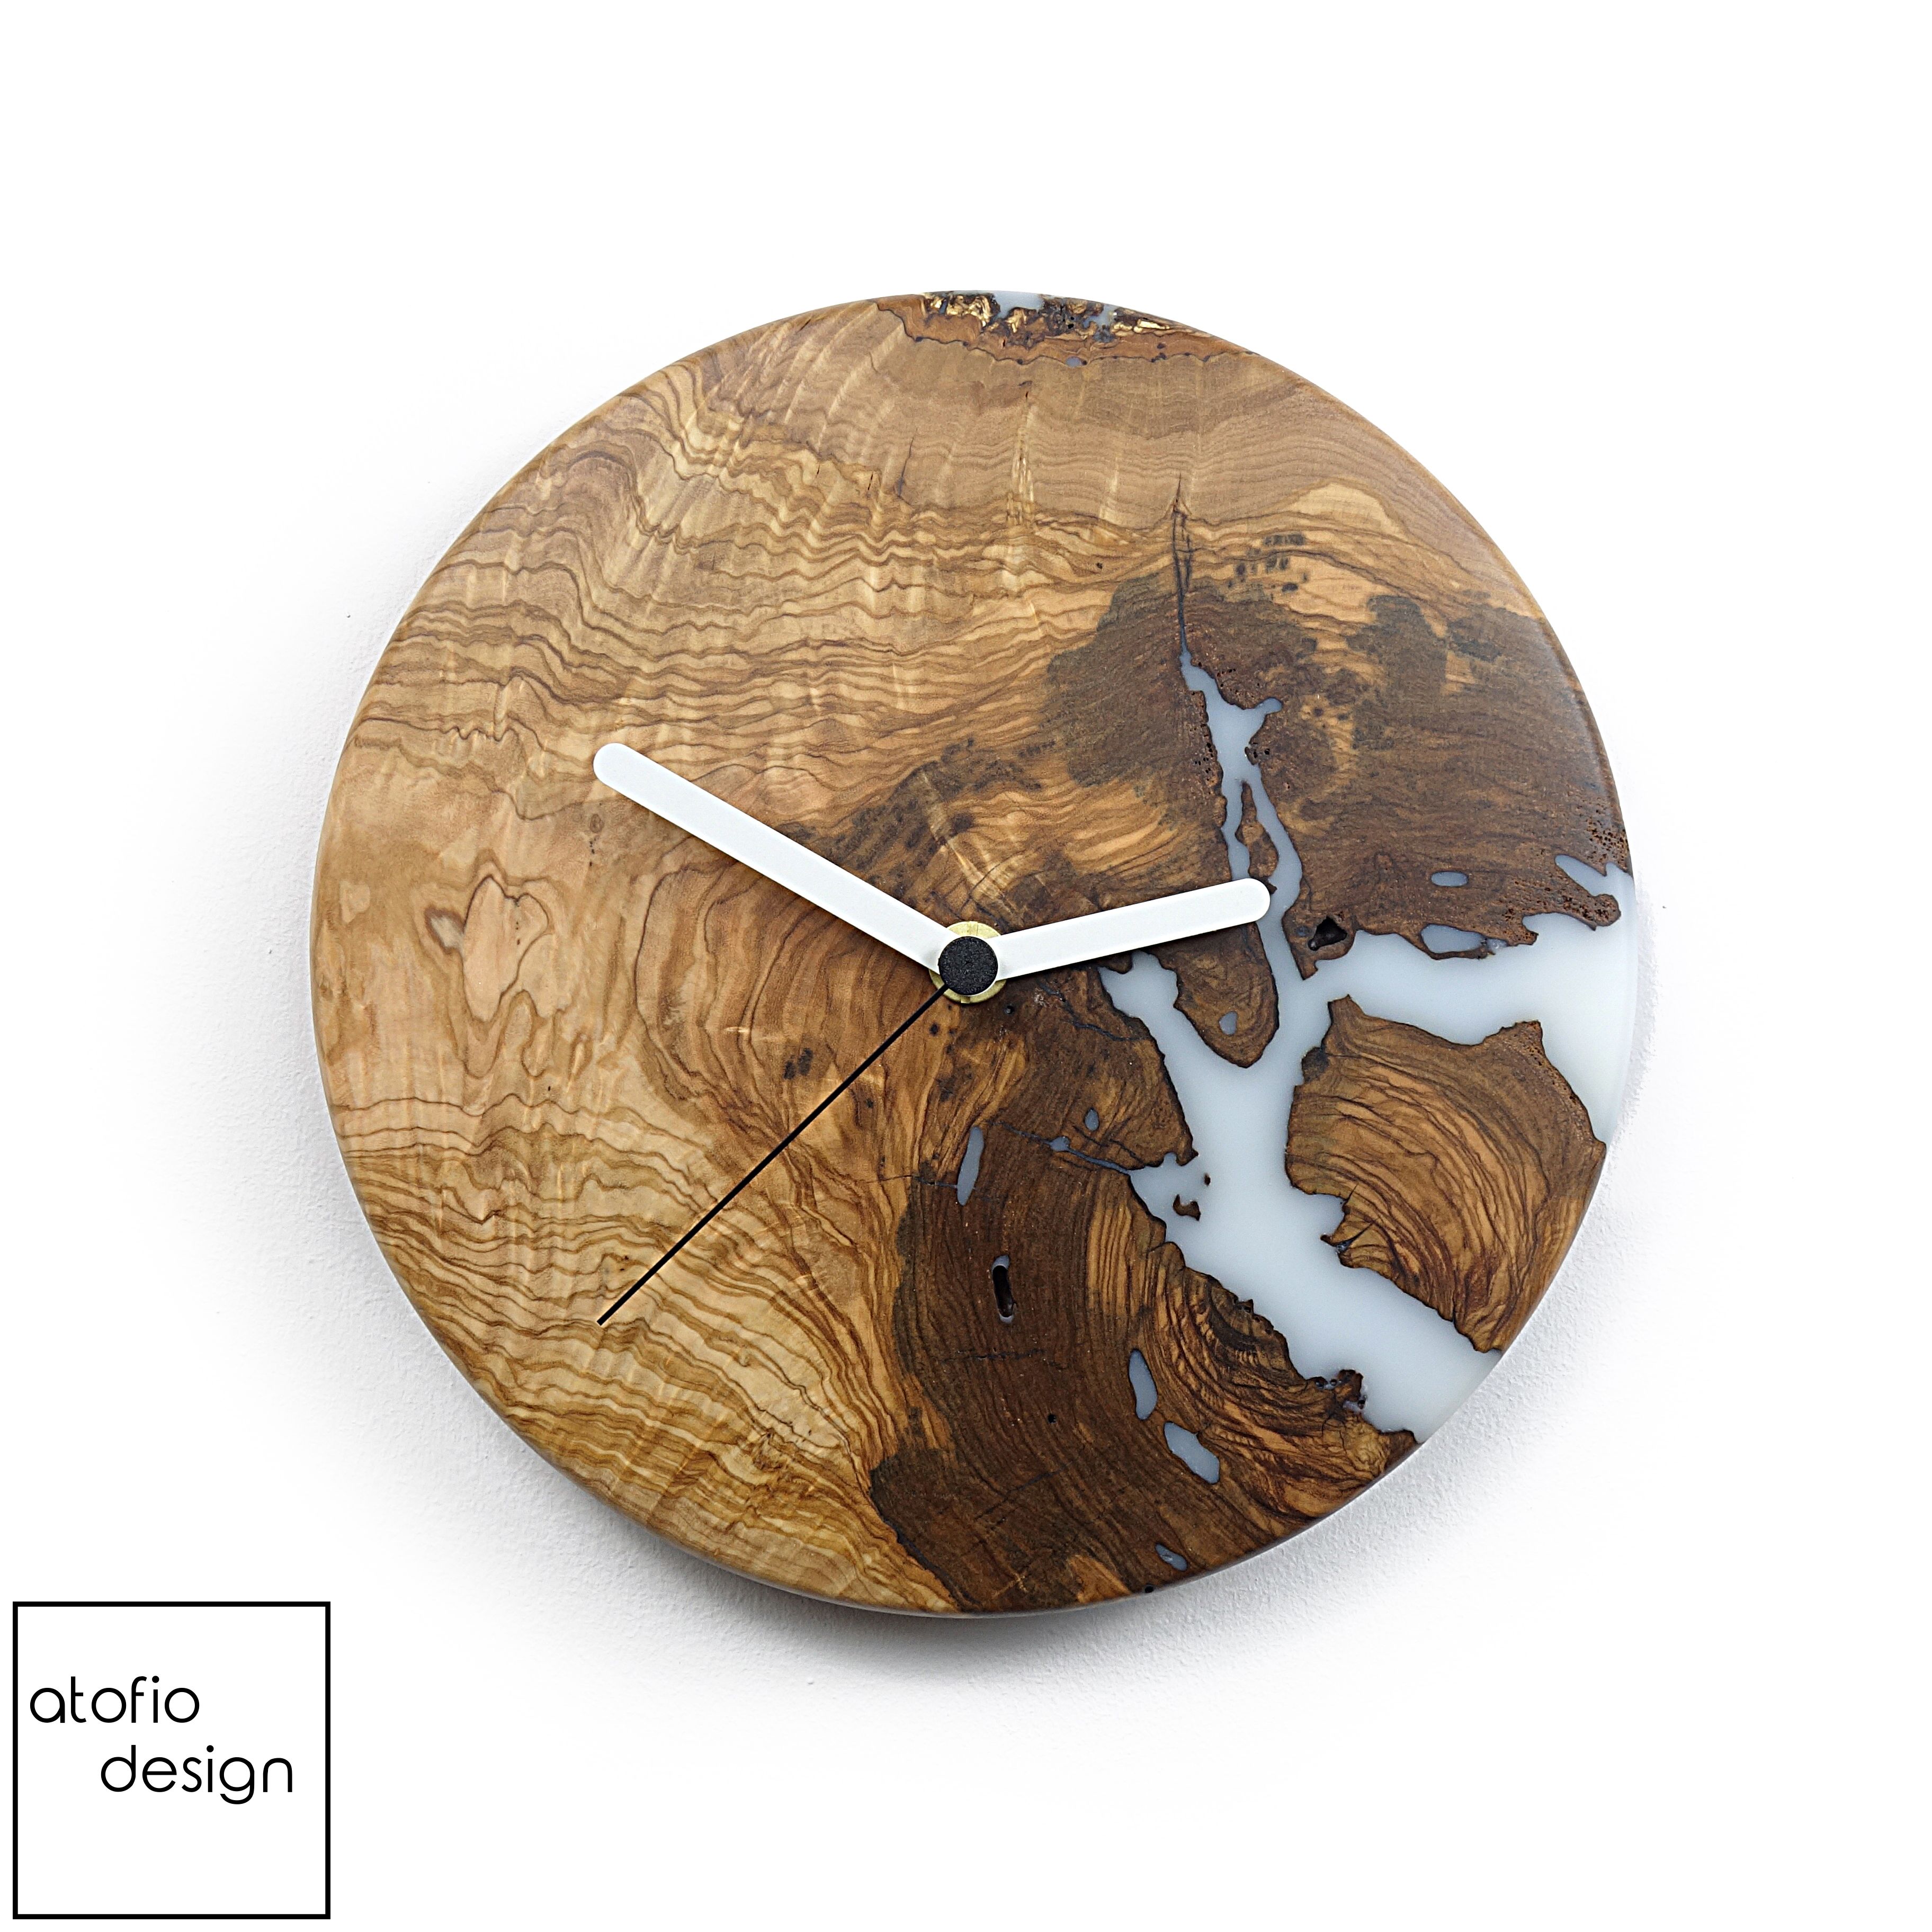
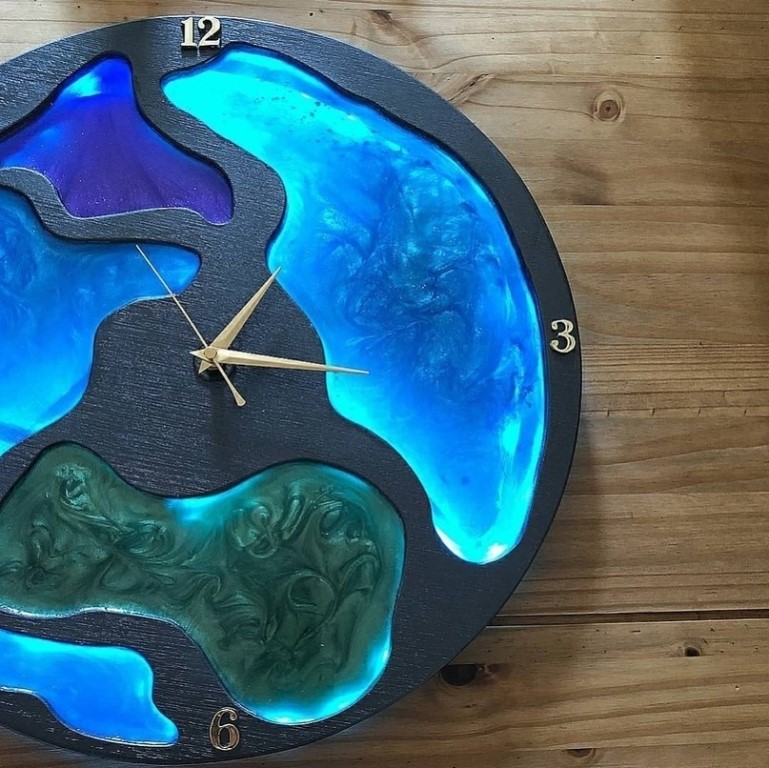
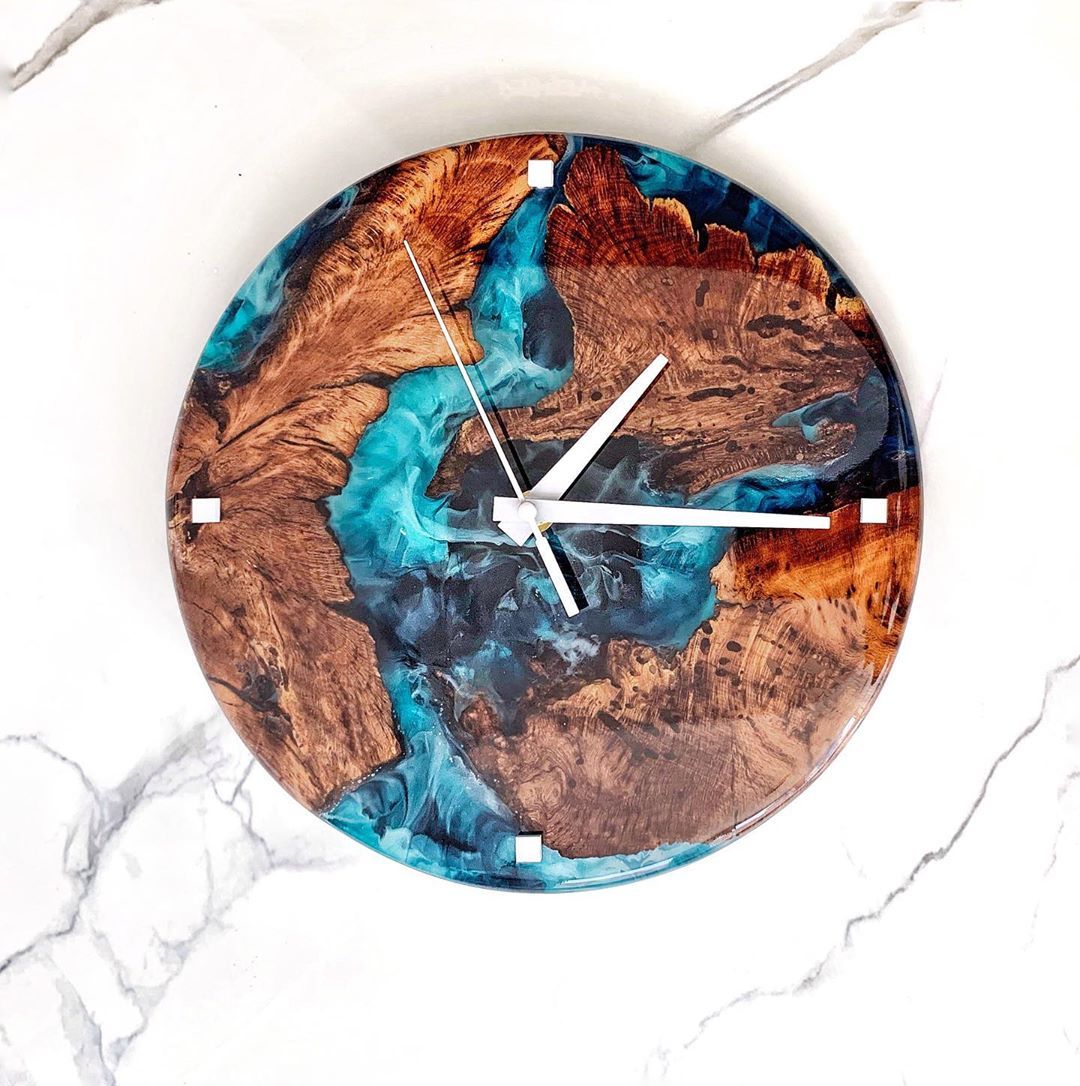
Another original option can be a wall clock made of transparent epoxy resin with an insert from an uneven piece of wood. Moreover, it can be of any color. It is better to choose a product with an unusual structure and irregularities. It is inserted into the central part of the object. In this case, the arrows can also be made of wood, but at the same time they must be different in color, otherwise they will merge against the general background. The numbers can be omitted, at all.
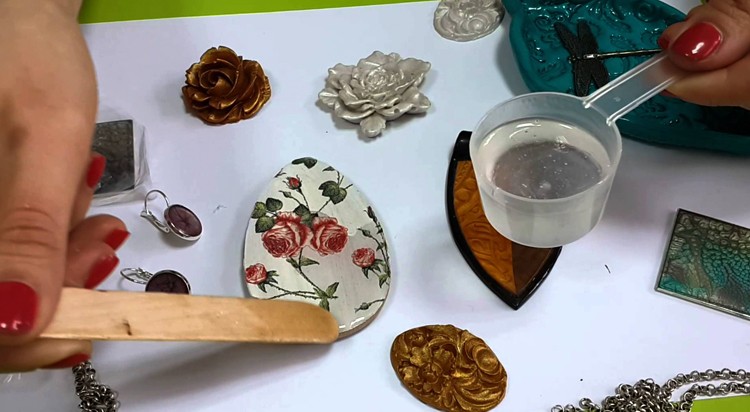
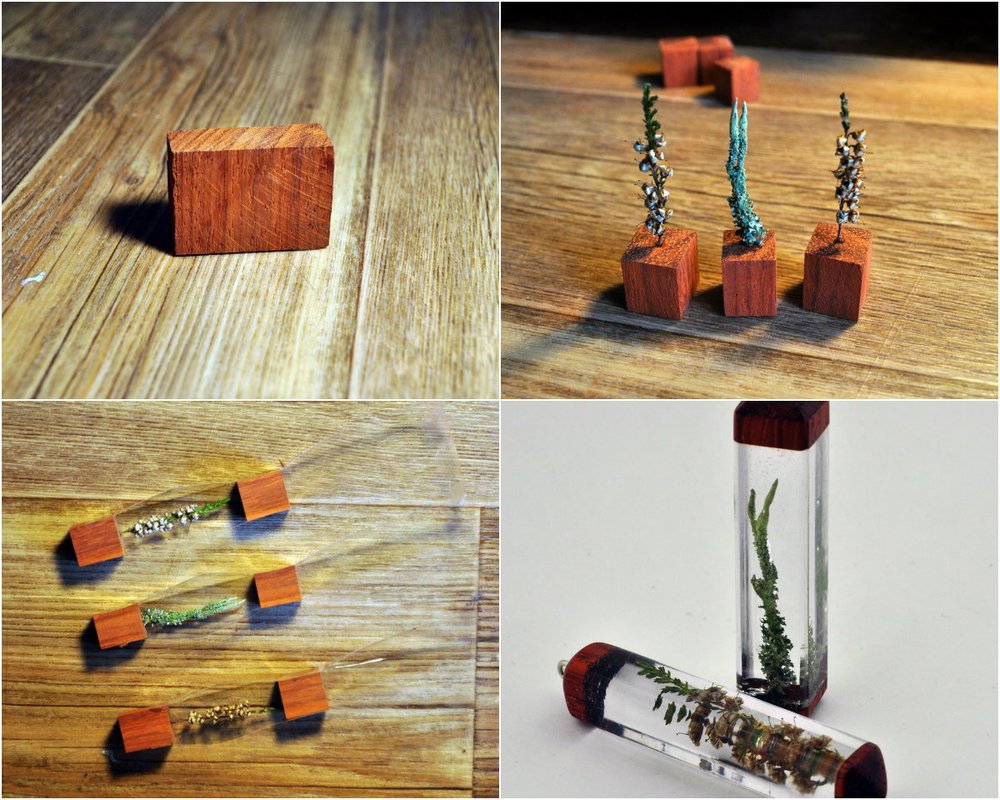
Filling the pendant
Having prepared everything you need, you can get to work. But first, it is worth covering the work surface with a layer of polyethylene. It is almost impossible to wash the resin away from the materials to which it adheres. The step-by-step actions of the wizard look like this:
- Installation of homemade formwork or open mold (as options - molds for ice or chocolate). The form needs to be perfectly aligned. This is not a painting where every millimeter is critical for harmony, but it's still better to try.
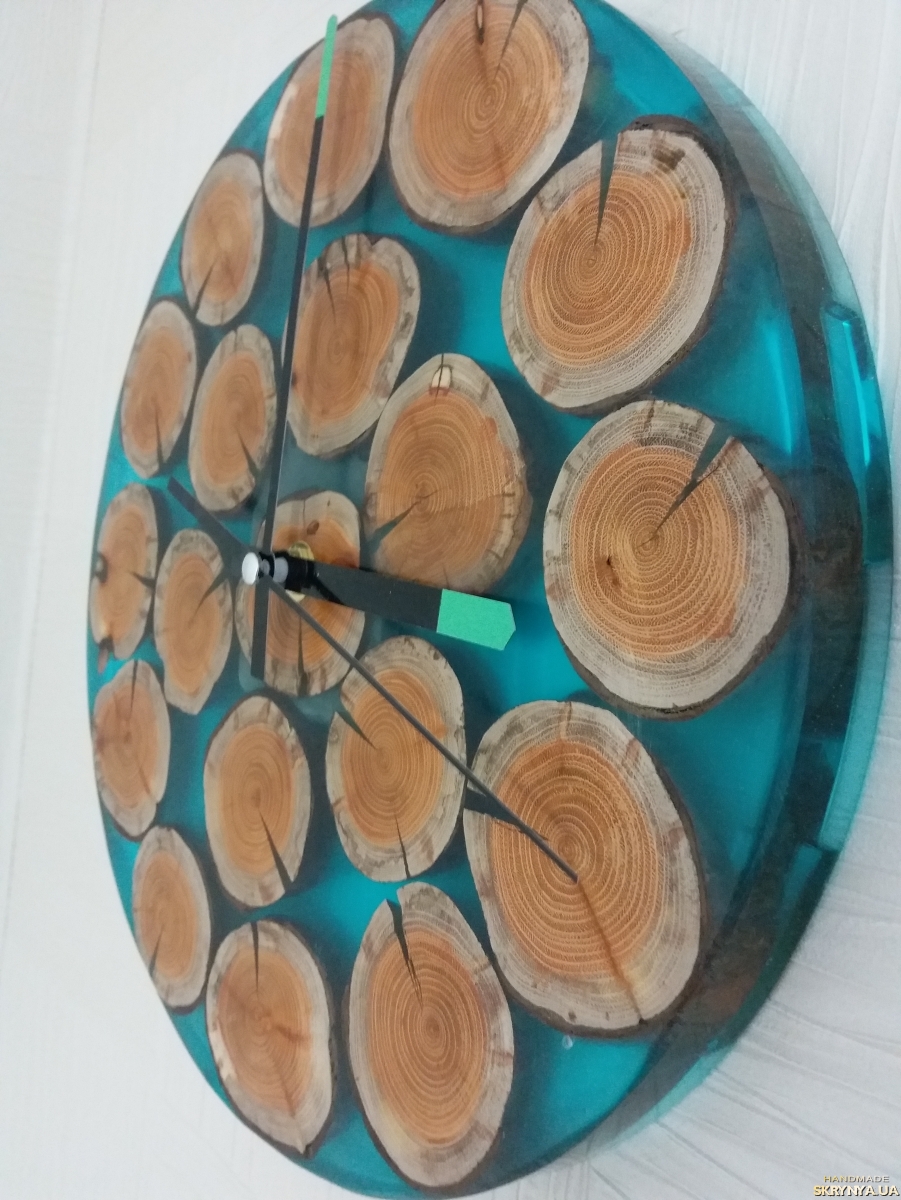
- Securing the wood slices inside. You can grab the pieces to the bottom with hot melt glue so that they don't float in the resin.
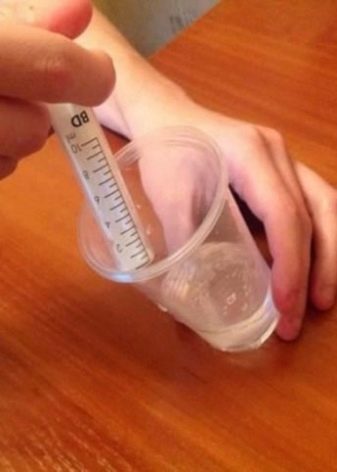
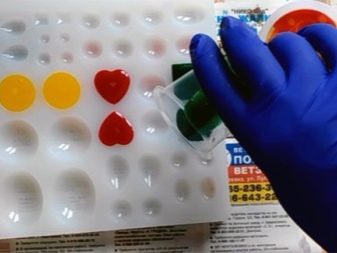
- Mixing resin. It is necessary to mix the solution exactly according to the manufacturer's instructions. There are no universal proportions - they differ from firm to firm. If the proportions are indicated by weight, you need to use an electronic scale (kitchen scales are suitable). If in volume, a syringe is perfect.
Note! The hardener is always added to the resin, not vice versa. If the composition is planned to be colored, the coloring pigment is diluted in the resin before adding the hardener.
It is extremely important to follow this sequence.
Before pouring, the container with the resulting solution can be placed in another - with warm water (its temperature should not exceed 60 degrees). Outwardly, it will look like a steam bath. Such a life hack allows you to quickly and better get rid of the air in the composition.
It is necessary to carefully mix the solution in a circular motion.
It is important to walk tightly along the walls. If possible, expel any remaining air bubbles
Mix in this way for at least two minutes, it is better to do it longer.
Carefully pour the resin into the mold. At the first stage of solidification, it is liquid and itself will be evenly distributed over the surface.
Cover the product with a dust-proof dome. If dust gets on the surface, the product will be aesthetically damaged.
If the shape and size of the pendant is critical and everything must clearly correspond to the sketch, after 6-8 hours it will be necessary to pour the mixture into the formwork. The fact is that the resin has a slight shrinkage during curing.

The solidification time can be different. Depends on the resin itself, working conditions. The average duration of the curing period is one day. In any case, after this time, it is better to check the readiness of the jewelry.
Workshop on making epoxy cup holders
Unusual, elegant and unique epoxy glass holders will become the real pride of any housewife. They fit perfectly into any interior, combining different shades. In the process of working, any small objects can be placed in the resin: buttons, stones, coins, sparkles, grass, etc., in accordance with the style of the premises. By the way, you can not only decorate your own kitchen with original products, but also make them as a gift for any event.
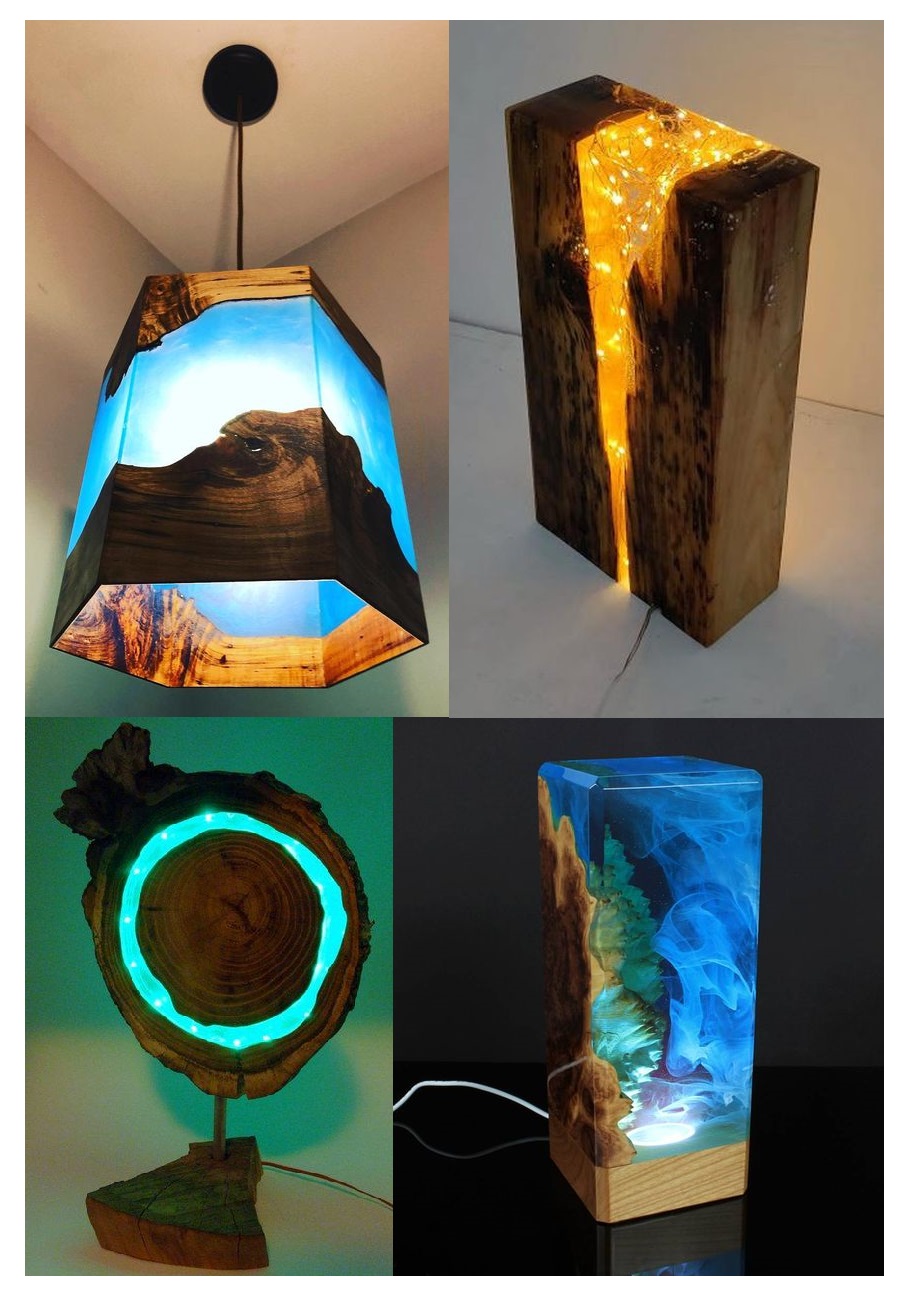
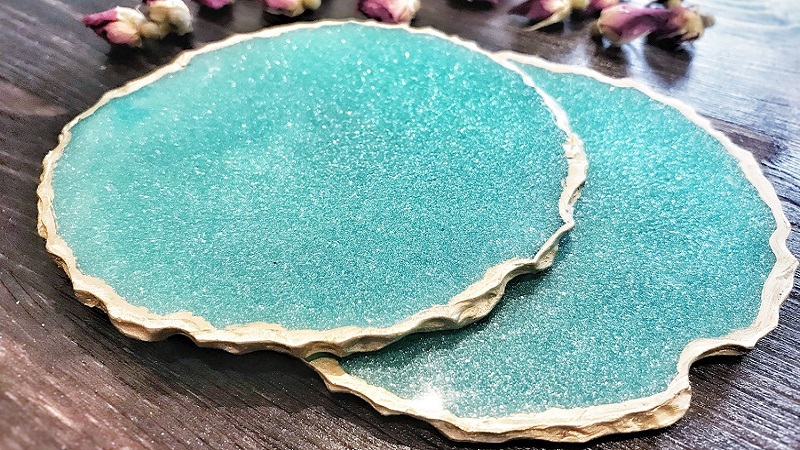 Epoxy resin helps make beautiful home furnishings
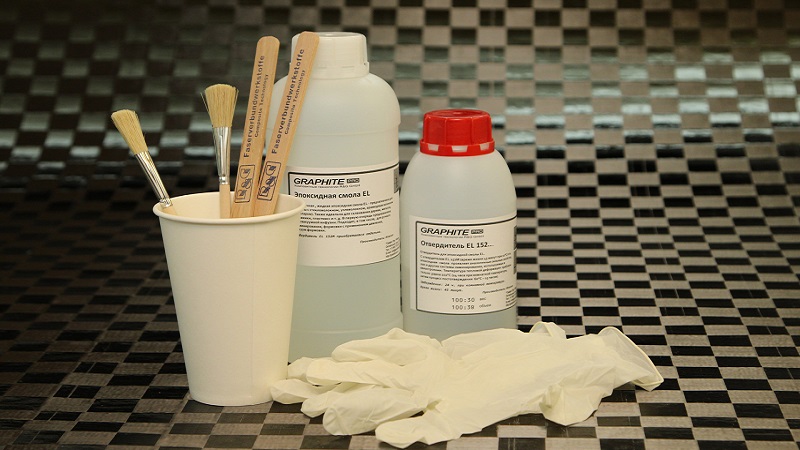
What you need to work
Before studying a master class and engaging in exciting creativity, prepare everything you need. To work, you need the following:
- epoxy resin in the required amount and a hardener to it;
- working stands (wooden cuts up to 15–20 cm in diameter);
- coloring pigments (transparent and opaque can be used);
- plastic container;
- plastic dishes to the width of the desired cup holders;
- disposable cups (if you plan to stain the resin in different colors);
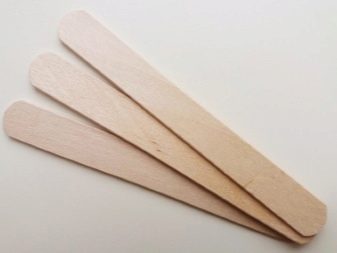
- wooden spatulas;
- personal protective equipment: glasses and gloves;
- burner (when preparing epoxy, it must be heated).
The workplace is also prepared in advance. Cover the table and floor with plastic. Also make sure that all work will be done in a well ventilated room. And don't forget to wear glasses and gloves.
Making cup holders: step by step instructions
Knowing the whole sequence of work, even a novice master can cope with this task. Epoxy cup holders are made in certain steps, you need:
- Prepare epoxy in a container (mix the resin with the hardener in the proportion indicated on the instructions).
- Stir the substance thoroughly with a spatula for 4–5 minutes until a homogeneous and thick consistency is obtained.
- Pour resin into cups and add the desired dye (colors can be mixed and get different shades and beautiful stains).
- Then add the desired filler to the epoxy.
- Place the dishes for making cup holders on a small hill and pour resin there.
- In the process, you can tilt the container and achieve original stains. You can also mix colors with wooden sticks.
- Use a gas burner to remove air and speed up the curing process. With the device turned on, quickly swipe near the surface (at a distance of 8-10 cm). All air bubbles will rise to the edge and burst. But do not overheat the resin and do not allow the mass to boil and form a foam.
- After 15–20 minutes, when the mass dries out a little, carefully remove its excess from the bottom of the stands.
 You should prepare everything you need for work in advance.
After all procedures, leave the products to dry for 1–1.5 days. Cover them from dirt and dust beforehand. For example, place a cardboard box or box on top. And after complete drying, you can already admire your magical works.

Installing the clock mechanism
Considering the size of the watch, I bought a movement with a tall dial and large hands. The diameter of the dial is 36 centimeters, so I bought the hands of the watch, which had a minute hand 16 and a half centimeters long. The watch is about four and a half centimeters thick, which is much more than the length of the shaft on the movement.

I put the mechanism of the watch in the center of the dial on the back, and then circled it with a sharpie. I drilled a one centimeter hole in the center all the way to the end so that everything would go through the shaft. Then I used a forstner and a regular drill to make the pocket larger than the mechanism's size. I kept drilling until I could push the shaft and use the nut on the end to tighten the shaft in place.

How to care for epoxy products?
In order for original epoxy products to last as long as possible, it is important to properly care for them:
- Avoid contact with sharp objects and surfaces, as scratches may appear.
- Store away from sunlight. There are special additives that protect the material from the damaging effects of UV radiation, but not all craftsmen use them. In addition, the decorative filling of the product can fade from the sun.
- Wipe the surface periodically with a soft cloth only.
- Do not use alcohol-based cleaners or other chemicals that can damage the top gloss coat of the epoxy.
Completion of work
The last step was to set the numbers on the dial, which I also bought. The numbers were glued to the back, making them very easy to stick to the front. Putting the numbers back in place, I set my clock. Then I inserted a special hanging system so that my new wall clock could be hung. I decided to hang them in the living room.I liked this project so much that I decided to make a clock, but using different colors and a different shape, for the bedroom and children's room. I am very pleased with the results of the work done. I really hope that this master class will inspire you to create something like that.
Pros and cons of epoxy for wood
Previously, epoxy was used in the form of glue for various parts, it was almost never used in art. Later, floors were poured with this material, noting its low abrasion, high strength and durability. Now resins with dyes or in their pure form are widely used to create unique products for the home. The advantages of epoxy for wood are as follows:
- the mass can be given any shape - it flows, fills the smallest pits, depressions and cracks;
- the hardened product is easy to grind and polish, you can drill holes in it, sharpen grooves;
- there are epoxy on sale in different colors, but even a transparent resin can be given any shade by introducing a dye;
- since the composition does not shrink, the furniture will retain its attractiveness for a long time.
The tool also has disadvantages. So, you need to strictly observe the proportions of resin and hardener, otherwise the mass can be irretrievably damaged. Resin is expensive, especially with transparent grades. The cost of large items will turn out to be large. Another disadvantage is the toxicity of epoxy. During work, you will have to use a respirator, gloves, glasses, and ventilate the room well. After hardening, the composition is safe.
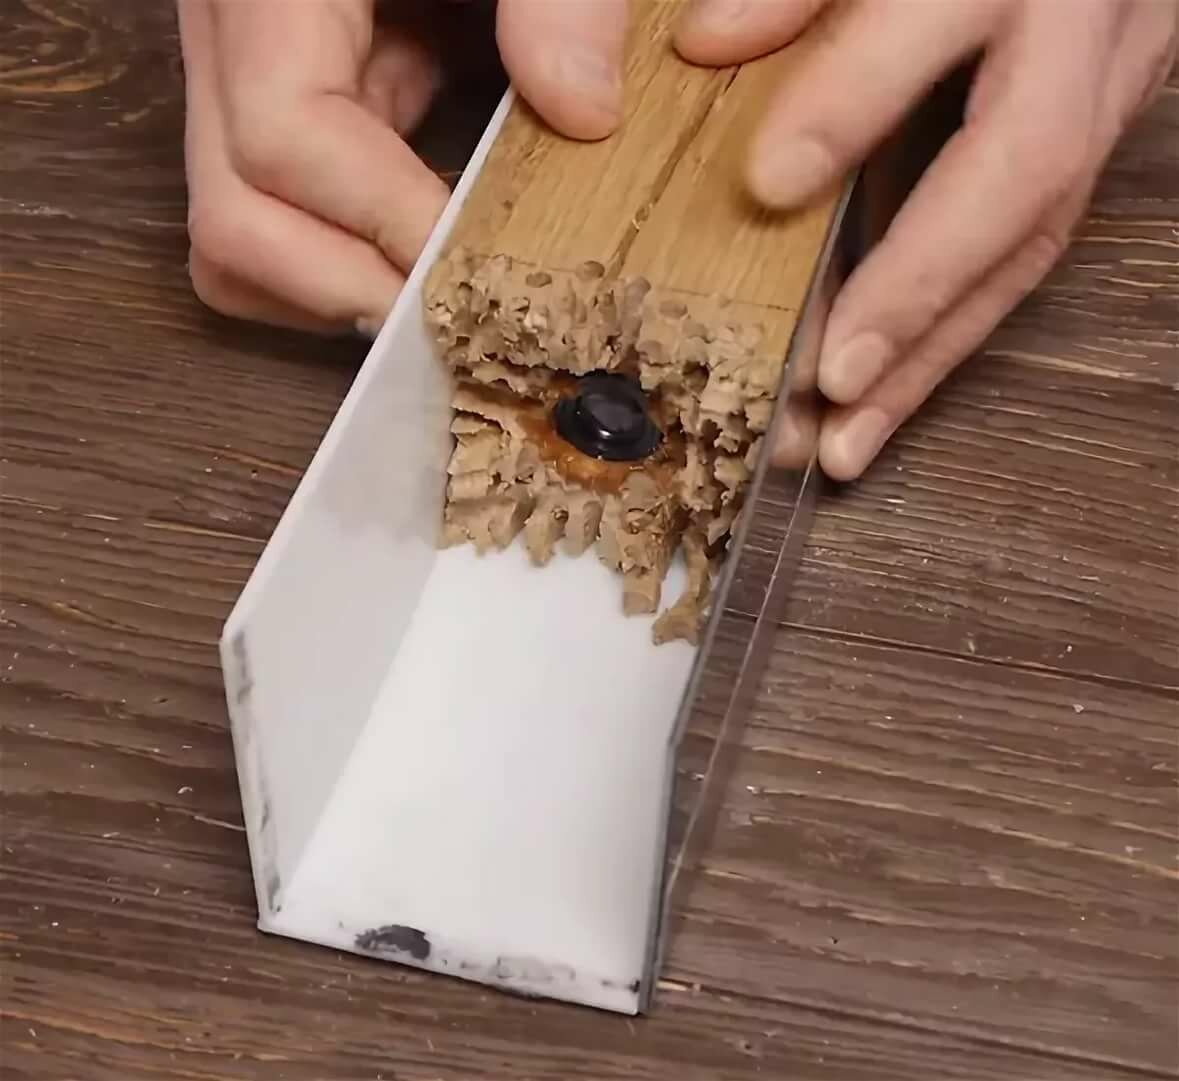
Work after hardening
When the resin is completely solid, it’s time to take the blank out of the mold or disassemble the formwork. Just press on the silicone mold to make the product fall out of it. The formwork can be gently broken with a thin screwdriver and hammer, if it is not possible to do it by hand. If the mold was made of plasticine, it is enough just to tear it off along with polyethylene.
Then you can start finishing the workpiece.
Using a special technique, the entire surface is sanded - front, back, and it is also worth paying attention to the edges. In general - in the absence of a tool - the polishing step can be ignored
But the appearance will lose a lot. Of course, no one will buy a machine for a single use. In this case, you can use fine-grained sandpaper.

A hole is drilled in the upper woody part of the pendant so that the fittings can be threaded. It also needs to be processed. It is better to give preference to a professional grinding paste.
If the slices are completely immersed in resin as planned by the author, the work is complete. If they remain on the surface, it is worth treating the wood additionally. Vegetable oils or waxes are used for this purpose. Such a move will not only improve the appearance of the jewelry, but also protect it from moisture.

Making jewelry out of wood and epoxy is a hobby, the interest in which is constantly growing. Using the described technique, you can make not only a pendant, but also a complete set for an original look. It will not be superfluous to get acquainted with the works of masters recognized all over the world, whose works truly inspire.
Form creation
The very first step in this process was the making of the mold. Since I wanted to get a rather unusual and non-standard wall clock shape, I decided to use corrugated plastic for making the mold, because it is much more flexible than melamine. Then, to connect all the pieces of the mold, I used a lot of hot glue to hold it firmly.

Note: It is very important to ensure that all seams are properly sealed with hot glue. It is also important to go through all the seams with silicone.
All this will help prevent resin leakage. Be careful at every stage of your work. Do everything with high quality so that your watch will serve you for really many years.
A family of designers transformed an abandoned 19th century building into a stunning home
The guy was afraid of the street all his life, but one day the neighbors knocked on his door
Olympic champion Svetlana Zhurova told the truth about the relationship with the prince

Care Tips for Epoxy Cup Holders
The resulting products are very durable. But do not put hot dishes on the cup holders - ugly stains can remain on the surface of the epoxy. Also, you do not need to influence the products with any solvents: acetone, alcohol. Epoxy resin does not tolerate aggressive chemical environments and will crack.
Clean the surface of the epoxy cup holders gently. Do not use abrasive powders - the surface will be damaged, and constant contact with soap solutions may cause the cup holders to lose their glossy effect. For proper care, use the following guidelines:
- first wipe the product with a soft flannel cloth, it can be slightly moistened;
- then dry the cup holder dry.
Adding color to layers
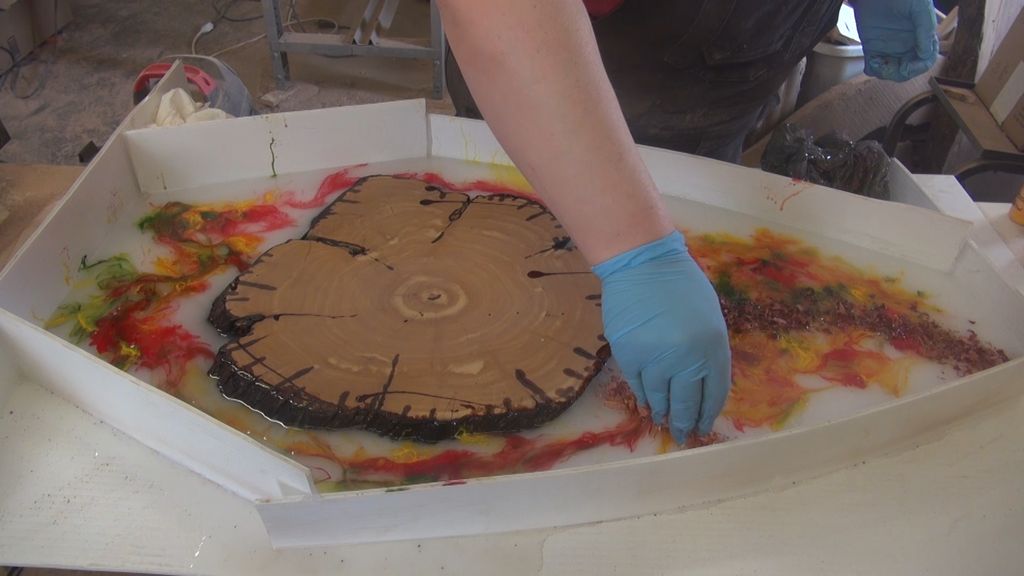
In the next step, I put some wood in the mold and applied a thin base coat of resin with added white to provide a good background for all colors.

As for the rest of the color, I thought a lot about trying to recreate that look when you stand under a beautiful tree in the fall and look up. You just see all the bright beautiful colors woven together. You see green, yellow, orange, red, crimson leaves. All this creates a fantastic kaleidoscope. I wanted to achieve just such an effect in my new project. I tried with all my might to achieve this.

I made color in two different layers on top of white. I also added some cedar wood shavings from another project to give the appearance of tree branches. I took autumn as a basis for the design of my wall clock. I like this time of the year the most. In winter, I had nostalgia for autumn, so I wanted a decor in my house in the form of a bright autumn speck, which would give more comfort and warmth to my home.
How to Intervene and Help Manage Parents' Finances: Find a Counselor
A touching photo: the dog thanks the woman for the food donated for the shelter
Children send pictures and letters to lonely perch Chang to cheer up

Exclusive epoxy watches: do it yourself
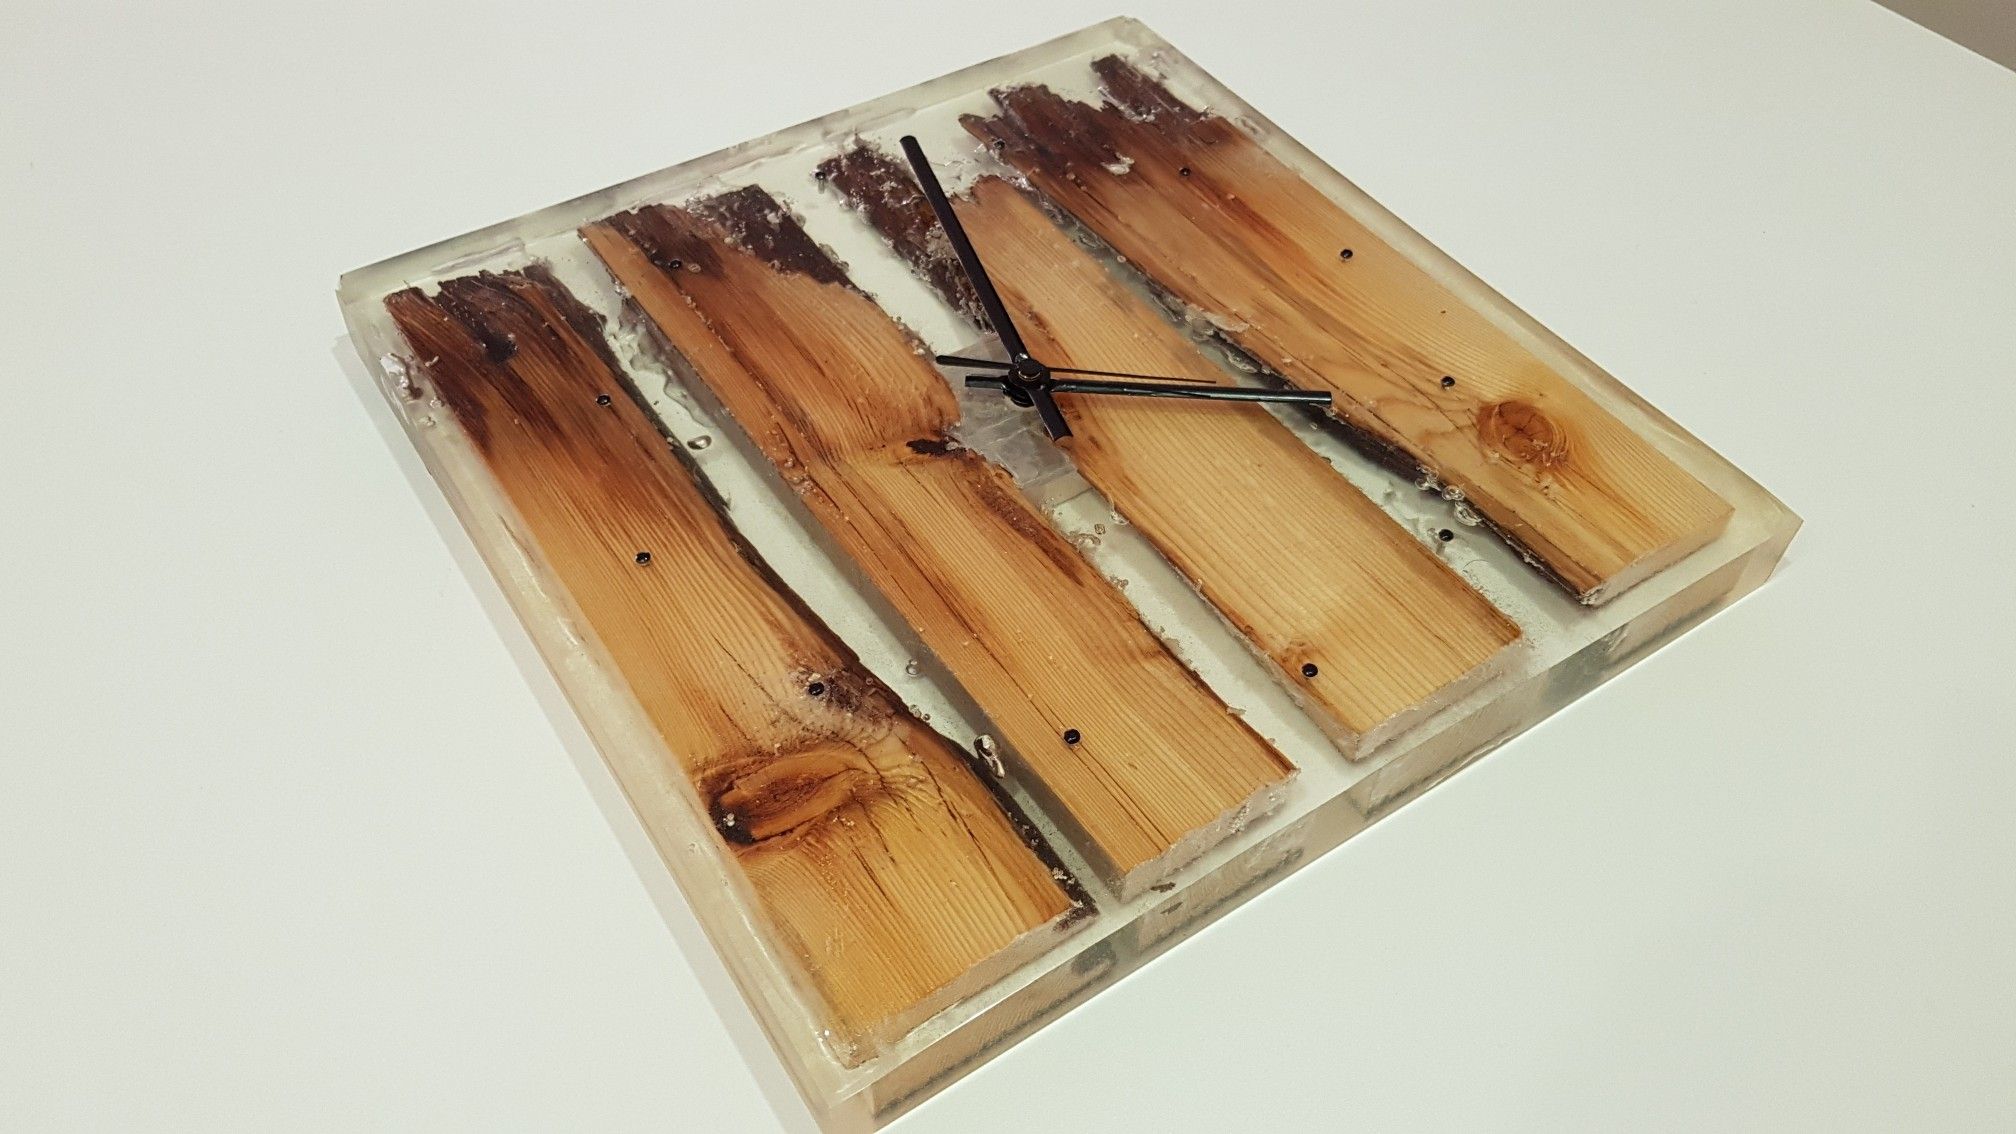
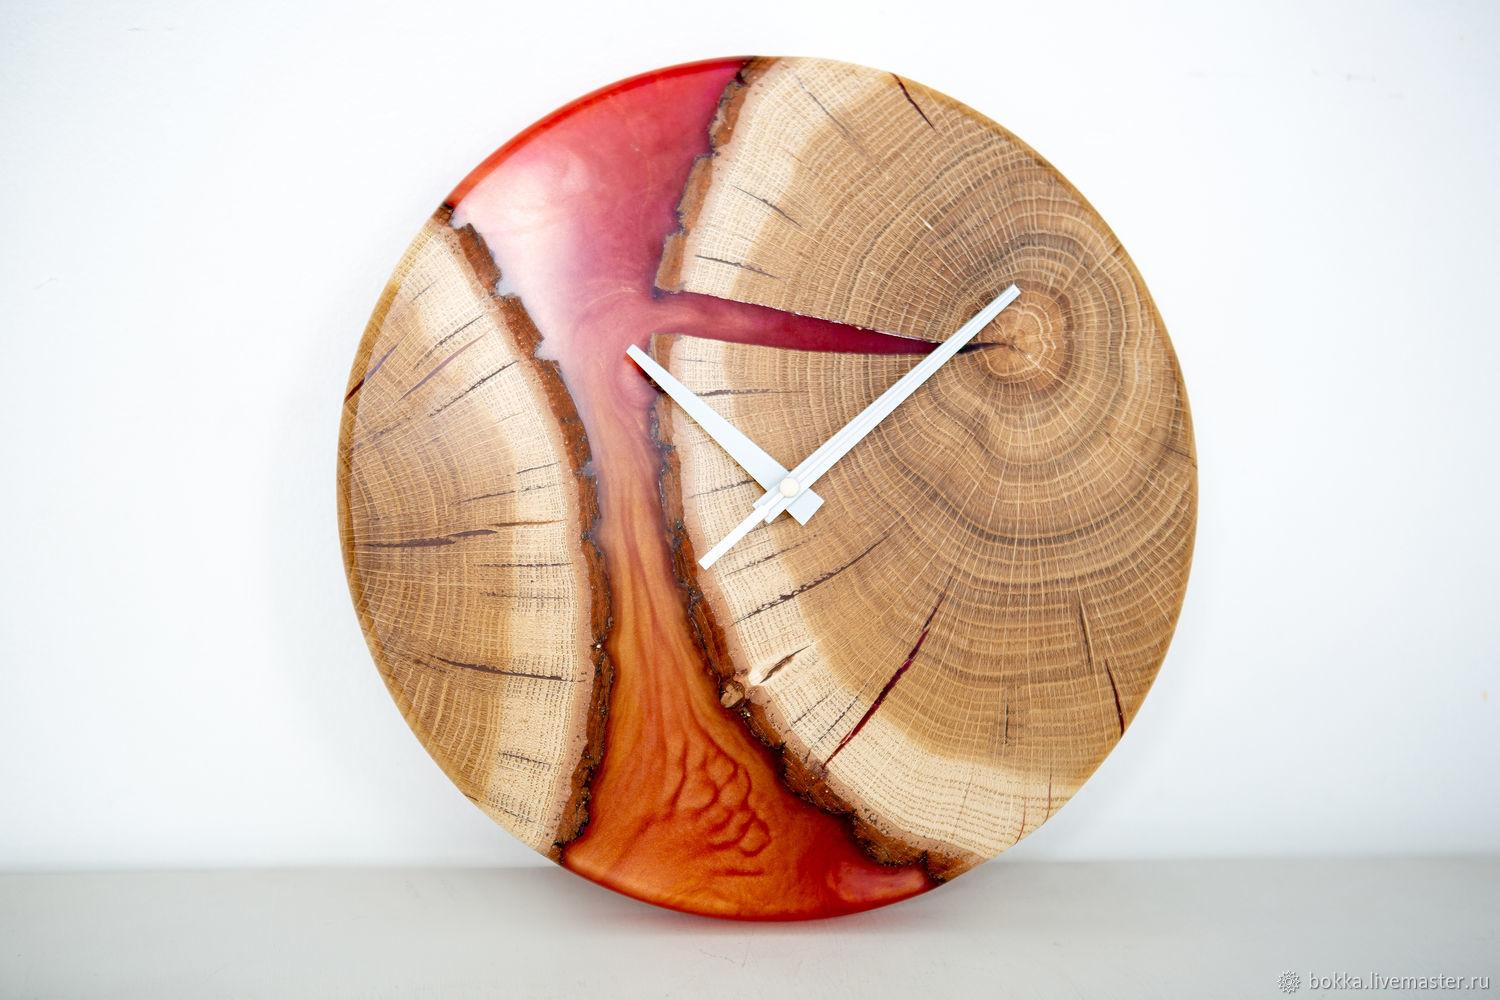
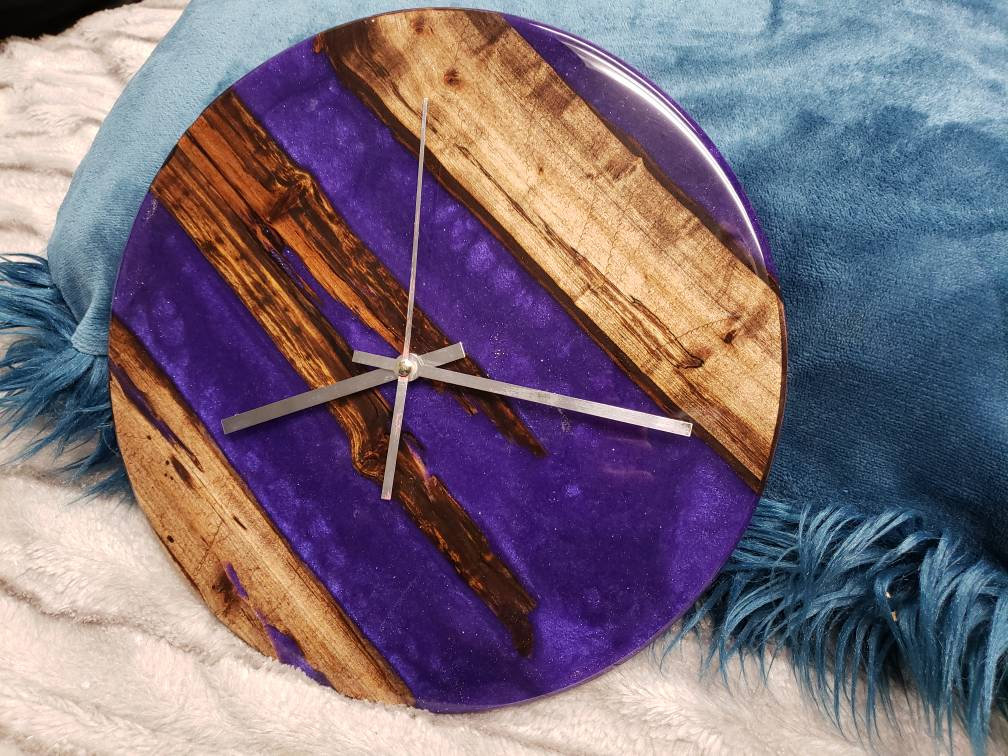
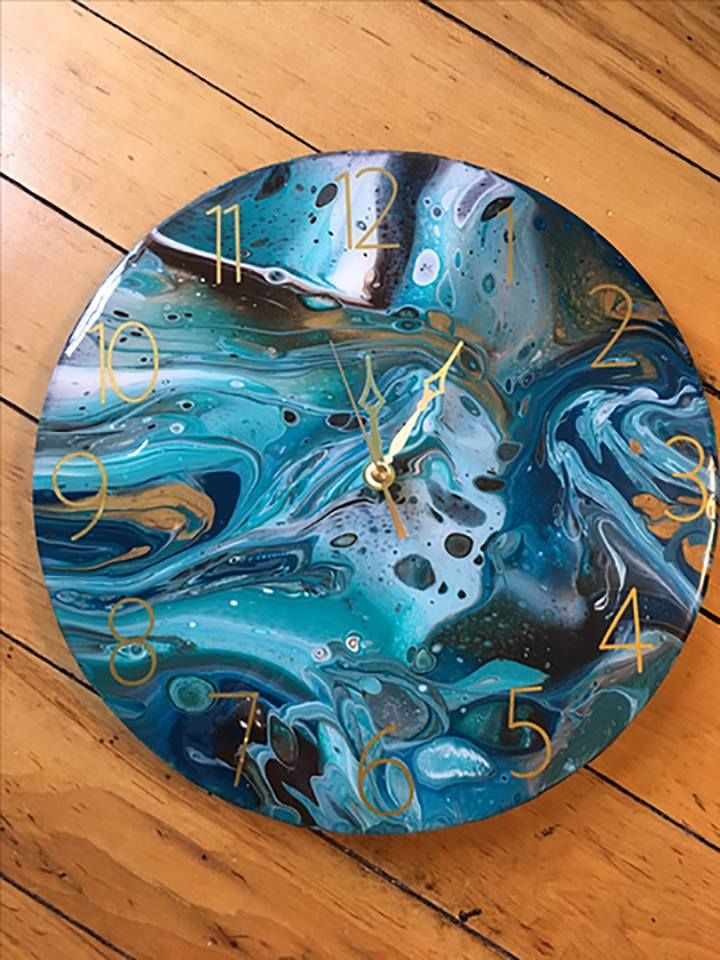
When the holidays are approaching, the pressing question arises about the choice of gifts. Do-it-yourself watches made of epoxy become the optimal and universal solution. Such a product will decorate your own apartment, adding a unique flavor.
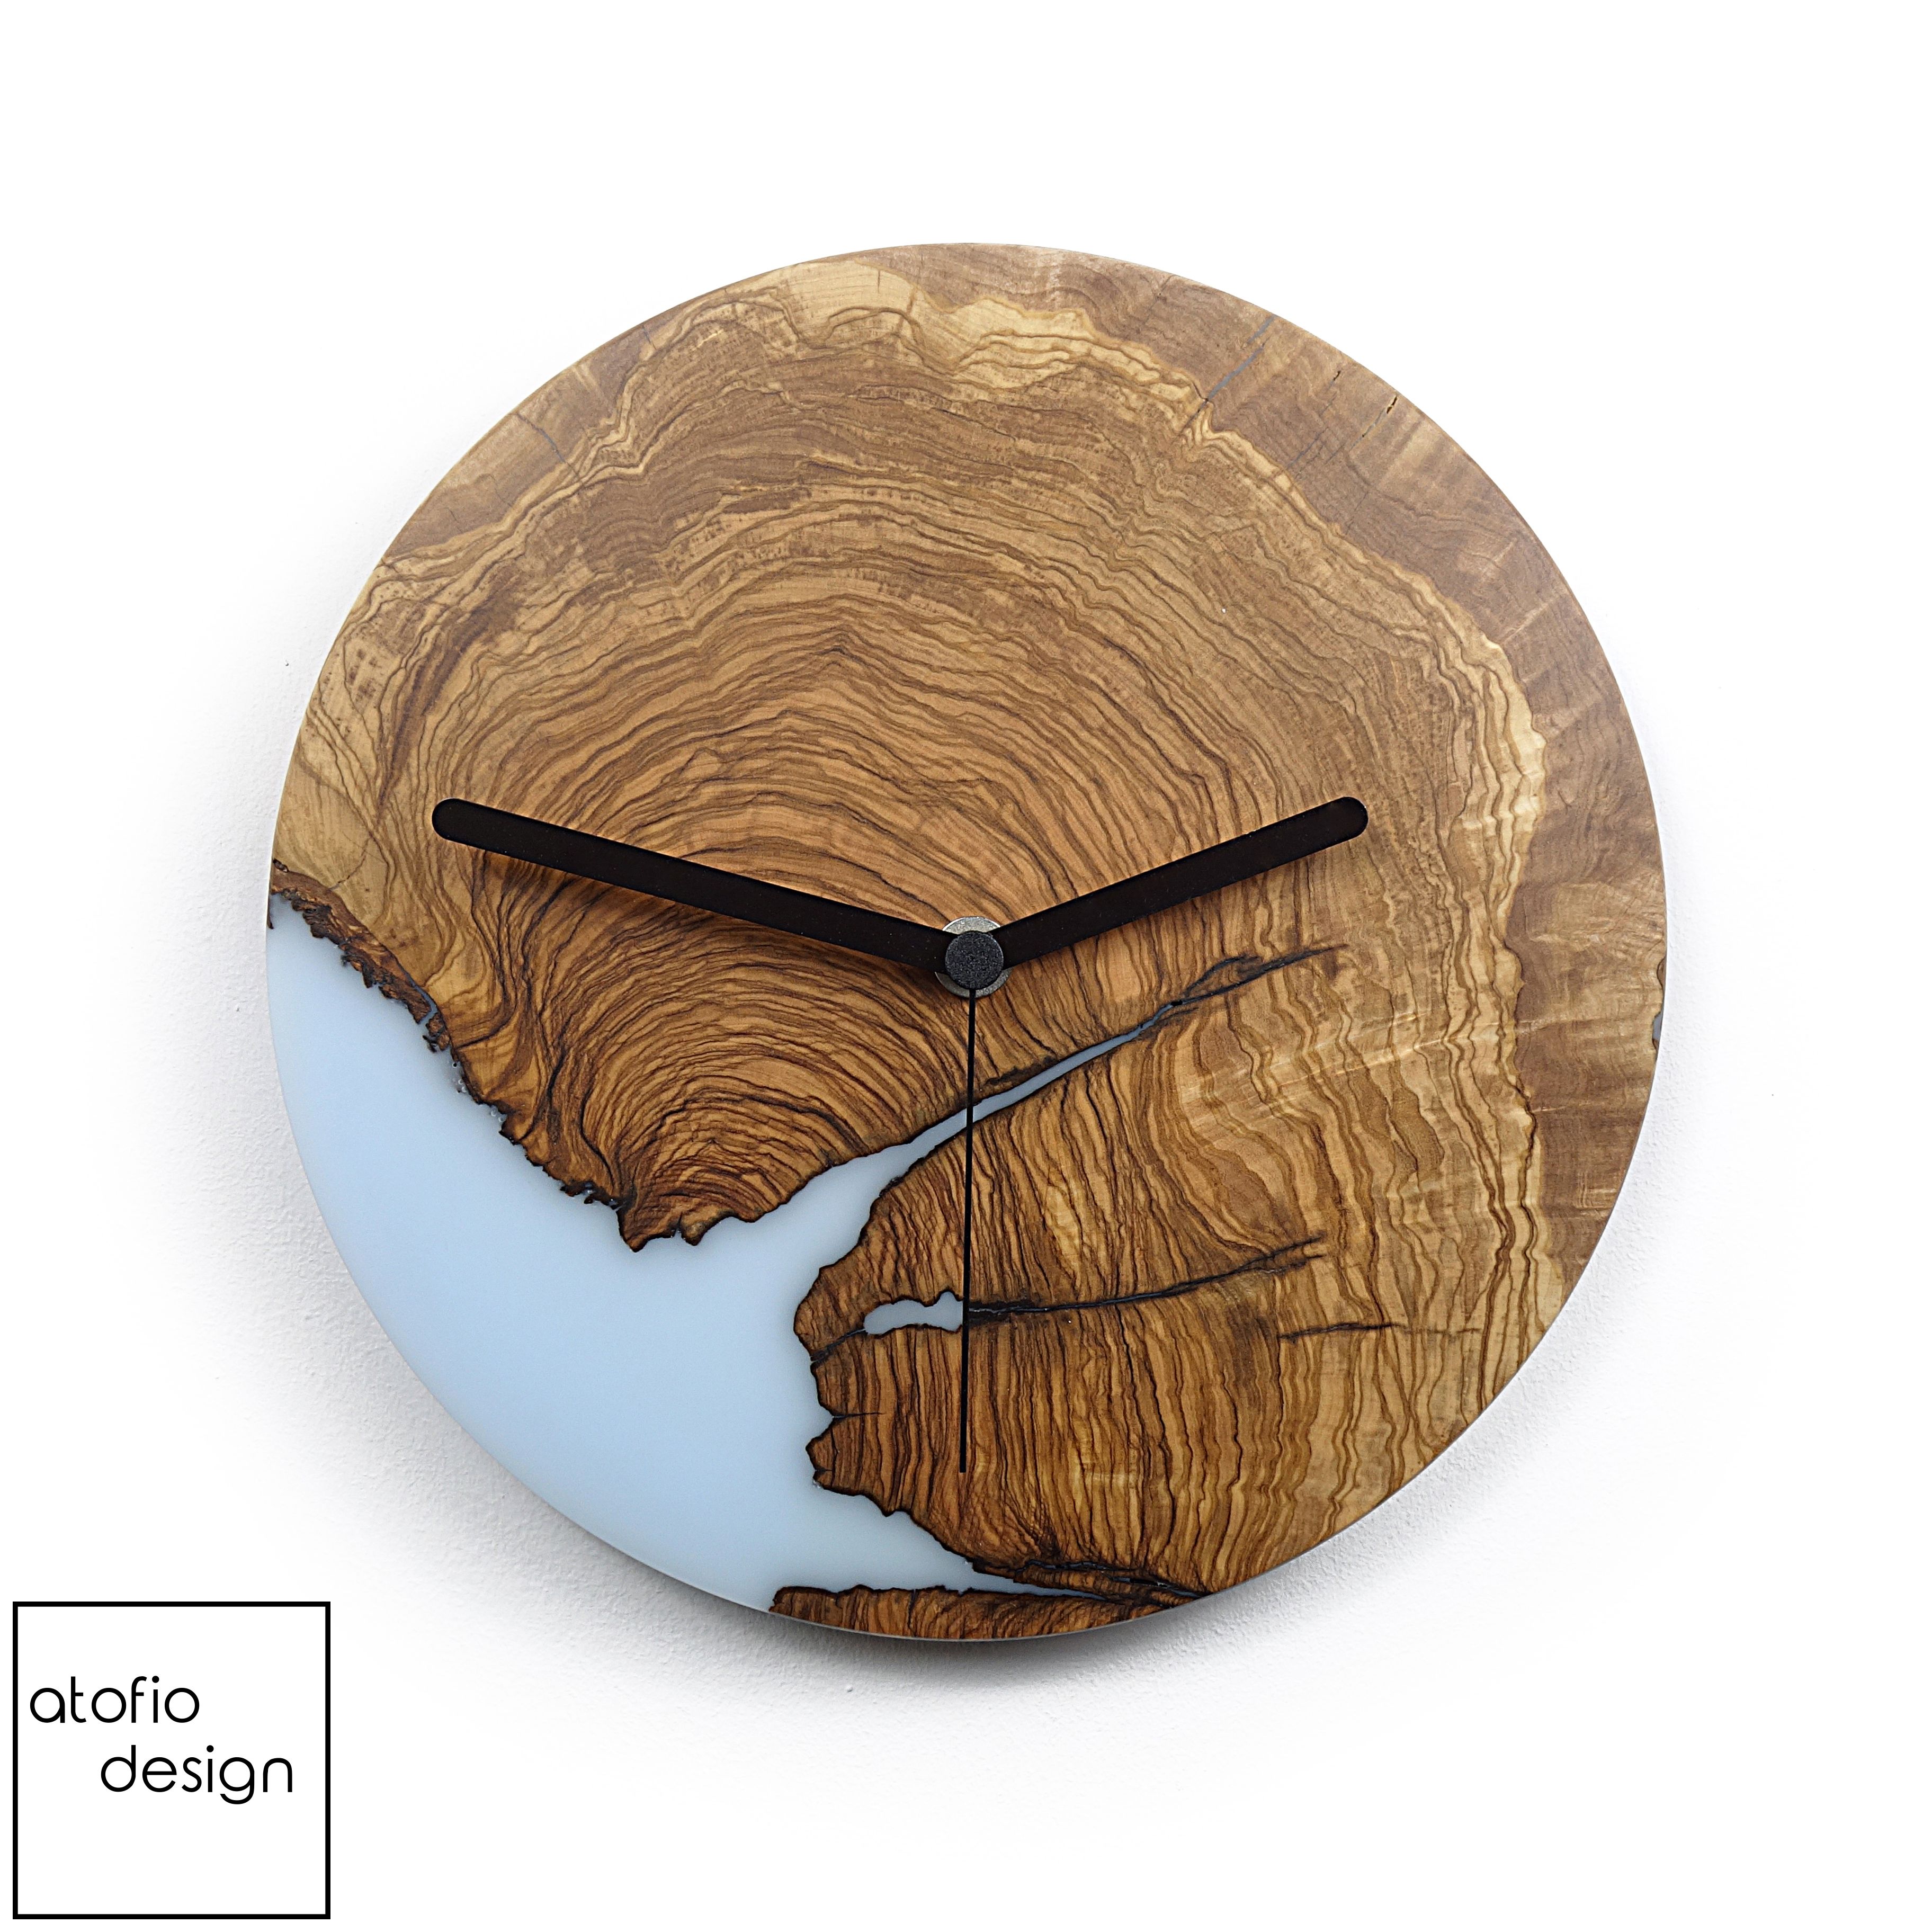
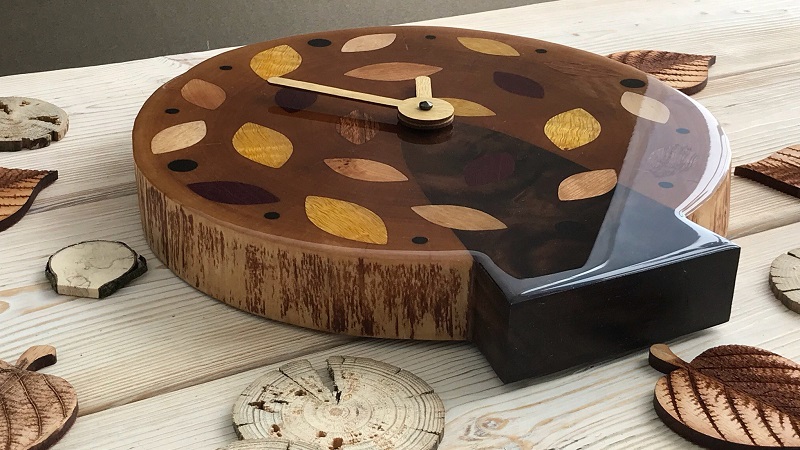 An epoxy resin clock will decorate any interior
What is required
Before starting to study the recommendations and step-by-step instructions, you should first prepare everything you need for work. To make a watch out of epoxy resin with your own hands, you will need the following:
- blank-form for a future product (you can make it from MDF or a piece of plywood);
- finished clockwork;
- epoxy resin with hardener and epoxy primer;
- auxiliary tools: disposable plastic cups, wooden spatulas for mixing the mass, brushes, masking tape and napkins;
- personal protective equipment: gloves, goggles and a mask;
- construction tools: gas burner and level;
- dyes and pigments for design.
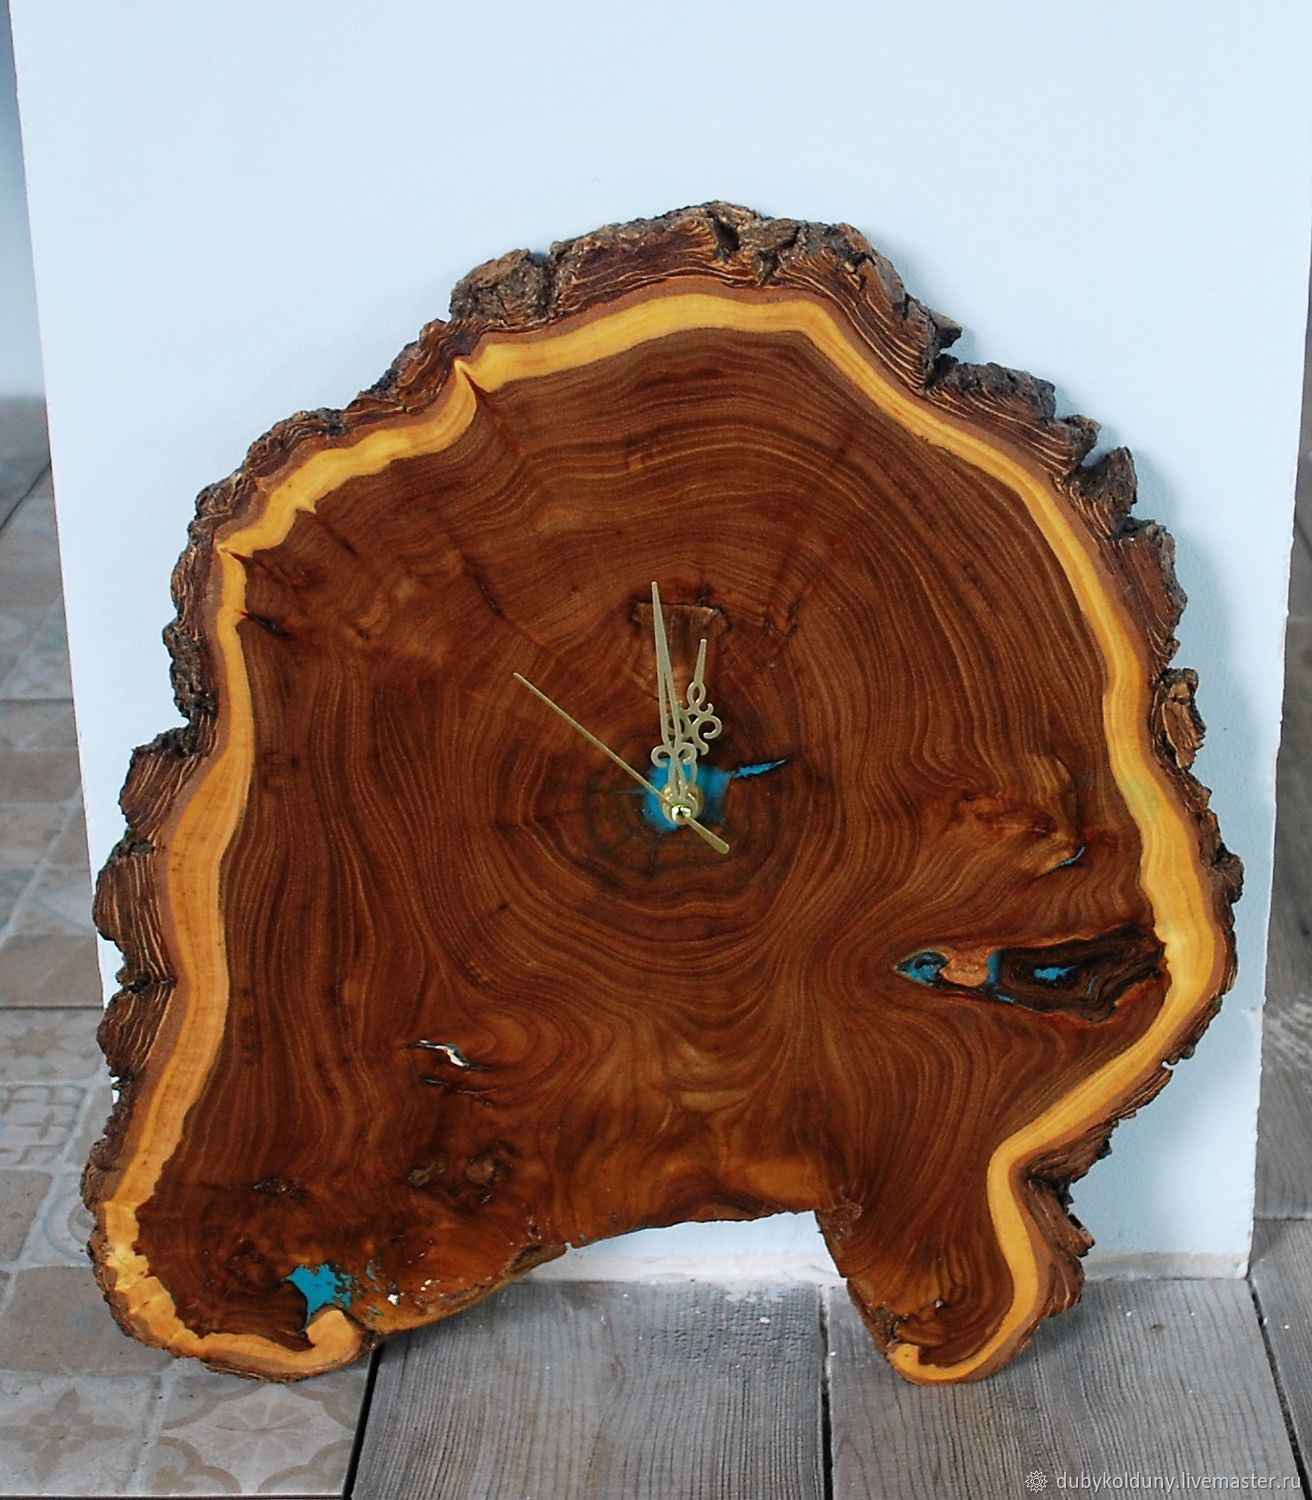
Preparation of the round mold
The master class on the creation of exclusive watches begins with the preparation of the shape of the future product. From the selected piece, the future base, specified in diameter and size, is carefully cut off with a circular. A small hole should also be cut in the central part of the workpiece. The clockwork will be inserted there. After the end of the work, the tree is sanded, all gaps are removed.
Fill
When the wooden round is ready, the second stage begins.Preparation of the workpiece for epoxy filling. To do this, use the following instruction:
- A small but massive board is selected.
- The workpiece is attached to the board on one side. To do this, on the side of the attachment of the round, ordinary plasticine is neatly laid out along its edges.
- Previously, before joining the parts, cling film is laid on the plasticine. This is to prevent the resin from leaking during pouring.
- After all the work on the round, a deepening is obtained. It will be filled with the mixture.
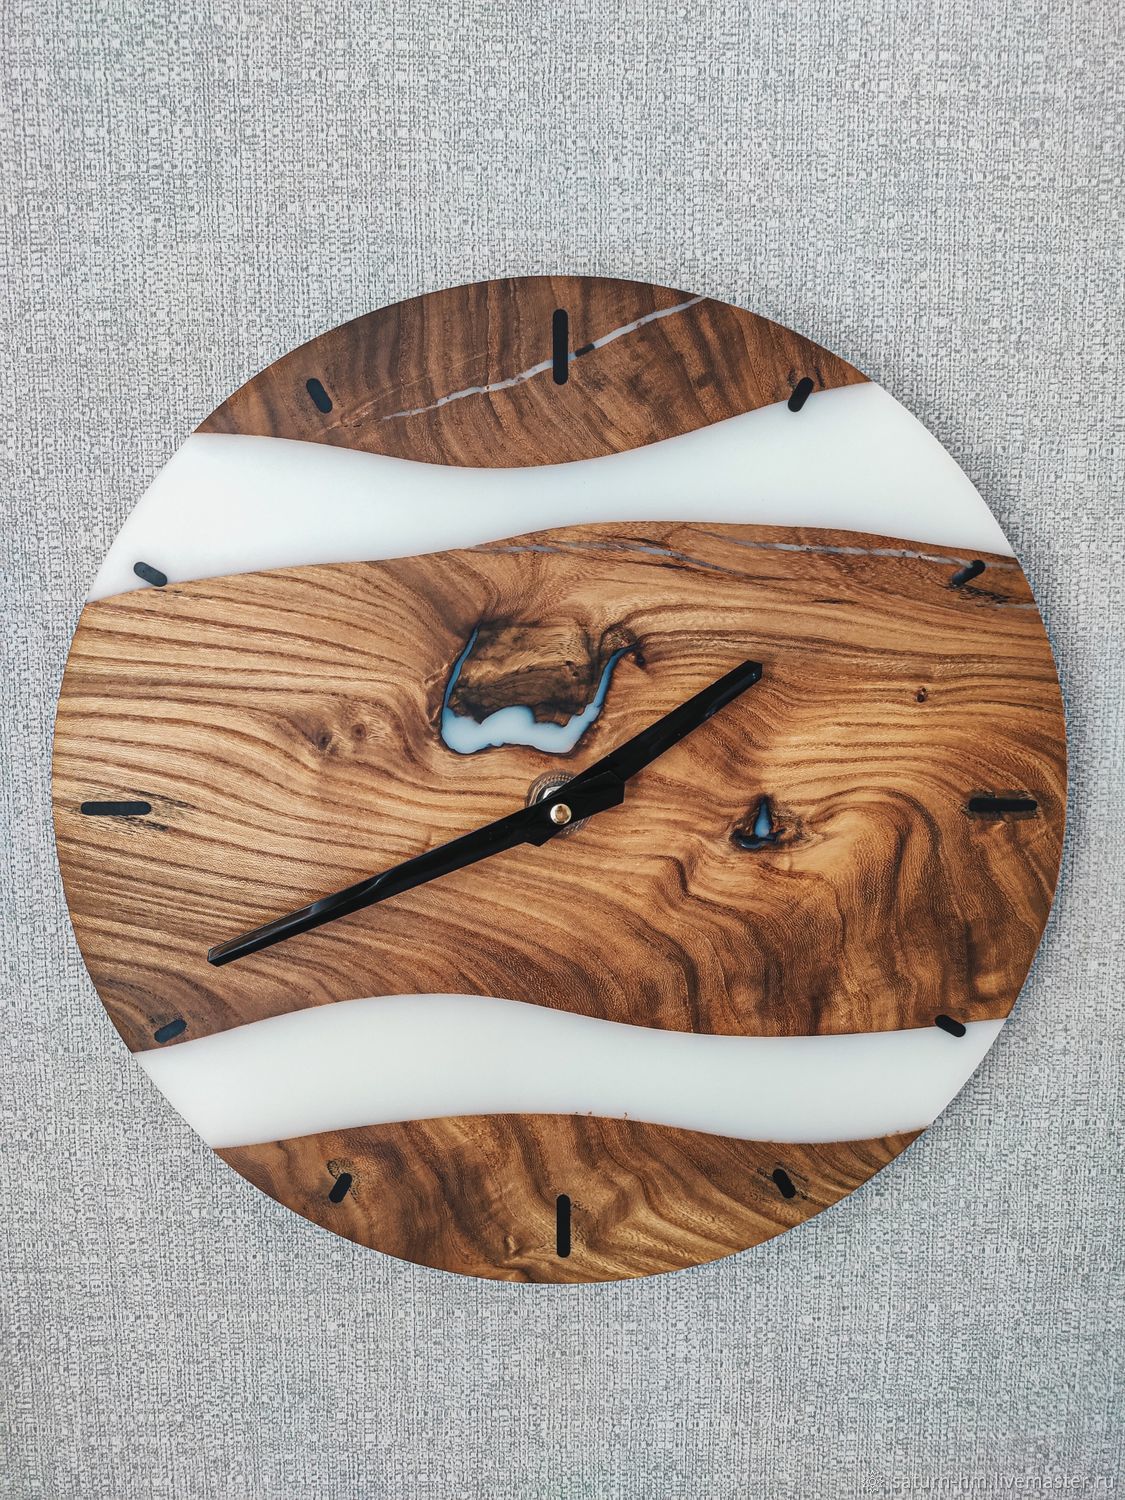
 When making a watch, you will need a blank product
This recommendation is relevant and important. Firstly, the two-layer coating of the product allows you to get an airy design, especially if additional design additions are used: twigs, flowers, coffee beans, sparkles, rhinestones, etc. And secondly, it helps to eliminate all the flaws that become visible during the first filling. The correct dilution of the resin with the supplied hardener becomes imperative.
According to the classical scheme, the masses are diluted in a proportion of 10x1, where 1 part is assigned to the hardener. But first, study the instructions attached to the package. Stir the mixture very thoroughly so that the hardener penetrates the entire depth of the resin container. After the first layer of filling, it is necessary to give time to its complete hardening, and then proceed to the second.
You don't have to limit yourself to just two fill layers. If a complex, multi-stage design is planned, the resin is allowed to be poured three or more times. But the subsequent pouring is necessarily done after the previous layer has completely hardened. The usual time for thickening of a resinous substance is 1–1.5 days.
Post-processing
After the last layer of resin has completely hardened, you need to remove the protective cling film. Then future watches are polished. For these purposes, it is better to use a grinder. After the grinding process, additional polishing of the product is made, the processing ends with cleaning with fine-grained sandpaper.

After all the work, a recess is made for the clockwork (on the back of the workpiece). A hole is carefully drilled along the central part of the fill. The axis of the mechanism is preliminarily inserted into the center and its complete contour is outlined. After that, a square is cut out according to the marking. Pay attention to the alignment when working so that future clocks do not "skew".
Final assembly of the product
When the movement is inserted, the hour numbers must be attached. A preliminary basting is made, then holes are pierced with a sharp awl in the places where the dial is marked. For durability, each inserted number can be glued with epoxy glue. The final step is setting the arrows. Our exclusive clock is ready - all that remains is to hang it on the wall and enjoy a beautiful addition to the interior.
Safety precautions must be taken when handling resin
What is epoxy resin, properties
Epoxy is a synthetic oligomer containing epoxy groups. In terms of the production method, it is very complex; it is a condensation product of bisphenol A and epichlorohydrin. It is impossible to use the material in its original form: only the introduction of a hardener can stabilize its condition, after which the polymerization reaction will begin.
The composition of epoxies of different brands may include other components - chalk, cement, alabaster, which compact the mass. The resin also goes well with aerosil, wood chips, graphite, various dyes, and aluminum powder. Various oils and other substances are also introduced into the composition, depending on the needs of users.
For pouring wood and other creative activities, a transparent resin without fillers, into which plasticizers and modifiers are introduced, is perfect. The material has the following properties:
- resistance to abrasives and mechanical damage;
- low wear rate;
- low moisture permeability;
- no shrinkage during operation;
- lack of reaction to the action of chemicals, with the exception of strong acids;
- excellent adhesion to wood, plastic, metal substrates, glass, ceramics, rubber and leather.
Material application
Resin uses are varied. It finds application in most large industrial sectors:
- electronics;
- aviation;
- manufacture of machines;
- repair of equipment;
- shipbuilding;
- construction;
- fiberglass production;
- pouring floors;
- production of glue, putty, grout;
- production of paints and varnishes.
You can also work with epoxy at home. It is ideal for the manufacture and processing of furniture made of natural wood and its derivatives, slabs. With the help of pouring, you can make an original stool, chair or table, cabinet doors. Souvenirs, jewelry, watches, figurines, cutting boards and products for the kitchen, bathroom, vases, tambourines and other toys for children are also beautiful.
Various types and states of glue
There are different brands of epoxy on sale - domestic and imported. Most of them are suitable for making furniture.
It is only important to decide whether a colored or transparent resin is needed for decoration. Usually, so that beautiful cuts of wood and its fibers are visible, they acquire transparent compositions. For example, quality resin YD-128 is colorless and transparent like glass
Epoxy MG-Epox-Strong also has no complaints about transparency, it is even suitable for creating jewelry. By the way, such resins can be combined with colored ones - make bright blotches inside the bulk
For example, quality YD-128 resin is colorless and transparent, like glass. Epoxy MG-Epox-Strong also has no complaints about transparency, it is even suitable for creating jewelry. By the way, such resins can be combined with colored ones - to make bright blotches inside the bulk.
These materials are two-component adhesives. The liquid resin is stabilized by adding the hardener supplied in the second bottle. You will not be able to pour furniture parts into molds with thick pastes, so you should not buy them.
There are 5 main states of resin:
- liquid - this is a material without a hardener or immediately after its introduction, has excellent fluidity;
- honey-like - resembles molasses, already a little thickened resin, which is better used for layer-by-layer filling of crafts;
- thick - the fluidity is sharply reduced, the mass does not flow well and is only suitable for gluing parts or for putty;
- rubbery - epoxy resembles rubber or hardened plasticine, sticky, but can change shape;
- solid - fully cured resin.
Differences between resin and glue
In master classes on pouring wood products, it is necessary to use epoxy resin, but not glue based on it. The main material differences are:
- the curing time of the glue cannot be changed, and the freezing rate of the resin can be increased or slowed down;
- the glue turns yellow, but the resin remains transparent;
- the glue has low elasticity, while the resin is malleable, it allows you to carry out the work required by the master;
- glue is used to join parts, it will not be possible to fill the product with it, almost any figurines can be made from resin.
How to use?
A master class on the use of epoxy for creativity allows you to get a complete picture of how exactly you need to work with this material. First of all, standard safety measures should be observed: wear rubber gloves and a mask or respirator, provide free air flow into the room, cover the workplace with polyethylene or oilcloth, make sure that the air temperature does not exceed + 25 ° C.

Preparation of epoxy resin requires the purchase of a certain set of consumables:
- compound and hardener;
- disposable medical syringes or measuring cups with millimeter divisions;
- a wooden spatula for mixing the composition;
- clean containers of different sizes.
Before starting work, it is recommended to read the instructions supplied by the manufacturer to the consumables. The proportions for different formulations vary, there is no single recipe. Next, the components are combined in a small bowl or cup, cuvette. Precision proportions will be ensured by using graduated cups or syringes. Do not prepare too much resin at once, it may start curing earlier than it is used up.

The combined hardener and compound are gently and thoroughly mixed in the selected container. At this stage, glitters and pigments can be added to them. For some time, you need to perform circular movements, removing air bubbles, achieving uniformity of the composition. If they nevertheless formed, the mixture is defended and heated. The air chambers will rise and be accessible for removal.

It usually takes 20-24 hours for the epoxy to cure completely
It is important to maintain the correct room temperature during this time. To speed up the process, you can send the workpiece to the oven for 20 minutes at a temperature of + 80 ° C, and then leave it at room temperature until complete crystallization
Pouring into molds
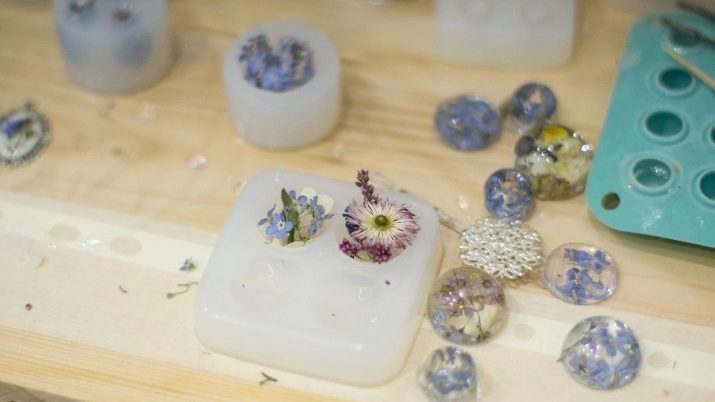
The finished resin can be applied in a variety of ways. Most often, it is cast in silicone molds - molds, giving the desired shape. Such blanks are used to make small items. Due to the peculiarities of silicone molds, the hardened resin easily leaves them. There are ready-made solutions for rings, key rings, pendants.
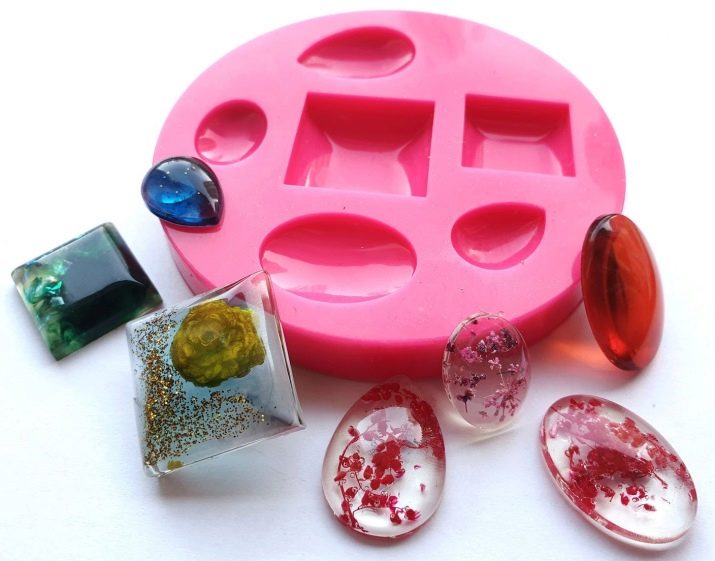
When using decorative natural elements - shells, stones, they are washed and degreased, herbs, moss, flowers are carefully dried. Then these components are put into a mold and filled with resin. The procedure may vary.
- With preliminary placement of decor. In this case, the decor is placed on the bottom of the mold. Then the resin is prepared - it needs to settle for at least 30 minutes. At the end of this process, the epoxy base is poured into a mold. It remains only to wait until the workpiece hardens and clean up its uneven edges with abrasive tools - a file, a small file.
- With resin pouring. After filling out the form, the decor is distributed in it with a toothpick. This allows you to create products with symmetrical and more complex filling.
After hardening, the resin product can be subjected to additional grinding and machining. Most often, sandpaper is sufficient, but you can use abrasive nail files for manicure and pedicure. A lot of dust is generated during sanding - it is worth protecting the eyes, nose and mouth.
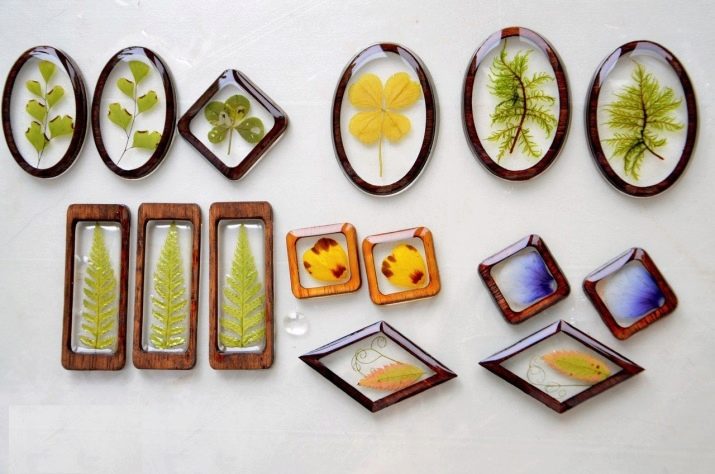
Casting within the framework
Epoxy resin products can be made not only in molds. There are special metal frames and frames. Their main difference lies in the need to grind the finished jewelry from the front and back sides. The lower edge of the frame is usually placed on the surface of the adhesive tape during pouring to prevent the resin from flowing out from below. You can also add decorative elements to the frame - leaves and flowers of plants, small ornamental stones, a photograph.