Step-by-step installation instructions
Most often, summer residents create their own hearth from stones. Any breed available is used. How to equip a fire safely, conveniently and beautifully?
Overhead installation

Example of aboveground installation
Step by step installation:
1Find a level area, clear it of foreign objects. Make sure it meets the security settings above
2Prepare the perimeter for further refinement, when benches, a gazebo, and other structures will be located around the fire. Peel off the top layer of earth on this site. Later, it will be possible to lay paving stones or pour crushed stone here.
3In the place where the fireplace will be, dig a hole up to 30 cm deep
4 Insert the metal ring inside
5Pour gravel into the container. It will ensure the stability of the structure, good outflow of water after extinguishing or rain. It also promotes good air circulation, which helps the fire burn easily and without excess smoke.
6 Lay stone walls around the structure, while the first tier of brick should be completely buried in the ground. For reliable adhesion of the masonry, use a solution or glue that is not afraid of heat
7The height of the well is determined at the request of the builder. Some people like deep hearths, others are limited to a half-meter height of the walls.
8Choose a lid for the fire. It will save you from falling into melt water, rain, debris. It will also extinguish the flame, will become a natural barrier for smoldering sparks
Recessed mounting

Deep installation of the fireplace
Step by step installation:
1Preliminary measures similar to the previous technology: preparing the place, clearing the area for sun loungers
2At the place of the fire, it is necessary to dig a pit 0.5 - 0.7 m deep.The diameter should be 10 cm wider than planned
3 Gravel is poured at the bottom to a height of 10-15 cm
4 The side walls are laid out with refractory bricks, do not forget about the coupling
5Replace the masonry with a steel ring. In this case, the diameter of the pit should tightly accommodate the metal frame.
6 The entrance is beautifully decorated with tiles or paving stones around the perimeter
7 A burner dug into the ground is also equipped with a tight lid.
Above the hearths, iron racks are installed with a horizontal crossbar, on which hooks are suspended. You can hang soup pots on them, boil water for tea or cook compotes. Gourmets fix a metal skewer and roast the whole bird on it.
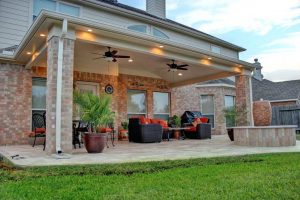
How to make a patio in the country with your own hands: a variety of design options, decoration and arrangement (85+ Photo Ideas & Videos)
Do-it-yourself barbecue area: stages of work
Immediately after the design, after all measurements and calculations, you can proceed to the purchase of materials and to direct work.
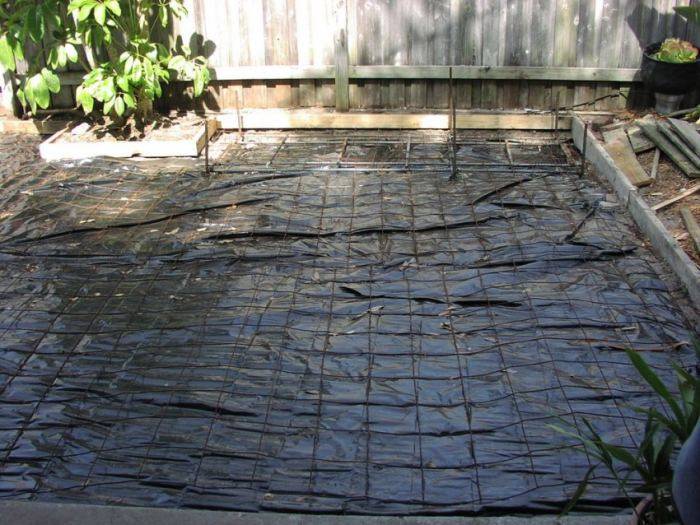
Foundation
For open structures, there is no need to build a foundation; it can be installed directly on the ground. But there are also special supports on sale.
If you chose a brick oven as a frying device, you will have to equip a monolithic stove. Ordinary soil under its weight (about 200 kg) will sag.
A monolithic base is created in steps:
- Make markings on the ground (mark the dimensions of the barbecue and add 15 cm to the borders). Remove the topsoil (remove about 60 cm).
- Fill in crushed stone, about 10 cm wide. Compact.
- Pour cement mortar (grade M200), the thickness of the slab should be at least 10 cm.
- Wait until it hardens completely - 1-2 weeks. Lay waterproofing (roofing material), coat with mastic (liquid waterproofing).
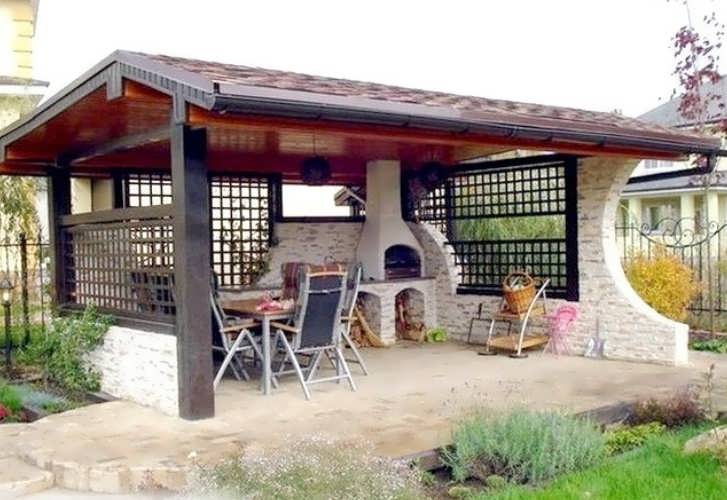


Floor (garden parquet or decking)
The base is covered with garden parquet or decking, if the project provides for the construction of a gazebo. If we are talking about an open type of barbecue area, go directly to the arrangement of the stove. And then lay the tiles around it.
Coating
The open area can be paved with:
- paving slabs,
- clinker bricks,
- natural stone
- pebbles,
- tree cuts,
- shards of ceramic tiles.
Choose a material that can be used to decorate garden paths as well.
The procedure differs depending on the materials used, but the following basic steps can be outlined.
- Make the markup according to the drawing. Remove the top soil (20 cm or half a shovel bayonet), cover with sand (10 cm) and tamp. Check with a level how smooth the surface is.
- Cover the sand with gravel. If you use plastic paving slabs with a lawn, instead of gravel, you can fill in the earth that has just been carefully laid down next to it.
- Then again a layer of sand. Plastic tiles can be laid directly on top of the ground, but they must be pressed down to the surface. Then the lawn mixture is sown, watered after 2 days. And it will be possible to start exploiting the surface no earlier than in 2 weeks.
- Only then proceed to paving. The exception is paving slabs. It is laid only on concrete (the top layer of sand is replaced with concrete). The cement-sand mixture is poured in strict observance of the technology (with the placement of beacons, in compliance with the terms, at a slope for drainage).
By the way, some craftsmen create paving slabs on their own, but it is a technologically complex task that requires skills and special equipment.
Support
Metal posts, brickwork, wooden beams (depending on the weight of the roof) are used as supports. A point foundation is prepared under the brick columns.
If the foundation is not provided for by the project, the columns are inserted into a well 1 m deep. But follow the sequence.
- Drill wells. Before installing in the bottom of the columns from the bar, saturate the bottom of the columns with liquid waterproofing mastic.
- Insert the beams, sprinkle with rubble and sand (in layers of 15 cm), tamp. Secure with temporary jibs. If you use metal poles, reinforce them in the well with pebbles
- Pour cement mortar over the backfill. Remove the temporary jibs after a week.
You can buy a ready-made metal brazier, you can equip a fireplace (by laying out a shallow hole with refractory bricks). But the oven is preferable (you can order the masonry or do it yourself). Allows you to get consistently good results (delicious aromatic dishes). Whereas in the first two options, the quality of the cooked food (taste, degree of baking and uniformity) largely depends on the strength and direction of the wind.
Review of purchased kits

Ready street hearth
Campfire bowls and ready-made fireplaces are the optimal solution for the gardener who can afford such a purchase. Unfortunately, pleasure is not cheap. But if the budget allows, you can choose stunning designs.
In the assortment of special shops with equipment for summer cottages, there are cast-iron or ceramic hearths, barbecues, tandoors, beautiful spheres, bowls, ready-made designs of a street hearth, fire barrels and other vessels.
Bowls and spheres
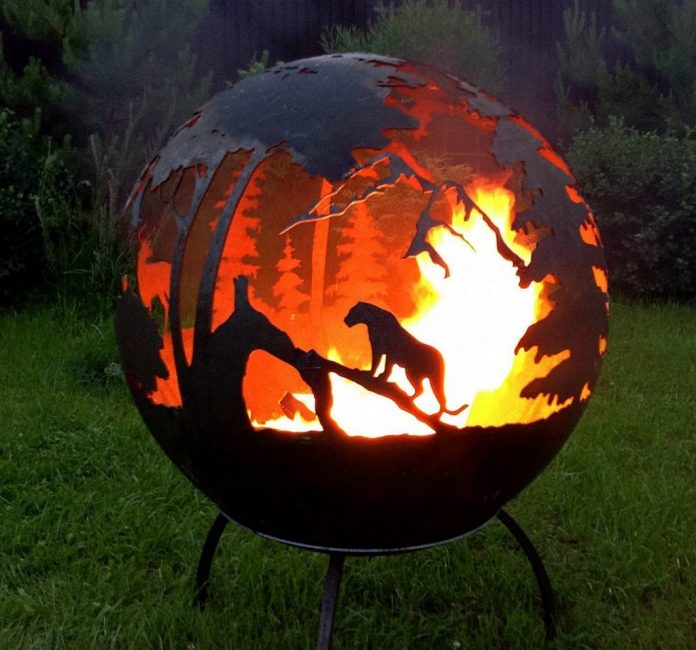
Bonfire sphere
Bowls and spheres
- They are a hit of sales. They have different diameters, depths, and are made of different alloys. Some are suitable for grilling.
- They are rounded compositions with metal carvings on a low or high base. The set includes covers, protective glasses, tongs for turning coals.
- The price range varies in the corridor from 7 thousand rubles. for an ordinary concrete bowl, up to 150 thousand rubles. for a unique design idea.
Street hearths

Classic finished design
Street hearths
- These are ready-made structures for installation in a specific location. They are not tolerated, not disassembled, used only for their intended purpose. The structure is dug into the ground, strictly following the instructions.
- Made of high quality metal, beautifully decorated.
- The cost of a ready-made fireplace starts at 80 thousand rubles.

Fire barrel
Braziers

Stylish barbecue design
Braziers
- For cooking meat or vegetables on skewers. The most convenient shape is rectangular, depth - from 25 cm.
- There are usually notches on the upper walls of the vessel for the installation of iron spokes.
- A simple, laconic product will cost 3-5 thousand, but the upper limit is even more than 100 thousand.
Cooking utensils over a fire

Cauldron with a frying pan lid
Cooking utensils over a fire
Tandoors, cauldrons, pans, cast irons, flat stones for baking. These are utensils for outdoor cooking. It is a pleasant bonus to the complete set of the country hearth.
The cost of containers depends on their volume, the manufacturer's firm, and the quality of the metal. The average price for a 15-liter cauldron for pilaf with a lid is 4-5 thousand rubles.
Avid gardeners over time become overgrown with useful accessories, outdoor cooking utensils, folding furniture
They even pay attention to the little things, like all kinds of lattices, tongs, hooks for hanging. Think over a design, which includes a decorative woodpile, bright blankets, mosquito nets.

How to make an alpine slide in the country with your own hands? | Device and Step-by-Step Tips (60+ Photos & Videos)
Question answer
What are the subtleties of building a gazebo with a barbecue?
- Plan to erect the structure only away from gas pipelines and power lines. Consider the location of trees and bushes. Residential buildings should also not be located too close: do not forget about soot and smoke, which will not please everyone.
- The foundation under the device must be above the level of precipitation and rainwater. This is an important step in extending the life of the oven.
- Protect the structure from precipitation and excess moisture.
- When creating or buying multifunctional appliances, keep in mind that the heavier the structure, the more durable it is.
What are the secrets of barbecue cooking?
- Do not marinate meat for barbecue. Better to just rub it with garlic;
- It is necessary to periodically spray water not only on the coals, but also on the food itself. However, it is better to do this with good quality white wine;
- Barbecue skewers should be strung not on metal skewers, but on wooden ones. Otherwise, meat in contact with metal will acquire an unpleasant taste and lose its juiciness.
These tips will help you create wonderful dishes with your handcrafted design.
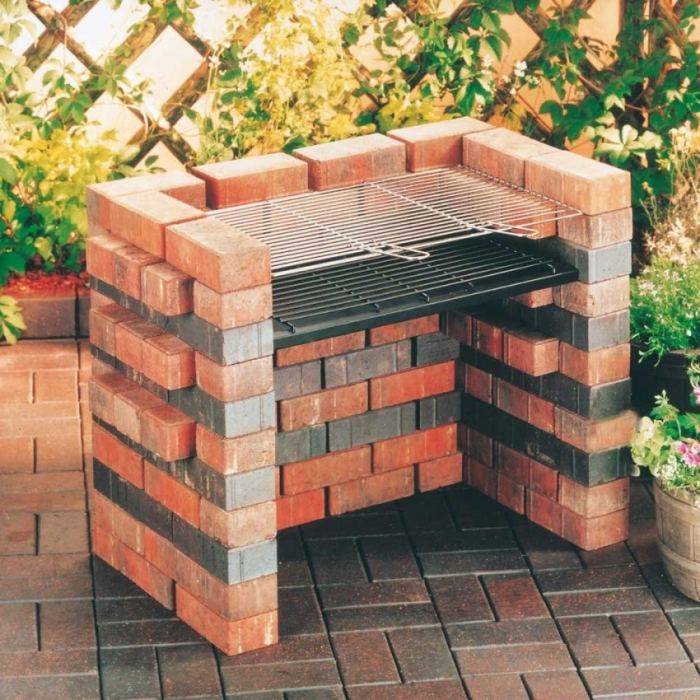
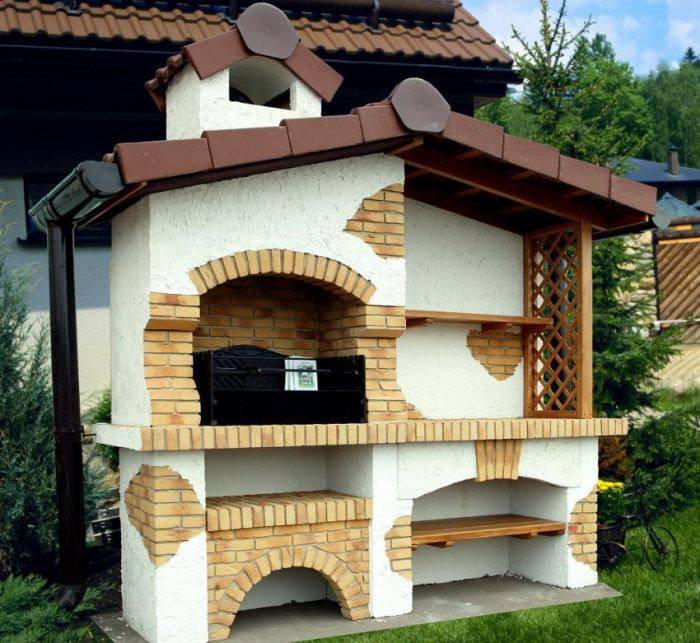
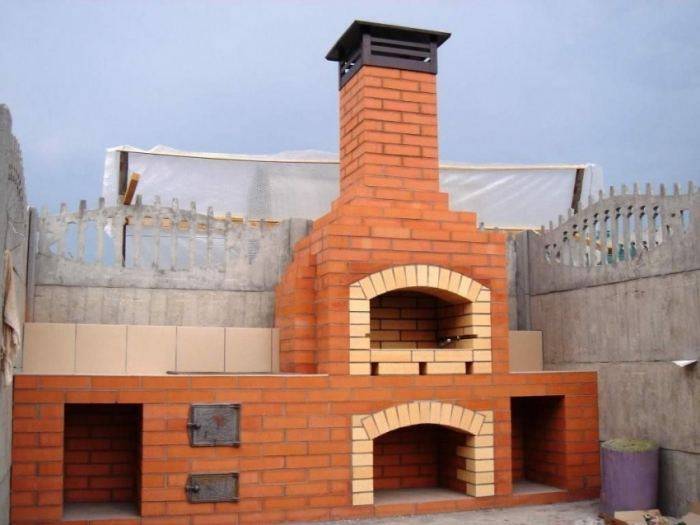
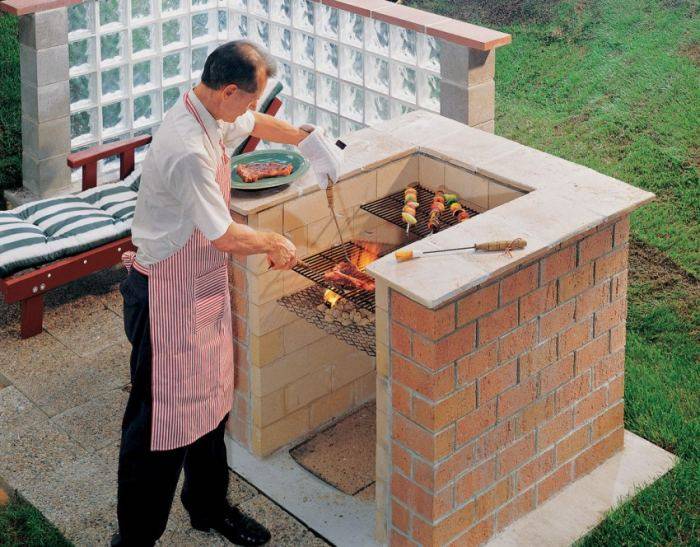
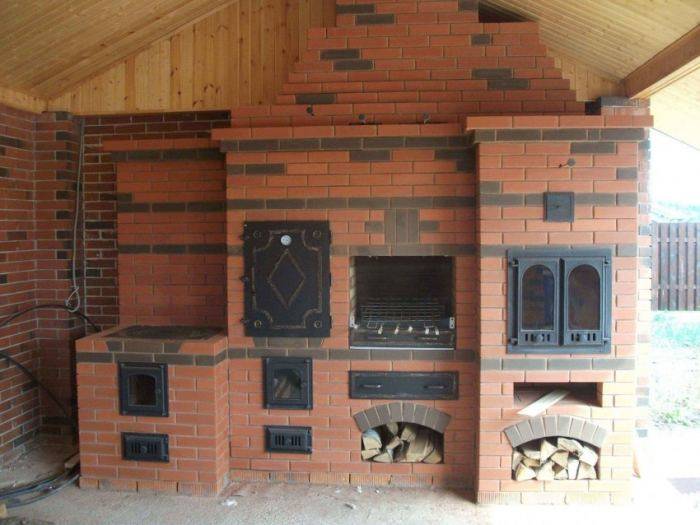
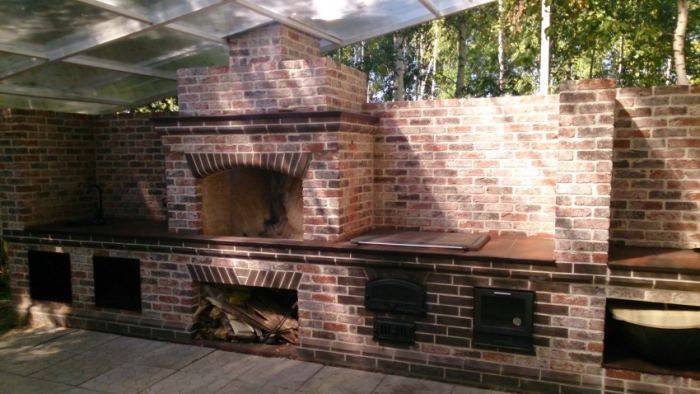
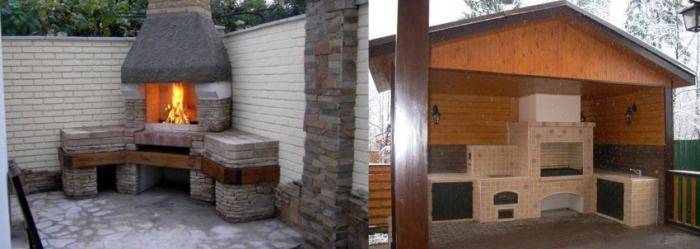
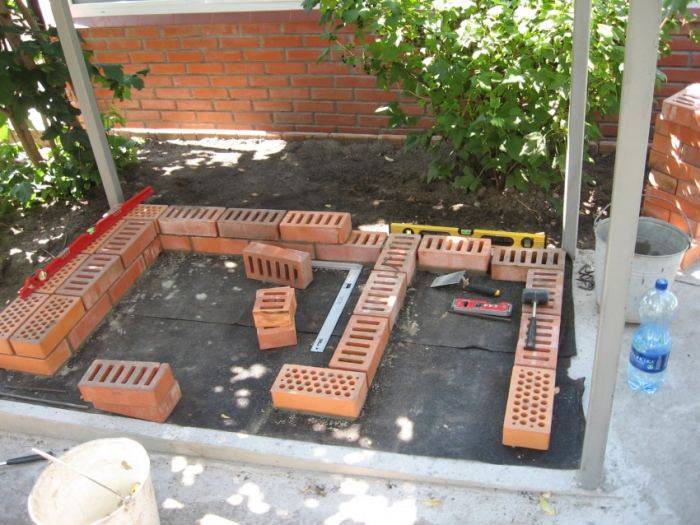
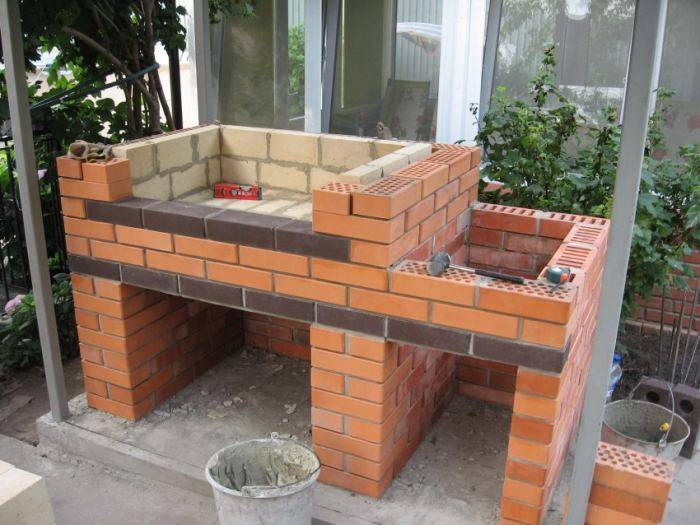
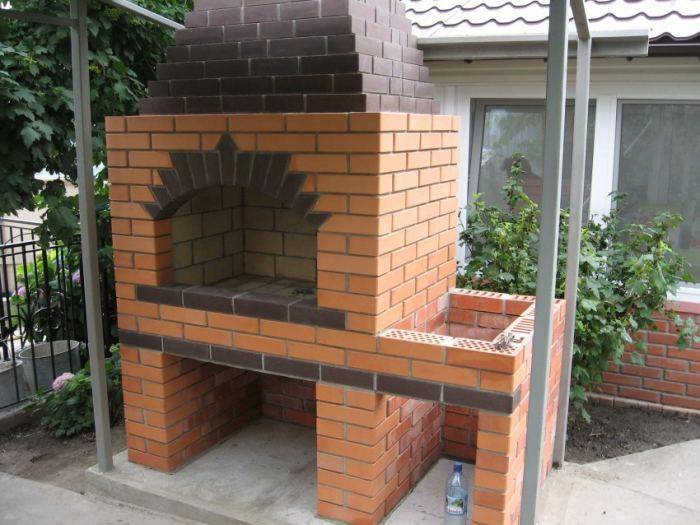
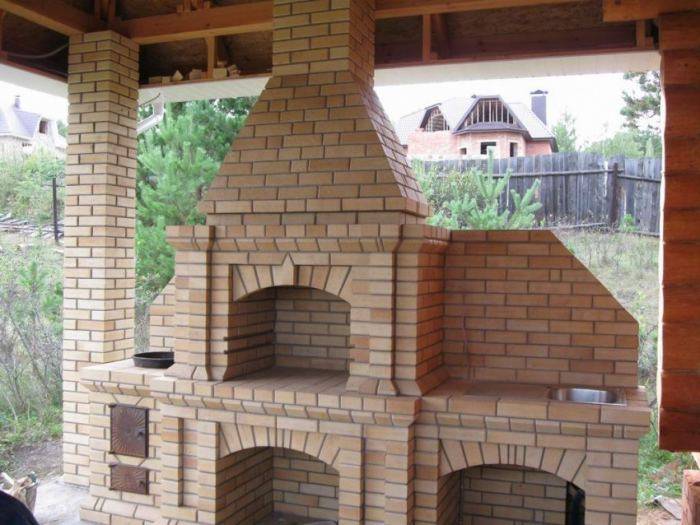
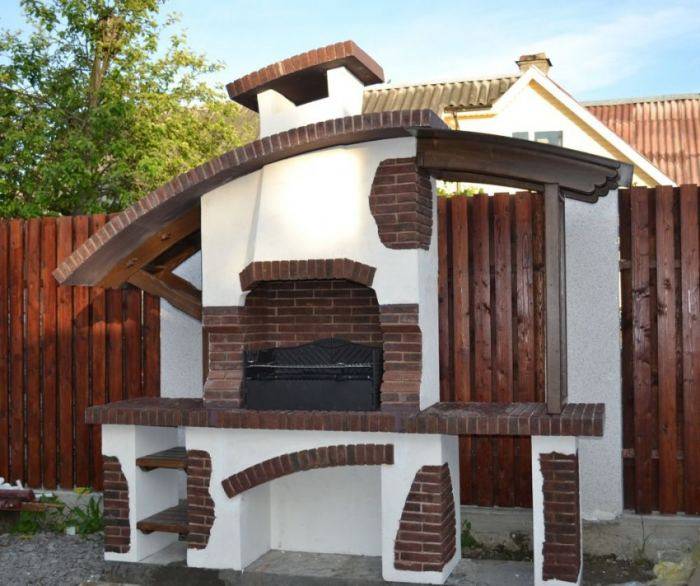
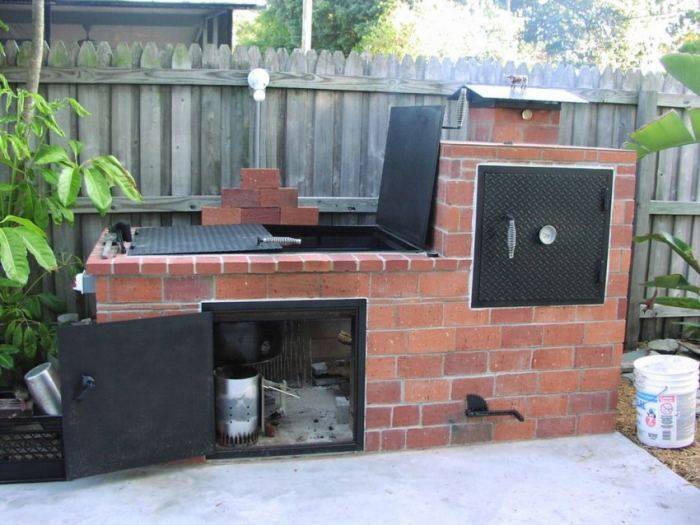
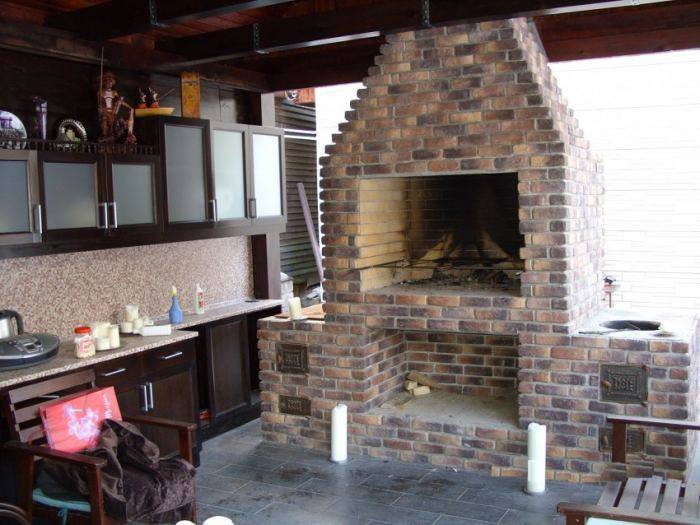
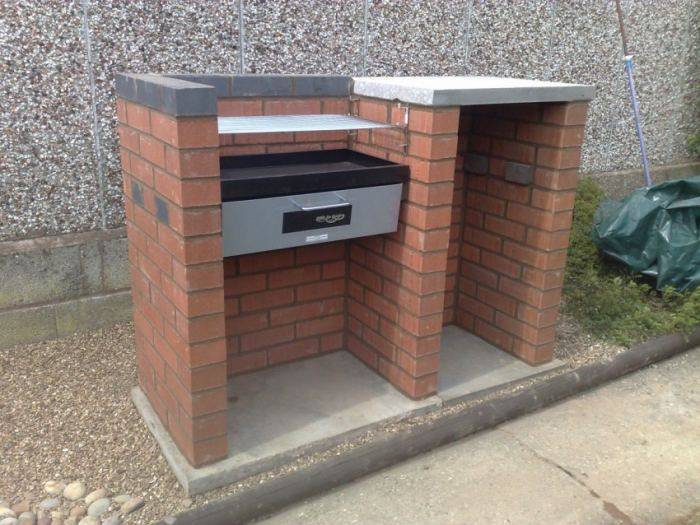
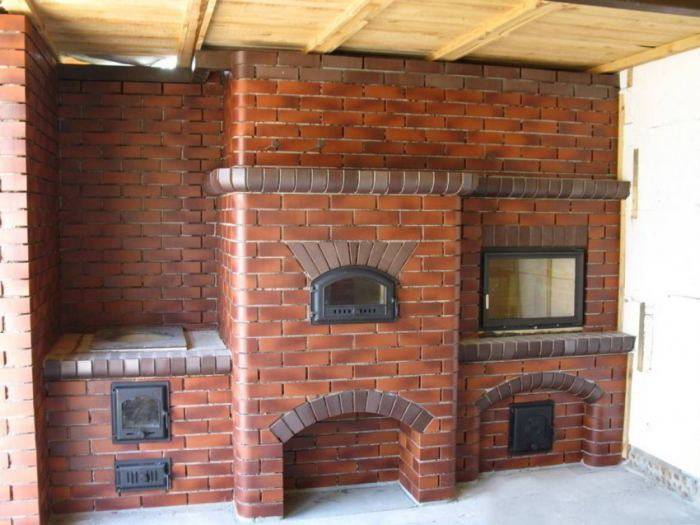
Photo of a brick barbecue









We also recommend viewing:
- Brick tandoor
- Construction of a cellar for a summer residence
- How to make a gazebo roof
- House extension options
- What is cheaper to build a house from
- Hozblok for giving
- Construction of a bath from a bar
- How to make a dog enclosure
- Do-it-yourself canopy
- Examples of country cabins
- How to build a porch with your own hands
- Brick brazier
- Summer shower
- Toilet for a summer residence
- Construction of a summer kitchen in the country
- How to attach a terrace to the house
- DIY gazebo construction
- How to make a polycarbonate greenhouse with your own hands
- How to build a chicken coop with your own hands
- Do-it-yourself shed
- DIY pergola
- DIY barbecue construction
- Do-it-yourself rabbitry
- Reliable visor over the porch
- The best forged gazebos for summer cottages
- How to make a hanging chair
- Bath in the country
- DIY veranda construction
- How to build a garage with your own hands
- Construction of a patio in the country
- Construction of a gazebo made of wood
- How to make a winter garden
- How to make a greenhouse with your own hands
- How to build a gazebo with barbecue
- Modern polycarbonate awnings for a private house
- Instructions on how to make a dog kennel with your own hands
Do-it-yourself mangal area - 3 master classes
To organize a simple barbecue area in the country, it does not take a lot of time and large investments. For such a site, you only need to purchase a brazier and garden furniture, bring all this to the dacha and place it in the place chosen for rest.

For an open area, it is best to prepare a place so that the soil does not settle or float from the effects of precipitation.
To do this, you need to do the following:
- remove the top layer of soil to a depth of 10-15 cm;
- then put geotextiles on the ground
- lay on it alternately a layer of sand and gravel 5 cm thick;
- each layer is rammed separately, and then both together;
- pour water on the prepared area to strengthen the seal;
- dry the surface;
- overlay the perimeter of the site with stones or bricks, creating a decorative side;
- use cement mortar to fix the curb.
- dig a trench;
- make a sand cushion in it for sealing;
- when laying stones or bricks, a working mixture is used, which will give the curb more strength.
- A portable brazier is usually installed on such an open area, from above you can pull an awning or install a canopy that will protect from the sun and rain.
- The most preferable option is considered to be a barbecue area with a hard surface.
- For her, a platform cleared from the turf is poured with concrete, on which it will then be possible to put paving slabs.
- To save money, a solid platform can be made only in the area where the barbecue is installed. The dining area can be located on regular ground or on a lawn. If possible, it is better to make a solid platform for both zones.
- To separate the zones, you can use partitions or lay out tiles with a different pattern or shade.
- For closed areas, it is imperative to make a foundation, since in this option a permanent barbecue is installed, which weighs a lot. When using a stationary cast iron brazier, it is imperative to first build a foundation.
- This is the most time-consuming and costly option, but in the end it allows you to get a full-fledged summer kitchen, where you can cook in the summer in a country house.
- To fill the foundation, builders do not recommend making a single base for the cooking and dining area. This is not rational, since the load on these zones will be different. For the dining room, it is better to make a strip foundation, and for the hearth - a monolithic one.
- Where there will be a brazier, you need to lay a monolithic concrete slab, which should go 5 cm around the entire perimeter from under the hearth.
- When making a hearth of bricks, you need to know the intricacies of the furnace business. If there is no such experience, then it is better to invite a professional stove-mason for laying.


What are the gazebos
The classification of gazebos can be based on the materials of their manufacture.
-
Wooden ones are the most common and popular among owners of country houses.
- Chopped gazebos - made of rounded logs, are used for a solid massive project with an area of at least 10 square meters.
- Forged - from forged metal, openwork and various in their performance.
- Metal - from a bent steel strip or metal profile.
-
Of an aluminum profile, usually of a square section, they can be prefabricated structures.
- PVC profile is not a very hard material, but it is frost-resistant and does not burn.
- Stone - made of stone and concrete in the form of garden pavilions, with domes of the same material, can be made of any stone - sandstone, marble, rubble, etc.
- Combined - any material is present here - according to the project and the taste of the customer.
Variety of gazebos
By the very texture, all gazebos can be divided into two groups.
- Open - no protective walls, windows, available - only the roof.
- Closed - with sliding windows, walls, often glazed - in sliding windows, are mini-huts.
Elevation above ground level:
- terrestrial;
- with a ladder;
- with a podium or pedestal.
By style
English style
- Russian - wooden with massive benches and a wooden table.
- English style - marble or other stone.
- Italian - wood with elements of embossing or forged blotches.
- French - with columns and a dome.
- Japanese - simplicity of lines and originality of the roof.
- Chinese - with rounded shapes, even in the form of a fan - sectors of a circle can have 6-8 angles.
- Eastern - with a tent and silk-screen printing and so on.
Chinese style
How to choose a place for a barbecue area?
One of the most important criteria that influences the choice of location is the safety of the structure. The brazier must be located on a free site, located at a considerable distance from the house and other outbuildings. This will prevent a fire from occurring. The metal structure should not stand next to trees and bushes, which is also worth considering.
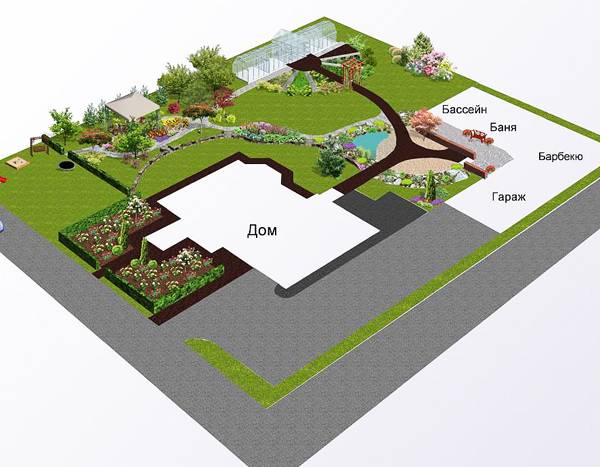
Important! Before proceeding with the arrangement of the barbecue area, it is recommended to draw up an appropriate project. You can prepare the scheme yourself or download it on our website .. When lighting a fire, it is also worth considering that the structure must be located in an area protected from the wind.
In this case, use the natural relief or household structures. The brazier can be placed near the wall of the dwelling, however, you need to maintain a distance of 1 m
When lighting a fire, it is also worth considering that the structure must be located in an area protected from the wind. In this case, use the natural relief or household structures. The brazier can be placed near the wall of the dwelling, however, you need to maintain a distance of 1 m.
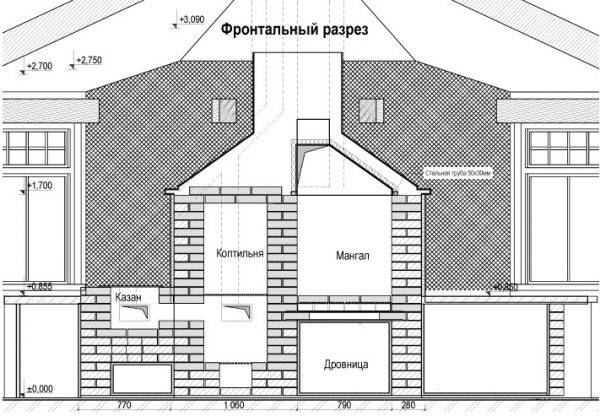
Instead of the usual metal barbecue, you can install a structure with a smokehouse or an oven in which you can cook various dishes, in addition to meat. The main condition is the presence of a project containing the required dimensions of the future structure.
The best option for protecting the structure from the wind takes into account the installation of a protective wall. Its dimensions vary from 150 to 350 cm. When arranging a barbecue area, it is recommended to provide free access to it. For this, a convenient path is most often laid. It can be made from different materials (for example, building tiles).

How is a barbecue different from a barbecue and grill?
Traveling mobile options for the three methods of cooking meat, fish and vegetables are common and available. But often their owners cannot clearly explain the differences between similar devices and what to give preference to.
A simple option for cooking meat over the heat of the coals is the brazier. In fact, this is a metal case, in which coals burn out and smolder, with a thoughtful fastening or fixing of the skewer. The quality of the prepared dish is determined by the skill of the chef. The barbecue zone equipped on the site takes up little space and does not require large material investments.
The street grill is a massive pan with a lid. The main difference lies in the three-sided effect of heat on the product (top, bottom and side). Cooking is carried out on grates. Adjusting the air flow with dampers in the housing makes the result more predictable.
Barbecue, roughly speaking, is a grill only without a lid. There is also a grill, draft and cooking time control is available. But the process takes place with a constant supply of fresh air.
Arrangement of a barbecue area
An important part of the recreation area arrangement is a canopy for an outdoor barbecue. It is a fairly convenient and practical construction that allows you to cook food on an open fire in any weather conditions.
The canopy is a structure consisting of a frame, bearing supports and a roof slab. It can be built in any shape, size and covered with various roofing materials.
The process of erecting a protective structure is not difficult and is quite within the power of any home craftsman. The canopy construction technology consists of the following stages:
- Draw a drawing of the future structure, where all dimensions will be clearly indicated.
- Install four wooden posts in prepared holes in the ground.
- Fill the supports with gravel and pour concrete mortar.
- Use metal corners and bolts as additional fastening of the supports to the concrete plinth.
- Fix the spacers and horizontal beams in the grooves of the support posts.
- Place the rafters on the horizontal beams.
- Fasten the roofing material to the rafter legs according to the manufacturer's instructions.
- Make and install a cornice from galvanized sheet along the entire perimeter of the roof.
The height of the canopy should be at least two meters, since no roof covering can withstand the high temperature of the hot smoke coming out of the brazier.
A barbecue area should not be left uncovered, as even with careful leveling and compaction of the soil, it can still get dirty. For paving, you will need the following tools and materials:
- Shovel.
- Cement mortar.
- Sand.
- Crushed stone.
- Pegs, twine.
- Mallet.
- Level.
- Tile.
The paving of the site is carried out in the following sequence:
- On the ground, make markings using a peg and twine.
- Remove 15-20 cm of soil in the marked area. Align the surface.
- Cover the soil with a layer of rubble (5 cm) and compact.
- Pour a layer of sand (5 cm) onto the crushed stone. Level and compact the surface.
- Lay the tiles on the sand with a small gap (5-7 mm) between each other and tap each with a rubber mallet.
- Sprinkle the joints with a mixture of sand and cement.
This completes the main work on arranging the barbecue area with your own hands. The final chord of the construction will be the installation of stylish lanterns in the recreation area. Such an accessory will not only decorate the site, but also create an atmosphere of comfort and tranquility.
