General provisions and recommendations
To lay out a corner fireplace with your own hands conveniently and quickly, it is advisable to check your actions with the ordering plan more often during work, and mark (number) the laid out rows with chalk. It is not worth tying the outer wall with the firebox, this can lead to deformations due to the temperature difference.

Circular masonry
After laying out five rows, wipe the masonry with a wet rag or rag, removing the remnants of excess mortar squeezed out of the seams under the influence of the growing mass of the structure.
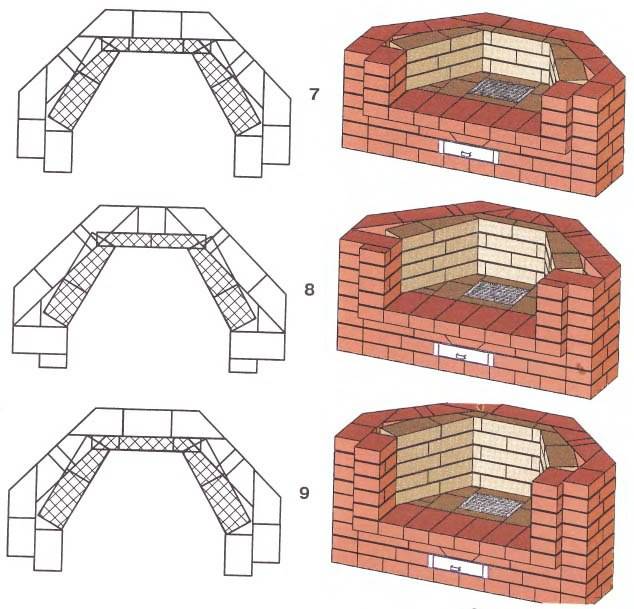
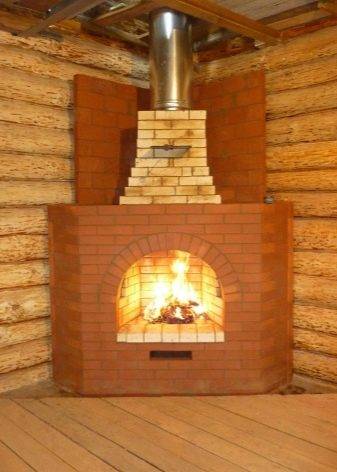
The inner surface of the firebox and chimney is not plastered! The slope of the back wall is leveled by a steel screen that can be built into the masonry. The vaults of the smoke box are laid out with gradual overlaps of bricks, about 5–6 cm for each subsequent row. The portal opening is closed by brick lintels laid in a circle. If provided, install a cast-iron door.
Circled during the production of work rests on the racks. After laying the castle bricks, double (double-sided) laying is carried out. On the roof, the pipe is brought out to the same solution that was used to lay out the basement.
Methods for finishing fireplaces
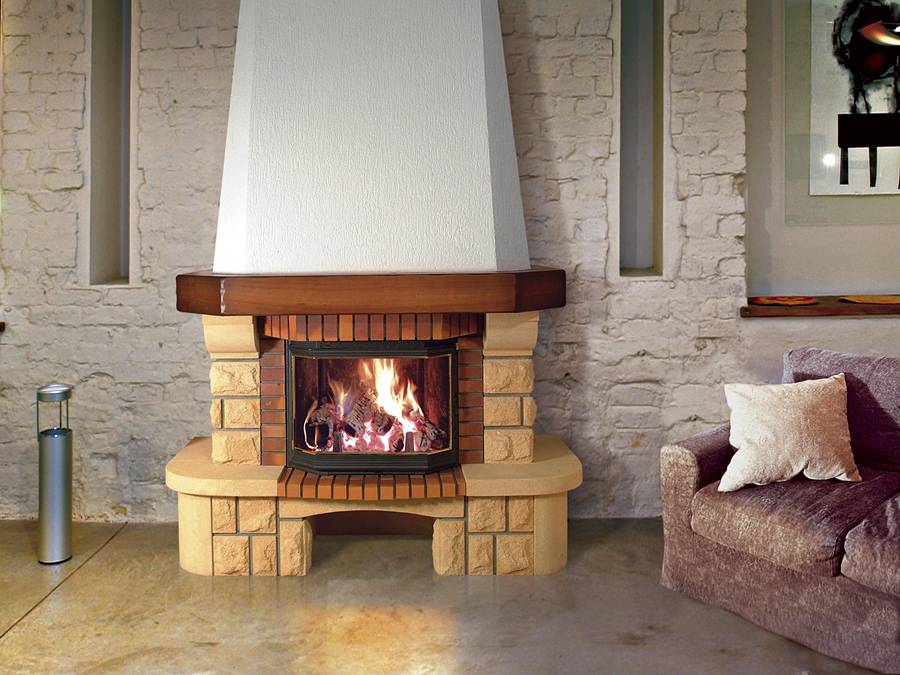
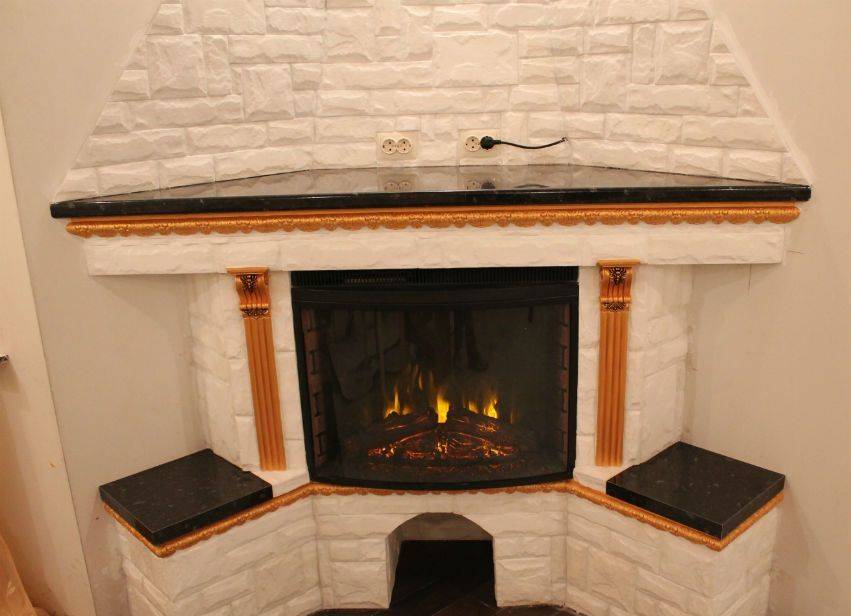
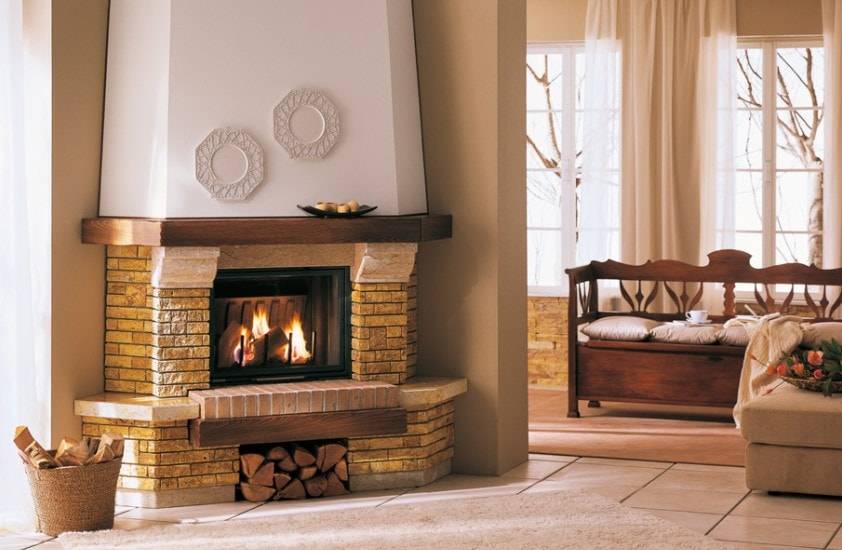
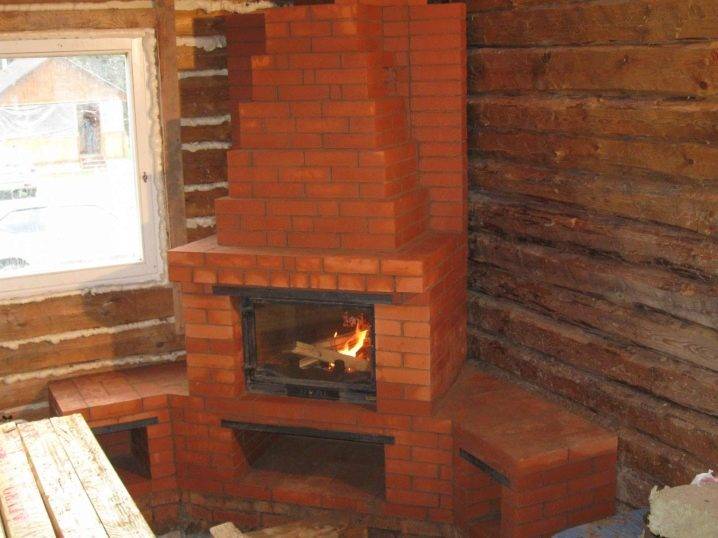
If high-quality facing bricks were used when laying the outer walls, then all that is required to improve the aesthetics of the structure is to perform jointing. To do this, they are rubbed, and the outer surface is ennobled with the help of a special tool - jointing. It is also necessary to grind the unevenness of the bricks and cover the walls with a special compound. The simplicity of this method has a big drawback - over time, the surface of the fireplace darkens and loses its attractiveness.
Plastering is a very simple way to improve the appearance of your fireplace. Ready-made decorative compositions, which are presented in a wide range on the shelves of retail chains, are best suited for this. You can start plastering work only after the walls of the fireplace are dry and shrink. If necessary, the portal can be painted with water-based paint, but this can only be started after the finishing layer has completely dried.

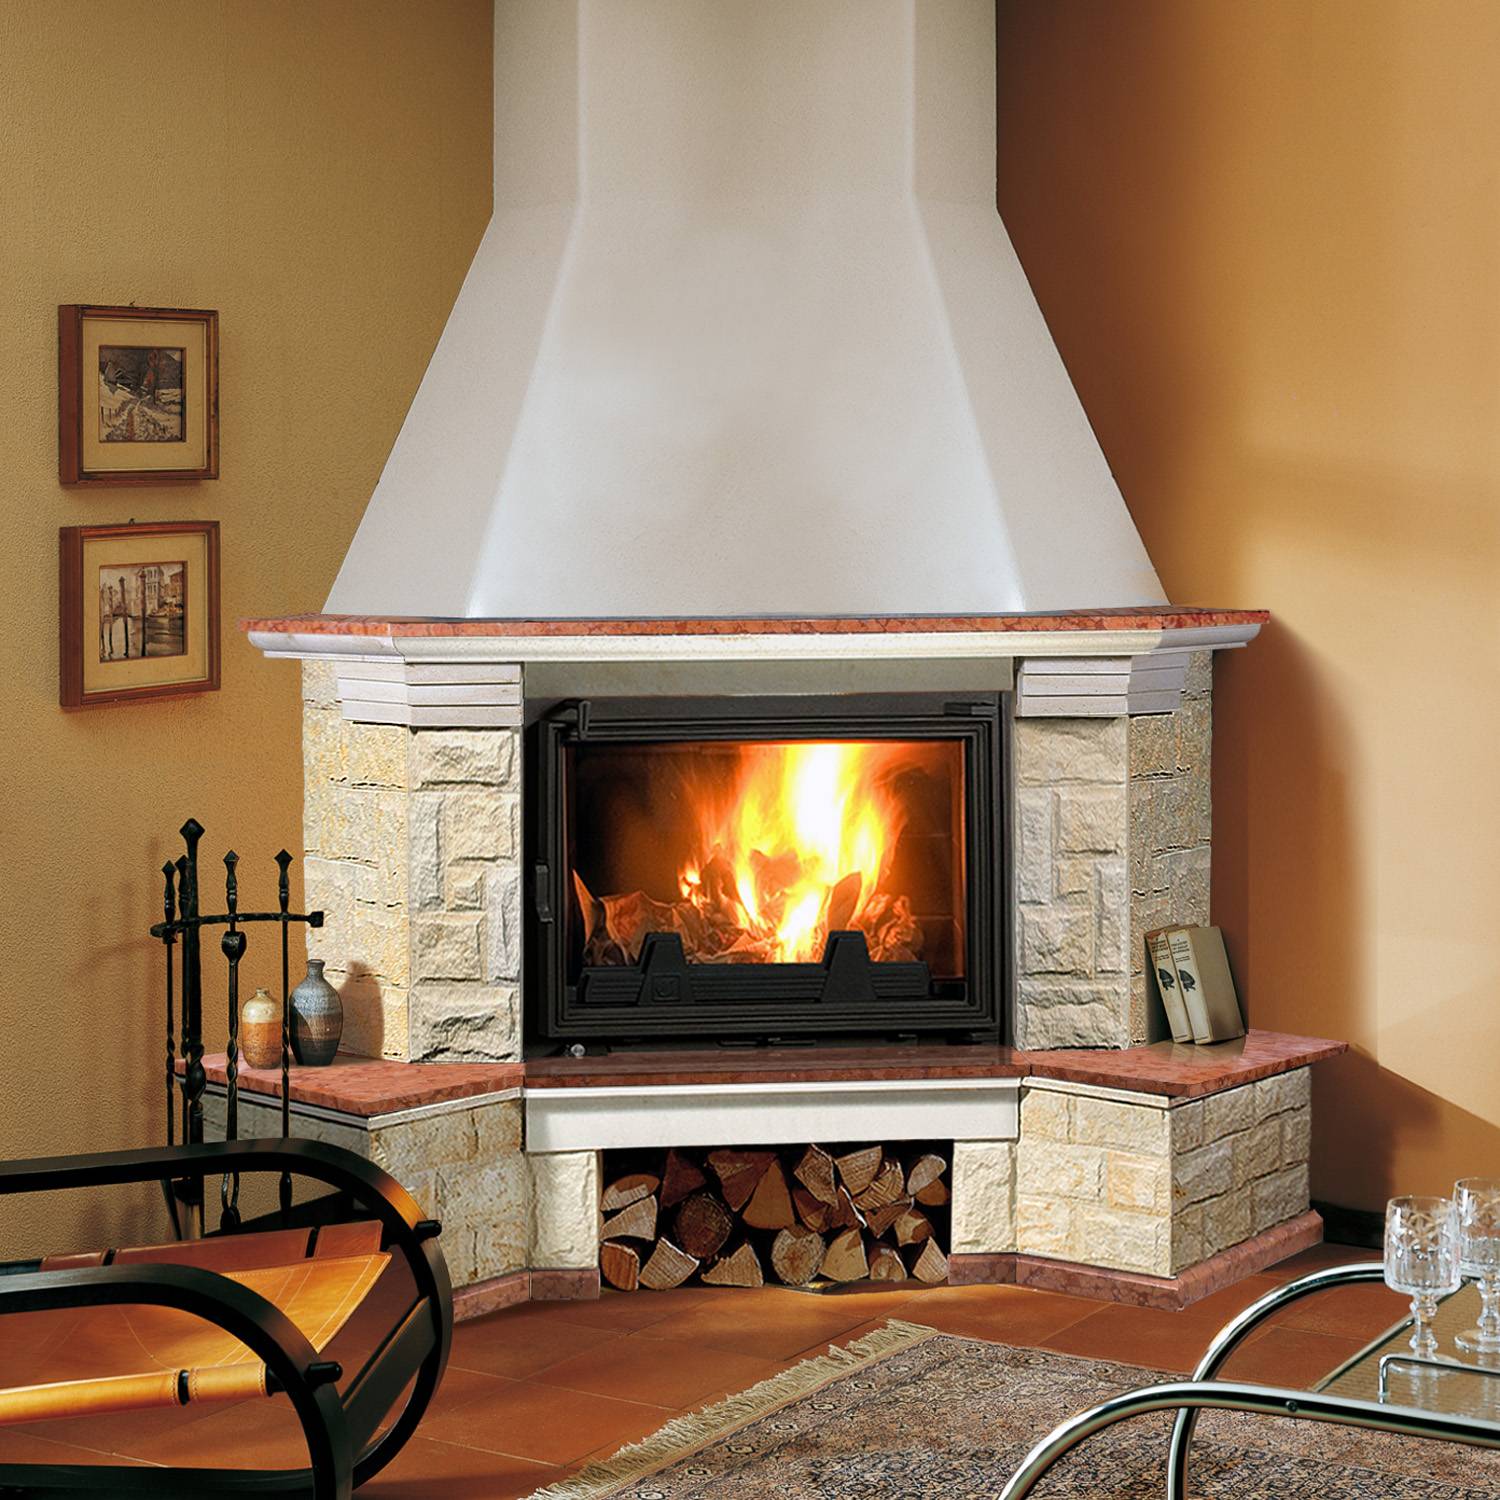
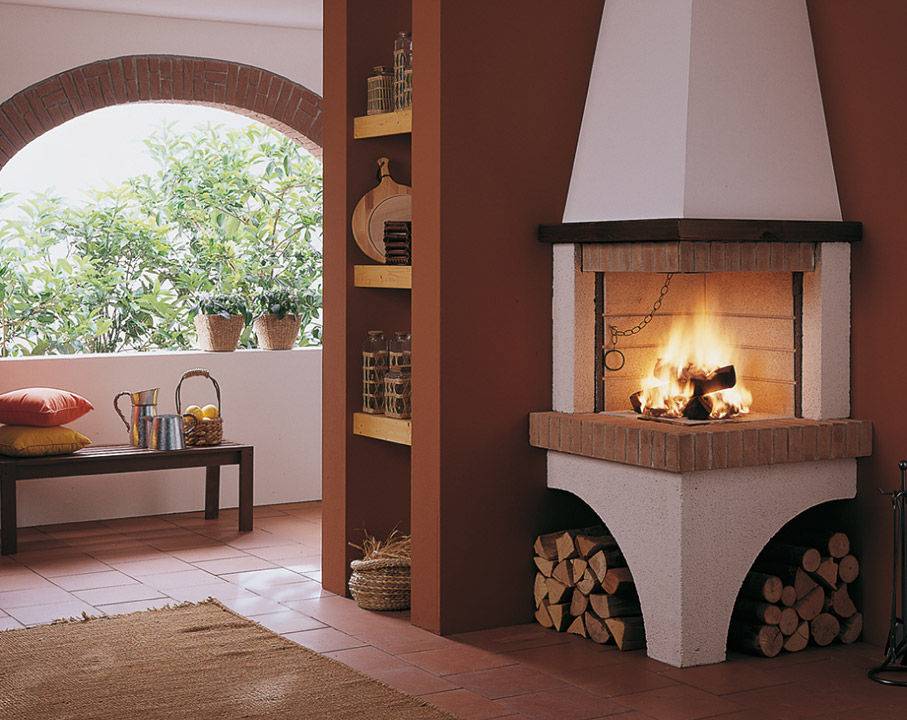
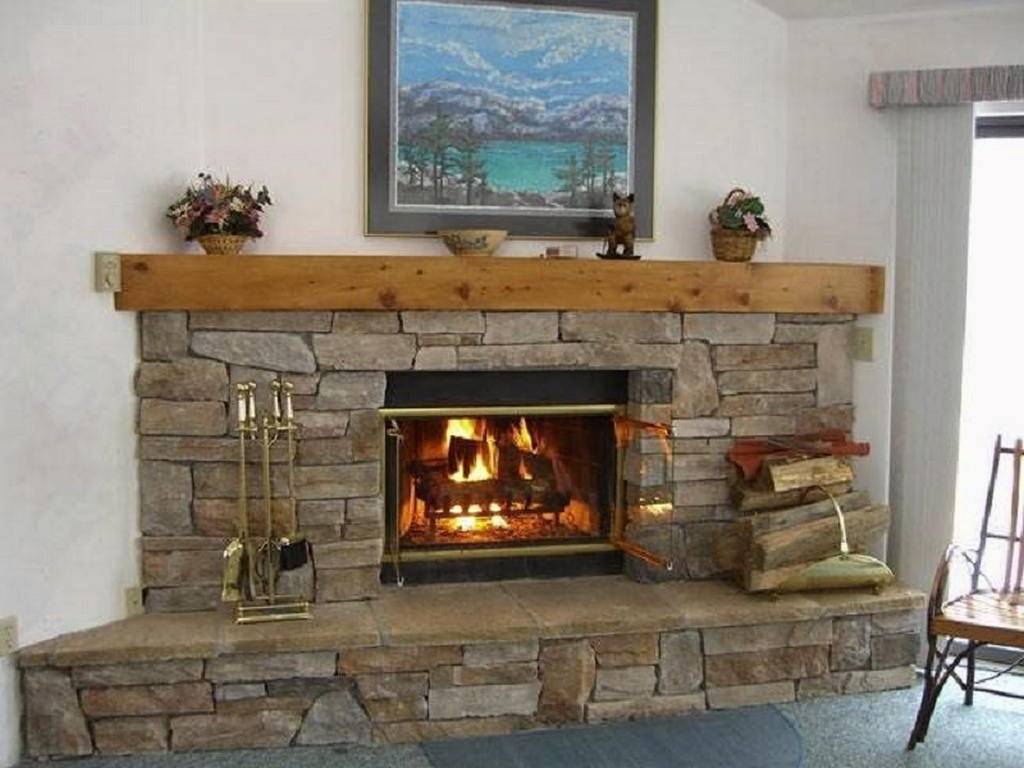
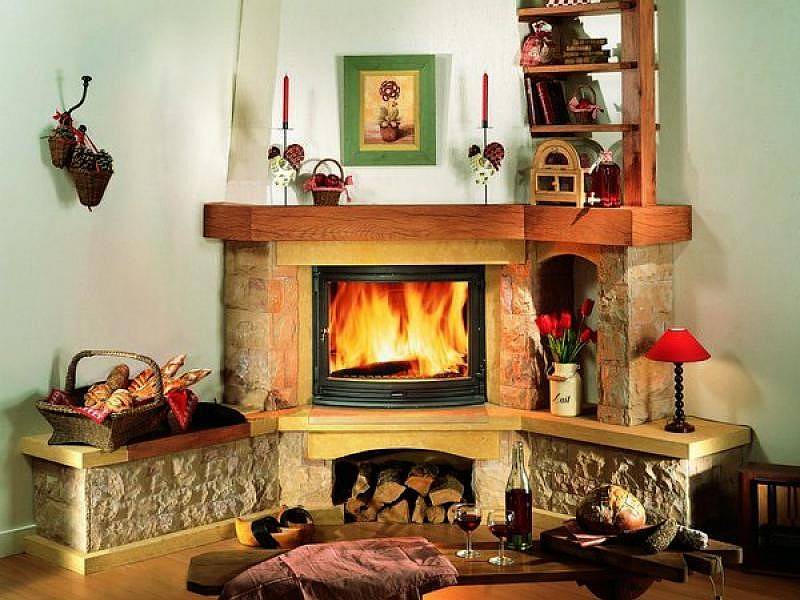
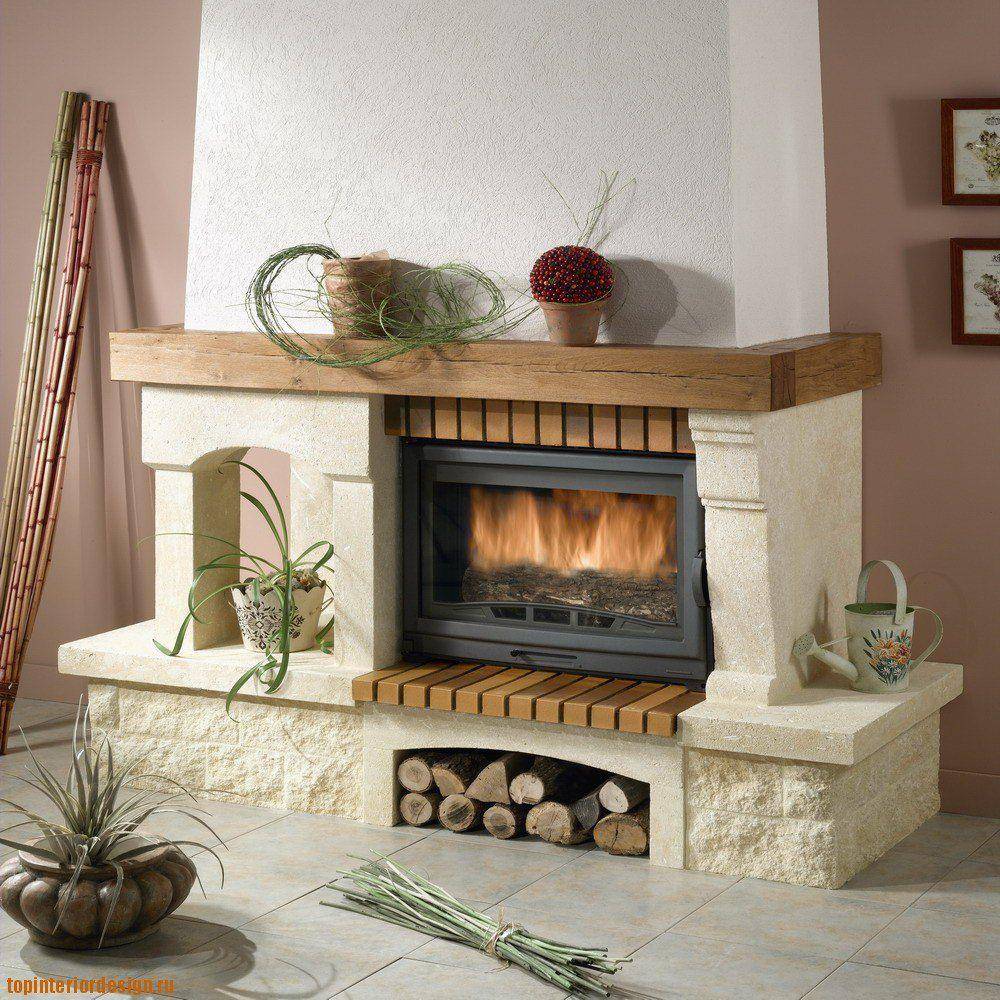
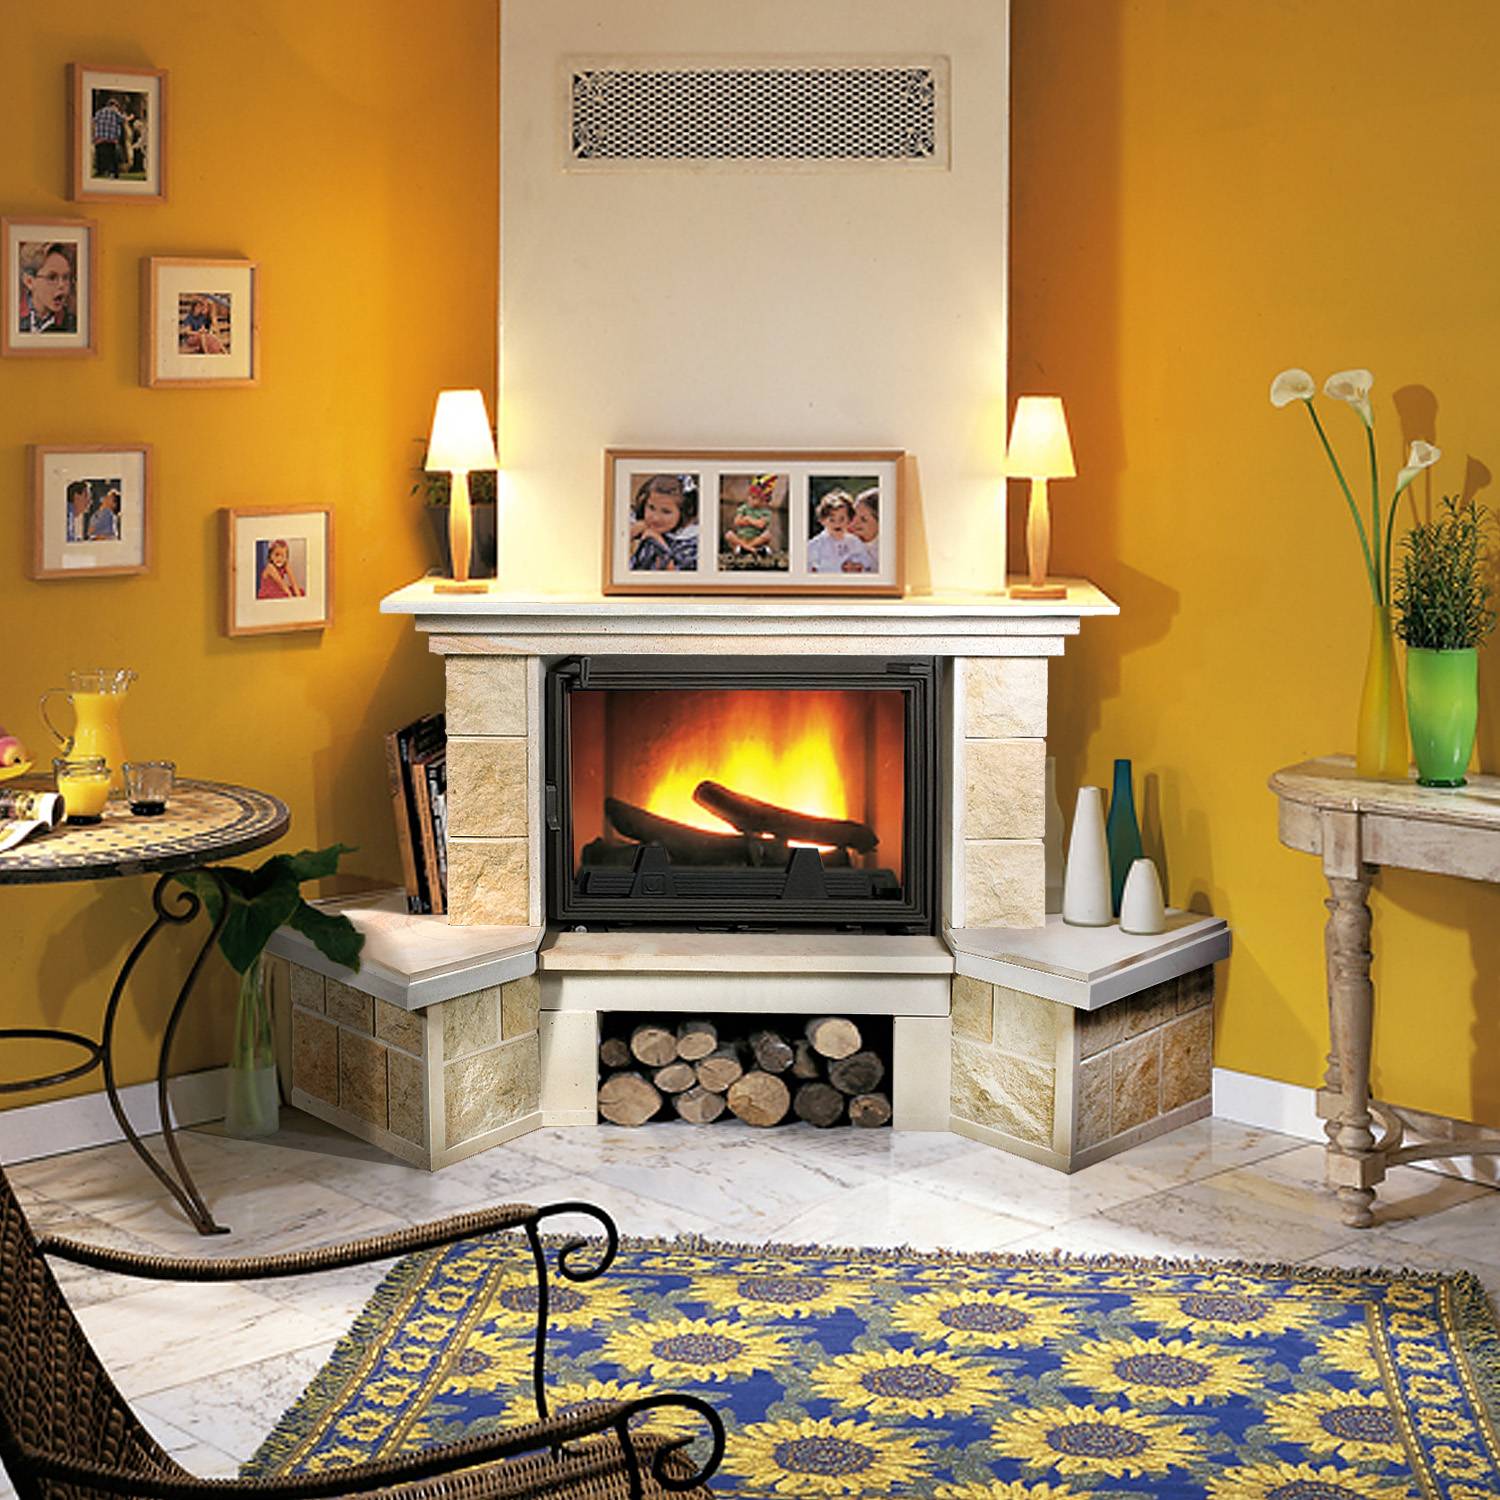
Fireplace, finished with natural stone, as if transferred from the era of knights and beautiful ladies
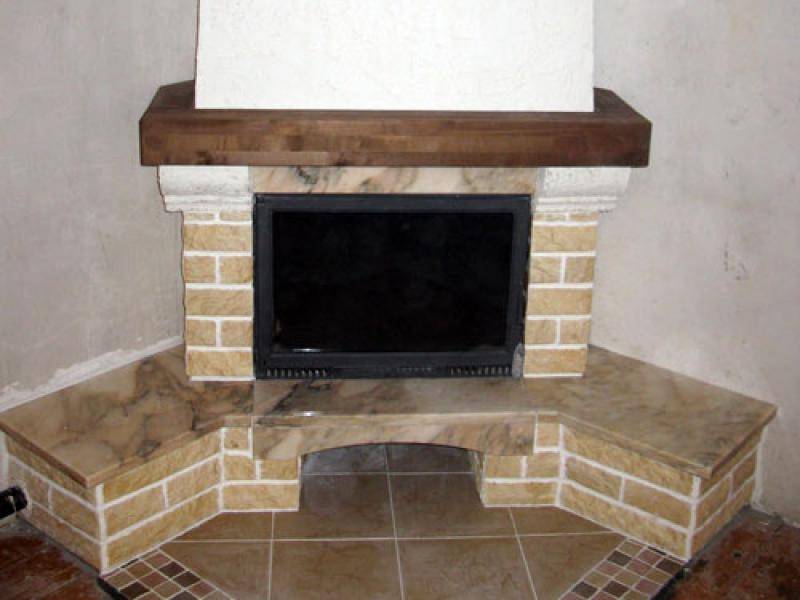
Currently, there are many options for lining the fireplace with materials of natural or artificial origin. Tiles will help to make the stove bright and irresistible. They will completely transform the portal of the heater, making it especially warm and homely. Finishing with marble slabs or stone, on the contrary, will create the effect of an expensive and presentable structure. As for facing the fireplace with ceramic tiles, you should choose only heat-resistant varieties - majolica, clinker, porcelain stoneware or terracotta. Of course, when laying facing materials, only special, heat-resistant adhesives should be used.
Chimney installation
Those who believe that the chimney is just a direct channel for the exit of flue gases should take a closer look at the scheme and procedures of the chimney, which experts recommend for equipping wood-burning stoves. Inside, it really is a hollow rectangular tube.
As for the outer part, its configuration fulfills an important functional purpose.
Chimney design and ordering
The thickening at the intersection with the ceiling is called fluff. Thanks to several additional rows of bricks, it is possible to reduce the temperature of the flue gases so that there is no need to install an insulating layer. If you install a straight, thin-bodied riser, then the floor will have to be protected with several layers of asbestos or basalt slabs.
At the level of the roof, the chimney is expanded to form the so-called otter. In addition to the aesthetic purpose, such broadening plays another, no less important role.When it rains, it is the otter that prevents precipitation from flowing down the outer surface of the riser, protecting the brick from destruction. As for the protection of the smoke channel, for this purpose, the top of the pipe is crowned with a metal cap.
For the rest, when erecting chimney chimneys, it is necessary to be guided by the same requirements as for other wood-burning stoves. The traction force depends on the correct placement of the structure on the roof, and therefore the operability of the fireplace. You can familiarize yourself with the rules for installing the chimney by carefully studying the diagram below.

Chimney installation diagram relative to the ridge and roof of the building
Step-by-step instruction
In fact, laying a corner fireplace made of bricks with your own hands does not differ from ordinary construction, with the exception of thin seams - the thinner they are, the better the fireplace will keep warm inside. For this, the solution must be as homogeneous as possible and without lumps. The permissible thickness of the furnace seams is from 1 to 3 mm for the fuel compartment and up to 5 mm for the chimney and the body. In this case, the seams must be filled completely.
How to build a brick fireplace:
- The easiest and fastest way to erect a fireplace is during the construction of a house, when the interior decoration has not yet begun. The first step is to take care of a stable foundation, the dimensions of which should be 5 cm wider than the basement row of the structure on all sides. Dig a pit of the appropriate size 60 cm deep. If the floor level is located much higher than the surface of the earth, you just need to carefully compact the soil under the future fireplace and make timber formwork. From the inside, coat the formwork panels with bituminous mastic or attach roll waterproofing (ordinary roofing material will do quite well). For the manufacture of formwork, sheet metal can also be used.
- Tamp the bottom of the pit and put a layer of gravel or brick chips 10 cm thick there, pour water and tamp it thoroughly. The surface should be as flat and horizontal as possible.
- Install the formwork on the crushed stone "pillow", and then put large stones or brick fight (quarry) inside. There will be gaps between the stones, and to fill them, add some more rubble.
- Mix a classic cement-sand mortar in a 1: 3 ratio. First, mix the dry ingredients, and then add water little by little, bringing the solution to the desired consistency (thick sour cream). Pour concrete into the formwork with a layer of 10 cm, level the surface and leave to dry for a day.
- The next day, again put on the dried concrete a layer of rubble mixed with rubble and fill with concrete. Thus, bring the foundation almost to the level of the finished floor (5 cm lower). Carefully level the last layer of concrete, cover with polyethylene so that it does not crack, and leave to dry for 5-7 days.
- After the foundation is completely dry, dismantle the formwork.
- Close the foundation with 2 layers of roofing material and start laying bricks in accordance with the selected order.
- Since bricks absorb moisture, they should be kept in water for 2-3 minutes before laying and applying the mortar. If this is not done, they will take all the liquid from the clay solution, and it will lose its strength binding characteristics.
- When laying the basement row, place the bricks on the ribs. For the rest of the rows, the bricks are laid flat. When the height of the structure reaches 25-30 cm, you can begin to form the walls of the combustion compartment.
- If the facade of the fireplace is not planned to be plastered or revetted, when laying the front part, try not to bring the clay mortar to the very edge of the brick by about 5 mm - this will allow you to beautifully embroider the seams later. Before laying each row, check the horizontal position with a building level, and the verticality with a square and a plumb line.
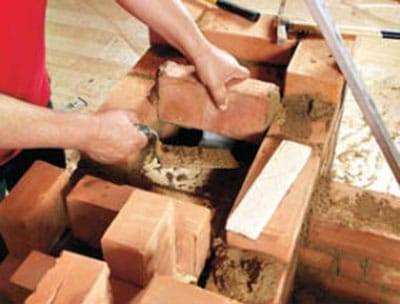
- When laying out the firebox and smoke chambers, smooth and level the solution not with tools, but manually. So you can feel and, if necessary, remove large particles and lumps in a timely manner, making the seams thinner. When you have completed 5-6 rows, wipe the inner walls with a damp cloth to wipe off excess mortar - then it will be quite difficult to do this.
- If you are bandaging the firebox masonry, the lining must be done separately without bandaging so that temperature drops do not destroy the structure.
- If you remember, the back wall of the fuel compartment and smoke box should be inclined. To do this, lay each subsequent row with a slight overlap on the bottom (4-5 cm). So that soot does not accumulate on such a "ladder", it is recommended to close the masonry with a steel screen 3-4 mm thick.
- To make the portal overlap, use a steel corner (you need a fireplace facing) or a circle - a special formwork that allows you to create an arched masonry. To do everything beautifully and correctly, first install the brick without mortar, evaluate the result, and only then lay it according to all the rules.
- When you bring the chimney to the roof, change the clay mortar to a cement-sand mortar - it copes better with the atmospheric load.
The scheme of a brick corner fireplace, no matter how simple it is, requires utmost attention and skills in working with materials. If you doubt your abilities, it is better to entrust the work to a professional, or at least enlist his support and recommendations.
Laying a fireplace with your own hands ↑
The construction of a fireplace is a multi-stage process consisting of several stages, each of which requires utmost attention and responsibility.
If we talk about the correct technology for the construction of stoves, it will not be superfluous to note that the base for the fireplace should be made separately from the foundation of the main building. First, a pit is prepared, the dimensions of which are 10 cm larger than the dimensions of the future fireplace. The depth of the pit is 50-70 cm. The bottom is covered with a layer of rubble, after which the formwork is built.
Rubble stones are placed in the formwork, which are then filled with cement mortar 3: 1 (sand: cement). The foundation is leveled, covered with plastic wrap and left to shrink for a week.
On the foundation, you need to lay a waterproofing material in 2 layers. Then the basement is laid, and the bricks of the basement row are placed on the edge, while all the rest are laid flat. Before use, the brick is soaked in water for a few minutes. This is necessary to achieve strong contact with the solution.
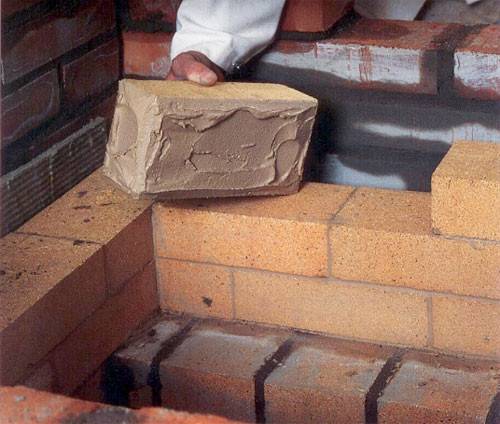
 Brick fireplace masonry is carried out according to a clearly drawn up scheme
If the masonry turned out to be inexpressive or brick defects were found, the stove can be plastered, or any other type of cladding can be applied, which will help to hide the errors without costly alterations.
The way the floor is laid is of great importance for creating a coherent composition. The furnace ceiling can become an original decoration. You can lay out bricks in even vertical or horizontal rows, or you can create an arch effect. Gems, wood, marble will cope well with the role of additional decorative elements.
 Do-it-yourself fireplace masonry
Wedge lintels are made of bricks laid on the edge and aligned with the formwork. As a result, wedge-shaped seams are formed, the thickness of which should reach 3 mm, from above - 25 mm. Arched and beam lintels are laid on the formwork, corresponding in shape to the given outlines. The lintel must be finished with a central brick, placed strictly in the middle and vertically, relative to the overall dimensions of the furnace.
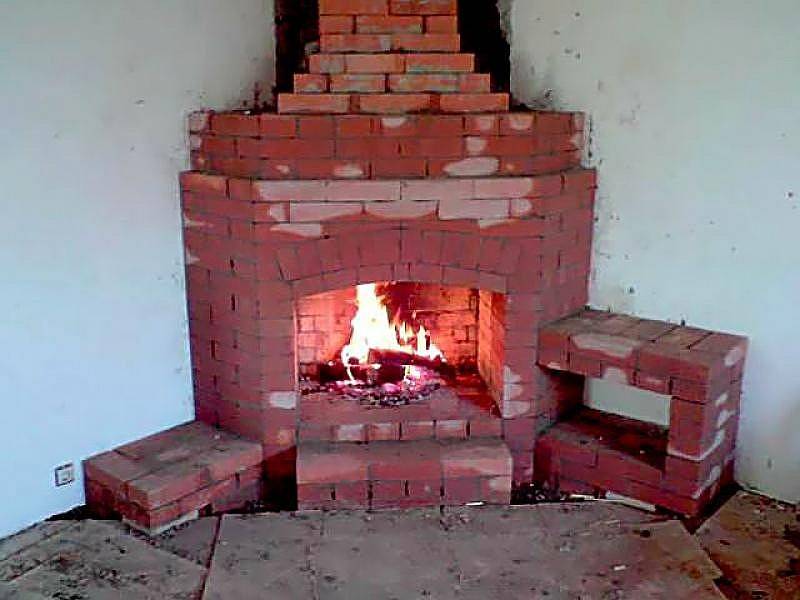
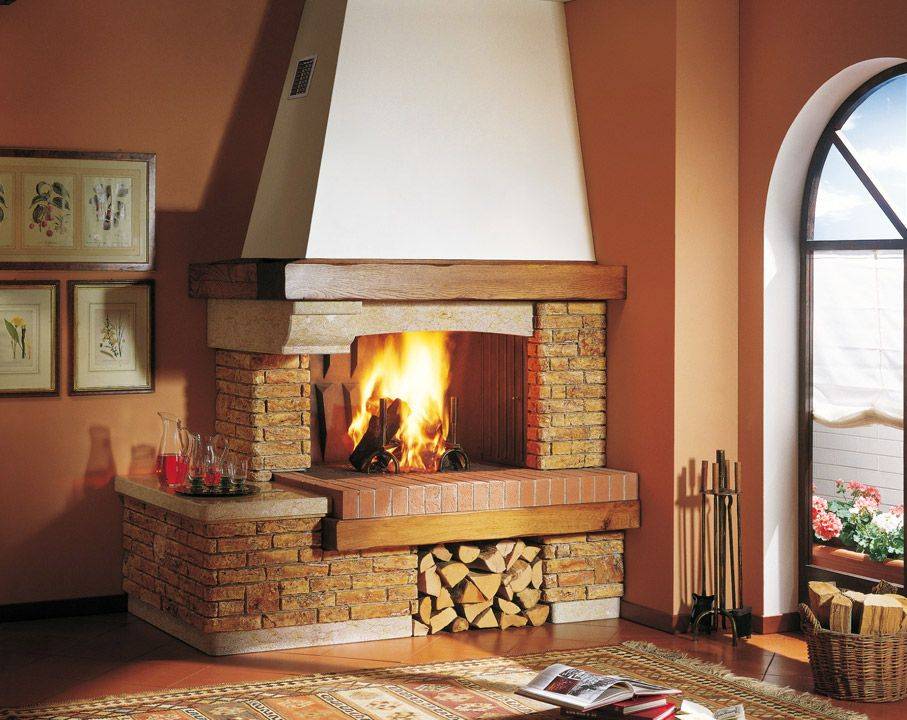
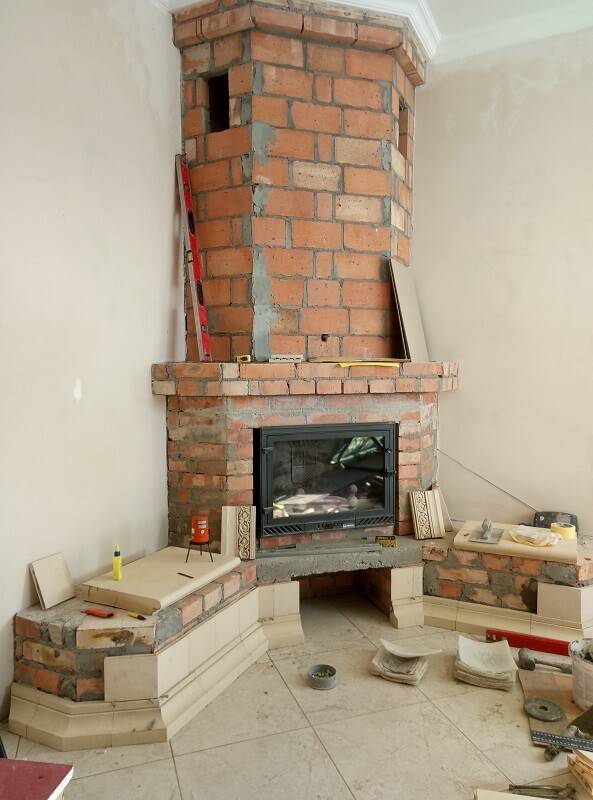
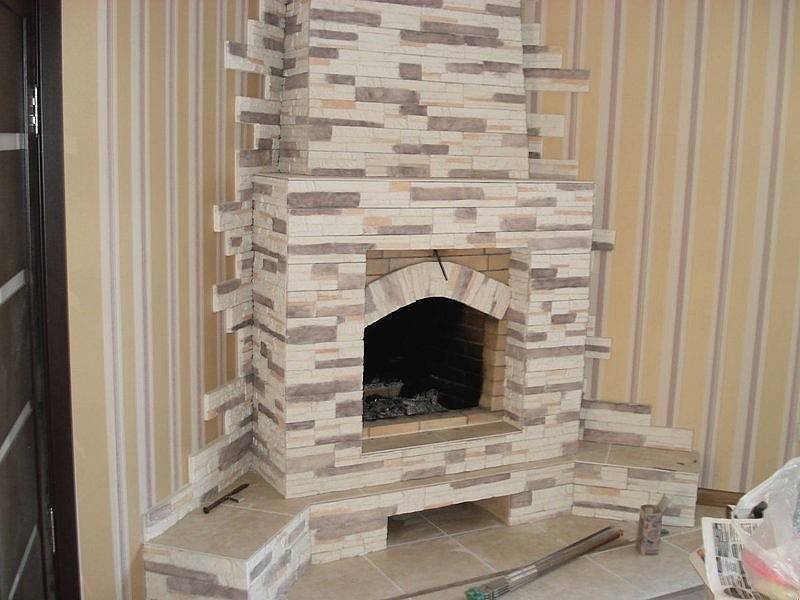
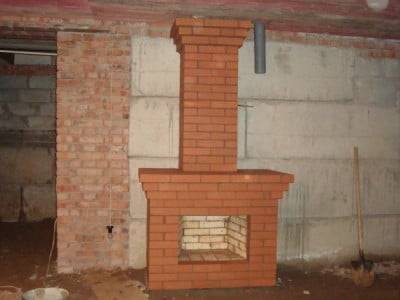 Freshly laid fireplace - the result of work
Before starting laying, it is important to carefully study the scheme, think over the decor. It is difficult to make adjustments to the performed order, and often impossible, because
a change in the position of even one brick leads to a change in all rows.
A competently drawn up plan that fully reflects the stages of work, thoughtful decor, high-quality materials and your desire - this is all that is needed to create an interesting fireplace that will become a worthy decoration of the interior, bringing warmth and comfort.
Finishing work
Honestly, I would not like to recommend anything in this section. Facing a fireplace is a serious and difficult business. Here you will need the services of a designer who will tie into a single whole both the design of the fireplace and the design of the room. After all, everything should be in harmony.
We just want to advise on the materials with which you can carry out the finishing work.
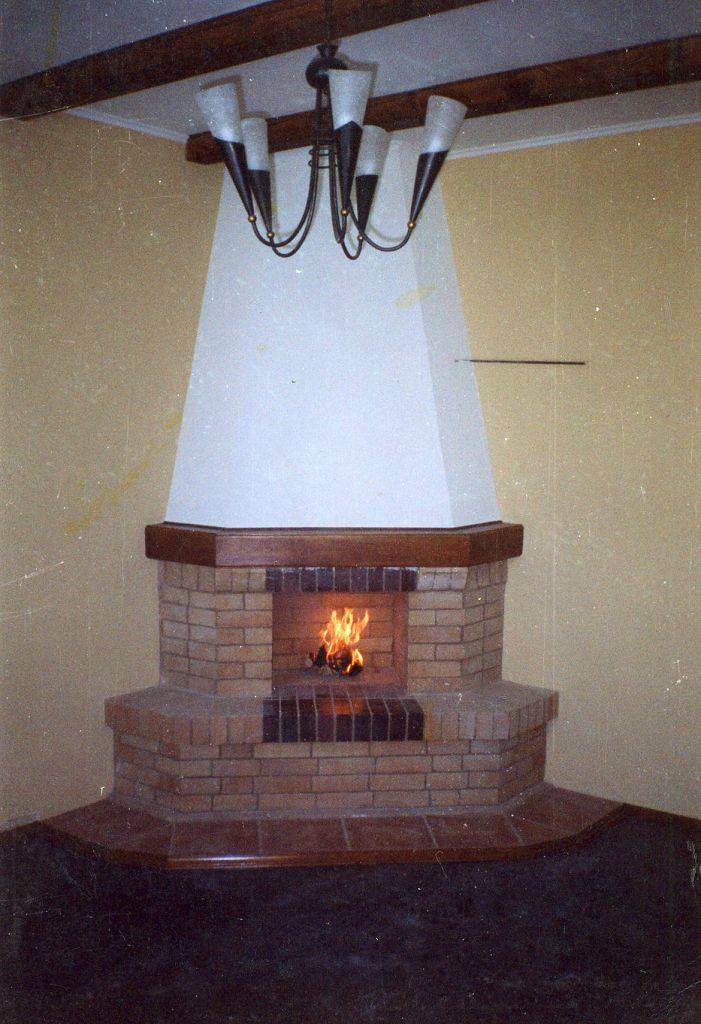
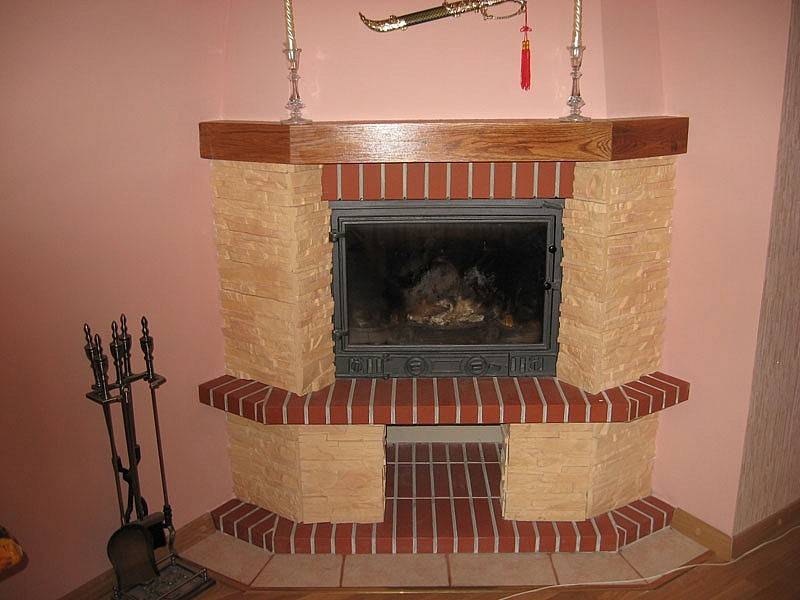
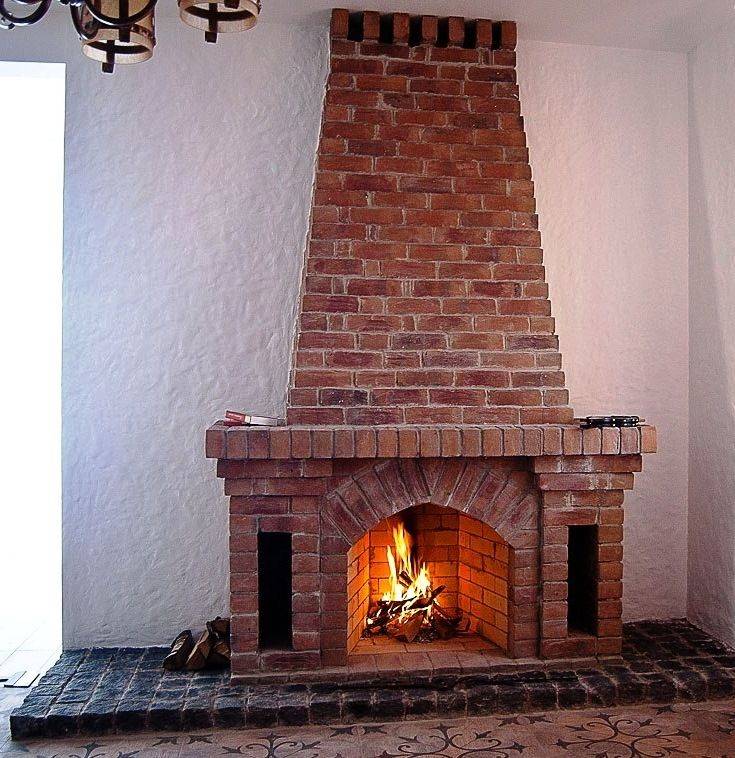
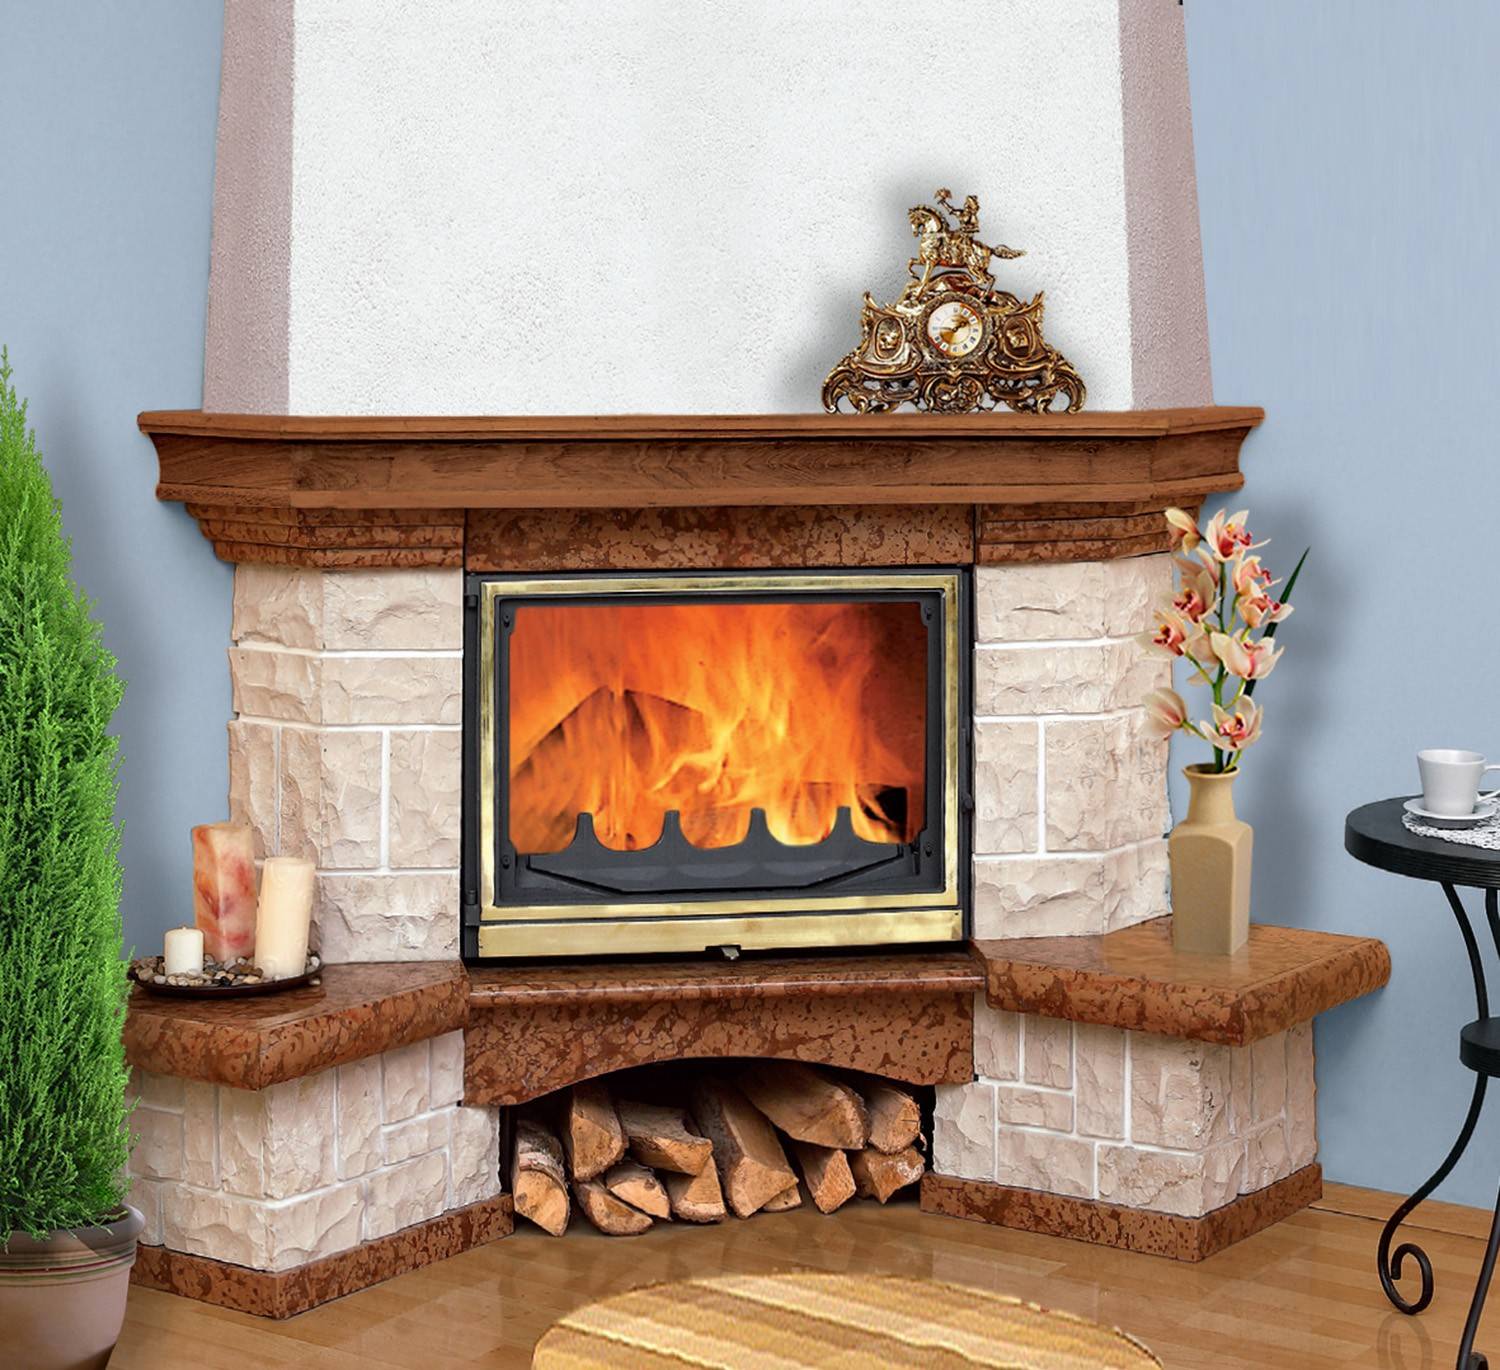
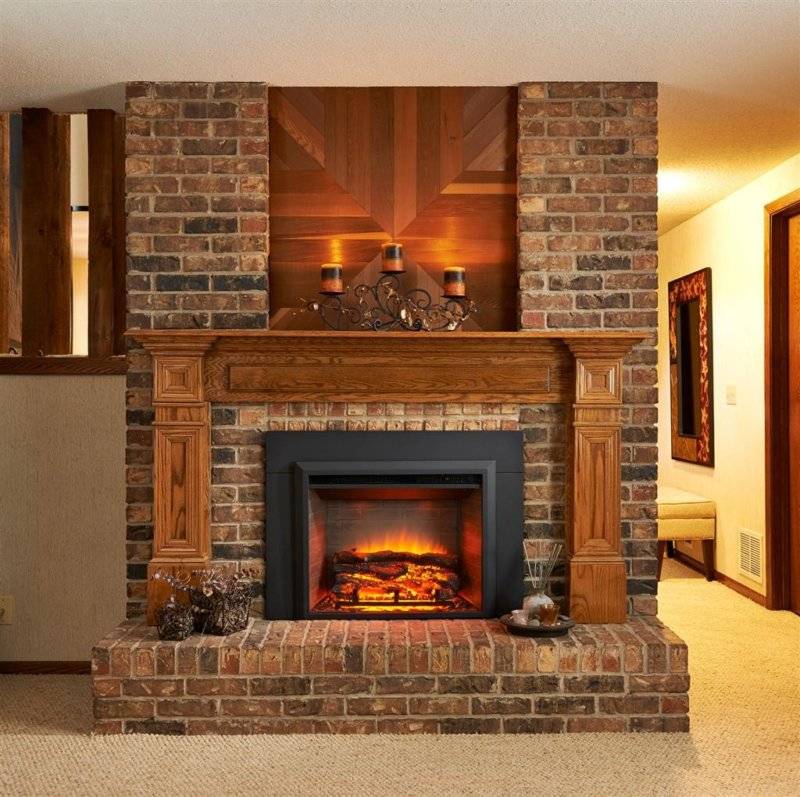
- If the brick from which you built the fireplace turned out to be flawless, then we can assume that the decoration has already been done. True, during the construction process, you will have to strictly adhere to a certain subtlety of the masonry layer. You just need to grout the joints using a white solution. It's actually pretty. By the way, here is a brick fireplace of this type in the photo.

Brick fireplace
Ceramic tile. Nowadays, this type of cladding has gained great popularity. Probably, the fact is that ceramics manufacturers currently offer such a huge assortment that you can assemble heating devices and cover them, knowing that the same brick fireplace will never be. But you will have to take into account and this is the point - not any ceramic tile can be suitable for decoration. First of all, it must be heat-resistant. And this category includes: majolica, terracotta, clinker, tiles and porcelain stoneware.
Stone. Say what you like, but the natural beauty of the stone is incomparable. It is not only beautiful, it is reliable, it is durable, it is powerful. In addition, the stone will never go out of fashion, therefore, having faced the fireplace with it, you can change the interior of the room more than once. A stone fireplace will still fit perfectly into it. True, this is the most expensive finish. And it doesn't matter if you use sawn wood or cobblestones. Although the market also offers a budget option - an artificial stone. It is not as durable as natural, but in appearance it will not yield to the latter.

Unusual finish
How to make a foundation for a corner fireplace?
The foundation diagram for the fireplace.
The base of the structure should not be associated with the foundation of a private house. There are 2 ways to build such a foundation.
The process of making a foundation in a house with a basement floor:
- First, you need to mark the depth of the structure to be made on the wall.
- At the place of the mark, you need to disassemble the flooring boards, and then transfer the marks below using a plumb line.
- The joists should not be dismantled until the base has been brought in from the basement under the fireplace.
- Using a plumb line, you need to outline the exact location of the structure on the basement of the basement floor.
- The floor of the basement floor is broken through to the base.
- The soil is dug up to the base of the building. The dug hole should be 20 cm larger than the fireplace on each side.
- The base of the pit is carefully tamped.
- The foundation of the fireplace is being erected. Between the base of the house and the foundation of the stove, you need to leave a gap of about 5 cm, which should be filled with sand in the future. The foundation is being built up to the basement of the first floor.
- Two rows before the base of the stove, a cement layer should be applied and several layers of roofing material should be laid on it to protect the structure from the dampness of the basement.
- Next, you will need to cut the logs that will be installed on the base of the fireplace.
- Another row of bricks is laid out.
If the building does not have a basement floor, then the foundation is made as follows:
Fireplace chimney diagram.
- You will need to dig a pit 15 cm more than the foundation.If there is no groundwater under the house, then you can immediately start making the base. If the walls crumble under the influence of groundwater, then they will need to be strengthened.
- Next, the base is made. On the first floor, you need to fill the crushed stone into the pit and tamp it carefully. Construction waste can be used instead of rubble.
- Formwork is being made.
- To isolate the base from moisture, the inner walls should be sheathed with roofing material or coated with resin.
brick masonry corner fireplace
Under the corner fireplace, a separate foundation and a fireproof cut between the solid wood and wooden surfaces are required. The division is often made of metal sheet or masonry in a quarter of a brick.

.
It is advisable to lay the fireplace according to the indicated drawings, observing the dressing of the seams, you do not need to rush at all, the faster you lay down, the higher the chance that the laying on a fresh clay solution will "float". Remember the difference in masonry between a Russian stove folded by a drunken neighbor and a fireplace for 80 thousand rubles. this is the observance of the horizontal, vertical and diagonal. If you do not have a hand and eye, check each brick with a level, keep the thickness of the seam 4-6 mm around the entire perimeter. If you are not sure about something or you have forgotten it is necessary to study the theoretical material of stoves and fireplaces.
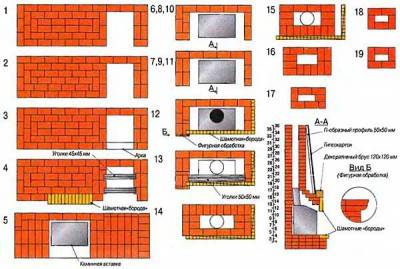
Masonry order
The order, elevation and section are shown on separate pages. In order for the ordering of the corner fireplace to be drawn up, you will need to prepare a sheet of A4 paper in a box and a pencil.
This implies the use of not only whole bricks, but also three-quarters and halves. Accordingly, you will need to accept conventional images.
The basement row of the fireplace is best made of brick, which will be placed on the edge - this will be more original, although this is not at all necessary. Next, the bricks (starting from the second row) are laid flat. The bottom of the furnace is often done 25-30 cm above the floor, which can be more comfortable.
Corner fireplace order:
From the sixth to the ninth rows, the laying of the firebox continues. Keep in mind that ceramic and fireclay bricks cannot be tied up. Ideally, a small gap should even be left between them so that the entire masonry during the operation of the fireplace is not disturbed due to the large temperature difference outside and inside the fireplace.
- The first, second and third rows must be filled with bricks.
- The fourth row will be the bottom of the fireplace.
- In the fifth row, an ash pan-blower is laid out. The support for the grate is formed by three steel strips (they are pressed by the masonry of the sixth row).
- In the sixth row, the grate is laid.
- In the seventh row, the lower setting of the portal is placed.
- Rows from the eighth to the thirteenth will form the walls of the portal, the laying is carried out with the dressing of the seams.
- In the eleventh row, you need to start, and in the rest - continue to lay out the inclined mirror at the back wall.
- In the fourteenth and fifteenth rows, it will be necessary to block the portal, continue laying and laying the mirror.
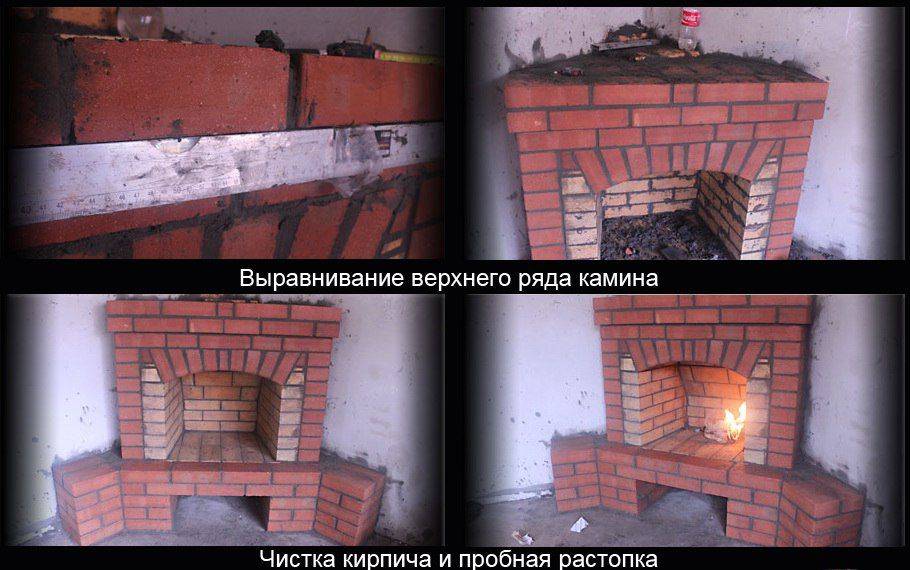
- In the sixteenth row, the masonry of the mirror ends. It is necessary to perform the ordering of the corner fireplace of the upper part of the tooth. From the side of the chimney, you will need to coat the tooth with clay solution in order to provide protection from burning out.
- Next are the seventeenth-nineteenth rows, in which the facade is being laid. Bricks need to be chipped as shown in the section, towards the high.
- The twentieth, twenty-first and twenty-second rows form a chimney 14x27 cm. The valve is installed in row 22.
- The twenty-third row goes next. The ordering shows that the smoke hole will be in the shape of a dovetail.
- In the twenty-fourth and all subsequent rows, the laying of the chimney ends.
Elements necessary for the manufacture of a corner fireplace
Use only bricks that are fireproof. Such a material is able to withstand temperatures over 1000 ° C, it will not deform when heated and cooled, and can retain heat well. The material will need to be soaked in water to remove air from it. The brick can be used when bubbles stop coming out of it.
In order to make masonry mortar, you can use blue or red clay. For a high-quality masonry fireplace, you need to add sand exclusively with fine grains, free from various contaminants. To carry out such a cleaning, it is necessary to perform “elutriation”. The sand will need to be poured with water 2 times, and then defended. The steps must be repeated until the water becomes clear.
Fireplace laying tools.
The base for the structure and the laying of the pipe are made of fired bricks, which are fixed with a mixture of concrete. To prepare a concrete mixture, you need to use cement grade M300 or M400 and clean sand with large grains. In this case, crushed stone can also be used. The ratio of sand to cement should be 3: 1.
The fireplace is folded with a clay mixture that is heat resistant.
First of all, you need to stir the clay in water until the consistency of thick sour cream. The clay should be left for a few days. Mix it thoroughly every day. Next, the required amount of sand is added to the length. The main indicator of readiness is that the solution does not crumble or stick to your hands.
In the process of laying the first 3 rows of bricks, it will be necessary to add a small amount of cement to the clay solution (3 parts of cement to 10 parts of mortar).
Elements that will be needed to build a brick fireplace with your own hands:
- Refractory bricks.
- Clay.
- Sand.
- Water.
- Cement of the M300 or M400 brand.
- Crushed stone.
- Plumb line.
- Building level.
- Trowel or trowel.
- Ordering.
- Shovel.
- Rammer.
- Roofing material.
- Resin.
- Pencil.
For corner fireplace
As stated, the ordering is a detailed diagram that indicates the position of each brick. In addition, ordering will greatly simplify your task and help you calculate the required number of bricks that you will need when building a stove or fireplace, moreover, you can avoid unnecessary waste.
The order of a corner fireplace is practically the same as a simple or classic version, you just need to consider a couple of points. One of these important points is that the foundation should rise 10 centimeters above the floor. You can perform this order by following the instructions.

At the first stage, it is recommended to lay the base on clay mortar. Continue to do it until the fourth position (row), where it is necessary to divide the fireplace into two blocks, covered by a stove.
Second phase. The first block should be designed for a log niche, and the second block for a front facade. At the next stage, it is recommended to use refractory bricks; here, a base for the furnace should be formed.

At the fourth stage, after covering the fireplace itself with a slab of hard metal, for example, steel, the construction of the fireplace should take place according to a previously prepared scheme up to the twelfth row. In order for the entire heating system to work efficiently and without any failures, it is also better to use refractory bricks for interior wall decoration.

At the next stage, it is necessary to continue laying, as at the beginning, according to a previously prepared scheme up to the twenty-seventh row. If you want to make additional rigidity, then you can install iron corners between the bricks. They can be crafted by hand.
And finally, at the sixth stage, it is necessary to make valves on top of the building. The corner laying of the fireplace differs in many respects from the classic one, but it is not at all impracticable.

7photos
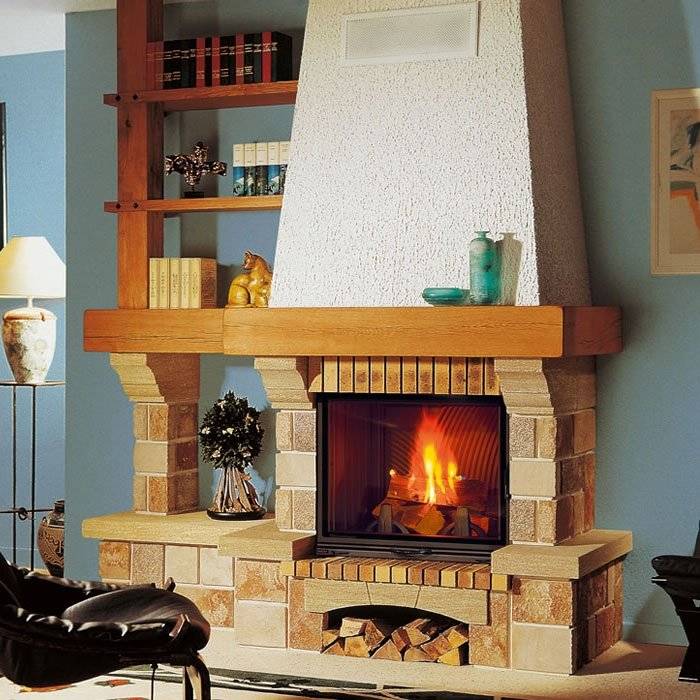
Design features
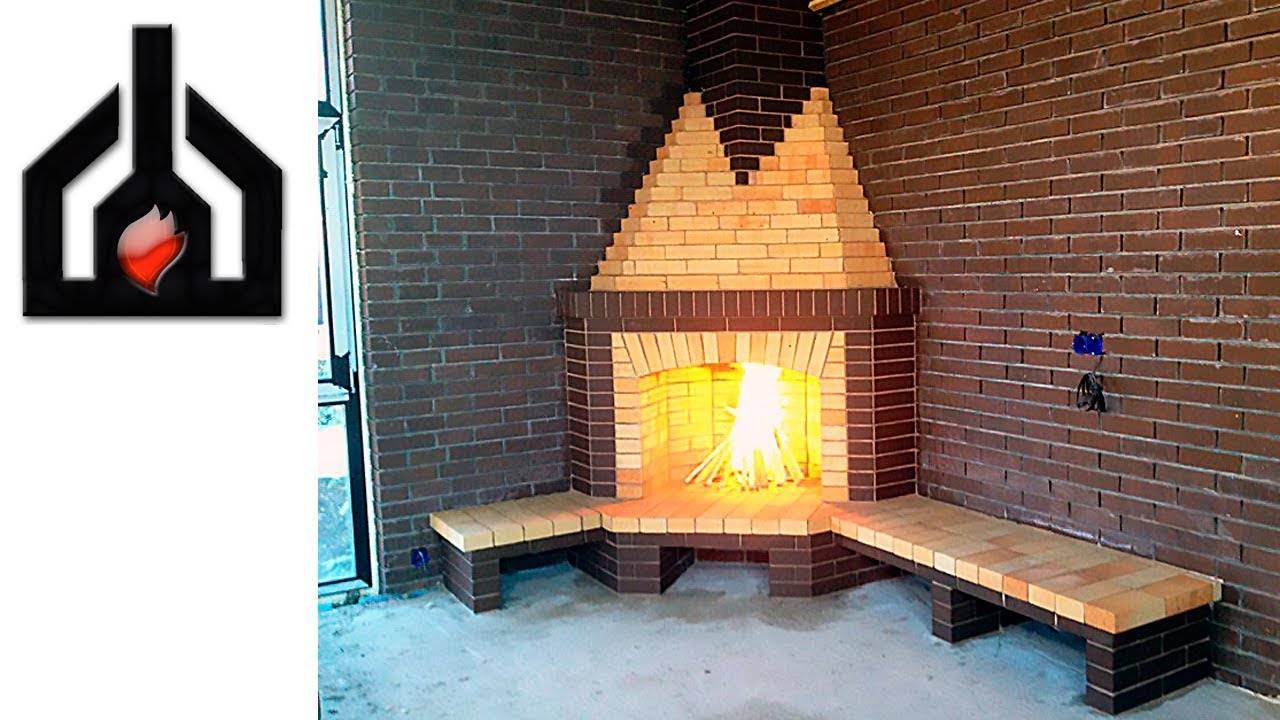
The main elements of a corner fireplace are the fuel chamber and the chimney. The correct ratio of the sizes of these elements depends on how effective and efficient the heating device will be.The base of the structure is called the fireplace table, which is at floor level and rests directly on the foundation. In front of the fireplace, they equip the pre-heating platform. It is laid out with refractory bricks and covered with ceramic tiles or metal sheets. According to fire safety standards, the platform must protrude beyond the portal by at least 30 centimeters on each side.
Corner fireplace device - drawing
Above the fireplace table is located under - a place where firewood is stacked. The canonical design does not imply the installation of a grate, but it is often installed in order to increase the performance of the heater. In addition, in furnaces with a closed hearth, the bottom blowing allows you to regulate the intensity of the flame. Thanks to this, it is possible to extend the burning time of one fuel insert, and therefore, to increase the efficiency of the structure.
Under, like the firebox, they are laid out with refractory materials - the temperature in this zone often exceeds 1000 ° C. Often, to enhance the heat-emitting ability, the back wall is lined with a sheet of "stainless steel" or a cast-iron plate. To further enhance the heat transfer of the fireplace, the back of the firebox is tilted forward. This allows heat energy to be directed towards the floor.
A smoke collector (hailo) is installed above the firebox - a chamber in the form of a truncated pyramid with a small sill in the front part. This barrier prevents the admixture of cold air with the combustion products and serves as an additional barrier preventing smoke from entering the room.
On the back wall of the smoke collector there is a smoke (fireplace) tooth - a protrusion necessary for the formation of the so-called gas threshold. Thanks to him, it is possible to reduce the flow rate of burning gases and make them stay longer in the combustion zone. The chimney tooth retains soot in the chimney, preventing it from falling into the combustion chamber. For this reason, a door for cleaning the chimney is often installed next to the brick ledge.
In the place of transition from high to chimney, a valve is installed, which regulates the draft. She also blocks the way for warm air from the room after the firewood is completely burned out.
The design of the pipe for removing combustion products is no different from the chimneys of other wood-burning stoves. To ensure good traction, the pipe is raised above the ridge of the roof, but not less than 5 meters from the hearth (grate).
Brick fireplace masonry: where to start? ↑
The most common type of material for building a fireplace is brick. Fireplaces made of bricks fit organically into any interior. The process of arrangement, although it seems very complicated, with a competent organization of the course of work, is quite feasible with our own hands.
To simplify the task and coordinate the procedure, it is necessary to develop a stacking scheme.
The masonry scheme, drawn up correctly, is half the success, because it reflects all stages of work, which helps to avoid irreparable mistakes. The masonry scheme should reflect the order of the fireplace, step by step, sequentially. You can develop such a drawing (if you have a great desire and relevant knowledge), or you can use ready-made samples, which, by the way, are abundant on the Internet.
 The masonry diagram clearly reflects the progress of work
And here are some more interesting ordering options:
 Fireplace ordering - option 2
 Ordering an English fireplace - option 3
Stoves and fireplaces are most often made of clay bricks. However, it is allowed to use other heat-resistant materials, for example, refractory brick or stone. For the front surface, you should choose bricks of the highest quality, absolutely identical in size and color, with right angles and an even edge.
The manufacture of stoves and fireplaces requires a special solution.Fireplace mortar consists of cement, clay and sand. The cement content should be small and not exceed the required ratio: 1 part of cement to 8 parts of sand. First, dry sand and cement are mixed, and then clay is added. Complete homogeneity of the composition is required, the mixture should be of a doughy consistency, without lumps.
Dimensions to be adhered to
The dimension of a corner brick fireplace is determined based on the heated area and its volume. In the example given in this article, we are talking about the area of the fireplace insert 0.2–0.3 square meters. meters. It is necessary to determine the width and height of the fireplace insert (firebox portal). For a small fireplace, the height to width ratio is 2: 3. Thus, for our fireplace, the portal will have dimensions of 56x40 cm.
The depth and height of the portal should have a ratio of 1: 2–2: 3
It is important to observe the dimension, since a larger depth indicator will reduce heat transfer, and a smaller one will provoke smoke. In the described case, the depth will be about 24-30 cm
So, we figured out the dimensions. The dimensions of the chimney opening for the chimney are selected in accordance with the area of the opening of the fireplace insert and should be eight to fifteen times smaller than it. If the chimney is in the form of a rectangle, then in our case it will be 14x14 cm. If the chimney has a circular cross-section, then its diameter should be 1-12 cm. The height of the chimney will be 3.5-4 m.
In order to increase the heat transfer properties of the fireplace, the back wall of its firebox is made with an inclination forward, from a third of its height and further. A smoke collector is placed at the top of the firebox. A cornice is produced between these elements, called a pass. The cornice prevents sparks, soot and smoke from entering the room.
When laying a brick fireplace, all its dimensions must correspond to the brickwork module. The dimension of the brick is 6.5 × 12 × 25 cm, the dimension of the masonry joint is approximately 0.5 cm. The furnace section has such dimensions as the diagram of the corner fireplace in the figure below shows. (see Corner fireplace - dimensions)
Diagram of a corner fireplace. Furnace dimensions
The section of the fireplace at the level of the firebox in the plan determines other dimensions. After we calculate them, we carry out layer-by-layer ordering (masonry) drawings.
Tips before styling
Regardless of the shape of the corner fireplace, it is recommended to provide for its presence in the house project. The work is classified as dirty, since there will be a lot of dust and debris. It is also necessary to solve such problems as dismantling the existing floor surface, binding to rafters and beams.
Only after the reinforced foundation has solidified will it be possible to start laying - this is 3-4 weeks. Each row performs a specific role, therefore, its laying is treated judiciously and with maximum responsibility.
When erecting a corner fireplace in a house made of wood, it is necessary to cover the surfaces with non-combustible insulation. The gap between the back wall and the wall itself must be not less than 1.5-2 cmto prevent fire. Having increased the space to 4-5 mm, you can not resort to thermal insulation, but it is not recommended to neglect it.