How to make a brick sauna stove
Starting work on laying bricks for the furnace, you should familiarize yourself with the order. It depends on both the material and the size of the oven. In this case, it is imperative to measure the edges every time. Because with any, even a miniature gap, smoke will enter the room. Bricks always fit very tightly, which does not depend so much on effort. How much from a well-prepared solution.
Sauna stove ordering
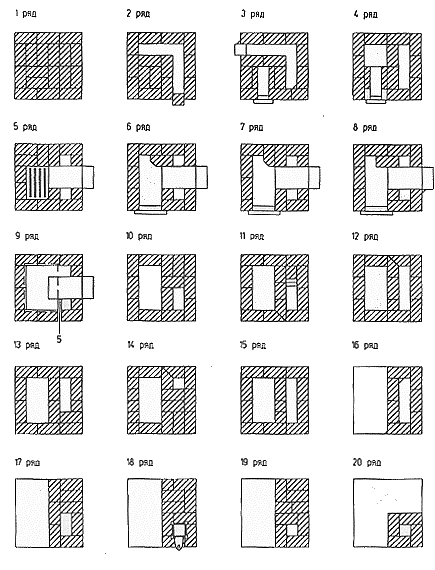
Photo 8 Scheme of ordering a bath stove
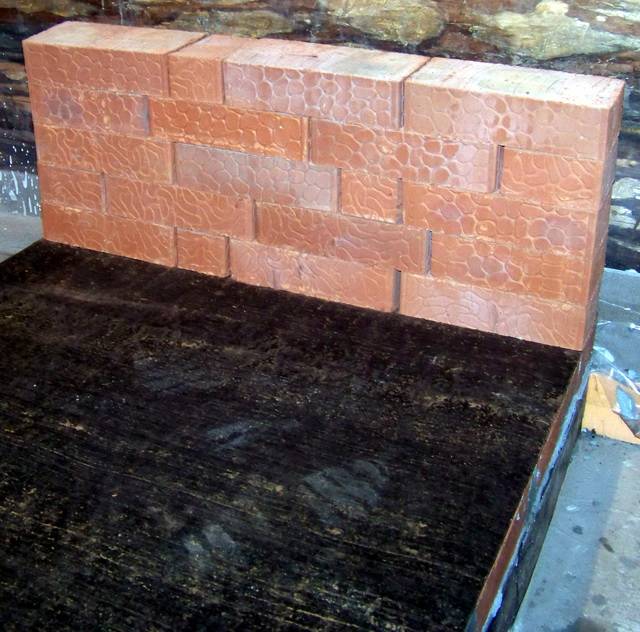
- The first row, as mentioned earlier, must be laid out on a previously prepared base. For this, the foundation under the furnace is tightened with bituminous waterproofing or roofing material. Wet all bricks from the first row with water.
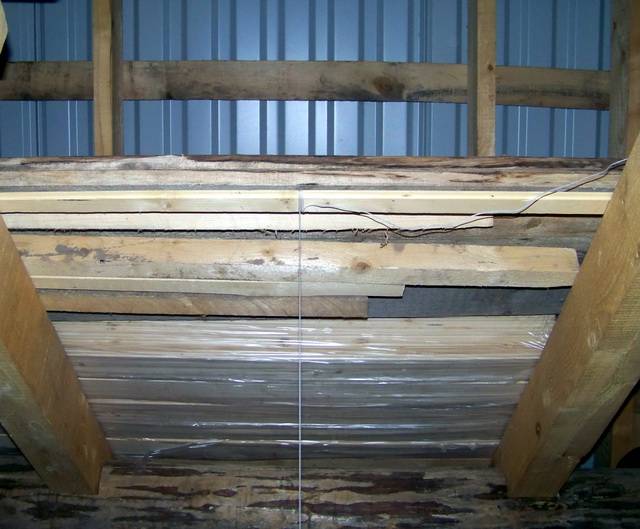
- Install a plumb line with a sinker, as shown in the photo
- Place the second and subsequent rows of bricks in a checkerboard pattern.
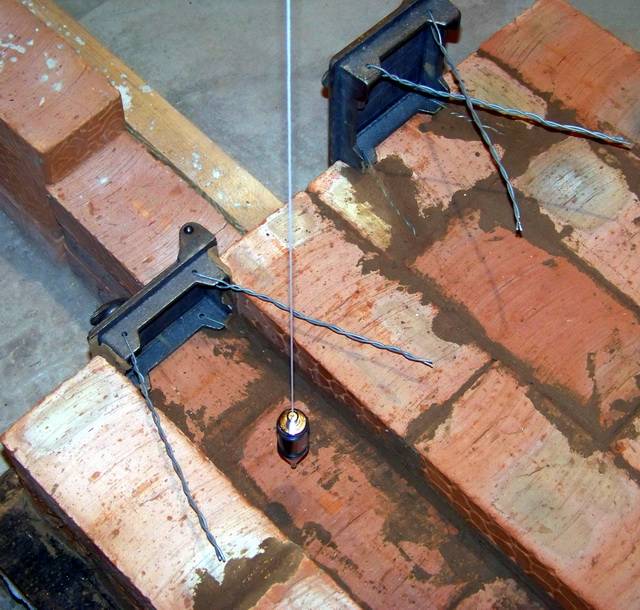
- On the 3rd row, as a rule, the blower door is mounted and reinforced with strong wire.
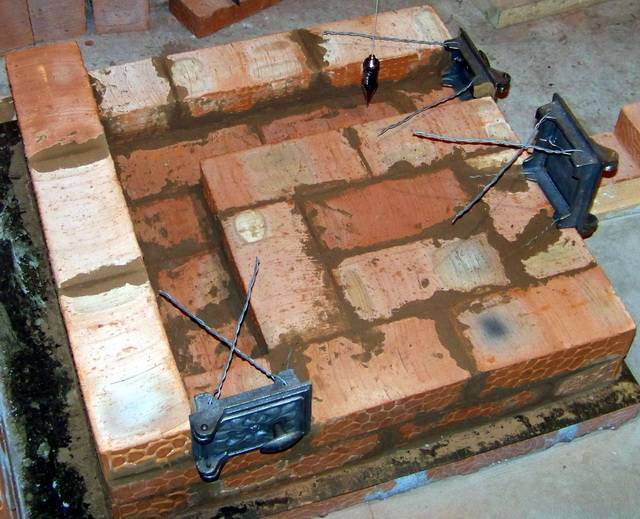
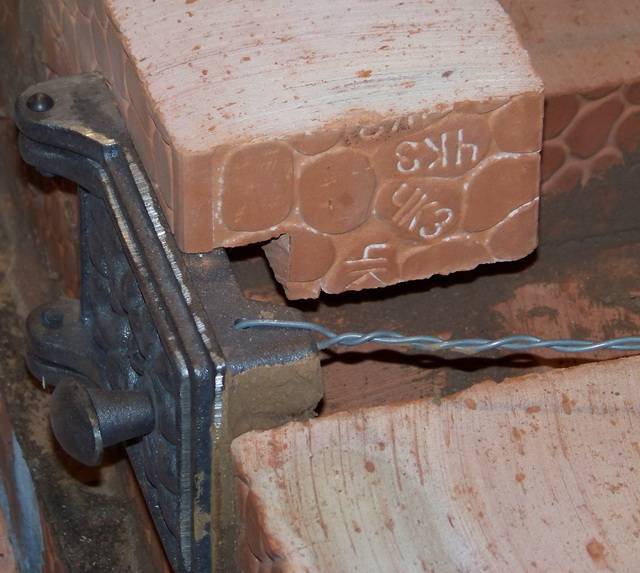
- To securely fix the door, the bricks around should be cut
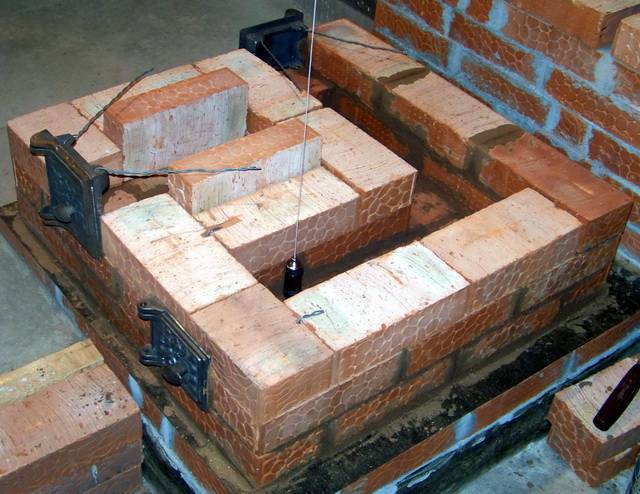
- On the 4th row, check the evenness of the walls and the future stove using a plumb line
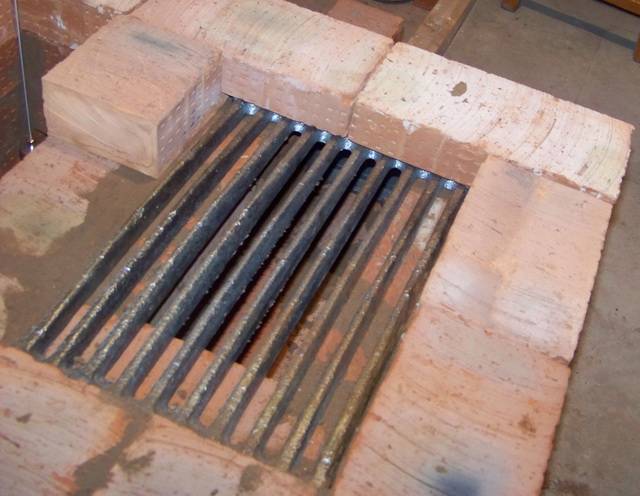
- From the same row, the laying of the ash pan and grate begins. Before installing the grate, make holes in the surrounding bricks, which will level the expansion when heated.
- In the 6th row, a blower door is mounted. In the 7th, a firebox door and a grate are installed. From the 8th row, the laying of the chimney begins, which continues until the fourteenth inclusive. On the 14th row, corners are mounted, and on the front side an opening is prepared for a container with water. It is imperative to cover the tank and all doors with asbestos.
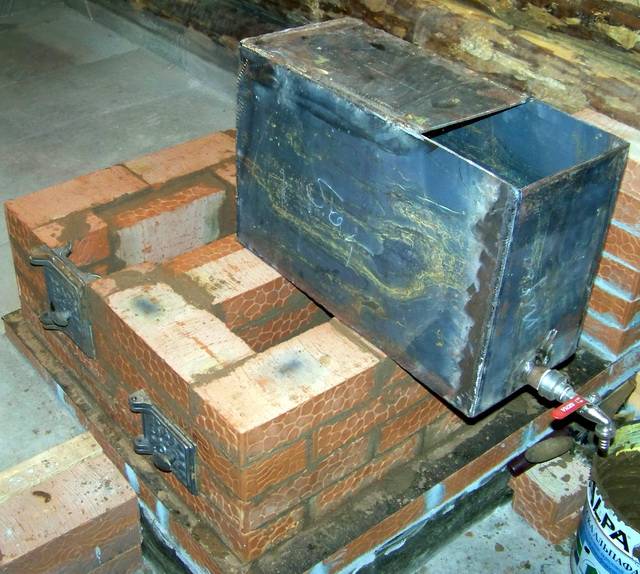
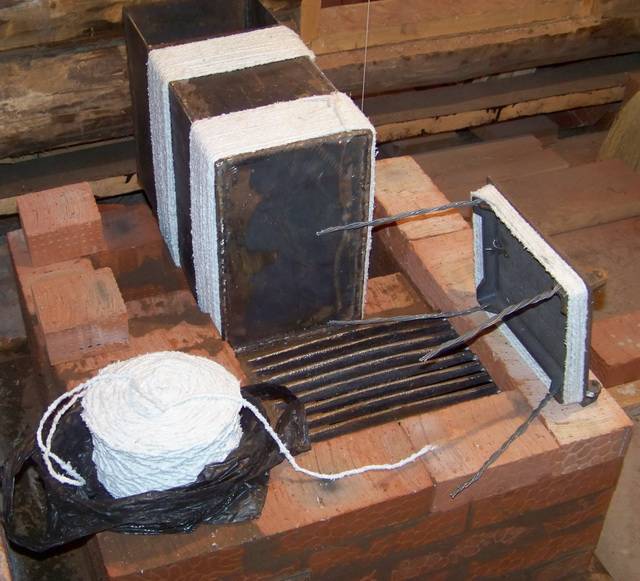
- From 15 to 18 rows of the wall are laid out in half a brick and at an angle. This is how the formation of the dividing wall begins, where each subsequent brick will close the joint in a checkerboard pattern.
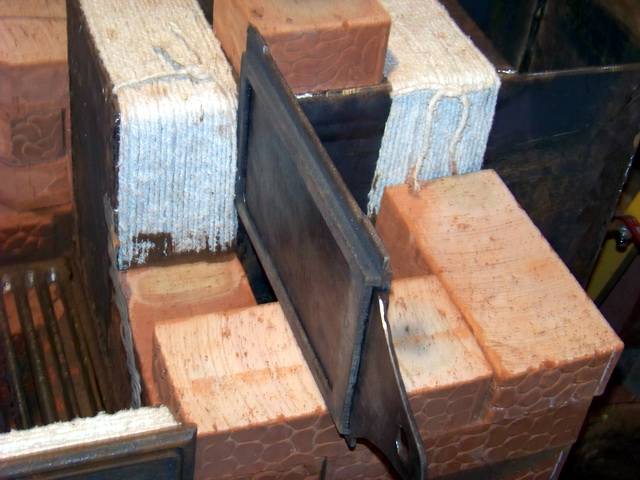
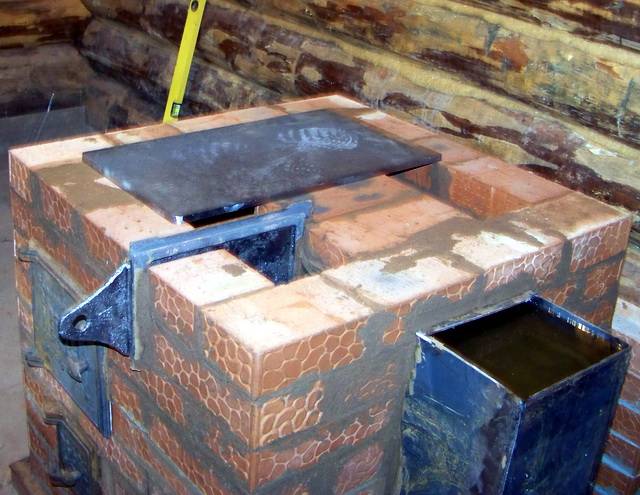
- In the nineteenth row, a steam outlet is mounted. Before laying 20-21 rows, steel strips are laid out on the bricks to strengthen the fastening (this is where a container with water will be installed). Further, the entire container is sewn up with bricks, it can even be incomplete parts or remnants.
General recommendations
For laying the stove, it is recommended to use the so-called. fireclay brick, which includes refractory clay
Such a brick can withstand even the highest temperatures and does not burst when water gets on it.
In addition, the decorative characteristics are beyond praise.
When planning to build brick ovens for a home, drawings with orders and safe operation are the most important things you should pay attention to.
The minimum allowable distance from the pipe to the wooden surface is 10 cm;
The gap between the roof and the chimney must be insulated with a sheet of metal;
The area in front of the stove is insulated with a similar sheet.
How to make a Buslaevsky stove
Buslaevskaya stove (Swedish) is a design ideal for small houses, summer cottages and country cottages. It differs from the classic Russian stove in that there is a built-in kitchen hearth and an extractor hood.
Drawings with the order and description of each stage will help to make such a stove for the house.
Required materials and tools:
- solid masonry bricks (red) 382 pieces;
- refractory bricks - 43 pieces;
- doors for the firebox and blower;
- cast iron stove with removable burners 70 x 40 cm;
- oven - 20 x 30 x 50;
- gate valves;
- grate ;;
- 2 meter corners 4.5 x 4.5 cm;
- 4 meter strips 4 mm;
- 4 strips 25 cm, 2 mm thick;
- 1 strip 35 cm, 3 mm thick;
- metal heat-resistant sheet 30 x 28 cm;
- cast iron plate;
- trowel (trowel) - for laying mortar;
- jointing;
- hammer pickaxe;
- mortar shovel;
- bracket;
- the rule
- rammer;
- mop.
Scheme of the Buslaevsky furnace
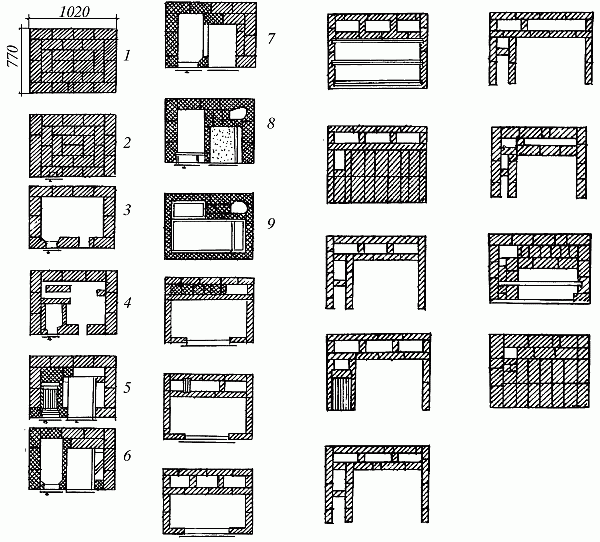
Photo 6 Scheme of the Buslaevsky furnace
In the video, detailed information about the order and bookmark of each row
Video 2 Detailed instructions for laying the stove
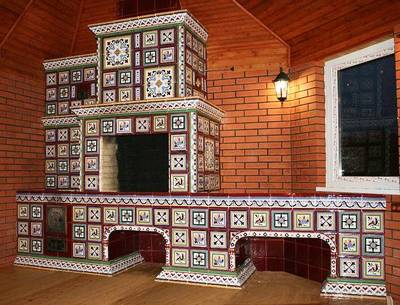
Photo 7 Stove with tiles
Do-it-yourself oven masonry - Swedish order
Traditionally, a Swedish stove with her own hands is assembled from ceramic red bricks, and the material that was in use is categorically not suitable here. But fireclay brick is suitable for the firebox.
In addition, even before starting work, you will have to prepare such basic elements of the furnace as:
- blew,
- oven,
- furnace structure,
- grates and valves,
- doors for cleaning,
- as well as a steel strip.
Moreover, the amount of materials required for work for each specific case will be determined by the dimensions and option of ordering the furnace.
stove masonry Swedish In any case, the foundation should be slightly larger than the dimensions of the future furnace. For it, concrete is used, which is poured in layers between broken brick and crushed stone. After pouring the last layer, a waterproofing layer is necessarily laid. Only after that you can start laying bricks of the order, see the drawings and diagrams.
Building materials for mini oven
You must first prepare the clay. To do this, it is poured with water and left so for about a day. You can speed up the process, for this, thoroughly knead it every five to seven minutes, preferably with a drill mixer, for an hour. Strain through a sieve. The sand must also be sieved beforehand.
To fold a mini heating stove, which will occupy an area of 0.4 sq. meter, you will need:
- 20 liters of solution;
- 60 pieces of red oven bricks;
- 38-40 pieces of fireclay bricks;
- firebox door;
- blower door;
- grate;
- hob;
- chimney valve.
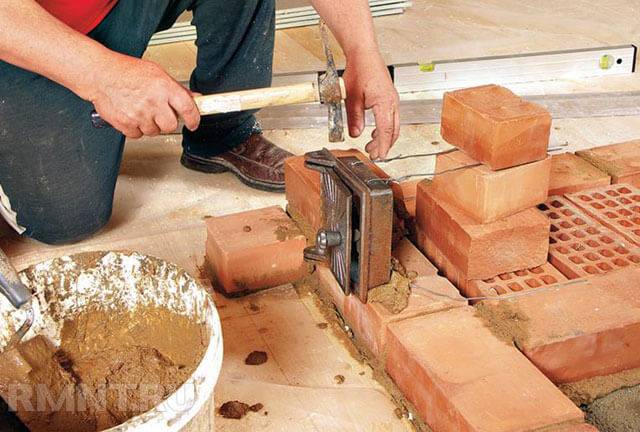
Doors, grate and hob must be cast iron.
If you do without fireclay bricks, then it will be a model of a mini wood-fired stove, not coal. Even the highest quality red bricks will deteriorate over time from the high temperatures created by coal fuel. In general, to make a mini Russian stove with your own hands, you just need to follow the recommendations.
DIY oven
Previously, it was in every home, but now the stove can be considered a zest and national exoticism. But this is a very convenient and functional thing that can combine heating, hobs, oven and warm stove bench, while having a wonderful design.
If you decorate the stove with tiled tiles or tiles, then the stove will turn into the center of the interior idea of the house. You can make such a stove with your own hands.
Ordering - a detailed diagram of the brickwork of a brick stove
The orders of brick ovens can be obtained for free, and this is almost half the battle. After all, ordering is the exact instruction for the placement of each brick. The only thing that will come in handy is a little experience as a bricklayer. But who of those living in a private house has never encountered bricklaying at least once? Walls, sheds, barbecues, fences ... now the oven.
In order for the house to be heated properly, it is necessary to make a calculation for a specific room, based on the heat transfer rates of the planned stove. The stove must be of such power that it can easily withstand the night until the next firebox.
It is very difficult to make such calculations on your own, but you can use the data of I.V. Kuznetsov. who calculated the average heat output per unit surface of the furnace. So, an average stove of 1.5x1.5x2.5 m should be enough to heat an area of up to 100 sq. m.
It is easy to push off from this and calculate the dimensions of the stove for your home.
Choosing a furnace design - Russian, Kuznetsovka, Dutch or Swedish
When we have decided on the approximate dimensions of the stove, you need to choose the required stove option that you will be laying. A large number of detailed schemes of Russian stoves - from small to large - can be found on the site. Kuznetsov's bell-type furnaces and the so-called Dutch or Swedes are very popular.
Kuznetsovki are famous for their special design, which allows warm and cold gases to move so that the efficiency of the furnace sometimes reaches 90–95%. In addition, the almost complete absence of soot and, accordingly, minimal maintenance of the stove. On the author's website, you can find up to 150 schemes of different masonry options.
Also in our area are popular "Swedes", but sometimes she is called "Dutch", although this is not entirely true. Since the Swede is an independent heating and cooking stove. while the Dutch women were used only as a heating supplement.
The choice of the "Swede" is also good because it is a truly stove station wagon:
- Food is prepared on it.
- Heating.
- Built-in oven option.
Consider how to make such a stove with your own hands.
Calculation of basic parameters
Before choosing a working project for a heater, it is necessary to make a preliminary calculation according to the parameters of a particular room. The most accurate method is sizing based on the heat dissipation of the furnace. In order not to go into complicated calculations, a simplified calculation scheme proposed by I.V.Kuznetsov is used for well-insulated houses. This method uses the average heat output taken from one square meter of the unit surface (TMEP). For a conventional firebox, take a value of 0.5 kW / sq. m, and if necessary, intensive heating, which occurs with a strong cold snap - up to 0.76 kW / sq. m.
In principle, these values are already enough to select a suitable project from those that can be found in the public domain. If the available options are not suitable for any reason, then you will need to calculate the parameters of the main elements of the furnace and design your own design.
Firebox
The dimensions of the furnace are determined based on the maximum volume of the fuel fill. In this case, the amount of combustible materials is calculated using their calorific value and specific gravity, focusing on the required power. The volume of the firebox should be 2–3 times larger than the obtained value, which will allow the stove to be reheated at extremely low temperatures.
When calculating the size of the combustion chamber, it must be borne in mind that the maximum filling should not exceed 2/3 of the volume of the combustion chamber. In addition, the dimensions of the furnace and all its components must be adjusted to the size of the bricks used for laying the furnace. In your calculations, you can use special tables developed taking into account the need to heat rooms of various sizes.
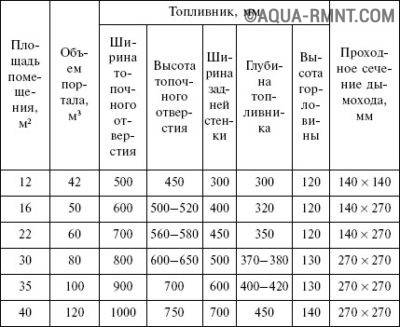
Calculation table for the main elements of a brick oven
Ash pan
The height of the ash pan depends on the type of fuel used. For low ash combustible materials such as coal or peat briquettes, this value is taken equal to 1/3 of the height of the firebox. If the stove is fired with wood or pellets, then the height of the ash chamber must be reduced to 1/5.
Chimney

When calculating the chimney, it should be borne in mind that the place of its installation must comply with SNiP
Unlike gas heating equipment, wood stoves do not require a lot of draft, so a rectangle would be the best shape of the smoke channel. When calculating the chimney, it is taken into account that the section of the blower should not exceed the area of its gas duct, while all values are adjusted to the dimensions of a standard brick. Since accurate design requires a lot of data and parameters, it is best to use one of the special programs.Nevertheless, for the most common cases (no kinks in the smoke channel, vertical passage, rectangular section, height from 4 to 12 m) you can use the average values for ovens power up to 14 kW:
- Less than 3.5 kW - 140x140 mm.
- 5 - 5.2 kW - 140x200 mm.
- From 5.2 to 7.2 kW - 140x270 mm.
- From 7.2 to 10.5 kW - 200x200 kW.
- 5 - 14 kW - 200x270 mm.
To calculate the amount of material required, it is best to use special tables. Below is one of them.

Calculating the number of bricks
Furnace constructive elements
Any brick oven, no matter what configuration it is and what masonry scheme it uses, includes several common structural elements that will be present in all models.
Foundation
The base of the entire furnace device on which it rests. Depending on the type and size, a brick oven can reach a weight of two to three tons. Such a heavy load must not be spread over the floors. Neither columnar, nor pile, nor strip foundations assume such a load. The only option when you can do without the construction of a special base is a slab monolith. In other cases, the foundation for the furnace must be built separately from the existing one. It is not recommended to tie them together, since the difference in the load can lead to deformation in the future.
 The stove will be the heaviest item in the house, so the foundation must match
Array
The mass is called the "body" of the furnace, which, in turn, is subdivided into several parts. Above the foundation, after the waterproofing layer, a base is erected - it separates it from the firebox and consists of several solid layers of bricks. They protect the bottom of the oven from overheating while heating the floors. A firebox is being built over the base - the part where the process of burning wood or coal will take place.
The firebox consists of a combustion chamber and a blower, each of these parts is equipped with a door of the corresponding size. Firewood is loaded through the furnace door, and soot, ash and ash are raked out through the blower door, and traction is also created. The combustion chamber and the blower (also called the ash pan) are separated by a grate. It is not her that the loaded fuel lies. The air passing through the blower fan blows the flame from below, and heat and combustion products are emitted into the chimney. The grate is made of thick cast iron so that it can withstand long-term exposure to high temperatures.
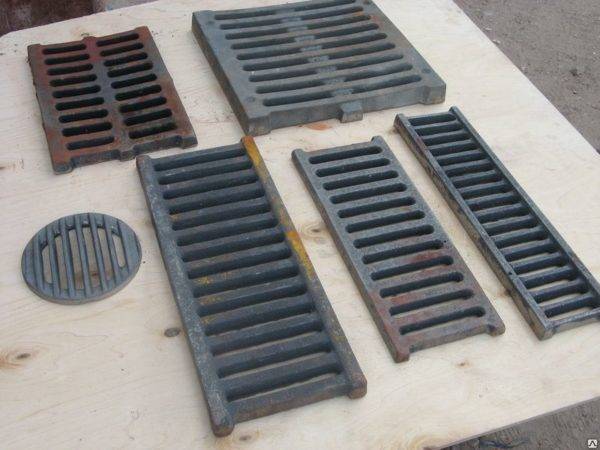 A good grate is cast iron
Further configuration depends on the type of oven. It can be equipped with a hob, oven, hotplates, as well as warm niches or a stove bench (beds). Many of these functions can be combined in one device. The removal of hot gases and heat from the furnace to the chimney is carried out through channels, their schemes are varied.
Video - Detailed bricklaying of a brick oven
If the stove is put only for cooking, then the channels are laid out so that after heating the hob and oven, the heat freely goes into the chimney. The heating stove has no devices for cooking, but it is equipped with several smoke circuits. Hot air passing through them heats up the oven itself more, which gives off heat to the room. The most widespread are combined ovens, where cooking devices are connected to curved channels or a rough oven. Such a stove is located in the middle of the house so that a part of the stove array goes into each room.
Chimneys
After the air and carbon monoxide bends around all the twists of the channels, they are discharged into the chimney - a pipe that goes outside. In brick ovens, the pipe is also made of brick, and its output is most often carried out through the roof. Nowadays, prefabricated chimneys of a circular cross section with locks have become widespread.
They are made according to the sandwich principle: a layer of dense heat-resistant insulation is laid between the inner and outer pipes of different diameters. Such a pipe is very easy to install and clean: the locks are disassembled, the clogged area is cleaned, then the entire system is reassembled. True, an adapter is required to connect a brick oven with such a chimney.
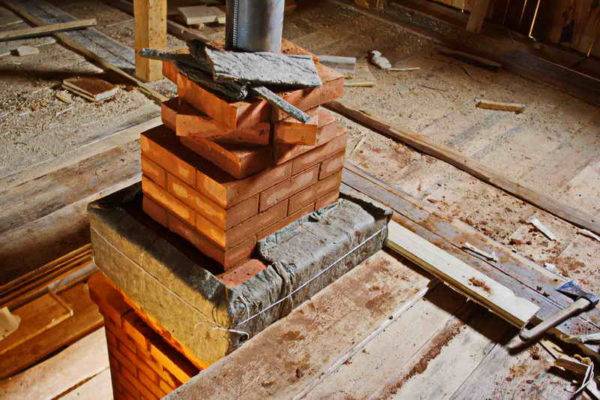 When passing through the ceilings, the chimney is lined with mineral wool
