Design features and types of ovens
The classic Russian bath is close to many and is highly popular among owners of private houses and summer cottages. This is not only entertainment and relaxation, but also great health benefits. For this, so many people appreciate her, trying to provide themselves with such an attribute in their own home.
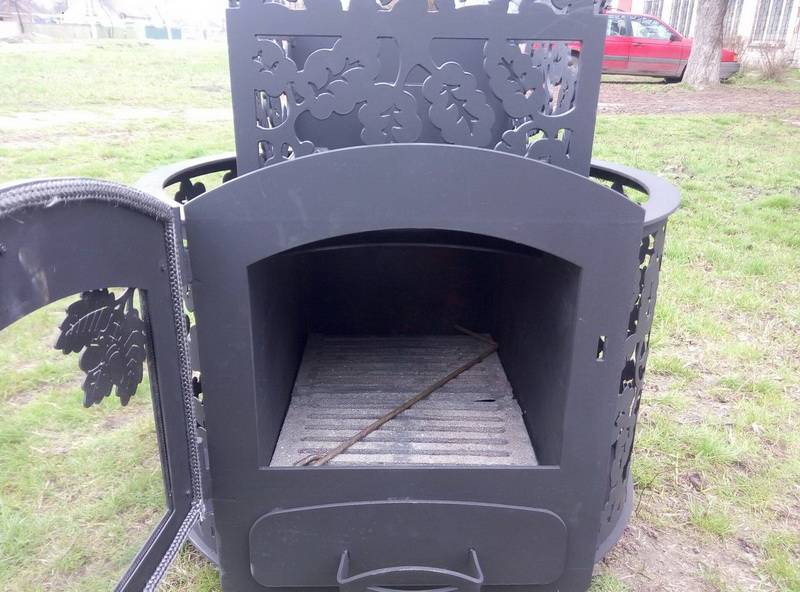
Typically, such a structure has a weight of about 800 kg. This makes it necessary to prepare for its installation. The foundation should be at least half a meter deep and 5 cm larger than the dimensions of the stove on each side. If the iron stove for the bath of the simplified version is not so heavy, then the foundation is usually not needed. It can be installed on a concrete floor.
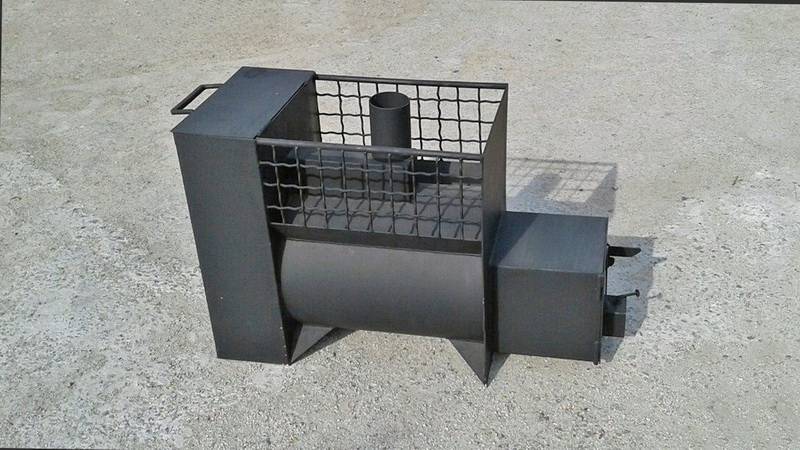
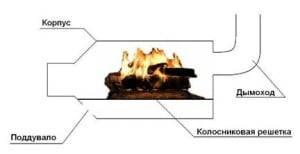
If the stove is wood, a grate is required. You can make it yourself or order a ready-made version in the store. The grate is installed in height as the level of the door of the firebox itself. From the side of the fuel compartment 30 cm from the door.
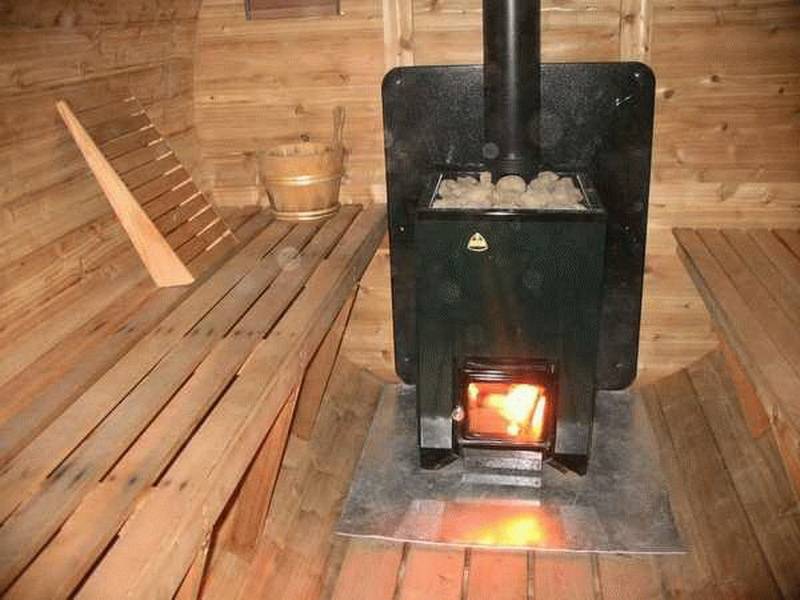
The outer wall is half the thickness of the brick. Inside the fuel chamber, a trick is often used: they make bevels for the coal that has burned so that it ends up on the grate.
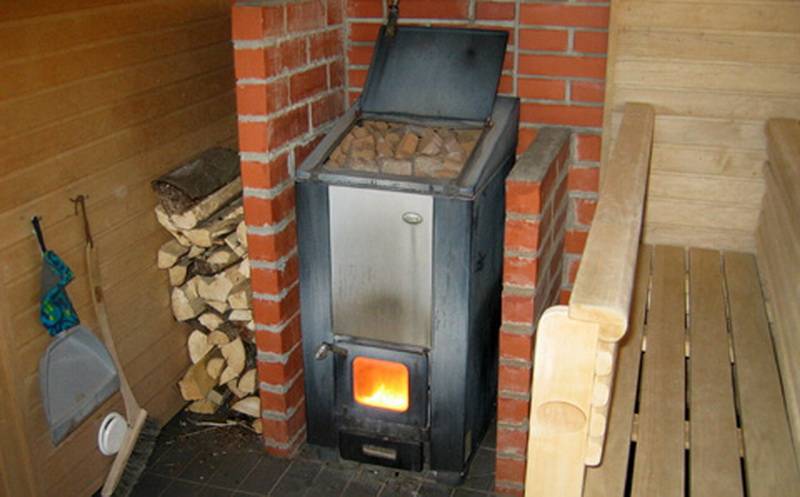
Any oven will still consist of the following main parts:
- Ash pan. This is the space under the firebox for collecting ash, which will need to be cleaned from there periodically.
- This door is needed for the flow of air into the structure so that the fuel burns better.
- Chimney valve. It is needed to provide the necessary traction in the stove. When it is fully open, the fuel burns more and burns, accordingly, faster. When the wood burns out and coal remains, the valve is closed. which helps to keep warm. But this should be done after they cool down, when they stop burning. Otherwise, in order to avoid harm to health, a gap of about two cm is left for air to pass through.
- Boiler (coil). Here the water is heated, due to the steam of which the bath “works”.
Each oven has its own differences in characteristics. Furnace types:
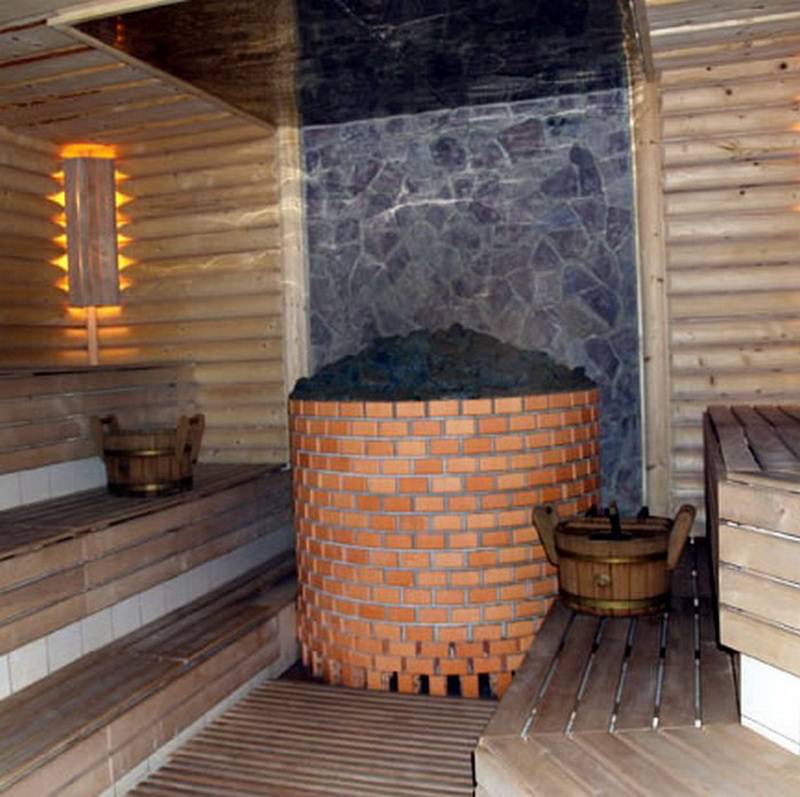
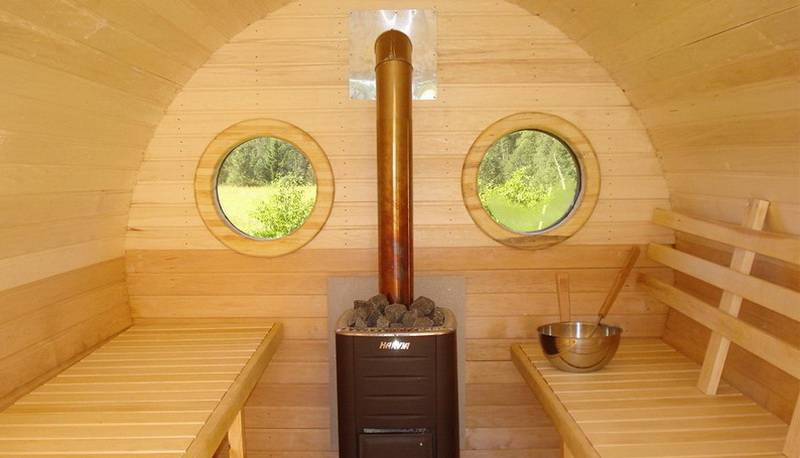
Wood-fired sauna stove. This is the most popular oven option. It consists of a firebox, chimney, ash pan and grate. Such furnaces are made of metal or stone. They so often become the choice among fans of the bath, because they have advantages: even the small dimensions of the device can provide enough heat to warm up a large room. Such furnaces are used even when there is no gas supply at the facility. This type of oven is the easiest to design. It also has a calming effect - the sound of crackling wood.
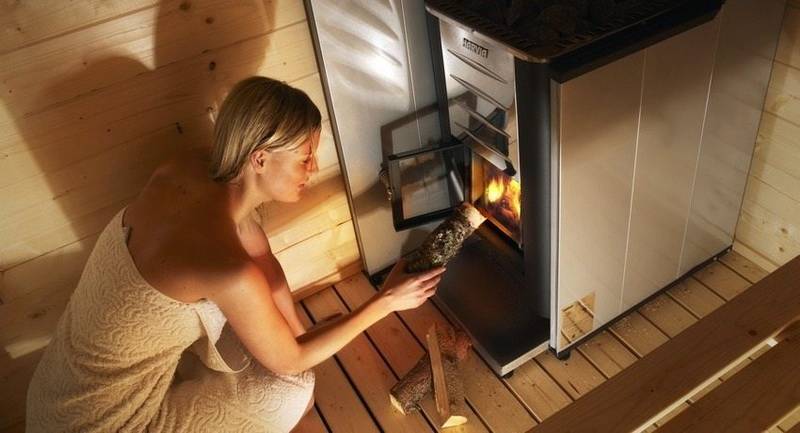
Cast iron stove. They, in turn, are divided into temporary and permanent burning furnaces. In the first case, firewood is used for the firebox. You can use the sauna when all the firewood has burned out. For a continuous combustion furnace, liquid fuel or gas is used as fuel. In the second option, the steam room is suitable for use even when the stove is only fired. This type of stove will warm up the room faster and distribute the steam more evenly over the entire area of the room.

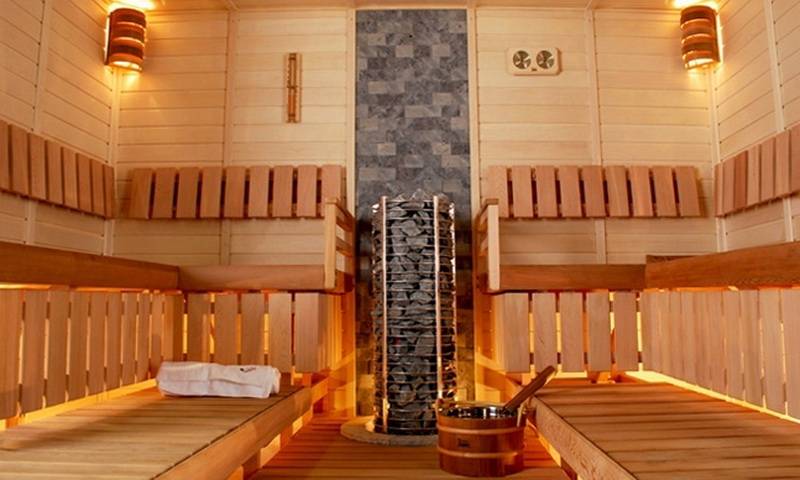
Electric oven. It comes in different sizes, has different characteristics in terms of efficiency and power. Like the previous one, it heats up quickly and lasts for a long time. The plus is that an electric oven doesn't need a chimney. They are also not expensive.

Finnish sauna stove. They produce dry steam combined with high temperatures. Such stoves are available both in the electric version and using firewood as fuel. You can make such a stove with your own hands. You only need special drawings and instructions.
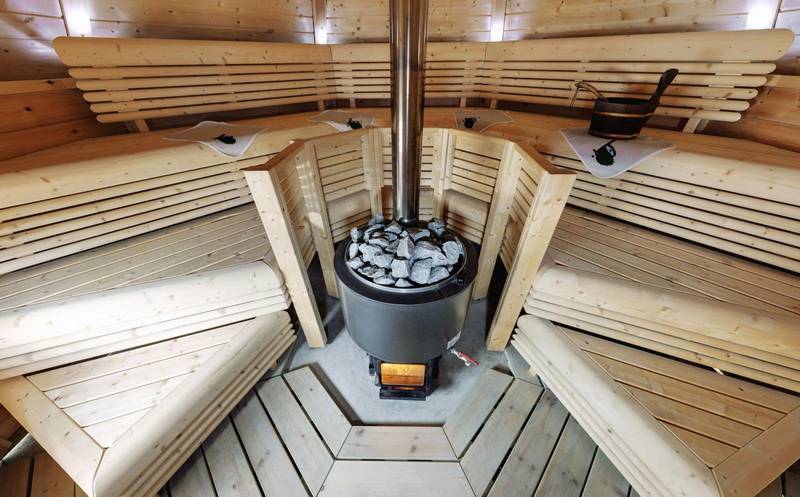
In order to use the oven to the maximum, it is advisable to know some of the features. For example, a wood-fired sauna stove can also be heated with other solid fuels. Coal and briquettes are allowed. If you approach the problem of how to make a stove for a bath correctly, then it will serve for a long time and please with the reliability of work.
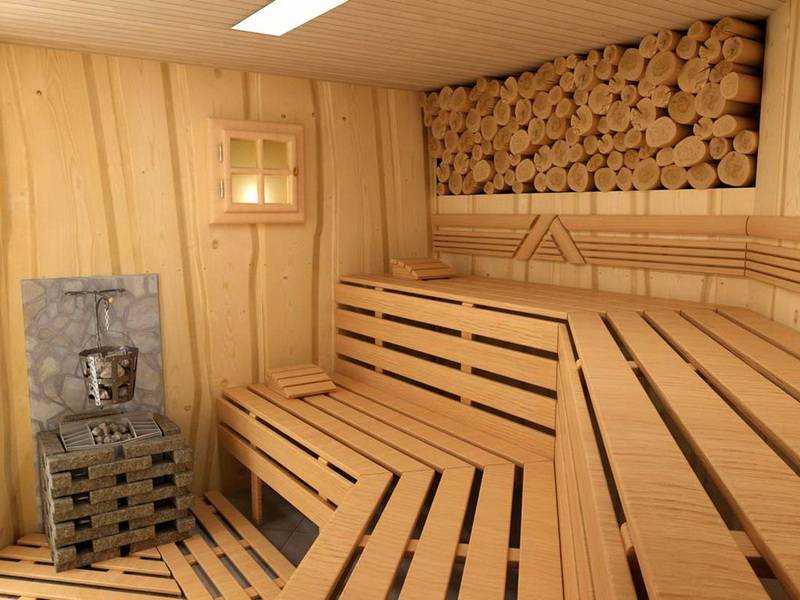
Cast iron stoves are connected to the central gas supply for operation. The use of gas cylinders for this purpose is not recommended due to the increased explosion hazard.
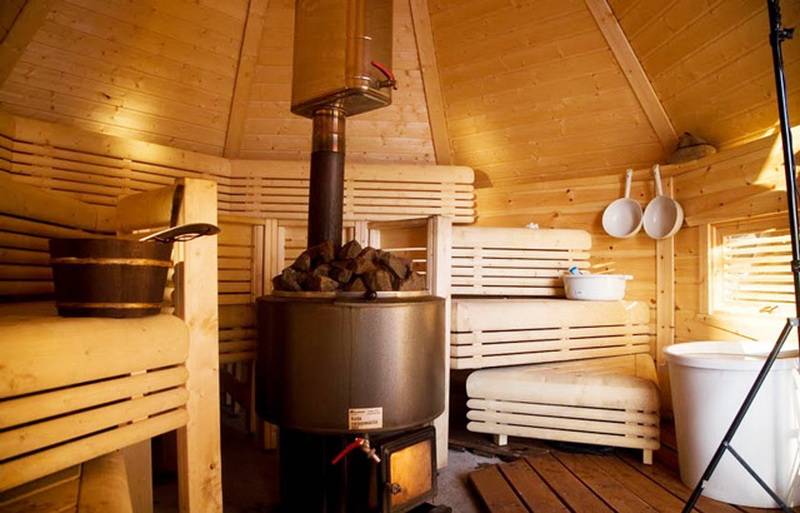
Stoves that use liquid for combustion give off a specific odor.
Stopping in the choice of an electric furnace, it is better to check the wiring first. Such ovens are not very economical for large rooms, which is also worth considering.
The cost of the furnace assembly itself will depend on many parameters, primarily on its size.
Varieties of ovens
The unit must warm up the entire steam room with high quality, but at the same time not interfere and not pose a danger to visitors
It is worth paying attention to the design of the oven that you plan to install in the steam room. If you classify products by the location of the fuel door, then the following options can be distinguished:
-
the firebox door opens directly from the steam room. This is the most common option. Firewood is loaded from the steam room. It is very convenient to regulate the draft by opening the door slightly. If the door is equipped with tempered glass, then the opportunity to admire the flames while soaring is added. However, it is worth remembering that when loading firewood, dirt remains on the floor, and oxygen in a small room is burned out too quickly;
-
the firebox door opens into the dressing room or the rest room. Fuel is being loaded from the same room. This option is considered the best and safer, because oxygen in the steam room is not burned out by the flame, it is easier to maintain cleanliness, space in the steam room is saved, and it is not necessary to install a separate heating system in the rest room. If, during the construction of the walls, a technological hole was not provided in advance for an elongated (remote) fuel channel, then you will have to partially break the partition;
-
the firebox door faces the street. Perhaps an acceptable option only for the smallest or seasonal baths. Loading and reloading fuel, traction control will have to be carried out, constantly running out into the street, which will cause discomfort.
The furnaces themselves, by their design, can be vertical, horizontal, in the form of a barrel and other shapes. A stone net and a hot water tank may be present. Chimneys from metal stoves are led out through the ceiling or wall.
Metal wood stoves for baths
Long burning boiler principle
Before reviewing the unit, you need to understand how it works. The bubafonya stove runs on solid fuel - wood. Before starting to heat it, you need to prepare the wood. In the boiler, it is heated up to 250 degrees Celsius with the help of paper ignition.
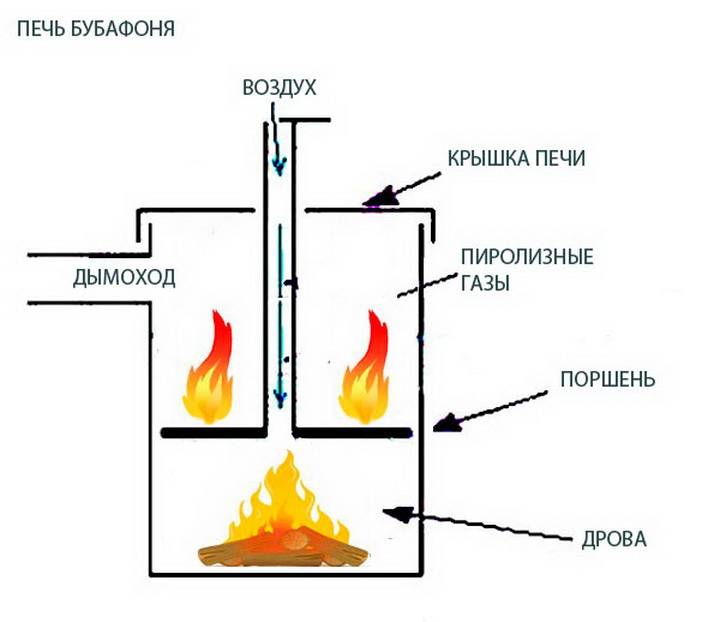
When charred, wood decomposes into simple chemicals: gases and vapors. When the temperature reaches 300o Celsius, the gaseous components ignite, accelerating the thermal reaction.

To protect against fire, as well as to prevent it from diverging throughout the entire container, a protective screen is provided on the hearth. A damper is used to regulate the temperature. When switched off, the air supply stops, as well as the combustion process.
One, two and done
Currently, there are drawings of round and rectangular stoves. The figure shows a diagram according to which a potbelly stove can be made with your own hands from an ordinary milk can, a similar structure can be made from a metal barrel.
Potbelly stove from a can
In order to make such a stove stove for a summer residence or garage with your own hands, you will need a minimum of tools and materials:
- Old milk can (if you chose the option of making from a barrel, then a barrel made of metal);
- Metal rod with a diameter of 6 mm;
- Branch. With the skill, you can make it yourself;
- Hammer;
- Chisel;
- File.
You can start working with your own hands. We did not specifically indicate the dimensions so that the master proceeded from the diameter of the barrel or can used.
First you need to make a blower.To do this, a rectangular hole is cut below the neck of the can (barrel). The edges of the hole are filed.
After that, in the bottom of the can (barrel), it is necessary to cut a hole of such a diameter, so that later you can tightly insert the branch (see the article Chimney for a potbelly stove). This is done as follows:
- At the site of the future chimney, at the bottom of the can or barrel, markings are made. The diameter must be 2 mm less than the diameter of the bend
- Using a chisel and a hammer, a hole is cut along the markings
- The hole is leveled with a file. A round file is best for this.
- It is necessary to drive the bend tightly into the hole. If the branch is not included, the hole is finalized with a file. In any case, the tap must fit tightly
- A snake is bent from a metal rod, it will play the role of a grate
- The finished grill is folded so that it can be inserted into the neck
- The inserted grate is aligned already inside the can (barrel). The grate is made of reinforcement and welded to the body. As you can see from the picture, there are two doors for the blower and the firebox. Such ovens are able not only to warm up the room well and quickly, but they can successfully cook food.
The potbelly stove is ready. If you wish, you can make a stand for it with your own hands. If you install a blower flap, you get a stove with adjustable draft. It is quite simple to arrange such a damper.
As you can see, a potbelly stove with your own hands can be made without special tools and materials. Just place the stove, made from a barrel or can, in the right place and connect the chimney. Your potbelly stove from a barrel will regularly warm the room until you install stationary heating.
The main stages of manufacturing a potbelly stove
1. All the details are marked on a sheet of metal: 6 steel rectangles for the walls of the furnace, 1 rectangle for creating a smoke reflector, a plate for a grate and a latch for a door. 2. Cut out a sheet of metal is possible at any metal warehouse. The guillotine, in contrast to the grinder, allows you to cut (chop) it more accurately. In this case, straightening (aligning the sheets) will not have to be done. 3. The furnace body is made in the form of a rectangle. Their sides are joined together at an angle of 90 ° and welded together.
4. To avoid mistakes, the oven box is first only tacked by welding in several places, and only then, after checking its horizontal and vertical, its seams are welded.
Important! All connections in the housing are carefully welded; to check the seams for leaks, you can coat the joints with chalk or kerosene. 5
Weld seams are cleaned with a wire brush. 6. The inner space of the stove is divided into three parts: a firebox, a smoke chamber and an ash pan. To separate the firebox from the ash pan, a grate is laid between them, on which the fuel will be placed. For this, corners of 5x5 cm are welded at a height of 10-15 cm from the bottom of the furnace on the sides and on the back of the box, on which the grate will be located
5. Welding seams are cleaned with a wire brush. 6. The inner space of the stove is divided into three parts: a firebox, a smoke chamber and an ash pan. To separate the firebox from the ash pan, a grate is laid between them, on which the fuel will be placed. To do this, at a height of 10-15 cm from the bottom of the furnace, from the sides and on the back of the box are welded corners 5x5 cm... on which the lattice will be located.
Advice. It is better to make a grate from 2-3 detachable parts. Otherwise, when replacing a burnt grate, it will be difficult to get it out of the firebox.
7. The grid is welded from thick steel bars or strips 30 mm wide. They are attached to 2 stiffeners - rods with a diameter of 20 mm. Since the grates burn out over time, it is better to make such a grate removable.

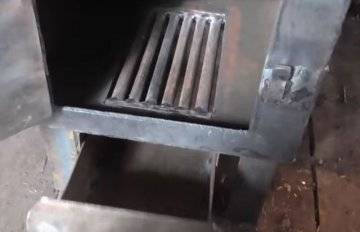 Manufacturing of a grate
8. At a distance of 15 cm from the top of the box, two strong rods are welded, on which it will be stirred one or two removable reflectors - thick-walled metal sheets, which will trap the flow of hot gases and send them for afterburning. However, they should not completely cover the oven. In order for hot smoke to enter the chimney, an indent of about 8 cm is made from the front (for the first sheet) and the back of the stove.
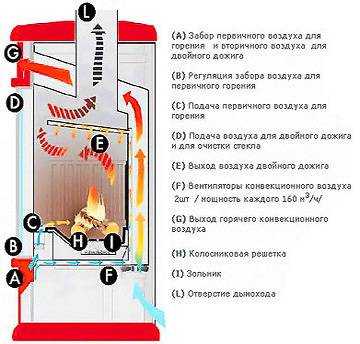
 Diagram of the passage of gases in the simplest potbelly stove and oven with a reflector installed
9. Next, the upper part of the box is welded, and then cut out in it pipe hole .
 Pipe hole
10. The front part of the stove with holes cut in it for the doors of the firebox and ash pan, is welded last. 11. The size of the door of the firebox must be large enough to be able to load fuel and change the grate without effort. The hole for the ash pan is made slightly smaller. 12. The hinges are welded first to the door and then to the stove body. They can be bought ready-made or welded from two tubes of different diameters. Door handles can be made from a strip of metal or a bar.
Important! When attaching the doors, fit them to the body as tightly as possible; for this, they are straightened (leveling) and cleaned with an emery wheel. Wedge latches that close the doors fit as tightly as possible to the body
13. This oven can be used to cook food or warm water. For this, a hole of the required diameter is cut in the upper part of the box. Oven burner... which will fit into this hole can be purchased at any hardware store. 14. For ease of use, the design installed on legs or welded pipe support. 15. The chimney joins the stove using a sleeve. 16. For inserting a damper... regulating the smoke outlet, two holes are drilled in the pipe. The metal rod is inserted into the holes and bent 90 °. To it in the center of the pipe is grabbed a "penny" made of metal - a gate, the diameter of which should be slightly less than the diameter of the pipe itself by 3-4 mm.
 Smoke outlet damper
The design of the stove-stove: features, principle of operation, arrangement of heat exchangers
A potbelly stove with a water circuit works as follows:
- Firewood is loaded into the firebox.
- Fire is kindled, heat is transferred directly to the water tank or the recuperator coil.
- Hot water is supplied to the heating or water supply system.
- Residual heat and combustible gases are removed from the room through the chimney.
- Ashes fall through the grate into the ash pan.
In the design of the unit with a water circuit, two principles of energy collection are used:
-
Direct collection of heat energy. The heat exchanger circuit is located inside the stove. Heat transfer begins immediately from the contact of the open flame and the boiler tubes. The water in the radiator boils and flows into the heating system. From there, it is sent to the water supply pipes. The heat exchanger experiences large temperature differences (contrast between the temperature of the water and the heat inside the oven).
-
Collection of secondary radiation from the heater. The boiler circuit is located outside the heater. Being outside, it collects the secondary thermal radiation from the heated metal surface. The degree of heating of the heat exchanger is lower than in the previous case, the temperature differences are not so significant. The water in the circuit of the device begins to heat up after the stove warms up.
Photo gallery: common types of heat exchangers
Mineral salts are formed inside the boiler. Therefore, instead of water, it is more advisable to use antifreeze or antifreeze, which contain additives that prevent the formation of mineral deposits.
The most common heat exchanger designs:
- a water tank built into the stove - a capacitive boiler;
- a pipe boiler - a tank in the form of a water jacket around a stove or chimney - a capacitive heat exchanger;
- main boilers are a coil spiral or a water conduit passing in the active zone of heat transfer.
Calculation of the main parameters of a potbelly stove with a water circuit
To calculate the dimensions of a stove with a water circuit, a drawing, drawing or sketch of the future device is required. This will help avoid manufacturing errors.
Having chosen a suitable project, we determine the parameters: length, height, width. We consider the dimensions of the combustion compartment, the length and diameter of the pipe, and the height above the floor.
The potbelly stove is characterized by high temperatures inside the boiler, therefore, metal with a thickness of more than 3 mm should be used. Or every 2-3 years to carry out scheduled repairs.
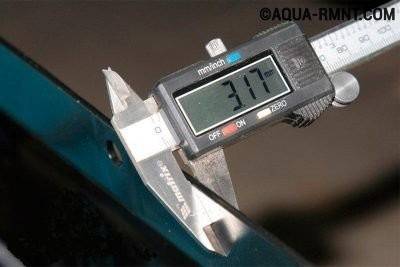
Thick-walled alloy metal is used in the manufacture of potbelly stoves.
Installation and connection
When installing the furnace, you must strictly follow the fire safety rules:
- The distance to walls and surrounding objects must be at least 800 mm. Walls can also be covered with ceramic tiles.
- All parts of the chimney must be tightly connected.
- The room must be equipped with a supply and exhaust ventilation system.
The chimney is installed as follows:
- We fix the first pipe section above the chimney opening.
- We build up the pipe elbows to the level of overlap.
- In the overlap we make holes with a diameter of 170 mm. Remove the layer of thermal insulation around the hole in order to exclude fire.
- First, we mount the through glass, then insert the pipe into it.
- Next, we connect the pipes to the external chimney.
- We apply bitumen to the pipe and insulate it.
If you need to heat a large area, you can connect the stove to the heating shield. This will increase the heat flow and allow it to be stored longer.
What can the Bubafonya boiler be made of?
Half of the entire structure is a boiler, which can be made of any material of suitable shape and characteristics. These can be the following items.
- Bubafon stove from gas cylinders with your own hands. Welding cylinders are the best base for a boiler. It is enough to fit it in size and you can already use it. Since the gas is under pressure, thick metal walls restrain it, which in the stove will prevent burning out.
- Old fire extinguisher. Large volume industrial fire extinguishers are convenient for boiler construction. Despite the fact that their diameter is smaller, they are able to withstand thermal stress.
- Metal barrel. The manufacturing instructions are similar to the previous options. For preparation, you need to cut the top and use it as an air outlet.
- Pipe. A wide sewer pipe with wide walls is suitable for a boiler. But this requires you to independently cut two circles from sheet steel and weld them as a bottom and a lid.
- Homemade sheet steel body. The boiler can be independently made from steel sheet by rolling it into a cylinder and welding it.
One of the simplest barrel designs
One of the easiest ways to assemble is from a tin barrel. It has thin walls, which contributes to a decrease in efficiency and low heat transfer. The advantage of this method is a large download volume and it can work for more than twelve hours on one tab. Barrels are standardized in size. In the event of a burnout of the walls, it will be easy to replace it with a new one.
Assembly instruction:
It is necessary to remove the weld seam that secures the cover. This is best done with an angle grinder to prevent burrs. To keep the seam perfectly straight, you can use a diamond-coated disc.
The edges of the barrel are knocked out with a mallet or hammer. On the lid, on the contrary, they are flared. As a result, the lid should fit snugly on the barrel.
A hole is drilled in the center for installing a chimney.
The distributor will require a cover from a similar barrel. If it is absent, you can make a part from sheet steel.
Air vents are welded to the lower part. They can be made from sections of a U-shaped profile or channel. This is necessary to improve the performance of the stove. If you need low efficiency for a small room, you can skip this.
On top of the hot air pipe, a damper is attached to the axis.In order to increase the usability, it is better to provide for a "lamb" mounting method.
A hole is made on the body for the chimney pipe
It is important that the seam is tight.
For added convenience, a solid sheet metal screen can be installed.
Cylinders and pipes
Do-it-yourself bubafon stoves from a gas cylinder are relevant. The principle of manufacturing from a cylinder and a pipe is similar. The main difference is that the pipe will need to be prepared. Two circles are cut out of a sheet of steel in diameter and welded on the bottom.
Several steel discs need to be cut to fit the diameter of the cylinder. In each of them, you need to cut a small segment to get more than a semicircle.
Inside they are installed by welding
It is important to weld them so that they mirror each other. The result is a multi-stage air lifting system.
On the ground floor level you need to make several holes in the wall with a diameter of 5 millimeters.
The end of the channel is connected to the outlet of the branch pipe.
In the middle of the wall, a door is made for a rectangular firebox.
A grate is mounted below the door.
Description of the stove for a metal bath and its main characteristics
You can, of course, buy a metal stove for the bath. However, the best option would be to make it yourself. A simple option is a potbelly stove, which is a metal structure equipped with a door and a pipe. Low heat transfer and significant financial costs for the purchase of fuel do not allow efficient use of the heating installation, so it can be seen on rare occasions.
Another thing is modern iron stoves. Their attractiveness, high efficiency and the highest fire safety rating are impressive. They are made of sheet iron, more than 0.4 centimeters thick. The constructive components are:
- it is customary to use a thermal chamber for filling and storing stones;
- there is a reservoir designed to store water with a volume of 30-70 liters.
An iron bath stove requires lining with refractory bricks. This makes it possible to evenly warm the air in the room and makes the structure completely safe for use.
Installing the stove in the bath
Since the correct steam room is always built of wood, the main requirement when installing a wood-burning heater is fire safety. To withstand it, follow these simple rules:
- the stove cannot be placed directly on a wooden floor, but only on an iron sheet protruding 70 cm in front of the firebox;
- wall cladding made of combustible materials must also be protected from fire with sheets of roofing iron or minerite;
- when installing a heater with the removal of the firebox, the opening in the wooden partition is also sheathed with non-combustible materials, as is done in the photo;
- the distance from the insulated chimney to the wooden building structures is 38 cm.

It is recommended to make a channel for the removal of combustion products to the street from a double-walled sandwich filled with basalt wool. Often, the same square-shaped water tank is used to isolate the chimney, which is built directly into the ceiling. How the stove is installed correctly in the bath is shown in the diagram:

Fuels and stove types
The stove in the bath is divided into 2 main groups, these are: metal (cast iron) and brick options. Brick sauna stoves are heat-intensive, they heat up longer, but also cool down for a long time. The iron stove is an economy type heating item, due to the multitasking, simplicity and convenience of the equipment. When choosing a stove or fireplace, it is necessary to look not only at the design of the heat source, but also at the type of fuel. Different fuels, when burned with the same mass, will emit different amounts of heat. There are many variations of the energy carrier.
According to the aggregate presence and type of fuel, all fuel groups are divided into solid, liquid and gaseous fuels. Solid is a common class of fuel, it includes: coal, peat, briquettes, firewood, pallets. They are used only in ordinary ovens as they burn out rapidly. Liquid type of fuel is kerosene, fuel oil, diesel, boiler room, coke-chemical liquid.
They have a significant heating value. The first type of gaseous fuel is natural gas obtained from gas deposits, or associated gas from the extraction of naphtha. It has a good calorific value.
The choice of the design of the sauna stove
Ideally, a heat source made of metal should meet the following requirements:
- Warm up quickly and raise the temperature in the steam room. Iron stoves do this perfectly.
- Keep warm as long as possible. Since the steel heats up and cools quickly, you need a heater to store heat, or an increase in the duration of the combustion of the furnace. The third option is to line the sauna stove with bricks after installation.
- To occupy a minimum of usable area in the steam room. If the volume of this room is too small, then it is better to choose a vertical structure with a loading door placed in the dressing room.
- The heater must be safe for people washing in the bath. To protect yourself from burns, a convection casing made of thin sheet iron can be installed on the body or, again, a brick wall can be built around the body.

Do-it-yourself iron stoves for a bath come in the following designs:
- with a body oriented vertically or horizontally in space;
- fired directly from the steam room or from the next room (an external firebox door is made);
- with and without a water tank;
- with an external or internal heater.
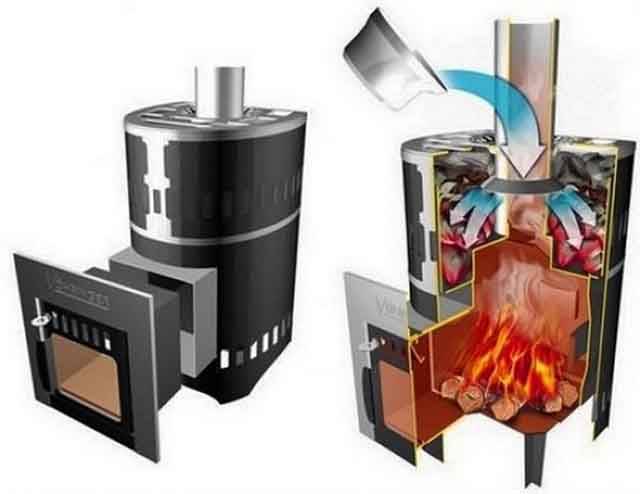
Vertical type stove
The vertical body of the stove, shown in the photo, gives 1 advantage - saving space in the bath. There are more disadvantages: short burning time (due to the fact that the flame covers the entire firewood) and not too high heat transfer. In terms of these important parameters, a horizontal sauna heater outperforms a vertical one, but at the same time occupies a large area.
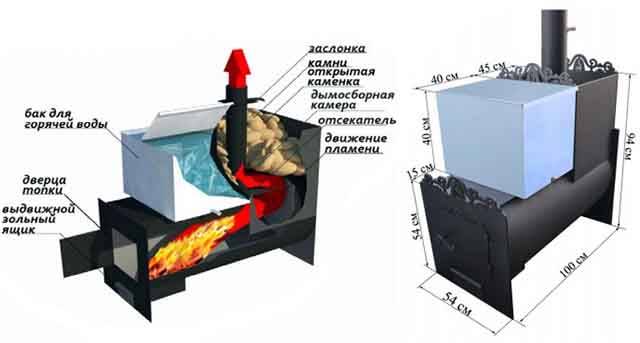
Horizontal stove with stove and tank
If there is no electric water heater in the bath, it costs nothing to put a tank for heating water intended for washing on the stove or chimney. It can be welded from ordinary metal, or better from stainless steel. There is also a more convenient way to heat water: the tank located in the washing room is connected by pipes to a steel samovar-type heat exchanger installed on the chimney.
Steel heat exchanger for chimney
The open stove, inherited from the Finnish sauna, heats up to a maximum of 400 ° C, but it can be poured with water in order to "add to the park." Stoves closed inside the stove body accumulate more heat, warming up to 700-800 ° C, but at the same time they become polluted by passing flue gases and therefore require periodic cleaning.
