Long burning ovens
Despite the disdainful attitude towards this type of heating device, as a temporary solution, an effective do-it-yourself potbelly stove can use such innovative solutions as afterburning of exhaust gases or pyrolysis combustion. As you know, these techniques allow the most complete use of the heat released during fuel combustion. At the same time, the frequency of laying firewood is reduced several times. There are designs of long burning with a water circuit, used as heating boilers.
Moreover, well-known world manufacturers produce such boilers in mass production (the Stropuva oven is produced by more than 20 companies, or the Russian Tverdotop of the Medved concern). The well-known Russian "Bubafonya" by the inventor Afanasy Bubyakin, who lives in Kolyma, is built on the same principle. This is a unique oven. A potbelly stove, which was built by more than one hundred craftsmen with their own hands.
Stove stove made of metal sheets
If it is necessary to heat a country house, a workshop, at the same time to cook food, you can make an economical stove made of sheet metal, which does not require a lot of fuel, thanks to the partitions in the firebox, the tight fit of the doors and the ability to regulate the air flow. It will require:
- Sheet metal from 4 mm thick.
- Metal with a thickness of 10-12 mm (for partitions).
- Metal grill.
- Chimney pipe.
- Metal corners (for legs).
- Welding machine.
It is necessary to cut out parts for the body and two partitions from sheet metal, which will be installed in the upper part of the firebox. They will create a kind of labyrinth for the smoke, which will increase the efficiency of the stove. In the upper part, you can immediately make a hole for a chimney with a diameter of 100 mm and a cooking hole with a diameter of 140 mm.

Then the doors for the firebox and ash pan are cut out of metal. You can hang them on regular hinges. But more durable options are curtains made of metal tubes and rods. They are closed with wedge latches. They can be cut from stainless steel sheet and bolted. In order to be able to regulate the intensity of fuel combustion, a hole with a damper must be made on the door covering the ash pan.
Weld a sleeve with a height of 20 cm to the hole for the chimney, onto which the pipe will be put on. In addition, a damper in the pipe will help keep heat. For it, you need to cut a circle out of metal. Bend one edge of the steel bar, make two parallel holes in the pipe, insert the bar and weld a round shutter to it. It can be rotated to adjust the intensity of the smoke output.
The pipe must have a 45 degree bend. If it passes through a hole in the wall, in this place the pipe must be wrapped with fiberglass and cement mortar must be applied.
In order to prevent accidental burns from touching the hot oven, a metal protective screen can be made on three sides at a distance of 5 centimeters. If you want to increase the heat transfer coefficient, the stove can be lined with bricks. This material cools down for a long time and after the end of the furnace it will heat the room for some time. The laying is carried out at a distance of 10-15 cm from the metal case. An air cushion will provide additional heat protection. Ventilation holes are created at the top and bottom of the masonry.
Stove from a pipe or barrel
An old barrel or large-diameter pipe is a fairly common material that will serve as an excellent blank for a stove. Here's what to do:
- Cut out two openings in the wall of the workpiece: the upper one for loading fuel, the lower one for cleaning the ash chamber.
- A strip is welded along the perimeter of the cut fragments - these will be the doors. To each of them you need to weld a handle and a latch.
- From the inside to the walls of the case, about 100 mm below the upper opening, shelves should be welded from the corner, on which the grate will fit.
- Now we make the grate itself - we weld several steel rods.
- If a pipe was used as a workpiece, you need to weld the lid and bottom to it. On the cover closer to the back side, you need to cut a hole to connect to the chimney.
- Legs are welded to the bottom, then hinges for doors and hooks for latches are welded to the body.
- We hang the doors.
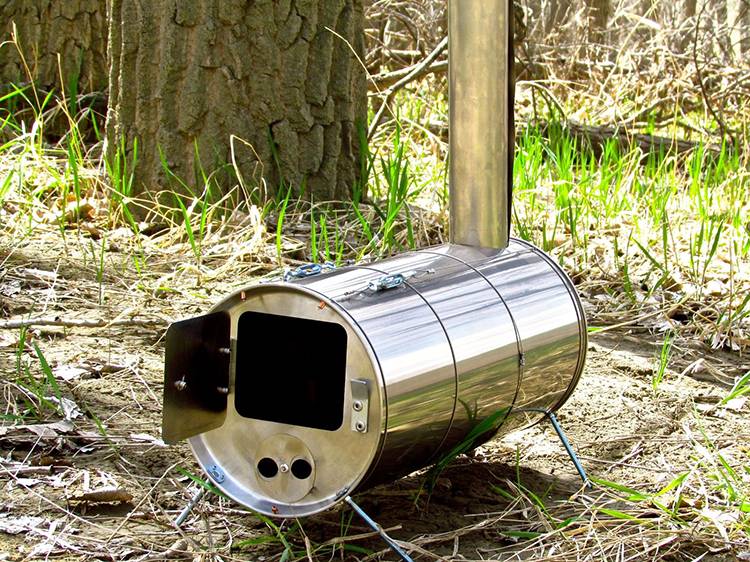
Assembling a stove-stove from a pipe
The potbelly stove is ready, it remains to install it in place and connect it to the chimney.
In this version of the oven, as in the first, the surface of the lid can be used as a hob (heating food or boiling water).
Tools, materials and skills that will be required for the job
Let's start with the materials: to create a stove, you need a set of used autodiscs of the same size, several pieces of thick sheet iron, 6 metal hinges, a piece of large diameter pipe (at least 12 cm) and a piece of pipe 3 cm in diameter, cast iron grate.
When performing work, you cannot do without a grinder and a welding machine. It was nice to have a sander or sandblasting under another, but, in principle, it is quite possible to cope without them. And of course - hand tools: a sledgehammer and a hammer.
As for skills, the most specific among them is the ability to work with a welding machine.
Advantages and disadvantages of using stoves
By analogy with any other heating devices, stove stoves also differ in certain pros and cons in their work.
Of the positive properties, the following can be noted:
- use of an unlimited range of solid fuels - firewood, sawdust, coal, wood chips, briquettes, pellets, peat, etc. In some cases, even recycled engine oil is used as fuel;
- the possibility of making a potbelly stove with your own hands (see drawings below) practically from scrap materials;
- compact size of the oven, which allows it to be placed even in a small room;
- there is no need to install a chimney, foundation and platform.
Negative characteristics include:
- the need to protect against the loss of combustion objects from the furnace - coals, sparks, etc .;
- strong and rapid heating of the walls of the furnace, which increases the risk of injury to others;
- high fuel consumption - it is rational to use such a stove only for short-term heating.
Waste oil oven
In this chapter, we will consider how to make a potbelly stove for working off with your own hands. The body of this furnace consists of two tanks and a pipe installed between them. The tanks should be made of sheet steel with a thickness of 4 mm, the pipe should have the same wall thickness, and only for the lid, a sheet with a thickness of 6 mm is needed.
The diameter of the connecting pipe should be 100 mm or slightly less, the length is equal to 4 diameters, that is, it is 350 - 400 mm.
The stove is assembled like this:
- The entire surface of the connecting pipe must be perforated: 6 rows of 8 holes with a diameter of 9 mm.
- In the upper part of the upper tank, with some offset to the left from the center, you need to cut a hole to which the chimney will be connected.
- In the lower wall of the same tank, now with an offset to the right, a hole should also be cut - a connecting pipe will be welded to it.
- On the other hand, a lower tank is welded to the pipe, but the hole in it is already made strictly in the center.
- A fuel filler neck equipped with a hinged lid is welded into the same tank.
- The structure is reinforced with connecting elements that hold the two tanks together, thus relieving the pipe.
- It remains to weld the legs to the bottom of the oven.
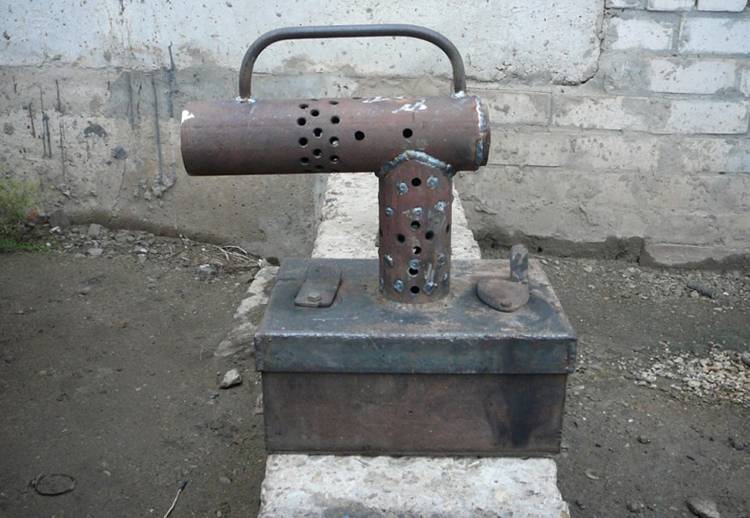
Stove on working off
Used oil is poured into the lower reservoir so that its level does not reach the lid by a few centimeters. The oven must be cold during refueling.
Next, you need to put a wick or rags twisted from paper into the neck and set fire, and when the oil ignites, close the lid.
In an hour, such a potbelly stove can burn from 0.7 to 2 liters of fuel.
Dignity of the stove-potbelly stove
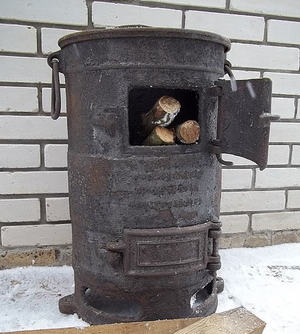
small room, etc., extremely simple
The stove-stove can be installed in any room where it is possible to bring a pipe outside. It takes up little space due to its compactness. Since the oven heats up quickly, it doesn't take long to get to the right temperature. The simplicity of the design makes it easy to create it from various materials at hand. You can equip a hole in the stove for installing dishes and at the same time cook food on it, heat water.
The main disadvantage of the potbelly stove is that it cools down as quickly as it heats up. Therefore, to maintain the temperature, it has to be heated constantly. But it is possible to create conditions for long-term heat release using a laid brick layer and creating a multi-stage furnace system.
The stove stove can be purchased ready-made in the store. However, you can cope with this work on your own, choosing the material, taking into account its availability, its presence in personal stocks.
Diy three-way potbelly stove
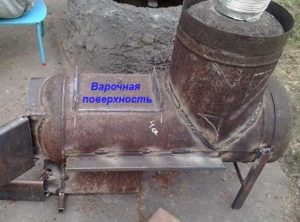
Three-way potbelly stove
A three-way potbelly stove (pictured above) is two gas vessels of 50 liters welded to each other at right angles. The principle of operation is as follows:
- The first is actually a horizontal potbelly stove from a gas cylinder on wood. It is equipped with all the details typical for a stove: a blower, a wood loading chamber, grates. Firewood is loaded here and fired up.
- The second vessel is a design unique in its simplicity and genius. It is divided by internal partitions in such a way that the smoke from fuel combustion, passing through it, changes its trajectory three times. The speed slows down and the furnace body gives off more heat. Eventually, through the branch pipe, the smoke is released to the outside.
- Additional ribs are used to increase the heating surface.
- As in a traditional stove, the air supply is regulated through a blower.
Expert opinion
Pavel Kruglov
Stove operator with 25 years of experience
Such a wood-fired stove from a gas cylinder is quite capable of producing about 10 kW of heat. This is enough to heat a 100 m2 room. This can be a warehouse, a shed, a greenhouse, or a garage. Such a simple design of the furnace is capable of delivering an efficiency of up to 55%.
On such a potbelly stove from two gas cylinders it is quite possible to cook food.
Before we start manufacturing, we will figure out what materials and tools we need and prepare the necessary drawings. It is very good if you have the skills of a welder. If not, then any specialist in ready-made drawings will bring your project to life. A video that is easy to find on the Internet can also help.
Materials and tools
We need the following tools:
- portable welding machine
- "Bulgarian"
- drill
- drill
- other tool.
The maintenance of the welding machine is not cost-effective, so it can be rented if necessary. The rest can always be found at the home master.
There are also few materials:
- electrodes
- cut-off wheels
- 2 gas cylinders of 50 liters
- sheet 2 mm thick
- corner for making "legs"
- reinforcement with a diameter of 20 mm
- others
Step-by-step instruction
Three-way potbelly stove scheme
- We make blanks from metal according to the drawing above.
- We cut out the necessary holes in the cylinder. One is for the stove, the second is for the smoke outlet.
- Cut off the bottom of the second cylinder. At the end we cut a hole for a pipe with a diameter of 100 mm. We cut the balloon so that it fits snugly on the first one, as shown in the drawing above.
- Make a grate.
- We make a blower. We weld the legs, hinges and door frames.
- We make doors. We seal all the junction points.
- Crop scraps should be used for partitions in a vertical cylinder.
- Weld one cylinder to another, weld the chimney.
- Weld on additional ribs to increase the heating area.
How to install a stove and chimney correctly?
In order for the balloon furnace to work correctly and to maximize the efficiency, it is important to correctly install. Otherwise, smoke may be generated in a cold room.
All fire and safety regulations must also be followed.
Installation requirements:
- Any combustible objects should be no closer than half a meter from the stove. Distances to non-combustible objects are not standardized.
- If you are heating a greenhouse, do not place the stove close to glass and plants.
- The wooden floor covering must be covered with a metal sheet. From the side of the firebox, a patch of size 50x70 cm is also covered.
- If the walls are made of wood, it is worth protecting them with non-combustible material.
- The potbelly stove is placed at a height of 200 mm.
- Direct the fan at the stove. Additional air flow due to convection will increase efficiency.
- Clean ash from the ash pan in a timely manner.
- Insulate the chimney. This will significantly reduce the heat loss of the stove from the gas cylinder in the garage.
From a gas cylinder
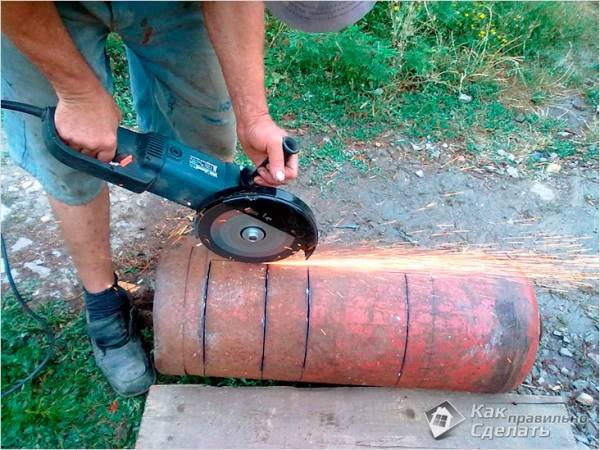 Potbelly stove from a gas cylinder
You need to start work with a drawing, but not on paper, but on the cylinder itself. The future firebox door and blower are marked with a marker. The door should be located in the center of the cylinder, and the blower should be located at its bottom. The distance between them is maintained no more than 10 cm, and a closed line is drawn in the middle. Along it, the grinder cuts the cylinder into two parts.
A grid is welded from 16 mm reinforcement, which is welded to the lower half, after which both parts of the cylinder are joined again.
In the places intended for the hinges, cuts are made. Then the hinges are welded there, and the door is cut out. The same operation is carried out with the blower.
It remains to equip the chimney. To do this, a valve is cut off with a grinder, and a metal pipe is welded in its place, the diameter of which should be 80-90 mm. The chimney cuts into the garage hood system or is led out through the wall.
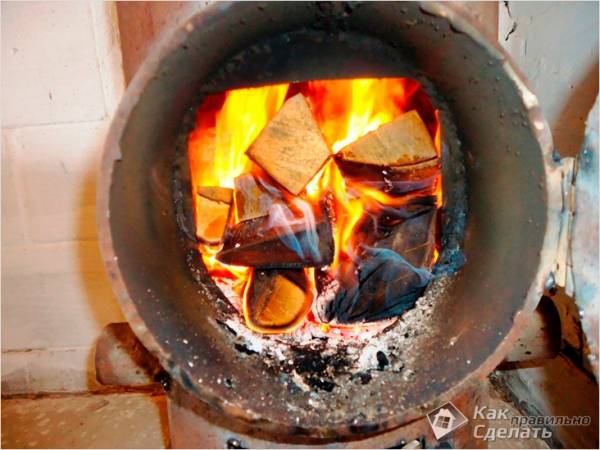 Ready potbelly stove from a cylinder
From a milk flask
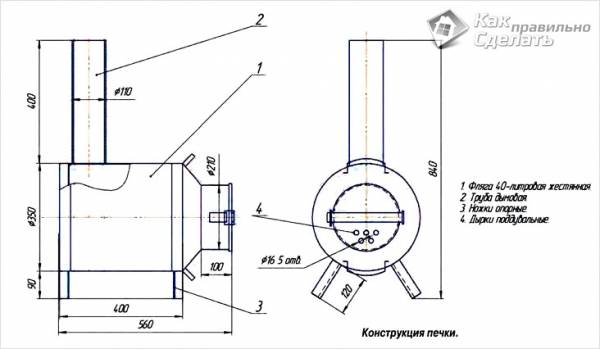 Flask potbelly stove scheme
A metal can is an excellent household item, suitable for storing paints, engine oils, and fuel. The design of the flask is ideal for making a stove-stove from it, but as a heating device it will not be as durable as we would like, its walls are not thick enough. We can say with confidence that it will last for 2-3 seasons.
As an independent production of a potbelly stove, you need to perform several operations.
First you need to mark, and then cut out in the lower part of the can, almost at the very bottom, a hole for the chimney. At the final stage of work, the pipe is tacked by welding. The diameter of the chimney is chosen from 8 to 12 cm. The chimney is lengthened after the stove is manufactured and installed.
The lid of the can is a ready-made oven door with a successful latch; it remains only to drill several blowing holes in it, the diameter of which can be 15-18 mm. This is done at the bottom of the lid.
4 legs of equal length are made from a corner or pipe cuttings, which are then symmetrically welded to the bottom of the can. A metal sheet can be placed in front of the door so that an accidentally dropped ember does not fall on flammable material.
The handles of the flask are a convenient piece for carrying the potbelly stove from place to place, by grasping them you can easily shake out the ash accumulated in the stove. It is for this operation that it is better to make the chimney detachable.
Well, that's all, it remains only to test the new stove.
Assembling the potbelly stove body from disks
Before proceeding with the assembly, you need to prepare the disks.
 All discs have a cut off cover right along the rim. Use a grinder for this purpose
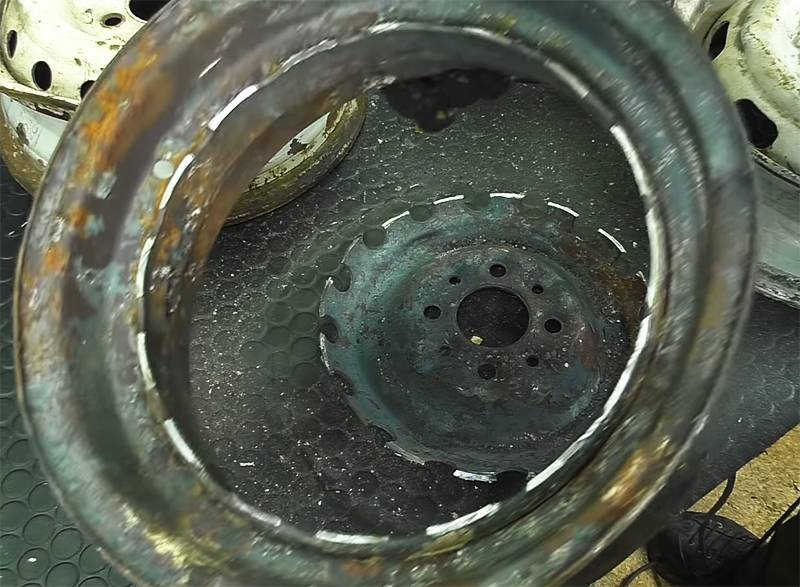 The result should be something like this: neat, without protrusions and irregularities
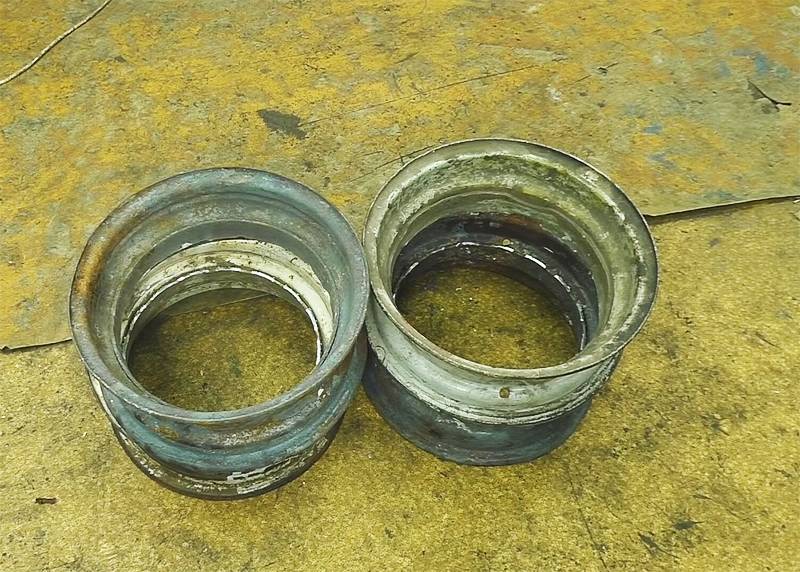 This procedure must be done with all 4 disks.
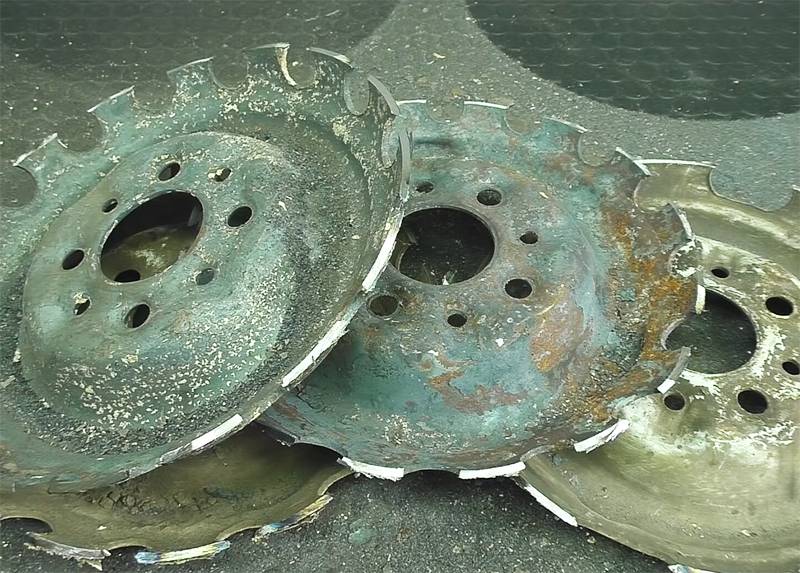 The covers will no longer be useful to you, but do not rush to throw them away, at least one of them will be a template for further work
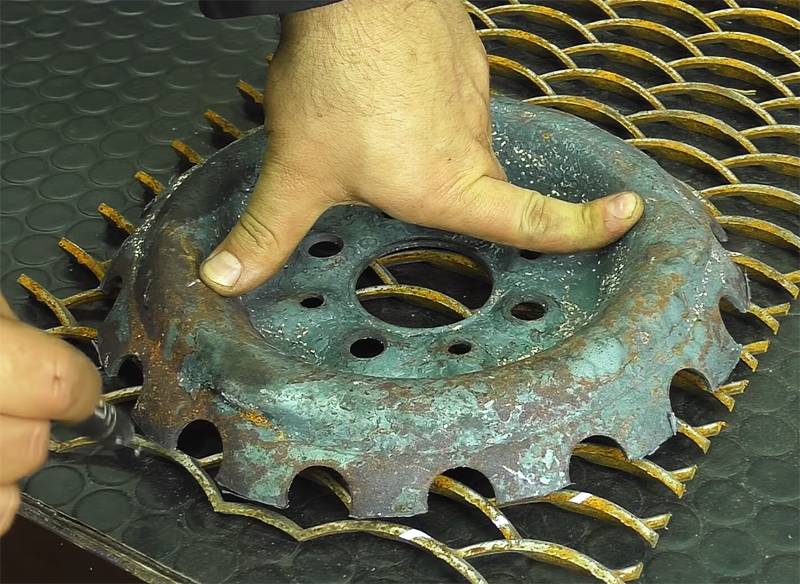 Place this lid on a wire rack and mark in a circle for a cut.You will need 2 such blanks
What if you haven't found a cast iron grate? It's okay, you can replace it with the same one, only welded from fittings. It will take more time, but the result will be no less successful.
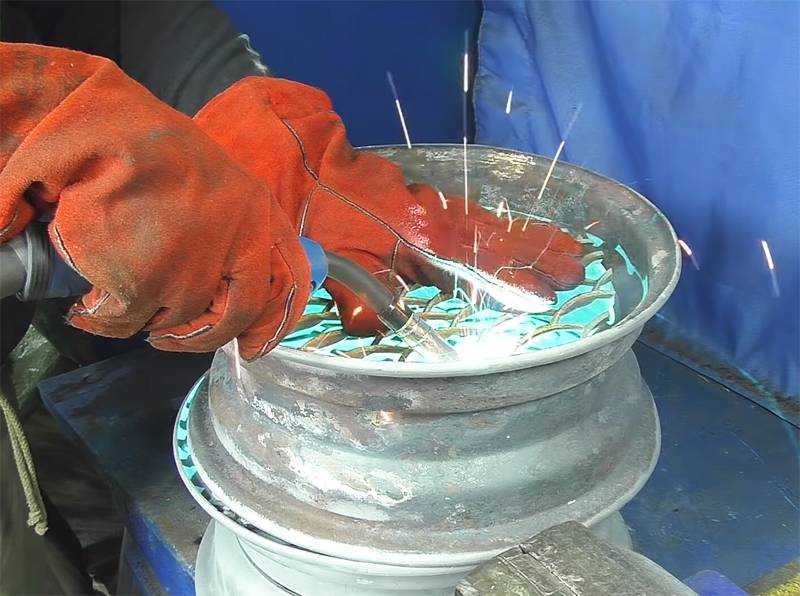 The grilles are welded to the inner rim of the disc. They need to be placed on the top of the first and third discs.
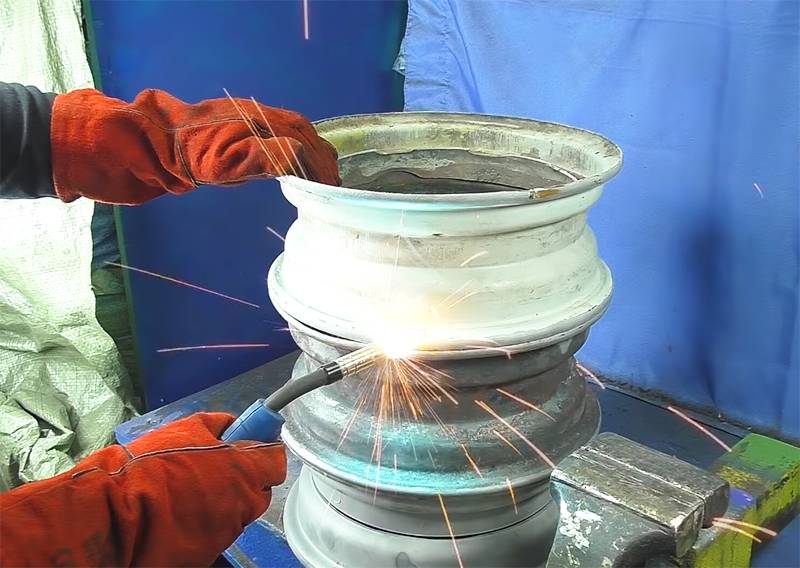 Further, the disks need to be connected to each other by welding in a circle, without leaving gaps and gaps
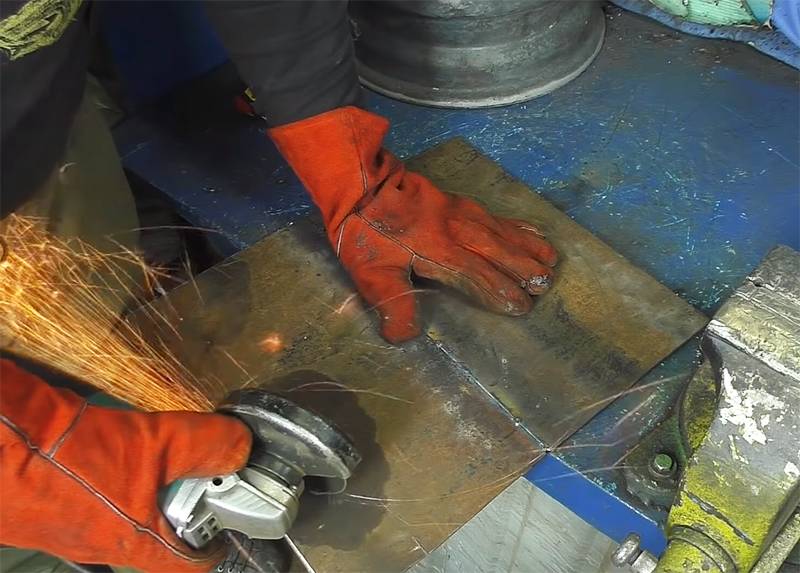 Use the cut lid again as a template and prepare two circles of metal for the bottom and top lid of the stove.
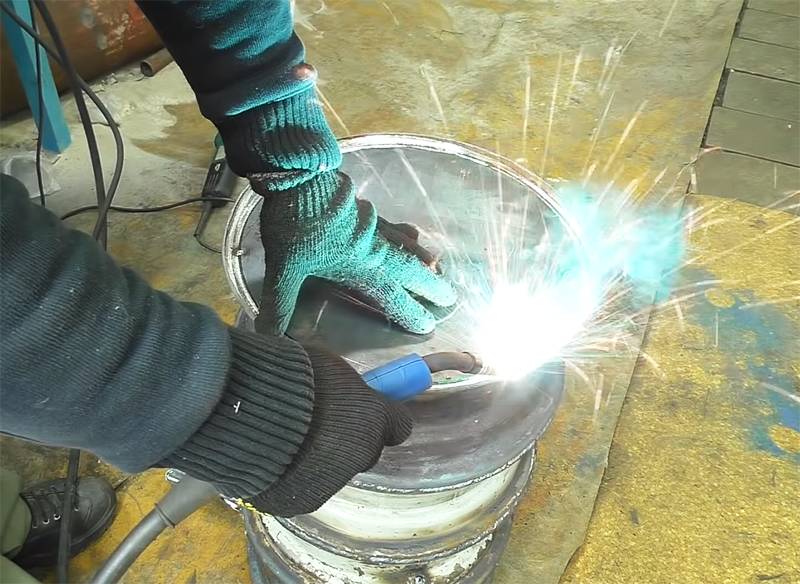 Weld the covers to the rims of the lower and upper discs on the stove
The base of the construction is ready. At this stage, it is sealed. The next task is to install the doors for the firebox and ash pan, as well as the chimney on the workpiece.
Installation
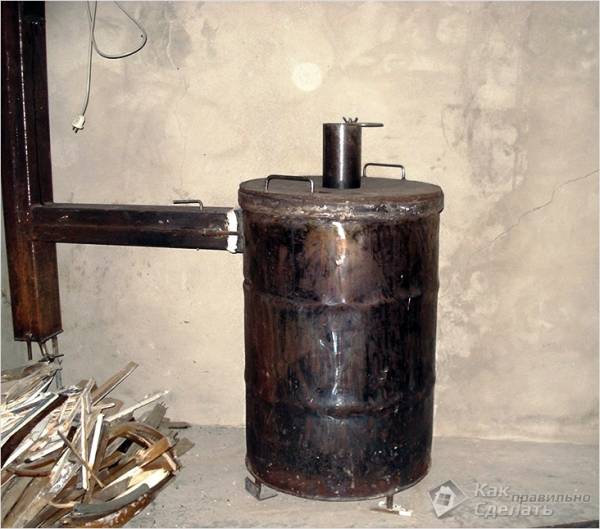 Installation
The use of homemade stoves, as well as any other heating installations, requires strict adherence to safety precautions. Initially, you should choose a place to install the stove. This unit, as practice shows, is best installed in a corner, namely near walls opposite in location to the garage door.
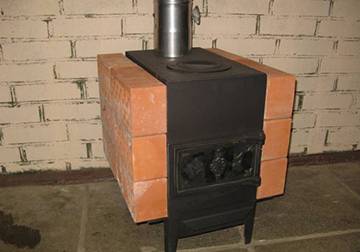
It is better to cover the stove with brick walls on all sides. So, the likelihood of touching a red-hot stove will be excluded, and the heat generated from its firebox will also accumulate. Thus, you will increase the efficiency of the device several times.
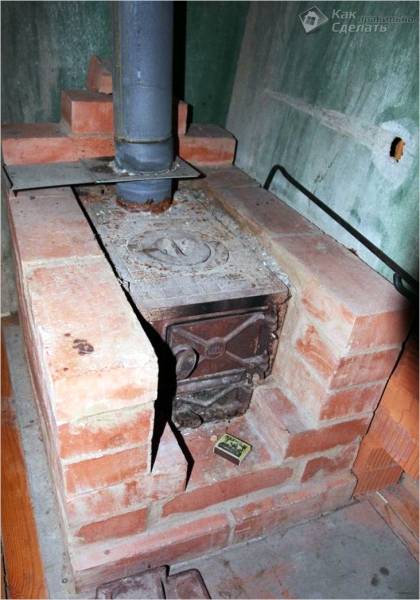 Increase in furnace efficiency
If the walls of the garage are made of wood, then there must be a certain distance between them and the stove, namely at least 100 cm.In addition, in order to avoid ignition of the building, the walls near the stove should be lined with asbestos sheets / bricks or other refractory materials.
As a base for a potbelly stove, you can use a sheet of steel, having a thickness of 1–2 cm. Another option is to fill in a concrete screed. Thanks to these actions, you will be able to prevent the spread of fire if embers / sparks, etc. suddenly fall out of the furnace.
To use a potbelly stove in the garage, you must first make high-quality supply ventilation in it. Fresh air must be supplied here in sufficient volume, which will ensure the normal combustion of the fire. A small gap between the ground and the garage door may well serve as ventilation. Otherwise, you will have to make a special channel for the timely flow of air into the garage, which is not very profitable from an economic point of view.
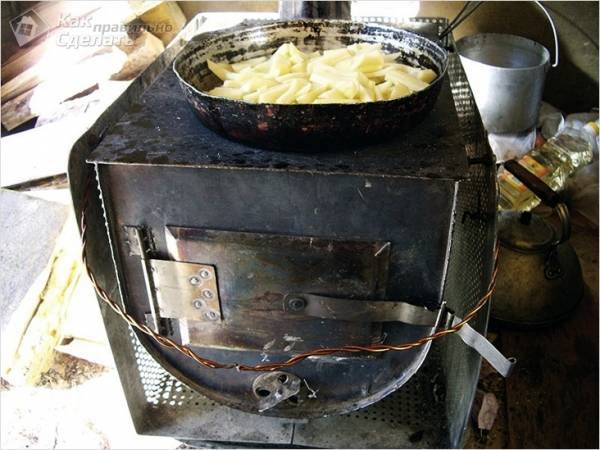 Potbelly stove with hob
If you equip a potbelly stove with a water tank, then the stove can be used to heat it up. By installing burners on it, you will also have the opportunity to heat food.
All work on the manufacture of a stove-stove will take no more than 2 hours, and you can enjoy the results of your labor for several seasons.
How to make a potbelly stove from a gas cylinder with your own hands
The manufacturing process for this oven looks like this:
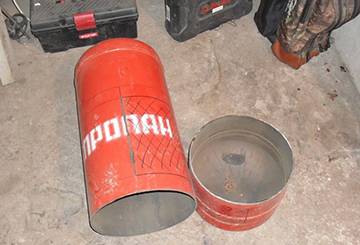
- A “crown” with a valve is cut off from an empty and thoroughly washed (!) Gas cylinder. The resulting hole must be sealed with a round plug.
- We cut out the loading opening in the bottom of the cylinder, and turn the cut fragment into a door according to the already described scheme. The cylinder will be located horizontally and that part of it, which is located at the very bottom, will play the role of a firebox. Accordingly, the cylinder wall will be used as the grate, in which many holes must be drilled.
- Under the "grate", a steel box with a door must be welded to the cylinder, which will simultaneously function as an ash chamber, a blower and a stand. This element is not exposed to high temperature loads, so it can be made of steel sheets of the smallest thickness.
- On the other hand, a horizontally located cylinder is equipped with legs (corner or pipe) of the same height as the box.
- Cooking the "channel" part of the potbelly stove. To do this, you need to take a pipe or another cylinder (then you need to cut off the bottom and the dome-shaped upper part from it) and weld three discs inside, located perpendicular to the pipe axis. The discs must completely overlap the pipe section, while perforation is performed in them: in the first (in the direction of the smoke movement) - on the left side, in the second - on the right, in the third - again on the left. To weld the middle disc, the pipe will have to be cut and then welded again.
- In the wall of the cylinder from the side opposite to the firebox (as close as possible to the cut off top), it is necessary to cut a hole that looks up. Its diameter should correspond to the diameter of the “channel” part.
- The “channel” part of the oven must be welded to this hole vertically, which is then welded from above with a plug with a hole for connecting to the chimney.
As you can see, the body of this furnace has an elongated shape, so the flue gases during their movement through it have time to give off more heat. This is facilitated by the perforation of the disks in the vertical part of the stove, which retains the smoke and makes it move along a winding path.
We called this stove a duct stove, because the same principle - lengthening the path of flue gases in the body of the installation - is used in brick duct stoves (Dutch).
Potbelly stove for a garage - why is it interesting
A small stove-potbelly stove, which was very popular at the beginning of the twentieth century, and now does not lose its relevance. At one time, she replaced the fireplaces, but as soon as centralized heating and gas stoves appeared, she began to slowly give up positions and disappeared from her homes. Nevertheless, such stoves can still be found in summer cottages and garages.
Interestingly, most of the burzhuikas that were used during the war years were made by hand. They were used by soldiers in dugouts and dugouts, residents of houses when they turned off the central heating, builders - in residential cabins. After the war, potbelly stoves were less common. But in the second half of the twentieth century in the USSR, people began to actively allocate summer cottages, and potbelly stoves began to appear often in country houses.
The potbelly stove is completely made of metal, which has excellent thermal conductivity, which means that it is very, very quickly able to warm up a small room. Heating of the air in the room begins as soon as the stove is ignited. True, it also cools down quickly, and to maintain heat it has to be constantly heated. The pipe near such a stove was also made of metal.
Stove stove for a garage
The main disadvantage of such a stove is a high fire hazard.
It must be handled carefully and carefully, not left unattended during combustion, there should be no flammable objects and liquids nearby. But on the other hand, it is extremely easy to use, multifunctional, it is very easy to make it with your own hands, transport it somewhere or install it in a new place.
Why is a potbelly stove often used in garages? The answer is above: this stove heats up the room very quickly and at the same time cools down quickly. An ideal option that will allow you to quickly warm up the same garage, but at the same time for a short time, only while a person is working in it. But it is unlikely that anyone will be in the garage for a long time. And leaving a flooded stove unattended next to your iron horse is dangerous. This means that before leaving you need to wait until the stove goes out. In a word, taking into account all these factors, a potbelly stove is an excellent inexpensive option for heating a garage. The same brick oven will take much longer to warm up!
Homemade potbelly stove from a barrel
And you can heat the stove with anything - it is absolutely not demanding on the quality of the fuel. Not only firewood or pellets are suitable, but also wood waste, rotten dry boards, and so on.
You can make such a stove yourself and in different ways. We suggest you create a potbelly stove from car disks - every motorist definitely has the old ones in the garage, and making a stove stove from them is a great way to give the disks a second life and make a reliable and durable device for heating the room.
Features, pros and cons of a homemade potbelly stove from rims
Now it is not at all necessary to buy a handicraft potbelly stove or do it yourself. You can buy ready-made in the store. Moreover, some options look pretty pretty, and in the area of the door they have tempered glass, which allows you to turn such a stove into an impromptu fireplace and watch the flame. Even ordinary stoves from the store, without glass, look good enough. But the question of quality remains open. You can buy the cheapest oven, but it will quickly burn out - a waste of money. And high-quality potbelly stoves will definitely not give away for a song.
Stove stove from the store
In addition, a good modern potbelly stove is made as safe as possible, which also increases its cost. Previously, the intensity of combustion was regulated by opening the door, now - with special latches, which increased the level of safety during use of the device. In addition, good store stoves are much more economical in terms of fuel consumption than artisanal ones. The chimney is also designed differently: now the stoves have special smoke chambers or special systems, due to which the pipes burn out quite rarely. In smoke chambers, the smoke has time to cool down a little before being released into the environment.
We still propose to make a potbelly stove with our own hands, but one that will be reliable and durable. It will not take long, but there will be much more confidence in such a stove than in a cheap store version. So you will not only save money, but you will also be able to work in a warm garage for more than one season.
Potbelly stove from rims
For example, you can create a high-quality and durable potbelly stove from rims. Her advantages:
- low cost - to create such a product, you will not need to purchase any special materials;
- durability - car rims are very thick and durable;
- heat resistance - the alloy used to create discs can easily withstand very high temperatures;
- high heating rate - such a potbelly stove quickly warms up to the desired level and quickly heats up the room (the efficiency reaches 85%);
- unlimited size - you can use 2-4 or more disks to create a stove, depending on your requirements.
Of course, this design also has disadvantages. To make such a potbelly stove, you need the skills of a welder and a welding machine. In addition, the product retains other disadvantages of any stove of a similar type: fire hazard, rapid cooling.
It is also important to consider some features. So, the distance between the lower part of the firebox and the grate to the first barrier for smoke (the upper part of the firebox) should not be less than 45-50 cm
If you have to heat the stove with raw wood, then it should be even larger - 65-80 cm. The need to maintain such a distance is due to the fact that smoke, leaving through the chimney too quickly, carries away the lion's share of the heat. The result is a decrease in efficiency. Also, because of this, a lot of soot and soot are formed inside the furnace, which also reduce the efficiency and increase the fire hazard of the furnace.
Diagram of a potbelly stove from disks for a car
Poor-quality fuel, garbage and waste are often used to fire a stove made of discs, and the optimal dimensions of a stove for a garage are far from being the largest. That is, in many cases it is simply impossible to make a high furnace section. In this case, it is easier to make a special grate structure assembled from thick steel or reinforcement. It is placed inside the furnace, leaving a small gap of 5 mm to take into account the thermal expansion of the materials.Due to such a grate, it is possible to solve the problem with the efficiency of a small stove.
How the oven works
The principle of operation is also not complicated: the fuel burns out, the flue gases immediately go into the chimney. The heated housing transfers heat to the air that washes it (convection heating), as well as through infrared radiation.
It is important to ensure that the amount of incoming air is precisely matched to the volume of the fuel load. This can be determined by the color of the flame:
 This can be determined by the color of the flame:
- red light indicates a lack of oxygen (fuel does not burn completely, soot is abundantly formed);
- the yellow color of the flame indicates the optimal ratio;
- white fire indicates excess air: this means that the draft is too high and a significant part of the heat produced is simply thrown into the chimney.
If the potbelly stove door closes tightly and the fire cannot be discerned, you can navigate by the red-hot ring on the chimney. The closer it is to the furnace, the more efficiently the fuel is burned.
By adjusting the air supply with the blower, you can see how the ring will change its position.
How to use such a stove?
Let this oven sit for about 3 days before using it for the first time. Then the first test furnace can be carried out. It is advisable to warm up the potbelly stove for the first time for at least 3 hours in a row with a full load of fuel. The doors and the blower must be open at this time. During this period, all surfaces of the furnace will be fired. Immediately, you can detect minor defects in the welded seams and correct the situation so that in the future the stove does not smoke during use. True, they can be eliminated no earlier than a day after the firebox testing, so that the device cools down well.
You can design the oven at your own discretion. In the instructions above, we described how to make a capital furnace. But in fact, you can simplify your task somewhat. An example is in the video above.
You can use such a potbelly stove in the same way as an ordinary stove from a store. Be sure to follow the operating rules and ensure maximum fire safety.
Also remember to clean your chimney regularly. The recommended frequency is at least once every 1.5-2 months. If the pipe diameter is very small, it is best to clean it at least once every couple of weeks.
Please follow the safety rules when using such an oven.
A stove-stove from disks for a car is not as difficult to make as it might seem at first glance. The main thing is to have the appropriate skills and some free time. But such temporary "investment" will certainly pay off a hundredfold and save you some amount of money for which you can buy something useful for your car.
