Advantages and disadvantages
A potbelly stove, like any device, not only a heating one, has its own not only indisputable advantages, but also the same kind of disadvantages.
Positive qualities include:
- Inexpensive material for the firebox. Anything that can burn will do, from propane fuel, wood and peat to any waste. At the same time, no alterations are required to switch to another fuel.
- A do-it-yourself potbelly stove will be inexpensive compared to more capital furnaces.
- The compact size of the potbelly stove allows you to abandon the foundation and the capital chimney.
The disadvantages of a potbelly stove are due to its advantages:
- Effective ventilation of the heated room is required.
- The design of the unit does not provide for the accumulation of heat, therefore, as soon as the flow of fuel stops, the stove instantly cools down.
- High fuel consumption.
Potbelly stove with a water circuit
By modernizing an ordinary potbelly stove, you can get an original effective source of heat in case of accidents, which will not interfere with any house.
This can be done in two ways:
- Put a water jacket on the burner tube
- Bend several copper pipes around the outer casing of the stove, thus forming a coil.
The turns of the coil tubes should be located at a distance of 5 cm from the perforated furnace body and connected to the main heating system. Place a screen outside the coil to reflect heat. It is made of sheet metal, aluminum, galvanized steel.
Water jacket - a tank located at the top of the furnace, the body of which contains fittings (2 - water is supplied / removed). It turns out a design like a samovar.
It is also advisable to install a thermometer.
Advantages of burzhuikas and their disadvantages
Cons inherent in such ovens:
- It is necessary to prevent the loss of combustion products (coals, sparks) from the furnace.
- To avoid burns (from the very hot walls of the stove), you should limit the access of children to it.
- Heating requires a large amount of combustible materials - it is more expedient to create a furnace for short-term use.
Pros of using burzhuikas:
- The choice of solid fuel is unlimited: you can buy peat or coal, prepare firewood for it or use sawdust and chips, briquettes and pellets are suitable, some use machine oil (recycled) as fuel.
- It can be created with your own hands and from readily available raw materials.
- She has a low cost.
- It is compact - it can fit even in a tight space, for example, you can design a stove stove for a garage.
- It is mobile, even when made from thick metal sheets.
- The heating of the room during its ignition occurs quickly.
Stove "dropper"
This stove is ideal for a small garage that has no heating or electricity. Such an effective design can be assembled by hand.
It has the following advantages:
- saves fuel;
- easily moves to a new location;
- easy to use;
- it is also used for cooking.
To assemble such an assembly, you will need the following materials and elements:
- metal in sheets;
- copper pipe;
- pipe branch;
- rubber hose;
- gas cylinder;
- screws;
- burner.
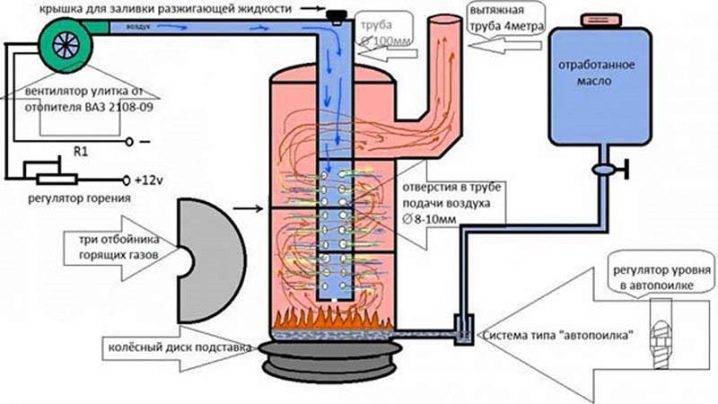
When constructing such a model, the following tools will be needed:
- welding machine;
- drill;
- clamp.


The work on the manufacture of this model will be safe if the structure is located in a place without drafts, away from flammable objects.
Features and principle of operation of the stove
Unlike a classic stove, a potbelly stove does not need a foundation, a complex chimney, or a platform. You can heat with firewood, sawdust, wood chips, peat, coal, waste engine oil. Simple construction and installation are available for self-fabrication by people with basic knowledge of working with metal. Due to its small size and weight, a homemade potbelly stove can be easily placed even in a small garage.
Compared to a brick oven, the potbelly stove cools down quickly. Therefore, to maintain a comfortable temperature, you will have to heat it all the time you are in the garage. The metal becomes very hot and can cause burns if accidentally touched.
The principle of operation of the stove is the same as that of a classic stove:
- the air necessary for fuel combustion enters the furnace through the blower;
- the resulting heat heats the walls;
- combustion products are removed through the chimney by natural draft;
- the fuel combustion rate is regulated by the position of the blower door.
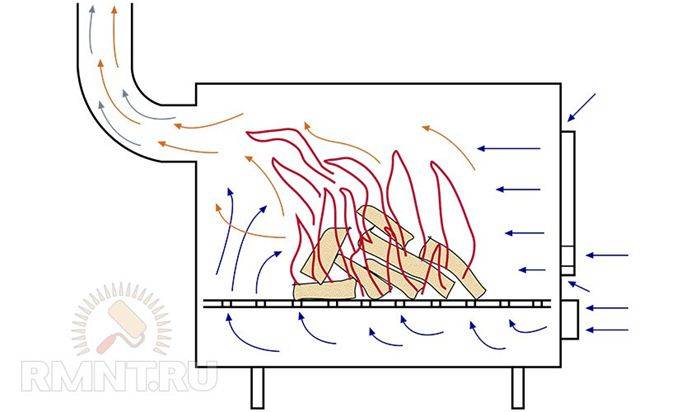
The principle of the potbelly stove
On wood or waste oil
Depending on the size, not only small, but also large rooms are heated with a potbelly stove during mining. In addition to machine oil, you can use other types of oil and diesel fuel.
The advantages of a working stove include:
- no need to be distracted by throwing firewood, one gas station is enough for a long time;
- due to 2-stage combustion, the efficiency is higher than that of a wood-burning analogue;
- potbelly stove on working off does not smoke in any weather.
Among the shortcomings are noted:
- noise;
- during combustion, the mining emits a specific odor, therefore, ventilation is required;
- the need for frequent cleaning of the combustion chamber and chimney;
- difficulty in removing the coke layer formed during oil combustion from the lower chamber.
The main advantage of a wood-fired stove is the ability to use any solid fuel. Among the disadvantages should be considered:
- The efficiency is low, since a significant part of the heat escapes into the pipe;
- the need to regularly throw up firewood, break firewood, make sure that the coals do not jump out of the firebox;
- time spent on fuel preparation;
- small range of regulation of the combustion process.
The characteristics of the stove during mining are better, but according to fire safety rules, the room for its installation must be equipped with supply and exhaust ventilation. Fulfilling this requirement for private traders is difficult, therefore they make a potbelly stove in the garage with their own hands on wood.
Interesting: Summer gazebos - shapes and designs
Step-by-step instructions for making a stove
Step 1. In our example, a simple 250 liter thick-walled barrel is used - ideal for making an oven. Cut off the top of the barrel, but do not discard.
The top of the barrel is cut off
Step 2. Make a kind of pancake cover out of the upper part for oxygen supply. Fit it to the size of the barrel - as a result, when installing between it and the walls, there should be 2 mm around the entire circumference. Weld the neck of the lid. In its center, make a hole for installing a pipe through which air will be supplied. Also weld 4 channels, as in the photo below.
"Pancake" for air supply Another photo of the element
Step 3. Slightly stepping back from the upper edge, cut another hole in the wall of the barrel - for mounting the chimney. In our example, a pipe with a diameter of 140 mm will serve as a chimney.
Chimney installation hole
Step 4. Start making the cover. Make her sheet metal 4 mm thick, and from the bottom weld a sealing ring corresponding to the diameter of the barrel. In the center of the lid, make a hole for the pipe that was welded to the pancake.
Lid for the oven In the middle of the lid there is a hole for the air duct from the "pancake"
Step 5. Make simple legs at the bottom of the barrel to keep the structure stable. The legs must be metal, as well as all other elements.
Making stove legs Legs must be metal
Step 6. Place the stove in the right place and start creating the chimney. In our example, it is of the prefabricated type. First of all, make a clamp by means of which the chimney will be attached to the body.
A clamp that will allow you to attach the chimney to the stove
Step 7. Make guides in the chimney, thanks to which it will easily be fixed on the body.
Chimney guides
Step 8.Dock the barrel to the pipe, without fail laying all the joints with asbestos cloth. Put a clamp over the fabric, tighten it.
Asbestos cloth Tighten the clamp over the cloth Finished joint between pipe and barrel
Step 9. That's it, the structure is assembled, you can check its performance. Load sawdust or wood inside.
Stove loaded with fuel
Step 10. Pour used oil over the fuel, then install the cap. As for the "pancake", do not use it yet. After the fuel has ignited, remove the cap and put on a "pancake". It takes about 10 minutes to fully warm up such a structure, in the future the firewood will burn for a long time. Although how much combustion will last depends largely on the quality of the fuel.
Photo of the finished oven for the garage
Video - Homemade potbelly stove for a garage
If you wish, you can modify the design described above, although it will already perfectly cope with its functions. For example, to increase efficiency, you can increase the surface area and thereby improve heat transfer. For this purpose, weld metal plates on the sides of the case.
In addition, you can make a grate with an ash pan: cut out a circle from a sheet of metal along the inner diameter of the body, drill holes with a diameter of 60-80 cm and install from below. After that, the ash will be poured down through the holes - to where the ash pan is equipped. It is believed that the fuel will burn faster because of this, keep this in mind and make sure that the ash pan is sealed as much as possible.
Making a potbelly stove with your own hands
When making a stove for a summer residence on your own, you can hardly do without:
- electric or gas welding machine;
- angle grinder (grinder) with cutting and grinding wheels;
- a set of hand-held locksmith material (caliper, ruler, hammer, drill, pliers, metal scissors, chisel, etc.).
As materials for making a potbelly stove with their own hands, they are used:
- sheet metal with a thickness of at least 3 mm (because the thinner metal will warp from the high temperature, or it will quickly burn out);
- cases of household gas cylinders (namely household ones, because industrial cylinders are too narrow for this purpose);
- metal drums for fuel and lubricants (100 l, 200 l);
- metal bar (for grate, all kinds of handles);
Pipes and elbows for a stove, as a rule, are made of tin. It is advisable to order their manufacture from a master tinsmith, or to purchase them industrially from a hardware store.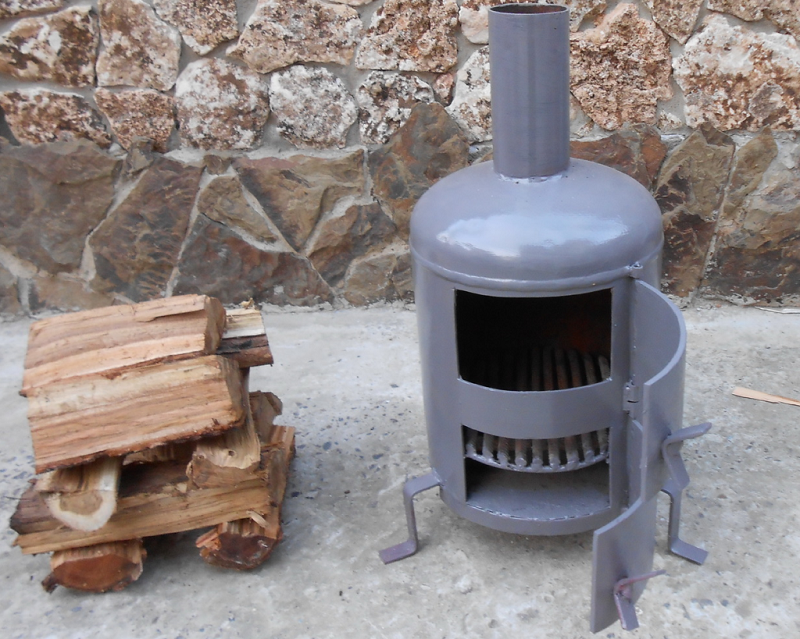
The potbelly stove kit consists of:
- from the oven itself;
- composite chimney;
- from a set of pipes and elbows;
- gate (chimney damper assembly);
- cutting (knot of passage of the chimney through the window of the room or awning of the tent);
- a metal scoop, a poker, a metal sheet and a box for solid fuel, which are necessary for servicing the stove.
Option # 1 - a reliable and efficient brick
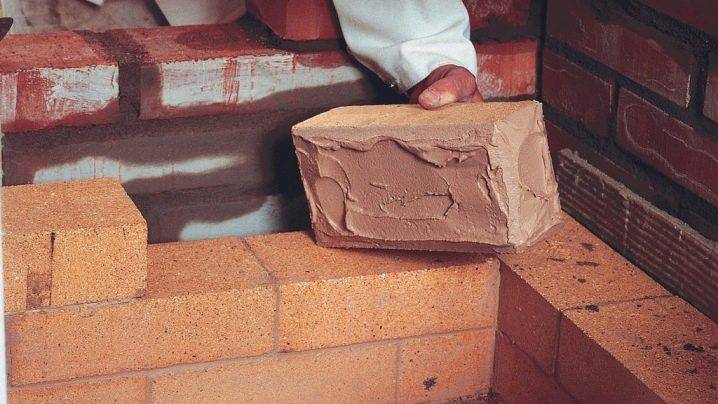
Brick ovens in garages are not common, since this option is quite laborious. Such a device occupies a small area, about 2X2.5 bricks. For masonry, they take refractory bricks, and also knead a solution of sand, refractory clay and fireclay powder.

When making brick oven for garage use a special fireclay brick, and while mixing the solution, it is recommended to add fireclay powder
Fireclay bricks are used for the combustion chamber at the level of the second, third and fourth rows of brickwork. The height of such a brick kiln is usually nine bricks. For the removal of furnace gases, a brick chimney is arranged, into which a stainless steel sleeve is inserted. The chimney is taken out, as a rule, through the roof.
Novice builders who decide to build a brick stove in the garage should discuss the nuances of the project with an experienced stove-maker - after all, this is a whole science worthy of a separate profession. If significant flaws are made during work, the masonry will have to be destroyed and completely redone.
Types and materials for manufacturing
There is no need for the purchase of specialized parts or the manufacture of individual particles for the self-made construction of furnaces of such a plan. Sometimes even improvised materials are suitable for work, which can be bought at a very low cost or even received for free. But some requirements for metals and brick products used for the construction of the structure are absolutely justified.
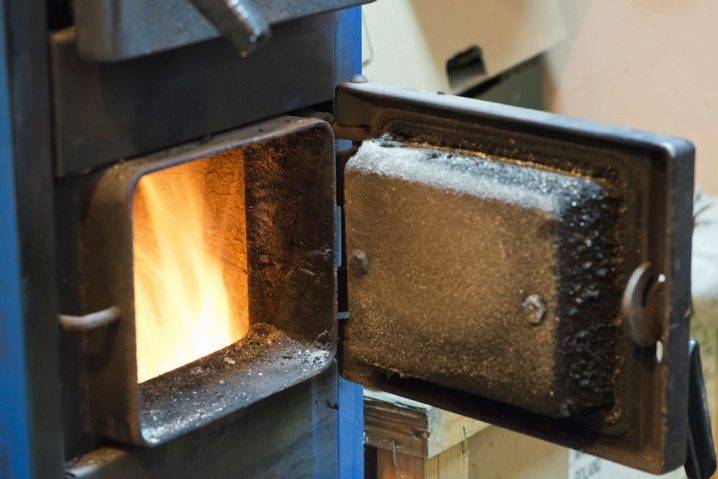
Let's get acquainted in more detail with all types of designs and the subtleties of manufacturing certain models.
Stove-potbelly stove
Perhaps the most common version of a garage stove is a potbelly stove. Such models were popular at the beginning of the 20th century and, being easy to use and very practical, were able to practically replace fireplaces. Potbelly stoves were popular in houses and apartments until the advent of central heating, and after that they began to be used only when necessary.

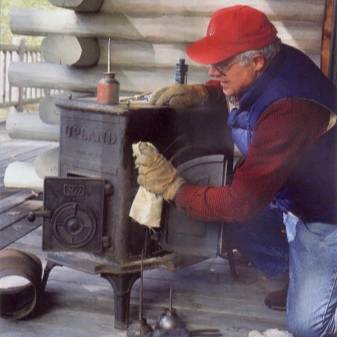
The potbelly stove is a very economical product, since no large costs are required for its manufacture. For manufacturing, you can use, for example, propane cylinders or large iron pipes with dense walls, which must have considerable strength.
Iron barrels are also fine, but special attention should be paid to their selection. The barrel should not be too large, since a stove with too large dimensions will be bulky and not entirely practical, but it should have rather thick walls - from 2 to 5 mm


There are types of potbelly stoves with a water circuit that differ slightly from the classic models. Heating of this structure is carried out by increasing the temperature of the water, as well as evaporating a certain amount of it, so the walls stay hot longer and radiate heat for a much longer time, heating the room.
The main advantage of this model lies in the duration of heat propagation, since the distribution and maintenance of heat can even be enough to heat a small country house. As for a small garage space, for those who spend most of their time working with a car, this is an excellent option for a heating structure.


Brick structures
In addition to compact and easy-to-use stoves, there is also a variant of brick structures, which has a number of both advantages and disadvantages.
This model retains heat much longer, as it takes a longer time to cool down. This heat capacity is provided both due to the thermoregulatory properties of the brick, and due to the rather large weight of the structure as a whole.
For a brick model, it is necessary to have a damper, which is also called a blower, thanks to which you can regulate the temperature in the room. The main thing is to learn how to use such functions of this model, since improper use of the damper can even harm your health.


When you make a brick oven yourself, you can save a lot, since the material is quite inexpensive, and the process is not so laborious as to interfere with outside labor. The main thing is to calculate the required amount of bricks and cement, as well as to purchase the necessary cast iron parts.
The heating power directly depends on the size of the firebox, therefore, depending on the functional features of the room itself, you can make a suitable size of the heating structure with the appropriate power.

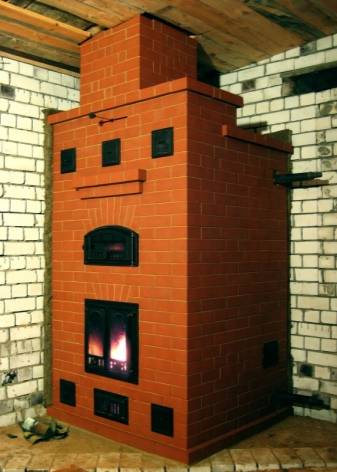
But, unfortunately, this product also has some drawbacks that can slightly overshadow the process of using the oven.
Such a structure cools down for a long time, but it also heats up for quite a long time, so some problems may arise with the rapid heating of the room. In addition, in order to maintain a certain temperature in the room, it is necessary to heat the stove daily.
Operation technology
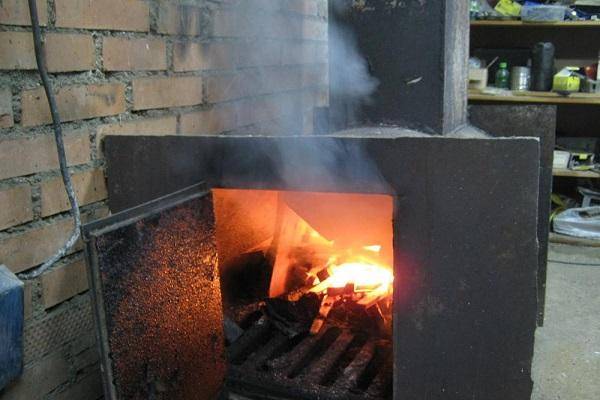
When using a potbelly stove, important rules should be observed:
- keep a safe distance between the stove and the walls;
- the chimney should only be taken out into the street;
- the place where the pipe goes outside is covered with solutions;
- It is recommended to put a box of sand next to the device and hang a fire extinguisher.
These recommendations will extend the life of your stove and improve safety.

Safe installation of the heater
It is extremely important to be guided by the fire safety rules when installing the stove. The best place is the far corner of the room, opposite the gate.
The chimney is taken out only to the street.
If the walls of the garage are made of wood, then the stove is installed at a certain distance. The wall itself near the device is covered with a metal sheet or concreted. It will be correct to attach a metal sheet at the base of the stove.

Procurement of heating material
Firewood is a popular fuel for potbelly stoves. They need to be thoroughly dried and cut. The size of the wood should be approximately 25 cm. Store the wood in a dry, ventilated room, protected from precipitation. Oak, birch, apple, cherry warms the room well. Do not use spruce, pine. They provide little heat and generate a lot of soot during combustion.

Cleaning the oven
The stove should be cleaned periodically so that dirt and soot do not accumulate in the chimney. For work, a special chimney brush is purchased. But you can make the device yourself. At the end of the stick, a brush with stiff bristles is fixed:
- Before starting work, cover the hole in the firebox with a rag.
- Initially, several movements are made in the chimney.
- Then they take out all the accumulated debris.
All actions are carried out carefully so as not to damage the surface of the structure.
Classic stove - potbelly stove
To get a classic do-it-yourself stove-stove for a garage, you need to take 10 steps:
- Make 5 blanks from sheet material: a bottom, two side ones, two for forming a smoke circulation.
- Mark the places for attaching the grate and smoke sheets to the side workpieces. Weld in these places on a bar of reinforcement or a corner for subsequent fastening in these places of the grate and smoke sheets. You can buy a standard cast iron grate or weld a grate from strips 25-30 mm wide of thick metal (you can use reinforcement rods, tractor pins or pieces of pipes with a diameter of 20-30 mm).
Classic stove - potbelly stove
- Weld the side walls to the bottom. Use a construction square to weld vertically.
- Weld the lower and upper workpieces in sequence so that a smoke channel is formed.
- Weld the lid with the welded-in sleeve. Install a damper in the sleeve so that the chimney can be blocked. Cut and weld the jumpers.
- Make a door. Equip it with hinges and a latch. Make the door large, so that it will be easier to remove the ash later. Fasten at the front.
- Weld the legs from pieces of metal pipe 8-10 cm long. Nuts can be fixed inside the pipe. By screwing the bolts into the nuts, you can align the position of the stove.
- Make a chimney from a pipe. Select the pipe diameter not less than the calculated one.
- Fix the chimney by insulating the transition in the wall.
- Place the stove in place and adjust it in height. Fix the chimney in the sleeve.
