In a house with more than one floor, it is impossible to do without a staircase. The most common of these are wooden structures. If you do not have many years of experience in carpentry work, then it is best to order the production of structural elements in a woodworking workshop. It will be possible to assemble them into a single whole with your own hands. This will save you about 30% of the cost of the stairs.
Types of stairs
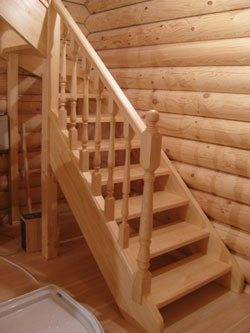
As a rule, screw structures and marching structures are installed in residential buildings.
Screw structures
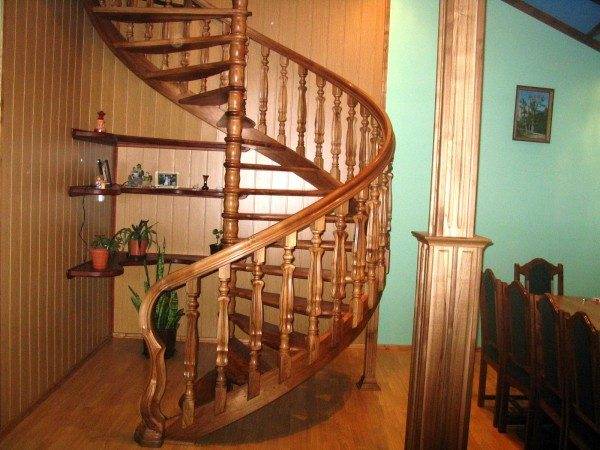
These structures are used infrequently. Usually, if the space is very limited or the interior design requires it.
Screw designs have a low level of functionality. So, it is quite difficult to bring large objects on them. Only one user can climb and descend on them.
It is very difficult to design such structures, since one pillar serves as a support for the structure. In addition, the costs of such structures are high. How much it costs to assemble a spiral staircase also depends on the cladding materials used.
Marching counterparts
Such structures are the most common.
- They consist of flights (marches) with steps... If there are more than one marches, then they, most often, are separated by platforms.
- Such structures can be straight and placed against a wall or have other support.... A distinctive feature of straight staircases is that they take up a lot of space.
- Most often, in order to save space, a pivot-type wooden staircase is assembled between floors.... The rotation should be between 90 ° and 180 °.
- The span can be curved... In this case, the corner should be convenient for entering the stairs. Then all the steps can be turned.
- Straight multi-march structures can be made without platforms, only with turning steps in their place.
Structural elements
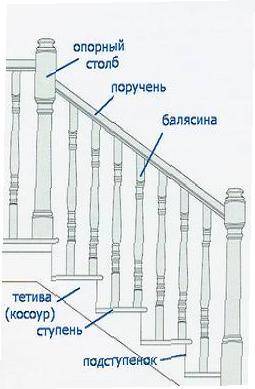
- Kosour is a load-bearing beam that supports the steps and risers from below.
- A bowstring performs a similar function. It has recesses, steps are inserted into them with their butt ends. The bowstring for the stairs is used on one side, when the staircase is adjacent to the wall, and on both sides, when the span is clamped between two walls.
Note!
It is less advisable to use a bowstring when the stairs are assembled from wood than kosour.
It cannot withstand high loads.
- Steps are elements consisting of a horizontal surface - a tread and a vertical part - a riser. Users step on the tread with their feet. The riser performs a supporting function. You can mount stairs without it. Then the surface of the step of the stairs will be free, and the legs will not rest. However, the structure will become less reliable and durable.
- Railings consist of handrails and balusters. Their size, shape and cross-section can be very different.
- The design of multi-flight stairs includes support pillars placed at the turns of the structure.
Calculation of the structure
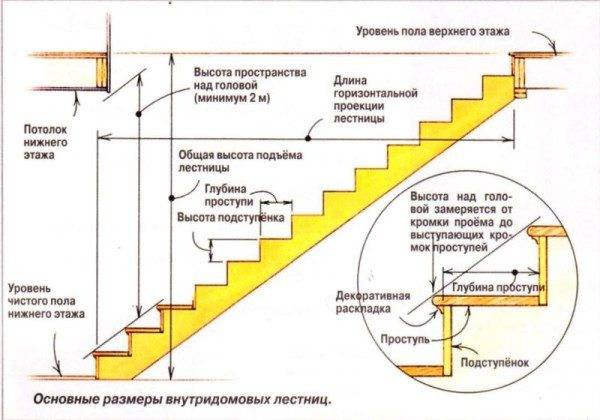
From the very beginning, you need to perform calculations and make a drawing of the stairs.
The height of the structure, the number of steps and the level of the tread width
Calculations begin with determining the height of the stairs.
Starting from it, you can calculate the number of steps, and after that - the height of the risers.
- To find out the height of the structure, you need to determine the distance from the floor surface on the first floor to the floor level on the second tier. Let it be 250 centimeters from floor to ceiling, the thickness of the floor and floor is another 35 cm. The result is 285 centimeters.
- Now you need to choose the height of the riser.This parameter is standard and is 15.2 / 19.7 cm. The instruction warns that at a lower height, users will lose their steps, and at a higher height, it will be difficult to rise and fall. Let's choose an average figure of 17 cm.
- The number of steps will be equal to the height of the stairs divided by the same riser parameter, i.e. 285: 17≈17 pieces.
- The minimum width of the tread should be 22 cm, maximum - 40. For accurate calculations, there is a formula: A + B = 47 cm. In it, the first letter means the height of the riser, and the second - the estimated width of the tread. According to her: 47–17 = 30 cm. Such a width of the horizontal part of the step will be convenient.
March width, ladder and stringer length
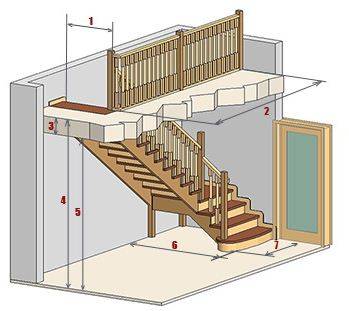
When a prefabricated flight of stairs is mounted, its minimum width should be 80 cm. With a narrower design, there will be difficulties with the passage of full users or with the transportation of large items. Optimally, this value is from 90 to 140 cm.
Note!
To make the structure look organic, it is recommended to use such a specific ratio.
Namely, the width of the spans should be a multiple of the same tread parameter.
In the given case, these are 90 and 120 cm.
To calculate the length of the stairs, only two calculated values are needed: the number of steps and the width of the tread. They need to be multiplied, given that the last step
will go to the floor of the second tier: 30 ∙ 16 = 480 centimeters.
The best option - with such a significant length, to make a two-flight staircase, with a turn of 180 degrees.
Ladder installation
Now about how to install the structure yourself, if the price of the work of the masters does not suit you.
Installation of stringers or bowstrings
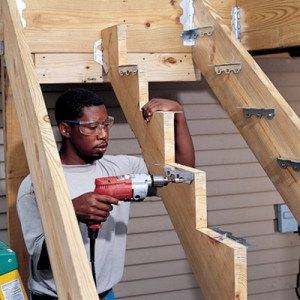
- Cut the stringer beam at the bottom and top so that the planned ladder length comes out.
- Then from the bottom, cut a piece at the bottom equal to the thickness of the tread - about 5 cm. When the calculation of their number was made, the thickness of the steps was not taken into account, because it is not particularly important for the entire structure, apart from the first element. Its height will not increase by the thickness of the horizontal part of the step.
- Now you need to make cutouts for the steps in the stringer. Mark on a metal square the width of the tread and the height of the riser, with a deduction of 2/4 cm. Then, using a marker, transfer the markings to the inside of the timber. Saw off the excess. It is best to use an electric jigsaw for work.
- Then put the support in its place. The upper edge of the beam should rest on the floor, the lower part should rest tightly against the floors on the first floor.
- Check the accuracy of the contour of the notches for the steps.
- Using the first support as a template, prepare the second stringer.
- Then sand the wood. For a more aesthetic appearance, you can mill the outer edges by rounding them.
- From below and above, the supports must be connected to each other with a bar. To this end, cut them out by one fourth in the indicated places. Fix the stringers to the beam with anchor bolts. When there is a possibility of attaching the supports to the walls, this is also done with anchors.
- Make sure to place the stringers correctly from the back. They should be located at the same level, so that the steps do not have a slope.
Installation of steps
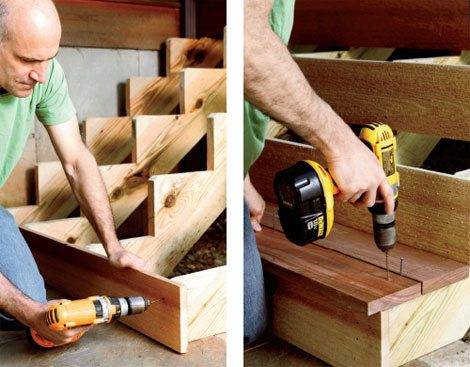
After the installation of the supports, when prefabricated staircases are mounted, steps are placed.
- First, cut the planks into the required number of risers of the planned length. Line them up with each other, then sand.
- Next, fasten from the front to the stringers with self-tapping screws.
- Then cover the elements with putty. This can be omitted if the risers are additionally revetted with decor.
- Then you can start making treads.
- As before, cut the board into the required number of pieces minus one.
- After that, carefully sand their front surface and round off the protruding outer edges.
- Then place on top of the risers and secure with screws.
- When using a bowstring on one side of the ladder, you need to insert the step into the previously made groove, before that, greasing the edges of the element and the cutout with wood glue.
Final work
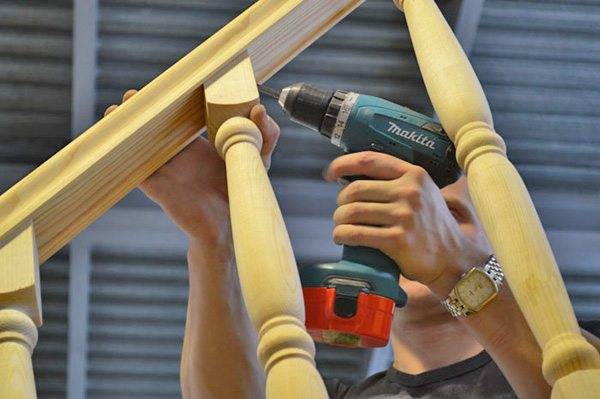
- Mark out and place the balusters on the steps. Secure them with hairpins 10 cm long and 0.8 cm thick.
- Fix the prefabricated stair railings on top with screws.
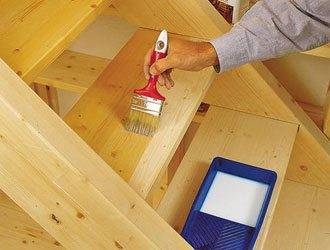
- After that, the main work will be completed. All that remains is to paint or varnish the structure.
Above, an independent installation of a straight one-march design was described. Installation of other types of stairs is somewhat different. So, when assembling a two-march analogue, first a platform with a support post is placed, then sequentially - stringers, risers and treads. The assembly of a spiral staircase also begins with the installation of a support post.
Output
The installation of a staircase, like any other serious structure, requires planning and a serious approach to work. Only in this case can you expect that the structure will be reliable, durable and strong. Watch the video in this article, it will help you get more information on the voiced topic.

