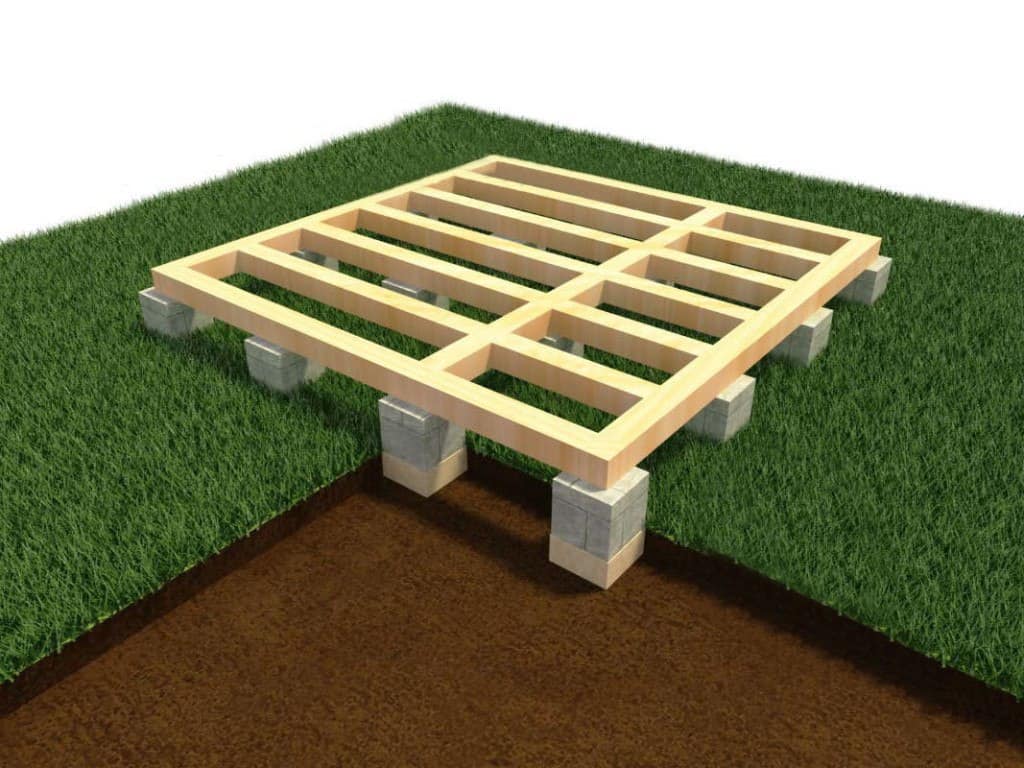
The foundation for a bath with your own hands: what will its walls be made of?
The load on the future foundation depends on the material of the walls. We believe that if the owner of the site decided to build on his own, then he will prefer the cheapest option. The cheapest will be a columnar foundation for a bath, which is not suitable only for brick and those soils that push and overturn the pillars directly in the ground - these are weak soils (peat bogs, for example) or strongly peaty (clayey). Let's first figure out what kind of foundation is suitable for a particular bath, and then there will be instructions on how to lay them.
For a bath from a log house, a bar
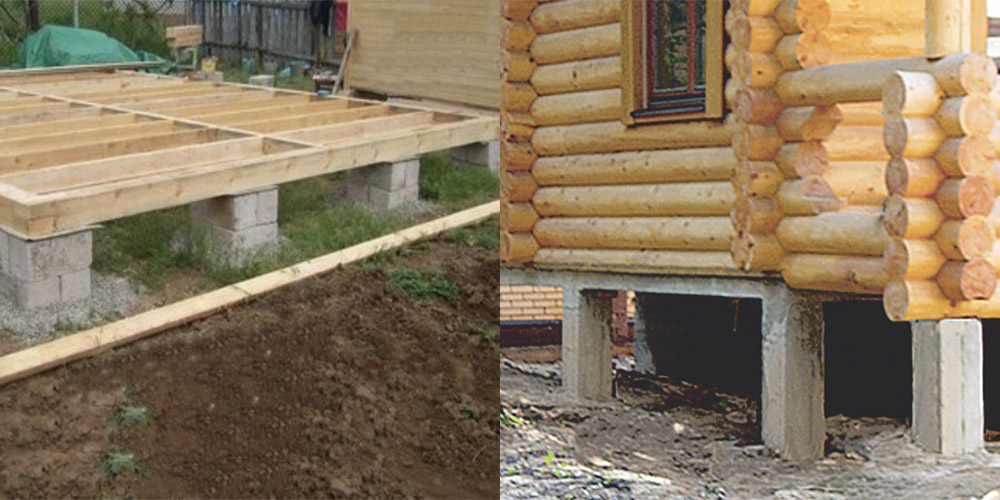
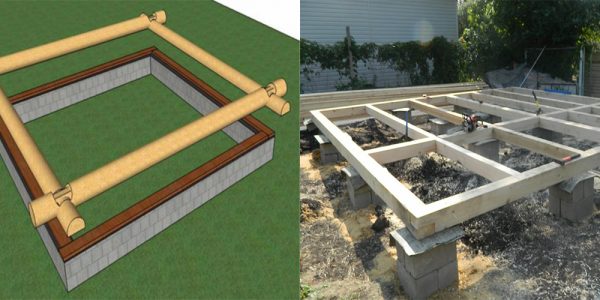
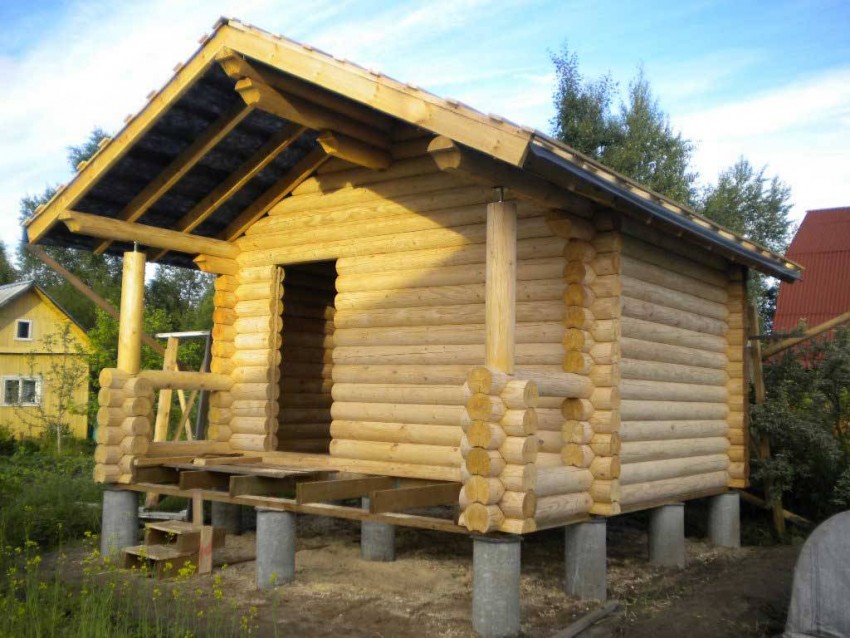
Any foundation is suitable for a log and timber bath, because wood is not the heaviest material. You can supply tape, columnar, and slab as needed.
We have a whole article in which the criteria for choosing the best foundation for a bath from a bar or log house are examined in detail.
Video
Here we invite you to watch a video on how to make an unburied foundation for a bath from a bar:
The foundation for a bath of blocks, bricks with your own hands
If the bath is supposed to be built from blocks (and this category includes both the foam block and the brick), then the main difference between them will be the mass of a cubic meter. For example, the popular aerated concrete is the lightest, cinder blocks are much heavier, and brick follows the cinder block by weight. Therefore, the foundation for a foam block bath must not only take into account the characteristics of the soil, but also the weight of the future structure.
IMPORTANT! The lighter the block, the easier and cheaper it is to build a foundation under the walls from it.
If there is no desire to spend time and energy on additional work (construction of a pick-up, laying strapping beams), then it is better to prefer a strip foundation - simply and reliably. By the way, it is suitable for both light and heavy blocks. A brick bath can be placed on strip, slab and pile foundations.
Find out more: the foundation for a bath from blocks - how to choose?
Do-it-yourself foundation for a foam block bath
The foam block is a material in its own way demanding (for the same waterproofing), but with regard to the foundation it has the least claims. A shallow strip or columnar foundations are suitable for him, with which the owner of the site and his comrades can quite cope. The instructions are as promised below. We also recommend that you read the article about the foundations of foam block baths - types, depth and other details.
The foundation for a frame bath with your own hands
A frame bath is another example of a lightweight material for walls, to which everything that has been said about foam blocks applies. The choice of a foundation for a frame bath can be complicated by problem soil, but in simple cases, when it comes to the independent construction of a bath, it will still be the same tape or columnar.
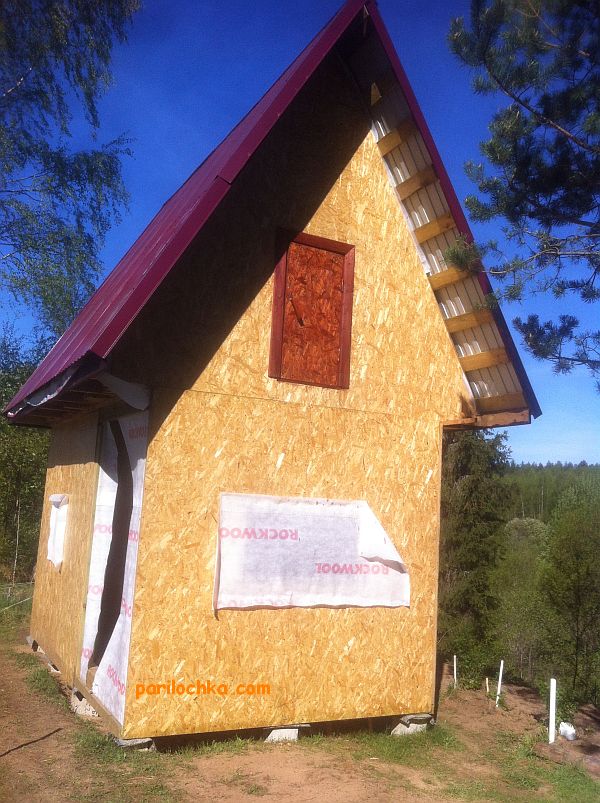
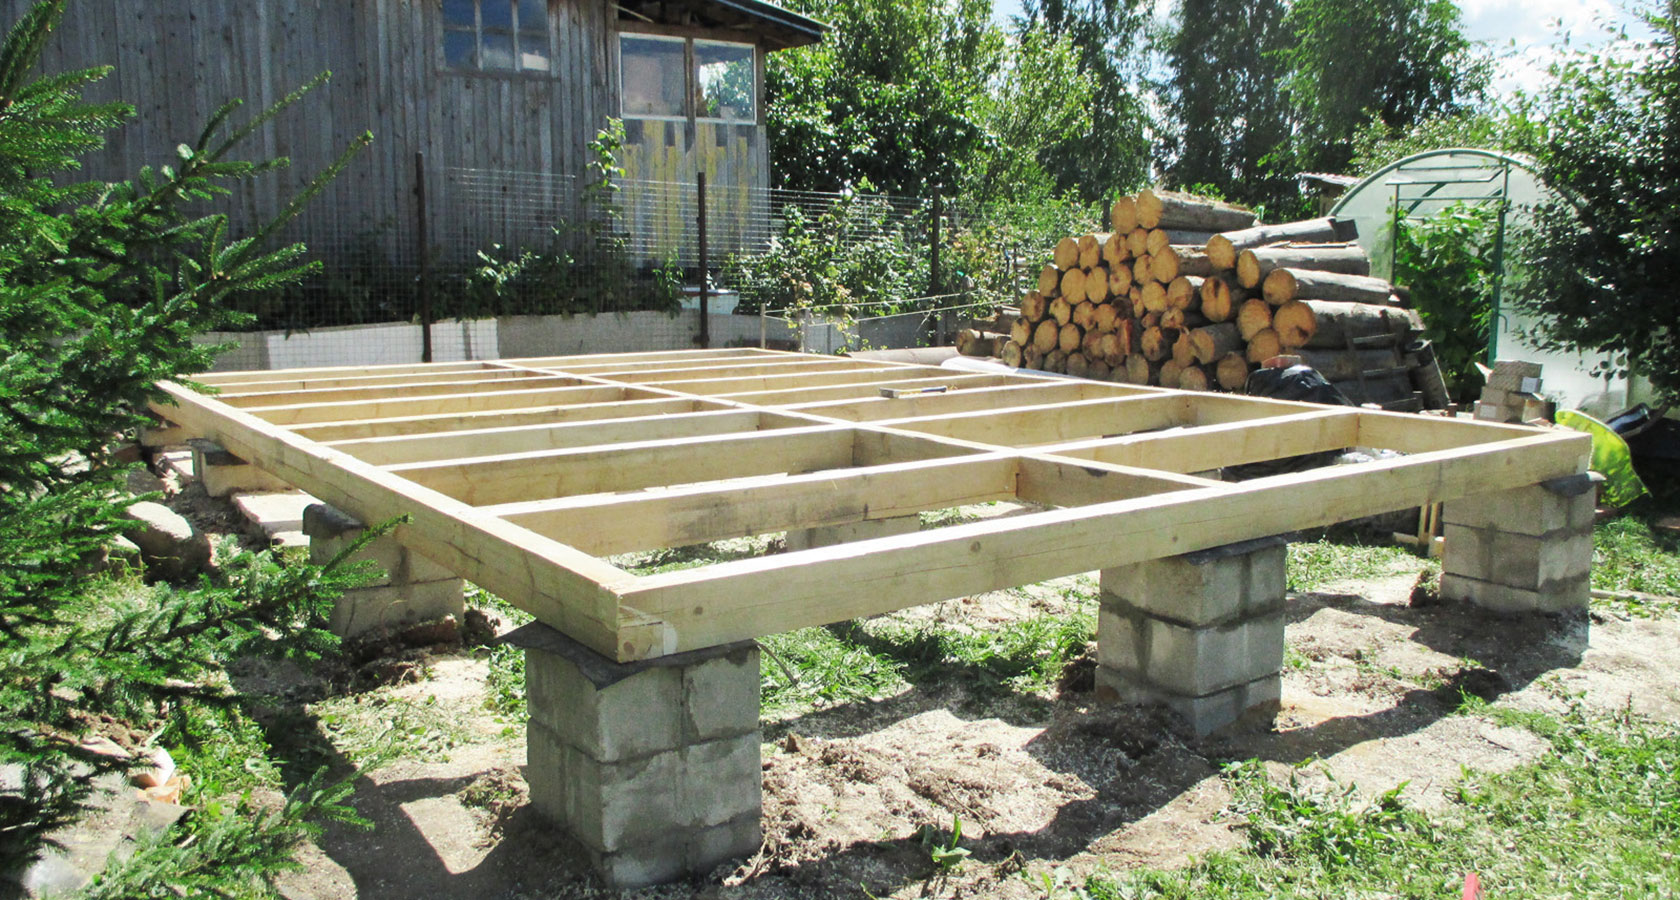
Frame bath on concrete posts
IMPORTANT! Focus not only on the material of the walls when choosing a foundation. Because soil and groundwater are more important
Neglect of these factors leads to rapid destruction of the building, which begins after the first year of operation.
Columnar foundation construction
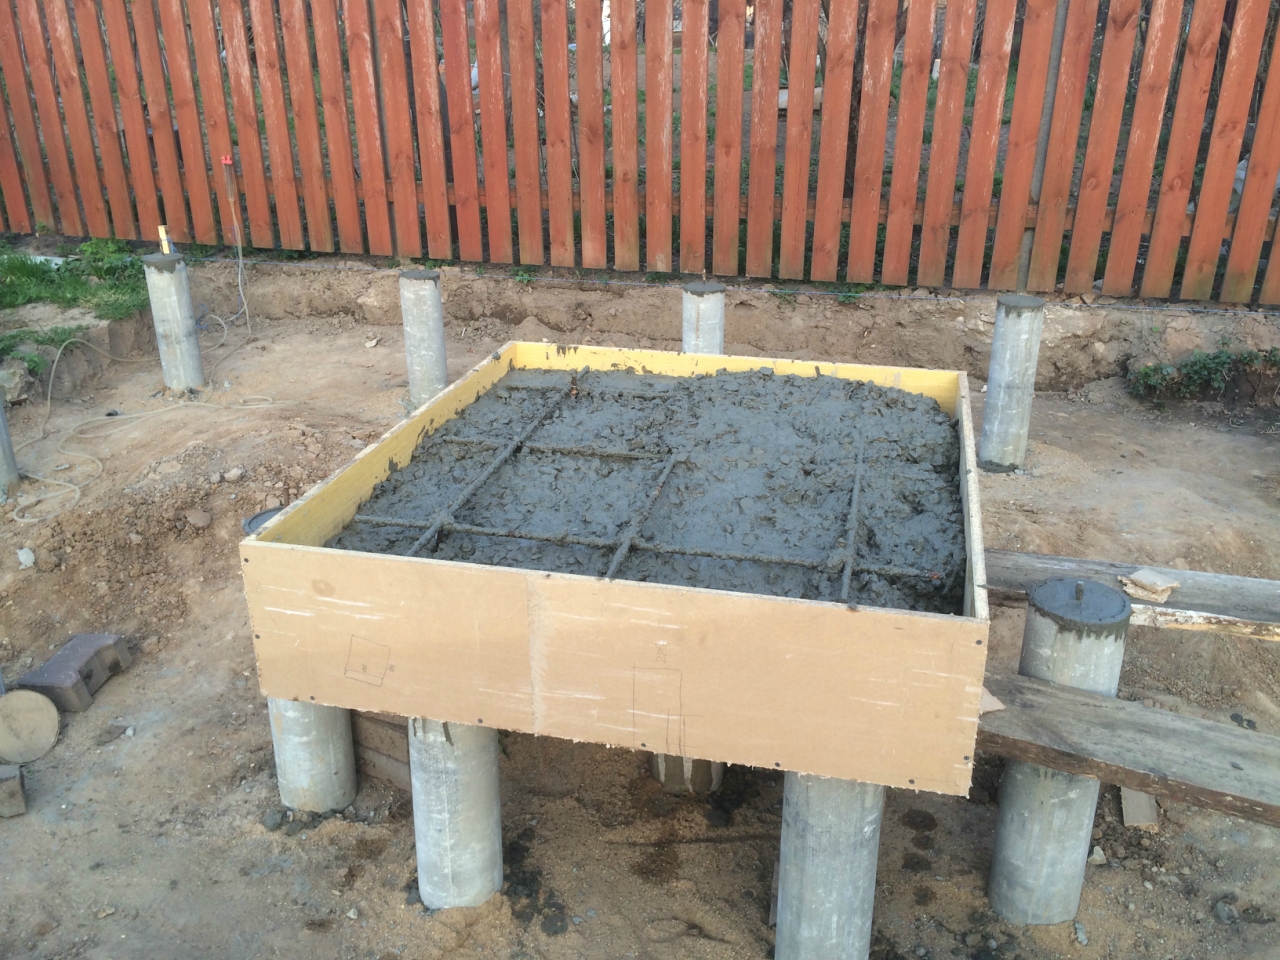
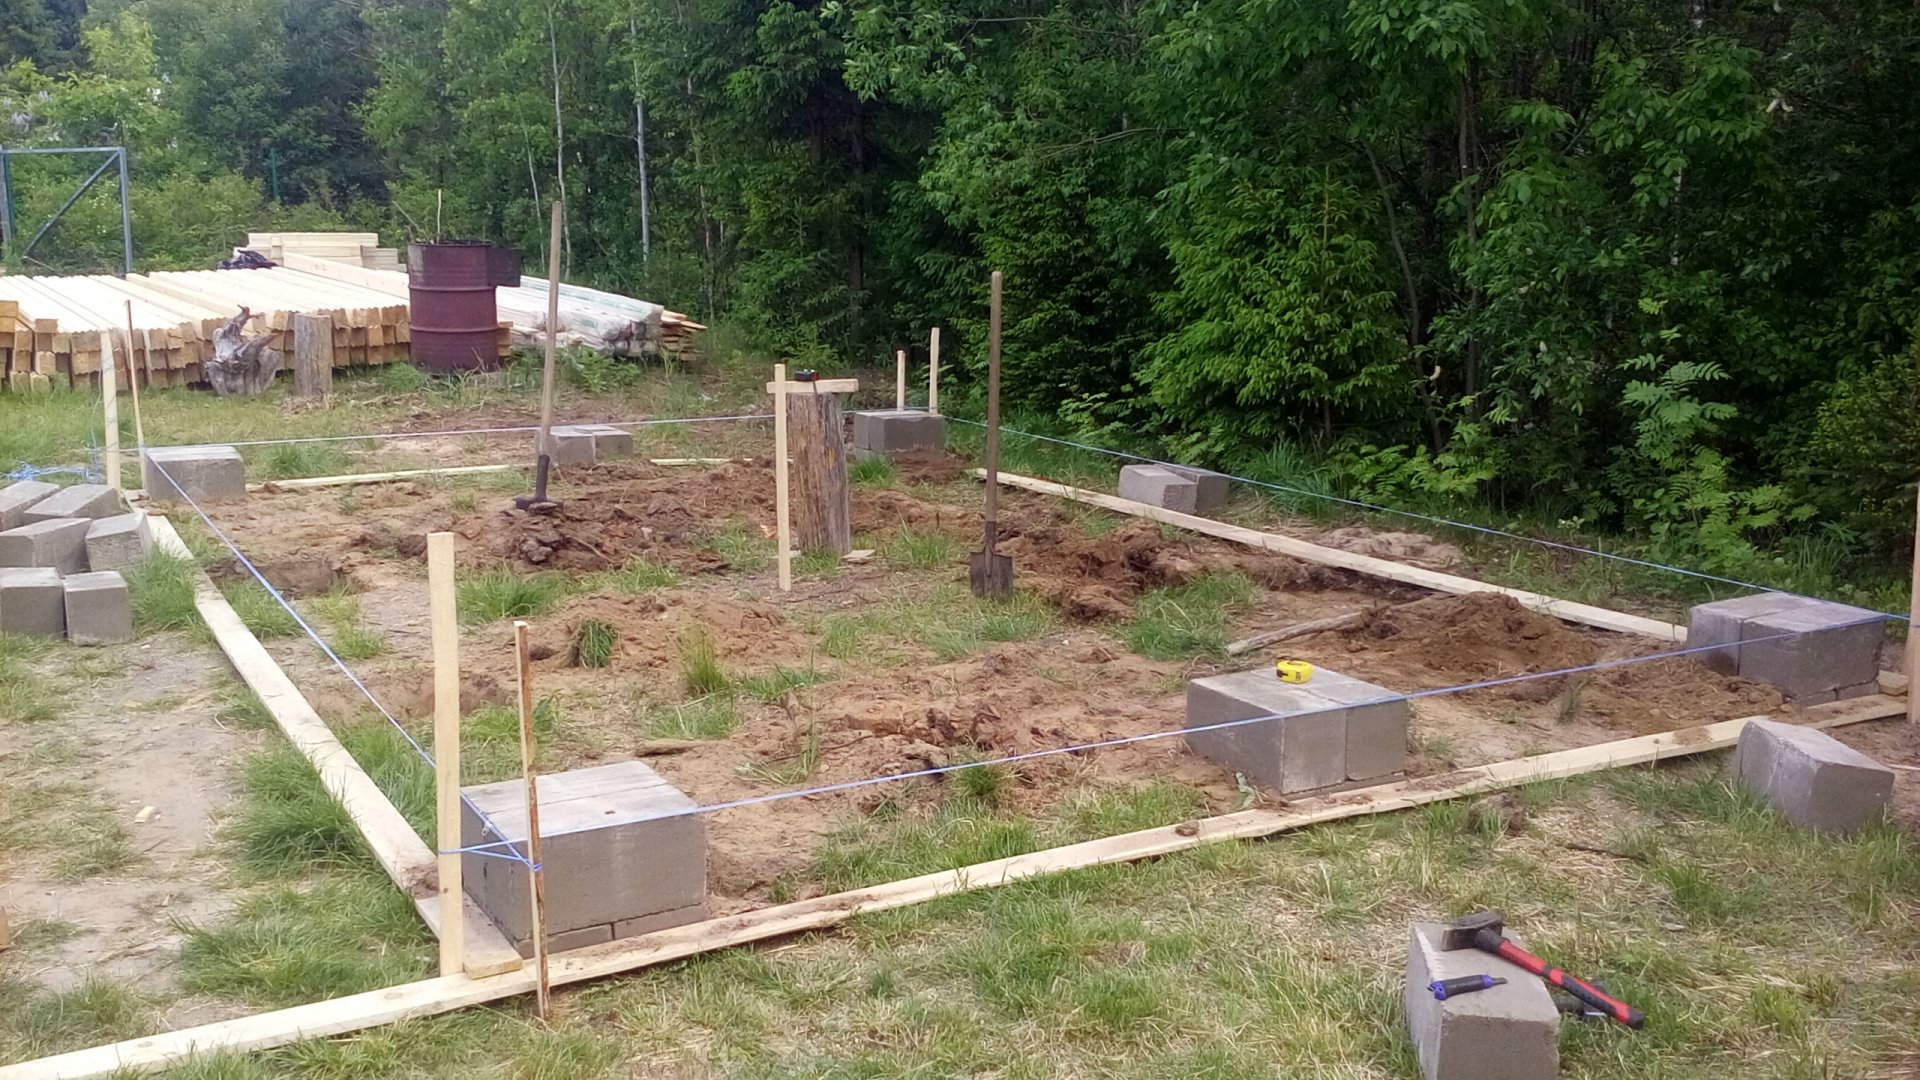
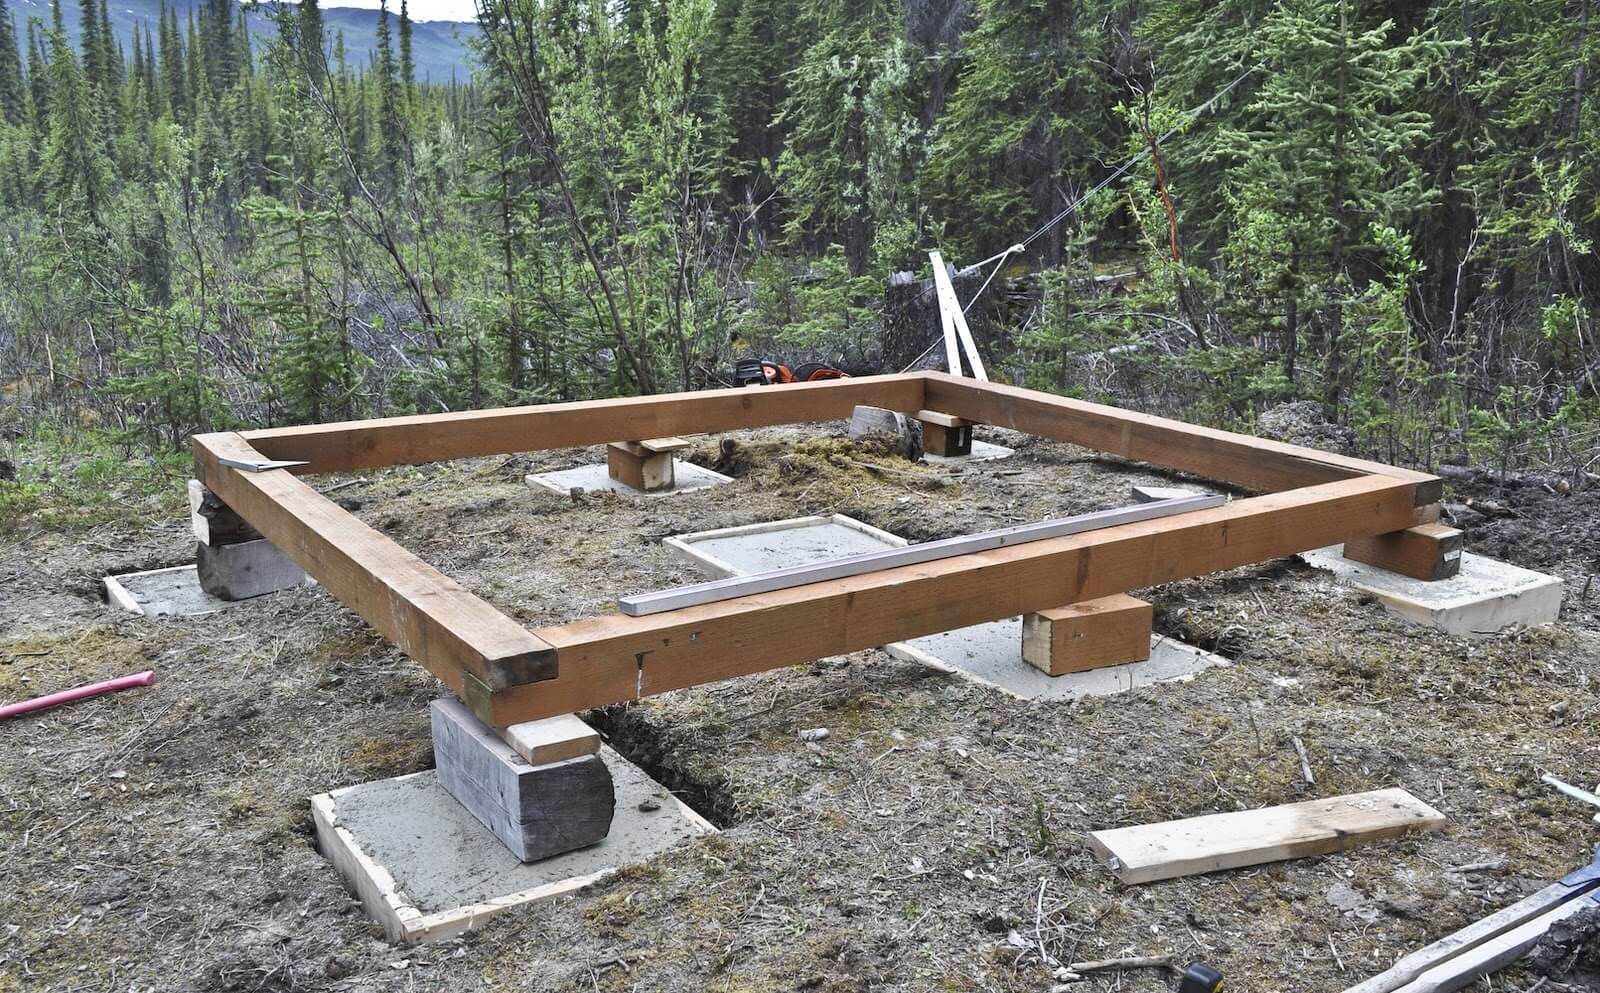
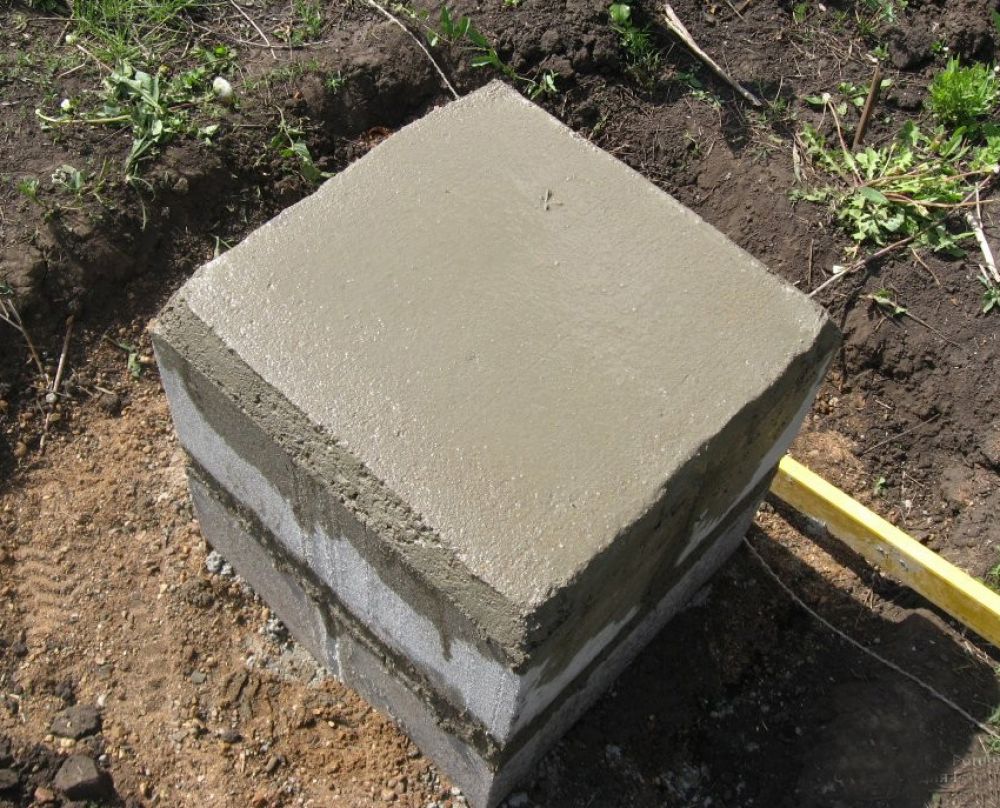
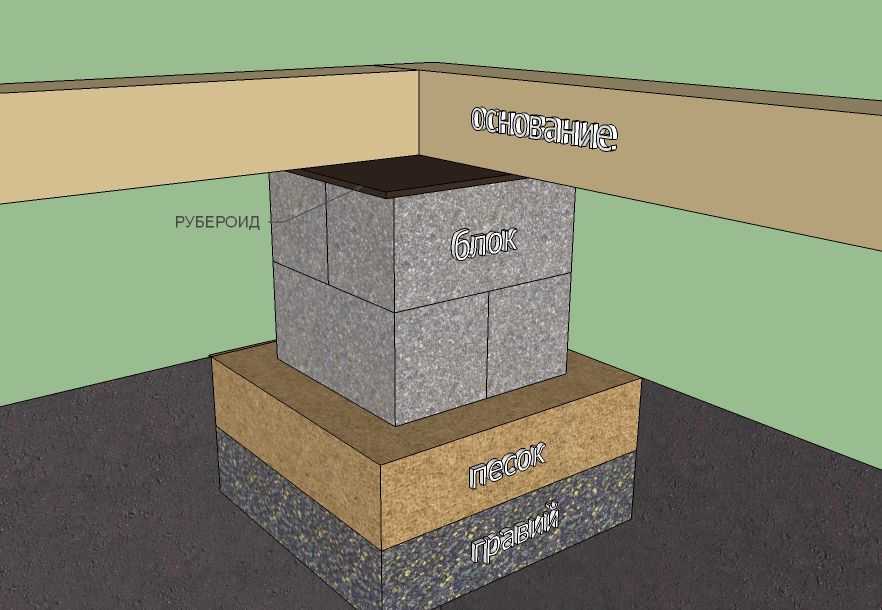
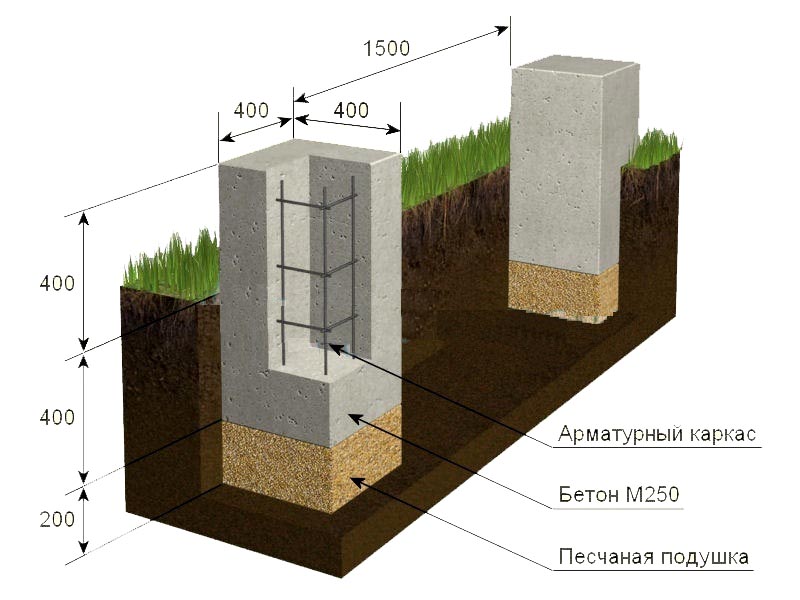
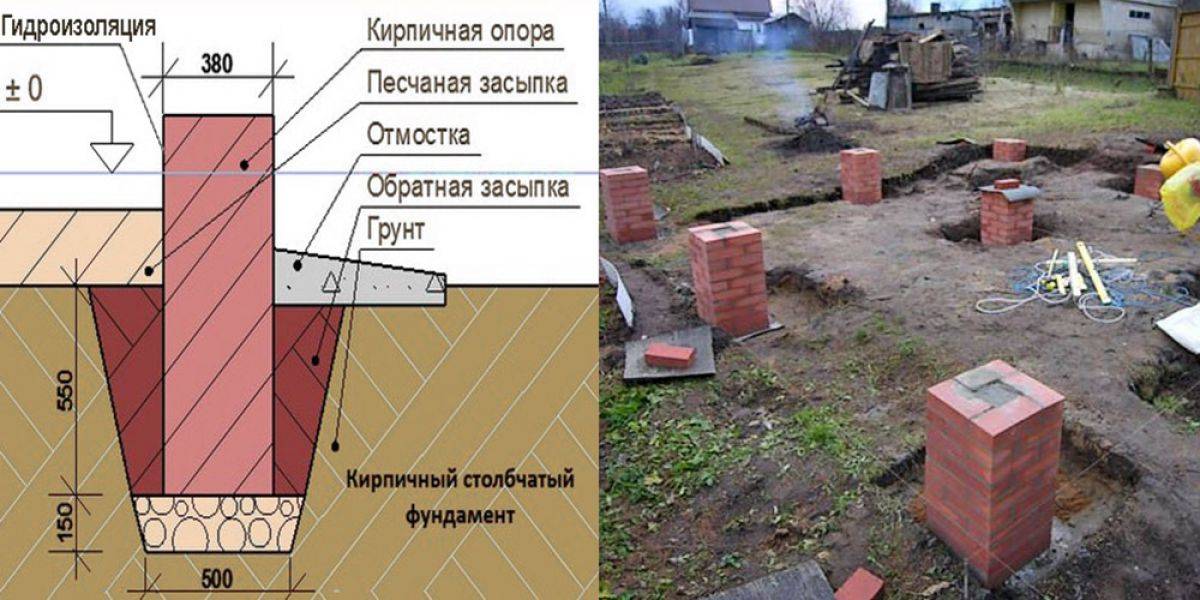
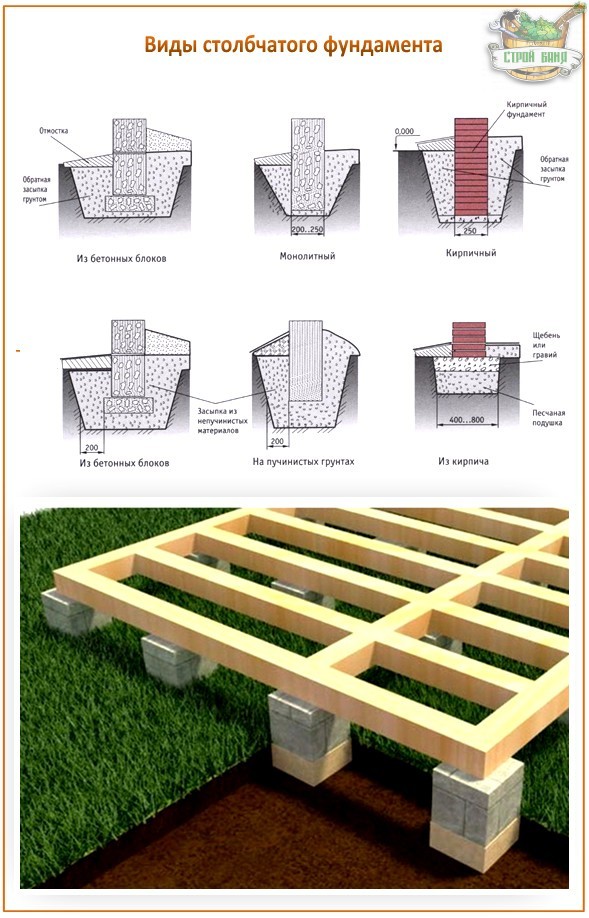
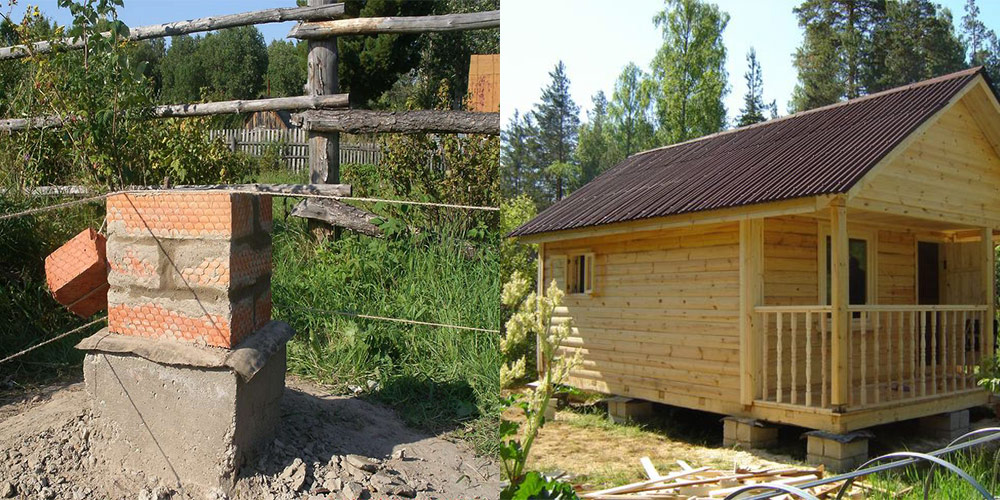
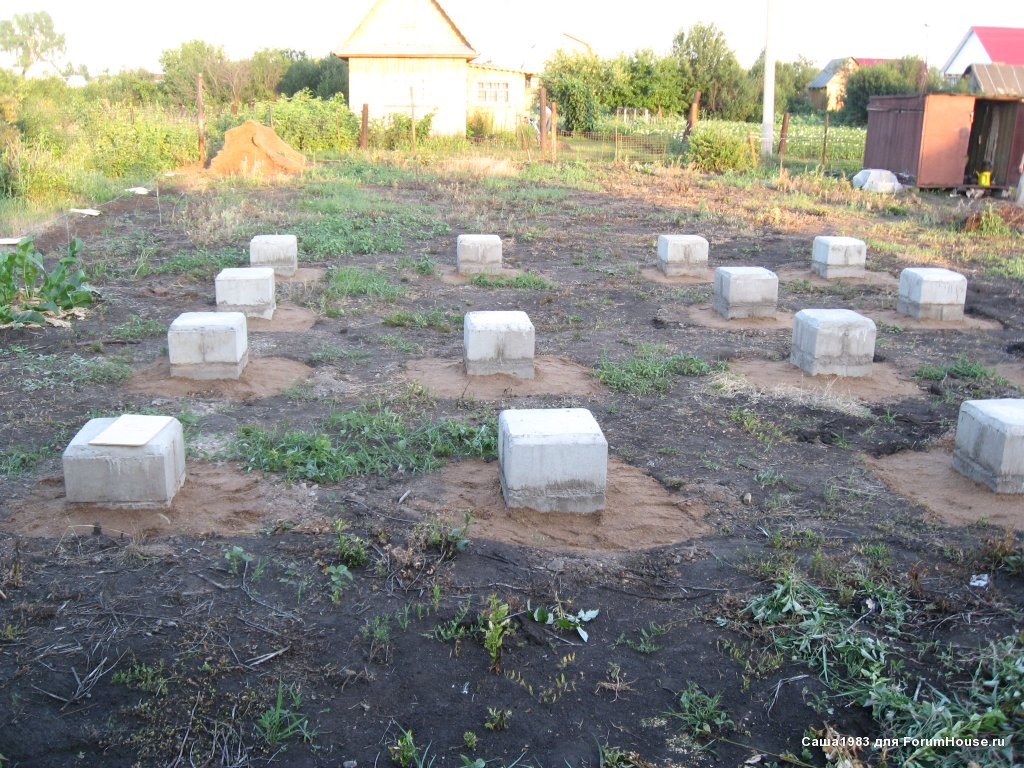
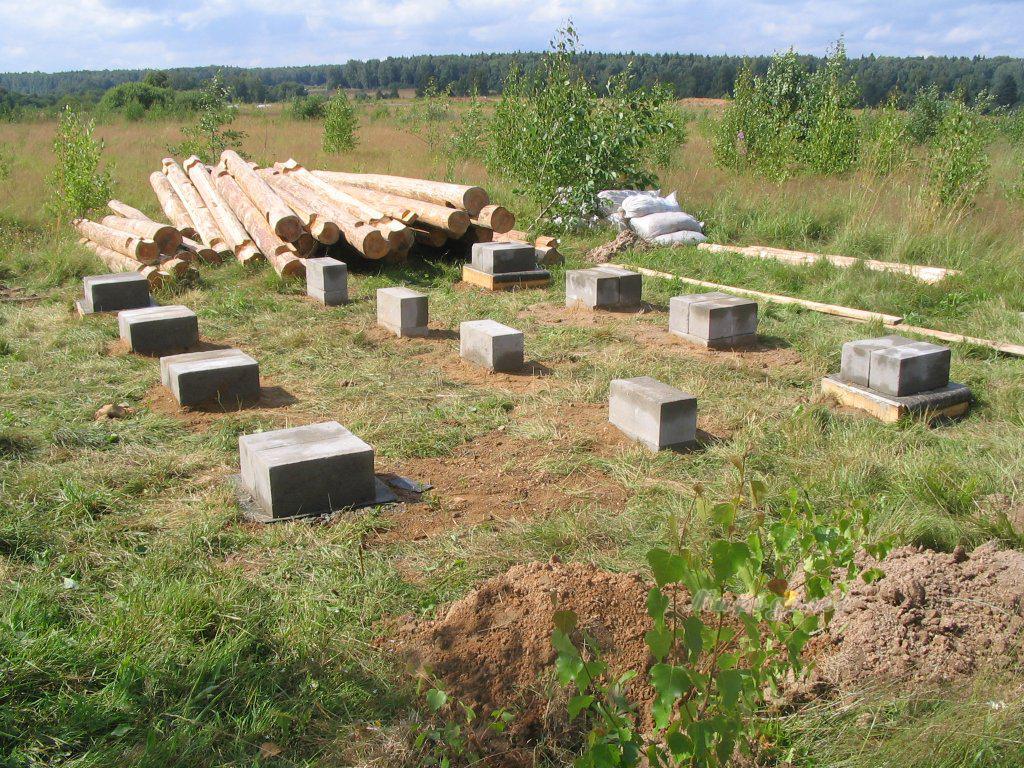
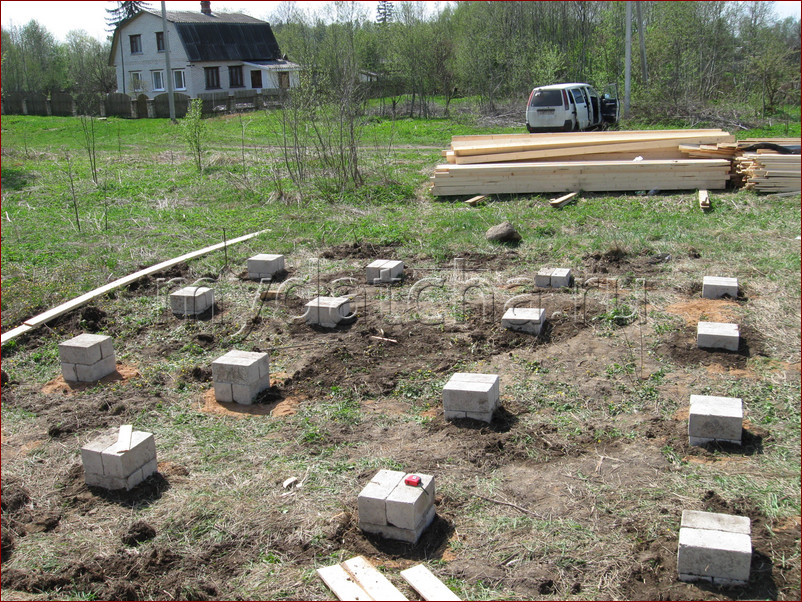
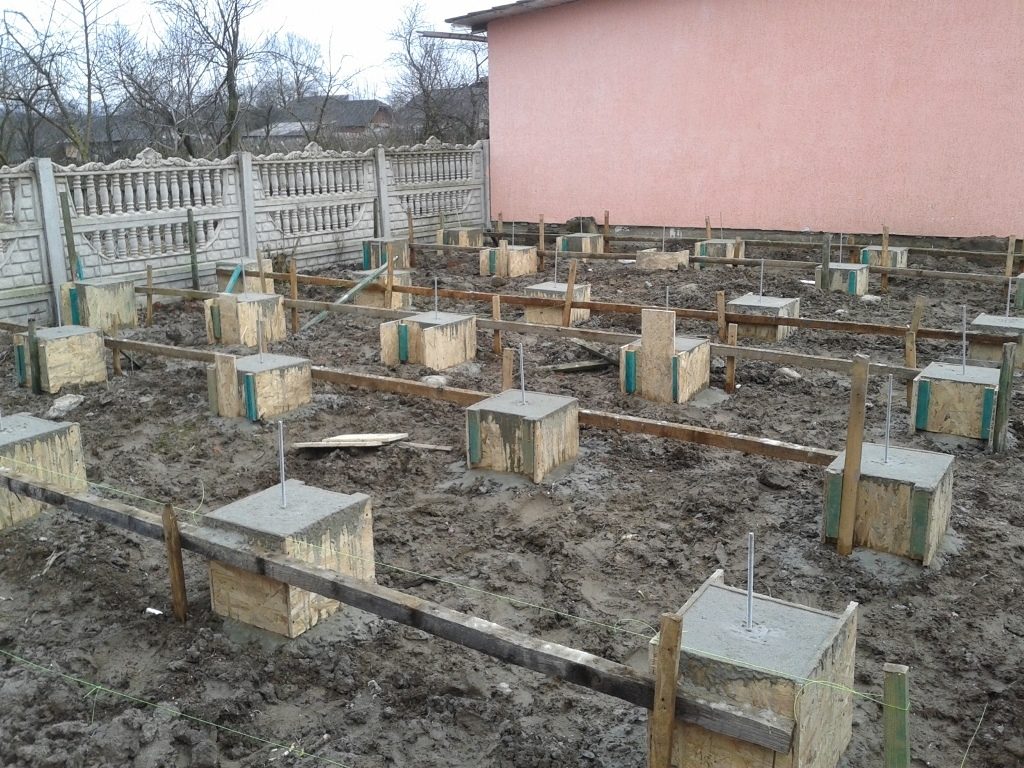
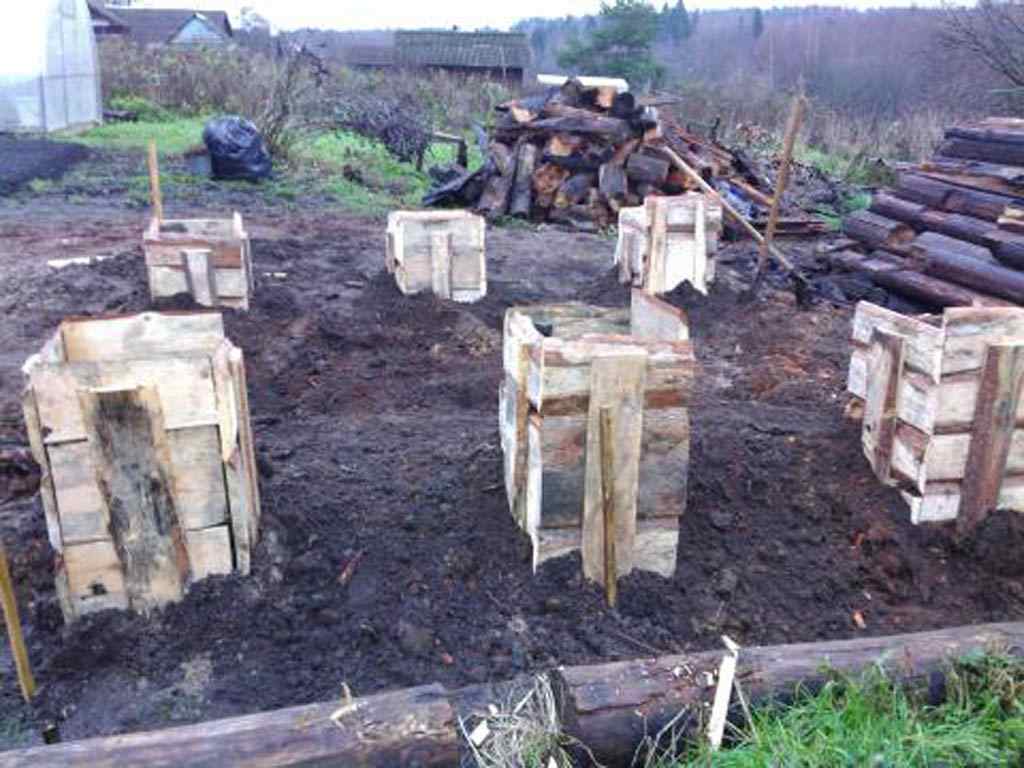
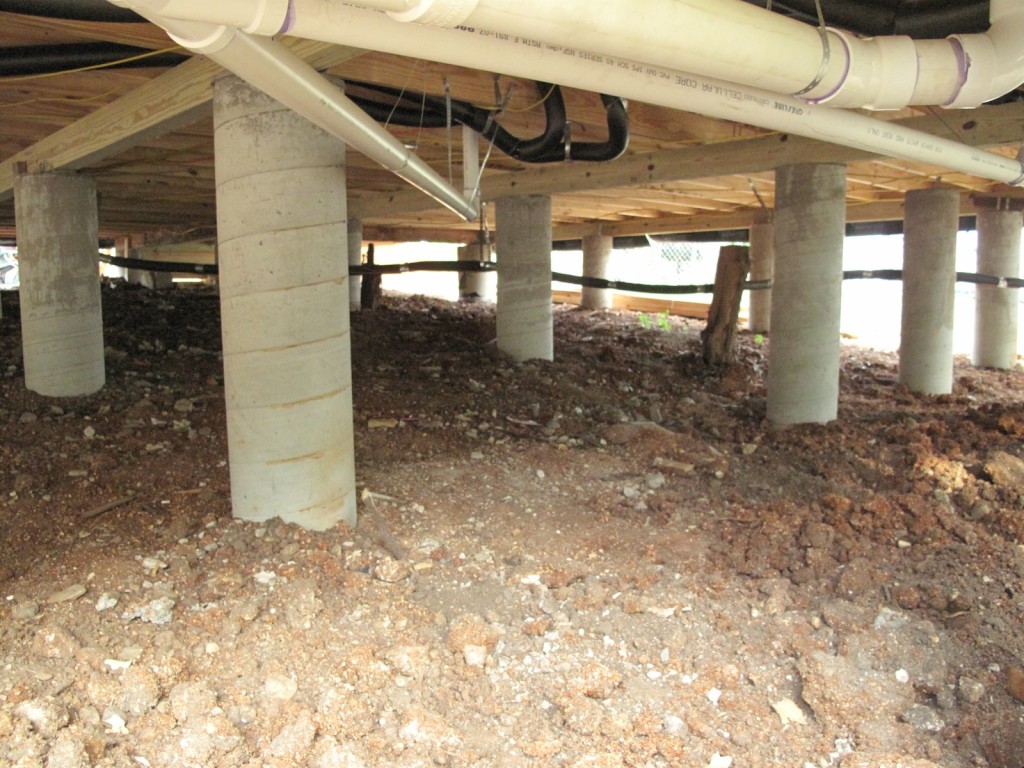
Whatever material is chosen for the construction of a columnar foundation, such a foundation is built approximately according to the same scheme - a hole of the required depth is dug, filled with 15-20 cm of sand, which is compacted with water spilling, after which a columnar structure is installed from blocks, bricks or pipes. filled with concrete mixture. Outside, each such pillar is carefully waterproofed using modern waterproofing materials - roofing material and bituminous mastic. If you prefer columnar foundations made of wooden pillars, then in addition to waterproofing, they should be additionally protected by impregnating with an antiseptic solution. Columnar foundations must be installed in the corners of a log house, at the intersection of internal walls. , as well as under the outer and inner walls after 1.5-2 meters. The device of a shallow columnar foundation is shown in the figure below.As can be seen from the diagram, a shallow foundation can be made of both brick and monolithic concrete.
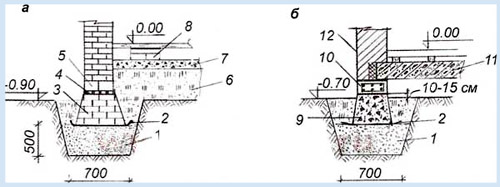
Columnar shallow foundations with tapering walls: a - brickwork; b - monolithic concrete;
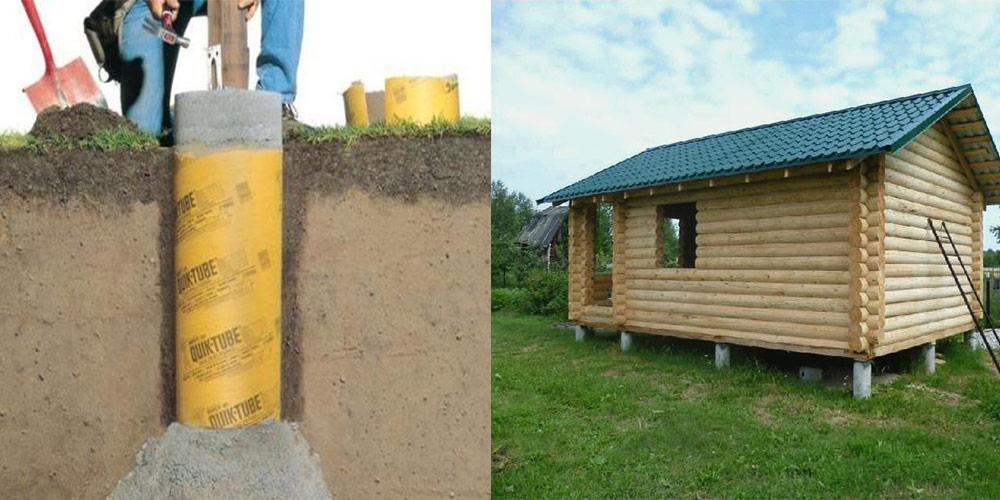
1 - sand pillow; 2 - roofing layer; 3 - columnar brick foundation; 4 - glued waterproofing; 5 - prefabricated reinforced concrete grillage; 6 - bulk compacted soil; 7 - concrete preparation; 8 - brick column; 9 - concrete foundation; 10 - monolithic reinforced concrete belt; 11 - reinforced concrete floor slab; 12 - slab insulation If you have determined that you need a recessed columnar foundation, then it can be made of monolithic concrete, poured into an asbestos-cement pipe, into which a reinforcing frame is previously inserted. Also, buried columnar foundations can be made of precast concrete blocks. Preparation of sand is also carried out under such a foundation.The diagram of a columnar foundation made of blocks buried below the freezing depth is shown below:
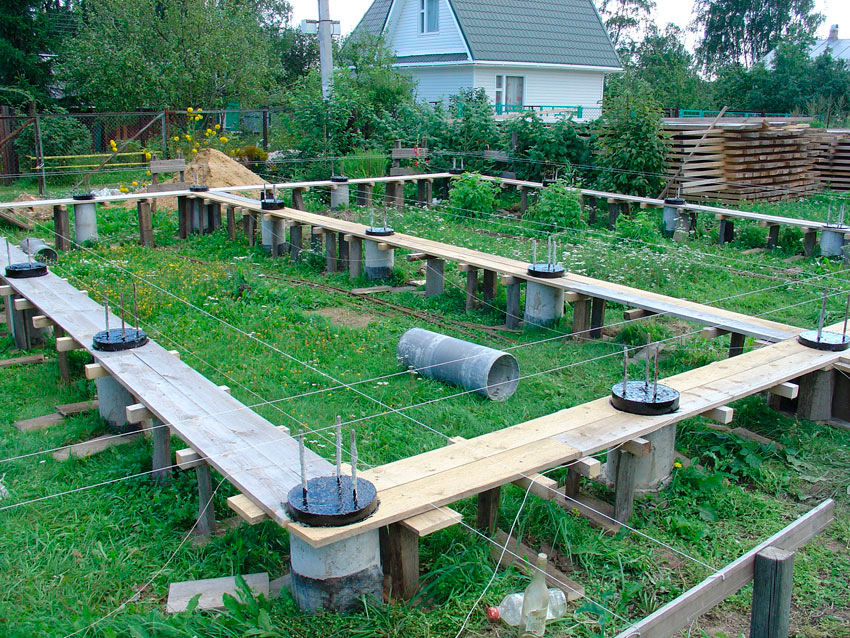
In some cases, it is necessary to carry out columnar foundations with a grillage - a reinforced concrete belt connecting the columnar foundations from above. Most often, the grillage is performed to evenly distribute the load from a brick building to the foundation. The diagram of the device of a columnar foundation with a grillage is shown in the figure:

The grillage device for a columnar foundation can be seen in the photo:

What foundation to choose for the construction of a bath using frame technology
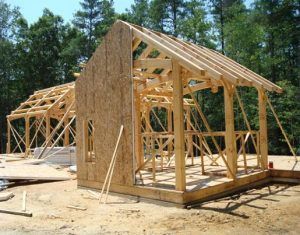
Frame structures are basically presented in the form of lightweight structures, consisting of small racks (maximum length 3 meters), internal and external cladding in the form of panels or boards, as well as insulation located in the walls.
As a result, any one-story frame bath will have a small dead weight that can withstand any type of foundation. In this case, the choice of a concrete base depends only on the level of occurrence of groundwater and the characteristics of the soil.
Options for a wooden foundation for a light frame bath
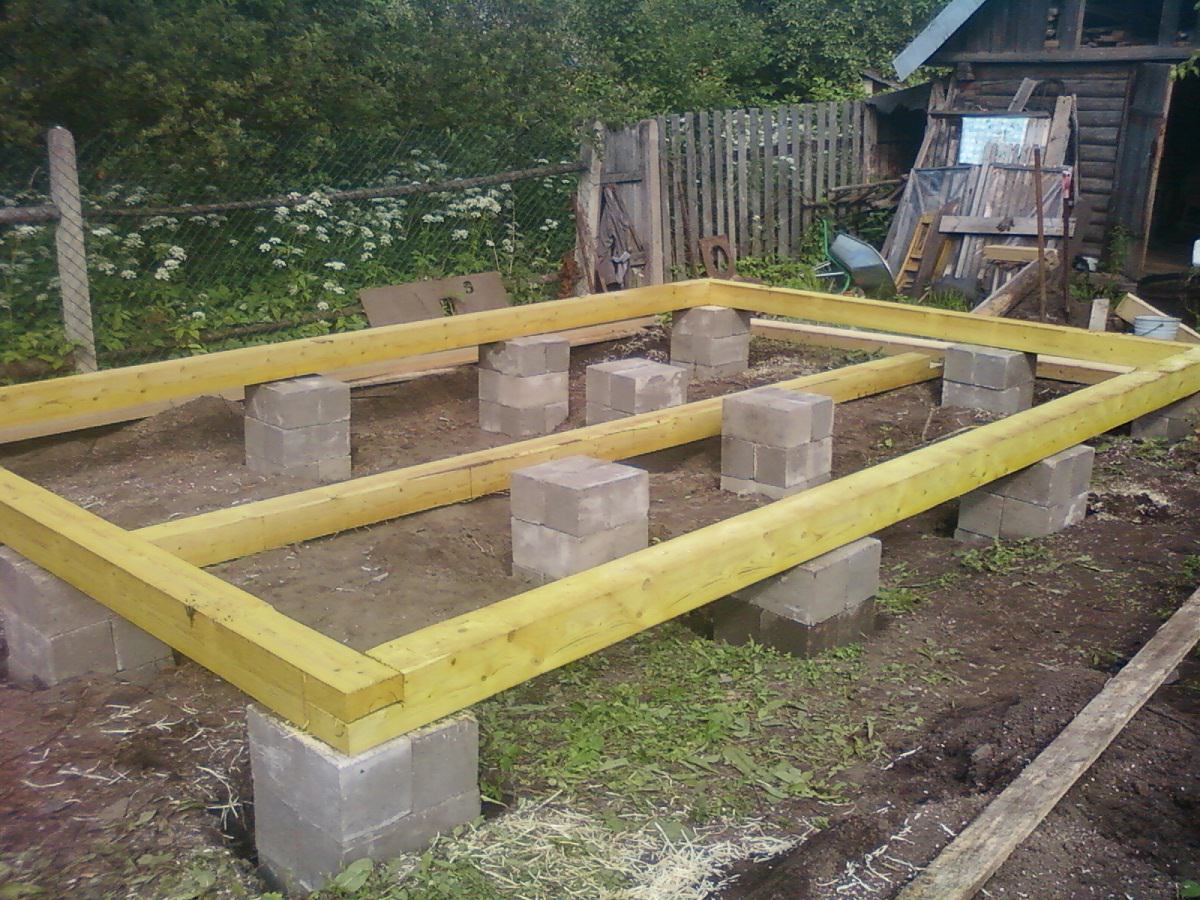
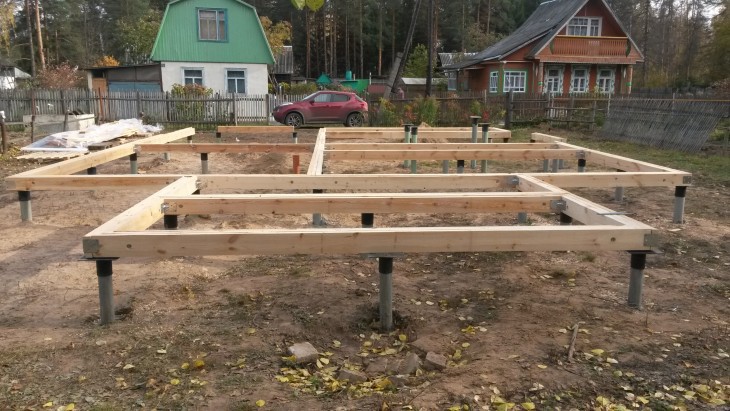
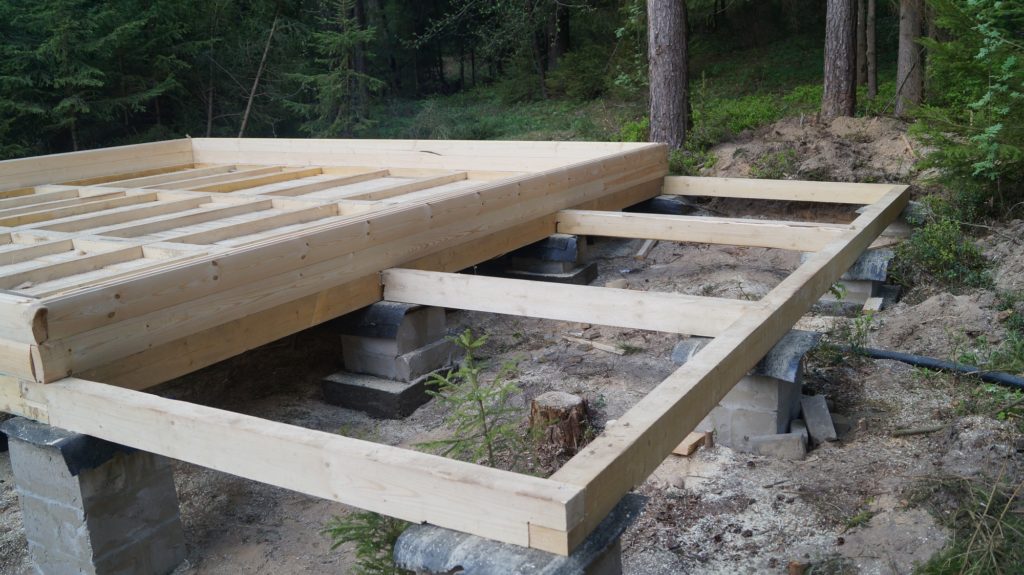
The use of a wooden lumber concrete base is possible only for mini-baths, the area of which does not exceed 12 sq.m. The most important thing here is to correctly calculate the diameter of the timber and to level the surface with your own hands.
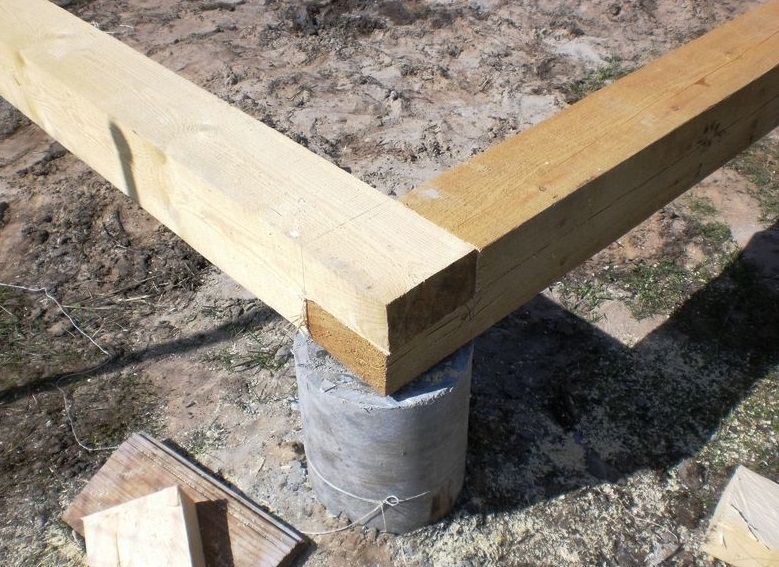
To build a simple wooden foundation, you only need to put up several beams at one level, which will be fixed with stakes from the sides. This base has proven itself well in the construction of small frame structures, especially in clay soil conditions. Despite the seasonal mobility of the soil, the base will not leave under the bath and will last for many years.
Columnar foundation option
 Column foundation for a bath
Columnar concrete base is set up if there is a high level of groundwater in the area. In addition, he will confidently hold the bath even in the case of uneven distribution and uneven soil composition. To build such a foundation with your own hands, you do not need to hire additional equipment or a construction team.
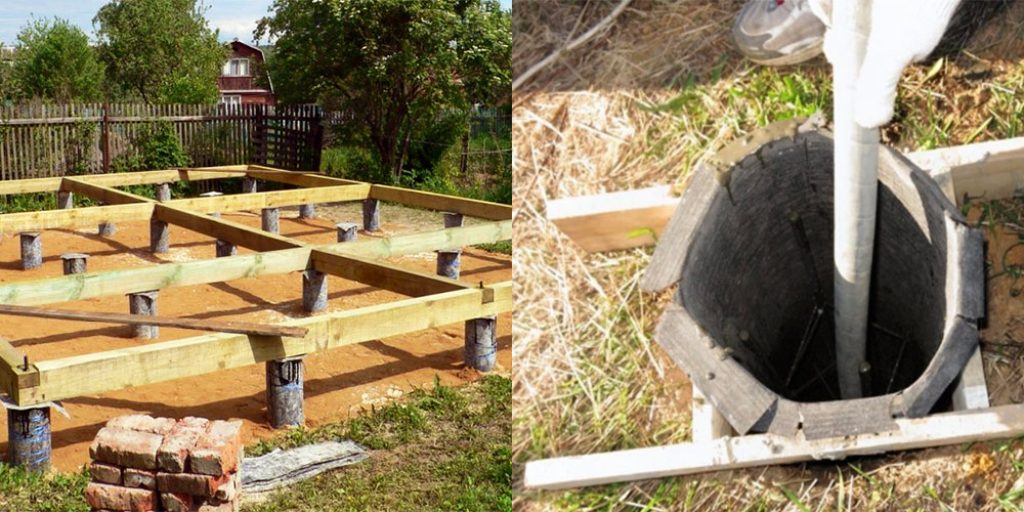
The whole set of necessary materials comes down to renting a good drill, buying a few asbestos or plastic pipes and 8-10 bags of cement along with 10 bags of sand. Laying the columnar base is divided into stages:
- It is necessary to level the ground under the site.
- It is necessary to mark the place where the future pillars will be located.
- Drill holes with a diameter of 10-15 cm and perform waterproofing from roofing material at the bottom of each pit.
- Knead the concrete with your own hands and carefully pour it into the hole in which a plastic pipe must first be installed.
- At a height of 20-30 cm from the ground, you need to fix the pipe and wait for the concrete mixture to harden. Don't forget to reinforce the pillars.
- Arrange a small grillage using a wooden bar.It will directly connect all concrete pillars, and serve as the base for the floor.
The device of the pile-screw foundation for the frame bath
This type of foundation is used only in difficult soils, where the groundwater is close and the average value of the soil freezing depth does not reach 0.5 meters. Metal piles, in turn, allow you to get to the base layer and stand firmly on the ground. Watch a video on how to arrange a pile foundation for a bath with your own hands.
To build a pile-screw base with your own hands, you need a team of up to 5 people. The work is as follows:
- On the previously cleared area, the places of the future location of the piles are marked.
- With the help of a drill, holes with a diameter of up to 40 cm are dug for the length of the pile, which is calculated after exploration and obtaining complete information about the soil.
- Metal piles are screwed vertically into the ground.
- The foundation structure is secured with a welded grillage and secured with strapping.
Erection of a strip foundation for a frame bath
The strip base option is assumed only in the presence of reliable soil (sandy loam, sand, etc.). In addition, the tape is not afraid of heaving soils and it comes out much more economical in terms of costs, in comparison with previous options. Watch a video on how to equip a strip foundation under do-it-yourself bath.
To build a tape with your own hands, follow the plan:
- On a pre-selected construction site of a frame bath, a 40 cm trench is dug along the contour of the future construction, the depth of which is no more than 0.5 m.
- Further, sand cleared of impurities is poured into the trench, which is carefully and layer by layer compacted.
- Above the trench, a formwork is placed, which is reinforced with welded metal pipes from below, and is fixed in width with rods.
- After reinforcing the entire tape, it remains only to pour the concrete in one pass.
- On top of the formed foundation structure, lay a strip of roofing material - this will protect the frame walls of the future structure from moisture.
As a result, regardless of which base you choose for the construction of a frame bath, the main thing is that it creates the most reliable and durable support and does not sink at any time of the year and on any soil.
How they are arranged and work
There are several ways to classify foundations used in modern construction.
Each of them concerns an important aspect: material, design and purpose.
But first you need to understand why there is a need to build a bathhouse foundation at all - after all, this is an easy construction. That's right - for an easy building (or for any weight on rocky ground), it may be absent or purely symbolic. But is the bath always easy?
To begin with, let's imagine this: no matter how unshakable the land may seem to us, it looks more like the sea than the builders would like. It's just a very slow sea. Instead of water in this sea, soils. And human structures are drowning in it. Depending on the composition of the soil, the sea can be very unstable and fluid, or it can try to squeeze the foundation out of itself in the cold.
The building will not crack or collapse only if a reliable foundation becomes an intermediary between it and the ground. It redistributes and transfers the load from the walls and roof to the ground. The one settles under pressure - this is one process. And at other times, the building expands and raises - this is the opposite process.
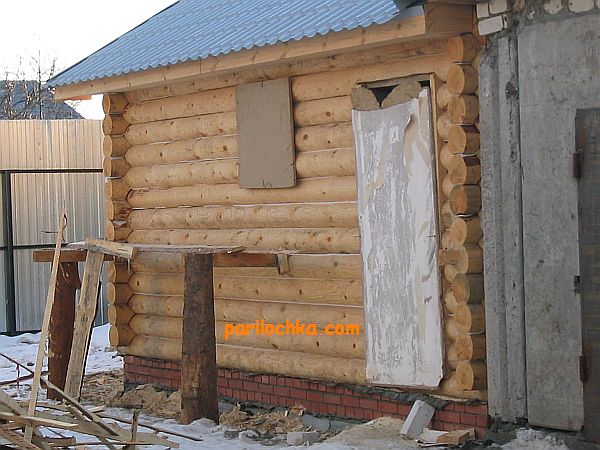
IMPORTANT! You need to know the geology of the site in order to make the right decision about the material and foundation for the bath.
At temperatures below freezing, the water in the earth becomes ice. And the volume of ice is greater than that of liquid. Therefore, the ice expands, crushing everything that gets in its way.The depth of the layer of freezing soil depends not only on the strength and duration of the frost, but also on the composition of the soil - clay soils swell especially strongly, and large sands do not suffer from this. But the finer the sand, the closer it is in properties to clay!

The table shows recommendations for choosing a foundation design, depending on the type of soil. Let us clarify that on coarse, gravelly sand, you can put any, and on fine sand - the types indicated in the table.
But here's what is not in the table: according to the depth of the laying, the foundations are divided into shallow and buried. The difference between them is how they relate to the depth of freezing. Shallow ones ignore this value, and deep ones are made lower in order to transfer the load to less mobile (in winter) soil.
The required height of the foundation and the calculation of the depth of its foundation are discussed here.
As for the material, the traditional materials are stone and mortar. But nowadays, concrete has replaced natural stone in most cases. Concrete types are divided into monolithic and prefabricated. The former are cast on site, the latter are manufactured at the factory in the form of standard blocks. A slab or strip foundation can be made of concrete.
If you do not use concrete as the main material, then there are varieties of columnar and pile foundations, which we will talk about a little later.
ATTENTION! Disadvantages of soils - not a reason not to build, it will just come out more expensive, especially if you change bad soil to coarse sand. In addition to replacement, you can strengthen a weak base, for example, with a weak cement mortar .. Groundwater is a separate topic
They significantly affect the bearing capacity of the soil and are capable of slowly or quickly destroying the foundation. Ideally, the depth should be below the freezing level and above the water table. But this is not always feasible.
Groundwater is a separate topic. They significantly affect the bearing capacity of the soil and are capable of slowly or quickly destroying the foundation. Ideally, the depth should be below the freezing point and above the water table. But this is not always feasible.
The main means of combating groundwater is drainage. However, its construction is expensive, so it is always better to build it not in the lowlands.

Read a great article on all the stages of building different types of foundations here.
Bath on a columnar foundation
The load can be transferred from the building to the ground either by planes or pointwise. When calculated correctly, point transmission is no worse, and even better for some types of soil.
Point transmission is carried out either with the help of posts or piles. The latter will be discussed below. The fundamental difference between pillars and piles lies in their length, and not only in the material. The piles are much longer than the posts.
The ability to use simple and affordable materials makes the posts an attractive option for the budget construction of a bath. Especially when it comes to frame construction.
The material for the column can be:
- stone;
- brick;
- concrete blocks;
- asbestos-cement pipes with concrete pouring;
- non-standard materials: sleepers, rubber tires, etc.
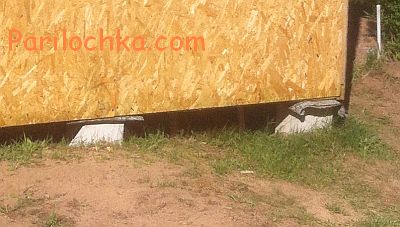
Frame structure on concrete posts
Recommendations
There is a wide variety of basement designs, each with a number of advantages and disadvantages. It is impossible to choose the best option, because the choice of the base depends on the characteristics of the territory. When erecting the foundation, it is necessary to consult with professionals, because the duration of the operational life of the bath depends on the competent arrangement of the foundation.
A layer of sand and gravel must be protected with a layer of geotextile. This material can be laid between the layers of soil, bending the edges up. The textile will protect the pillow from silting and erosion. The material passes moisture through itself well, and due to its composition it does not undergo destruction for a long time.Geotextiles are produced in special rolls, which makes it easy to use.
It is necessary to drain water from the bath. To do this, arrange a special drain that goes into the ground.
How to start building the foundation for the bath, you will learn further.
Where to start work
> So, first of all, we draw up the general outline of the building perimeter. Next, we make markings for the pre-bath room, steam room and the main washing room. Most often, a steam room and a place for washing are combined in order to save usable space. Such a plan already gives an accurate idea of how the foundation will be located. For further calculations, a drawing and a specification of the material from which the future bath building is being erected is required. Based on it, taking into account the height of the walls, it is easy to calculate the type of foundation required. Today, baths are built not only on logs. For these purposes, a beam, a foam block, a gas block, a frame type of walls, an expanded clay block, a brick and even a cinder block are perfect. Frame and brick walls will need to be additionally insulated.
In this article, the calculations are given for a traditional log bath. Other materials are used less frequently. In the traditional sense, we have this type of bath. Calculations are similar for log structures.
The next step is to prepare a site for construction. If there is large vegetation on the ground in the form of trees and shrubs, then they should be cut down, stumps uprooted, roots cut down. Large and medium-sized stones must be removed from the territory of the building, the grass must be mowed. The top layer is covered with turf - remove with a shovel and set aside away from the line so that it does not interfere. It can be useful in the future in the garden, as it is fertile soil.
Now you need to make a markup for digging a trench to fill the base. For these purposes, ordinary wooden pegs or rods of ordinary reinforcement are often used, which are exposed at the corners and at the joints of the foundations.
At this stage, it is very important to keep the right angle of the lines and the diagonal at the corners. Any rope serves as a zero level
It is pulled on pegs and the horizontal is adjusted using a regular building level. The straightness of the corners is verified with a square or a simple check of the diagonals of the rectangle. The diagonals must be equal to each other.
Column foundation made of pipes
Columnar pipe foundations
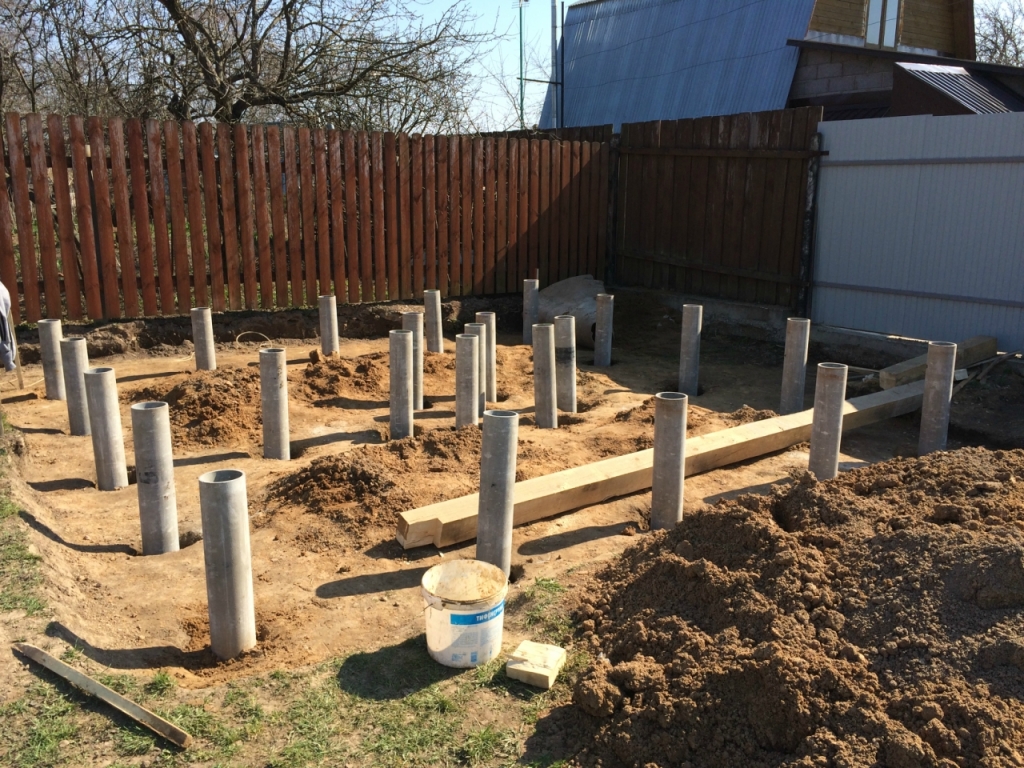
The best option for a columnar foundation of a bath is metal or asbestos-cement pipes Ø200 mm, which are easily cut by a grinder into parts of the required length. It should be noted that a pillar made of a pipe should protrude about 0.4 meters above the surface.
| Name of production | Weight of 1 pipe, kg | Inner outer diameter, mm | Price for 1 p / m, rub. |
|---|---|---|---|
| BNT 100 * 3.95m | 24 | 100/118 | 102,97 |
| BNT 150 * 3.95m | 36 | 141/161 | 165,79 |
| BNT 200 * 5m | 85 | 200/222 | 319,99 |
| BNT 250 * 5m | 125 | 238/266 | 392,76 |
| BNT 300 * 5m | 162 | 292/320 | 617,46 |
| BNT 400 * 5m | 279 | 365/407 | 958,66 |
| BNT 500 * 5m | 430 | 456/508 | 1732,51 |
Without fail, pipes must be protected from moisture and other negative factors. To do this, you need to make waterproofing - wrap the pipe surface with roofing felt with bitumen, glued waterproofing materials or treat with special mastics.
We prepare pipes for the foundation
The prepared pipes are carefully and evenly lowered into each hole.
Installation of foundation pipes
The gap between the pipe wall and the ground is filled with previously dug earth or sand with gravel (layer thickness 40-50 centimeters), which it is advisable to carefully tamp.
In the middle of the installed pipes, at a distance of 7 centimeters from each other, reinforcing rods of Ø12-14 millimeters should be inserted, which act as a reinforcing frame. Since the reinforcement should protrude above the finished posts, its length should be 20% longer than the pipe size.
After completing these preparatory work, you can start pouring the foundation pillars. The best option is concrete grade M400.It can be ordered in specialized enterprises or made by yourself using a concrete mixer. For self-production, it is enough to use cement of the M400 brand, coarse sand, gravel of fine and medium fractions, which must be mixed in a ratio of 1: 1.5: 3. The required amount of water is 0.4 part of the amount of cement taken.
The process of pouring the concrete mixture itself takes place in several stages (see table).
| Work order | Illustration |
|---|---|
| inside the installed pipe, concrete is poured to a third of its height |
Fill |
| the pipe rises, which makes it possible for the concrete to form a kind of pillow, and then it is pressed into this base |
The pipe rises |
| subsequently, step by step, in and around the pipe, we continue to pour concrete, tamping it every 0.3 meters with a deep vibrator for concrete, and in its absence, you can use a reinforcing bar. This is necessary to get rid of air bubbles and improve the quality of concrete. |
Adding soil Flooded column |
Cover the piles made in this way with foil and let them stand for 7-10 days. During this time, the concrete is gaining the necessary strength and the construction of the bath can be continued.
This method of erecting columnar foundations is one of the most popular due to its high reliability, relative cheapness, quick installation with minimal skills.
Ready waterproof bollard
How to insulate the foundation of a bath
Do-it-yourself work on the basement of the bath is easy to do. Around the perimeter of the building, soil is removed 50 cm wide to the depth of the base. Sand 20 cm high is poured onto the bottom of the trench. Sheets of expanded polystyrene are laid on a tamped sand pillow. Plates are glued with bitumen mastic or other adhesive bitumen-containing means. After the installation of expanded polystyrene plates along the perimeter of the bath, the sheets are poured with sand and the gravel layer is restored.
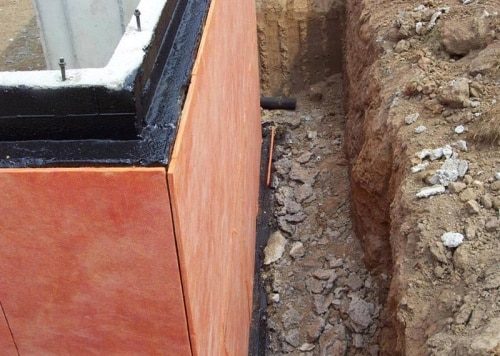
Insulation of the foundation with expanded polystyrene plates
Attention! The joints between the plates are filled with polyurethane foam to avoid condensation. Styrofoam cuts off cold air well and is the cheapest insulating material
It has a porous structure. Foam sheets are glued to the base with a bituminous adhesive solution in a pre-prepared trench
Styrofoam cuts off cold air well and is the cheapest insulating material. It has a porous structure. Foam sheets are glued to the base with a bituminous adhesive solution in a pre-prepared trench.
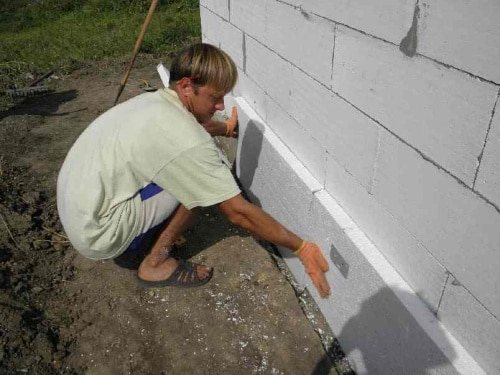
Insulation of the foundation with foam sheets
Polyurethane foam is ideal for insulating the basement of a bathhouse and basements. It is durable, safe, waterproof and heat insulating material. Polyurethane foam can be sprayed onto a concrete base, thereby leaving no gaps.
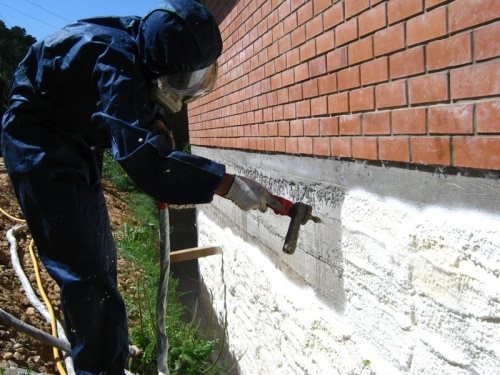
Thermal insulation of the basement of the bath with polyurethane foam
Strip foundation for a bath of blocks
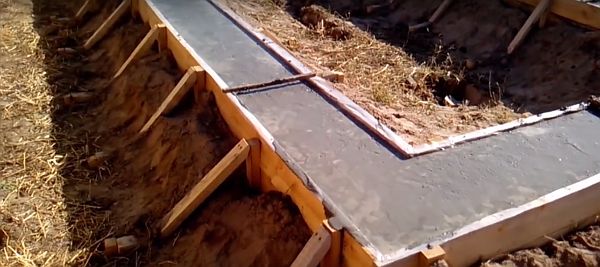
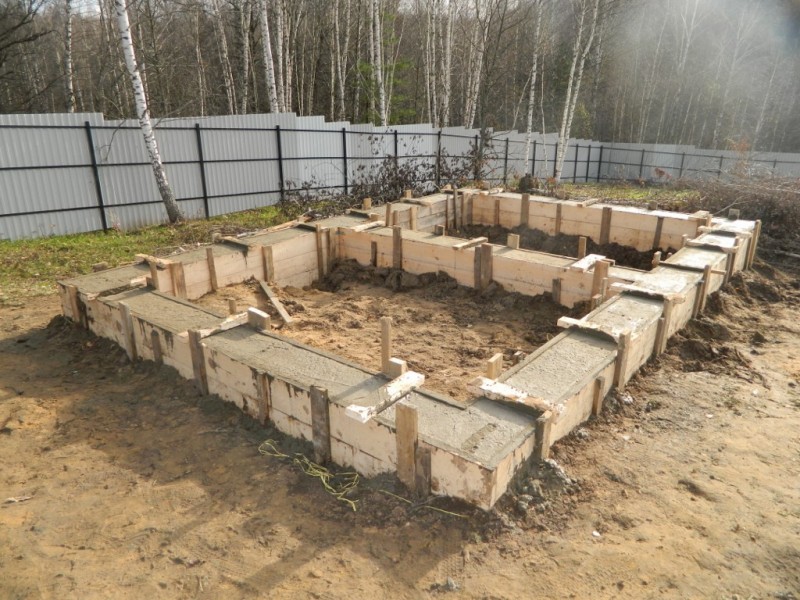
Strip foundations in the formwork.
After the building spot has been selected, the marking of the site begins. To do this, you can use building threads and knowledge in geometry. Just postpone the right angle, knowing that for a triangle with sides 3 and 4, the hypotenuse will be 5. Another helper will be the building level.
The inner contour is the first thing that is marked out. When the marking of the future foundation is completed, its correctness is checked by measuring the diagonals: in a rectangle they must be equal to each other.
IMPORTANT! Do not forget that the heavy stove, which will heat the bath, also needs a solid foundation.
After marking, the next step is digging trenches. Each trench is dug 20 cm wider than the width of the concrete band.
In case of strongly heaving soil, it is worth adding depths under the sand and gravel cushion, which is made with a thickness of 10 to 60 cm. About the height and depth of the foundations here.
IMPORTANT! When filling up sand, do not forget to tamp it or water it with water to compact it.
On top of the sand is a layer of rubble. The depth of the foundation above the pillow should be 60-70 cm - this is the shallow version.
After the completion of the earthwork, the turn of the formwork comes. It is made of planks reinforced at the sides and fastened at the top of the structure. A reinforcing frame is placed inside the wooden formwork on stars or other supports. Even for such a light bath, like a foam block, you cannot do without it. Enough 12 mm reinforcement.
IMPORTANT! Before pouring, do not forget about the vents - cuttings of about 100 mm pipes inserted into the frame, which will then become ventilation holes for the subfloor.
After pouring concrete, air is necessarily expelled from it - either by bayonet or using a vibrator. The poured concrete will set within 7-10 days, after which the formwork can be removed, but the concrete will take a long time to mature. After 28 days (recommended period) after pouring, you can start building the walls.
Useful video
We suggest watching a video filmed by professionals, where you will find many nuances that are not mentioned in the article.
How to make a heap around the bath
In ancient times in Russia, the heap was used as a bench. Relatives and friends gathered on the rubble. They sang songs and danced. In modern construction, the embankment is rather decorative.
Materials for making:
- corrugated board or wooden boards 4 * 10 cm;
- nails;
- metal profile or wooden bar 5 * 5 cm;
- sawdust.
Installation steps:
A metal profile is attached along the perimeter of the bath, giving it the shape of a mound.
Installation of a frame made of a metal profile for the construction of an embankment
Attention! If the upper part is tilted too much, it will be impossible to sit on it. If you plan to use the filling as a bench, you should use wooden materials or bricks.
According to the dimensions, the blanks are cut out of the corrugated board and attached to the frame
The voids are covered with sawdust.
Installation of corrugated board on the frame
Sheathed the upper part of the embankment and decorate the corners.
Facing the frame with corrugated board
Monolithic foundation (reinforced concrete slab)

Monolithic foundation (reinforced concrete slab)
This is the most reliable type of foundation for a bath, the easiest to manufacture. It requires high-quality materials, since more requirements are imposed on a monolithic slab than on other structures. The work process is not complicated, many developers are pleased that there is no need to use construction equipment.
| Stage | Description |
|---|---|
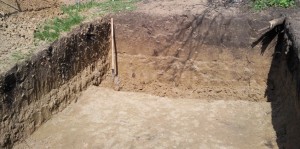
Digging a pit |
Usually, for a monolithic slab, a pit is dug with an allowance for creating a special cushion of gravel or sand. It is necessary to accurately level the surface. The creation of slopes is prohibited. If you neglect this rule, the foundation is guaranteed to undergo cracking and deformation. |
|
Formwork installation |
To create the formwork, it is necessary to select boards at least 25 mm thick. They are installed using supports. Before laying the reinforcement, check the rigidity of the fasteners so that after the concrete is poured there is no deformation or destruction of the formwork. |
|
Waterproofing and insulation |
Drainage is being created for subsequent water supply and sewerage. Layers of waterproofing are applied to the sand cushion, if necessary, insulation. When using the latter, care should be taken that it is covered on both sides with a material that does not allow moisture to pass through. |
|
Reinforcement Reinforcement scheme |
Reinforcing mesh is knitted with the use of reinforced concrete rods of various sections. Initially, it is necessary to provide a base on which the reinforcing cage can be placed. It should be remembered that it is impossible to lower the reinforcement into the pit directly onto the insulating layers. When pouring concrete, in this case, the mixture will not cover the lower edges of the reinforced concrete mesh, which will significantly reduce the strength of the entire structure and can lead to cracking of the foundation.On the surface of the pit, special chairs for reinforcement are installed. It is advisable to use these elements. Bulk bricks and other rigid structures can act as an alternative, but it is very difficult to attach a reinforcing cage to them. The widest reinforcing bars are selected. They are required to install a vertical row. To make it convenient to work with the structure, you can immediately install all the rods on the armature chairs. Horizontal elements of the frame are laid out in 1-3 layers, depending on the depth of the foundation. The distance between the layers can be made from 10 cm, since a denser fastening is rarely justified. At all intersections, the reinforcing bars are held together by welding or steel wire. |
|
Pouring concrete mix |
You can create a concrete mixture yourself, guided by a common recipe. Crushed stone, sand and cement are mixed in an exact proportion of 5: 3: 1. If this work seems too long, you can purchase a ready-made mortar, which is sold dry. To dilute the mixture, both independent and factory preparation, it is necessary to use water. The exact framework is not determined, however, the concrete should be brought to a consistency resembling low-fat sour cream. Immediately after dilution, it is necessary to start pouring the mixture. It is very difficult to do it manually. If necessary, work is performed in several stages, that is, in layers. This technique negatively affects the strength characteristics of the foundation, however, it is allowed in building codes. It is advisable to use special equipment. The device can be rented or borrowed from friends. In this case, the device will take the finished mixture from the mixer and feed it to the object using a tray. While pouring the concrete mixture, you need to work in parallel with a deep vibrator. With its help, the structure becomes strong and even, since excess air is removed on time. This measure cannot be dispensed with. |
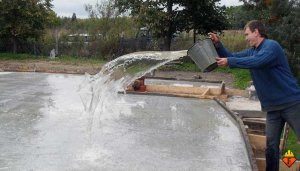
Foundation wetting |
After pouring the foundation, wait 24 hours and moisten it. This requires a sprinkler. It is forbidden to flood the structure with a strong jet of water. If the work is carried out at low temperatures, the foundation must be covered with a waterproofing polyethylene film. The slab foundation dries for a long time. It is advisable to refrain from further construction work for 3-5 weeks. |
Anyone can fill the foundation for the bath with their own hands. To do this, you need to choose the appropriate type of construction, correctly carry out all stages of work and use only high-quality materials. If the foundation is poured carefully, all building codes are observed, the base of the bath will be strong and durable.

