How to make a cellar in the country
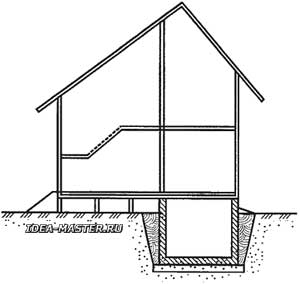
Before starting the construction of a cellar in the country, you need to understand the classification of this kind of structures. So, it is customary to call the basement the underground part of the cottage or other building, which can be used for absolutely any purpose:
- as a change house for storing inventory, some products, building materials or other things needed in the household;
- as a boiler room in which a heating unit is installed and firewood, coal or pellets are stored;
- as a basement, on which, with proper waterproofing, a pool or even living rooms in the basement can be placed.
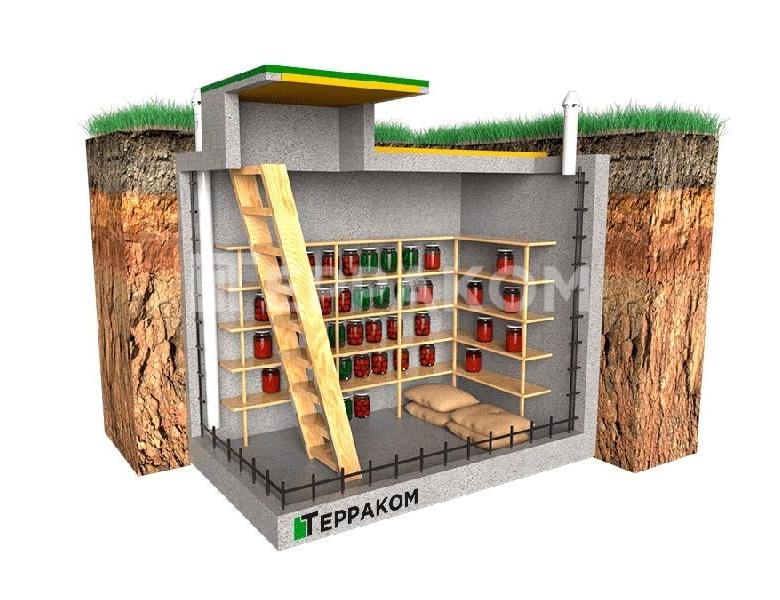
A cellar is usually called a structure detached from a residential building, designed specifically for storing food from the garden and cans with conservation. It is quite possible to design a basement in the country, including the arrangement of a separate room - a cellar.
It is customary to build cellars in suburban summer cottages. After all, their construction can begin even during the operation of the house, while the basement must be laid along with the foundation, laying communications underground, an additional layer of insulation and waterproofing.
The classification of cellars depends primarily on groundwater level Location on. So, if groundwater flows through:
- deep (more than two meters from ground level) - you can build an underground cellar completely below the ground level.
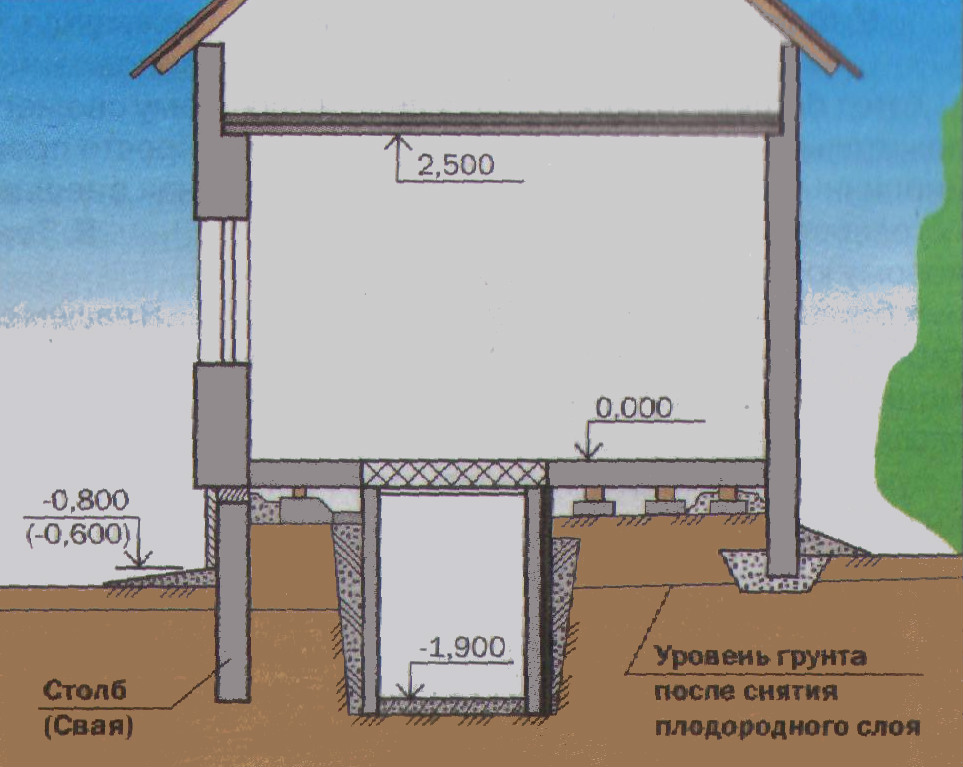
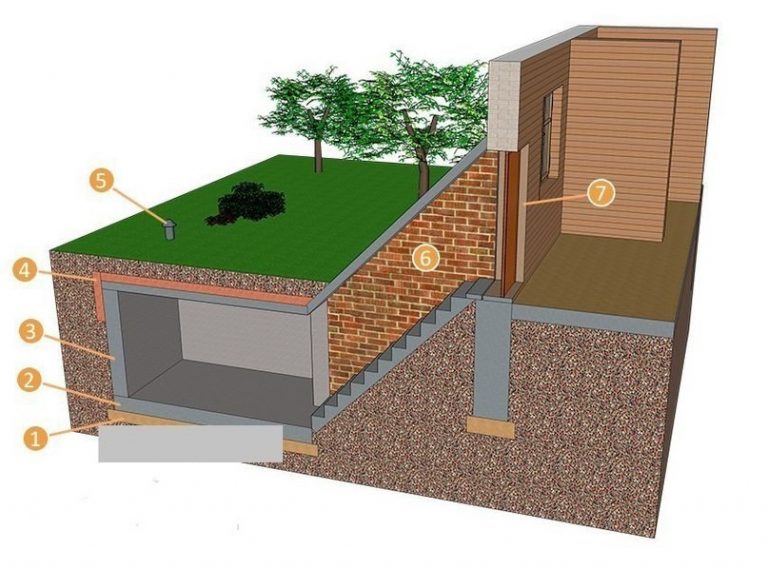
- Close to the surface - only an overground structure is suitable, which involves the construction of not only a basement, but also a change house, a barn or a summer kitchen above it. The upper building will serve as an equalizer of temperatures outside and inside the cellar, as well as additionally protect the underground from precipitation and moisture.
- The average level of groundwater (120-150 cm) makes it possible to build a semi-underground type cellar, when part of it is underground, and part of it is raised above zero.
To determine the type of cellar for a summer residence, first of all, it is necessary to inspect the groundwater. This is easy to do if there is a well or a well in the country. Otherwise, you will have to drill a special hole and measure the water level. But this method will allow you to additionally take soil samples from the required depth, which will help at the design stage to determine the wall material, type of floor and other structural elements of the basement for the summer cottage.
Attention! The groundwater level in the country should be measured during the season when the amount of precipitation in the region is maximum. Usually, this is done in spring or autumn.
How to build a foundation with a basement with your own hands?
A phased plan for the construction of a base with a residential basement consists of the following points:
- Cleaning and marking the construction site.
- Arrangement of a pit and trenches for engineering communications.
- Arrangement of drainage bedding under the sole of the future foundation.
- Arrangements for waterproofing the foundation soles.
- Construction of the sole of the base.
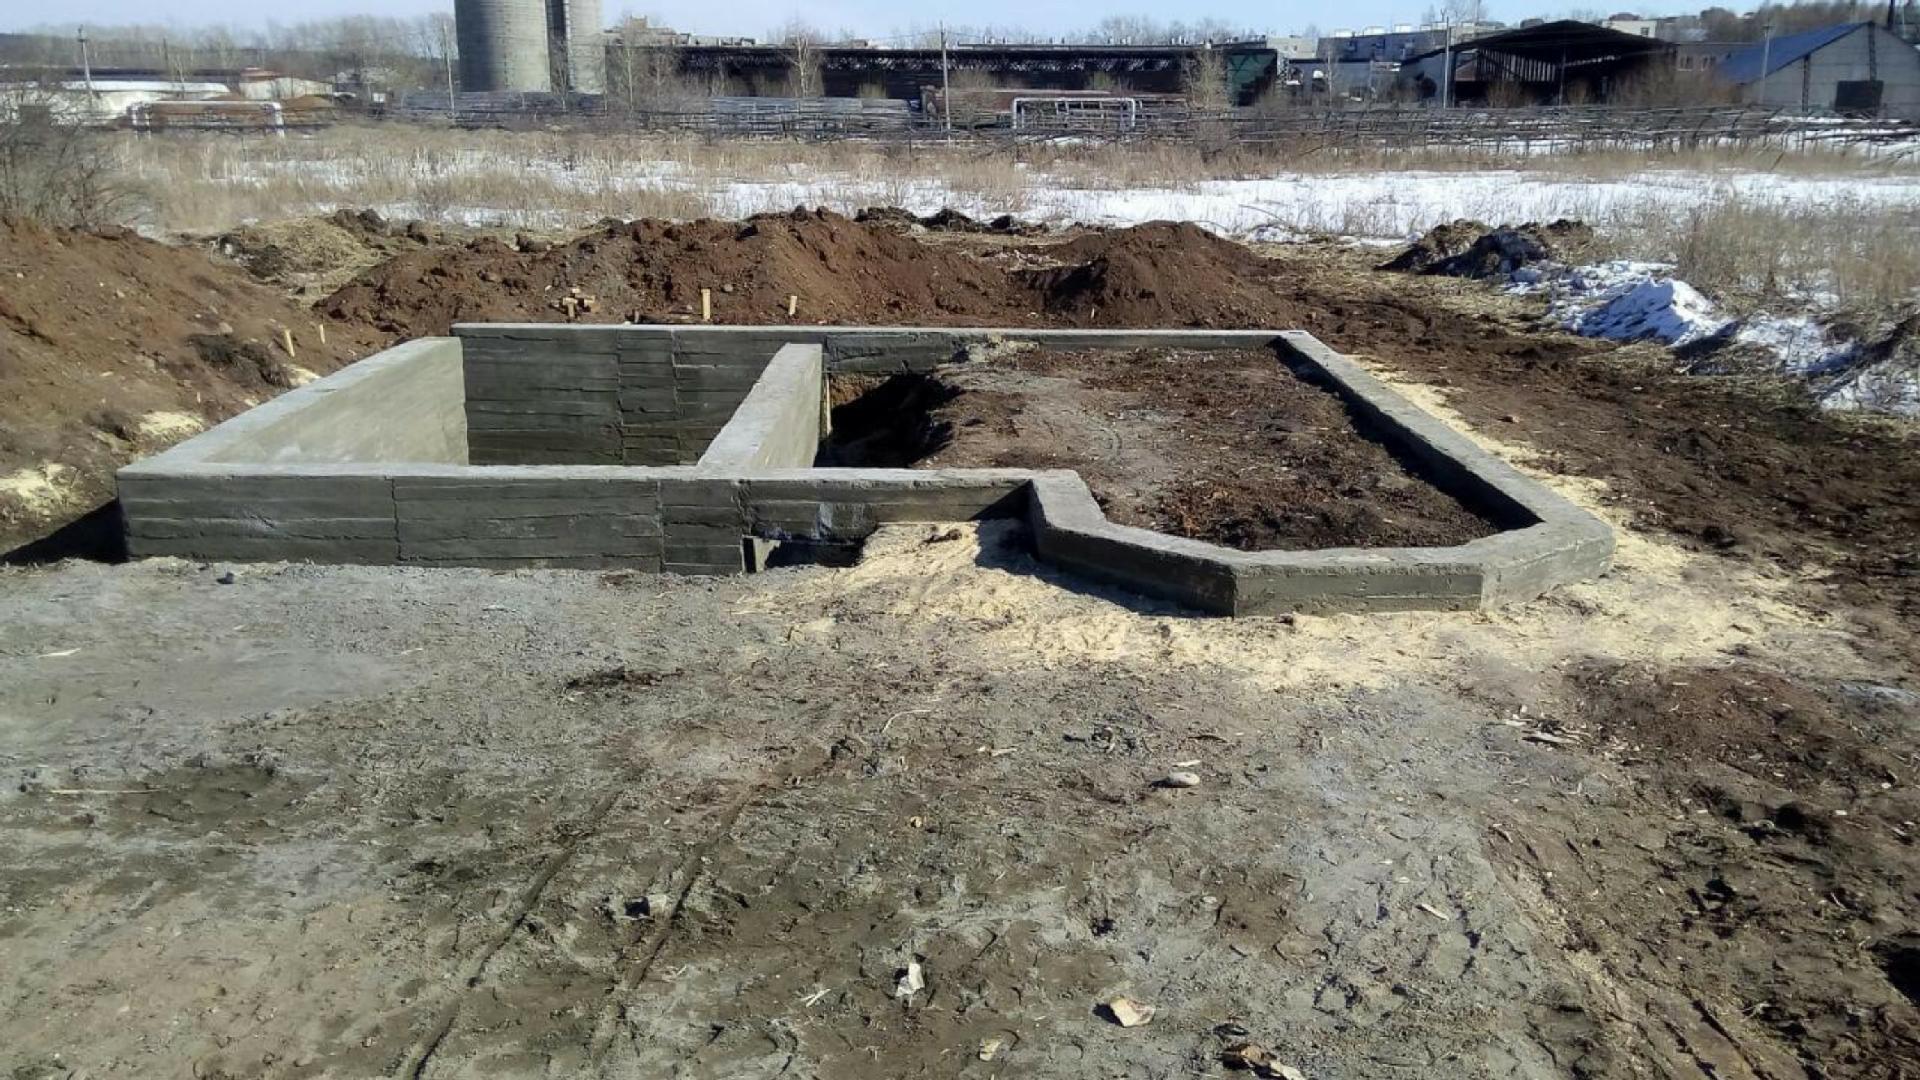
- Base wall construction.
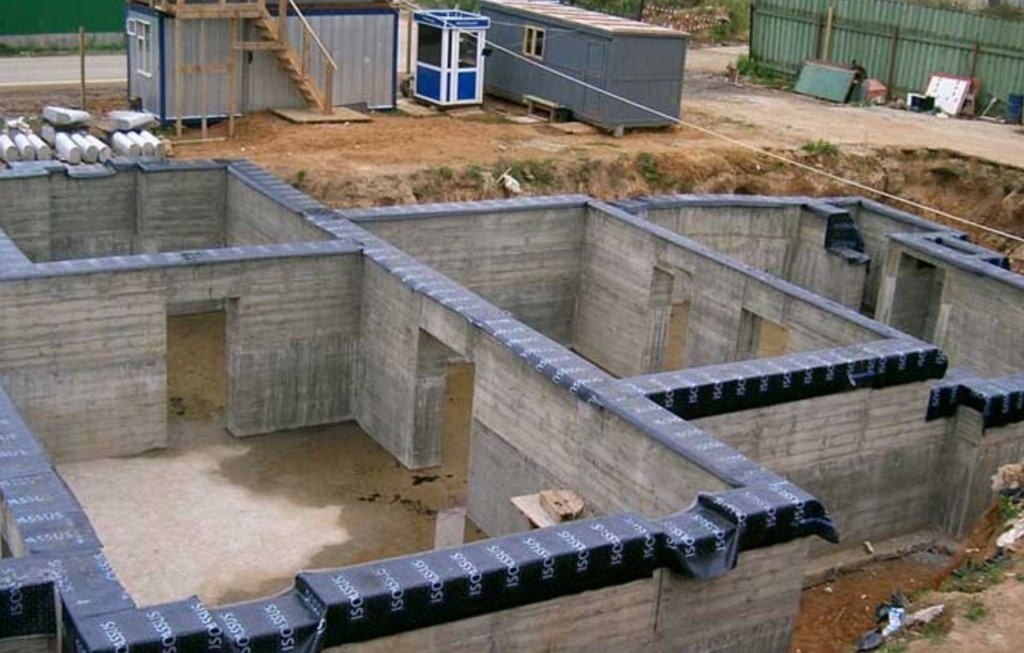
- Waterproofing and thermal insulation of base walls.
- Backfilling of soil with the obligatory arrangement of a drainage layer under the base wall.
- Arrangement of the blind area and front finishing of the basement of the building.
The first four stages are carried out according to generally accepted technologies used in the construction of a conventional strip or slab foundation. That is, before making the foundation for a house with a basement, the site is cleared of fertile soil (it will come in handy in flower beds), mark the upper border of the pit and start earthworks.
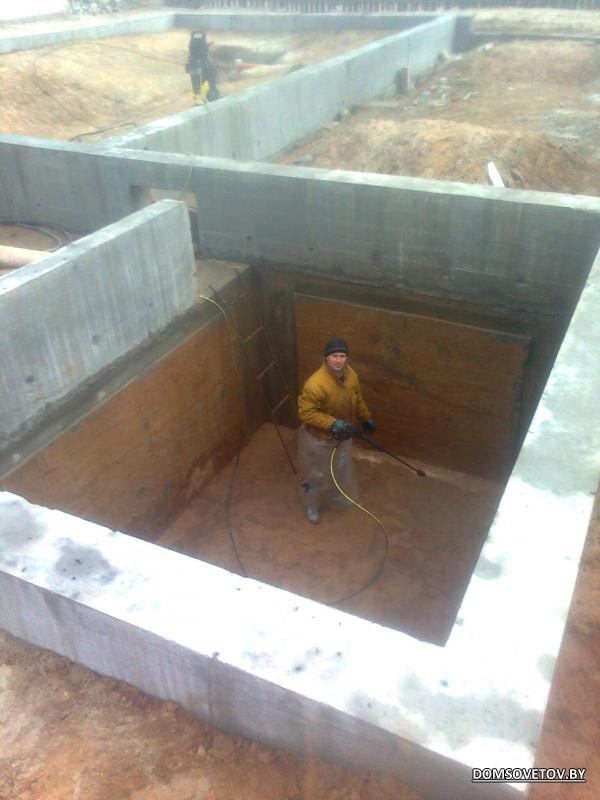
Digging of the pit is carried out in stages, by selecting 50-centimeter layers of soil.As a result, the walls of the pit have a stepped structure, and only the bottom of the excavation coincides with the dimensions of the future foundation.
The filling of the drainage layer is arranged by placing a 15 or 20 cm layer of sand and fine gravel at the bottom of the pit. On top of this sandwich, roll waterproofing (membrane film or roofing material) is laid.
But work on the construction of the sole and walls of the base is carried out according to an individual technology, which is characteristic only for the construction of monolithic foundations with a basement. Therefore, we will consider the construction of the sole and walls separately.
Fill the sole of the base
Construction of the sole of the base involves pouring a classic foundation slab, along the perimeter of which reinforcing outlets are left. That is, a removable formwork is laid along the perimeter of the last step of the pit, inside which a reinforcing cage is equipped with vertical posts towering above the edge of the deck.
However, when independently arranging a deep basement, a labor-intensive solid foundation sole is not built. Instead of a monolithic slab, you can get by with a wide tape, the dimensions of which exceed the thickness of the foundation walls by 40-50 centimeters (20-25 centimeters from each edge). Such a sole will work no worse than a monolith, increasing the bearing capacity of the soil.
Well, the floor of the future basement can be poured over the crushed stone bedding, laid directly on the waterproofing layer.
As a result, the least time-consuming process of filling the sole is as follows:
- A classic, double-walled formwork is built along the contour of the walls, equipped with an overlap of 20-25 centimeters on each side of the wall.
- Decks are reinforced with cross braces and side scaffolding.
- In the inner part of the formwork, grids of 12-mm reinforcement are laid, which are connected to vertical, outrigger pins.
- The formwork body is filled with M300 or M400 concrete.
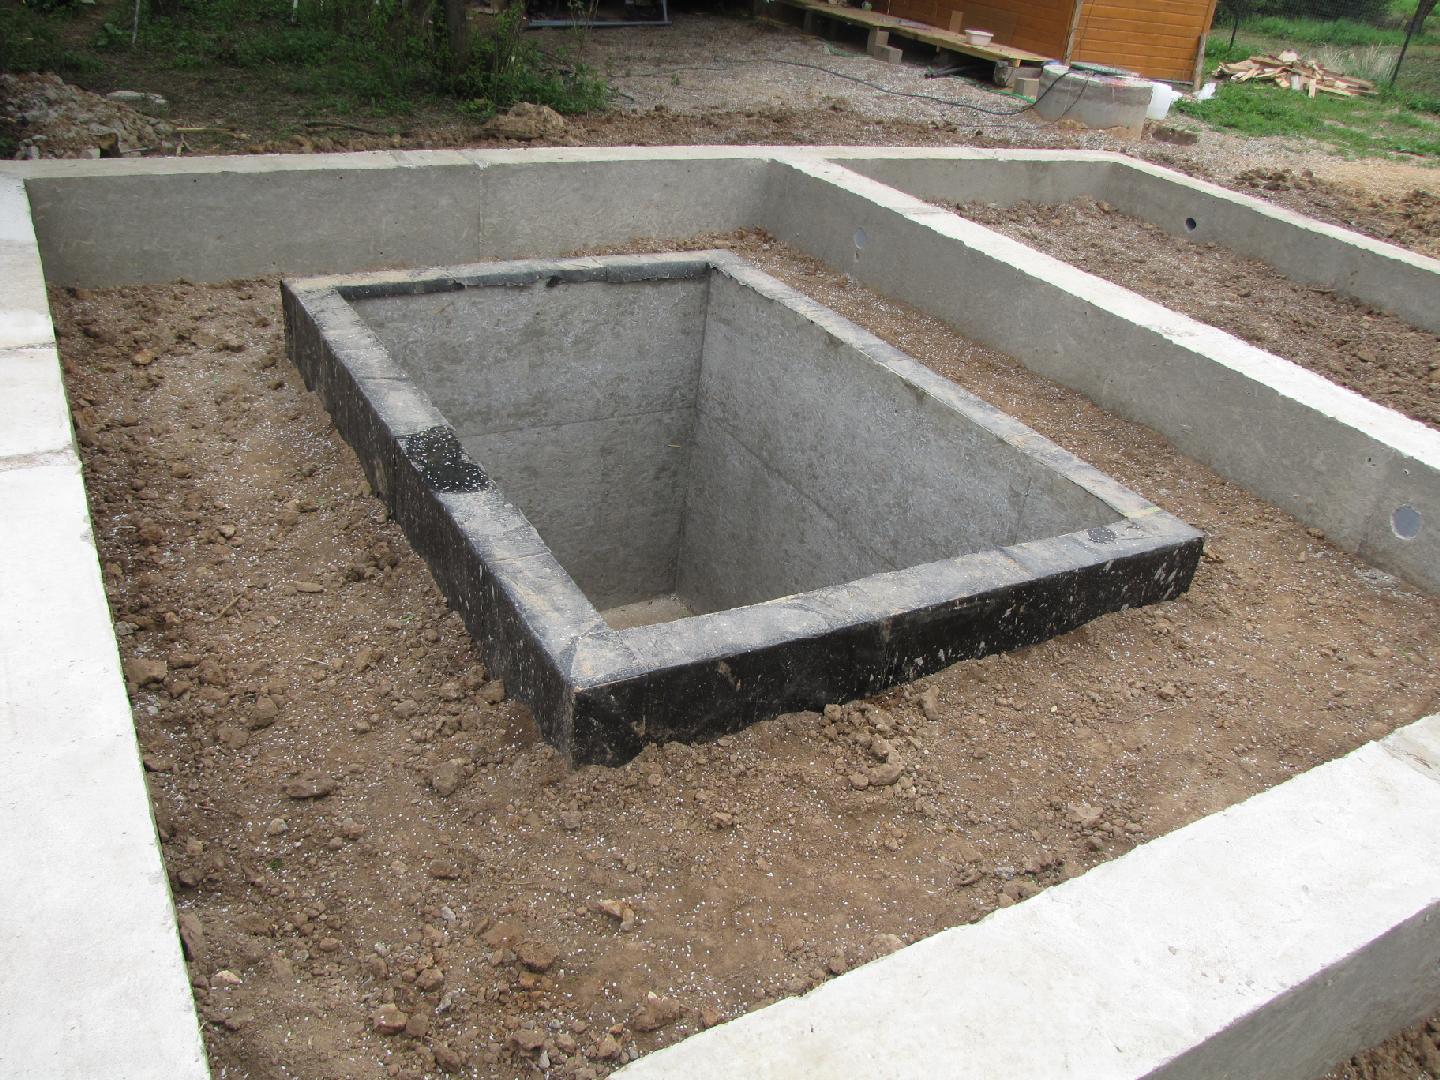
After the concrete hardens, the formwork is dismantled, and the side edges of the sole are coated with moisture-repellent mastic.
How to fill a foundation with a basement - stages of work
Having completed the construction of the base of the base, you can proceed to the construction of the foundation walls. Moreover, the fastest and most reliable way to build such walls is to fill in permanent formwork from foam or hollow formwork blocks.
By using formwork blocks, you can save time on the construction of labor-intensive panel formwork, the deck height of which will be 2-2.5 meters. However, panel formwork is cheaper than the block version.
The construction of block formwork resembles the assembly of a wall from blocks of a child's construction set.
In practice, this process looks like this:
- Blocks fit into special grooves, which eliminates the possibility of distortion of the wall of the future foundation. In addition, block formwork does not need support scaffolding.
- The reinforcing frame is laid between the blocks, on transverse screeds laid inside the formwork.
- The vertical pins of the reinforcement are joined to the outsole outlets and are located in the inner cavities of the blocks.
The concrete is poured in layers, the depth of which should not exceed 30 centimeters. The foundation grillage is the upper edge of the monolithic fill.
The construction of panel formwork involves the assembly of a double-walled structure from metal or wooden decks, the height of which is equal to the height of the foundation wall. Such a structure requires sophisticated support scaffolding to anchor the decks while the foundation wall is being poured. Filling is carried out according to the same layer-by-layer principle.
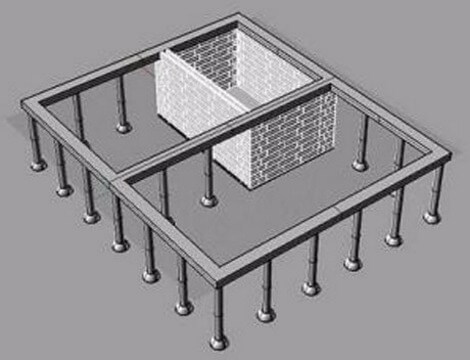
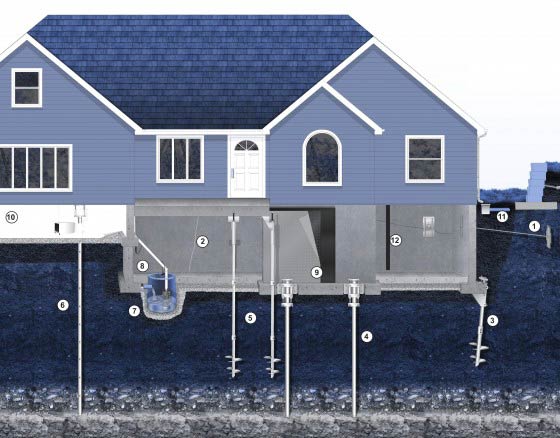
Basement device in a house with a pile foundation
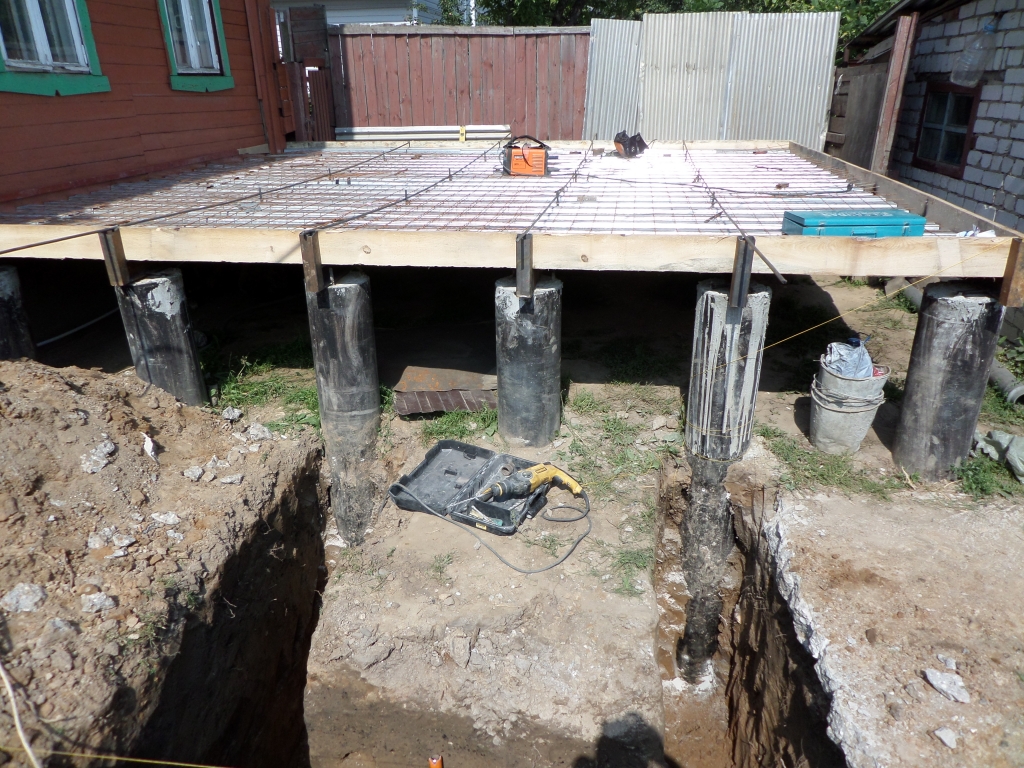
Modern technologies help to connect the pile foundation with the basement. This solution is becoming more and more popular.
It is important to determine the size and arrangement of the basement, to make accurate calculations at the design stage
Design features of screw piles
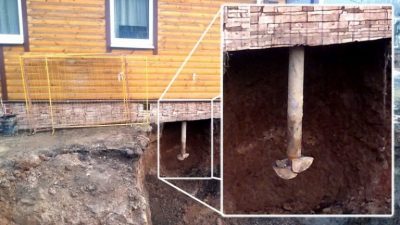
Screw piles are pipe metal structures with a pointed end. A blade is attached to the sharp tip. It helps to screw the pile into the ground. The base for the future building is attached to the head.
The construction of a pile foundation is justified on heavily watered, clayey or weak soils, quicksand. Screwing in the pipe rod does not loosen the soil. On the contrary, the soil is compacted around the pile. Each support can withstand loads up to 7 tons.
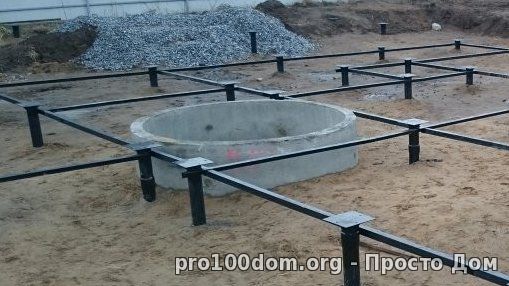
Screw piles are installed at a distance of up to 2 m. To give greater strength, the upper platforms of the piles are tied with a grillage. This base can be reinforced and poured with concrete. The construct becomes connected.
The number of screw rods is determined by calculations for the permissible loads on the grillage. For example, a 6x6 m house will require 12-16 piles. Installation of the structure is carried out quickly. The specified number of screw piles is installed in about 3 days.
Main requirements
Not every construction company will undertake basement equipment with a pile foundation. And self-construction is fraught with unforeseen consequences.
Success is guaranteed by the utmost care and accurate calculations
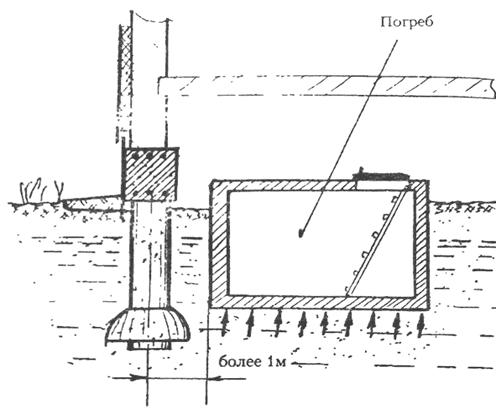
At the design stage, the distance from the piles to the walls of the cellar is taken into account. The distance should not be less than 2 m. Violation of this requirement leads to the loss of stability of the rods, to soil subsidence.
To dig a pit for a cellar, you need to know the location of each pile. The walls of the cellar are erected inside the perimeter, outlined by screw piles. Observe the same distance from the supports.
Pile posts are selected according to:
- type of building;
- a piece of terrain;
- type of soil.
The materials for the walls are tarred logs, bricks, and reinforced concrete blocks. Additional layers of thermal insulation and waterproofing are applied. Cladding materials are used to protect walls and facade finishes.
Sequence of work
The basement is equipped simultaneously with the construction of the foundation or after its laying. The usual workflow looks like this.
- Dig a pit. Its dimensions should be larger than the planned basement perimeter.
- A crushed stone and sand pillow is poured, carefully tamped.
- Waterproofing is laid on top. They make it from roofing material or thick film.
- A fine mesh is laid on the waterproofing layer. Concrete is poured, screed is performed.
- The walls are being erected.
- The gaps between the walls of the pit and the basement are covered with sand. For better ramming, the sand is watered.
Neglect of the main requirements and a certain sequence of work can lead to a weakening of the pile foundation. Deficiencies and negligence in the performance of work can contribute to the destructive effect of soil swelling. In such cases, the results can become unpredictable.
Recommendations and Tips
Often a separate tape base is prepared for the cellar. It is recommended to make the basement foundation light, tie it with screw rods. For greater reliability, the structure is reinforced with a grillage. It turns out a kind of hybrid - pile-tape base.
The grillage is raised to the height of the planned basement. It is necessary to take care of the construction of a capital drainage system.
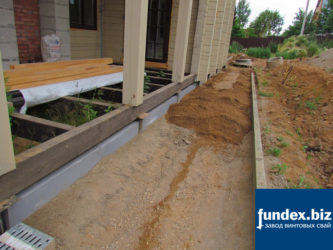
Basement equipment with a pile foundation requires covering the basement. The solution to this problem improves the design appearance of the building and increases its energy efficiency. Cover the base:
- miniature tape base;
- insulation over the beams, which are attached to the grillage and piles.
With the 1st option, a trench is pulled out along the perimeter of the foundation. The deepening is reinforced and poured with concrete. A brick is laid on top of the solidified base, covered with insulation. The mini-foundation is obscured by decorative panels.
In the second version, beams are attached to the grillage and piles. Insulation is placed between them. Penoplex or polystyrene is suitable. At the final stage, decorative siding is mounted.
It is better to give the walls of the basement an oval shape. Then it is possible to avoid destructive point loads that occur when the soil swells. The oval shape softens the pressure on the walls, evenly distributes the loads along the vertical area.
The strip-pile foundation is successfully combined with the basement and gains improved energy efficiency.
Vault floor
The most common option is a concrete floor. Arrangement of such a surface, of course, will not provide 100% waterproofing of the room, although concrete has a lot of advantages over an unpaved floor, which are already visible at the construction stage:

After the reinforcement mesh is assembled, concrete can be poured.
- Anaerobic bacteria can emit gases that are potentially dangerous to humans, which will never enter the cellar through the concrete floor.
- A variety of pests will also not be able to enter the store through the concrete surface, so arranging such a floor is the right solution if you are concerned about this problem.
- Even large rodents cannot destroy the concrete floor.
- During floods, when the dirt floors simply begin to slip from under your feet, the concrete surface will remain in place.
The construction of a concrete floor in a cellar in a private house involves the following steps:
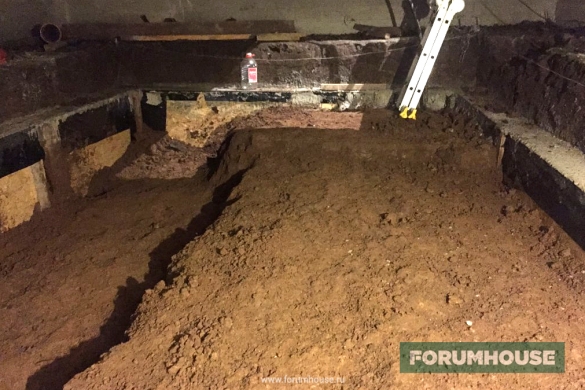
- The first step is to dig a pit, determine the size of the cellar and level the bottom of the pit.
- Next, you need to make a sand pillow, the thickness of which should not exceed 20 cm. It is tamped with the help of improvised tools and water. The pillow must be firm and level, otherwise the concrete floor will deform in the future.
- Then it is recommended to lay a layer of gravel, which also needs to be well tamped and made as even as possible. Arrangement of this layer will ensure high reliability of the surface and the cellar under the house will not be subject to deformation.
- A waterproofing material is laid on a gravel-sand cushion (special polyethylene or roofing felt can be used). This is necessary not only as a barrier from groundwater, but so that the cement milk after pouring the solution does not go into the lower layers. Due to this approach, concrete is gaining ultimate strength. Of course, this will not give an absolute guarantee against moisture penetration into the premises, but at least it will minimize the risks.
- A stack of reinforcement is placed on the waterproofing layer. In this case, the thickness of the reinforcement rods should be 5 mm or more. Reinforcement of the floor surface ensures surface resistance and durability during operation.
- At the end, the floor is poured with cement mortar with a thickness of about 10-15 cm. It must be understood that the coating will gain working strength only after a few weeks. Walking on such a floor is prohibited for the first days after the completion of the work.
Arrangement of a foundation with a basement: stages of work
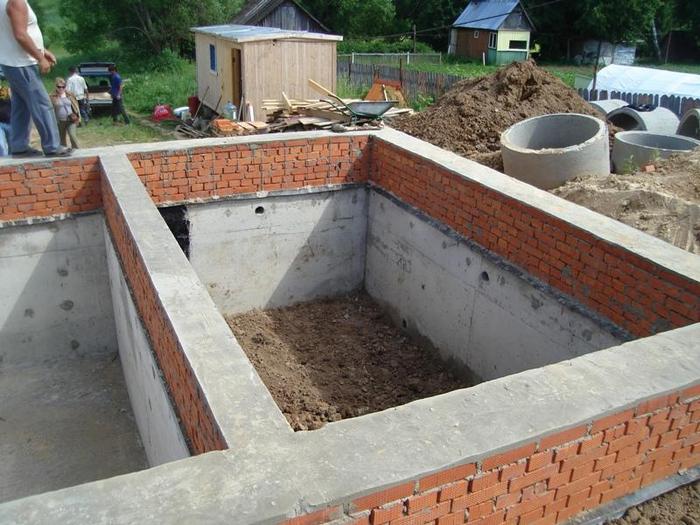 When starting construction, it is necessary to carefully calculate the height of the future premises to minimize errors and subsequent alterations.
When starting construction, it is necessary to carefully calculate the height of the future premises to minimize errors and subsequent alterations. It is very good if you can stand in full growth in the basement, but it all depends on the user's capabilities.
The height of the base should correspond to the height of the basement, taking into account the level of the ground aquifers and the freezing point of the soil. The order of work is as follows:
The layout of the foundation of the house, in which the stress of the foundation is calculated and a way to eliminate the fact is determined.
Drawing up a list of materials, tools (it is better to take with a margin).
The layout of the base of the house is carried out taking into account the characteristics of the territory of the construction site
It is important to choose the most optimal location for the future structure.Experts offer the following markup instructions:
- drive pegs into the ground to mark the corners of the structure;
- pull the threads diagonally, and it is imperative to measure the length of the threads - it must be identical;
- at the slightest error in the length or shift of the peg, repeat the process.
Now you can start arranging the foundation, consider the tape type of base, the device of which is well shown in the video, and carrying out the processes for arranging the base with your own hands is not very difficult.
- Dig a trench around the perimeter of the structure, removing excess soil.
- At the bottom of the trench, fill up a cushion of gravel-sand mixture up to 30 cm high, level it.
- Cover the pillow with roofing material.
- Make a formwork from the boards.
- Build a reinforcing frame from rods, set the mesh to a height of 5 cm below the level of the base.
- Moisten the formwork with water. Prepare the concrete mix for pouring.
- Pour the strip foundation in layers, compacting each layer and releasing air.
- Wait for the mixture to harden within 21 days.
- Remove the formwork, fill the voids with soil.
Now that the foundation for your building is ready, you can start arranging the basement. What to do:
- Dig a pit for arranging the basement. The soil needs to be taken out;
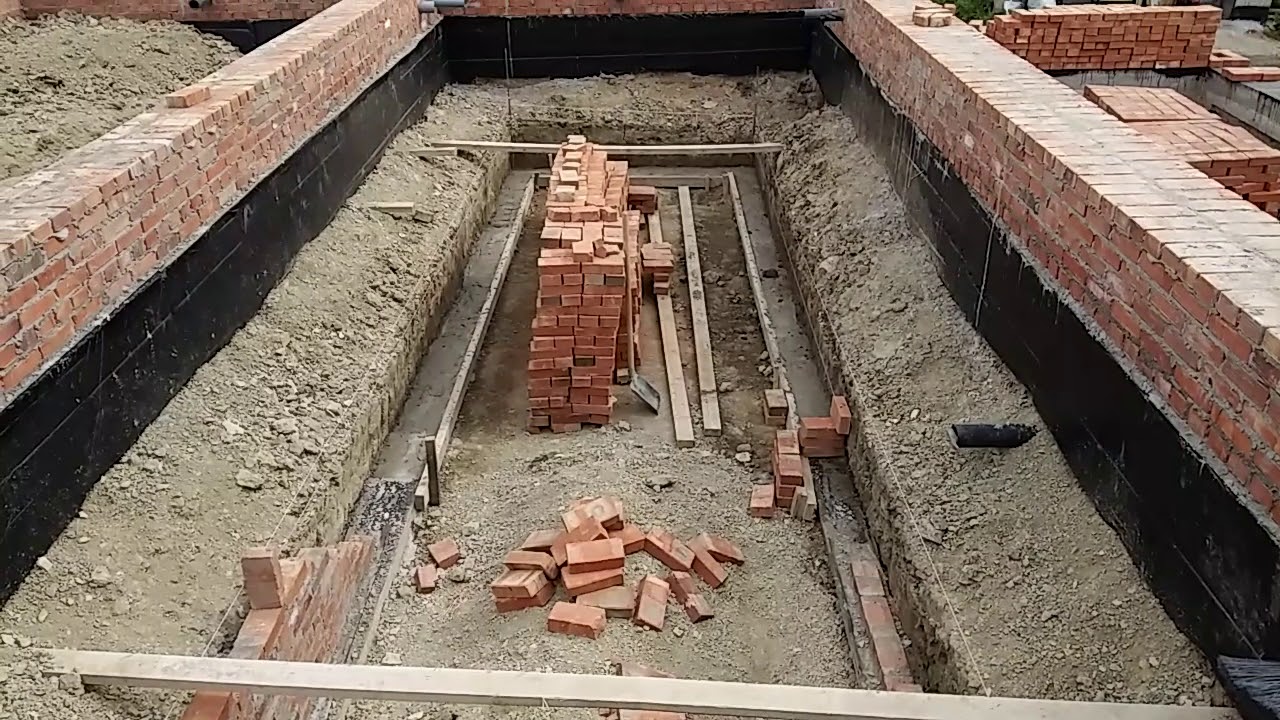
- Fill the bottom of the pit with crushed stone or gravel chips of the middle fraction. Backfill thickness maximum 15 cm. Tamp down;
- Prepare cement mortar, fill the floor;
- Build wall planes and waterproof the basement walls with any available material;
- Also make waterproofing of the foundation, where the basement is being built. The procedure will reduce the influence of external factors on the entire structure.
As you can see, you can build a house with a cellar by creating a strip foundation with your own hands. The technology is available and in demand, especially in areas where the geological characteristics of the soil make it possible to create a foundation with an increased depth of the base. The main processes are well shown in the video, so if you have any questions, the master class will give detailed explanations for each of them.
And remember that all processes are best carried out in the warm season: the foundation device requires good drying of the concrete composition, from which the foundation tape is made and the cement mortar, which is used to construct the floor slab in the basement.
Cellar: design solutions
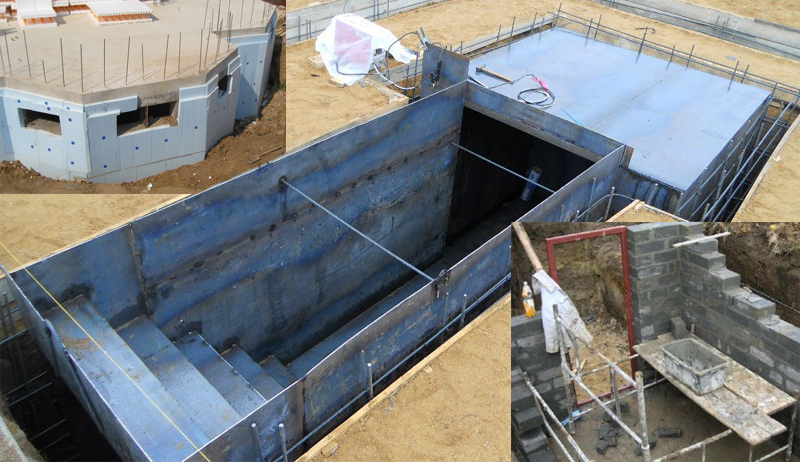
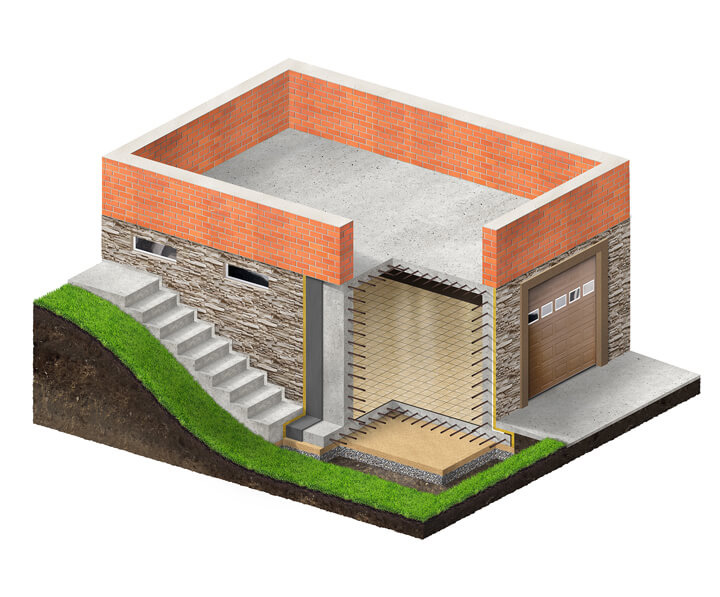
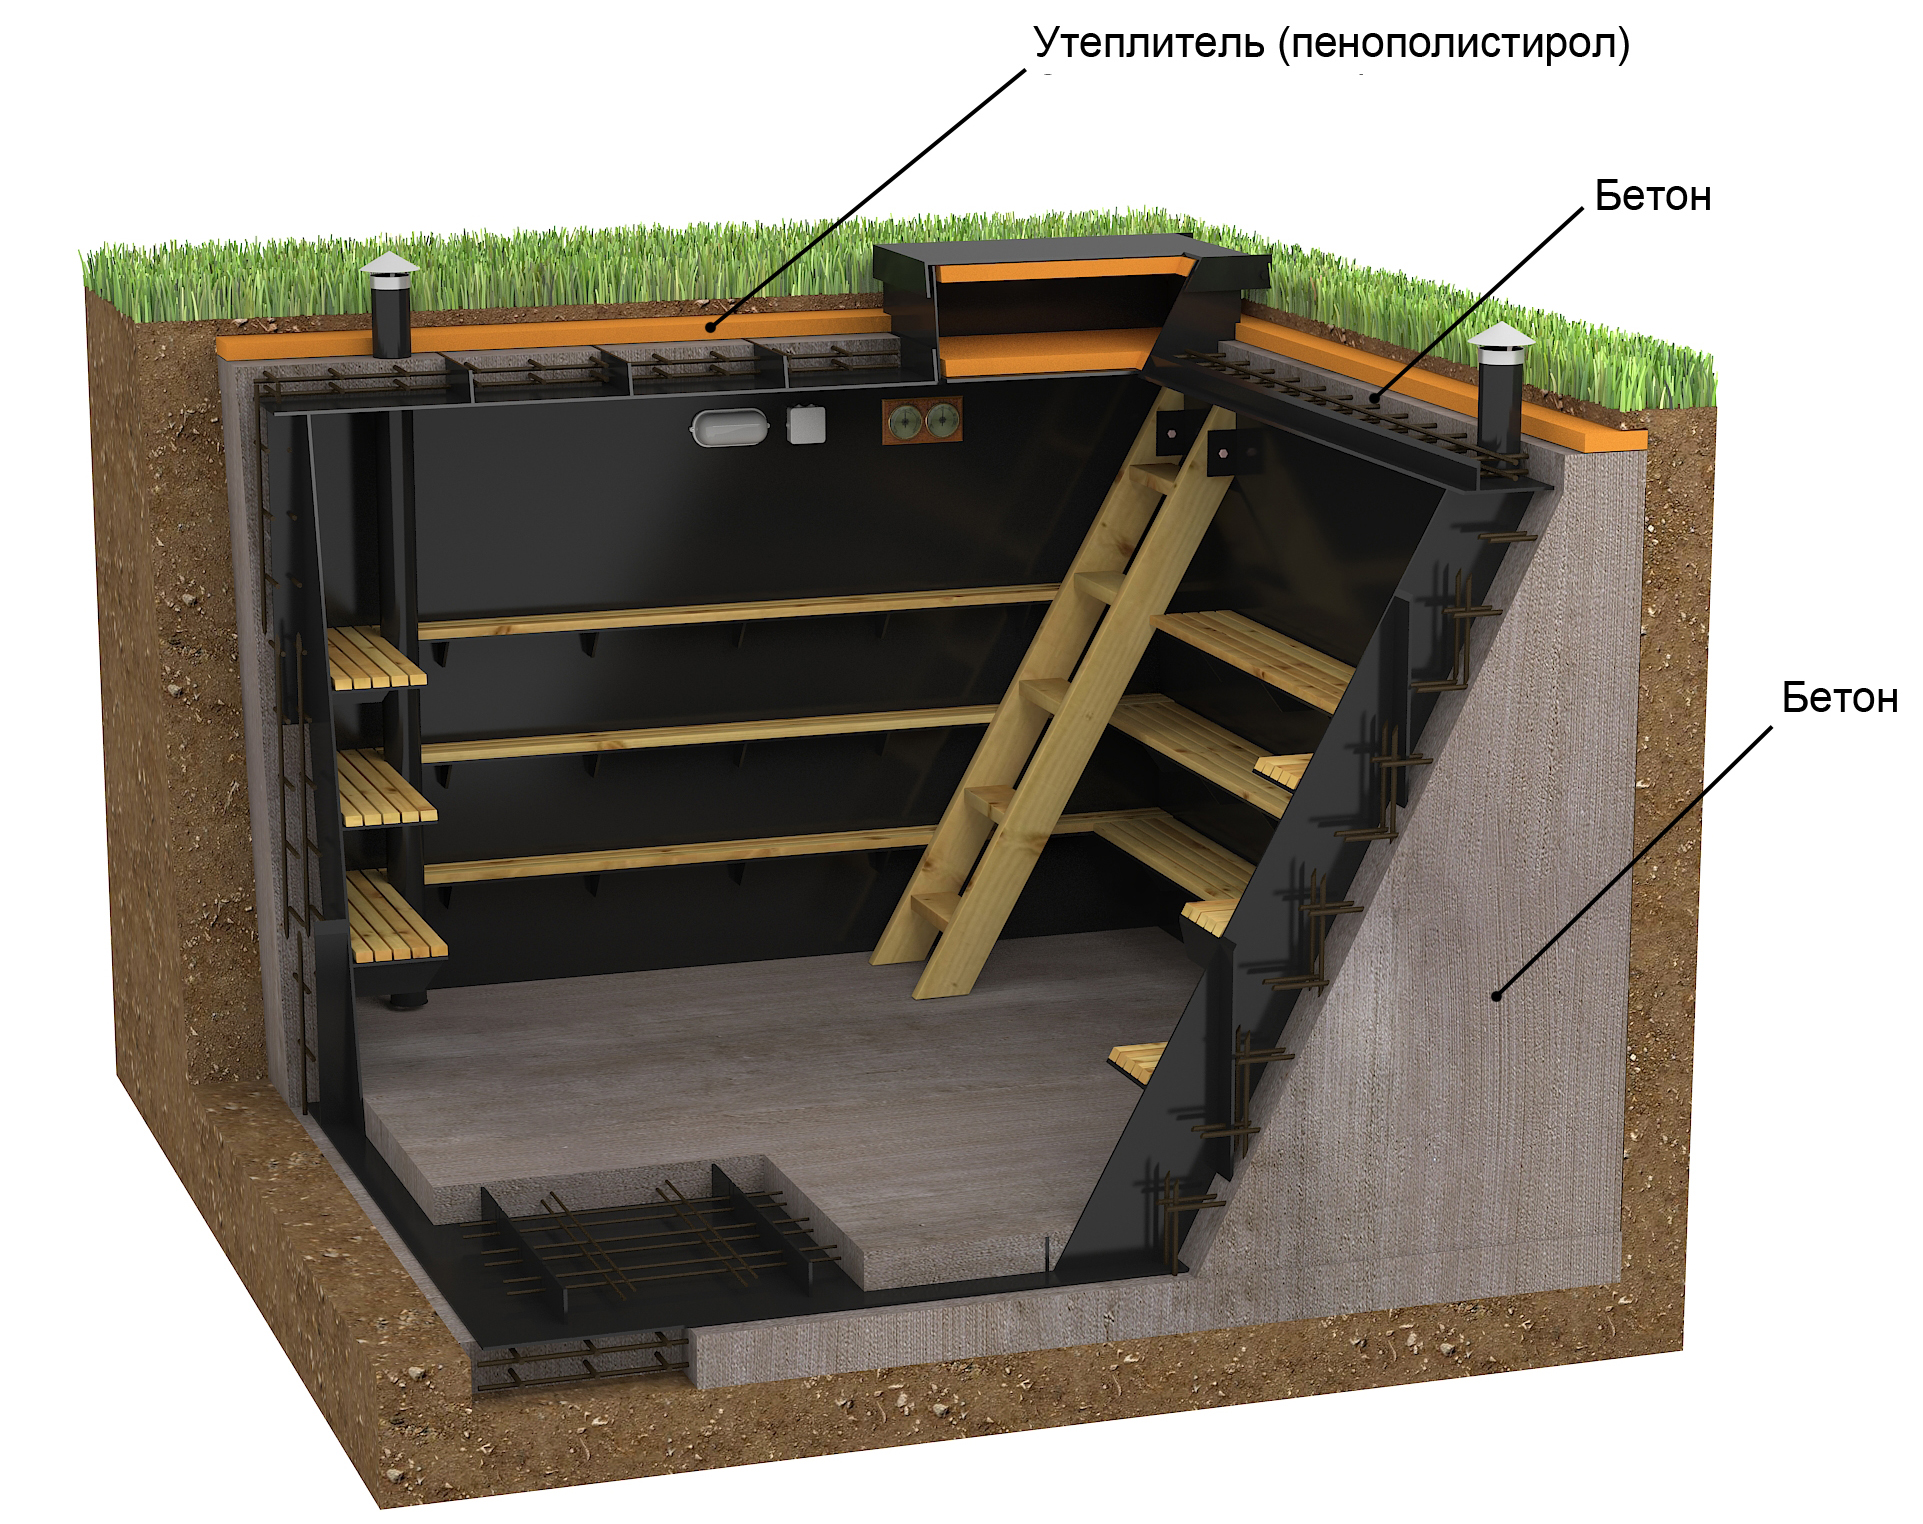
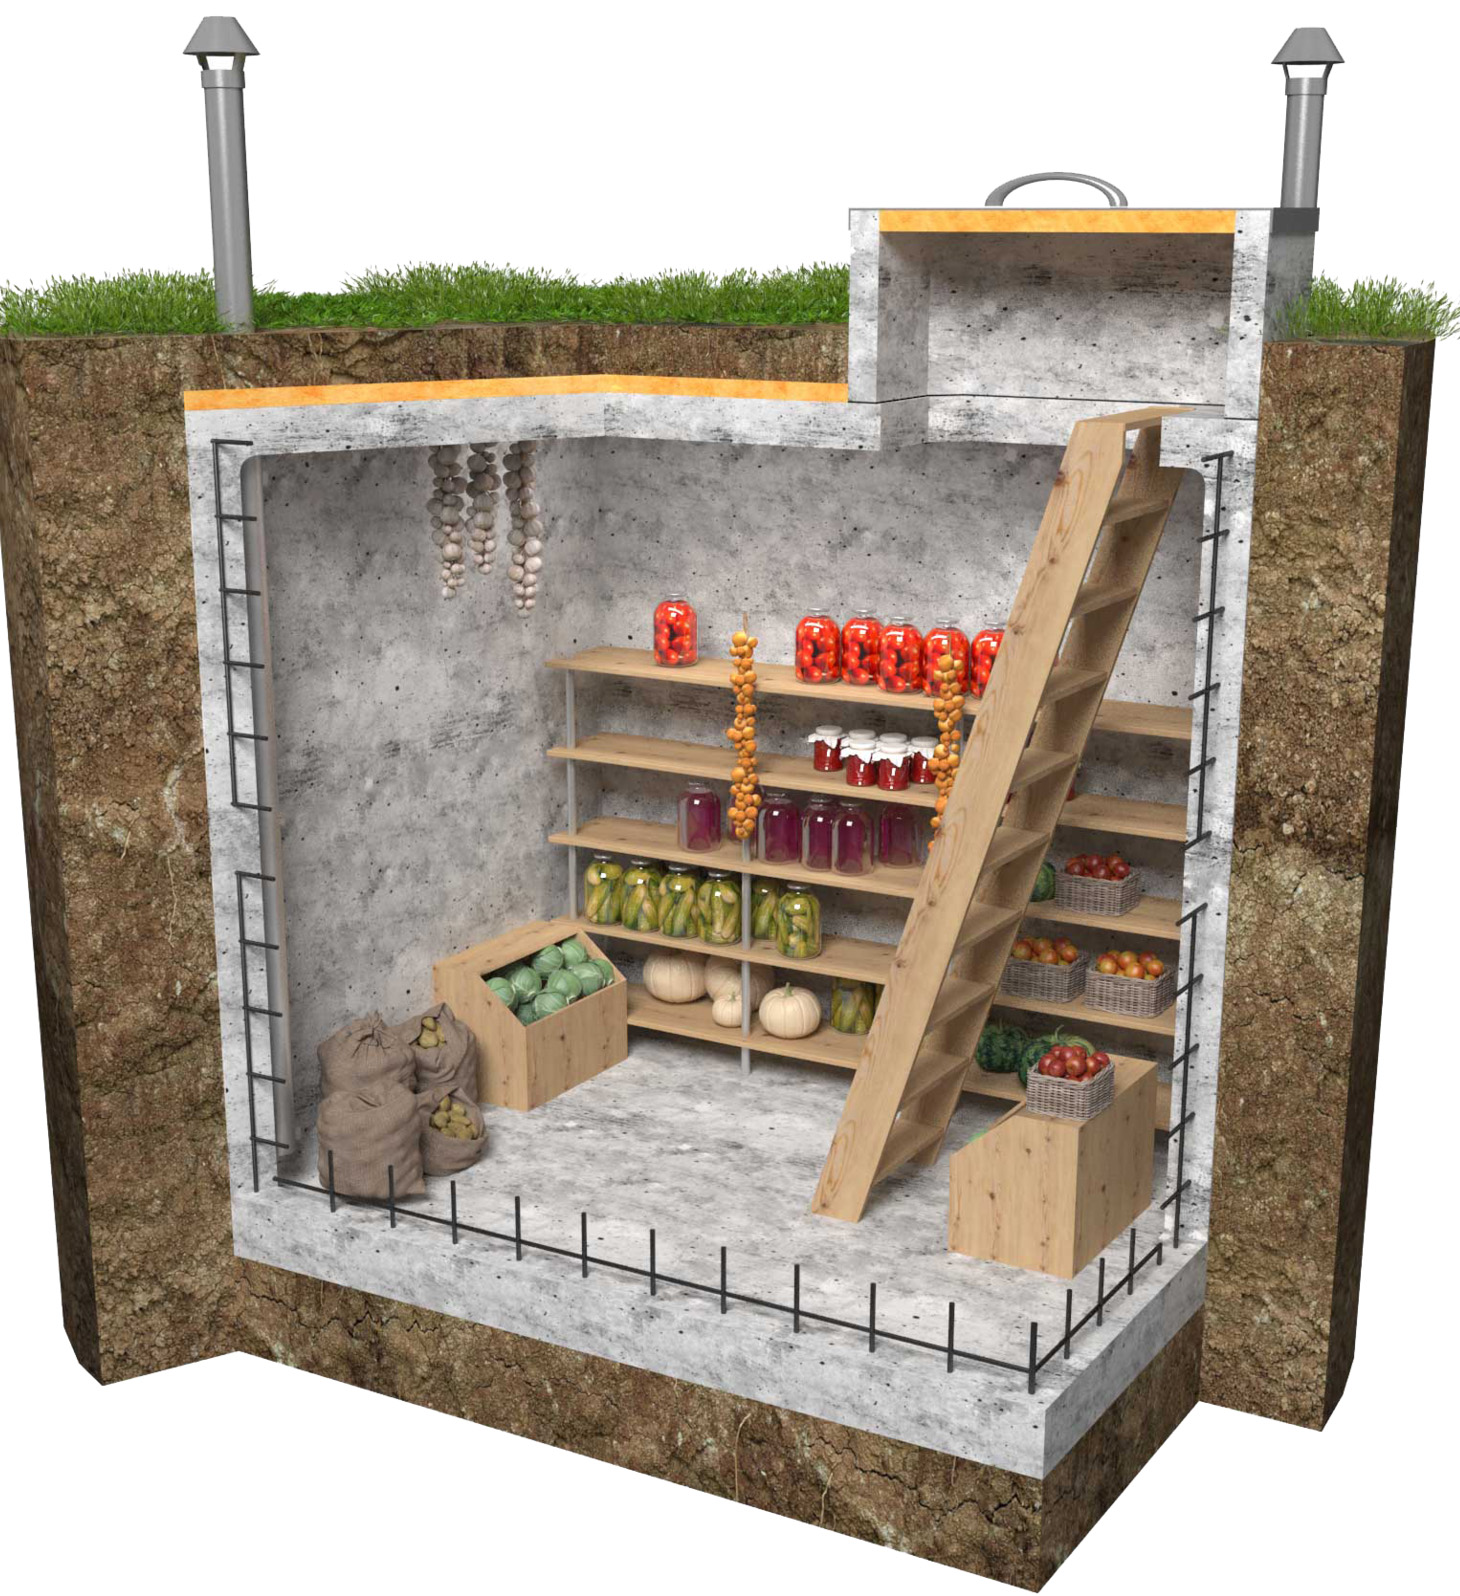
Any cellar is an isolated underground chamber, or a partially buried room, which has its own foundation; walls; ceiling and entrance doors with stairs. In different cases, different materials are used for the construction of the cellar: remnants from the construction of the main building, natural materials (stone, wood). The foundation for the construction of the cellar can be made of two types:
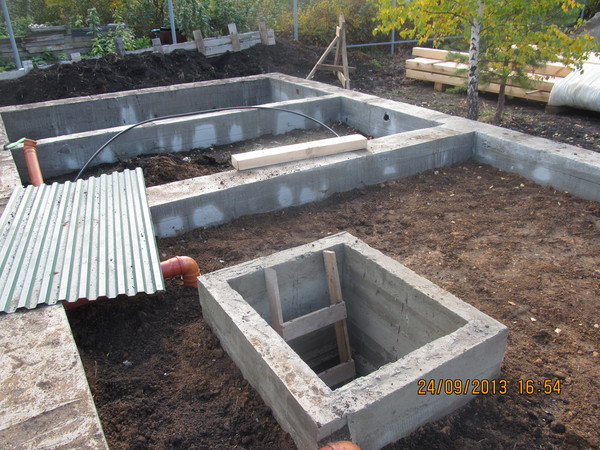
- Strip foundation - this option is used for dense base soils with a low groundwater level.
- Recessed monolithic slab - this type of foundation is used in wet soils, as well as in the case of attaching a cellar to an existing building with an erected strip foundation (cellar in the house).
Erection of a strip foundation for a cellar device
How to properly make a strip foundation for the construction of a cellar? A detailed description of the construction work will allow even a layman to build a solid foundation for the cellar.
Preparatory work
Digging a foundation pit
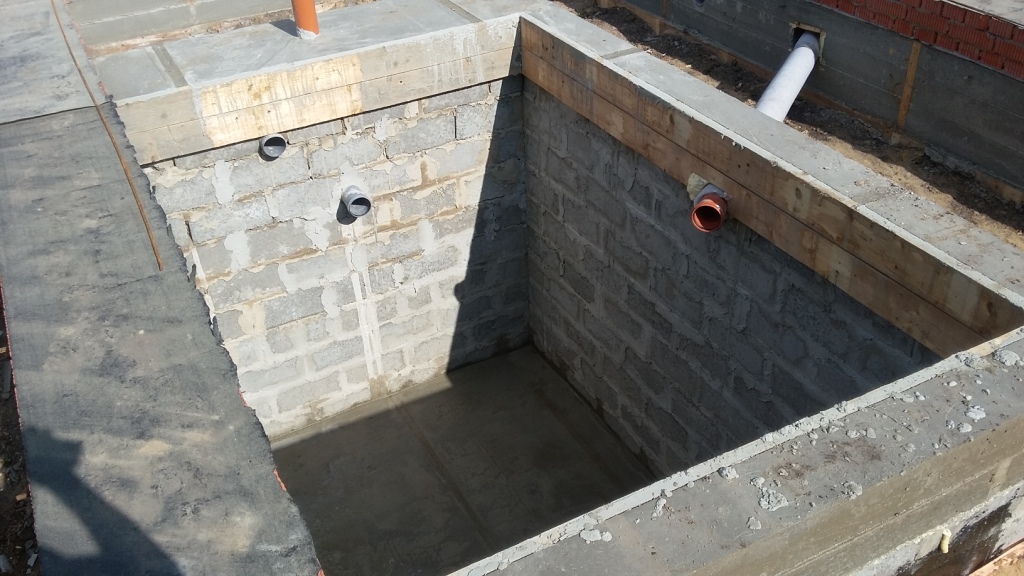
To begin with, it is worth deciding on the size of the cellar, after which it is necessary to clear the construction site, removing debris, vegetation, and all existing obstacles from it. The site is leveled by carrying out the necessary planning work. If the cellar is not planned to be buried, they dig trenches around the perimeter of the planned structure. The depth of the trench is provided for up to 44 cm, width - up to 30 cm.
When the cellar is partially buried in the ground, trenches are dug out to a greater depth, while shields are immediately set up to protect the walls from collapse.
The bottom of the trenches is leveled, rammed and covered with a layer of coarse sand (up to 10 cm), which is rammed by spilling water.
On the compacted sand, it is necessary to make a backfill of crushed stone with a fraction of up to 20 mm, which is leveled and compacted. The thickness of the crushed stone layer for backfill is 10 cm.
Formwork and reinforcement cage
Installation of strip base formwork
To preserve the rigidity of the foundation and give it strength, a special spatial frame is made of reinforcement with a diameter of 10 mm, which is allowed to be connected with a knitting wire or welding. Welded frames are less durable than wire-bound frames.
Reinforced frame for strip foundation structures we prevent deformation of the foundation foundation when exposed to uneven loads.
The location of the reinforcement cage in the body of the foundation should be monitored; displacement of the spatial structure relative to the center of the foundation horizontally and vertically is not allowed. Before pouring the concrete solution, the reinforcement cage should be leveled, if necessary, by lifting it on bricks above the crushed stone pillow.
Formwork panels are prepared from wooden boards, durable plywood. It is allowed to use ready-made panels of reusable demountable formwork, which must first be cleaned of layers of dirt and concrete mortar. The formwork is exposed along the walls of dug trenches, strengthened by setting struts and supports
It is very important to observe their verticality when exposing the shuttering boards. Using for the manufacture of formwork uneven boards, the gaps between them should be insulated with roofing material
Concreting
Pouring concrete mortar
Pouring of concrete must be done at one time in order to prevent the appearance of "cold bridges" in case of uneven hardening of the concrete mixture. It is necessary to start pouring the strip foundation with concrete from the corner of the structure (it is allowed to fill the formwork with a mixture simultaneously from two angles diagonally).
After pouring the mixture into the formwork, compaction should be performed using a vibrator - this will allow the formed internal voids to be filled with concrete, which subsequently greatly weaken the strength of the foundation.
It is necessary to look after the concrete surface in the strip foundation - several times a day they moisten the upper part of the foundation, and also cover it with a film from premature drying out.
The construction of the foundation for the cellar is gaining strength in 28 days. What can be done during this period at the construction site? It is allowed to remove the formwork panels approximately 2 weeks after pouring the concrete mixture.
The foundation for a utility cellar can be prefabricated belt support structures reinforced concrete, during the installation of which special lifting equipment will be required. The joints between the elements are carefully sealed with concrete mortar.
Equipment device
The device of the cellar is performed with the reinforcement of the monolith, using ribbed reinforcement, with a diameter of 8 to 14 mm
There are two options to build a base with a basement with your own hands - this is a pile and tape monolithic type of device. It should be said right away that the first option is quite difficult to perform, therefore, in practice, most often we meet a monolithic foundation. In our article, we will discuss the construction of a basement space in the second type of a house foundation. For a monolithic structure, there are such rules for its construction:
- In the case when the device of the basement space is planned at the design stage of the house, then its depth can be about 3 meters. Bookmarking is done with a special technique. The work begins with the preparation of the pit and depends on the type of laying.
- When we perform the steps to create a foundation with a basement floor, then there are no restrictions on the deepening of the building. For optimal performance, it is sufficient to correctly calculate the wall thickness for different materials.
- To avoid the negative impact of the soil in winter, you need to cover the area around the walls with sand instead of earth. It is easy to do this, because do-it-yourself construction is carried out in a pit, around which there are sections of the territory for filling. You need to perform the action immediately after waterproofing and insulation.
- The device of the cellar is carried out with the reinforcement of the monolith, using ribbed reinforcement, with a diameter of 8 to 14 mm. If this is a small building, then the horizontal load-bearing components of the frame have a given value of 10-12 mm.
- In a typical reinforcement frame, there are usually four carriers, but in some cases there are five components. The ring with a jumper must be placed at a distance of up to 80 cm, and the entire structure must be connected to each other with a wire.
- An important process is the waterproofing of the basement with a basement, which will help protect the premises from dampness. This can be done with mastic or cellophane film.
- Thermal insulation is also necessary, especially in the case of the basement, since the cold easily penetrates the monolith. Foam is used to solve this problem, but there are cheaper ways.
It is best to start building a foundation with a basement with your own hands at the same time as planning a house. This will allow you to carry out calculations taking into account the basement space, which will avoid unpleasant situations in the future.
Main requirements
Not every construction company will undertake basement equipment with a pile foundation. And self-construction is fraught with unforeseen consequences.
Success is guaranteed by the utmost care and accurate calculations
At the design stage, the distance from the piles to the walls of the cellar is taken into account. The distance should not be less than 2 m. Violation of this requirement leads to the loss of stability of the rods, to soil subsidence.
To dig a pit for a cellar, you need to know the location of each pile. The walls of the cellar are erected inside the perimeter, outlined by screw piles. Observe the same distance from the supports.
Pile posts are selected according to:
- type of building;
- a piece of terrain;
- type of soil.
The materials for the walls are tarred logs, bricks, and reinforced concrete blocks. Additional layers of thermal insulation and waterproofing are applied. Cladding materials are used to protect walls and facade finishes.
Basement construction under the house
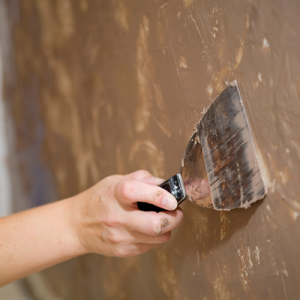
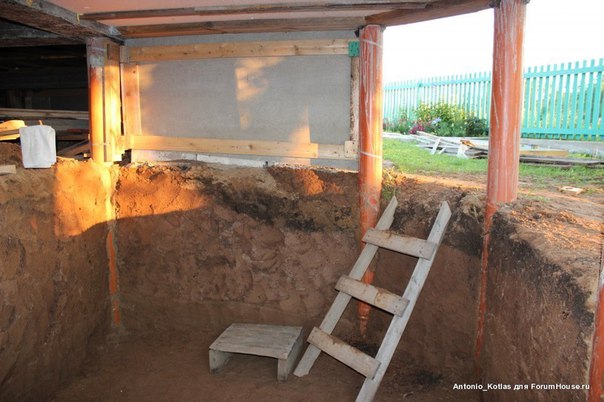
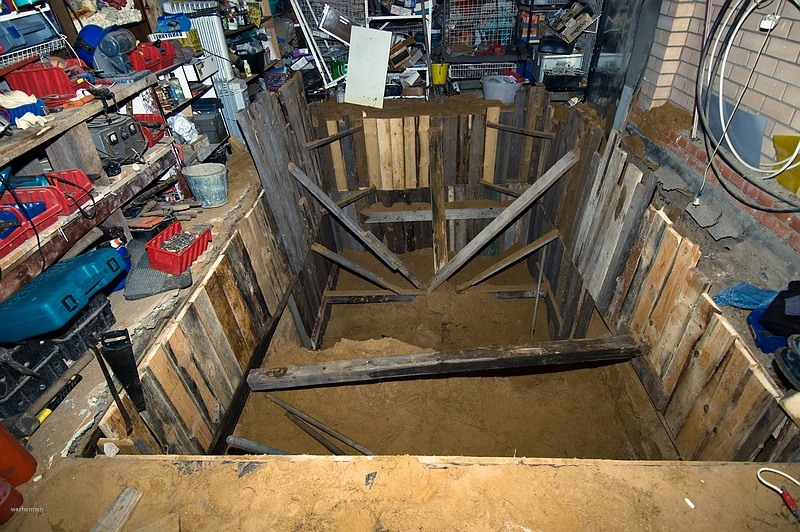
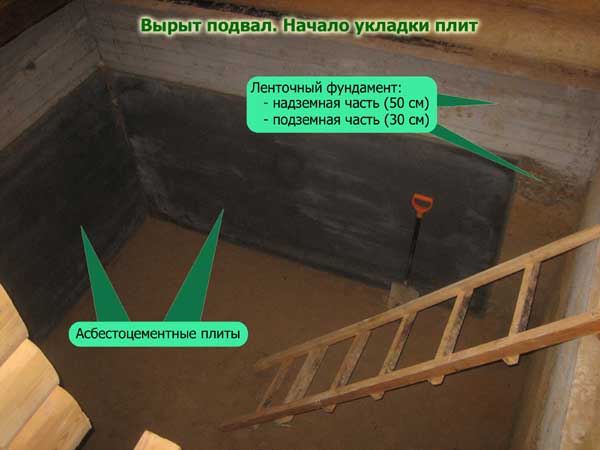
- If the depth of the foundation of the house is sufficient for the basement, then inside the old foundation you need to open a pit, not forgetting that it is necessary to retreat from the existing foundation by at least 1 - 1.2 m. And if the house is two-story, then 2 m. This is it is necessary so that the soil crumbling from the walls of the pit does not affect the stability of the foundation.
- The bottom of the resulting pit must be carefully tamped. Then polyethylene is laid on it and a pillow of rubble and sand is arranged over it.
- On top of the pillow, another layer of polyethylene is laid with an overlap on the walls of the pit, which will serve as waterproofing of the basement.
- A reinforced concrete slab is mounted on top of the waterproofing layer, which will be the basement floor.
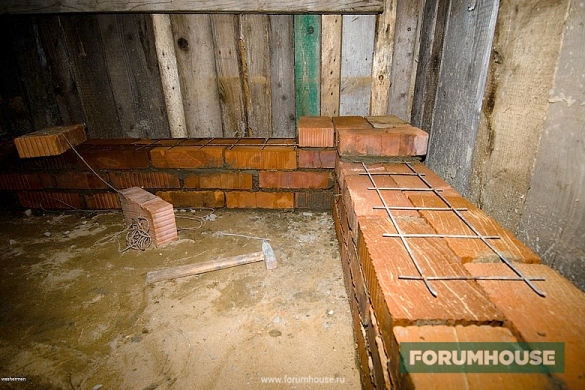
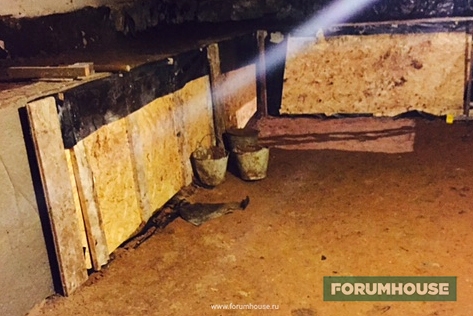
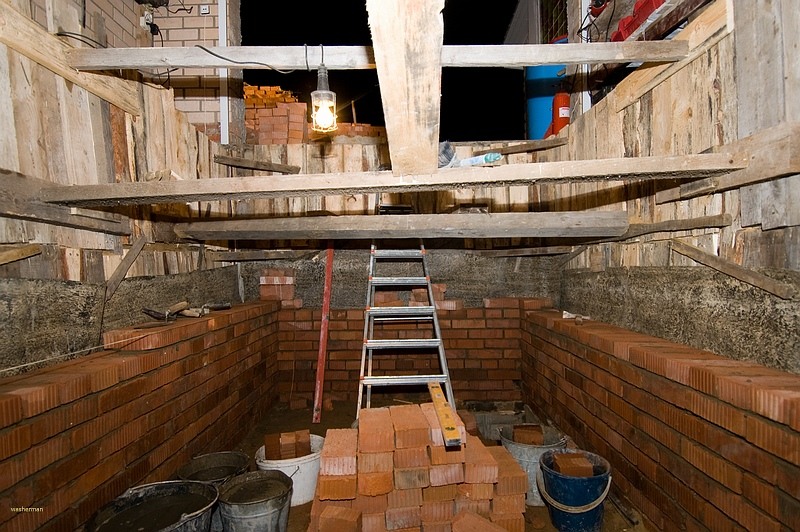
- After the floor has hardened, it is necessary to expose the formwork and pour the walls of the basement, also using reinforcement. If the soil is dense, then the walls of the basement can be laid out with bricks and plastered.
- It is imperative to provide for ventilation in the basement, otherwise it will be damp.
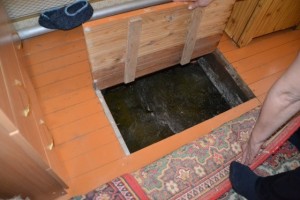
- It remains to restore the floors of the room and make a hatch to the basement.
If the basement area is large, then the descent into the basement can be organized like a regular flight of stairs. If there is not enough space, then you will have to use a ladder.The main advantage of this method of building a basement is the ability to do all the work yourself.
Among the disadvantages are the following:
- The need to perform all work by hand due to the impossibility of using technology.
- The removal of soil is carried out through living quarters, which is not very convenient for both workers and households.
- Not everyone can competently mount ventilation and waterproofing of the foundation, which in the future may complicate the use of the basement for its intended purpose, as well as lead to the appearance of dampness in it.
If it is possible to make a basement during the construction of a house, this option should be preferred. The room will turn out to be much larger in area and better equipped.
(Visited 478 times, 1 visits today)
Isolation from moisture and temperature extremes
Digging a basement or cellar with your own hands is half the battle. The main thing is to properly isolate it from moisture penetration. Because it is moisture that is the main enemy when storing fresh vegetables and fruits.
- The first stage in creating a waterproofing cellar with your own hands is to cover the outer walls of the room with special compounds based on bituminous mastic. It is worth noting that you need to cover the wall in 2-3 layers in succession.
- At the second stage, the walls of the cellar must be finished with a layer of any roll-on waterproofing. In principle, traditional roofing material is also suitable. It is glued directly onto the mastic by heating the material. Rolls should be overlapped so that there are no joints.
- The overlap of the cellar must also be insulated, because sedimentary moisture can penetrate through it. For this, it is recommended to use dense polyethylene. In this case, it is necessary to cover not only the ceiling with insulation - it is very good if it goes down to the walls of the cellar. To keep the material in place during operation, you can use any fasteners.
- It is also recommended to insulate ventilation pipes (especially their upper part). The waterproofing material is wrapped around the pipe here, securely fixed, and all the cracks formed are covered with mastic.
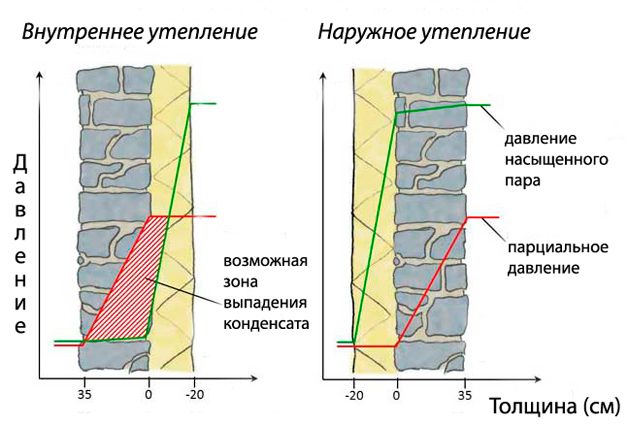
Comparative diagram of external and internal insulation of the walls of the storage facility.
As a rule, it takes several weeks to set up a cellar (if the base is concrete, then additional time is needed for the solution to harden). You can do all the work with your own hands, however, it is recommended to invite 2-3 partners, who will definitely be required at least at the stage of digging a foundation pit.
Do not forget also about the thermal insulation of the room. It is best to do it outside, because there it will be many times more effective. Several insulating materials can be used (e.g. expanded polystyrene on the outside and mineral wool on the inside). At the same time, the right solution would be to install a vapor barrier membrane from the inside of the wall.
Particular attention should also be paid to the cellar lid - it should fit snugly against the ceiling. It is best to make a small vestibule with two lids.
Then good thermal insulation will be provided. This option is relevant when arranging an entrance to the cellar from the side of the wall, since it is quite difficult to make a double entrance through the ceiling.

