Why are many extensions to the house made of foam blocks
Most people, when choosing a material for an extension, are increasingly inclined to use foam blocks. They have pros and cons, but there are more pros. The main advantages of the properties of foam blocks:
- Even a non-professional builder can handle the installation. Thanks to this, you can save on attracting specialists and complete the extension yourself from start to finish;
- Fast installation - the glue solution between the foam blocks dries much faster than the concrete solution;
- The material is fireproof - does not support combustion and does not burn;
- The minimum sediment is ensured by the porous structure;
- Environmental friendliness - the composition is safe for nature;
- The porosity of the material also provides low thermal conductivity - the masonry of foam blocks in 2 rows does not need to be insulated;
- The service life of buildings made of foam blocks reaches 50 years and more.
- The loose structure of the blocks allows you to cut them with a hacksaw, but it is better to use a circular saw;
- Structural strength - it is difficult for intruders to break through a plastered wall made of foam blocks;
- Due to its lightness, it can be used for construction on all types of soil and save on a strong foundation;
- Low cost compared to brick.
Insignificant material flaws:
- The great influence of atmospheric influences on the material requires the construction of a structure in dry and warm weather and finishing or waterproofing after construction;
- The attractiveness of the appearance is permissible only for the loft style, which is not yet very common in the country.
It is interesting: What self-tapping screws to fix polycarbonate: we consider in general terms
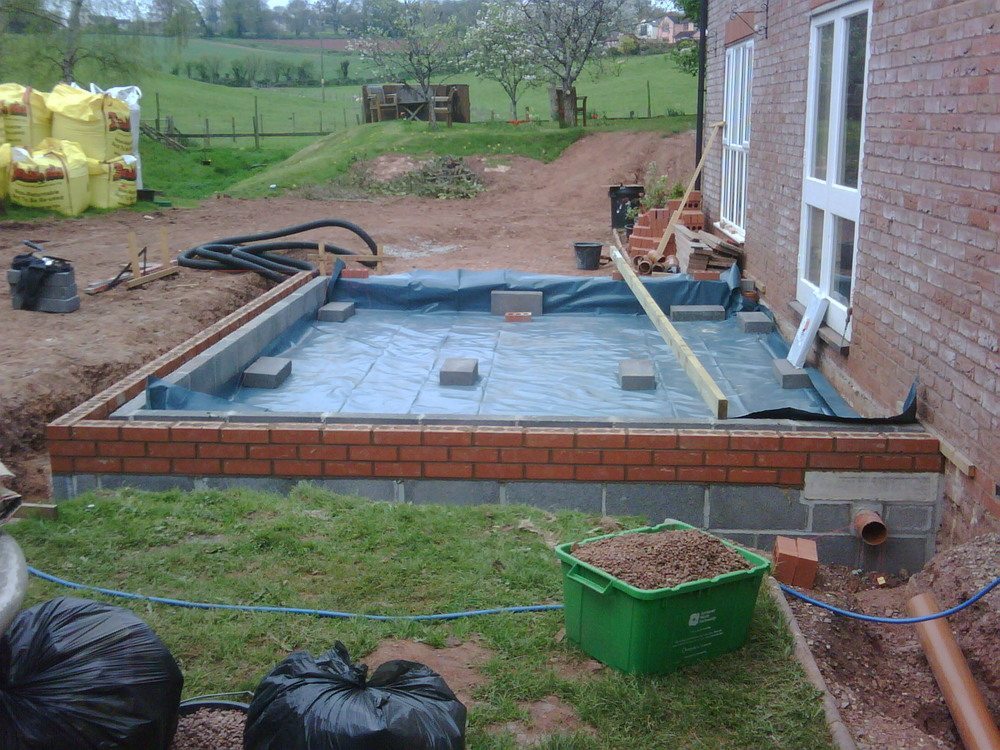
Pouring the foundation
In order to minimize risks, the main focus should be on the foundation. It should not differ from the foundation under the main building.
That is, to be exactly the same in width, depth and content
It should not be different from the foundation under the main building. That is, to be exactly the same in width, depth and content.
The foundation for the extension must be proportional to the loads, identical to the main foundation.
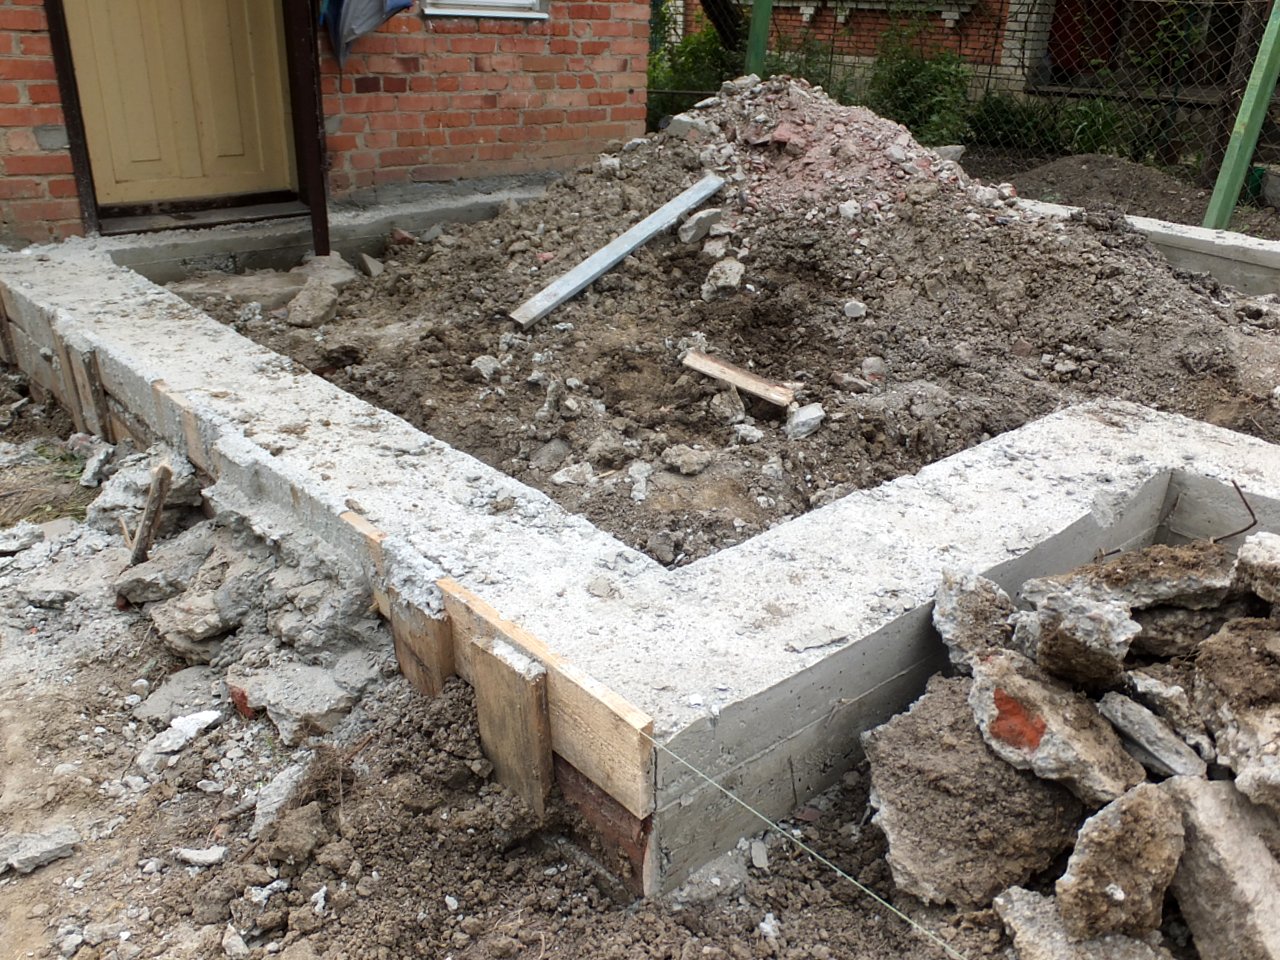
It is not recommended to connect the new foundation to the main foundation, as any connection will break. The extension will surely settle and break the connection.
Therefore, it is recommended that when pouring a new foundation, make a small indent from the old one. That is, in the places of contact, between the foundations, lay a roofing material, a tarred (pine) board or a thin sheet of polystyrene.
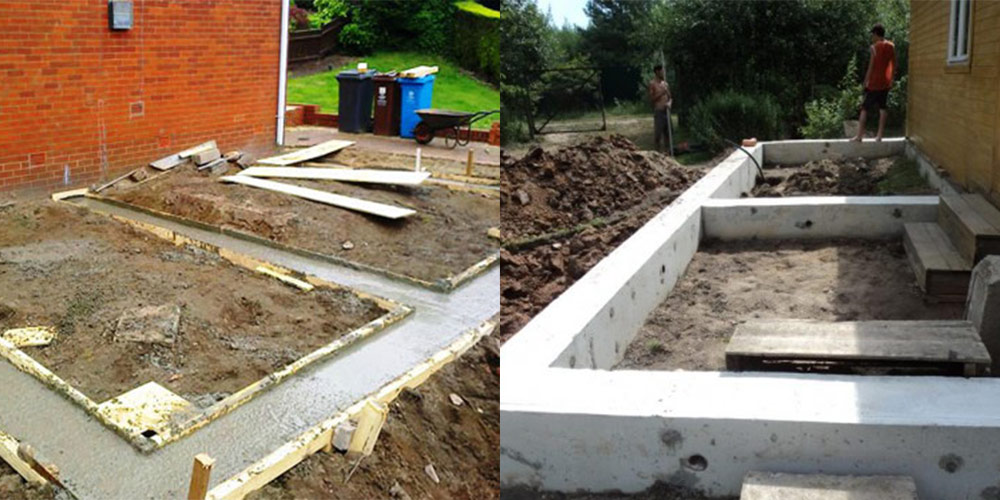
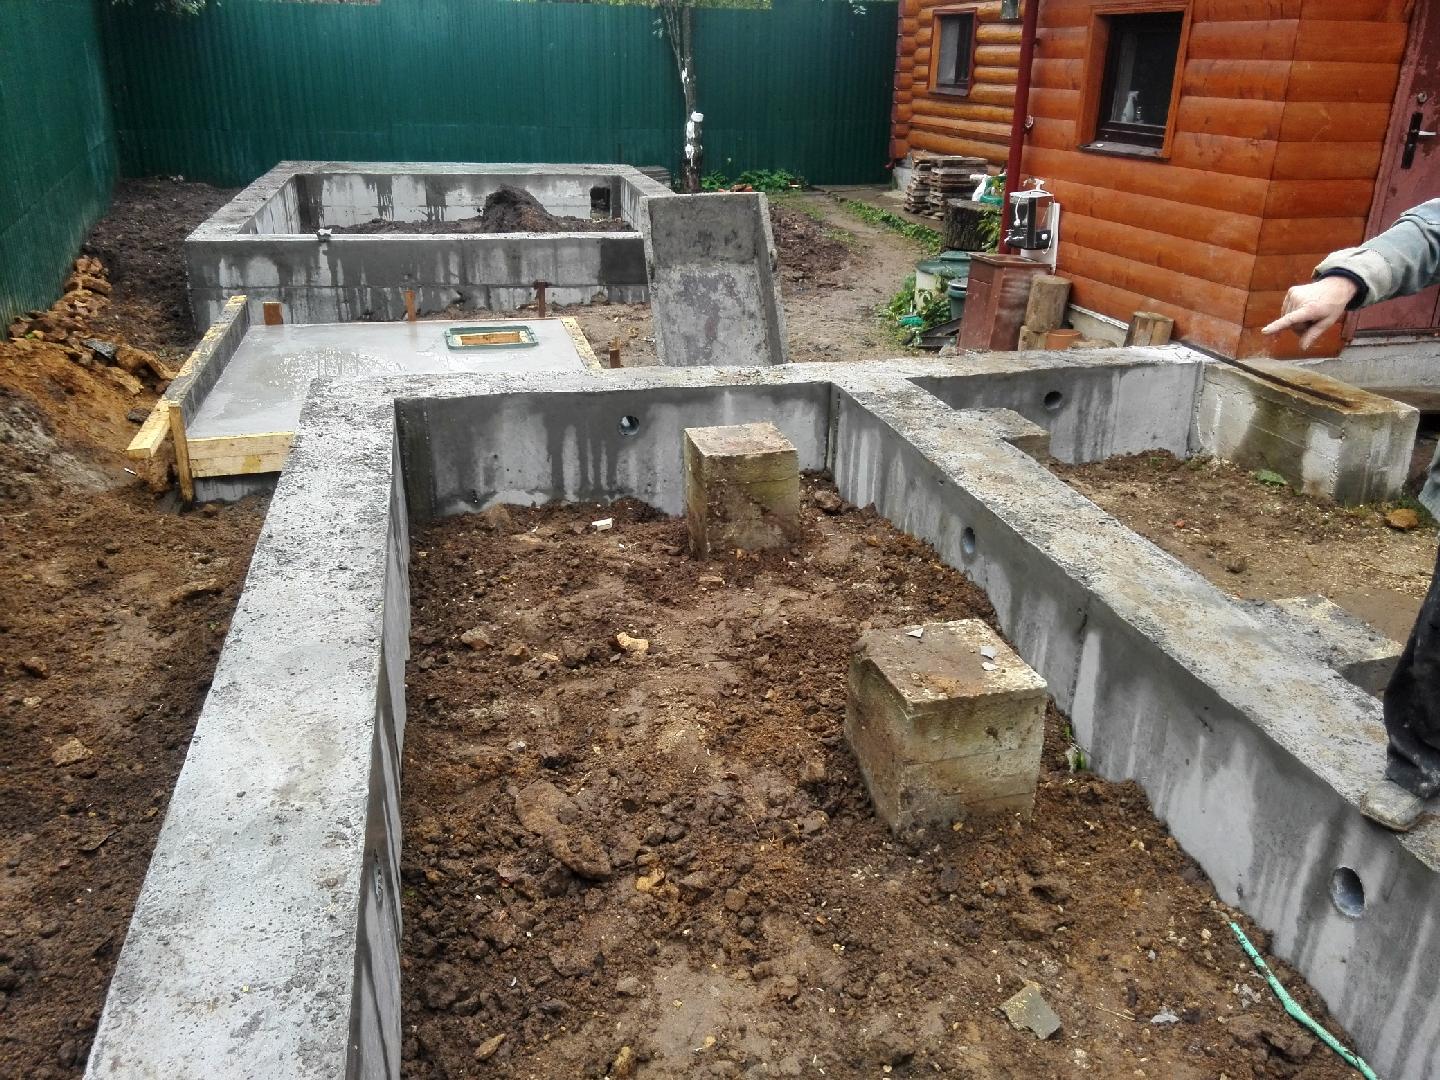
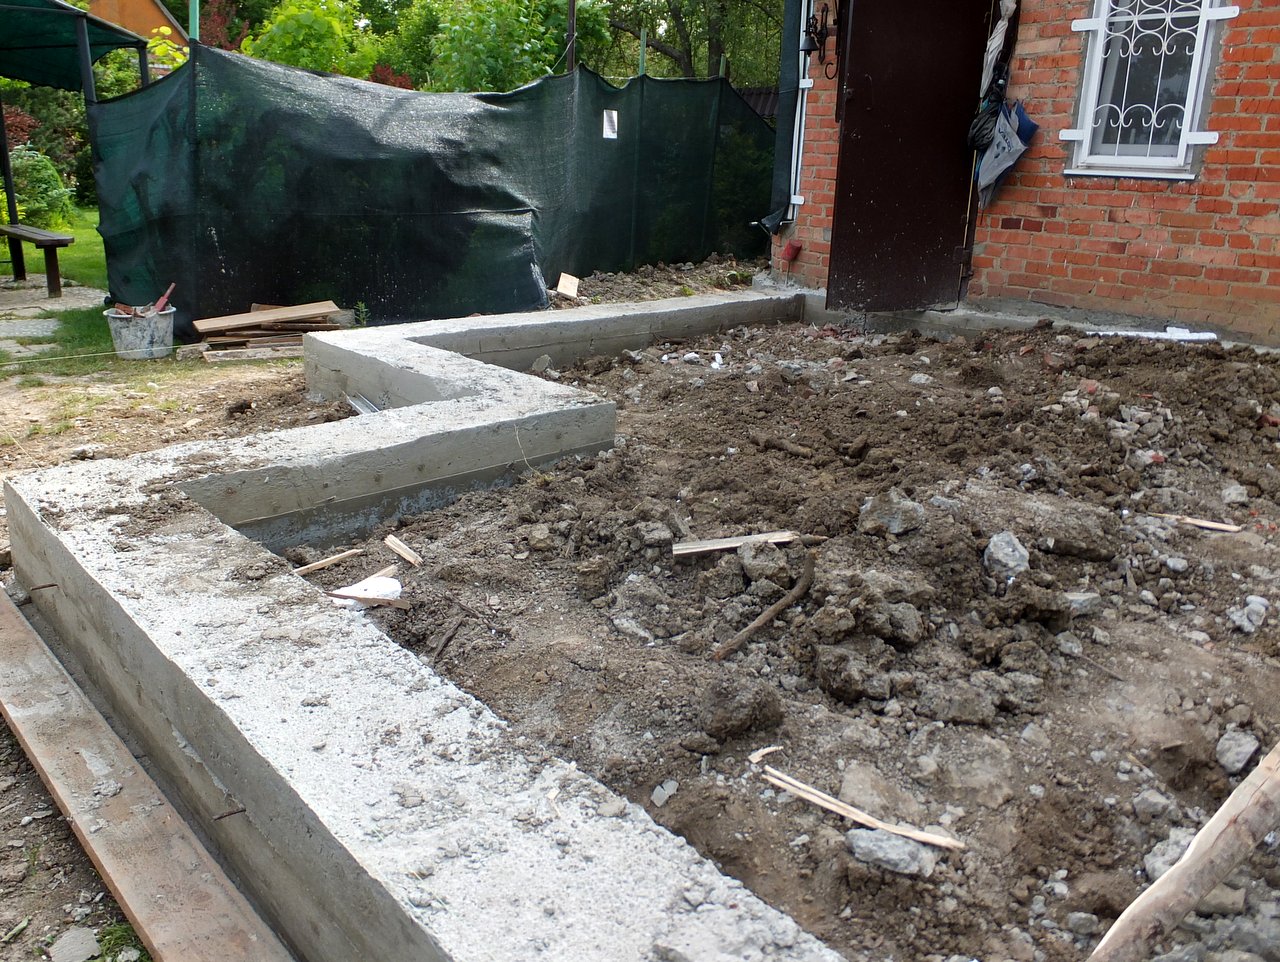
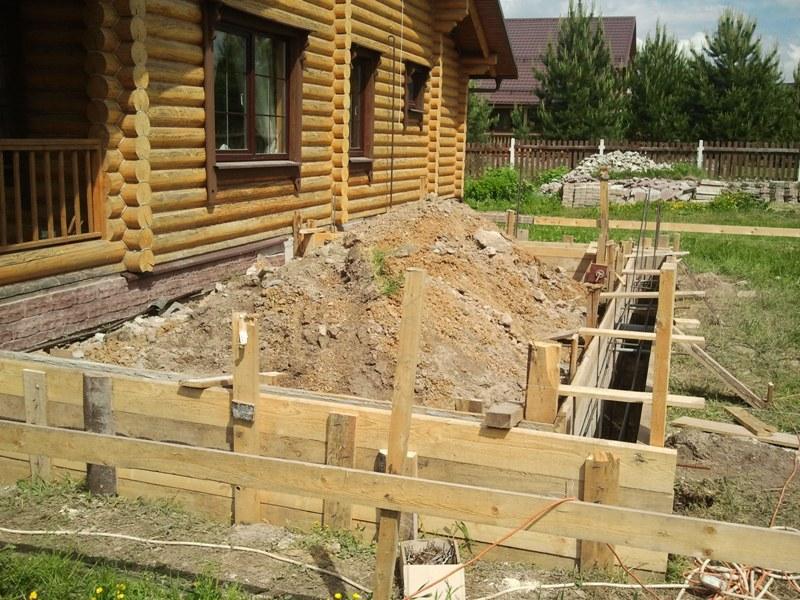
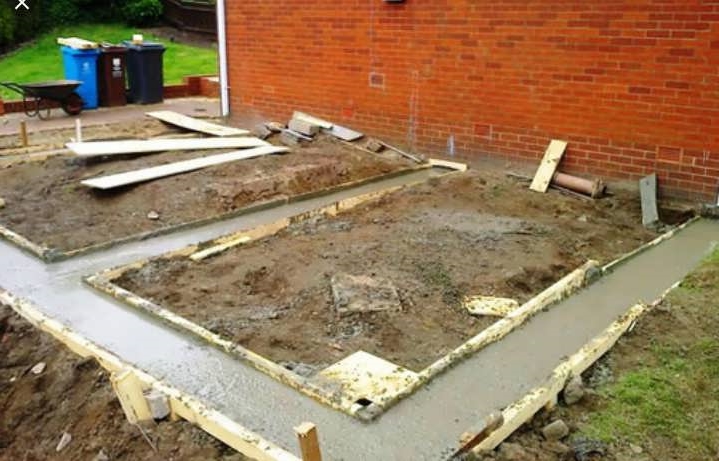
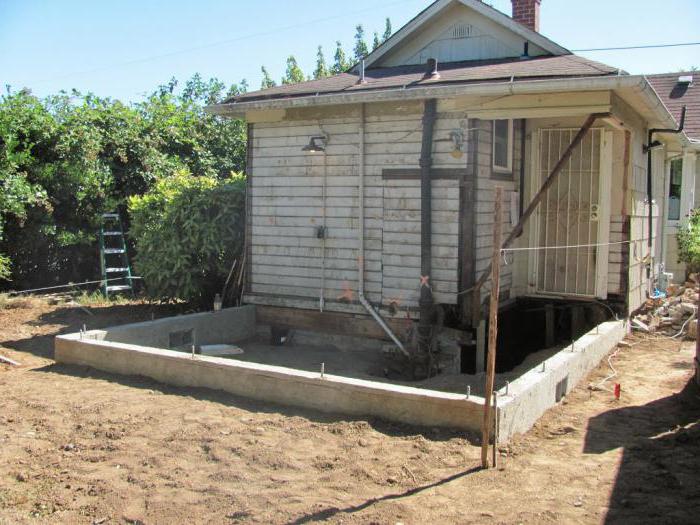
The foundation is poured either with the letter P, or along a circular closed contour. See the picture below.

Another little trick from practitioners. If the foundation, located parallel to the main building, is made wider than the rest of the foundation, then, when subsiding, the extension will not move away from the building, but will move even closer to it.
For example, the main foundation is 50 centimeters wide, increasing the parallel trench by 10 centimeters, and this side will sink slightly less than the rest of the walls.
Brick extension to a brick house
The foundation and formwork are ready, now the question arises, how to properly attach the brick to the wall? This applies not only to brick extensions. The same recommendations apply to annexes made of foam block or gas silicate blocks.
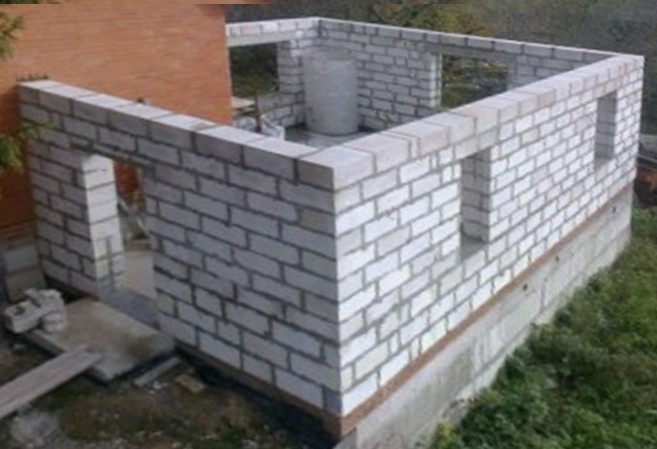
Just like the foundation, it is undesirable to make a bunch of walls. Of course, it is impossible to give one recommendation for everyone. Much depends on the quality of the soil under the building.
Another important factor is the size of the extension.If the extension is large, then there is a fear of how stable it will be, without fixing on one of the sides.
Therefore, large outbuildings are best done as a separate building, which is being built close to the old building.

In this case, there will be a circular, closed foundation, all 4 load-bearing walls and a separate roof that is not connected to the main building.
If the extension is small, then it can be made in the form of the letter P, without being tied to the house.
In any case, you should consult with a specialist, indicating:
- soil characteristics,
- extension dimensions,
- wall thickness,
- the material from which the extension is being built.
How to tie an extension with a house
If you nevertheless decide to tie the extension to the house, then you should start with the foundation.
This work is very difficult and costly. You will need to drill holes in the old foundation into which the reinforcement is glued. Please note that do not clog the fittings, but rather stick on special glue.
The same operation is done with the walls. For joining the walls, holes are also drilled into which the reinforcement is glued.
Then the mesh is laid in the seams, after several rows of masonry. The roof and the roof are made common.
However, even with such a tight connection, there will still be cracks or breaks.
Frame extension to a brick house
Sometimes attached to a brick house:
- Frame extension;
- Wooden extension;
- An extension from a bar and other, lightweight material.
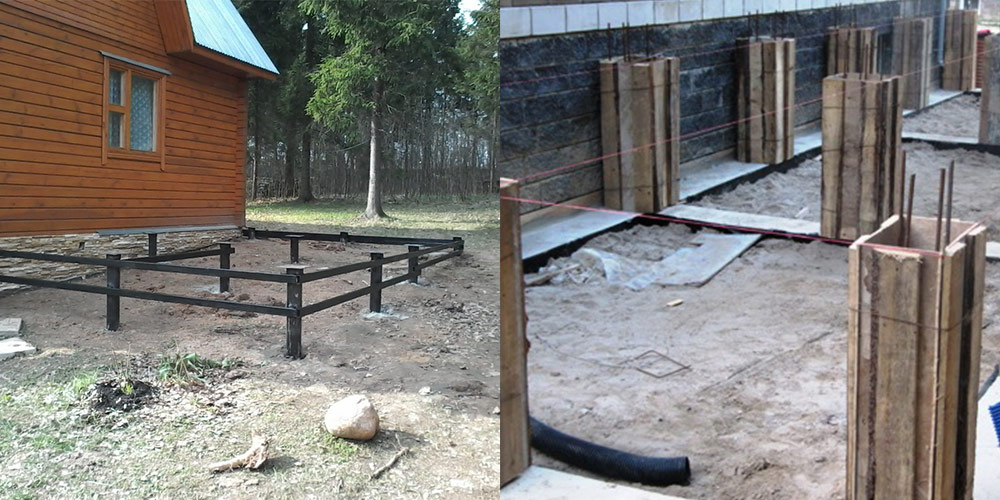
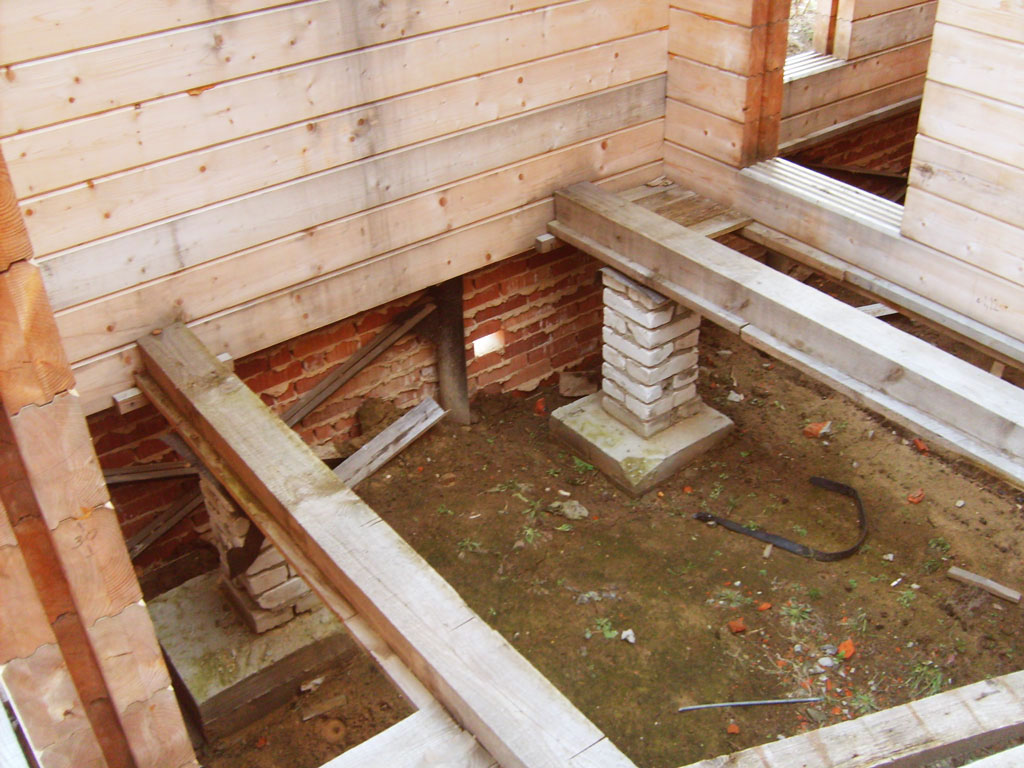
In this case, it is not necessary to fill the strip foundation. It is quite possible to make an extension on a columnar foundation.
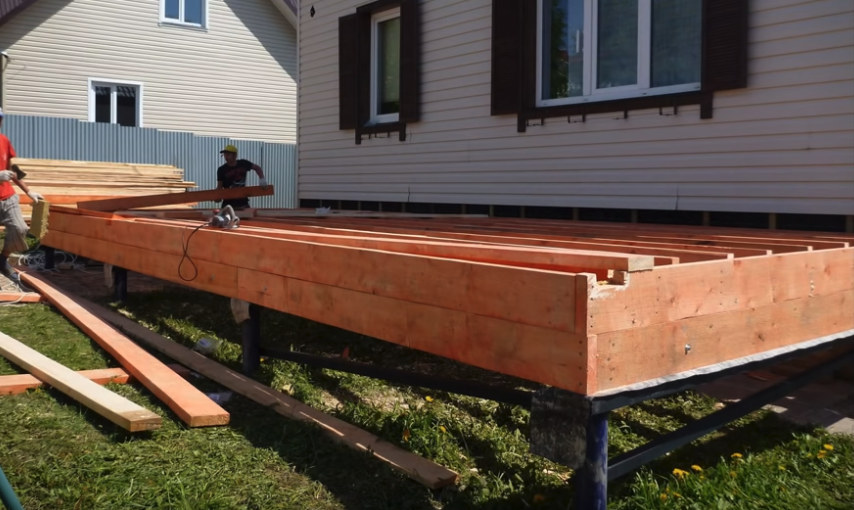
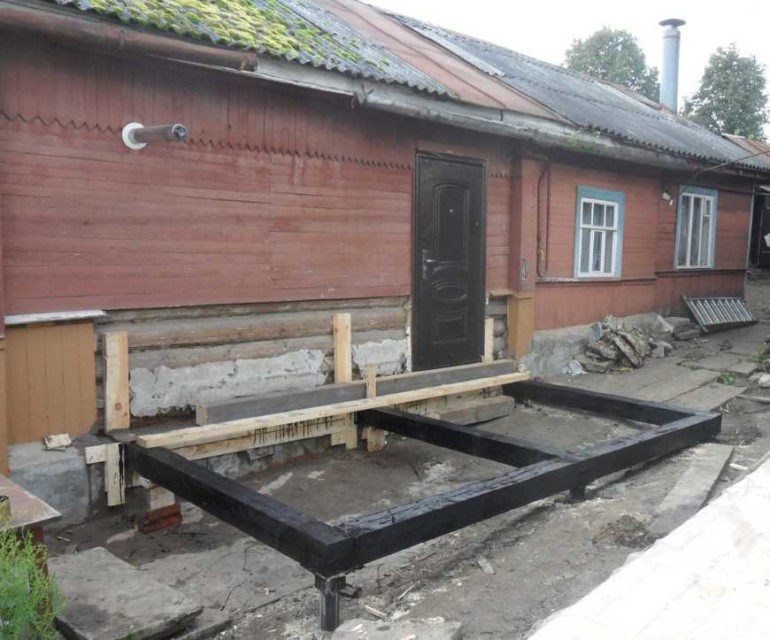
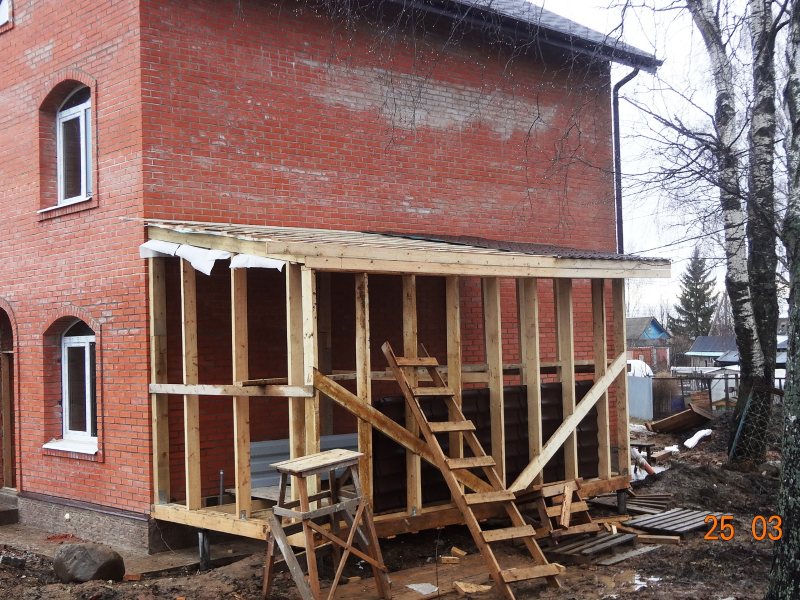
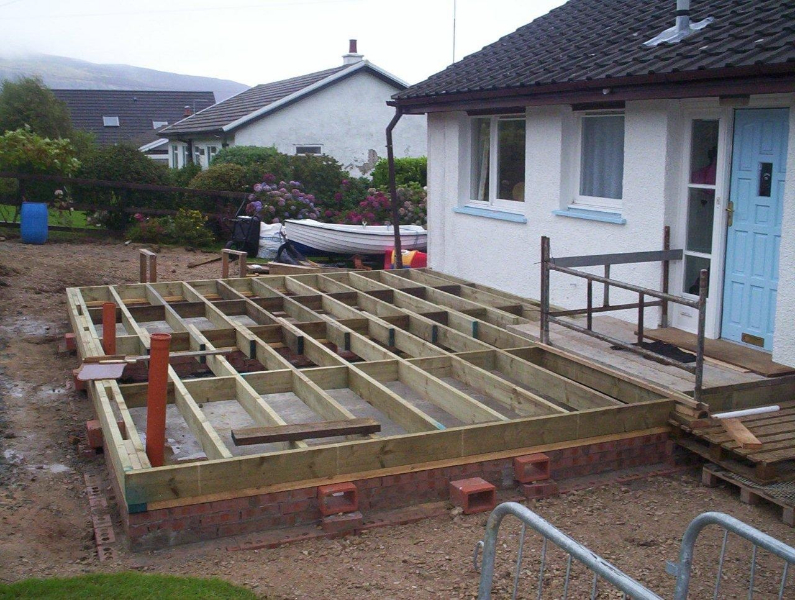
Then, a wooden frame is assembled on a strip or columnar foundation. One side of the frame is attached to the main building. For example, as shown in the photo:

Or in this way, a photo:

Then, the frame is sheathed with basic material: timber, boards, panels, and so on.

A small gap that forms between the brick wall and the frame is blown out with polyurethane foam.

Also widespread, in our country, is the method of connecting a wooden extension with a brick house, using a wall slitting. In this case, the wooden frame is partially recessed into the wall and screwed on with mounting brackets.

We advise you to read:
- How can you use old brick in the country.
- How to properly heat a new brick oven.
- Expanding a window in a brick house, expert advice.
- How to make a homemade brick machine.
- Which house is better made of timber or brick, video review.
- Do-it-yourself brick fireplace.
Arrangement of the foundation for an extension to a brick house
In most cases, additional area near a brick house is built from the same material, that is, brick. This means that the foundation for such a building must withstand the significant weight of the structure being erected. Such properties are possessed by a strip reinforced concrete structure. This reliable and solid foundation is very popular in private housing construction. It is carried out in the form of a monolithic tape, and all the work can be done by hand.
The process of arranging a strip base for an extension to a brick house is as follows:
After marking the site for the extension, they proceed to earthworks
In this case, it is important to properly deepen the base, given that the base of the foundation should lie below the freezing boundary of the soil. In addition, it cannot be located higher or lower than the foundation of the main house.
The thickness of the bases should also be approximately the same. Therefore, the width of the trench for the additional foundation must be made wider by 20-25 cm to install the formwork system. You can dig a trench using construction equipment, but it is more economical and easier to do it manually, using a shovel. The bottom of the trench is carefully leveled and tamped.
Then the dug trench around the entire perimeter is covered with a small layer of sand, moistened and compacted.If necessary, moistening is performed again, after which the sand is tamped again. The dense sandy layer is covered with gravel or fine gravel, which is also well compacted. The result is a kind of cushion that compensates to some extent for the seasonal movement of the ground.
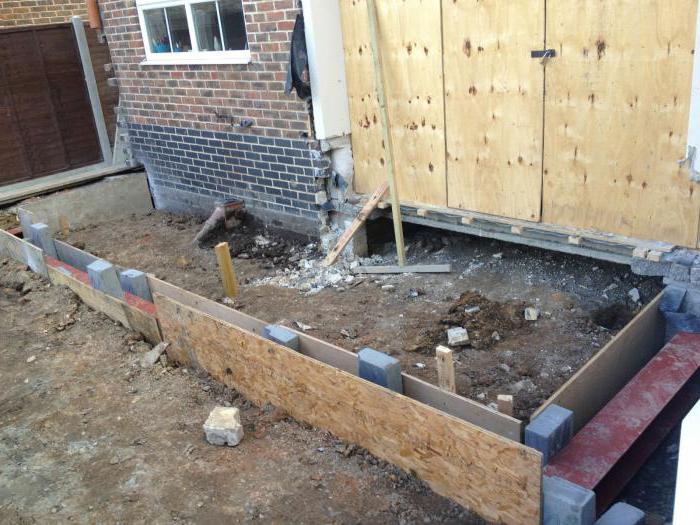
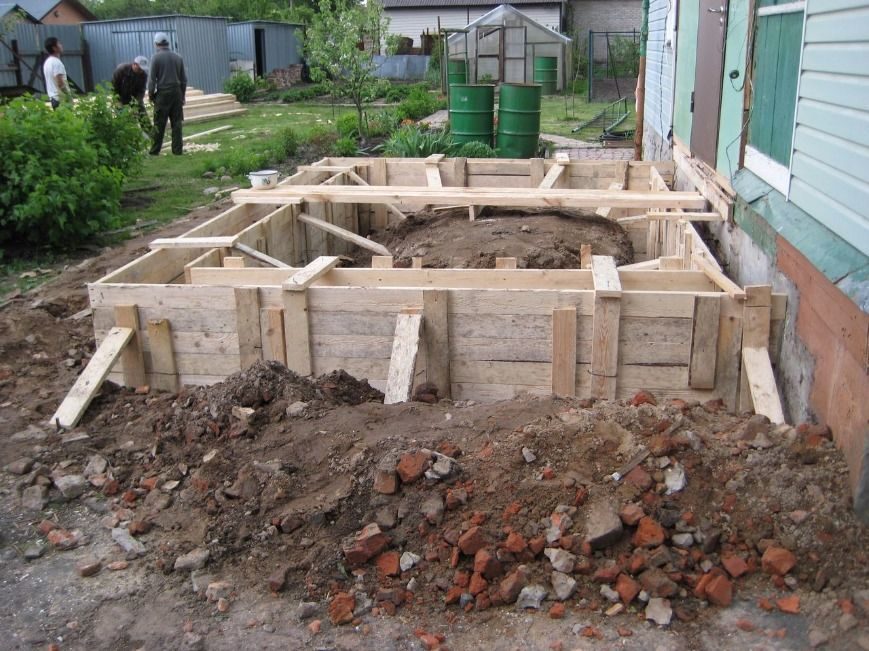
A formwork made of boards is installed in the trench. The material is knocked together by fastening with transverse bars. Expose knocked down shields on both sides of the trench. Spacers of the same length are installed between them, which support the shields and ensure the same thickness of the foundation. The formwork must rise above the ground level. It is imperative to check the verticality of the formwork. This is done using a plumb line or a building level.
The whole structure is reinforced with a reinforcing frame. To do this, 4 or 6 rods of reinforcement are connected with jumpers, maintaining a certain step. At the same stage, a rigid connection to the main foundation is performed. For this, holes are drilled in the already existing base and reinforcement rods are fixed in them. In the future, these rods are connected to the reinforcing frame of the additional base by welding.
The entire structure is filled with concrete, which can be ordered from the precast concrete plant. Ready concrete is delivered to the site by specialized transport immediately before the foundation is poured. Prefabricated concrete is of high quality, but this option is quite expensive. Making concrete mortar with your own hands will be cheaper, but this will take a lot of effort. At home, concrete is prepared as follows: take 1 part of cement grade M400, 3 parts of coarse sand and 5 parts of fine grained crushed stone. All components are mixed, and water is added to the resulting mixture. Water is added gradually in small portions. The finished solution should have the consistency of thick sour cream.
When pouring concrete into a trench, you need to tamp it carefully. Simple sealing actions are performed by trimming the reinforcement, which is pierced by the poured mixture. However, a greater effect is achieved when using a deep vibrator.
The surface of the poured foundation is leveled with a trowel or spatula. The horizontalness of the base is checked by the building level. To avoid cracking the foundation, it is necessary to constantly moisten the surface.
How can two foundations be connected?
The foundation for the extension can be rigidly adjacent to the base of the dwelling, as a result of which a single structure is formed. Such a solution is relevant if the site has a weak or not heaving type of soil. It is also worth giving preference to this option when you are going to make an extension of several floors and want to connect it to the main house through a single roof.
If the base is a slab, then a monolithic foundation should also be poured for additional housing. In this case, it is necessary that its thickness is at least 400 mm or the base of the residential building has protrusions. In this case, the slab reinforcement can be welded to the frame of the new foundation. In addition, if you wish, you can do everything yourself.
Monolithic foundation slab
The tape-to-tape connection assumes the presence of a sand cushion and reinforcement with a longitudinal slot. Metal rods are driven into specially prepared holes in the base of the house and form a frame for the new foundation. Further, the joint is made by means of a release with a length of about 40 cm.
You can also build a separate base for the extension, which will be in close proximity to the house. A sheet of roofing material should be placed between the two bases. This material acts as an excellent waterproofing, you can also place a layer of thermal insulation, or you can get by with a simple tow
In this case, it is very important that this layer allows the new base not to collect water during precipitation and not damage the foundation of the house. From the outside, special decorative overlays are fixed to the wall, covering the seam
Selection for different buildings
In order to choose the right type of base for the extension, you should first study the condition and dimensions of the base of the main building, the type of soil. You can do this yourself. To do this, next to the old house, you need to dig a hole with dimensions of 100x150 cm. In the columnar foundation, the depth of the piles and their dimensions are measured, in the strip foundation - the width of the sole and the height.
This will provide equal conditions for shrinkage and give greater strength to the entire bond.


For lightweight frame extensions to a wooden house, a budget option with a columnar base will suffice. This base is suitable for all light types of verandas, terraces, porches, dressing rooms and vestibules. The depth of the new and old foundation must be equal. On swampy soils with a high groundwater level, a pile or columnar foundation should be chosen.


Brick houses most often have a strip foundation, therefore it is also recommended to attach a strip foundation. Several types of ligaments are made between the bases.
- Rigid connection of foundations with a closed contour. For such a bundle, it is necessary to drill holes in the ready-made tape to a depth equal to 35 diameters of the connecting reinforcement. They are arranged in a staggered manner in two layers, then rods 70-100 cm long are inserted into the holes.It is possible to fix the reinforcement in the old foundation using the wedging method, when cuts are made at the end and when driven into concrete, wedging occurs or a chemical anchor is used. Then the strapping is made with the rods of the new reinforcing cage.
- If a new foundation is planned with an open circuit, then a rigid connection is made only at the joints with the existing foundation.

- The technological seam with a closed tape loop is made of 5 cm thick expanded polystyrene sheets, which is laid between the two bases and at the same time is a vertical element of the permanent formwork.
- An open circuit with a technological seam is arranged according to the above scheme, only insulation is placed at the junctions of the circuits.

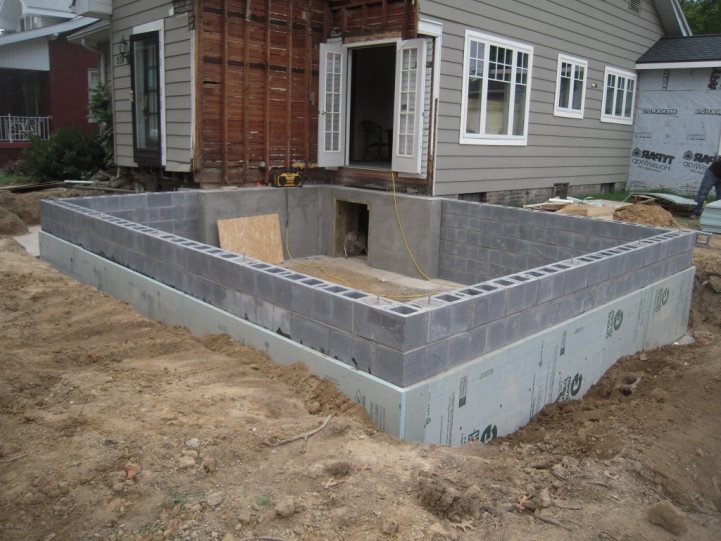
Foam concrete has low shrinkage rates and low weight; you can erect the walls of the annex from it on your own without the involvement of experienced builders.
If the house has a basement and several floors, the walls of the building are wider than 40 cm, the soil is complex and heavy loads are planned, the best option would be a base in the form of a slab, in which the loads are distributed over the entire area.


Fastening the racks and bottom strapping
After the foundation is poured, it is given the opportunity to gain at least 50 percent strength. Typically, concrete or grout is used anyway. After that, you can proceed with the installation of the frame. On top of the foundation, no less than a couple of layers of waterproofing should be laid. Roofing material or roofing felt is used as waterproofing, folded in half. It is permissible to use other, more modern waterproofing materials, including in liquid form.
After that, you can do this:
- First, the racks are fixed, after which the strapping is formed.
- First of all, the strapping is done, and then the racks are attached.
In the case of the first option, when pouring the foundation in the places where the racks are installed, special fasteners are poured. In the photo below you can see what such fasteners are. It can also be a metal plate in the shape of the letter "P", while it is poured upside down, and it is better to weld a rod from the bottom of the plate. A stand is inserted inside this letter "P" and fastened with screws or self-tapping screws. Naturally, before installing it, all holes for fasteners must be drilled, and the dimensions of the plate must correspond to the dimensions of the racks in the section.It is permissible to fasten it with ordinary nails, which will not in any way affect the reliability of the entire structure.
 How to attach racks to the foundation
After installing and fastening all the racks, the harness beams are attached between them.
If another option is used, the strapping bar is first mounted. If, at the stage of pouring concrete, with some step, the studs are bricked up, then the task is greatly simplified. In the places where the timber is attached, it is enough to drill holes, after which the timber is pushed onto the studs and reliably attracted by the nuts to the base. After that, they begin to install the racks, armed with one of the methods shown in the image below.
 Options for attaching the racks to the strapping bar
In any case, it is better to use metal corners, which will make the structure more durable and more reliable, especially since these racks are loaded with a roof, and this is very important
Wooden house

Photo of a silicate brick extension
Preparation
We will talk about the outbuildings, the material for which is both ordinary red ceramic bricks and silicate, including double silicate brick M 150.
Before starting work, you need to have an idea of how they are carried out. You need to know about a set of tools and building materials. But it all starts with an examination of the condition of the home.
First of all, you need to make sure that the walls of your house are in good standing. This is especially true for those who will be affected by the load from the structure being erected.
Pay attention to the crumbling parts of the walls, to its rotten parts. Remember that the support of a brick structure on rotten wood is not reliable.
This is fraught with the destruction of both the main dwelling and its attachment part.
Next, pay attention to the foundation. A brick annex to a wooden house will exert great force on the overall foundation
Take steps to strengthen the foundations of your home.
Pay attention to such foundation parameters as:
- The depth of its occurrence.
- Height above ground level.
- Transverse section.
Erection

Work is in full swing!
Work with brick is more expensive than with foam block, which has recently become more and more popular. The price of foam blocks and materials for working with them is less. However, brick products have some quality advantages, such as strength and moisture resistance.
Next, we will give you an answer to the question of how to make a brick extension to a wooden house. Let's start with a small outline plan.
The work includes the following stages:
- Erection of the foundation. It must be powerful enough. The foundation of the outbuilding is connected to the reinforced foundation of the dwelling.
- Erection of brickwork. It should start from the wooden wall of your house. Before you start laying, make a competent calculation.
- Connection of an annex made of brick to a wall made of wood.
The foundation is created from concrete blocks. As already mentioned, it must be powerful, capable of withstanding an extension.
Brick laying is carried out according to standard rules.
To implement it, you will need:
- Trowel.
- Binder lime-cement mortar.
- Threads and pins. The pins are required for jointing. The thread controls the vertical evenness of the masonry.
Based on the type and design of the outbuilding, you will also need additional devices for the production of work.
The connection of two materials (brick and wood) can be done in several ways:
- With powerful staples.
- Using a special cement mortar.
- By means of a sealing tubular material, which is covered from the outside with the same cement mortar.

Joining brick and wood with staples.
Laying a new foundation
The type of existing and new bases must be fully consistent with each other. However, we must not forget about the features of the building and the ground.
Having chosen a columnar base, it is important to make sure that the dimensions of the new pillars completely coincide with the parameters of those already installed. To learn how to make a foundation by attaching your own hands, see this video:
 Watch the concrete dries - there should be no cracks in it
The selected connection is made (rigid or expansion joint). When hard, reinforcing rods are driven into the prepared holes and the construction of the formwork is started.
Its inner surface is protected by waterproofing, which can be used as a polyethylene film. Now a reinforcing cage is laid at the bottom of the trench, leaving a distance to the sand and gravel cushion, and poured with mortar.
A mixture for a solution is prepared from sand, cement and crushed stone in a ratio of 3: 1: 5, adding water in such an amount that the composition resembles thick sour cream in its consistency. During the curing period of the concrete, care must be taken to ensure that no cracks appear on its surface. You can protect the built foundation from drying out or from excess moisture by covering it with a film or a layer of sawdust.
 When building your new foundation for an extension on pillars, each of them will have to be protected from moisture using roofing material or special mastic. The depth of the wells should be below the level of freezing of the soil and at the bottom of each it will be necessary to equip a sand cushion.
Reinforcement after the construction of the formwork in each well is carried out with fiberglass, which does not require additional waterproofing. Filling is done by hand and does not require additional force.
Erection of the walls of the extension
The home craftsman selects the wall material at his discretion. It can be red or white brick, shell rock, expanded clay or aerated concrete blocks. In one case or another, the technology for erecting an extension from aerated concrete to the house and supporting structures is unchanged.
- A waterproofing material (roofing material) is covered on the surface of the foundation.
- Check the flatness of the surface. If necessary, it is leveled with ordinary cement-sand mortar.
- Brick construction begins with the construction of the corner parts of the wall in one or two rows. In this case, the markings are made in such a way that the angles between the stretched cord are everywhere 90 °. Corner blocks should be erected ideally, the evenness of the entire structure depends on them.
- A cord is stretched between the corner "columns", along the line of which the intermediate parts of the wall structure are erected.
- The extension being built is periodically “connected” with the main brick building. To do this, every 3-4 rows of masonry in the walls of the house, two holes are drilled with a perforator at the level of the lined row. The diameter of the holes is selected in such a way that 30-50 cm metal rods (reinforcement or wire rod) can be driven into it with effort. Thus, the walls of the veranda being erected are combined with the wall of the residential building.
- When laying rows, you should periodically check their horizontality so that the upper final row is laid out strictly parallel to the horizon line.
Openings for windows and doors are made using a level, the upper lintel is made using a concrete post laid horizontally or a steel square profile.

Types of verandas
There are 2 types of verandas that deserve attention: closed type (with glazing) and open type. Open verandas are less functional and are used mainly in the summer. As for closed verandas, it is permissible to use them all year round.
There are also combined verandas, some of which are closed, and some are open.
As for closed verandas, it is permissible to use them all year round. There are also combined verandas, some of which are closed, and some are open.
 You can relax on the covered veranda all year round. It also reduces heat loss through this wall
As a rule, walk-through verandas are built. To get into the house, you have to go through the veranda. If an impassable veranda is being built, it can only be accessed from the house. You won't be able to go outside from such a veranda. Unfortunately, such verandas are not practical and functional, so few people build them.
The attached veranda can be small and occupy some part of the wall, or it can be large, occupying 2 adjacent walls. Such verandas are called corner.
 The perimeter extension gives the house an extravagant look
As for the shapes, they can also be different, but they are mostly rectangular. Although rare, there are extensions in the form of hexagons, semicircles and other non-standard shapes, while their construction takes much more time and money.
Various building materials are used for the construction of verandas.
Building materials used
The most popular building material is wood, since wooden structures are easy to manufacture, and wood is quite affordable and environmentally friendly. Unfortunately, not in all regions it is possible to use wooden products due to their high cost, therefore they use metal elements. The frame made of metal can be sheathed with any finishing material. Regular glass, double-glazed windows, polycarbonate, etc. are used as glazing.
 Veranda from a metal frame and special window blocks
For the construction of verandas, such building materials as brick, shell rock, rubble stone, building blocks are actively used. After erecting walls from similar materials, they are subsequently finished with the same materials as the entire house. You do not have to build walls, but simply fence off the extension, as shown in the photo above.
If wood, as a building material, is difficult to get, then the veranda frame is made of metal profiles. This is often easier and faster. In this case, it is easier to use double-glazed windows, as well as other structural elements. In addition, the design is more reliable and more durable. Recently, polycarbonate of various degrees of transparency has been very popular. The advantage of this material is that it is perfectly combined with metal elements, while having a low weight. When using wood, polycarbonate practically does not look, violating the harmonious combination of materials.
 Polycarbonate veranda attached to a brick house. The whole frame is assembled from a shaped tube
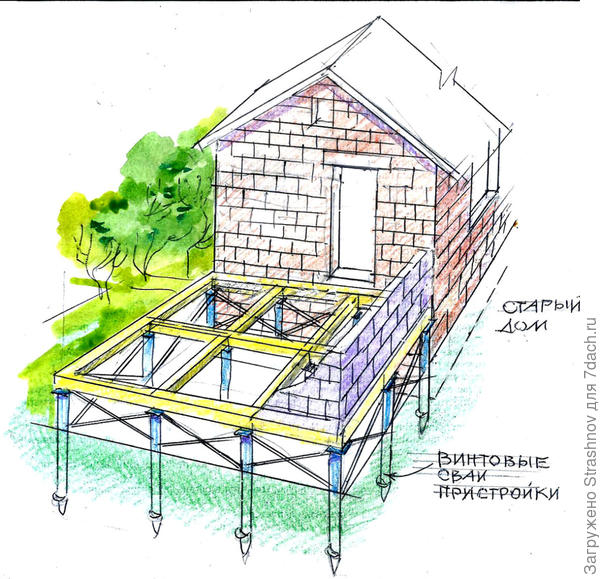
An example of a foundation arrangement for an extension on screw piles
Before starting work on laying the pile foundation of the extension, you need to know on what foundation the house is built. What is it for? Different types of foundations behave differently during operation. The strip foundation will settle less than the pile foundation or vice versa.
 Annex on screw supports
Therefore, if the house and the extension have different types of foundations, then expansion joints are arranged in the places where the structures of the house and the extension are adjacent. That is, a small gap is left between the grillage of the pile base of the extension and the base of the house. Expansion joints are closed with strips, both outside and inside the house and annex. Otherwise, it is fraught with the appearance of cracks and destruction in the places where the extension adjoins the house.
When the house and the extension stand on screw supports, the grillages of both structures, like the rest of the structures, are connected into a single whole.
Construction process
So, a small house stands on screw supports, the developer decided to attach a veranda to it.
The centers of the supports are located at the corners of the extension, under the load-bearing walls and in the centers of concentration of the loads (for example, under the summer stove). Piles are placed in steps of 1.5-2 meters. In the alignment with the installed supports, the verticality of the subsequent piles is controlled.
After installing the supports in the design position, the tops of the piles are marked for trimming with a grinder at one level.
The depth of soil freezing reaches 0.7 m. Groundwater is at a depth of 2 meters. Taking into account the small load from the weight of the extension structures, screw piles with a diameter of 100 mm, a length of 1200 mm with a sharp end and blades with a width of 60 mm are used.
The pile is screwed in by two workers using a pipe threaded through the hole in the top of the pile. If the process of dipping the support goes with difficulty, then pipe sections of a larger diameter are put on the ends of the lever. During the rotation of the pile, it controls the verticality of its immersion. The supports must protrude at least 150 mm above the ground.
We recommend watching a video showing in detail the entire process of installing the supports.
The support pipes are poured with concrete. As the pile is filled with concrete, it is compacted with a pin in the form of a piece of smooth reinforcement or other handy tool.
Arrangement of grillage
To connect the supports with the grillage, a piece of a metal stud with a thread at the end is immersed inside the pipe. After the concrete has hardened, they move on to the grillage device.
Often, the grillage is prepared from a wooden bar. Studs are threaded into the holes of the timber and fastened with nuts. The upper structures of the extension are attached to the wooden grillage.
Watch the video on how to properly equip do-it-yourself grillage.
The support headrests are formed depending on the structure of the grillage. If the grillage is made in the form of a frame from a channel or a corner, then a metal plate is welded to the upper end of the support. The plate is positioned in such a way that there is a backlash for centering the grillage elements.
The foundation on such supports is laid for light buildings. Masonry, brickwork or prefabricated reinforced concrete annexes require a more powerful foundation.
Brick house
Preparation

You can attach a veranda made of wood
The brick structure itself is quite stable and durable. You do not need to conduct a complete survey of your home for any structural problems. It is enough to limit yourself to a visual inspection of the living space (see also the article Beautiful brick houses: projects and a variety of materials).
The same goes for the foundation. The foundation on which the wooden extension to the brick house will be erected will be light.
Speaking about the fundamental basis of the outbuilding itself, it should be noted the multivariance of its creation. This can be the simplest option with brick pillars, or it can be a full-weight concrete structure.
The most optimal option for creating a foundation structure is to copy it from the main structure, to which the extension is made. That is, you must observe all the same depth, dimensions, material and other parameters available for the foundation of the main structure.
The fastening of the two foundations is mandatory. It is carried out using special mounting brackets. You will need these same mounting brackets to secure the walls of the annex and the main building.
Erection

This is the kind of beauty that can come out in the end.
A wooden annex to a brick house is erected immediately after the foundation is created. After that, the creation of the extension begins from the wall. Building bricks and wood are connected here in a slightly different way than with a brick annex.
The wood structure is inserted into the base of the brick wall. To do this, you need to grind out the wall, and put a part of the wooden structure into this strobe. After that, the two buildings are fastened with special mounting brackets.

Introduction of wood into brick by the example of a wooden floor.
The final stage of joining will be covering the joints with cement mortar. Of course, do not forget about finishing work.
If you want to insulate the joint, then do it with tubular thermal insulation materials.Their installation is carried out directly in the gutter, before grouting and finishing.
As you can see, it is quite possible to make an extension with your own hands, you just need to try
Also important is a clear instruction
Foundation for an extension
The foundation is an important element in construction. It is necessary to transfer the weight of the structure to the ground. The type of foundation depends on the type of soil, as well as the severity of the structure and is determined at the design stage.
For the construction of a porch and light structures such as pergolas, you do not need a solid foundation. Heavier outbuildings require a capital foundation. Of course, it is better to immediately lay the foundation together with the foundation of the wooden house during its construction. But if the extension was not originally planned in the plans, then when making the foundation for the building, it is necessary to tie it well with the main one.
If the extension is being built after the house, depending on the type of extension, you can lay a strip or slab capital foundation, as well as build it on poles or piles. To lay the strip foundation, a trench is pulled out along the perimeter of the base of the future extension. Further, foundation blocks are placed in the trench on a prepared cushion of sand or crushed stone and filled with mortar.
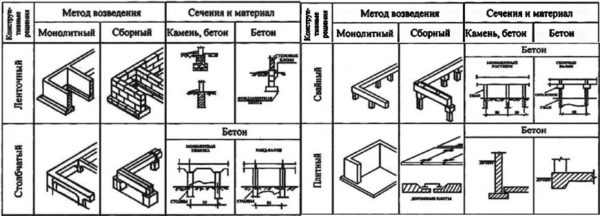
Foundation options for an extension
Before pouring the monolithic strip foundation, the reinforcing cage is welded into the trench and the formwork is installed. For a slab foundation, a frame is welded and poured with concrete over the entire area of the base of the future veranda or terrace. The advantage of such a foundation is that it can serve as a floor.
The capital foundation of the extension must be well secured to the base of the main building. To do this, we drill holes along the entire frontal length of the house foundation every 20–30 cm and insert cut pieces of reinforcement of a suitable diameter. We weld the ends to the reinforced frame of the base of the extension. After the foundation of the outbuilding is laid, it must be given time for subsidence.
Floor and ladder construction
It is best to lay the terrace floor as a single plank covering. The boards are placed on logs cut between the 1st and 2nd strapping crowns at the bottom. Lags and floorboards must be treated with an antiseptic and covered with paint. The upper step of the porch acts as a continuation of the floor.
After completing the construction of an extension under the roof of the veranda, it is recommended to place an entrance door and a staircase. You can make a separate canopy. An extended top step is placed on the same level as the veranda floor. It is customary to attach elements of a straight wooden staircase to 2 side bowstrings, which are located at an angle.
The board used as the bottom rung is placed on the ground. Its ends should be close to the bowstrings and fastened to them with nails. Next, the inserts are installed, cut according to the template and repeating the contour of the side board. They also need to be attached to the bowstrings. A central support board and a riser are arranged between them.
Preliminary work
Preparatory stage
In order to determine the type and size of the base of the building, a pit 100 × 150 cm or 100 × 100 cm is pulled out near any wall. The strip foundation is measured in width and height. In the columnar, the parameters of the pillars and the depth of their laying are important
This issue should be given sufficient attention, since marking the foundation is one of the most important stages.
The size of the base is measured using a steel rod, the end of which is bent 90 °. The rod is placed under the sole, placing the bent part strictly horizontally. Turning it, they detect the moment when the bent edge rests against the wall from the inside, they put a mark on the metal. The distance from the bend to the mark, measured after removing the rod, will correspond to the width of the tape.
At the time of the development of the pit, the type of soil on the site is also determined.The data obtained will determine which foundation to choose.
If the project of an old house is available, preliminary measurements are not required. But it is imperative to find out the geological characteristics. Careful planning at the initial stage of work, taking into account all the terrain features, will avoid mistakes.
After the analysis carried out, it is necessary to decide what structure the future foundation should have. There are several types of them:
- columnar;
- tape reinforced concrete;
- pile and pile-screw.
With rare exceptions, the extension has the same type of foundation as the house. This ensures the reliability of the entire structure.

