The subtleties of building a foundation
Building a garage is not easy and responsible. Therefore, even before the start of construction work, some nuances should be taken into account. Firstly, the characteristics of the material of the future construction and, secondly, the features of the work on the construction of the foundation.
What you need to know about foam blocks?
Modern foam blocks are an environmentally friendly material that is made from water, sand, foaming agent and concrete. It is the foaming agent that makes concrete blocks as we know them - porous.
Foam blocks are often used in the construction of technical structures: warehouses, garages. This is due to their low cost and high thermal conductivity. Buildings made of foam blocks retain heat much better than brick buildings.
Advantages of foam blocks:
- low cost, which means economy;
- low weight, therefore, ease of use;
- dimensions comfortable for construction;
- environmental friendliness;
- structural strength;
- resistance to external influences (including natural phenomena);
- high thermal insulation properties.
In addition, the foam block is a fireproof and moisture-resistant material. These characteristics make foam concrete blocks a fairly versatile material.

What do you need to know about the foundation?
Before starting construction, you need to find out what type of foundation is most suitable for your site. First, let's figure out what types of foundations are.
Types of foundations
- Tape. This is the simplest and most popular type of foundation. You can do it yourself without much difficulty.
- Columnar. Such a foundation is somewhat more difficult to implement than a tape foundation. For its construction, the pillars are installed in the soil and poured with cement, the structure is combined with the help of reinforcement. Columnar foundations are most suitable for clay soil.
- Pile. It is used on the ground with poor stability. Indispensable for the construction of large buildings.
- Monolithic slab. Such a foundation is good for small one-story buildings. It is not designed for heavy loads.
As you can see, not all foundations are the same, they differ in both the type of construction and the materials used.
One question remains: how to understand which foundation is suitable for your building? There is no universal solution, in order to find out which type will be most suitable, you should pay attention to the following factors:
- type of soil;
- depth of groundwater;
- characteristics of the site allocated for construction (for example, is there a slope);
- weight and area of the proposed building;
- material from which the building will be erected.
Only after studying in detail the features of each type of foundation and answering these questions, you can decide which foundation is best to use.
Construction
In order to build a garage with your own hands, you need to know the order of work. Phased planning and erection of the structure in accordance with the rules and regulations will allow you to achieve a good result in the shortest possible time.
The step-by-step instruction is a list of actions that will help organize your work and make it relatively easy and of high quality. So, the construction begins with the fact that the site is marked with pegs, thereby determining the future foundation. It is necessary to inspect the territory for obstacles that may interfere with freely entering and leaving the garage.
The next step will be to determine the type of soil and the choice of the foundation. For heaving territory, you need to completely fill the entire floor, the construction of a basement and a viewing hole will be impossible.For dense soil with deep groundwater, you can make a strip foundation, where both a basement and a viewing hole are appropriate. They are also laid down at this stage.
Further, swing gates are installed on spacer pins, they serve as a reference point and will be the element that cannot be adjusted after the walls are built, therefore they need to be installed evenly and check their performance.
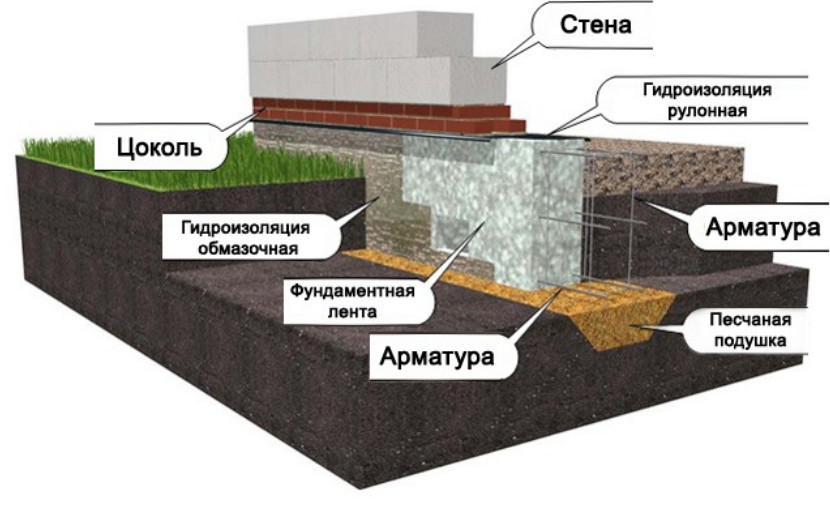
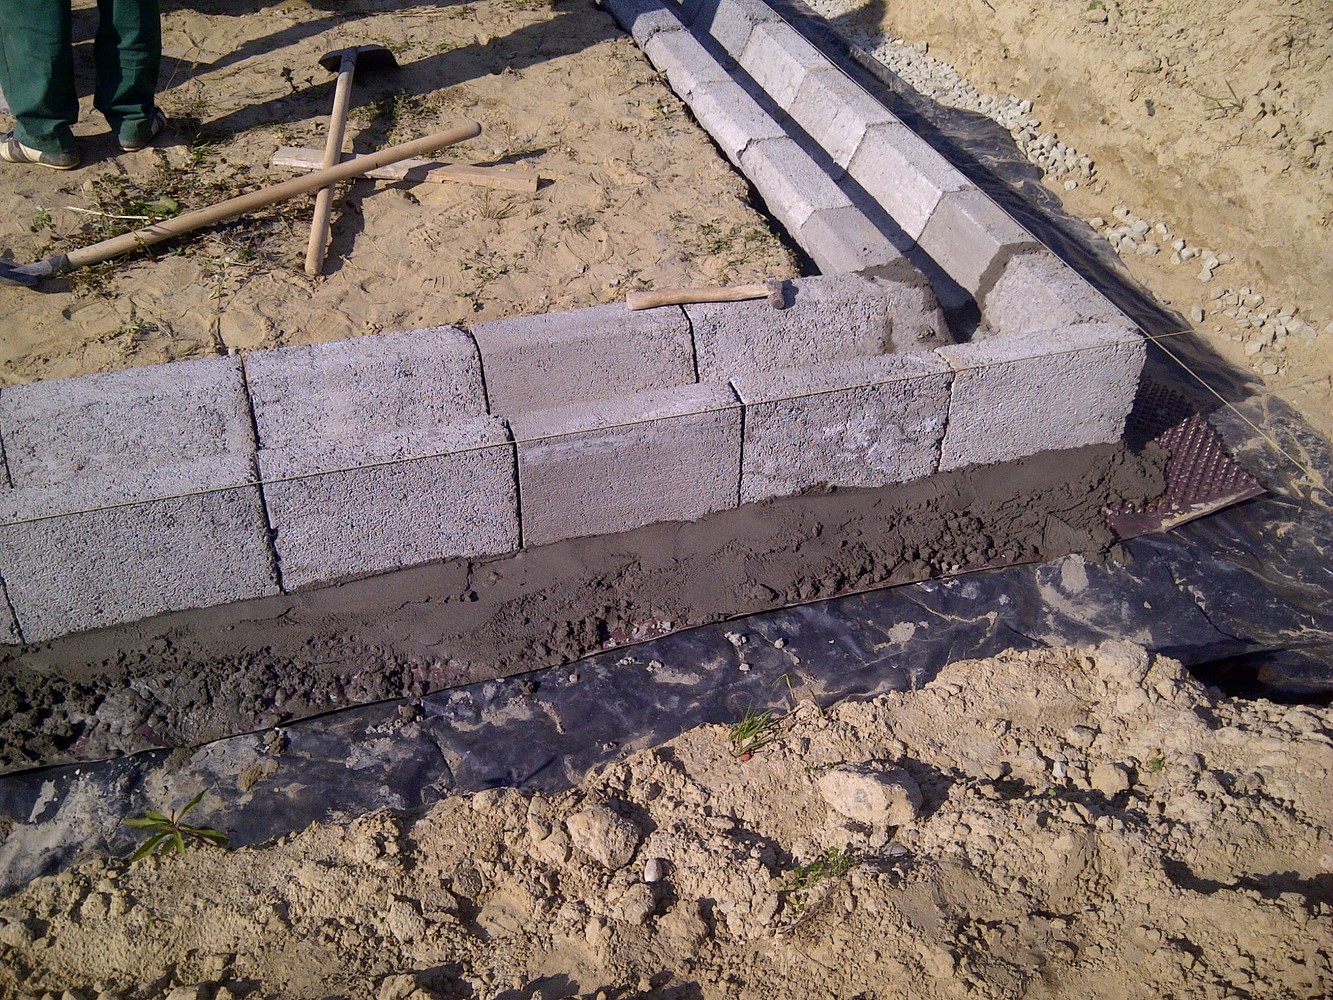
When this stage is done, you need to move on to waterproofing under the base of the walls, which is made of roll materials. Only after this stage does the construction of the walls begin. It is correct to start lifting the walls from the corner. The first row is placed on a cement-sand mortar. Next, a special adhesive solution is used, the blocks are shifted by one third of their length.
As soon as the height of the walls has reached the end of the gate, you need to install a concrete lintel beam directly above the opening. If the roof is planned to be pitched, then it is best to make a lowering on the side farthest from the gate. In the event that a hood will not be installed in the garage, then small holes must be made at the bottom and top of the wall so that air can circulate in the room.
The construction of the walls ends with the creation of a solid reinforced belt, on which the ceiling beams will be laid. They need to be laid out, maintaining an interval of 80 centimeters, and the ends of the beams should be brought out twenty centimeters outside the wall. Grooved boards are laid on the lower edges of the beams, which will form the ceiling. It is on this surface that the waterproofing will be laid.
For the roof, it is best to use corrugated board because of its lightness and strength. You can cover the beams and slate if available. Work is carried out from the back wall to the gate and ends with the formation of a visor. When all the work is completed, the process of warming with expanded clay, slag or glass wool and the screed of the walls is underway.
When the garage is completely ready, then everything that is required can be attached to the finished structure - a bathhouse, an additional workshop, a shed or any other structure that will play a different role than a garage.
Step-by-step instructions for building a frame garage
Let's start with the fact that the place for the building is ready, a gravel-sand cushion has been created, which is rammed in the most careful way. Now you will need to use this instruction and do a simple job step by step. Well, you need to start with a drawing.
Drawing of the frame of the future garage
In principle, a drawing is not required, but a fairly simple drawing will need to be drawn in order to have an idea of the future design. Determine the exact dimensions of the garage, make a preliminary calculation of materials. Knowing the size of the structure in advance, you can easily determine the material consumption and the cost of the finished project. This is very convenient, so you shouldn't ignore this kind of work.
The foundation of a frame garage
To create it, we need:
- Formwork
- Lathing
- Concrete mortar
A trench is being dug along the perimeter of the future building. It doesn't have to be deep. We install the formwork on three sides of the garage. Do not expose from four sides! It will be necessary to reinforce such a concrete base. To do this, you can use a special mesh for stiffening, as well as reinforcement. The monolithic slab will distribute the load evenly. You need to pour a high-quality concrete mixture based on sand or based on sand and gravel.
Do-it-yourself installation of frame garage walls
So, our base is completely dry, and you can proceed to further work. Now we need a tree or a profile pipe. When using a profile pipe.
When working with a profile pipe, you can use as a connection:
- Welding
- Bolts
Corner posts and gates must be assembled from a bar with a section of 100x100. Between the posts of the lower harness, you need to maintain a distance of 120 centimeters. In the corners, struts are installed.This will give the structure strength. If you need a door or gate, make room for it. The frame must be strong.
Arrangement of the roof of a frame garage
The work on the structure of the frame takes several days. After the frame is ready, proceed to the roofing device. It is necessary to build it according to the rules, since the roof will have to withstand wind and snow loads.
You need to start building the rafter system. For this you need boards 100x25 and 100x50. The entire structure, as a rule, is assembled on the ground and only then installed on the garage and fastened to the base of the walls. Use all kinds of connecting elements for this.
It is better to make the roof gable with the same slopes. The ridge should fix it. Next, it is necessary to make a crate from smaller beams. Any material convenient for you is fixed on it:
- Corrugated board
- Shingles
- Bituminous sheet
Finishing work
The decoration of the garage is its cladding. It is produced using various materials. Most often, wooden lining is used. It is easy to sheathe it, its cost is low. So, consider all the materials for cladding:
- Euro lining
- Siding
- Profiled sheet
- Facing brick
Do-it-yourself frame garage insulation
The garage is insulated from the inside. For this, you can use mineral wool or any other material on the market. If necessary, you can also use plastic wrap, and then sheathe the inside of the garage. The cladding from the inside is made by various materials, which are presented in the range today. Thus, the garage will be warm and protected inside and out. What else do you need for a car?
There are gates:
So, all the work is done, the garage is ready!
Preparing for construction: drawings, dimensions
In preparation for construction, the purpose of the building is determined: a garage for one or two cars, with or without a specially equipped place for things. You don't have to make a lot of detailed drawings. In the case of self-erection of a building, a drawing diagram with the designation of elements and dimensions is also suitable. As an example, take a ready-made scheme on the Internet or from neighbors who have already built a similar building for themselves. It is also possible to order garage plans from experienced craftsmen if you are not confident in your abilities. A knowledgeable person will study the area and help create a complex blueprint.
The standard dimensions for a single car garage are as follows:
- width - 3 m;
- length - 5 m;
- height - 2.1 m.

One car garage drawing
When planning a garage for two cars, you need to take into account the necessary gap between them. If the length and height of the room remain unchanged, then the width increases by 2 times. Standard sizes of a garage for 2 cars:
- width - 7 m;
- length - 7 m;
- height - up to 3 m (depending on the height of the car and the type of body).
Material selection tips
In order for the choice of foam blocks for construction to subsequently meet expectations, when buying, you should check the compliance of such parameters as:
- Blocks color. Varies from light gray to dark gray shades. Excessive whiteness will indicate the addition of lime instead of cement, and this, in turn, leads to a loss of structural strength, as well as a decrease in environmental properties.
- Bubbles. All of them must be separated from each other - this does not allow the material to absorb moisture. If the bubbles form a single whole, there is a gas block in front of you, the characteristics of which are opposite.
-
The form. The geometry of the blocks must be perfectly flat. You can check this as follows: by installing one block on top of another. The flat surface will tightly connect to each other and will not sway. Errors are acceptable, but small - 2 mm (plus or minus).
- Fortress. You can check it by taking a small piece of material and making an attempt to crush it with your palms.A crushed piece will indicate savings on cement or the addition of a large amount of water.
- Chipped. The visible structure should be the same. In a high-quality foam block, all bubbles are spherical. Oval elements reduce strength and make the material brittle.
- No grease streaks. The walls of the block and the inside of it must be identical in color. Otherwise, this means that the lubricant was of poor quality, and this, in turn, will lead to problems with the construction site - the plaster will not fit well on such a foam block.
- No cracks. Their presence indicates a violation of the drying of the material, as well as the formation of internal stress. Such blocks can collapse.
-
The last criteria are density and weight. Indicators of sufficient density - from 600 to 1000 kg / m3. The weight of the foam block is checked in accordance with the issued standards, which can be viewed in the table below.
Garage calculation
The common block size is 0.6 m * 0.3 m * 0.2 m. For a garage that is not specially heated, walls with a width of 0.2 m are suitable. Therefore, foam blocks are placed on the side. The bottom layer is raised above the ground by 0.3–0.4 m (with the exception of contact with the water surface).
To know how many blocks will be needed for construction, we will give calculations using the example of a garage with dimensions of 5x6x3 m.Material for one row will be required: the perimeter of the planned building / length of the foam block = ((a + b) * 2) / c = 36.6 = 37 blocks, where A and B are the sides of the garage, and C is the length of the foam block (6 m). The number of rows with a garage height of 3 m is equal to: garage height / block height d / e = 10 rows, where d is the garage height and e is the block height (0.3 m).
The number of foam blocks for construction, respectively, is equal to: the number of blocks in 1 row x the number of rows = 37 x 10 = 370 blocks. But this is not the end of the calculations. The garage needs a gate (doors and windows at the discretion of the contractor) - on average, it takes 30-50 blocks.
As a result, the number of foam blocks for the construction of a garage with dimensions of 5x6x3 m is 320-340 pcs. Taking into account the defective elements, lay down + 3%.
Required tools
To make building a garage easy, you need to prepare the following tools in advance:
- Screwdriver.
- Saw.
- Hammer.
- Welding inverter.
- Nails.
- Construction and corded level.
And you will also need the following materials:
- Foam blocks.
- Cement, sand, concrete and crushed stone.
- Reinforcement and roofing material.
- Welding electrodes.
How to make a garage door from foam blocks
When the walls and pediment are ready, and the cement mortar has set properly, you can proceed to the next stage of work - the construction of a homemade garage door.

To begin with, you need to draw a plan diagram of the garage door, taking into account their dimensions (width and height), as well as indicating the amount of material required.
Gate sizes can be different, depending on the individual needs of the motorist.

According to the drawn up scheme, you can calculate the amount of materials that will be required for the manufacture of the gate. The length of the channel for the garage door frame and corner of 50 mm is calculated according to the drawing, but calculating the required amount of material for the cladding will be somewhat more difficult. If you are using 2mm sheet metal, the standard dimensions of which are 100 X 200mm, you will have to cut it. To simplify the task, you can cut sheets directly in the warehouse according to the dimensions indicated on the drawing of the garage door.

Do-it-yourself installation of a garage door made of foam blocks begins with the installation of a frame. It is made monolithic with the walls of the garage with the help of fittings welded and run between the blocks during the laying. Next comes the binding of the gate to the frame, which is leveled in all planes. The fastening of each sash is carried out in turn. First, the corners are cut according to the dimensions indicated in the drawing, minus 10 mm. In this case, you get two corners of 209 mm and two corners of 135.5 mm.It is necessary to leave a gap of 5 mm between the frame and the sash, and between the sashes and on the hinges - a sheet overlap of 10 mm on the frame and on the corner of the adjacent sash. The gap is made with 5 mm strips. They are installed between the frame and the sash corner.

To make a garage door from foam blocks, after making the corners, you need to cut off one inner side of the shoulder from each of them at an angle of 45 °, so that you can then join them together. Then you should install the lower and left corners with 5 mm spacers, press them to the frame with clamps or weld them (after work, cut off the fasteners with a grinder) and weld between the corners. The installation of the upper corner is carried out in the same way, after which all the elements of the corner are welded to each other. Finally, the last element of the corner is applied and the top and bottom of the installed element are welded.
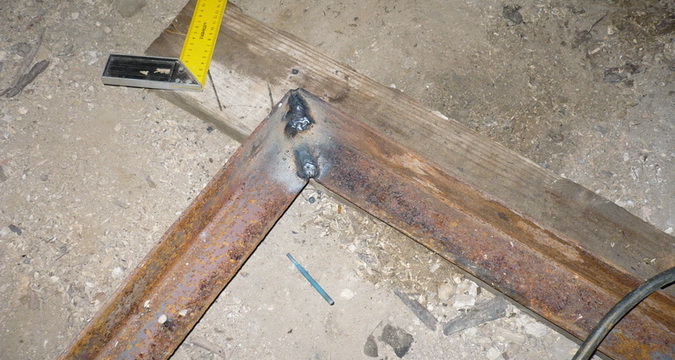
After that, the sheet steel elements should be installed on the clamps in accordance with the drawing of these parts. They are welded from the inside of the garage to the corner. The next element is installed in the same way and is also welded to the corner. The weld seam between these elements must be continuous.
The second flap is installed in the same way, with the only difference that the width of the applied sheet element at the covering flap must be with an overlap of 10 mm or less if an overlap between the flaps was previously made.

Then powerful garage hinges are installed with a gap of a few millimeters to the frame and welded to the frame and metal sheet. To give the sash greater rigidity, an additional plate of 50 x 100 mm and a thickness of 4-6 mm can be installed between the hinge and the sheet metal. For the convenience of further installation of the insulation of the gate leaves in their middle part, you need to add one more corner by welding them to the leaf leaves.
At the end, on the inner side of one of the doors, it is necessary to install latches that will fix the gate.

If desired, the finished gate can be sheathed from the outside with some interesting texture and color material (for example, a metal profile), making sure that the gate and the roof of the garage, as well as the fence around the entire site, are designed in the same style.

Garage doors must be insulated, since the metal from which they are made will cool the garage in the cold season, and heat up in the sun in summer. As insulation, you can use 4-5 cm thick foam. The height of the insulation sheet must correspond to the parameters of the corner used in the manufacture of the gate. First, a wooden block with a section of 5 × 5 cm should be attached to the corner, to which insulation is then attached along the entire perimeter and in the middle of the sashes. It is possible to insulate the sashes both from the inside and from the outside under the metal profile sheathing (first, the insulation is mounted, and then the sheathing). In addition to polystyrene, expanded polystyrene is used as a heater - the material is more durable, but also more expensive.
This video demonstrates the installation of a do-it-yourself garage door from foam blocks:
Garage door
It is better to purchase garage doors ready-made, since it is not always possible to make them yourself. You need to select the desired design of the gate and order it. Modern garages have several types of gates:
- swing;
- lifting;
- roll;
- sliding.
The simplest and most familiar option is a swing entrance gate. It is better to mount them before the walls are erected, so that later the gates are embedded in the masonry. It is necessary to lay 2-3 layers of waterproofing along the perimeter of the base (roofing material is usually used).
First, the outer frame is fixedly installed. Reinforcing rods about 40 cm long and 1.2 cm in diameter are welded to it. It is advisable to place them in the places of the seams of the future masonry.The inner frame has 2 hinged leaves, in one of which it is desirable to arrange a wicket. All errors in the installation of the gate are determined using a building level and a plumb line. All errors must be corrected at once. Then the gate is fixed with timber braces. After that, you can start laying the walls.
Do-it-yourself step-by-step instructions for building a garage from foam blocks: foundation-finishing
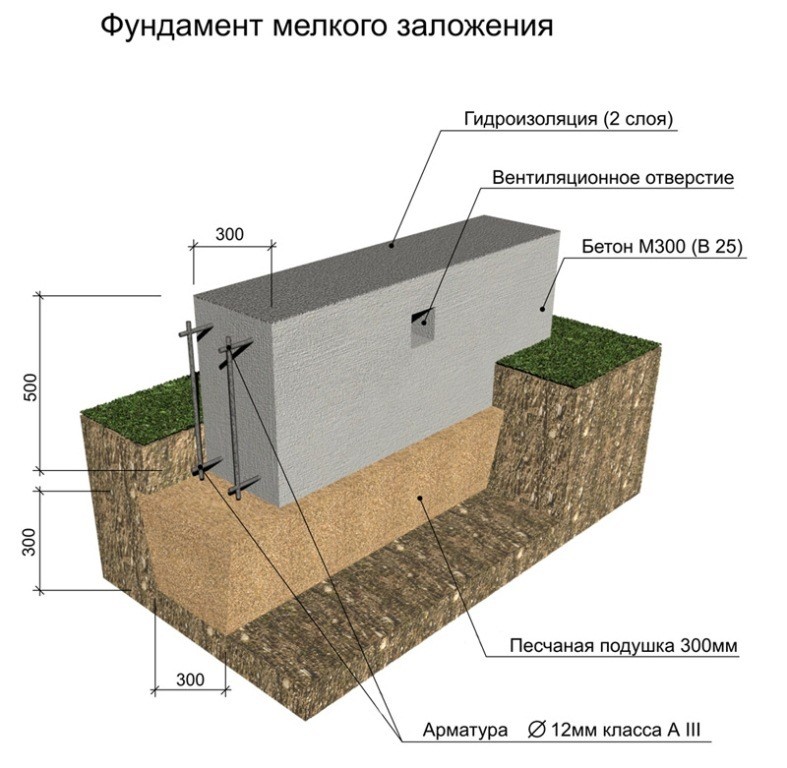
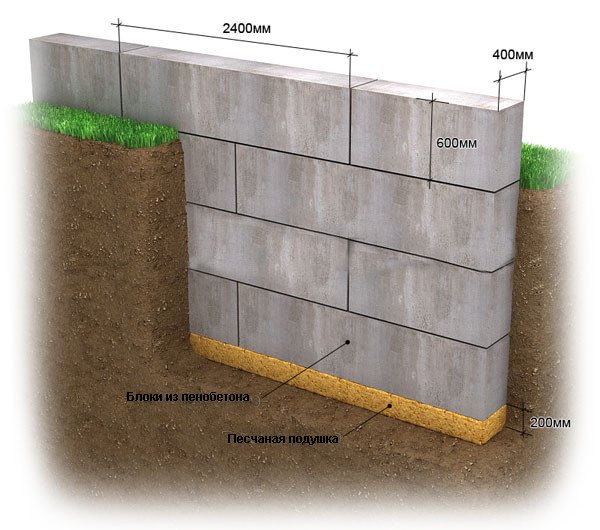
The construction of a building begins with the foundation. Be sure to monitor the laying of a layer of waterproofing, which reduces the likelihood of dampness. Material - monolithic reinforced concrete slabs of strip or slab type.
The strip foundation is used more often, is cheaper and better lifts the building above the ground. Tiled is used on clay types of soil. The first option is laid on sandy-gravel or non-rocky sandy soils, or in such buildings where a basement level is needed.

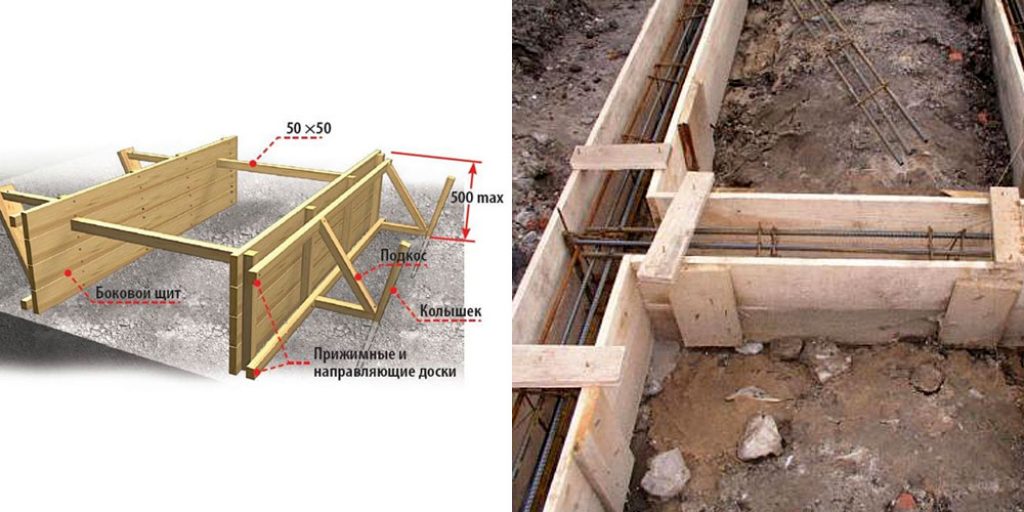
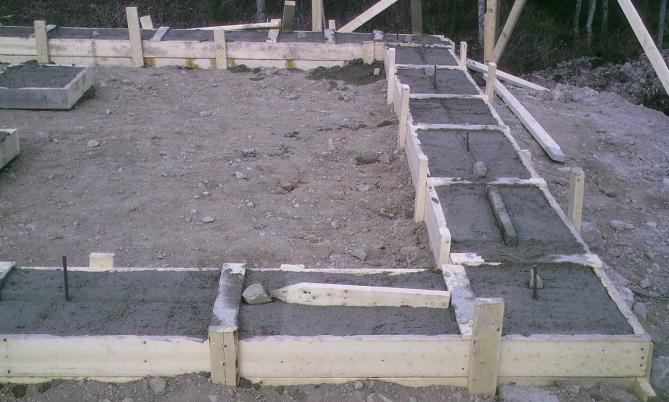
An example of how to assemble a frame for pouring a foundation
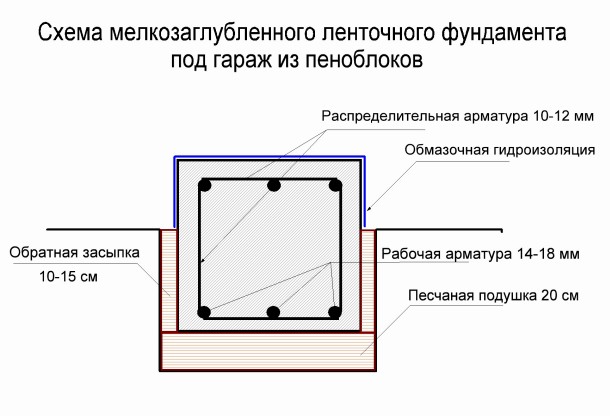
For the foundation, a trench 50 cm wide and 70 cm deep is pulled out. After that, compact the soil in the trench itself and fill up the sand by 30 cm, fill it with water and tamp it. To strengthen the base for the garage, the foundation is reinforced. To do this, you need to weld the frame and insert it into the trench.
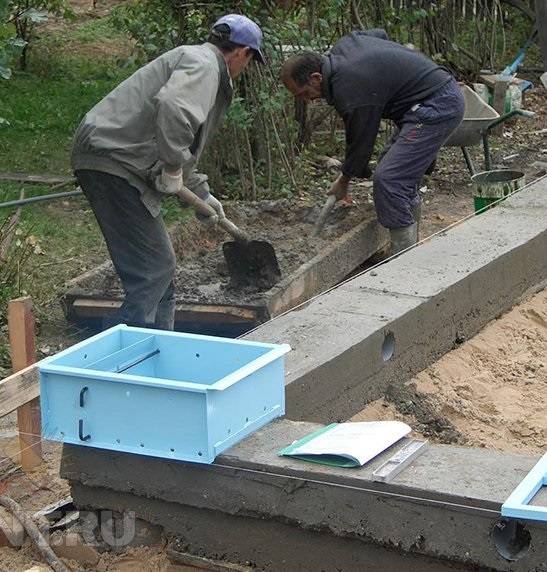
Then the trench is covered with roofing material for waterproofing. Prepare concrete and pour over mesh reinforcement. You can proceed to the next stages only after it has completely solidified.
To install the gate, a reinforced concrete lintel is laid in the foam block wall. Alternatively, a double-sided steel corner frame is installed. When erecting a building, the master puts blocks around the frame. To give them the desired look, a hacksaw is used, the blocks are cut to height. For the garage, gates of such a design are chosen that will suit both an aesthetic and financial point of view.

The jumper is made from a metal corner
At the first stage, weld the reinforcement rods (40 cm in length and 12 mm in diameter), four (or more) pieces in height, to the door frame. It is desirable that the mesh of reinforcement passes through the joints of the blocks. This will strengthen the structure.
The next step is priming and painting the gate. This can also be done in advance to speed up the garage construction process. The last stage is the installation of the gate in the opening strictly vertically. The position is checked at the building level and fixed on both sides with wooden braces.
The walls are built on the basis of two types of compositions. This is either an ordinary cement mortar or construction glue. The use of the first material is cheaper, but the seam width reaches up to 1 cm. The second material is consumed less and the joint width is only 2–5 mm. The glue is used only under the condition of the exact geometrical dimensions of the block.
The first thing to do is set the corners. A rope is pulled between them, along which the laying is carried out.

Reinforcing mesh should be laid every two layers, this will eliminate the appearance of cracks
We begin to lay the walls. Embed the reinforced mesh after the first two rows. Then lay 2 more rows and repeat until the roof.

In order to strengthen the walls of the garage, they should be reinforced. This must be done every two layers of masonry.
The rods, welded to the door frame at the stage of their installation, are lined with foam blocks. In the next step, the lintel is mounted above the gate. In its manufacture, corners of 5 cm are used, from which the frame is cooked according to the size of the gate. Installed on the inside of the walls and fixed with cement. A beam is laid on top and the construction of the wall continues.

First, the beam is laid, and only then the laying continues
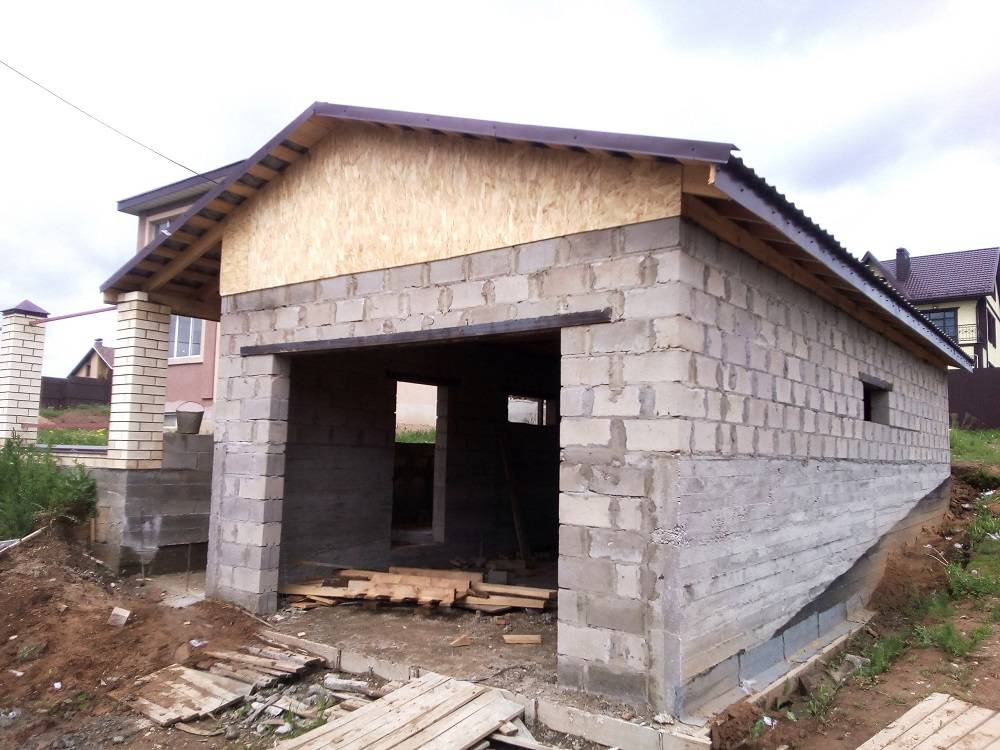
The roof is made on a pre-prepared base. If it is made of wood, then a Mauerlat from a bar is applied to the walls and tightened with anchor bolts. This reinforcement distributes the load from the roof to the walls of the foam block garage.Armopoyas under the Mauerlat increases the degree of reliability of the structure, therefore, use is desirable, but not necessary.

The roof is made on a pre-prepared base
In the first stage, I-beams are installed at the same distance of 80 cm and embedded in the walls. The protruding part is at least 20 cm. This is done in order to protect the foam blocks from unwanted moisture.
Boards (40 mm in thickness) are tightly laid along the lower shelves of the beams. For waterproofing, roofing material is laid, on top of which slag or expanded clay is poured.
At the next stage, a concrete screed is carried out. Prepare the mixture and fill in the insulation with a layer of 2-3 cm. Wait until it is completely dry and waterproof with bitumen mastic. The finishing stage is the outer covering of the roof with roofing felt. Layers are laid from bottom to top with a slight overlap.
The exterior finish of the garage will protect it from moisture and external influences. For this purpose, hanging facade devices are suitable. On the walls of the foam block, gypsum vapor-proof plasters are kept, but, taking into account the microclimate inside, it is more advisable to use a material made of cement. Before applying it over the mesh, the surface must be thoroughly primed.
Walling

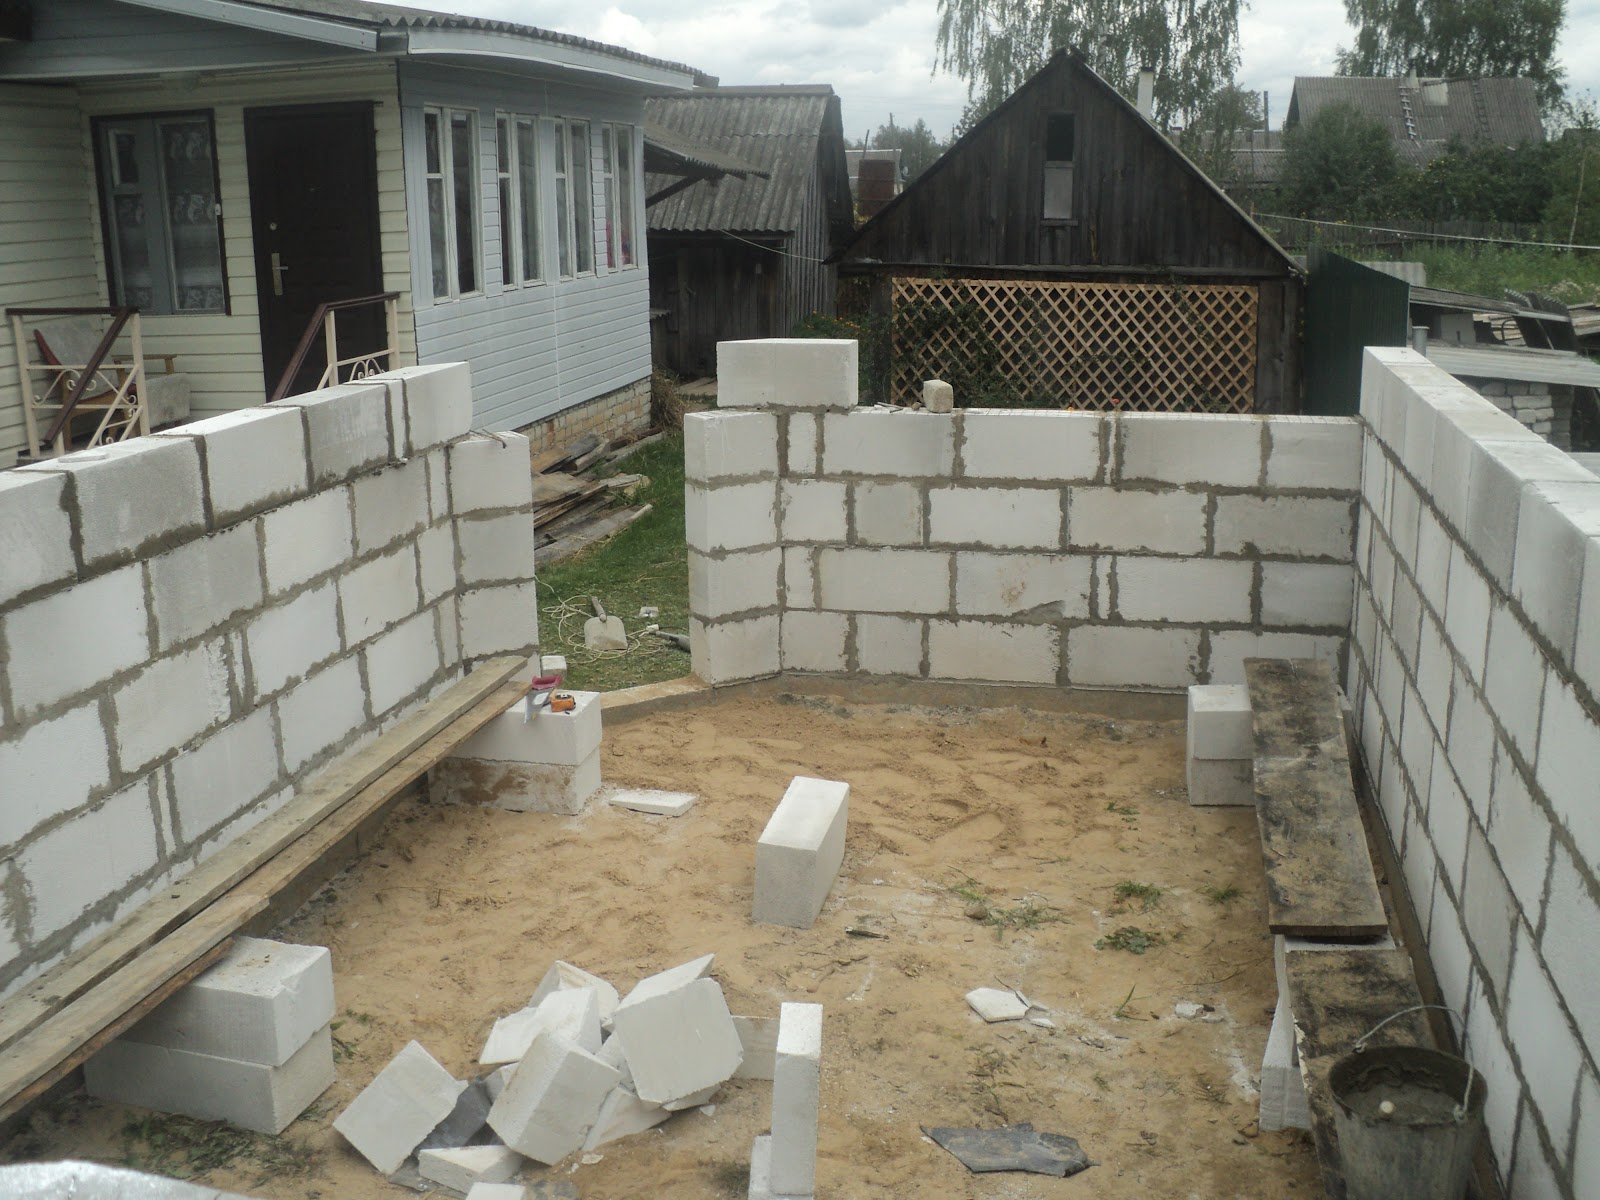
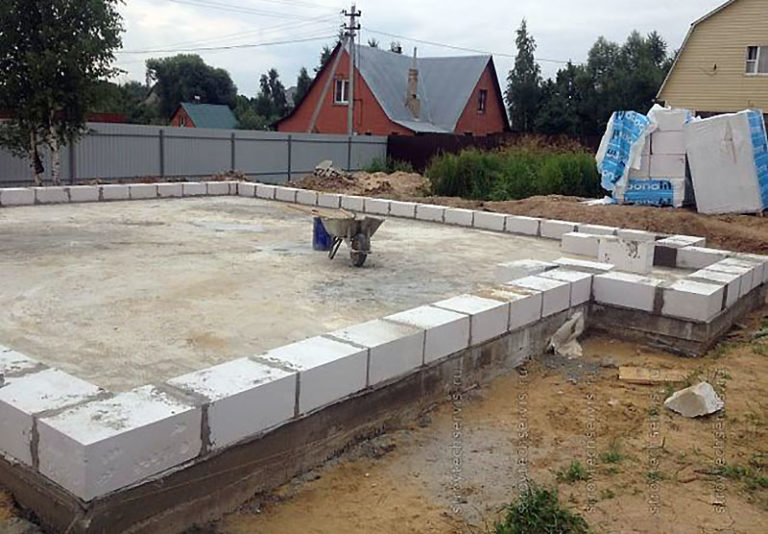
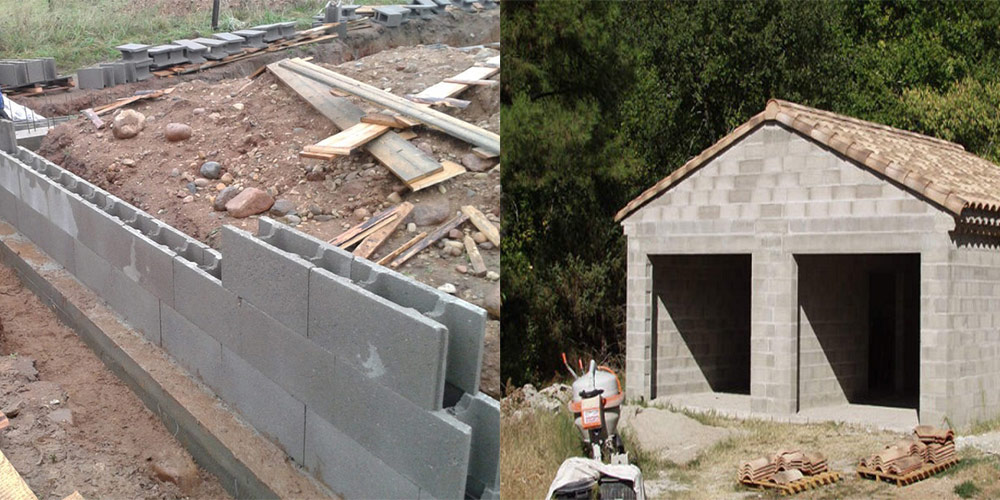
It is better to start building walls from a corner. Installation of blocks is carried out with the long side along the wall. Foam blocks are laid on a special glue or cement-sand mortar. If we talk about glue, then it provides thermal insulation much better. Therefore, its use is more effective. Moreover, the consumption of glue is relatively small.
So, setting the corners, pull the rope between them. The walls will be laid along it. The masonry should be reinforced every two rows. For this, a special mesh or masonry reinforcement is laid in the seam. The rods that you previously welded to the gate are embedded in the masonry between the blocks. When you have reached the floor beam, then the masonry is performed without displacing the block. If necessary, trim the block so that the bunch of seams is not broken.
 Gate opening
To make a slope, foam blocks are simply cut with a special hacksaw. The situation is completely different if the roof is gable.
Then it is important to think over how the roof gables will be closed. Alternatively, you can continue laying from or use another lightweight material, for example, lining
Gates

For the garage, a gate is selected taking into account the dimensions of the building and the free space near it. If you have a large area, it is convenient and inexpensive to install swing gates. If there is not enough space, it is better to buy rolling, roller shutter or overhead sectional doors.
Swing

Swing gates have been installed for several decades, they are good for many reasons:
- Simplicity of design. The gate is made of 2 leaves and a frame welded from a reliable channel. There are no complicated mechanisms, so the device needs almost no maintenance;
- Reliability. They can serve for decades without much maintenance and repair. But the quality of the materials used matters. The strength of the hinges is especially important, they are exposed to high loads;
- Any size of the gate. There is no width or height limitation for this design. Swing gates can be installed in an opening of any size, they are made individually;
- Possibility of installing a door. A door can be installed in the door leaf, which creates additional comfort. In addition, heat losses are significantly reduced in winter;
- Low price;
Sectional

Pros:
- Sectional doors are easy to use, they are easy to close or open, they do not have heavy leaves like swing systems;
- Saving space. When opening, the doors move along the ceiling, they do not require additional space for the leaves. There are models in which the sections move along the walls. This mechanism is best suited for wide door openings;
- Appearance.For the decoration of such gates, various finishing materials are used - from natural wood to metal with various coatings;
- Thermal insulation. Such gates are often made of 40 mm thick sandwich panels, installed tightly in the guides. This allows you to keep warm in the room;
- It is permissible to mount in large openings. There are designs that are used in openings up to 7 m wide and up to 6 m high.
Minuses:
- Complexity of installation. It is not easy to install this system on your own - for this reason, you will have to hire professionals. During use, you need to monitor the state of the system and maintain it regularly so that no breakdowns occur;
- Whimsical to the quality of the components. Many times there have been cases in which sectional doors, purchased cheaply, broke down 1-2 years after installation. Deterioration of the mechanism, the spread of corrosive processes are the most frequent troubles with inexpensive products;
- Poor burglary resistance. This structure is easier to open than sliding or swing structures;
- High cost. A high-quality product will be expensive, but it is advisable not to save too much - cheap products will not provide you with reliable protection.
Roller shutters

When choosing a gate suitable for a garage, you need to pay attention to this design. Main pluses:
Main pluses:
Compactness. The gate is made of lamellas, connected in one leaf, and a shaft located above the opening
They are easy to place in any garage, this does not require free space along the walls and on the ceiling, it is only important to find 30-40 cm of space above the opening;
Versatility. It is permissible to install the drive shaft of roller shutter doors both outside and inside the room
When placed outside, the shaft is installed in a closed box preventing access to the mechanism;
Uncomplicated automation. It is permissible to install automatic devices to increase comfort, but this will be expensive;
Diversity. The gates are painted in different colors during manufacturing, copies of the appearance of stone, wood and other materials are created on the surface of the canvas. There are options with small plastic windows that allow you to illuminate the garage without windows;
Many sizes. The gate is made up to 7 m wide and up to 6 m high.
The cost of these products depends on the area of the canvas. Among the shortcomings, mention should be made of poor burglary resistance. It is easier to pull out the lock in these gates than in other designs. For this reason, it is advisable to use them in a protected area.
Plating technology
The interior surfaces of the garage are finished when the plastering work is completed. What to sheathe and how to do it - the owner decides, taking into account his preferences. Walls made of aerated concrete must be protected from external influences. Do not believe people who say that this material does not need to be sheathed - this is a lie. Rains in summer, snow in winter and gusts of wind destroy the structure of aerated concrete. For cladding, the surface is first plastered - the coating is applied by fixing a special mesh on the wall.
You can protect the material by covering it with brickwork. But be sure to make an air gap - for gypsum concrete and brick, air permeability is very different. With close contact of materials, moisture vapor will be unable to quickly be removed through the brick. They will begin to flow in a simpler way - through aerated concrete and collect in the garage.
The walls of the garage are sometimes sheathed with thermal panels, this material allows you not to spend money on additional thermal insulation of the building, while improving the appearance of the room. Thermal panels are made with imitation of natural stone or brick. Often, a frame is created from a metal profile, followed by finishing with sheet facing materials.
Drafting and costing
The construction of a garage from aerated concrete blocks begins with the creation of a building project, taking into account the individual requirements of the site and the owner.
A garage project is created taking into account several parameters:
- Characteristics of the soil at the site;
- Height of moisture in the soil;
- Features of the climatic conditions of the region.
You can design in several ways:
- Create a project and a working sketch yourself;
- Choose a ready-made project suitable for you;
- Order design documentation from a special organization.
Preparing a project yourself and saving money on it is not too difficult. It is necessary to view the existing projects of similar buildings made of aerated concrete or change the finished project to your conditions.
You need to collect certain information:
- Required garage dimensions;
- Features of the construction of the building;
- Required bearing capacity of the foundation;
- Garage roof structure;
- Room decoration.
You need to decide which design and size of the garage is right for you, taking into account the planned number of parked cars, the need to build a viewing pit and a basement. After creating a project, you need to calculate the amount of materials required for work.
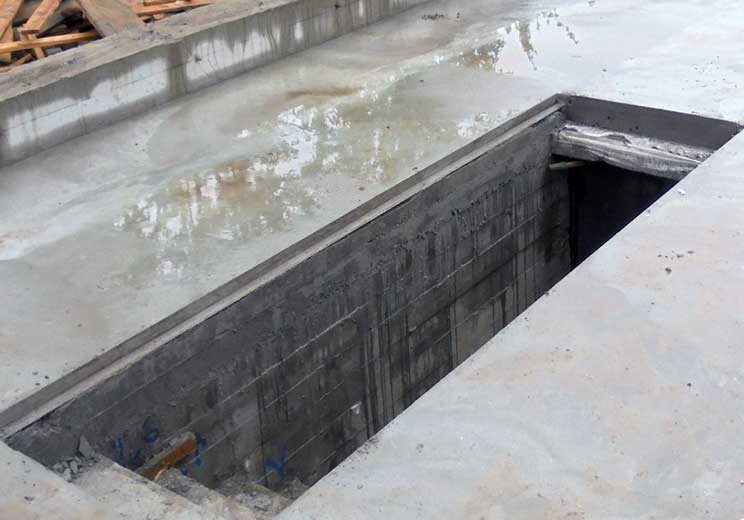
Observation pit

Recall that when building a viewing hole, it is imperative to take into account the depth of the groundwater. If the depth is more than 2.5 m, then there is no need to make drainage. If less, then drainage is accordingly necessary. We suggest that you familiarize yourself with the manufacturing process of the inspection pit, in which it is necessary to make drainage. You should also make calculations for its size. The length is chosen taking into account the size of the car, usually 2 m is enough. As for the depth, it should be such that it is convenient to move in it. So, you take into account the growth of the car owner, adding 30 cm to it and the vehicle's ground clearance, which is from 120 to 175 mm. As a result, the approximate depth will reach up to 1800 mm. (30 cm is a lot - you can't reach the car. The ground clearance of cars is different and this must be taken into account in advance, taking into account the performance of the existing car.
The works on the manufacture of the inspection pit are as follows:
- First, land works are carried out. In doing so, take into account the thickness of the finishing floor screed, cushion, waterproofing layer and drainage.
- The bottom of the pit should be covered with gravel, with a layer of 100 mm, and then with sand, with a layer of 50 mm. All this is rammed in turn.
- Trenches are dug along the perimeter of the pit to organize drainage, up to 500 mm deep.
- The bottom of the trench is covered with geotextiles. It must be wrapped on the wall of the trench 80 cm.
- Next, a 50 mm layer of gravel is poured, and a drainage pipe is mounted on top. Perforated pipes made of plastic, asbestos cement or ceramic can be used. When laying the pipes, make a slight slope for their functionality. For 1 m, a 1 cm slope will be enough.
- After that, cover the pipe with a 20 cm layer of gravel and wrap the geotextile. So, the drain is ready.
- The future pit floor is covered with a small layer of clay, which must be tamped.
- The next layer is rolled waterproofing, for example, roofing material or plastic wrap.
- After that, the formwork for the floor is made, a reinforcing frame made of reinforcement is laid and poured with concrete. It is recommended to add "Dehydrol" or "Betonoprav" to the concrete mix for the production of waterproof concrete.
- When the floor screed has dried, re-waterproofing is carried out.
- If the groundwater is located high to the ground level, then the walls of the inspection pit are also smeared / rammed with clay.
- For the construction of walls, you can use brick or make monolithic concrete, having previously made waterproofing and erecting a formwork with reinforcement. The latter option is most relevant with a high level of groundwater.
- A waterproofing layer is laid on the walls, which is connected to the waterproofing of the floor. Carefully process all joints, crevices and edges. After that, concrete is poured.
- When the walls are dry, you can finish the walls and floor of the inspection pit.
- Walls can be plastered and tiled or fiberglass boards.
- A safety rail must be installed on top of the pit. It is needed so that the cars do not accidentally fall into the pit. For its manufacture, a 60 mm metal corner is used. The frame is welded to the size of the pit. Having laid it on the pit, the frame is concreted. Upon completion of construction, it will be possible to lay boards on the corner (40 mm thick enough) to close the pit.
This stage of work can be performed both immediately after pouring the foundation for the walls of the garage, and after their construction.

