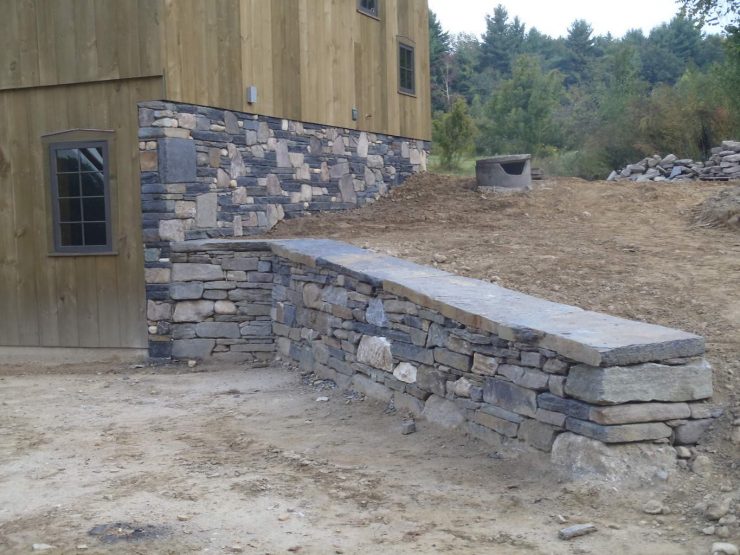
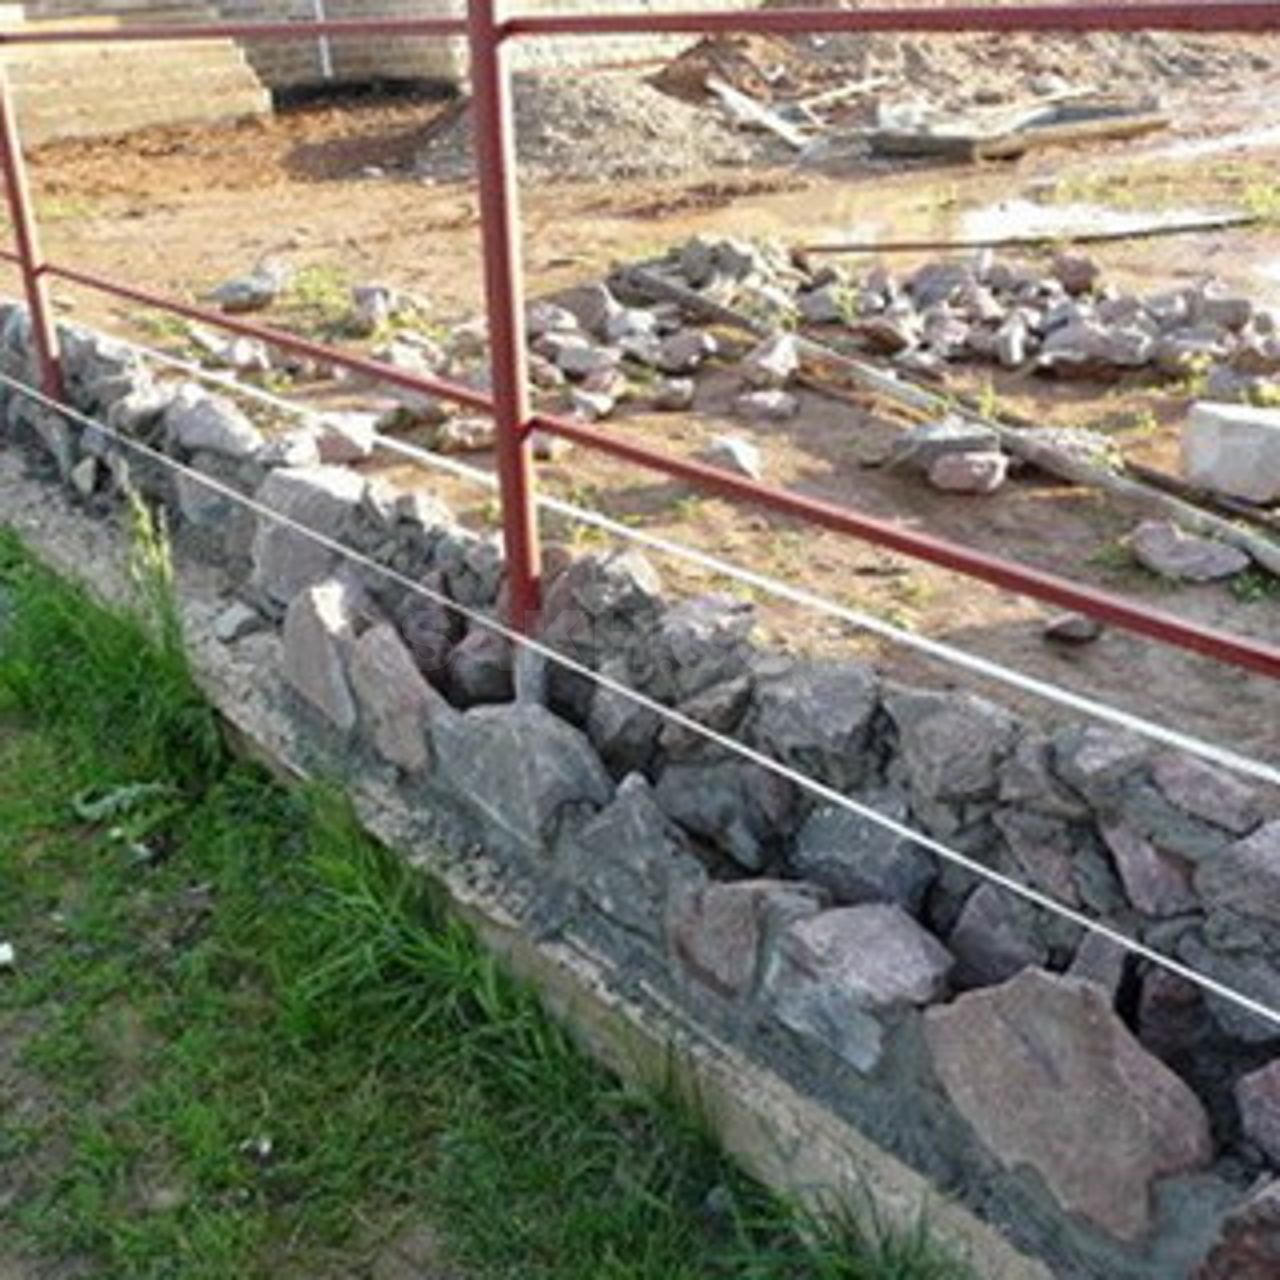
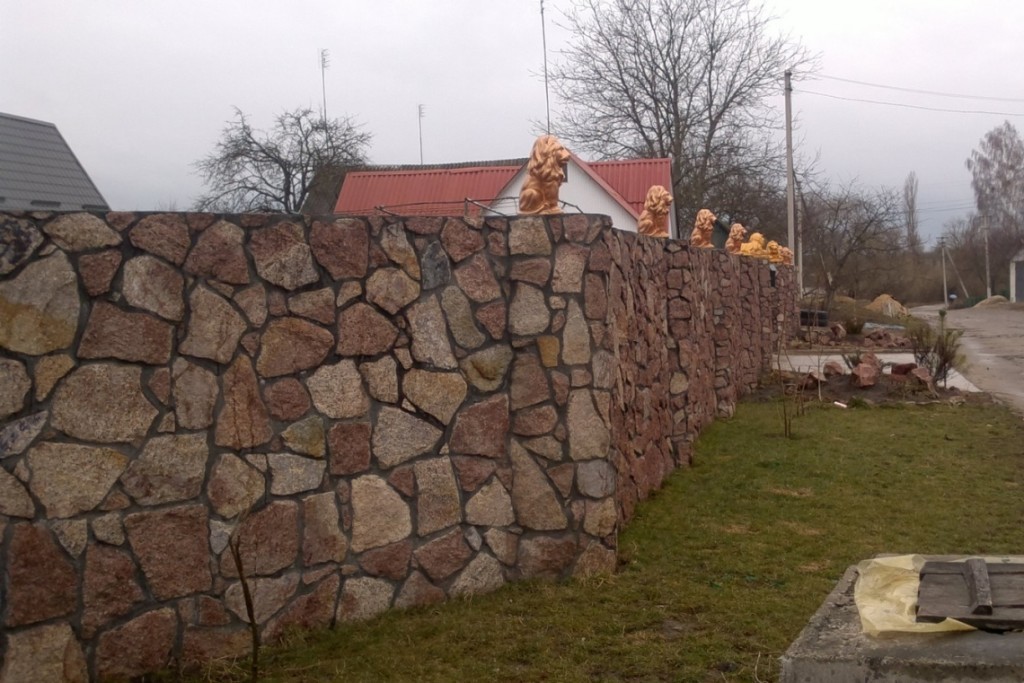
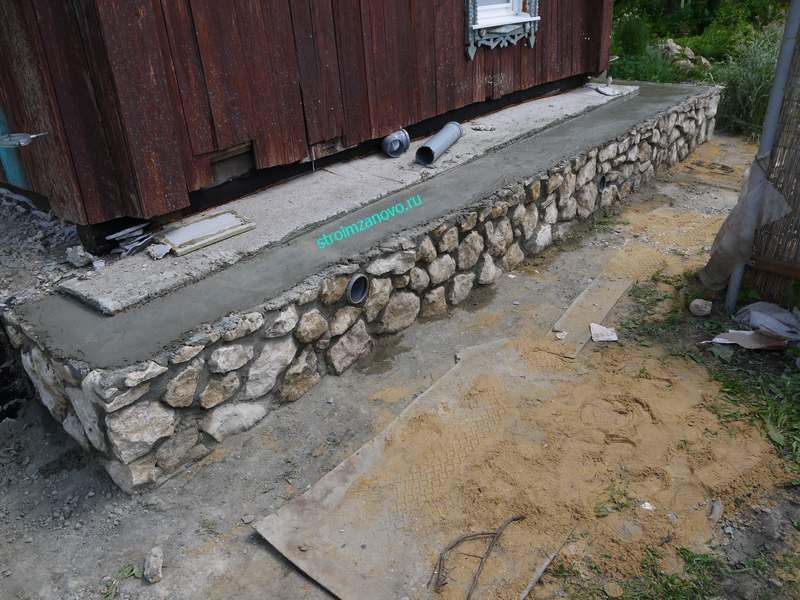
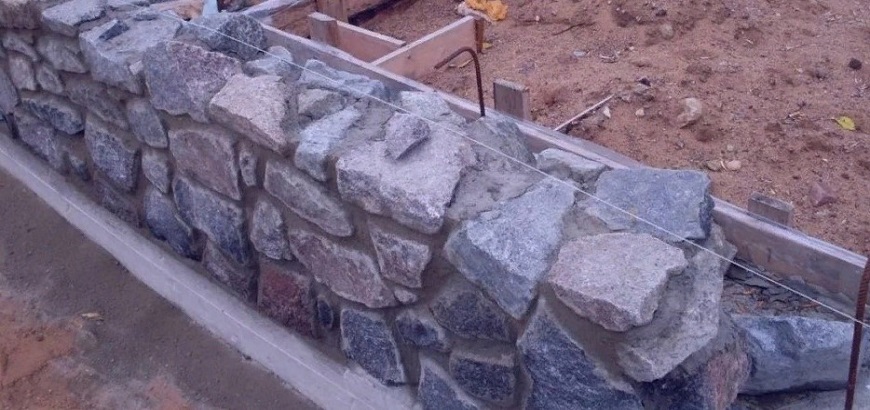
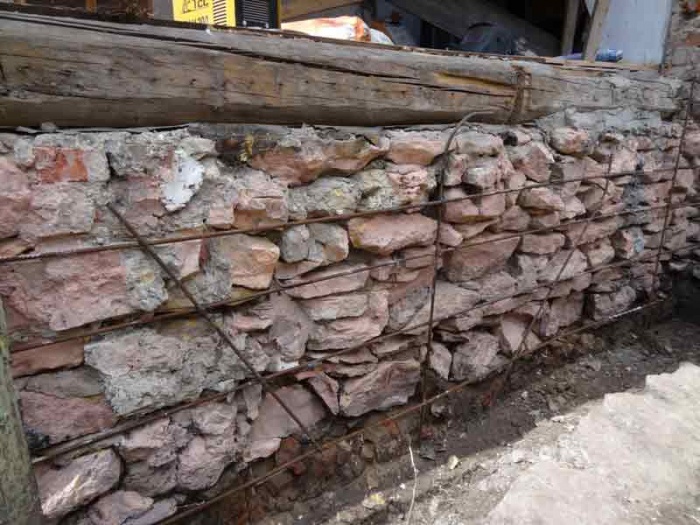
Ways of laying rubble stone
Masonry is carried out in three ways:
- Under the bay;
- Under the bracket;
- Under the shoulder blade.
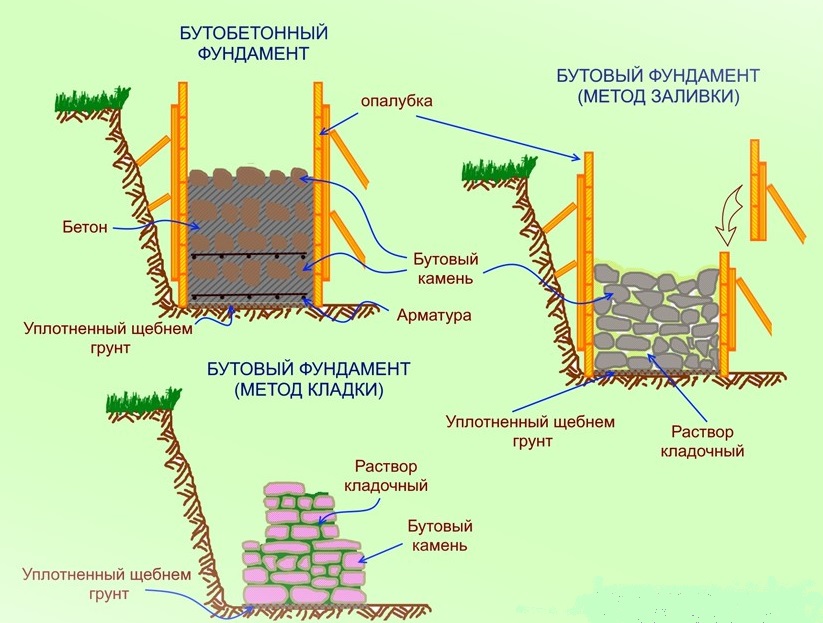
Laying stone for pouring
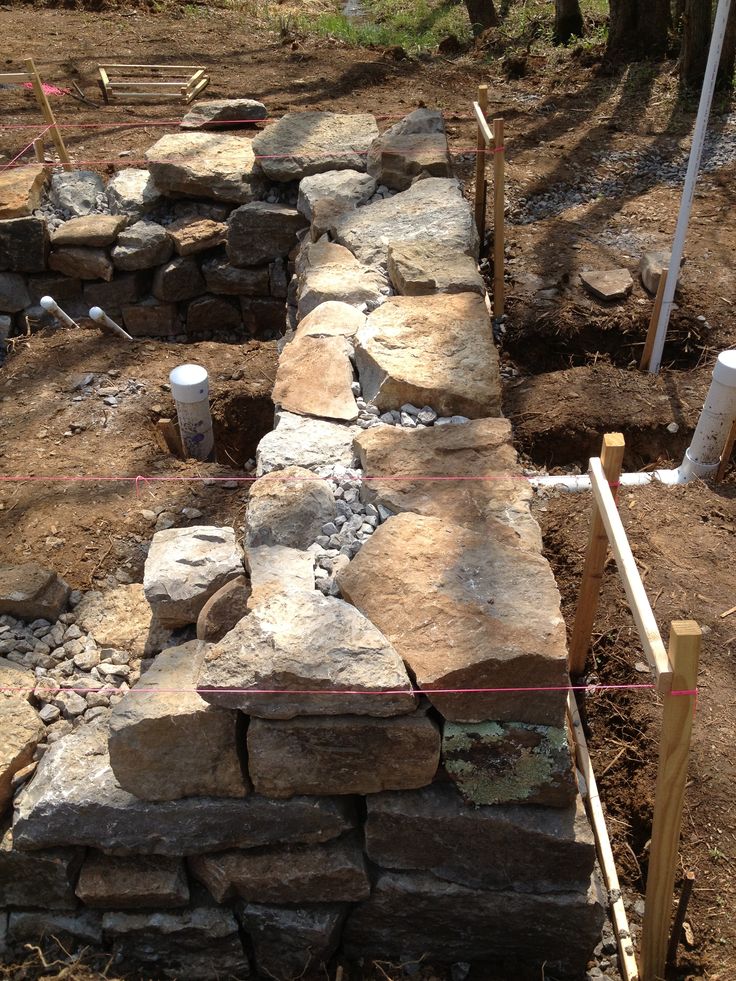
This method is used on dense soils for the construction of buildings of small height up to 10 m. The first layer must be made "dry" without concrete. It is laid out from torn rubble and cobblestones on a prepared sand pillow. Then they are covered with a layer of rubble from 5 cm to 10 cm and carefully tamped.
The rammed surface is poured with concrete into all voids. Each subsequent row is also laid dry and then poured with a solution. For dense filling of voids with concrete mixture, a vibrating plate is used.
Watch the video on how to properly lay the stone for further pouring.
Laying stone under a shovel
This method of stacking is different in that the stones are carefully selected in size and shape. This ensures minimal gaps and voids between cobblestones.
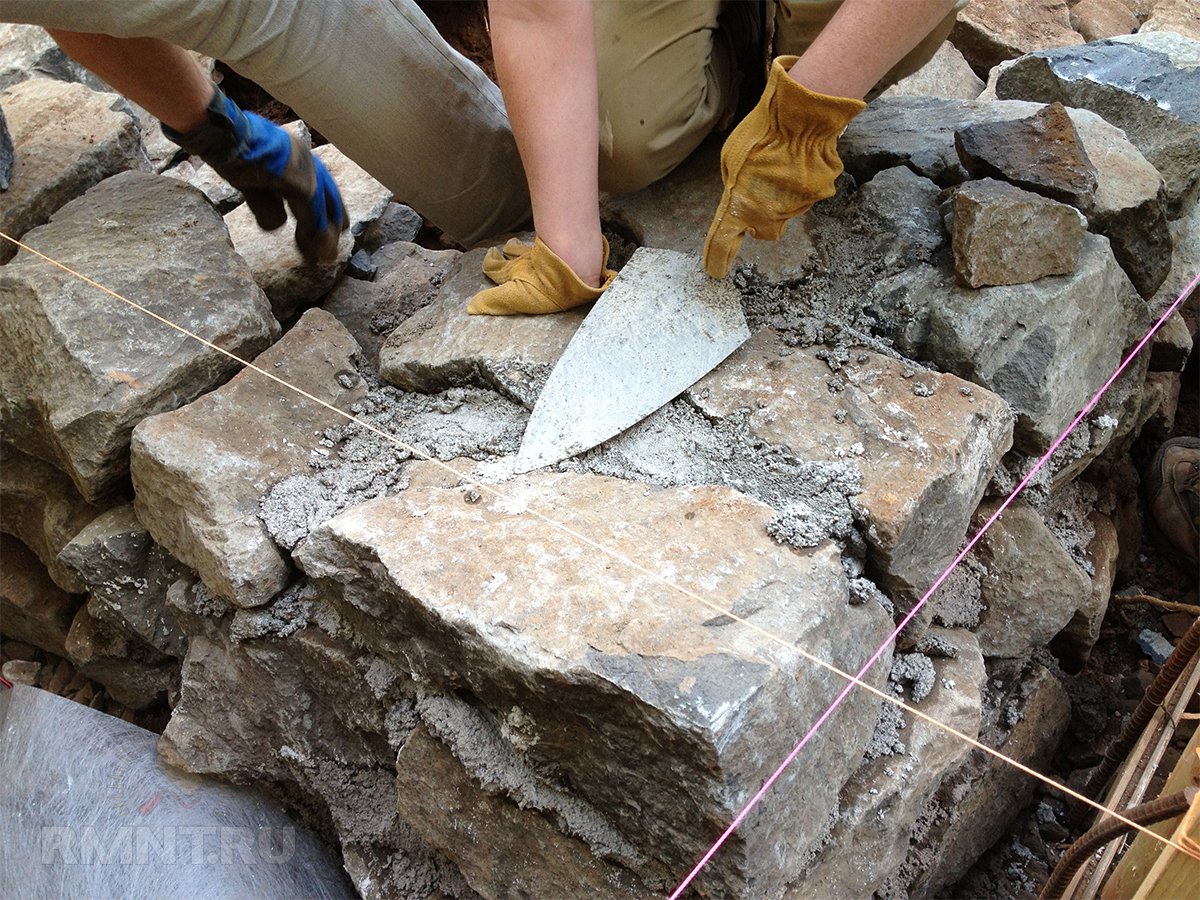
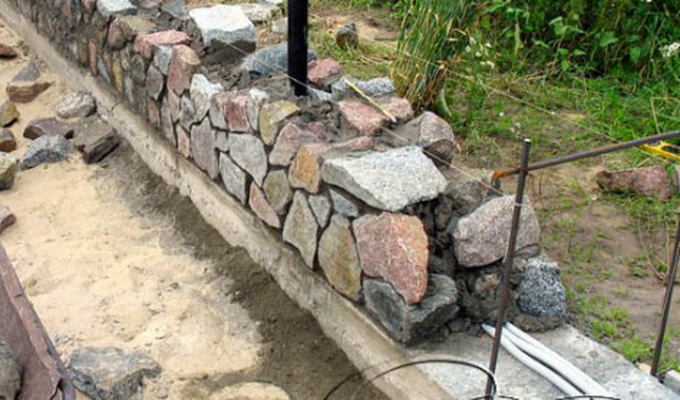
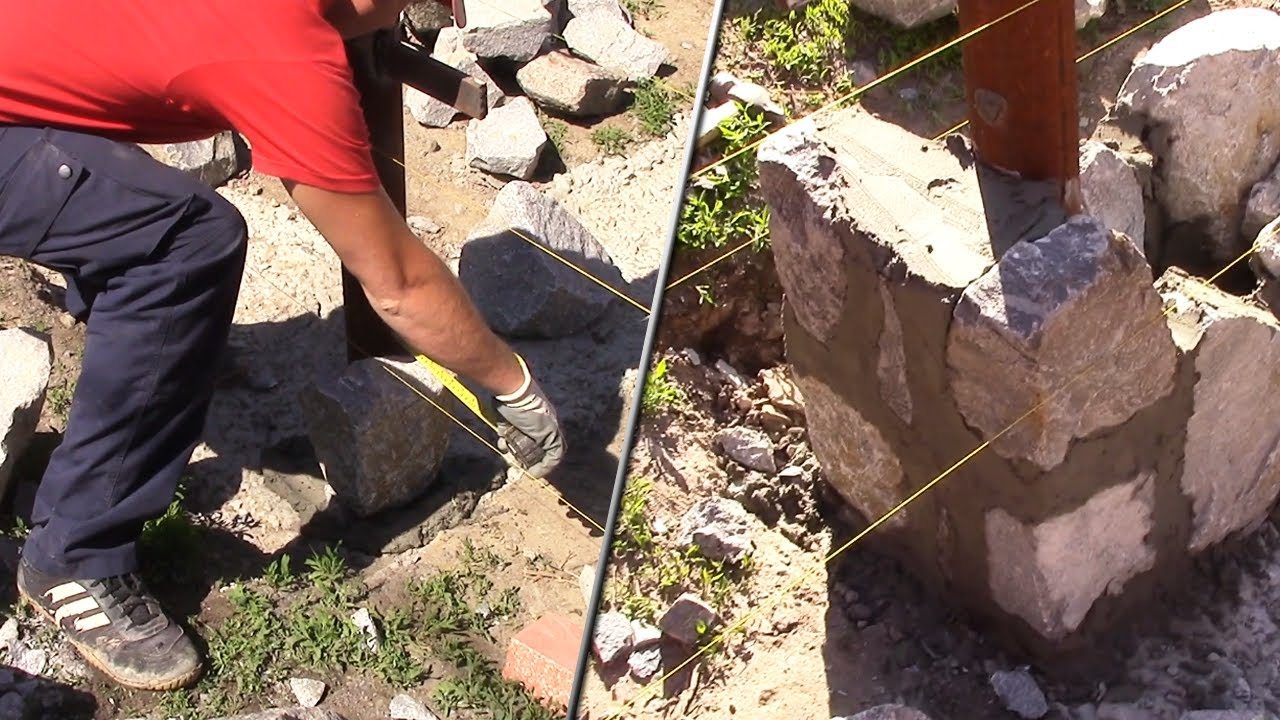
Each row of masonry begins with the installation of lighthouse and milestone cobblestones. They are selected at the same height. Beacons are laid at the corners of the base and in places where the walls join in cement mortar. To control the same horizon of beacons, control cords are pulled.
Guided by the laid out beacons and the control cord, the rest of the stones are laid out. Then a layer of rubble is covered with fine gravel, gravel or sand and the entire surface is rammed. The rammer can be made with your own hands from the material at hand. For small areas of masonry, ramming is done with a hammer or sledgehammer.
We recommend that you see how the base is made with your own hands.
Laying stone under the bracket
This method of do-it-yourself masonry is used when laying columnar supports. The staple is a template made of dense material. The selection of the boot according to the template is done by hand. The process is time consuming and time consuming. It is mainly used in the construction of columnar supports.
It should be noted that all the difficulties caused in this way will more than pay off by obtaining a high-quality and reliable foundation.
Types of natural stone and its quality
In construction, this natural rock is called buta. It can be of various origins. It includes sandstone, limestone, some types of shell rock, granite, dolomite and tuff.
To lay the foundation of the house, use a boot weighing up to 30 kg. The maximum usable size of the boot on its largest side should not exceed 50 cm.
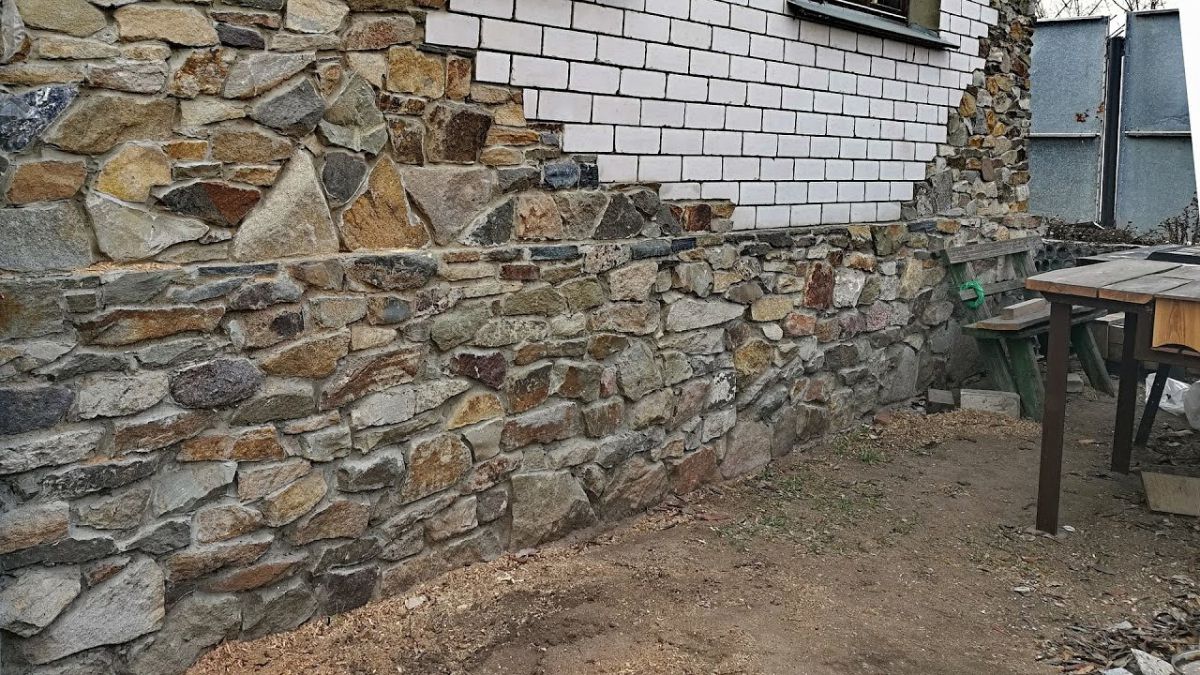
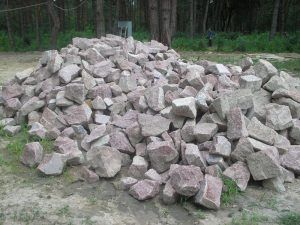 Torn rubble has uneven surfaces and different sizes
Booth is distinguished by its shape and size:
- Ragged - it is distinguished by its irregular shape and uneven edges, has uneven chips;
- A cobblestone is a small buta variety with a maximum size of 12 cm to 30 cm. A cobblestone is a boulder with a rounded surface;
- A limestone booth is a rock in which the transverse dimension is much smaller than its horizontal dimensions. Its main advantage is the relative parallelism of the upper and lower planes. Foundation laying requires significantly less labor to fit stones to each other;
- A booth up to 50 cm in size with smooth sloping edges is called “bedded”.
Cladding the base with natural stone slabs
As a rule, this type of material has a rather tangible weight, therefore, in rare cases, it is permissible to mount it only on a solution. When using this method, a special reinforcing mesh is necessarily launched over the base, which will ensure the reliability of fastening the plates to the surface.
Basically, for fastening, special anchors or fasteners are used, which are mounted in the process of laying the panels on the mortar.
In this case, it is obligatory to bind each trim element to the base.
- The fasteners are special stainless steel hooks, and for each plate, at least two fasteners are required at the top and bottom. To install them, holes are made in the slabs of natural stone, into which the hook is inserted, while the second part must be built into the base.
- During installation, it is necessary to cut out the grooves in the slabs so that the hook does not protrude beyond the surface of the panel.
Scheme for the installation of slabs of lining of the foundation
- The fastening of the hooks themselves in the body of the slab is carried out using an adhesive solution.
- Additionally, the plates themselves are fixed with similar hooks.
- The laying of slabs of natural stone begins from the corners of the building, all the others are oriented along the slabs of the lower row. All other measures for finishing the basement are carried out as in previous cases.
Such a simple method allows you to give the visible part of the foundation a presentable look with a minimum of costs for the purchase of consumables, do not forget about the additional protection of the base from the environment.
Professional recommendations
With a professional approach to work, you can reduce the time required for pouring the foundation by several times. To do this, there is such an instruction:
Work with buta on the marked area
- A marking of the site is made. Trenches are dug, and formwork is installed. A little sand is poured into the finished trench and stones are placed there, pressing them into the created "pillow". All the gaps that result from laying are covered with crushed stone and tamped. A mixture of concrete is prepared (1: 3) and fill the first row with it to make it more durable. The other row is laid out according to the same principle. At the same time, do not forget to "tie up" the seams, as when laying brick material. Rows that will protrude above the ground are reinforced with wire or embossed reinforcement.
Following these fairly simple guidelines, you can lay out the rubble base much faster. The result is a robust and durable structure that can withstand the heaviest buildings and is built to last.
Construction of rubble foundation: masonry "under the blade", "under the bracket" and "under the bay"
The foundation of a house made of rubble stone is usually performed in the following ways: "under the shoulder blade"; "Under the bay"; "Under the shoulder blade".
What are the requirements for laying foundations "under the blade"?
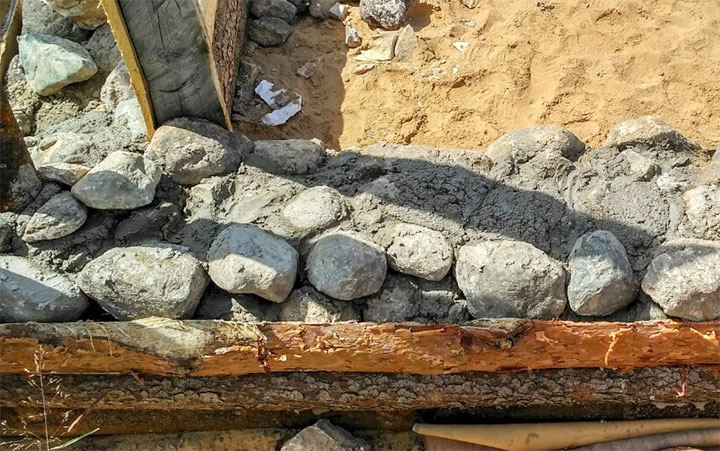
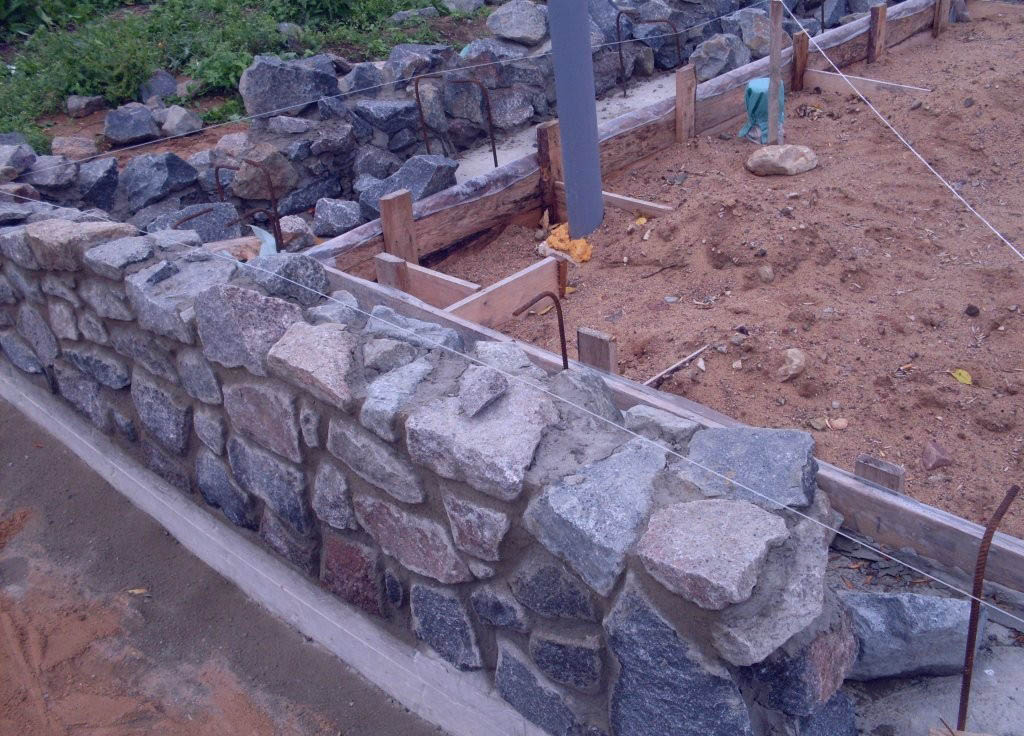
Rubble masonry "under the shoulder blade" is performed in horizontal rows 25 cm thick with the selection and pinning of stones, cleaving (filling) of voids and bandaging the seams. The first bottom row is laid on a prepared base dry from large bedded stones facing down with the bed. In order for the stones to fit snugly to the base, they are upset with a rammer.
Then the voids between them are filled with small stones or crushed stone and poured with a liquid solution (with a cone draft of 13-15 cm) until all the voids between the stones are filled. When laying rubble stone, the chipped stone is also compacted by ramming. Further, the laying is carried out in order, observing the dressing on a plastic solution. The mobility of the masonry mortar should correspond to the immersion of the reference cone by 4-6 cm.
In what order are rubble foundations "under the shoulder blade" laid out?
Each subsequent row begins with stacking versts. Before the construction of the inner and outer versts at corners, intersections and every 4-5 m on straight sections of the wall, lighthouse stones are laid on a solution. On them, on both sides of the masonry, the moorings are pulled, along which the horizontal row and straightness of the front surface of the foundations and walls are checked. Stones for verst rows, selected in height, are first laid out dry in order to find the most stable position in the masonry. Then the stone is lifted, a layer of mortar with a thickness of 3 ... 4 cm is laid and the stone is finally installed, settling it with a hammer.
What is Cyclopean rubble masonry?
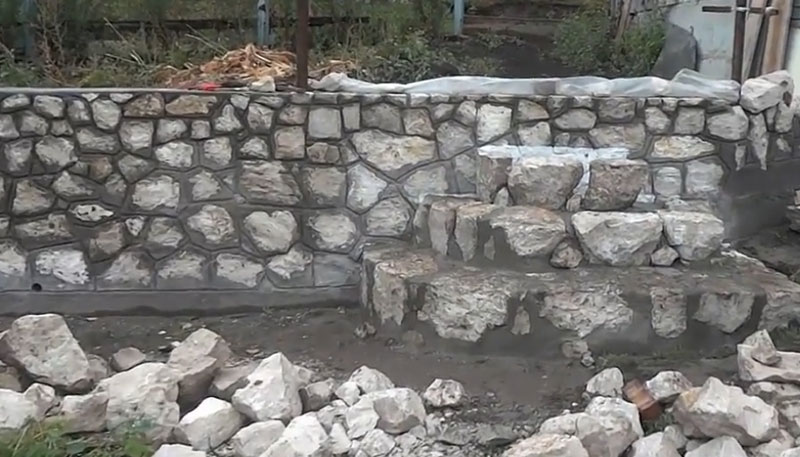
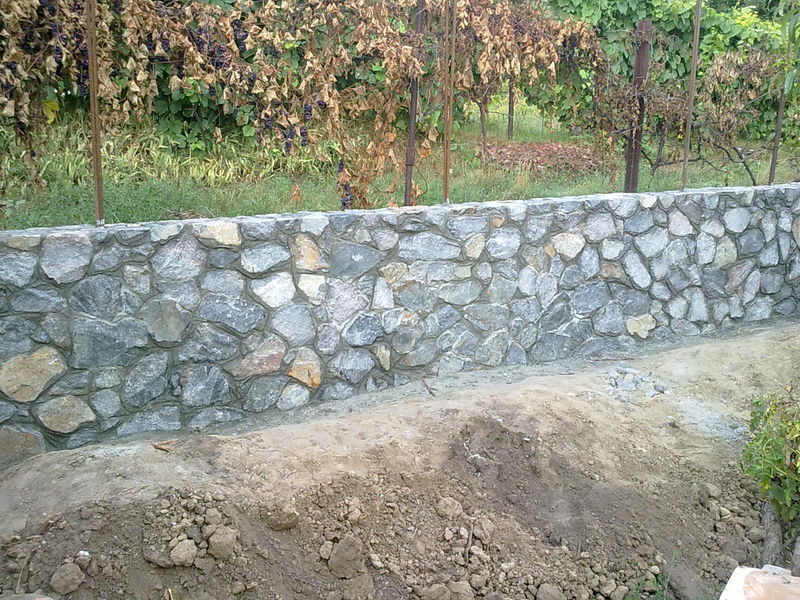
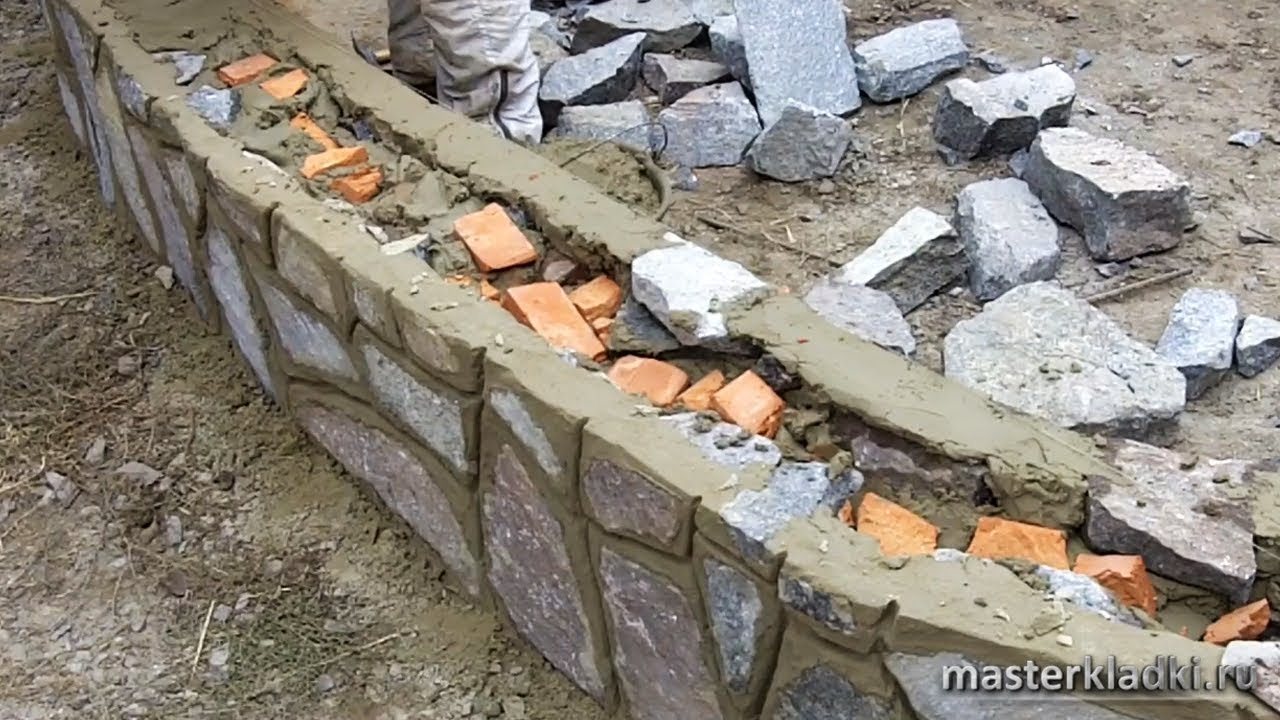
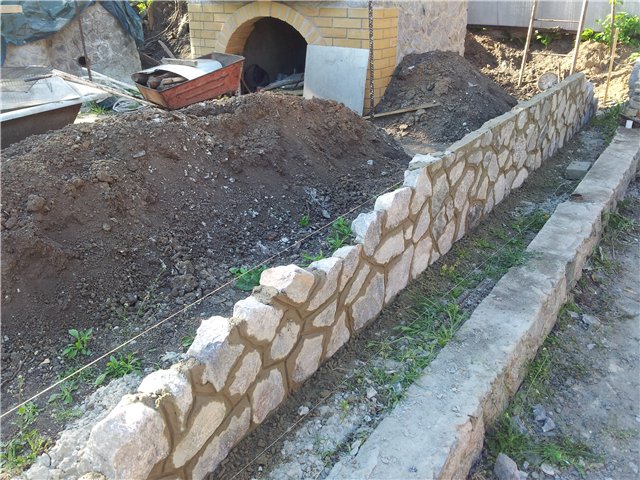
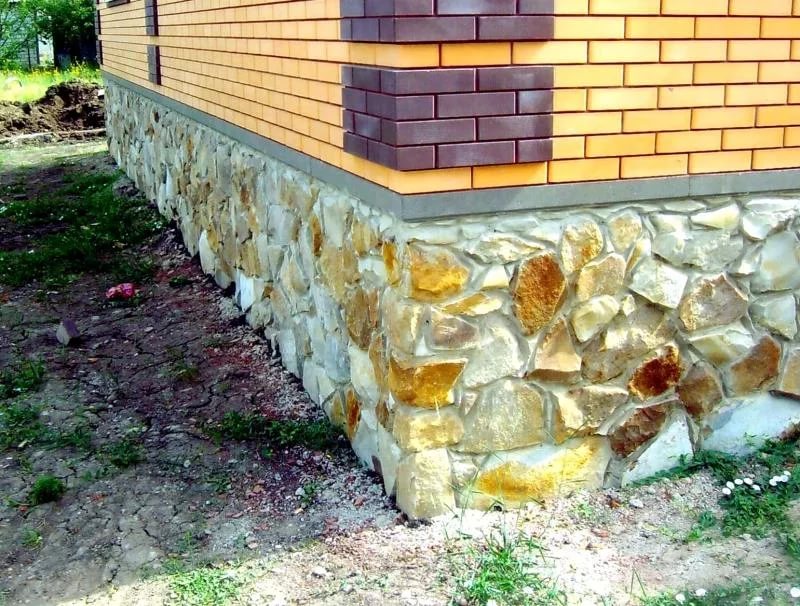
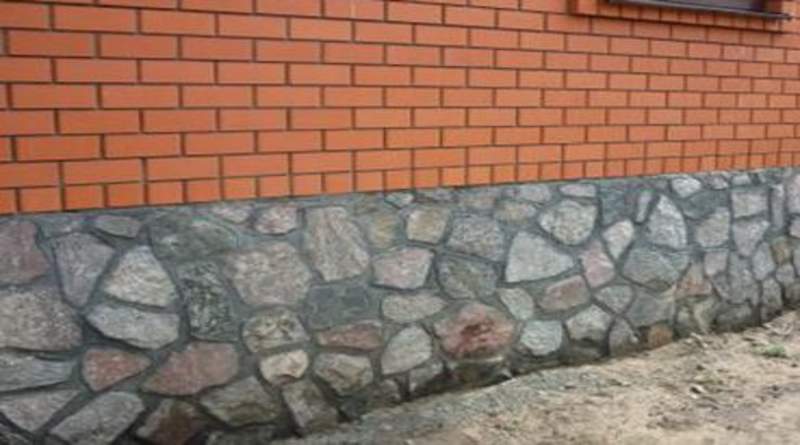
To create a decorative surface when constructing a rubble foundation, a cyclopean masonry is used, which is performed using the "under the blade" method. Specially selected stones are placed in the front surface of the masonry, placing them in vertical rows so as to create a pattern from the seams between them. These seams are also made convex (2-4 cm wide) and embroidered. In this case, roughly hewn stones are used for laying the corners, tying them up with the masonry of the wall.
How do you lay the foundations "under the bracket" and "under the bay"?
Masonry "under the bracket" is used for the construction of walls and pillars. This masonry is a kind of "under the shoulder" masonry, it is made of stones of the same height, selected using a template.
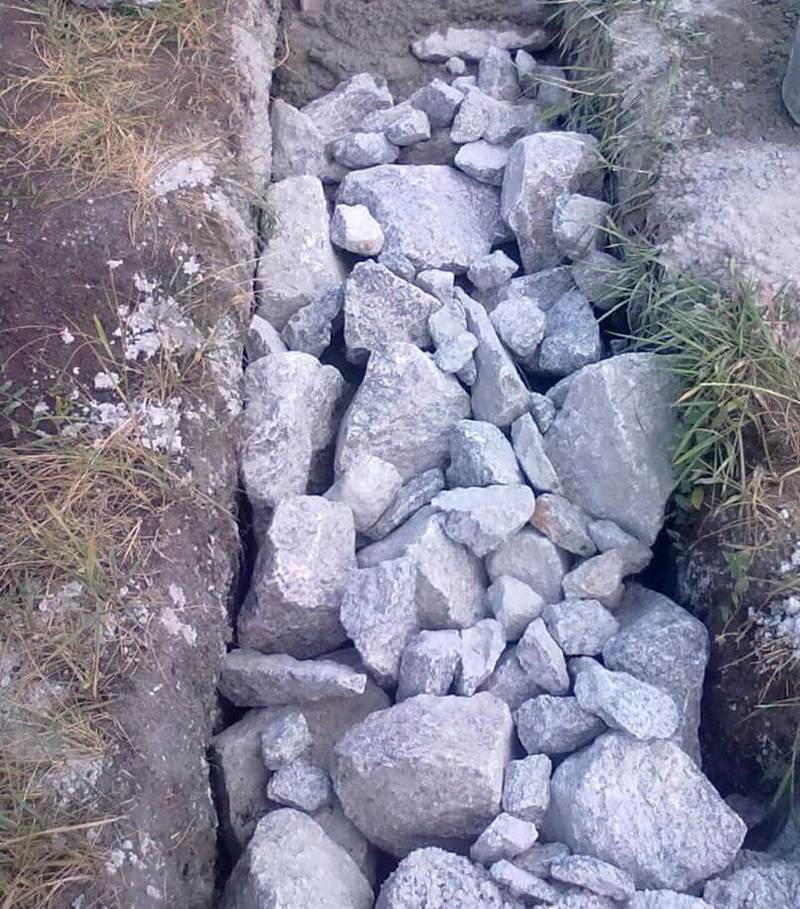
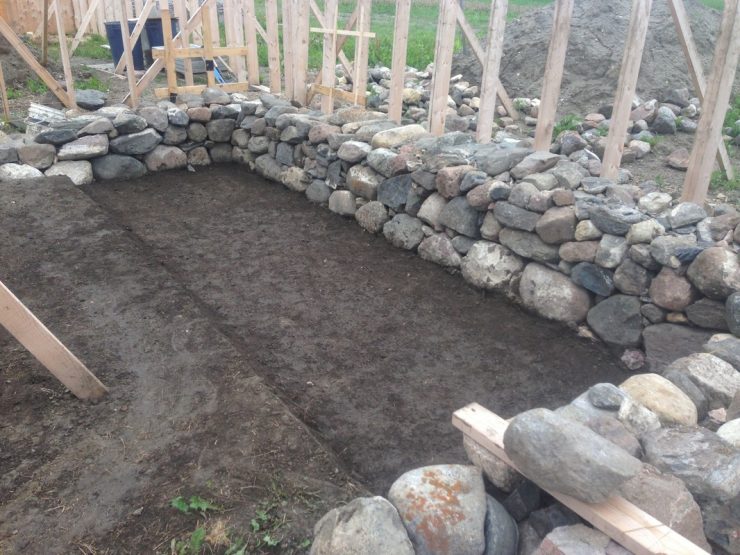
Laying "under the bay" is made of ragged rubble or cobblestone without the selection of stones and laying out verst rows. For this, formwork is made in the trenches after the end of the earthwork. If the soil is dense, then with a trench depth of up to 1.25 m, it is possible to lay the masonry without formwork with the walls of the trench. The first layer of rubble stone with a height of 20-25 cm is laid on a dry base without mortar, a spar with walls and compacted with tamping. Then fill in all the gaps with small stone and crushed stone. The laid layer is poured with a liquid solution so that all voids are filled. Subsequent laying is carried out in the same way in horizontal rows 20-25 cm high, filling each row of masonry with mortar. Rubble masonry "under the bay" is allowed only for foundations of buildings up to 10 m high and only when building on non-subsiding soils.
Watch the video of laying rubble foundations in the above ways:
How to make a rubble or rubble concrete foundation?
In this case, as a rule, columnar foundations are used for the construction of light structures from a bar, rounded logs or frame-type buildings. If you are planning to build a bathhouse made of wood, then columnar foundations are a good choice.
If your site is dominated by heaving soils, formed by moist silty sands with interlayers of silt, clay soils prone to frost heaving, then the construction of a strip foundation, including a shallow one, may be a good choice.
How to make a rubble foundation with your own hands?
Whatever type of foundation you choose, depending on the soil conditions and the weight of the building being built, they can be made from various materials.
Today, foundations made of reinforced concrete blocks, monolithic foundations poured into the formwork with a reinforcing cage installed in it, brick foundations, as well as columnar foundations made of pretreated wooden posts are widely used.
In soft soils, a foundation of rubble stone or rubble concrete foundations is often erected.
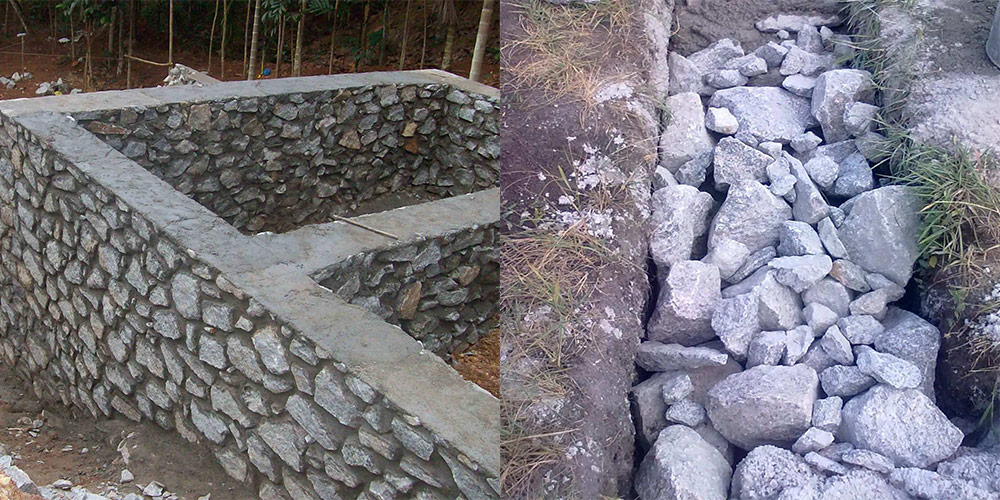
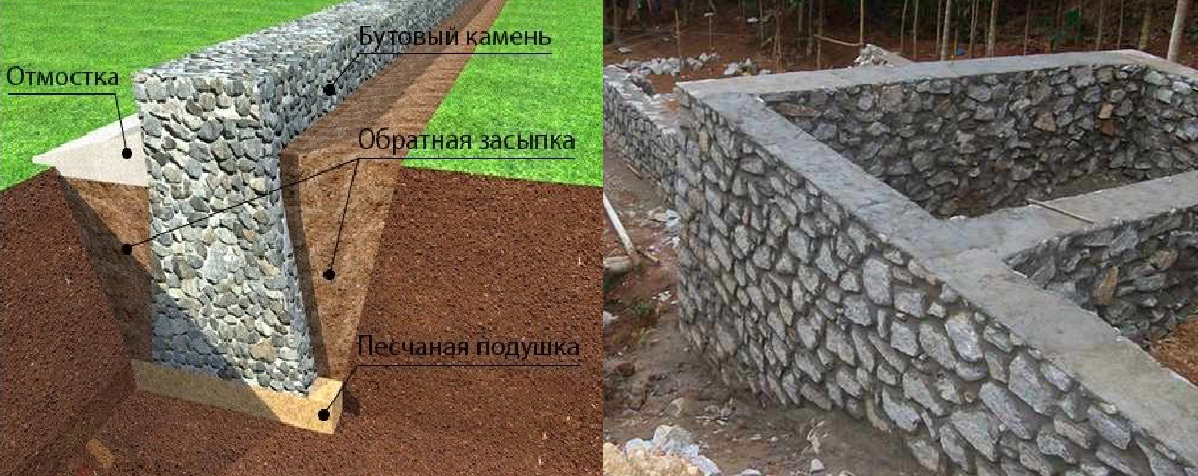
Rubble foundations are made of large stones laid on well-compacted soil of the base. Depending on the soil, the rubble foundation can be erected both in formwork and directly in a trench with sheer walls.
The stones are laid in rows, alternating with layers of pebbles or gravel, compacted with a rammer and poured with cement mortar. filling the voids in the masonry.
The thickness of each row is 15-20 cm. The mortar used for rubble foundations should be prepared in the following proportion: for 1 part of cement, 3 parts of sand. The amount of stone in the masonry should be approximately equal to the amount of mortar. Cement is best to prefer the M400 or M500 brands.
Before starting the construction of the rubble foundation, you should select a sufficient number of stones of the required size, clean them from dirt and dust. For laying the lower rows, it is advisable to choose flat oblong stones up to 20-30 cm long.
Construction of rubble concrete foundation
A concrete foundation differs from rubble in that it is made from the same mortar from which concrete is made.But instead of crushed stone, brick battle, rubble stone, half-brick are added to the mixture.
The rubble concrete foundation is also laid in layers - first a layer of mortar with a thickness of 10 cm, then a layer of filler with a thickness of 15-20 cm, etc.
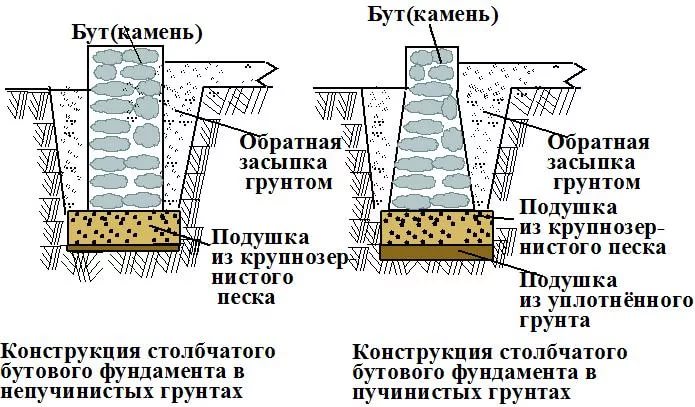
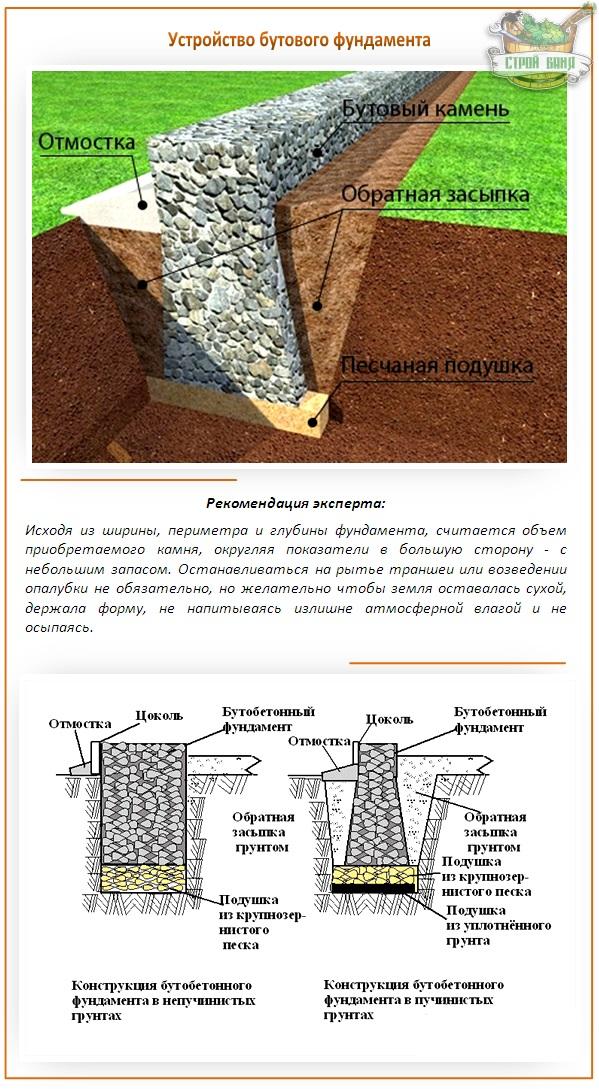
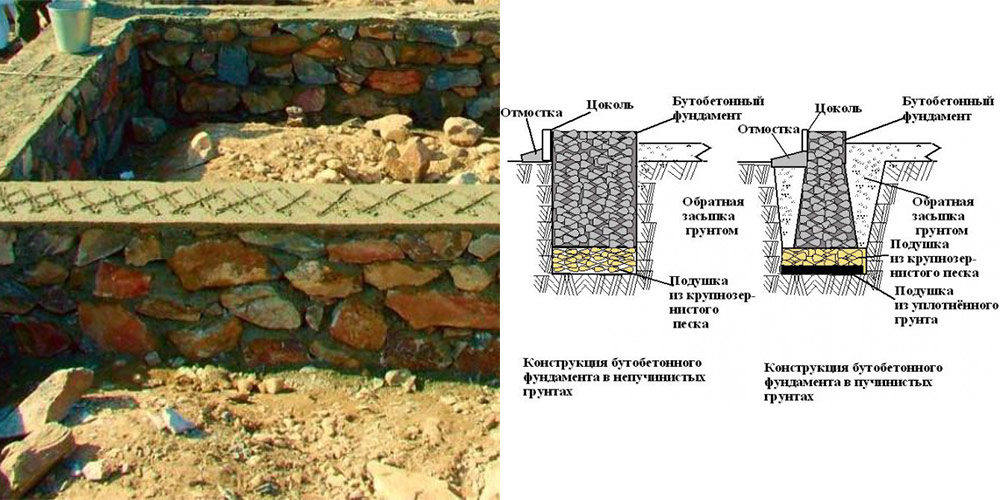
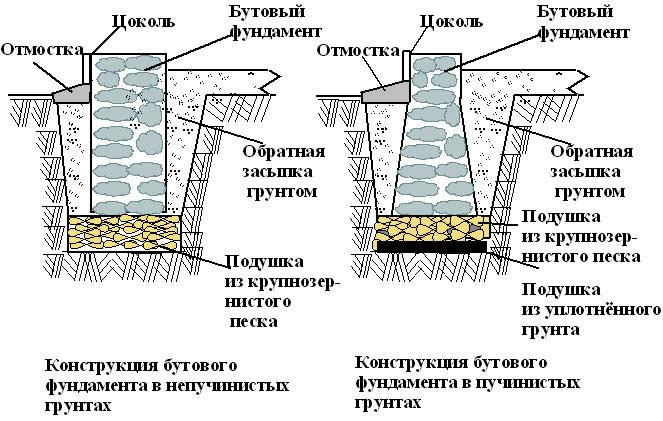
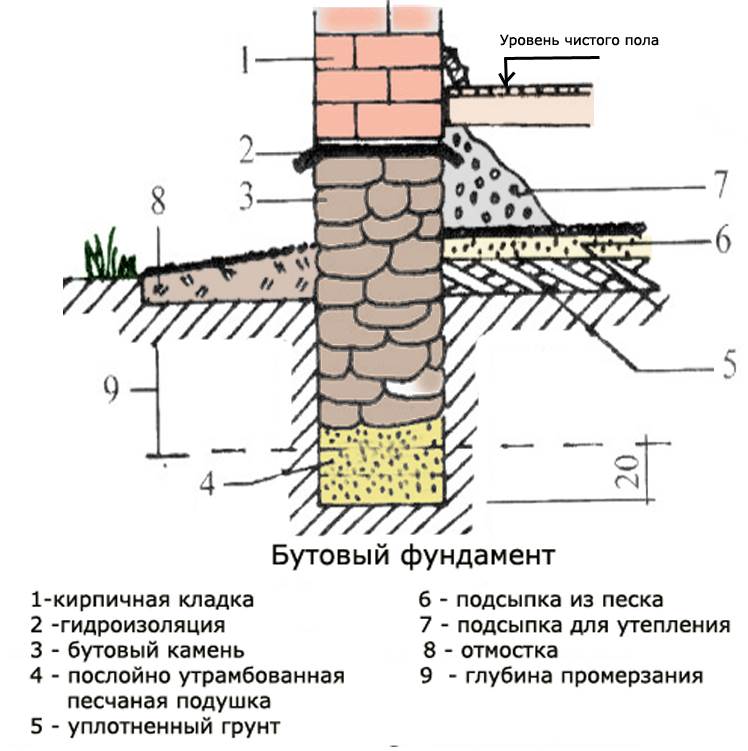
A diagram of the construction of a concrete foundation for brick walls is shown in the figure below:
As you can see, there is a sand cushion for the foundation. allowing more evenly redistribute the loads from the structure to the base soils.
Features of the construction of rubble foundation
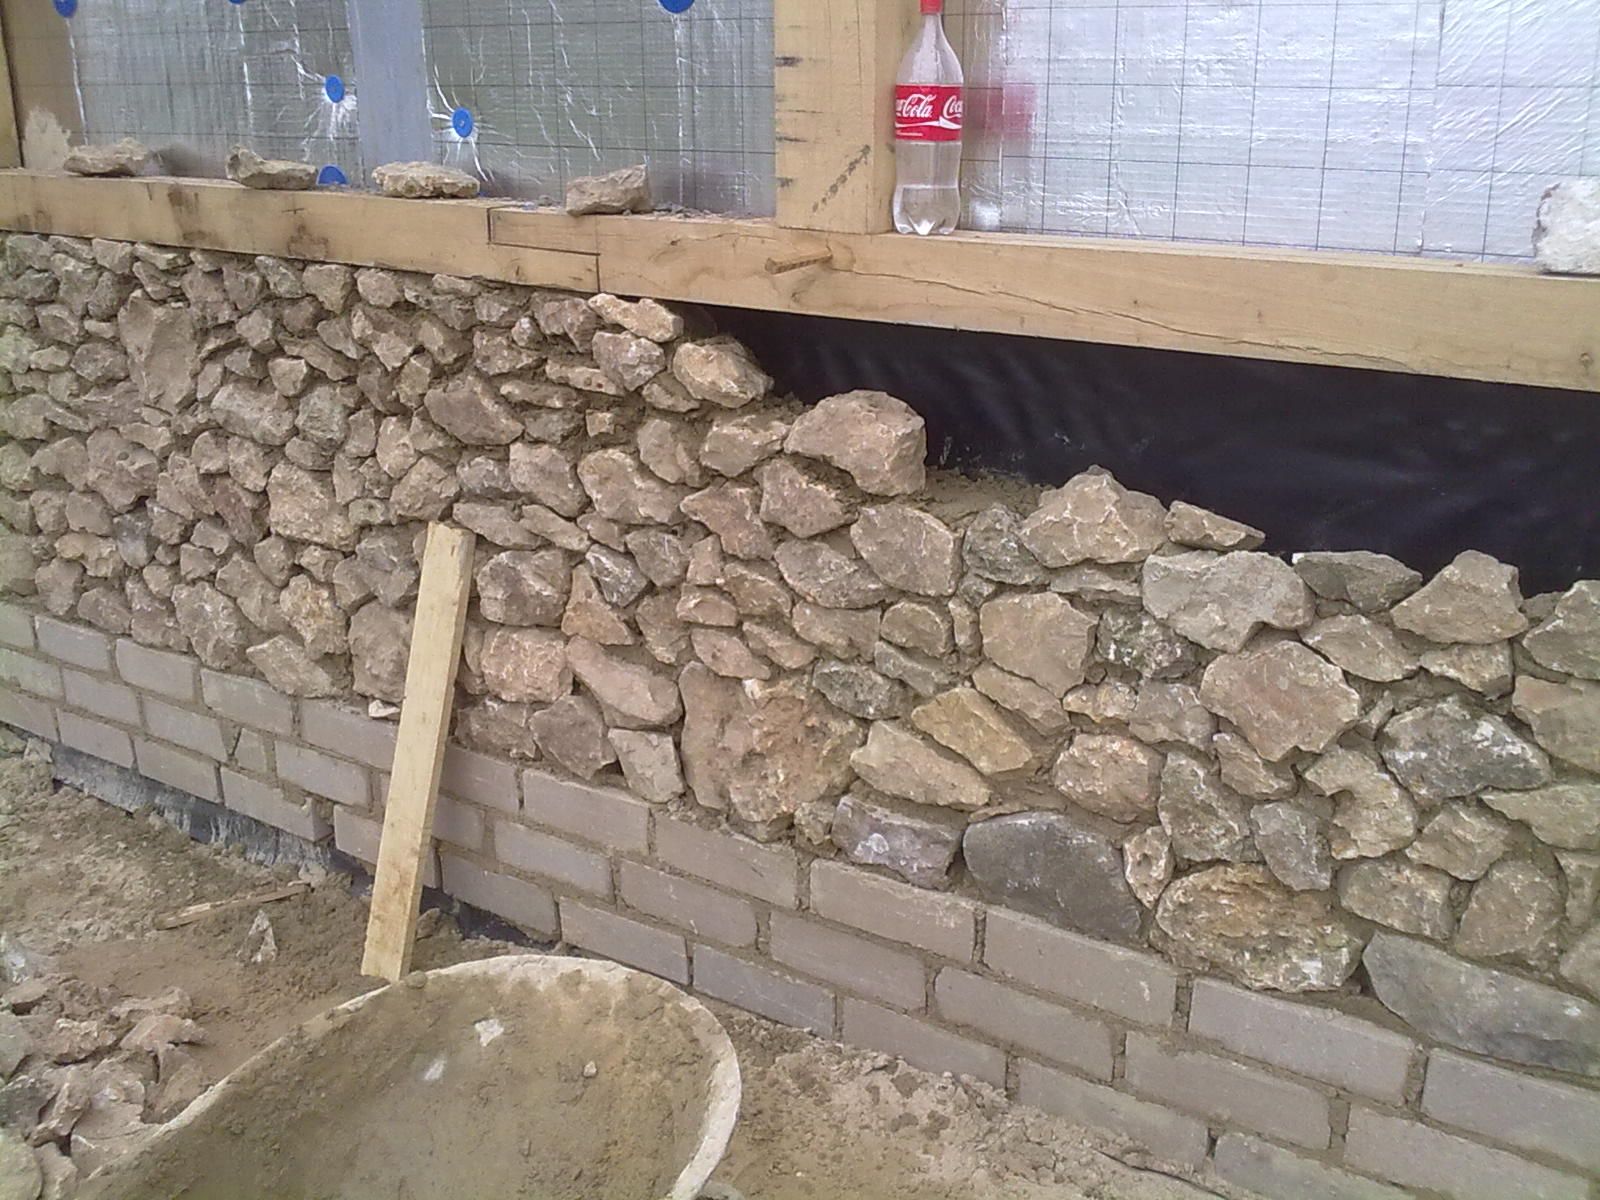
The part of the rubble foundation that rises above the earth's surface is recommended to be performed simultaneously with brick cladding.
Fastening of the brick cladding with the above-ground part of the foundation is carried out by laying a bonded row of bricks, embedded on a half-brick in rubble masonry, every 4-6 spoon rows.
The numbers indicate: 1 - insulation, 2 - rubble stone, 3 - brickwork.
If during the construction of rubble foundations it is planned to stop work for more than a day, then to protect the already built part of the foundation from drying out in hot weather, the already built part of the foundation should be spilled with water at least 3-4 times a day, covered with glassine or a film that prevents the solution from drying out.
As you can see, there are no particular difficulties in the construction of rubble and rubble concrete foundations, and if you have all the necessary materials, you can always build such a foundation with your own hands.
Furnaces of the Novosibirsk company Termofor have been in increasing demand lately, and this is no coincidence. The Termofor stoves have gained popularity among customers due to their reliability in operation and affordable prices. Today the company is producing a new line of Read.
One of the most popular types of doors is infill doors. Due to the simplicity of the design and beautiful appearance, this type of door is often chosen as interior and entrance doors. They are made of various materials, so it will not be read.
Despite the fact that each bath has windows, there is not always enough light that penetrates through them to comfortably steam and wash. Especially if you decide to go to the bathhouse in the evening or in cloudy weather. Therefore, often in Read.
Masonry technology and mortar used
Before you start laying stones, be sure to wet them a little with water. This is necessary so that they adhere better to concrete and retain their natural moisture.
It is better to lay stones not very tightly, leaving a small gap of about five centimeters. In order to lay the bottle, use an ordinary sledgehammer or hammer (drive stones into the cement so that they sit more tightly in it). Also, one of the secrets of dense masonry is clay.
There are several technologies for masonry: "under the bracket", "under the shovel" and "under the fill". Let's consider each technology separately: "Shovel". This construction technology is quite simple:
- The first step is to prepare a dry base, and then a butt row is placed on it;
- Next, we put the bottle itself and unforgettable tamp it tightly. We fill the resulting gaps with a small stone and fill it all with a liquid solution from above.
- At the end we put a spoon row.
It is important to know: be sure to check that the stones do not touch each other and that there are gaps between them. If in the building you are going to additionally finish the walls, then be sure to put the formwork, as in the future it will greatly facilitate this process .. "Under the bracket"
This masonry process itself is quite complicated, and it is additionally complicated by the fact that the stones for the base must be of almost perfect shape.
“Under the bracket”. This masonry process itself is quite complicated, and it is additionally complicated by the fact that the stones for the base must be of almost perfect shape.
- The first step is to prepare a sand cushion base;
- Next, a waterproofing layer of roofing material is laid;
- Then the first row of buta is placed on this layer;
- A cord is installed along the stones, which will serve as a guide in the process of further masonry;
- To fill the voids formed between the stones, you need to put a smaller bottle;
- We tamp rubble stones by lightly tapping a sledgehammer or a construction hammer (this procedure is necessary so that they better sit in a sand pillow);
- Now the stones need to be poured with concrete;
- Now we lay the remaining layers of buta according to the same principle.
“For filling”. Such laying is always carried out under the formwork and does not differ in such strength as its older “brothers”. Perhaps, such a foundation is ideal for light buildings (for example, a bathhouse or a shed). Therefore, in order for such a foundation to be stronger and stronger, a vibration compactor is used to further strengthen it (it increases the strength of the base by about forty percent).
So, now let's get to work:
- To begin with, prepare the trench and base and cover it with coarse sand and tamp it well.
- Lay the butt row and fill the gaps with sealing grout.
- Finally, the second row is laid, compacted and rammed.

Solution used:
Simple cement mortar. The cement is mixed with clean sand, poured with a small amount of water and filled in as a base for rubble stone (the proportion of the concrete solution is 1: 3).
Another easy-to-prepare solution. Sand, crushed stone and a little water are added to the cement
The addition of crushed stone will increase the stability of the building several times (the proportion of cement-sand mortar is 1: 4). It is important to know: while mixing the solution, observe the proportions in order to avoid the appearance of bubbles, which over time will lead to the destruction of even such a solid foundation. Remember: the solution should not be very liquid.
You can also purchase a ready-made solution at any hardware store.
Pouring the foundation in winter and concreting technology in the winter
How is rubble concrete masonry carried out in winter?
The strength of rubble concrete masonry depends on the strength of the concrete included in its composition. If the rubble concrete masonry is erected by the freezing method, then during the thawing period its strength will be practically zero. Therefore, freezing of rubble concrete is allowed only after the strength of concrete in it reaches 50% of the design, but not less than 7.5 MPa. This is possible if the "thermos" method is used (for large volumes of concrete work) or electric heating of rubble concrete.
What are the features of laying foundations in winter conditions?
When laying foundations in winter, the base is protected from freezing, both during the production of work and at the end of them, otherwise the subsidence of the base during thawing can lead to cracks in the masonry. In winter, it is impossible to arrange and level the base with sand layers exceeding 100 mm thick, since with a large thickness of the artificial sand base, uneven precipitation, cracks in the foundations and walls of the building are possible. When erecting foundations by freezing, it is allowed to use bricks, stones of the correct shape and blocks. It is also allowed to erect walls from bedded rubble stone, if it is confirmed by calculation that they will withstand the load during the thawing period.
How to make concreting of foundations in winter conditions?
It is better to entrust the concreting of the foundation in winter to specialists. In winter, the following methods are used: concreting by the "thermos" method; concreting in thermoactive formwork; heating of concrete with thermoactive flexible coatings; heating of concrete with infrared emitters; the introduction of antifreeze additives. For example, according to the technology of concreting foundations using the "thermos" method, the concrete mixture is immersed in a thermally insulated formwork.During electrical heating (through and peripheral), the structure must be constantly monitored using instrumentation. A type of electrical heating is electrical heat treatment of concrete with heating cables and wires. The most promising way is to hold the concrete in thermosetting formwork. Heat is transferred through the shield deck into the surface layer of concrete, and then spreads throughout the entire thickness.
Construction procedure
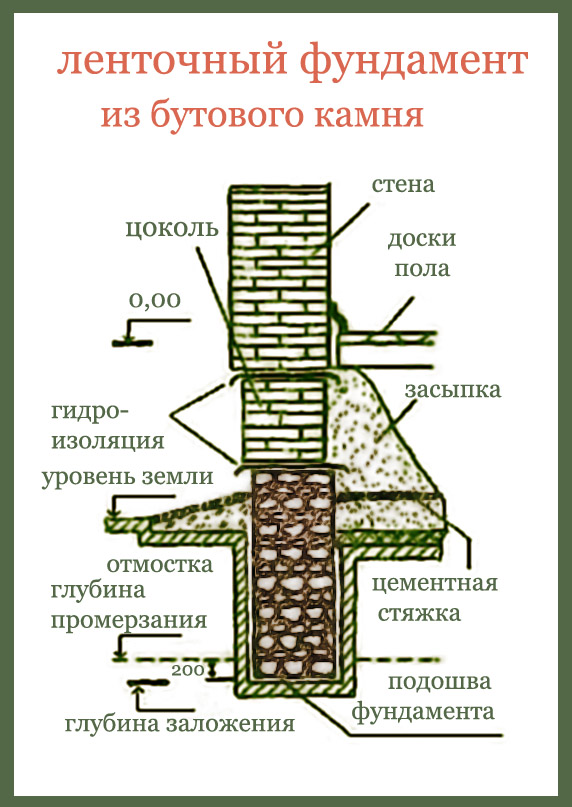
 Rubble stone foundation scheme
Step # 1. Preparation of a foundation pit. When the building project is ready and all construction approvals have been received, you can start preparing the construction site. We import rubble stone and other building materials in the required quantity. Get all the tools you need. Set the markup for the project and dig a pit. The depth of the pit should be below the level of soil freezing.
Step # 2. Formwork installation. If the soil is dry and strong, the formwork can be omitted, and the rubble stone can be laid directly into the trench. In case of crumbling soil, ordinary formwork is placed or sheet, roll materials are used.
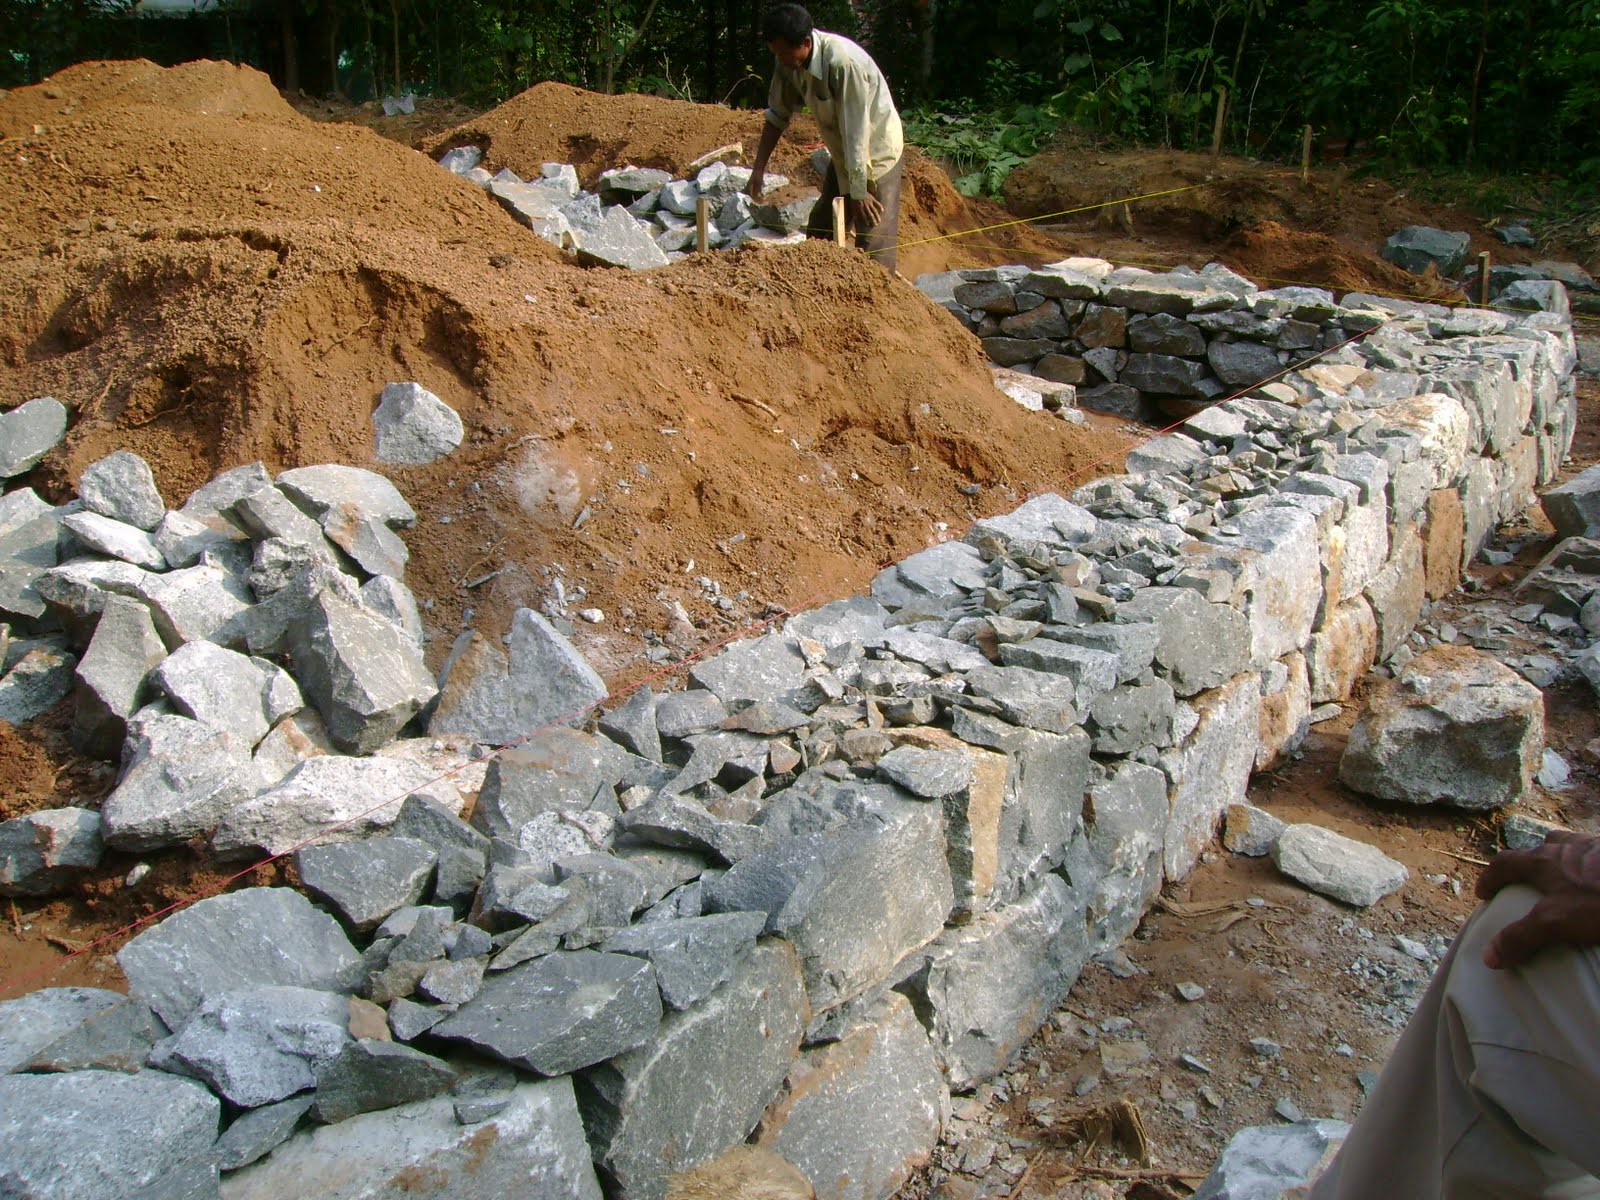
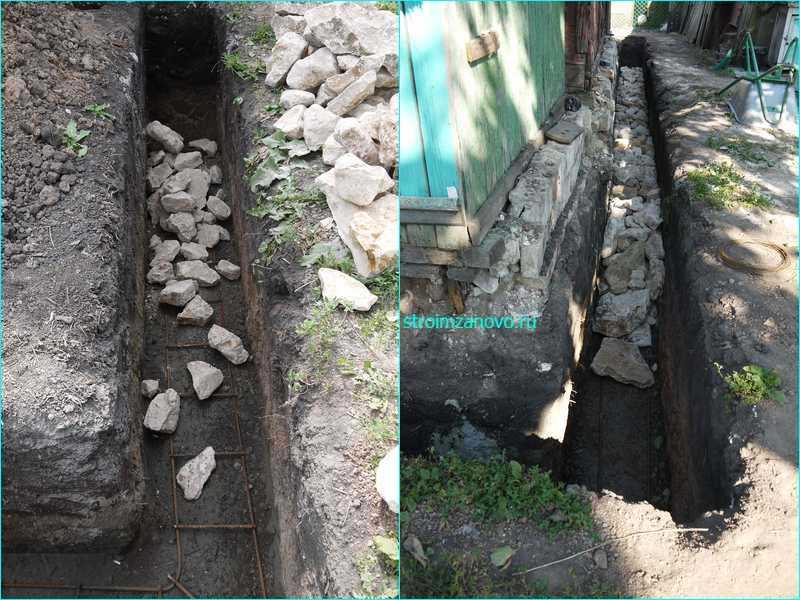
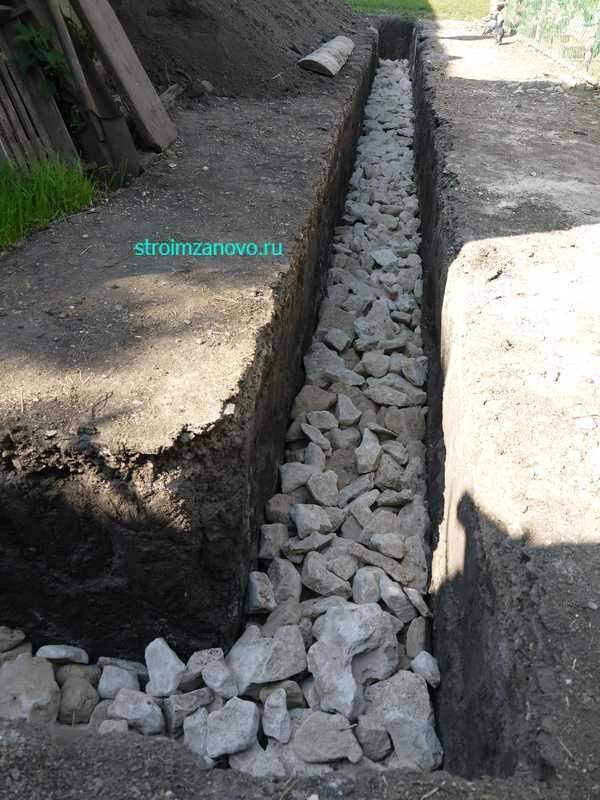
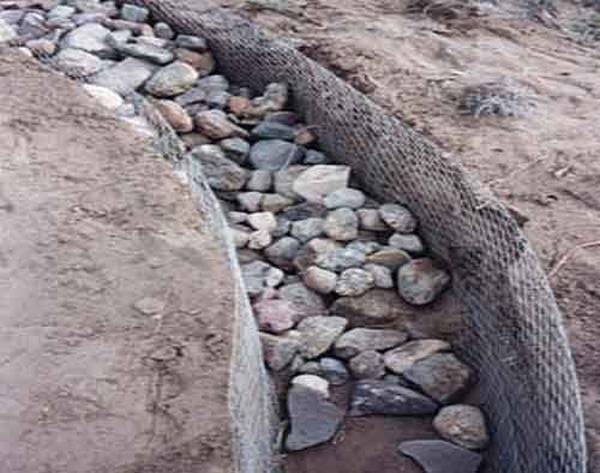
 A trench filled with rubble
Step # 3. Rubble stone laying. The bottom of the trench should be covered with a 25 cm layer of sand, tamped down and start laying the first layer of stone. To do this, choose the largest stones and force them to lay them on the sand so that they lay firmly and do not move. If the depth of the foundation is 50 cm, then its width should be from 65 cm to 70 cm.
The stone is carefully selected in shape, laying out the first row and the corners of the subsequent ones. If there is no rubble stone of the desired shape, you need to cut a piece closer in shape with a chisel and a sledgehammer. The empty spaces between large blocks are filled with small fractions formed after cutting. The laid row is poured with a slurry of cement, and then a sand-cement mortar is placed. The laying of the next row is started observing the dressing.
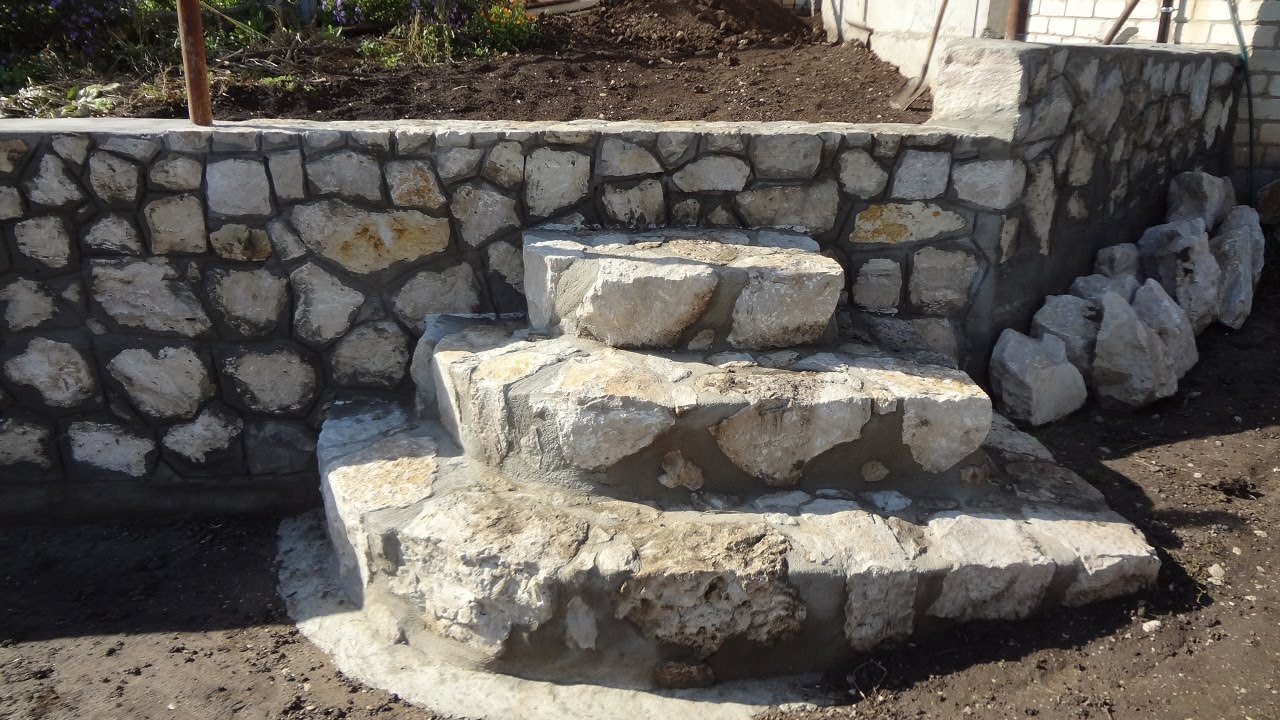
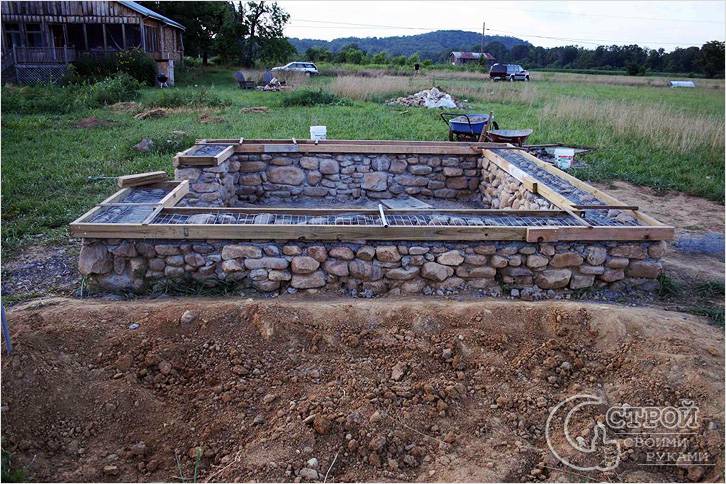 Stone foundations in modern construction
Step # 4. Removing the formwork. When the stone foundation gained strength, it was time to disassemble the formwork. An empty space remains between the trench wall and the stone foundation. It needs to be covered with small pieces of stone. You will get an excellent drainage layer.
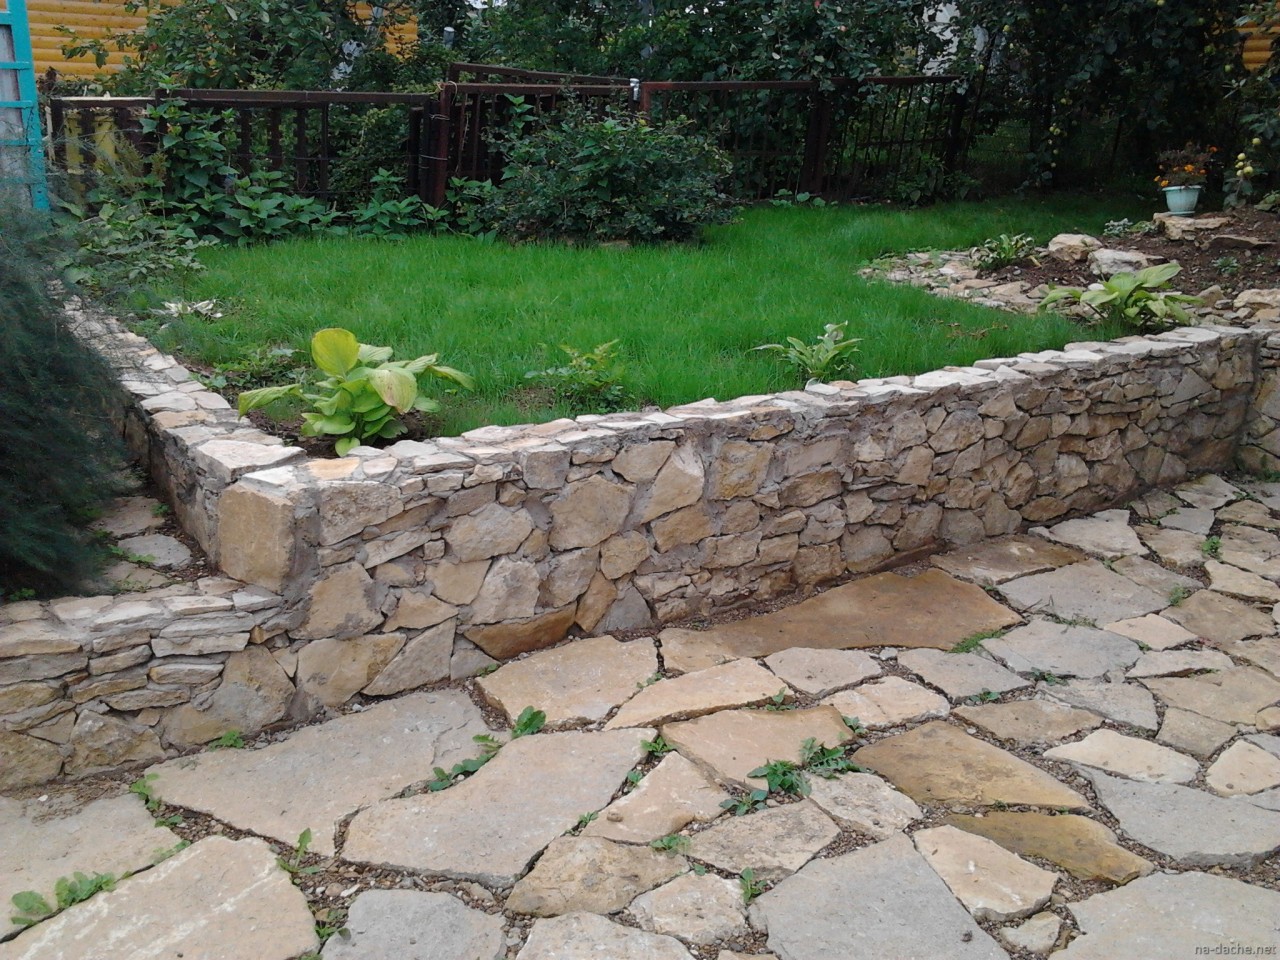
The remains of the stone can be used to create a beautiful alpine slide on the backyard and paving garden paths.
Do-it-yourself formwork and pouring the foundation
The trench for the concrete foundation must be at least 0.5 m deep.
- If the plan requires a foundation to be laid above ground level, it is necessary to make several rigid wooden panels. To do this, it is necessary to install the fastening racks diagonally and horizontally along the entire formwork being erected.
- The racks are fastened together with nails so that in the end sharp corners are obtained.
- So that the formwork does not deform in the future, its walls should be well pulled together.
- When the formwork is ready, you can start pouring the base. The first layer of concrete mortar is poured 15 cm thick and evenly distributed over the entire bottom of the trench.
- In order to remove excess air from the concrete solution, you can use a wooden handle with a pointed end. In this case, you should pierce the solution with careful movements, slightly stirring the concrete mass.
- After the solution is poured and excess air is removed from it, it must be left to dry completely.
- As soon as the first layer dries, you can start pouring the second, its thickness should be about 25 cm.
- While the solution is in a liquid state, rubble stones need to be drowned in it. But so that about half of the material remains untouched by the solution. The distance between the stones placed in the device should be on average up to 6 cm. At the same time, it is necessary to strictly ensure that the stones do not touch each other.
- The procedure for the next pouring, removing air and laying new stones is the same as at the beginning.It is carried out as many times as necessary.
- In the last layer, the stones are completely filled with mortar so that there are no sharp edges on the surface, which in the future can interfere with the construction of load-bearing walls.
- In the following days, the freshly poured foundation must be watered so that the water pressure is sprayed in the form of rain. After moistening the base, be sure to cover it from sunlight, for example, with a tarp.
- After the foundation has completely solidified, you can start arranging the leveling screed, the height of which should be no more than 15 cm.
Above ground level foundation is provided by formwork made of sturdy wooden panels.
Typically, the concrete device cures within 28 days, although outwardly it looks almost ready in a week. It should be remembered that the setting time of the concrete mixture depends on the air temperature. If it is cold outside, then it takes 15 days for the sand-cement mortar to harden, and it reaches the corresponding strength only on 36 days.
Required materials and tools:
- rubble stones;
- concrete solution;
- a wooden handle with a pointed end;
- wooden boards and fastening racks;
- sand and crushed stone;
- roofing material;
- nails;
- hammer;
- shovel;
- level;
- roulette.
To prepare a concrete solution you will need:
- cement grade M400 or M500;
- clean sand with medium-sized granules, preferably river or quarry;
- crushed stone with a diameter of not more than 30 mm;
- water;
- concrete mixer or container in which the solution will be mixed;
- shovel;
- hoe.
A do-it-yourself concrete foundation is considered the simplest and most economical option among all known types of foundation. It is widely used in the construction of houses, baths, garages and even in the installation of fences. And since this type of foundation is reliable and low-cost, it is very popular among private developers.
DIY masonry and sorting of rubble stone
After the foundation is ready and along the planned stone wall (fence or basement) lighthouse strings will be stretched, meaning the plane of the wall, you need to pre-sort the stone.
If the master does not have a special exclusive task, then the stone can first be decomposed into four heaps:
- put the largest stones in the first pile;
- in the second - stones with a length equal to the thickness of the wall, these are butt stones;
- in the third, the largest heap, all other stones will remain, except for those that have a right angle.
Stones with a right angle need to be thrown into the fourth pile, there are relatively few of them, these will be corner stones. Such sorting of the stone will make it possible to use the available stones as expediently as possible. Since any laying of stones begins with the largest available stones, it is so convenient to have them at hand and immediately put them into the laying of the first - lower rows.
So: big stones are put down, in their thickness not exceeding the thickness of the future wall. If there are openings in the wall, then you need to immediately put the lower corner stones in these places so that they denote these openings. Before you start laying rubble stone, you may need to lay a waterproofing material on the foundation, for example, roofing material. This should be done when a dwelling is being built.
Before laying a rubble stone, keep in mind that it is distinguished by its polyhedrality, that is, versatility. In this case, the boot, of course, has irregular geometric shapes. It is just an available raw coarse stone material. How do you begin to build something out of it? Naturally, for this you need to somehow understand it, somehow distinguish the sides of each stone, somehow adjust the stone to the stone, somehow set the stones.
In the construction business, universal, well-known bricks have long-accepted names for their sides.The largest edges are called the bed, with them the brick is laid on the mortar. The long sides are called spoons, the short ones are called pokes. If the bricks are laid with long sides to the outer plane of the wall, then this is a spoon masonry or a row. If the brick is laid against the outer surface of the wall with its short side, this is a butt row. All produced types of bricks usually have some of the same dimensions, they are easily combined with each other and are stable in masonry. Therefore, building from bricks is relatively easy.
The produced or mined block stone, like brick, has parallelepiped shapes, is stable in masonry, etc. However, it has long been customary that stone blocks have slightly different names for their sides.
As in brick, there are beds in block stone, but spoons are called face and tail, and pokes are called burrs.
But the rubble stone has absolutely no parallelepiped shapes. In jewelry, for example, cut diamonds have their own special names for the sides. In principle, a bricklayer needs to know all these names, since a rubble stone can have both sides and tunnels, like a burr or a poke, and facets of its own kind. But above all, a bricklayer works with the face of a rubble stone. The face in each rubble stone must be chosen by yourself. The face in the rubble stone is the side of the stone that will go outside the wall. Usually this is the smoothest side of the stone, or if not the smoothest, then just well suited in adjoining the previously laid stone. In general, the face of a rubble stone can be any of its even and large sides, directed outward - the oriented surface of a particular stone. And of course, the rubble stone has at least a lower bed. The lower bed of a rubble stone can be smaller than the face, and a larger area. The lower bed may not have a right angle with the face of the rubble stone. The angles between the lower beds and the faces vary approximately from 60 to 110 degrees, it all depends on the situation and requirements. But to start rubble masonry, you need to take from large stones those in which the angle between the lower bed and the face will be within 80-95 degrees. At the same time, it is quite typical that many rubble stones will have neither a specific upper bed, nor a tail, nor burrs as such. Instead, there will be all kinds of kinks, edges, edges.
It is quite a typical rubble stone and may become one of the first to be put on the foundation.
Professional recommendations
With a professional approach to work, you can reduce the time required for pouring the foundation by several times. To do this, there is such an instruction:

Work with buta on the marked area
- The marking of the site is being done.
- Trenches are dug and formwork is installed.
- A little sand is poured into the finished trench and stones are placed there, pressing them into the created "pillow".
- All gaps resulting from laying are covered with crushed stone and tamped.
- A mixture of concrete is prepared (1: 3) and the first row is poured with it to make it more durable.
- Another row is laid out according to the same principle. In this case, do not forget to "bandage" the seams, as when laying brick material.
- The rows that will protrude above the ground are reinforced with wire or embossed reinforcement.
Following these fairly simple guidelines, you can lay out the rubble base much faster. The result is a robust and durable structure that can withstand the heaviest buildings and is built to last.
Selection of stones and preparatory work
The choice of stones for the foundation is based on their strength characteristics, and the size is adjusted in the process of performing the work. Too large fractions are broken up, and small ones are used to fill voids and arrange pillows.The minimum time is required to prepare the cobblestone, but if you have to work with the so-called white stone, then its preparation should be given as much attention as possible.
The stone should not:
- crumble;
- dust;
- crumble under the blows of a hammer into many small pieces.
The most important procedure in the preparation process is skirting. Large stones weighing more than 30 kg will need to be broken into at least 2-3 pieces. The technology is simple but time consuming. To begin with, the stones are cleaned and washed, sprinkling abundantly with water, then, after waiting for drying, they outline a line along which you need to split it with paint laces, and only after that they drive a chisel into the depth of the lump.
High-quality elements under the blows of a hammer will be divided into separate fractions of the required parameters. Not only the size is important, but also the weight of each broken piece. If the shape is not very important, then the weight of each stone should not exceed 30 kg. Having received the required number of components, you can start preparing the land plot:
Clearing, during which it is necessary to get rid of excess vegetation, especially trees and shrubs.
Carry out the markings in accordance with the approved project, paying special attention to the corners. Deviation from the value of 900 will lead to distortion and cracking of the structure.
Designation of the outer boundaries of the foundation and stretching the parallel laces at a distance corresponding to the width of the future base tape
This parameter should be 10 cm higher than the actual thickness of the tape, since the height (thickness) of the formwork panels that will be installed in the trench are taken into account.
After completing the preparatory part, you can proceed with the excavation and assembly of the formwork.

