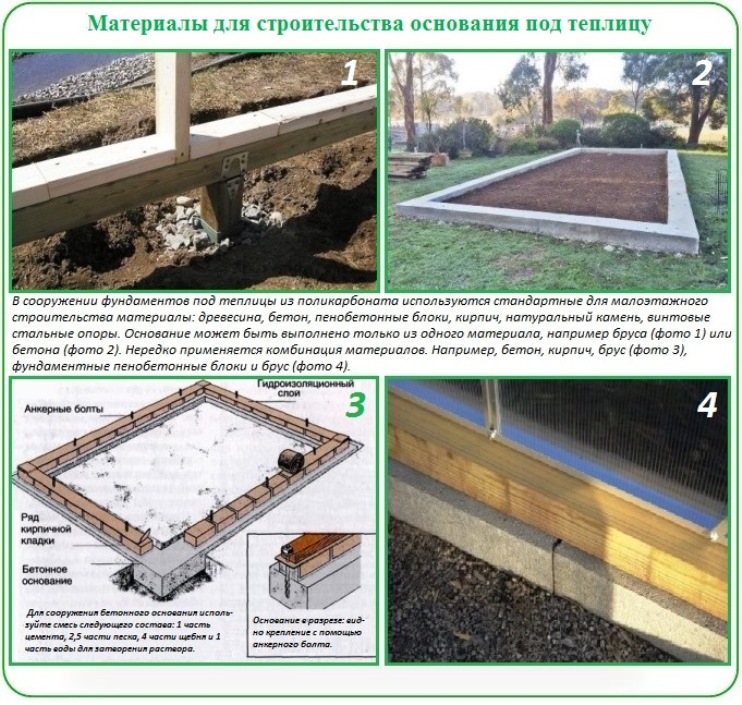
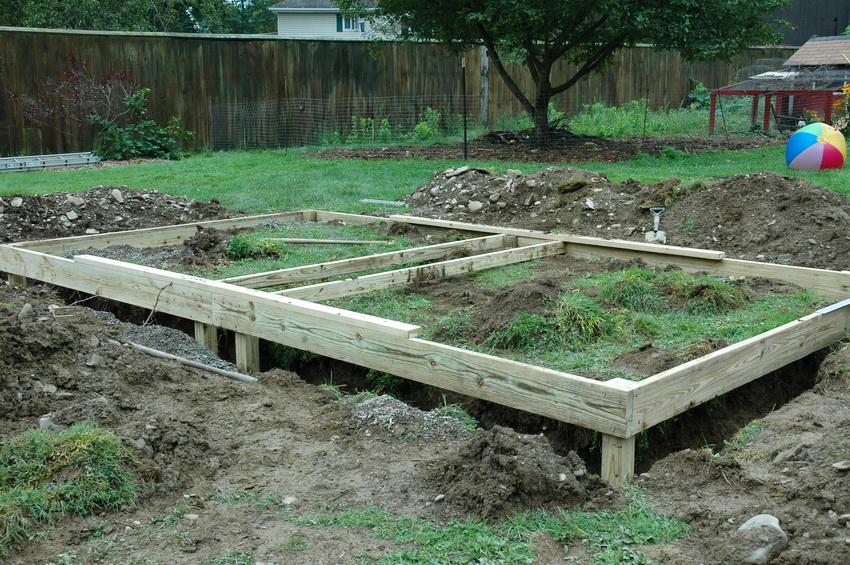
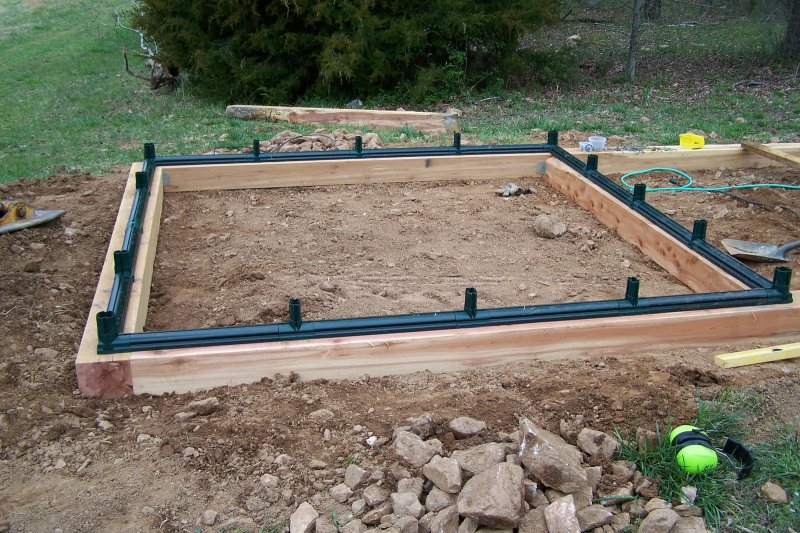
Bar base
But when installing on a timber, the features of polycarbonate greenhouses should also be taken into account. One of the main ones is that for the installation of the frame and the subsequent sheathing with polycarbonate, a perfectly flat surface is needed. Otherwise, the arcs may be different in height, which will lead to problems with sheathing with polycarbonate sheets and a loose fit of the material.
Usually, a 100x100 bar is used for installation, but it is quite possible to install the structure on a 50x150 board
So, the most important thing when installing on a wooden base is to make the correct measurements.
- First, a frame is knocked together, which must fully correspond to the size of the greenhouse frame.
- Further, the knocked down frame must be set exactly in level, for this you need a building level. If you have large differences in elevation on your site, then in the future you will have to do voluminous work on digging the structure into the ground, provided that you want the greenhouse to stand level.
- When all sides of the base are leveled, check for correctness. To do this, measure the diagonals. They should not differ by more than 2 cm from each other.
- In this version, the wooden base is buried in the ground after assembling the entire greenhouse, but you can use another method.
The foundation for a polycarbonate greenhouse, made of a bar or board, is easier to install in a pre-prepared trench.
- The depth for a size of 100x100 mm should be 15 centimeters. The width should be 8 cm greater than the width of the material.
- At the bottom of the prepared trench, it is imperative to pour gravel or crushed stone, this will prevent the wooden base from being exposed to excessive moisture.
- Having lowered the wooden base, all its sides must be aligned strictly in level.
- The corners of the base are fixed with building corners, and the voids between the walls of the trench and the timber are covered with soil.
In addition, when constructing a foundation from a wooden base, be sure to make sure that it is treated with special antiseptic materials that protect the wood from harmful insects and decay.
The installation of a polycarbonate greenhouse on a timber foundation can be carried out not only on a gravel base, but also on a waterproofing material that also protects the wooden structure from the harmful effects of water and excessive moisture.


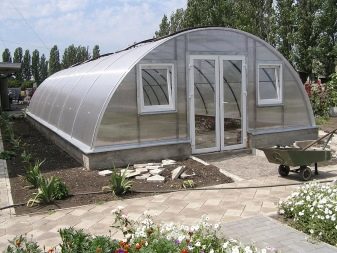
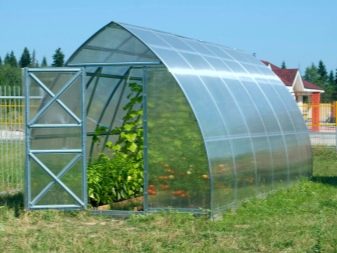
Greenhouse on a foundation: pros and cons
When wondering if a foundation is needed for a greenhouse, inexperienced gardeners often do not consider the consequences. Installing a building directly on the ground can result in not only loss of crops, financial costs, but also a health risk.
Without necessary reason:
- plants planted inside the greenhouse are not protected from damage by ground pests: moles, bears, shrews;
- access to the interior of cold air and water is possible, with its stagnation on the site;
- the frame with the greenhouse cover quickly deteriorates from constant contact with wet soil;
- light structures can fly away with strong gusts of wind, damage other garden buildings, plants, cripple the owners;
- heavy structures sink into the ground, after which they deform under their own weight and can fold.
Saving on the construction of a polycarbonate greenhouse base will at least lead to additional costs. Do not be afraid of the difficulties of independent foundation construction. With a competent approach to the production of work, you can make a high-quality inexpensive support for the greenhouse.
Unlike the production of foundations for residential buildings, you can significantly save on the base height, which will be five times less. The average depth of the greenhouse support is 20-30cm.Also, for manufacturing, you can use what is left from the construction of a house, garage or scrap materials.


What to put a polycarbonate greenhouse on: assembly instructions
Dimensions (edit)
A greenhouse is a special building where cultivated plants can be grown. This is achieved through the use of transparent materials for the frame, as well as heat retention inside the system. The dimensions of this structure are not standard, as they depend only on the land plot and the technical capabilities of the owner.
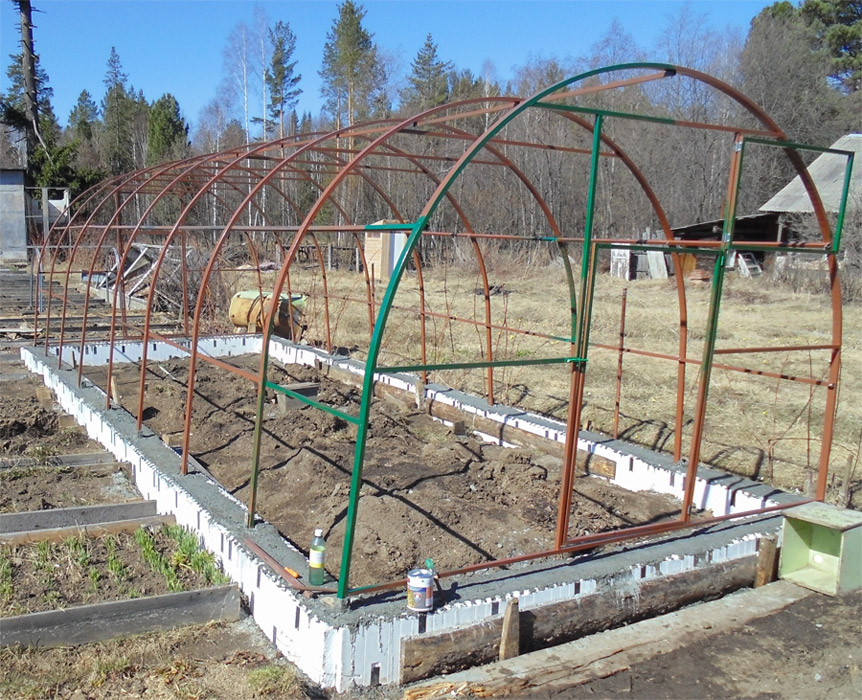
Therefore, in most cases, the dimensions of the foundation are selected individually. Many summer residents build greenhouses 4x6 or 4x8 m.But there are also more huge structures that need a reinforced foundation. Therefore, when constructing such systems, the width and depth of the support are increased.

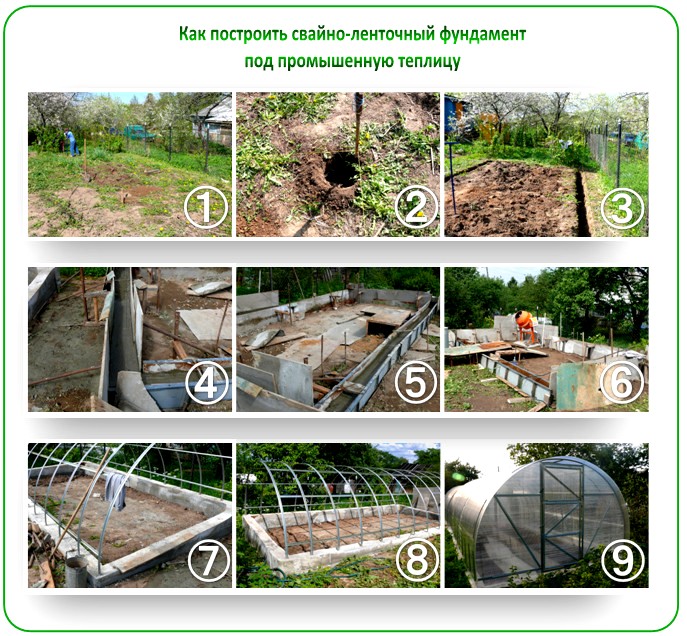

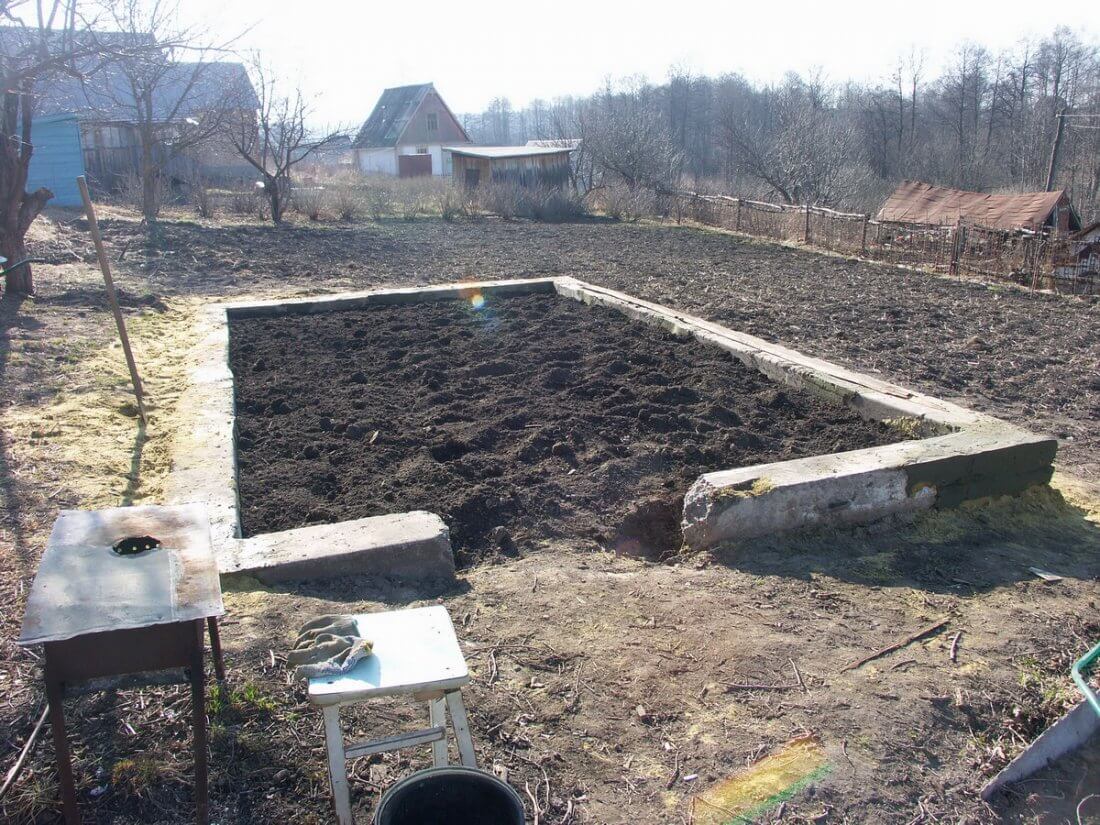
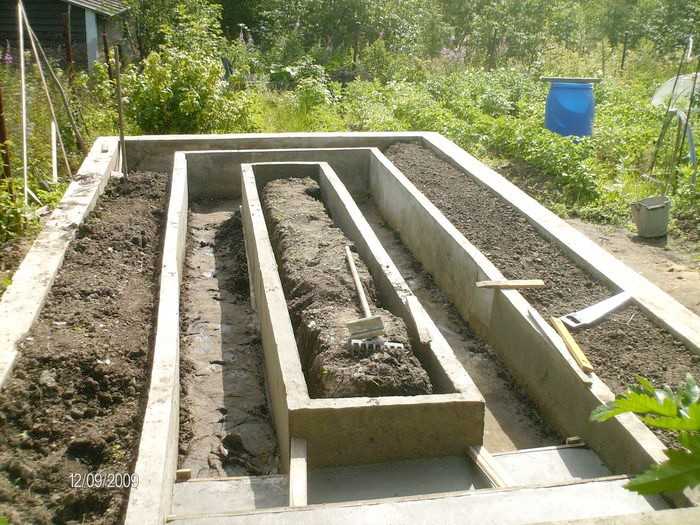
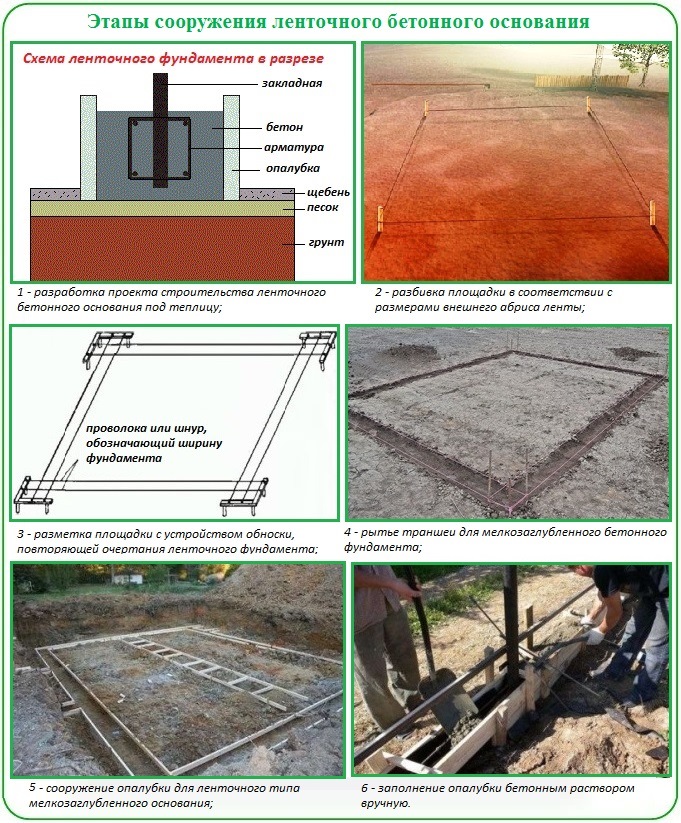
Monolithic concrete slab foundation
Such a pedestal for a greenhouse will provide complete protection against the penetration of pests, frost, and will quickly remove excess moisture from the structure. But it is very expensive, therefore it is recommended only for unstable, "playing" soils. The monolithic foundation is poured under non-separable greenhouses, which can be operated in winter.
How to make a slab foundation with your own hands
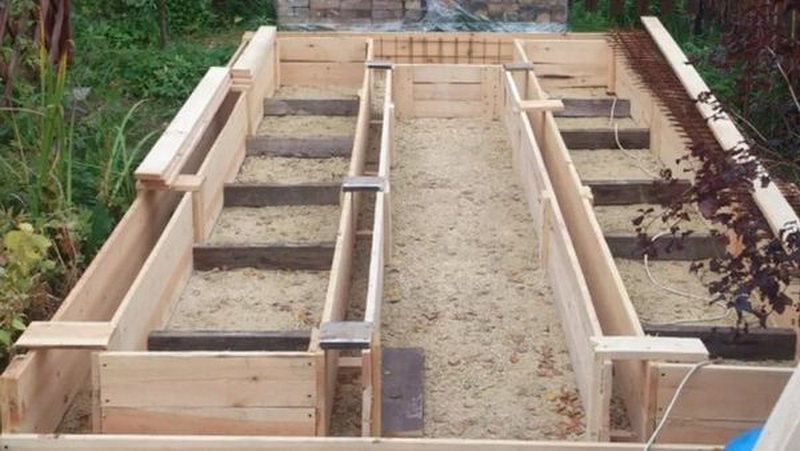
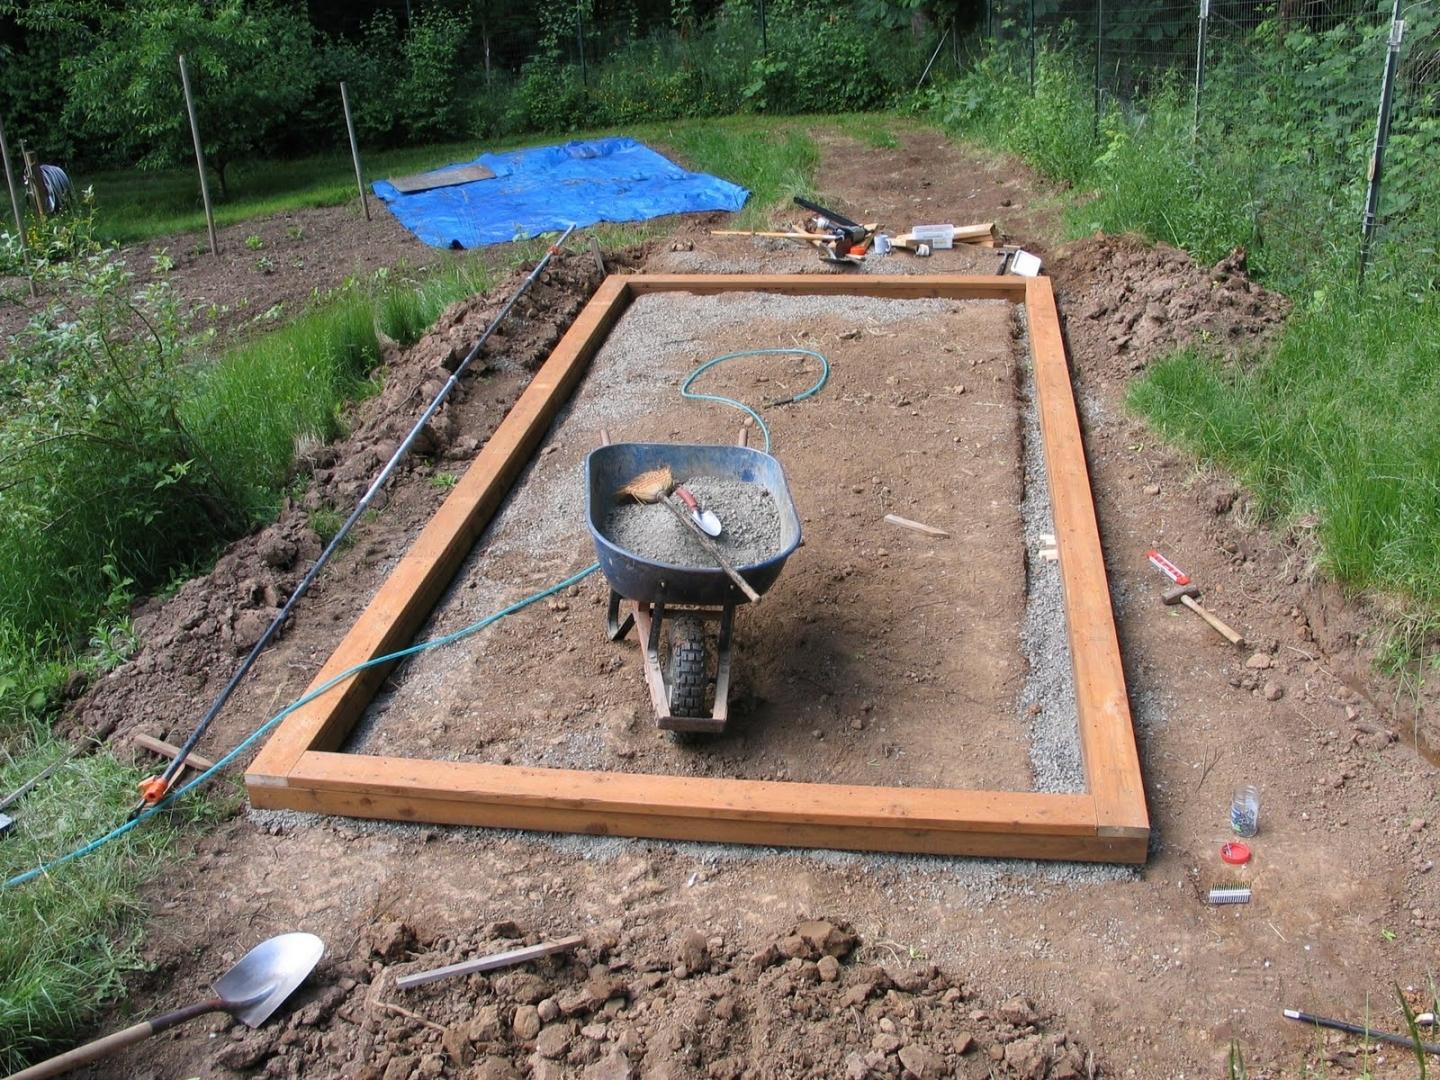
- A pit is dug, the dimensions of which will be 7-10 cm wider than the estimated size of the greenhouse. They remove the entire fertile layer of soil, which can then be used to fill the beds. The depth of the pit is about 30 cm.
- The entire inner surface is lined with geotextile, which will not allow the walls to sprinkle, and will provide excellent drainage.
- A formwork made of boards is placed at the edges, which should rise above the ground by about 20 cm.
- A sand pillow (10 cm) is poured, which is tamped tightly, moistened with water.
- A layer of gravel is poured over the sand, which will support the concrete (about 5 cm).
- A reinforcing mesh is lined over the gravel.
- The prepared foundation pit is poured with freshly prepared concrete, smoothing and leveling the surface in the course of work.
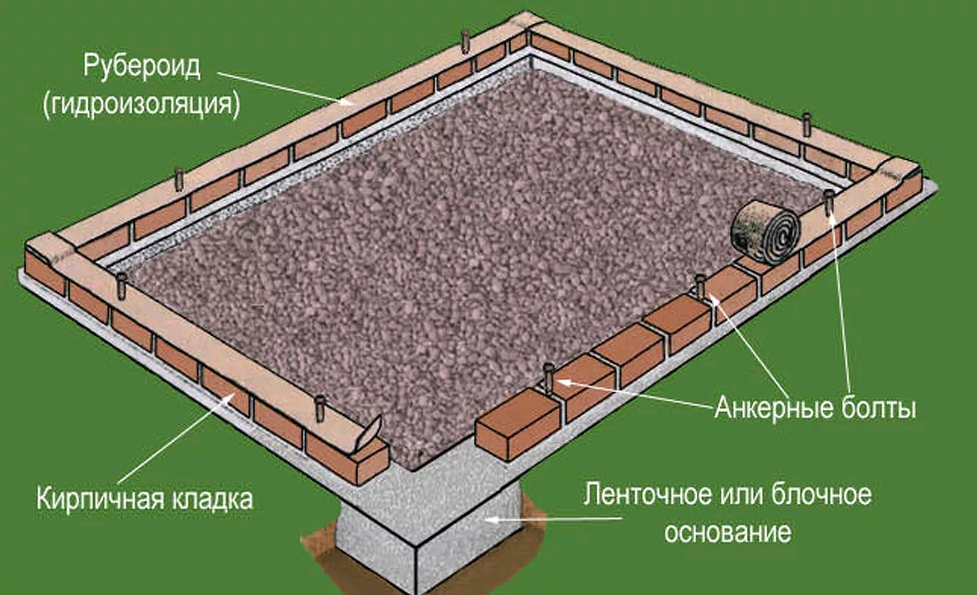
- An hour later, when the concrete "grabs", anchor bolts are inserted into the foundation around the perimeter of the greenhouse so that they turn out exactly on the line of the base of the future frame.
- Leave to cool for a couple of days.
- The concrete must be periodically moistened, and if it is not possible, then throw wet rags on top, which will prevent the solution from drying out too quickly.
To prevent water from stagnating on the concrete during operation, you can create a drainage system (but install it before pouring the foundation!).
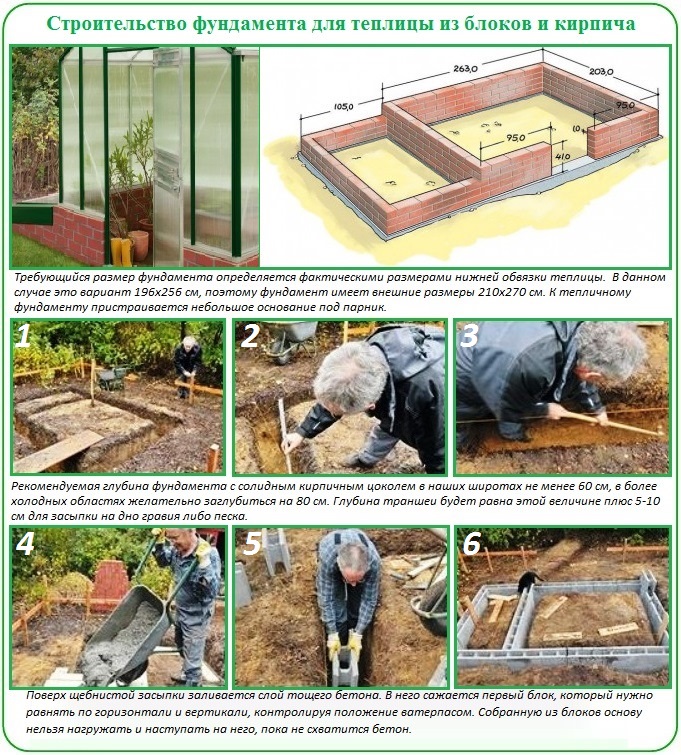
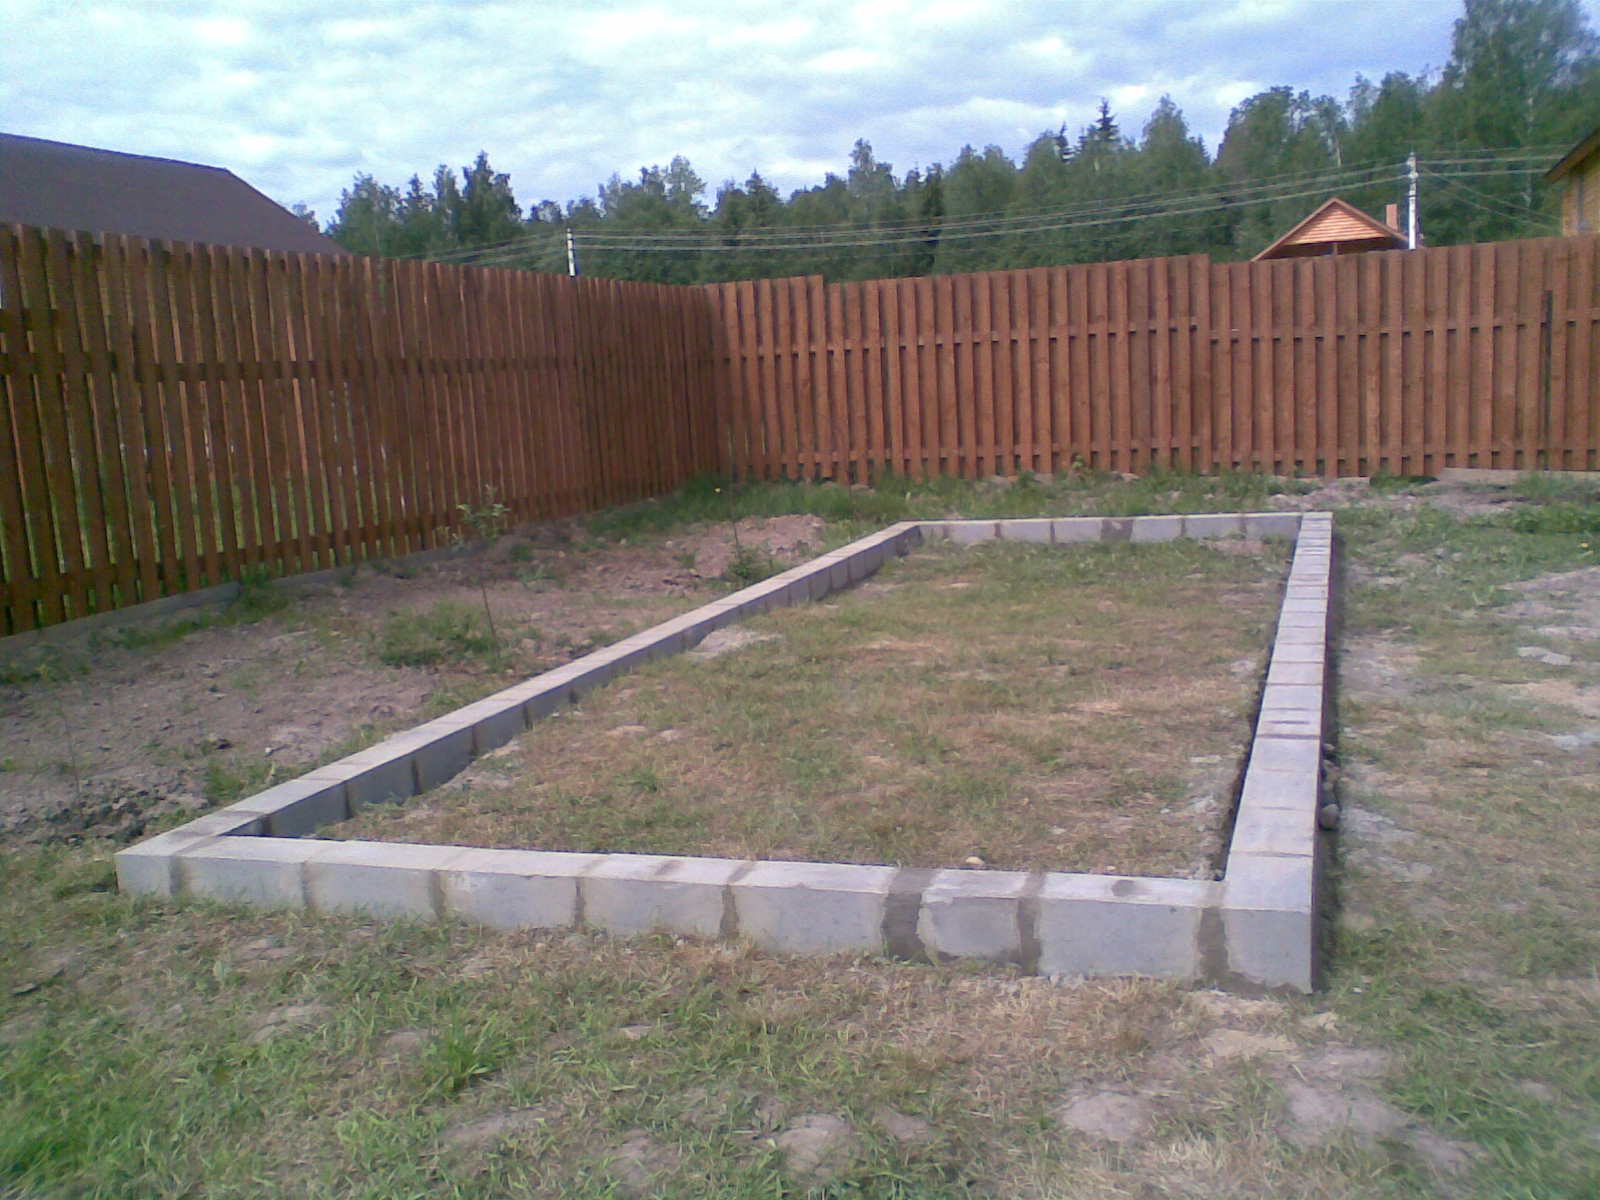
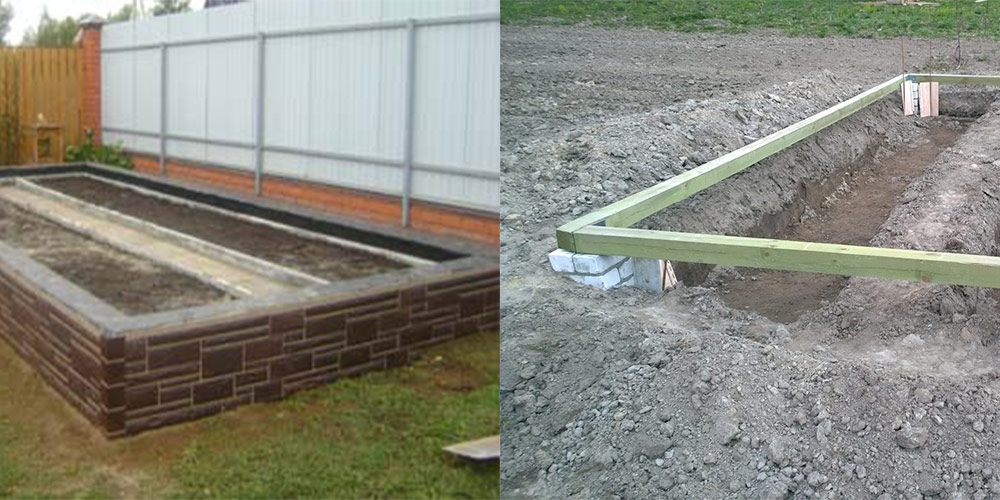
Block foundation
This type of foundation is distinguished by its high strength and high waterproofing properties. This option is ideal for areas located in lowlands and with high humidity, which, as you know, has a completely negative effect on plant growth. So, how to make a foundation for a greenhouse yourself?
- First, mark the dimensions of the future foundation on the site. Before digging a trench, it is advisable to decide on how wide the base will be, and where you will directly fix the greenhouse: in the middle of the base, closer to the outer or inner edge. In order to avoid mistakes. In the corners of the location of the future greenhouse, pegs are installed and a rope is pulled between them. It is advisable to dig a trench so that the rope is located exactly in the middle. With this option, the risk of calculation errors is minimal.
- As for the dimensions, the optimal width will be taken equal to 25 cm. The depth can be taken equal to 30-50 cm. For a greenhouse, it is more rational to install a shallow foundation, since the weight of the structure is not so big.
- A layer of gravel at least 10 cm thick is poured onto the bottom of the dug trench and carefully tamped.
- Next, a concrete mixture is prepared and poured into a prepared trench. Do not forget after pouring about the need to pierce the poured concrete to remove excess air.
- Separate blocks are pressed into the corners of the trench with freshly poured concrete and move further along the entire perimeter. Be sure to level the surface of each block to the building level.
- The remaining concrete solution is poured over the laid blocks.
- The surface of the poured concrete mortar should be leveled with a spatula. Such a foundation is usually arranged on the same level as the soil.
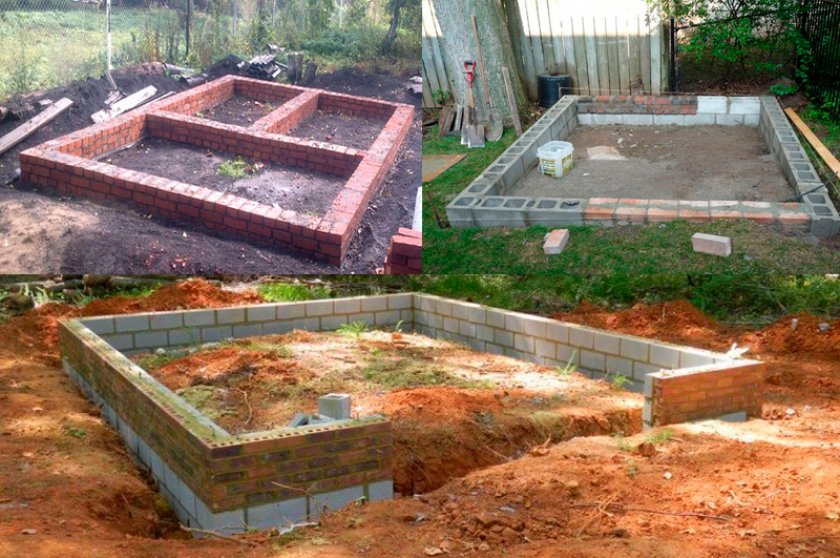
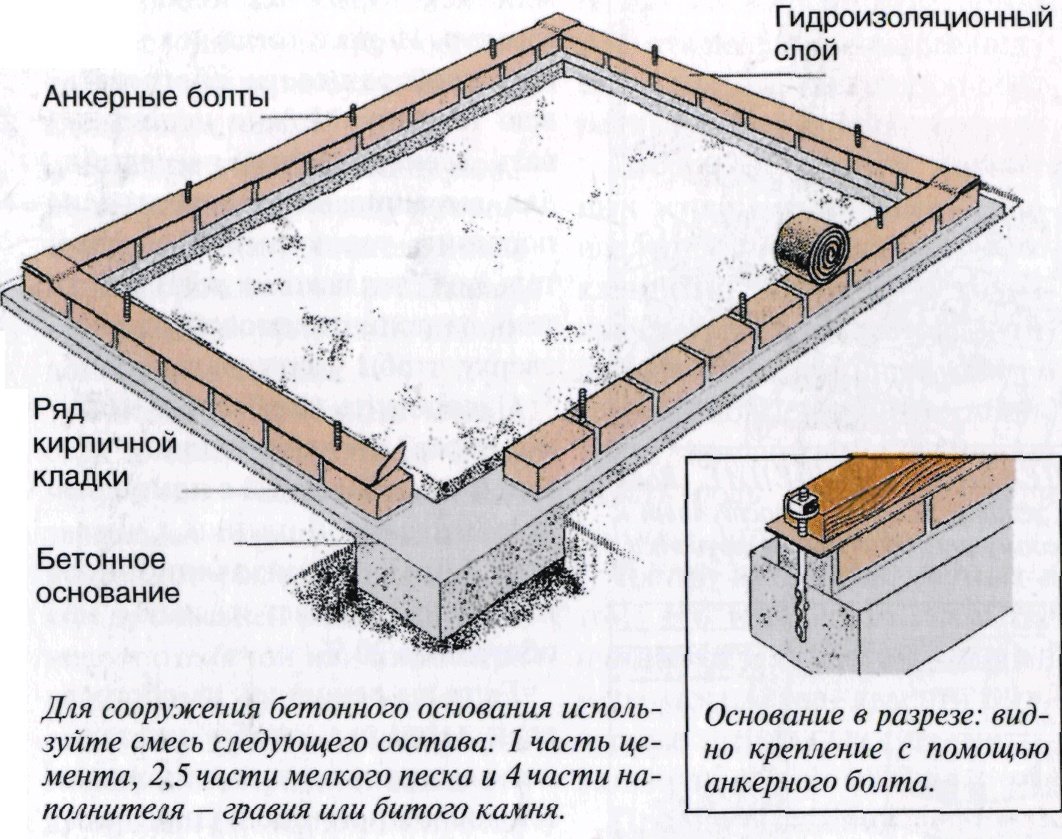
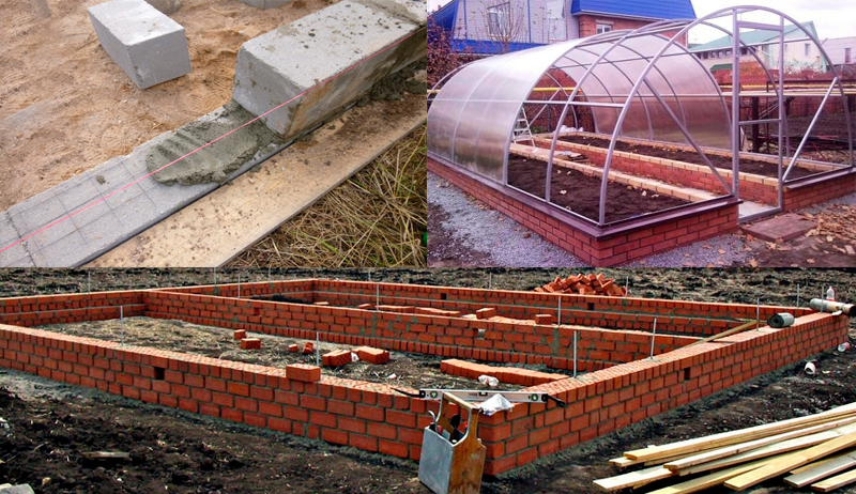
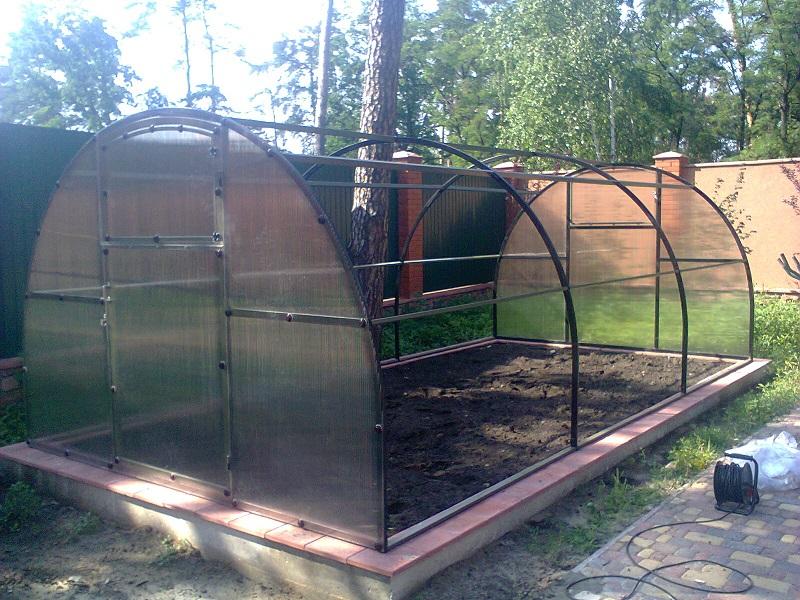
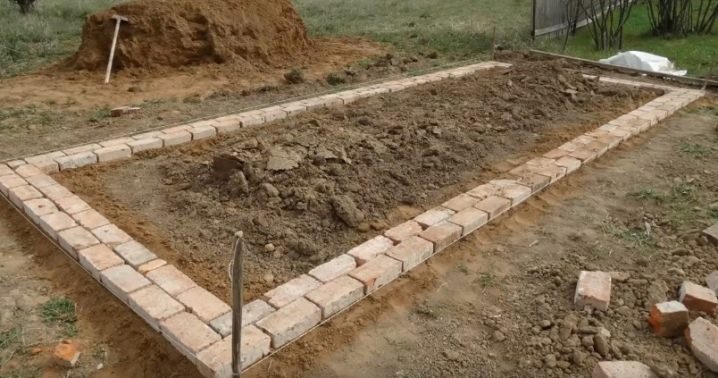
- Further, starting from the corners, frame bricks are laid out on the base, a distinctive feature of which is increased resistance to moisture and precipitation.
- It is necessary to lay out about 5 rows of bricks.