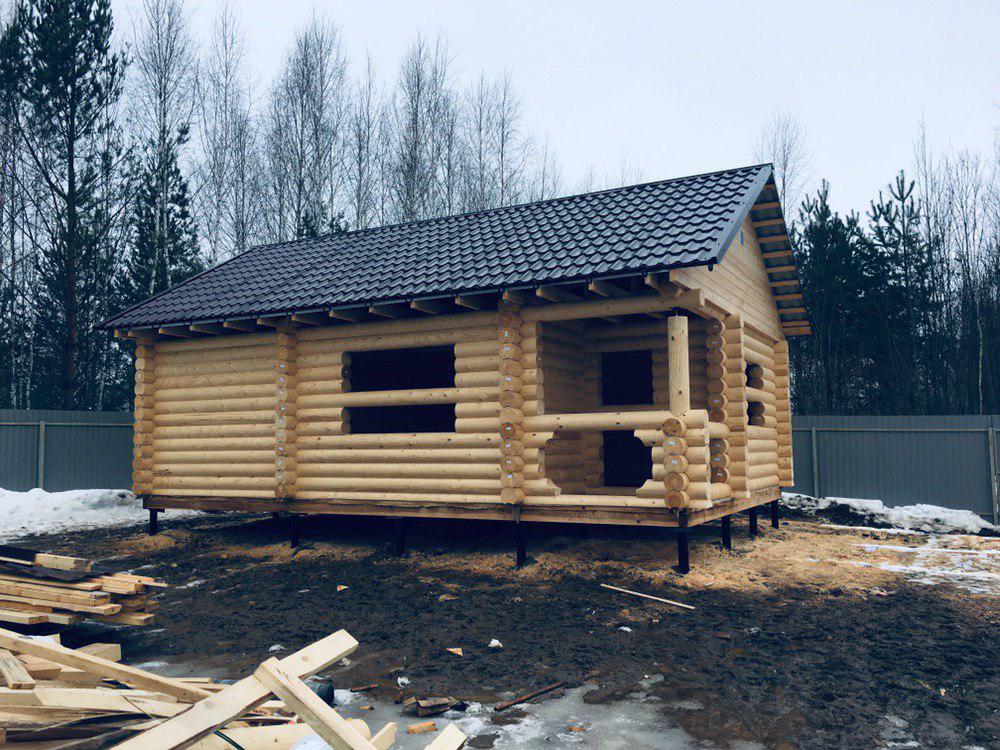
Floor installation
When building a bathhouse on screw piles, it is important not only to create a foundation according to all the rules and accurate calculations, but also to take the installation of the floor in this room seriously and responsibly. There are two options for its creation: the first provides for suitability for use only in the warm season of the year.
The second floor option will make it possible to enjoy bath procedures all year round. If the bathhouse will be used only in the warm season, simple wooden boards can be used for floor installation. However, then you should be prepared for the fact that water will constantly seep through these boards to the ground.
To install a leaking floor with a water drain on the ground, you will need the following.
| Materials (edit) | Specifications |
| Wooden beams. | Section size - 150 × 100 mm. If beams of this size are not available, others can be used. |
| Holders for beams. | For 1 meter of the bath area, 2 holders are consumed. |
| Sulfur floor boards, finishing boards. | Regardless of what kind of wood the boards are made of (larch, oak or other), the board must be processed and sanded. |
| Building tools. | Screwdriver, self-tapping screws, drying oil, brush. |

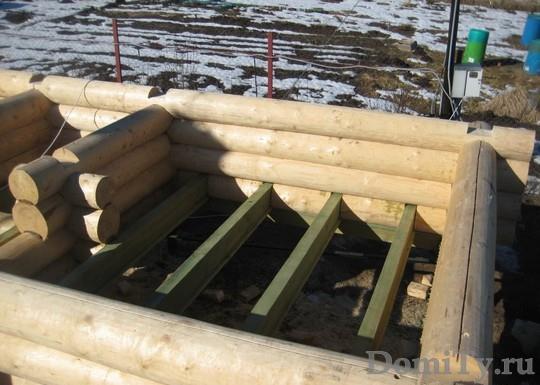
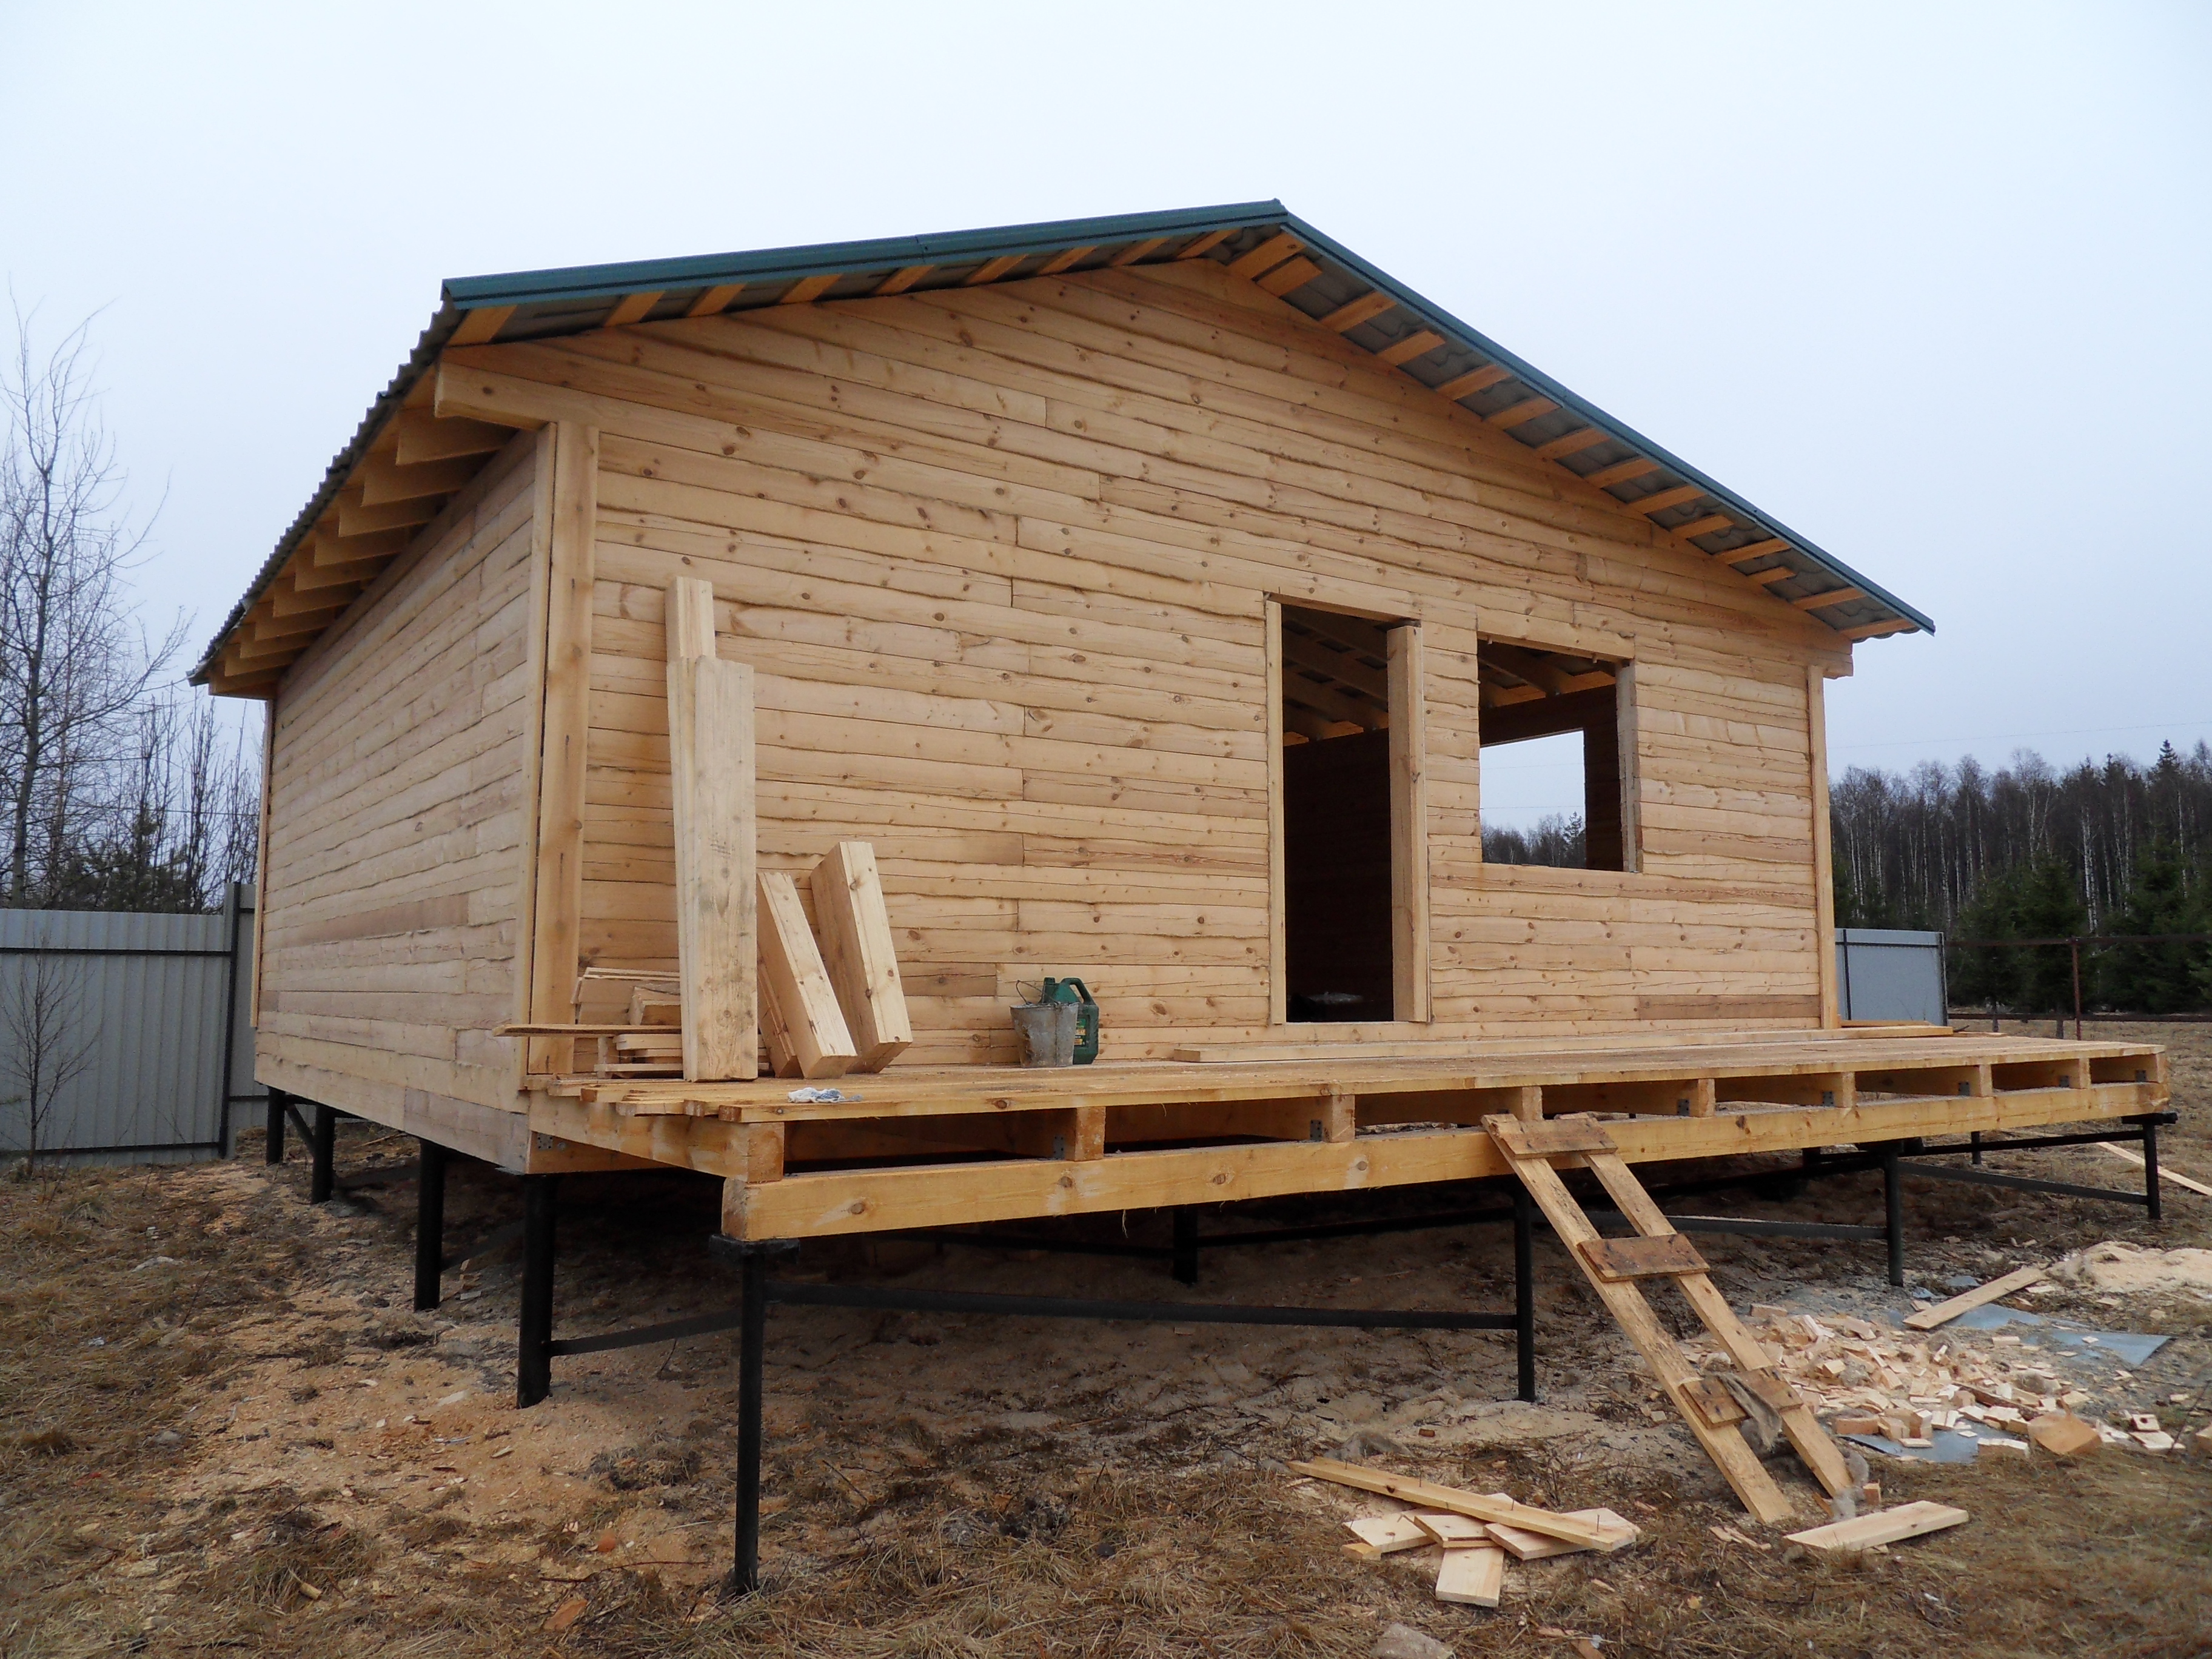
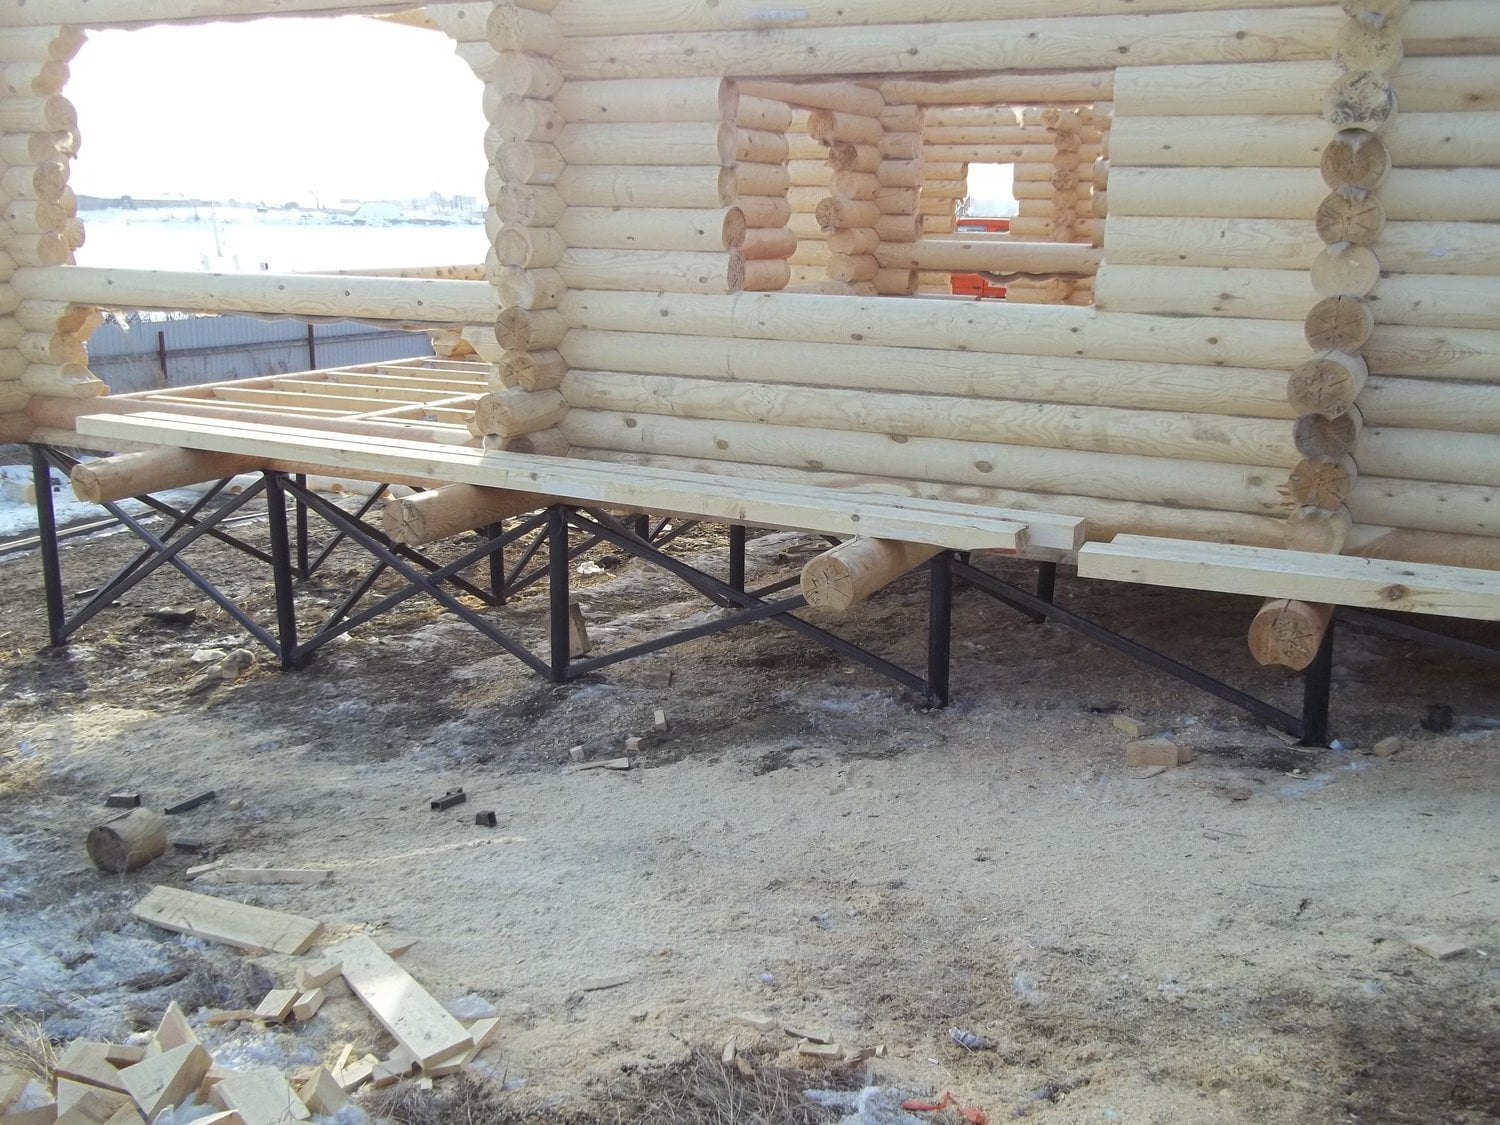
First of all, a strapping bar is laid on the piles. Then the holders for the timber are mounted with the calculation of their parallel location at a distance of 1 meter from each other. Then the beams are placed in the holders. In this case, it is necessary to observe the indent of each beam from the strapping bar. The distance of the indentation is 1 cm. This is how additional ventilation of the wooden floor is achieved.
The subfloor boards are laid on the beams. They are strengthened with a screwdriver and self-tapping screw. The final stage: creating a finished floor from sanded and processed boards. Gaps of 5–8 mm are left between the boards. The surface of the finished floor is covered with linseed oil in 2 layers.
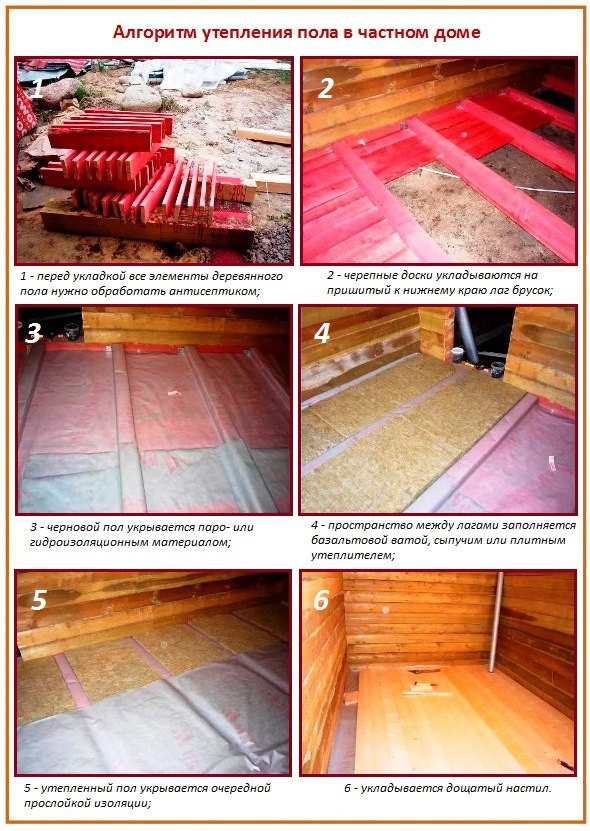
To create a warm floor in a bathhouse on screw piles, a little more work should be done. But in this case, "the game is worth the candle": thanks to the floor insulation in the sauna on screw piles, you can wash and use the steam room all year round. As in the first case, when installing a warm floor, beams are first laid and a rough floor is made. But the holders should be mounted so that a slope is obtained in the direction of the intended drain. To obtain a good flow of water, a slope should be made with a calculation of 1cm by 1 meter beam length. Then logs should be laid on the rough floor, fixing them with long dowels and a heater between them (it is better to use expanded polystyrene). This is how the floor is insulated.
The next stage: vapor barrier of the floor in the bath. For this, the EPDM membrane is laid with the absorbent side to the floor. It is also placed on the walls of the bathhouse to a height of at least 10 cm. The edges are fixed with aluminum slats. Simultaneously with these works, a sewer pipe for draining is installed as tightly as possible to the floor. All the resulting cracks are sealed with a sealant.
For the finished floor, tongue-and-groove boards are used. They are adjusted to each other using a mallet. In the place where there will be a drain, a sewer ladder is made.
This type of foundation, invented in Great Britain, has become widespread in Russia. He is also given preference in the construction of baths. The cheapness of construction, the ease of the installation process and its reliability are the reasons for the popularity of its application. The undoubted advantage of such a foundation is the ability to build different types of baths on it, which will last a long time. And it is possible to build them with your own hands.
Bath floor on screw piles
The method of arranging the black and final floor depends on the assembly method and material. If a bathhouse on piles is built from ordinary timber or logs, then only a rough floor is equipped in the room.

The flooring of the finished floor is started only after the completion of the shrinkage processes. If the box and the supporting elements of the bath are assembled from glued profiled material, then the rough tamping, insulation, waterproofing and finishing floor can be laid within a couple of months after the completion of construction.
The level of packing of lagged beams of the subfloor is selected below the plane of the beams of the screw piles. The difference in height can be calculated by adding the thickness of the padding boards, insulation and waterproofing membrane. After laying the sandwich on the floor, the plane of the foam insulation slabs should coincide with the strapping line of the screw piles, as in the video

Sauna on screw piles: floor insulation
To assemble the rough floor of the bathhouse, an off-grade board is used, you can even take low-grade timber or unedged timber. The subfloor does not affect the state of the screw supports, the main thing is that the material is of the same thickness.
Boards are stuffed on lagged beams with ordinary nails, no self-tapping screws, fasteners are hit at the ends of the inch, stepping back from the edge by 10-15 cm.

As insulation of the bath floor on screw supports, sheet expanded polystyrene is best suited, you can take penoplex or technoplex. For middle latitudes, the rough floor of the bath can be insulated with sheets of 50 mm thick, if the frost in winter is more than 40 ° C, then it is best to lay two layers of foamed insulation.
Advice! Masters advise, before laying the insulation, to lay a wooden lath with a section of 20x30 mm around the perimeter of the subfloor. Thanks to it, the surface of the slabs forms a drain slope towards the hole, the water will not stagnate and drain much faster.
Waterproofing the floor in the bathhouse on piles
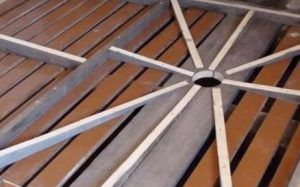
Before laying the waterproofing on the subfloor in a slab insulation, it is necessary to cut a hole for the outlet of the bellows of the water drainage system. The diameter of the hole in the expanded polystyrene should be equal to or more than 1.5-2 mm of the section of the corrugated or plastic pipe.
After installing the corrugation, you can lay the foil insulation. The best option for the bath floor on screw piles is the EPDM rubber membrane. The material is rolled out in a single sheet over the surface of the insulation, admitted to the walls by 25-30 mm per side.
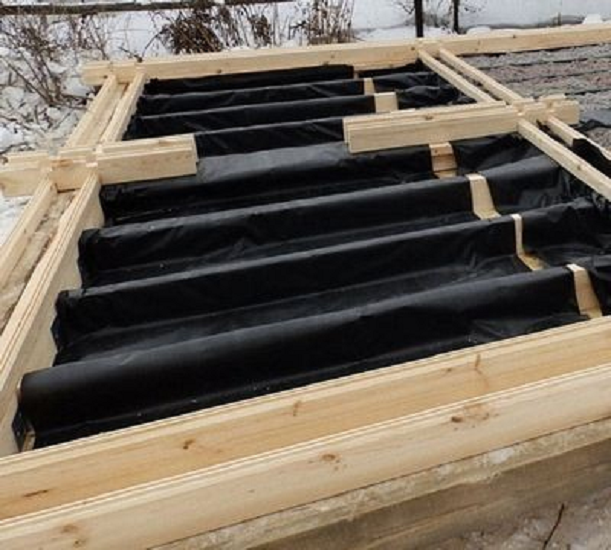
To hold the waterproofing sheet around the perimeter of the washing or steam room, the baths are stuffed with an aluminum sill, which presses the material to the insulation.
At the drain point, a hole with a diameter smaller than the internal diameter of the drain is cut out, after which the upper flange of the drain device is installed and the structure is tightened with a mounting screw.
Spilled floors in a bathhouse on piles
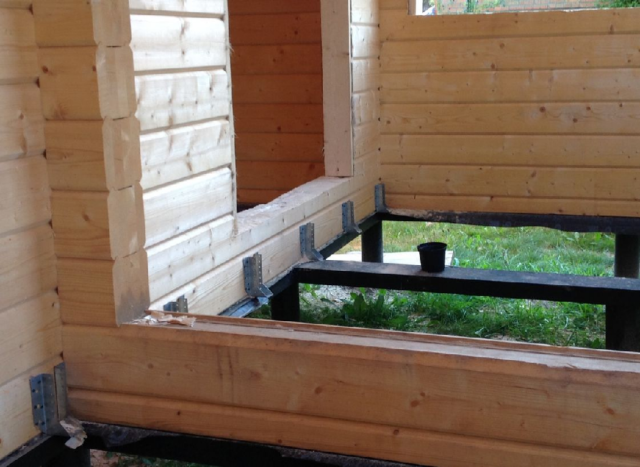
The next stage in the construction of the bath is the finished floor. Preliminarily, metal mounting "moths" are attached to the walls, on which the logs of the finished floor are laid. The distance between the beams depends on the size of the steam room of the bath, the screw foundation provides a high rigidity of the base, but experts recommend placing the floor in the bath on piles with a pitch of 50 cm between the beams.
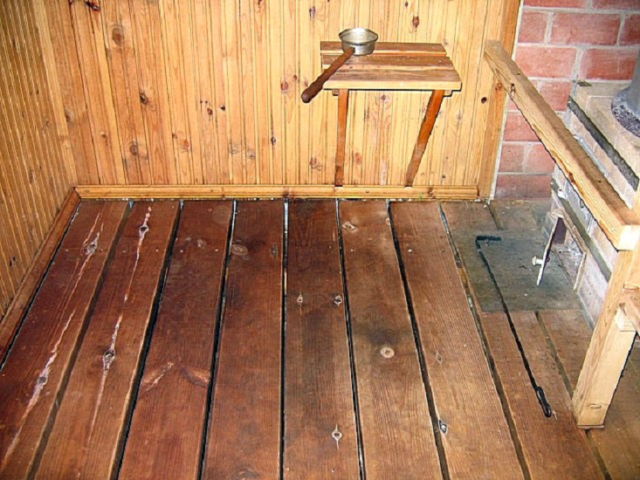
Floating floor boards are laid on the logs, usually floorboards with a thickness of 25-35 mm are made removable on wooden pins. The boards themselves are sanded and chamfered to avoid splinters and chips.
There are 1.5-2 mm gaps between the floorboards, such a scheme ensures reliable drainage of water even with a large number of washable ones, and the removable floor of the bath pile-screw foundation allows you to periodically remove the boards and clean the lower level.
Layout of the foundation and installation of the pile foundation on our own, strapping the foundation
Work begins with the preparation of the site - digging out the roots of large plants, removing 10-15 cm of fertile soil (the recommended stage when screwing in metal piles, mandatory when laying hammered or pouring supports from reinforced concrete) and the minimum leveling of the site under the future bath.
Optimum results are achieved when laying the foundation for a log-bath made of metal screw piles with a cross section of 108 mm or more. Supports are laid at the corners and under the bearing walls with a step of no more than 2.5 m, the exact number depends on the weight and number of storeys of the bath, the length depends on the depth of the stable soil layers (from 2 m and more).
The marking of the pile foundation is carried out in 2 steps - preliminary, with the designation of the places where the supports are screwed in with pegs and a stretch of the cord to check the level (diagonally, along the sides and in height) and the main one, after digging a pit about 50 cm deep.
After that, the support is inserted into the finished hole exactly in the center and screwed in using a long crowbar or a lever from a 2-3 meter pipe, put on the top of the pile. The work is carried out by at least two people (one worker holds the pile in an upright position, the other presses on the scrap and turns the pile).
To avoid mistakes, the corner piles are screwed in first (taking into account the requirement that the main axis of the support coincide with the center of the future log or bar). And only then, after re-checking the diagonal and sides, the rest of the piles are screwed in, usually having the same diameter.
The piles are screwed in until the maximum stop and the end of the swing and subsidence of the support down.
Separate requirements are put forward to furnace foundation, which has a direct dependence on its weight and design. So, a separate, not connected with other structures, a small slab foundation is laid under the capital masonry oven made of bricks. With a unit weight within 100 kg (modern wood-burning fireplaces, gas models), it is enough to additionally strengthen the floors in this place, adding, for example, a beam.
The installed piles are cut with a grinder along the lines previously marked with fishing line and chalk or paint. The evenness of the fishing line before cutting is checked with the help of a laser level, by analogy with screw-in, the marking begins with corner piles. The internal space of the piles, if necessary (namely, high risks of displacement of supports by unstable soils), are filled with sand or concrete. In other cases, the stage ends with the preparation of the piles for lumbering.
A log house rarely needs a monolithic reinforced concrete block, the simplest and most practical way to prepare piles for fastening the lower crown is to weld on top of thick (from 5 mm and higher) metal plates with dimensions not less than the thickness of the bar. Holes for fasteners (anchor bolts or self-tapping screws) in the plates are prepared in advance.
At the end of the welding work, the outer parts of the piles and plates are treated with bitumen mastics or anti-corrosion paints.
At high risks of pile displacement, the plates can be changed to a metal channel, but in most cases this is not necessary. Immediately before putting the bath into operation, the pile foundation should be insulated with a wick made of wood and polystyrene foam or covered with special panels.

Screw piles: advantages and disadvantages in the construction of a bath

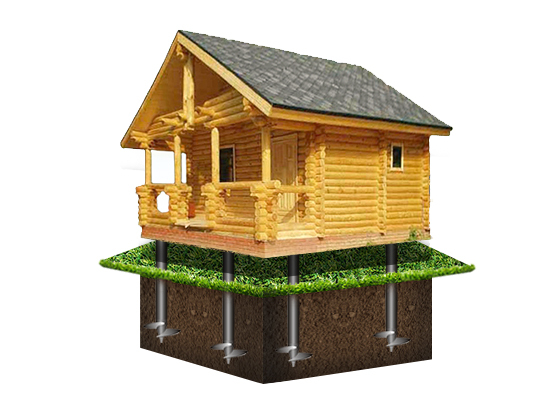
Screw piles made of steel pipes, which are equipped with blades and a sharp tip, with their help, the structure is screwed into the ground. The tip carries the main support load, redistributes the load from the structure to the ground, prevents the pile from being pushed out of heaving soils in winter.
Screw piles are used as a foundation for light frame buildings, while the installation of such a foundation is possible almost anywhere, even with the most difficult and difficult terrain.
The main advantages of screw piles:
- Ease and speed of installation - heavy special equipment is not required for the construction of the pile foundation. The design does not require preliminary preparatory work on wells.
- Efficiency - foundations for screw pile log houses are much cheaper than classic concrete foundations.
- Reuse - if necessary, it is allowed to unscrew the piles from the ground and use them in the construction of a new facility.
- Strength and stability - the pile foundation provides high strength and stability of the building, especially with possible heaving of the soil in winter.
- Suitable for use on any soil, including water-filled, sandy, peaty or clayey.
- Use on any terrain.
Cons of screw piles
First of all, this is due to the quality of the metal from which the structures are made, as well as the observance of the technology of protecting parts from rust
It is very important that the manufacturer carefully observes all the established standards in the manufacture of structures (used steel grades; conformity of pipe wall thickness), and also conducts high-quality anti-corrosion insulation of products. Pipes immersed in the ground are adversely affected by stray currents, which accelerate metal corrosion and shorten the life of the piles
Types for building a foundation for a bath
As a rule, a bathhouse is not a large object, and this is the main condition when choosing a foundation. Driving posts will require special construction equipment, which is expensive to rent. In addition, on each hammered reinforced concrete pile, you will have to arrange a head. It turns out that this type of base for the construction of a mago bath is suitable, therefore, many prefer screw and bored options.
Bored
This option is used for almost any small object, which includes a bath. There is only one difficulty here - well drilling.
The bearing capacity of the bored pile column is formed as a result of work in two planes - from the support located on the soil layer lying under it and from the interaction of the lateral surfaces of the column with the soil in contact with them.
Distinguished by such features, the bored pillar may not reach a strong soil layer located at great depths, but fulfill its functional purpose due to the work of the lateral parts. In this case, the piles are called "hanging" and it is not recommended to use formwork structures for their construction.
You can arrange formwork from steel, asbestos-cement or plastic pipes, use a box-section structure for this, but in this case, the cost of installing a foundation base will increase by about two, because besides the formwork, you will need piles that retain the bearing capacity. The concrete solution is poured immediately into a well drilled in the ground.
Taking into account the fact that the bath is not capable of creating a significant load, calculations for the installation of bored pile supports will not be needed. But there is a simple technique that you still have to use:
- the diameter of the wells should be twenty to thirty centimeters, the drilling depth should be from two to two and a half meters. If this condition is not met, this means that the pile has reached a dense soil layer, and it can be left at that depth;
- pile supports are installed at corners, external walls and internal partitions;
- installation step - no more than three meters (under the bath 6 x 4 m, if the bearing internal wall is one - 9 supports).
If it is impossible to arrange wells of the specified diameter, it is allowed to reduce their diameter to ten centimeters, installing small supports in triangles with a step of 30-40 cm.
Screw
Such supports are suitable for any small structure. Their bearing capacity depends on support on solid ground.
Among the main advantages are:
- maintaining the integrity of the surface layer;
- the speed of building the foundation;
- acceptable installation costs.
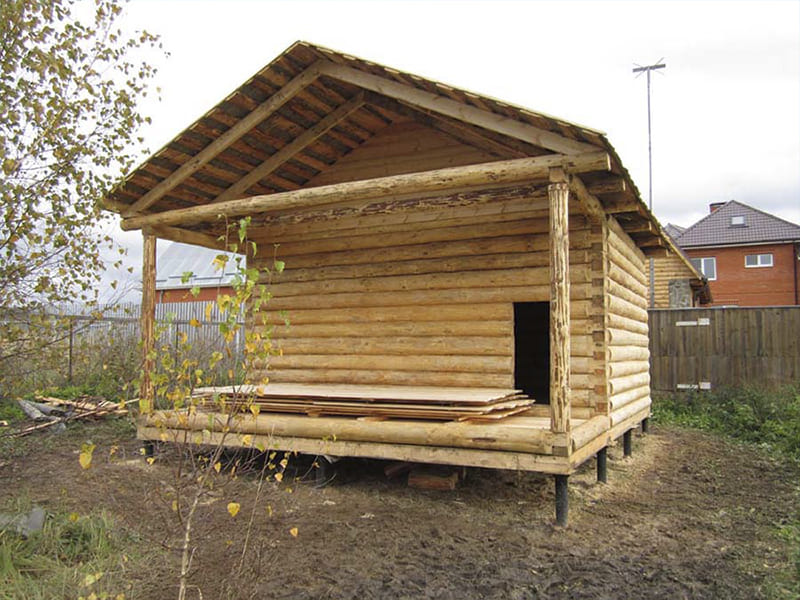
The pile, which is a steel pipe with blades, is screwed into the soil mix. On the upper sections of the pipes, supporting frames made of metal (grillage) are arranged, on which the structure rests. It turns out that the bathhouse "hangs" in the air. The screw supports are exposed every two and a half to three meters, without fail - at the corners and load-bearing walls. Pile diameter - from 108 mm.
Technologically, the process does not cause difficulties, but there are certain features:
- the pile should be buried at least 1.6 m, for which it will be necessary to conduct a study of the soil composition;
- in the process of screwing in, scuffs will appear on the walls of the pile, which will entail corrosion of the metal;
- the installation of piles should be carried out strictly vertically, the heads are aligned along a single horizontal line. This entails additional measures for trimming or building up the installed supports;
- since the bathhouse on a pile-screw foundation is raised above the ground, the water supply and drain for the bathhouse will have to be carefully insulated;
- for greater stability, builders recommend reinforcing them before concreting the piles;
- when performing work in the winter season, preliminary drilling should be carried out, reaching the point of soil freezing.
Grillage - as an integral part of the pile foundation

The task of the grillage is to tie the piles into a single rigid structure and evenly distribute the load along the entire perimeter of the structure. This is especially true for a bath, where some local areas may experience increased impact from furnace and boiler equipment, water containers and other things.
The grillage can be:
- Prefabricated - recruited into a single structure by means of separate standard elements;
- Monolithic - erected on site by pouring heavy concrete into the formwork;
- Prefabricated - monolithic - as a kind of intermediate type, the use of which also takes place in everyday practice.
According to the orientation, the grillage is high and low. Low - is laid at a certain depression from the day surface and removes some of the load from the piles, redistributing it to the soil. High - located above ground level and transfers the load exclusively to the piles.
In the practice of bath construction, the most widespread is a high monolithic grillage reinforced with a metal bar.
What is a pile, and what type are they
A pile is a metal, wood or reinforced concrete rod or pipe that is buried in the soil and gives the foundation of a building or structure additional bearing capacity. If metal and reinforced concrete products themselves are endowed with sufficient strength under mechanical stress during their installation, then wooden elements, in most cases, require some preparation. The lower end is hewn into a wedge, and the upper end is protected by a metal plate, so that the upper end does not rivet or "break" during hammering.
By the type of load distribution, the piles for the bath are supporting and hanging:
- Support - interacts with the ground, mainly with its lower end. Such piles are long and must be supported by the underlying soil layer with sufficient bearing capacity;
- Hanging - interacts not with the end, but with the side walls, due to the appearance of a "soil shirt" on them. The shirt is a layer of soil that adheres to the pile during its penetration into the ground, forms a single whole with it, and it already adheres to the surrounding soil and keeps the pile suspended, without support at the bottom point on the solid and durable underlying layer. Such piles can be significantly shorter in length than support piles.
3> Materials for making piles
As we have already said, a pile foundation for a bath can use various materials for the manufacture of working elements. Let's dwell on this in more detail:
- Wooden piles. For their manufacture, a long forest of coniferous trees is used. The most affordable options are pine and spruce. Larch is a somewhat more expensive material. In exceptional cases, primarily due to its high cost, oak is used. Such piles can be: single, composite and batch.In most typical situations, due to the low weight of the bath structures, simple type piles are used;
- Reinforced concrete piles are standardized metal-reinforced heavy concrete products. The strength characteristics of a conditioned product with a section of 300 x 300 mm allow you to confidently work in soils of low bearing capacity at a full length of up to 12 meters. Naturally, in the reality of bath construction, the use of such a quality is unlikely, however, as an indicator of opportunities, this is demonstrated quite clearly. In addition, piles of this type are distinguished by enviable durability, even when used in heavily watered soils or directly in water;
- Metal piles. The most expensive type of the listed. The pile foundation for a metal bath, in the overwhelming majority of cases, is made of pipes with a diameter of about 6 inches or 152 mm in metric terms. Practice shows that they are used when the owner has at his disposal the material, inherited on the occasion and inexpensively, and he is tempted by the possibility of quickly mounting the base through the use of special equipment. For example, a hydraulic hammer based on a JCB-3 wheel excavator-loader. Fast, efficient and reasonably acceptable in terms of the cost of a machine-hour of operation of the installation. Methods of protecting metal from structural steel should not be neglected. After all, it is susceptible to manifestations of corrosion in a humid environment. In most practical situations, it will be sufficient to coat the working part of the pile with a waterproofing mastic based on modified bitumen.

Attention! In some cases, when pipes of insufficient cross-section are used to confidently hold the bath structure, each element is additionally reinforced by filling the cavity with heavy concrete with intermediate shrinkage of the array with a manual rammer or vibrator. At the exit we have a kind of combined metal-concrete pile
Walnut flour cookie recipe
There is no flour in this cookie at all, so it will ideally fit into the diet, moreover, it can be used by people suffering from cereal intolerance. Cookies are prepared easily and quickly, and their taste is very pleasant and unusual - after all, flour in this recipe is completely replaced by nuts. The amount of sugar can be increased or decreased as desired - that's all depends onwhat degree of sweetness you like best.
Mix 2 eggs and 70 g brown sugar until smooth, add 200 g of any nut flour. You can grind several types of nuts for a change, and add a pinch of salt, cinnamon, cardamom, lemon zest, or a few drops of vanilla essence to the dough for piquancy.
Roll into walnut-sized balls, place on a baking sheet covered with pastry paper or silicone mat, and press down slightly. Bake for 15 minutes at 180 ° C. Don't worry if cracks appear on the surface of the cookie: this is as it should be. Hazelnut cookies are covered with a crust on the outside, but on the inside they are soft, tender and crumbly. Enjoy a healthy dessert!
Flourless nut cake
This light and airy cake with hazelnut flavor will appeal to the strictest gourmets, as it combines sophistication and principles of healthy eating. This is an incredibly tasty and delicate dessert, especially if you use whipped cream for the layer.
Grease a baking dish with butter, lightly sprinkle with flour, add the nut mass and bake for about an hour at 170 ° C. When the top of the sponge cake starts to spring, turn off the oven, remove the mold and let the sponge cake cool slightly in it. After that, carefully remove the biscuit from the mold and leave on the table until it cools completely.
Cut the biscuit into 2 or 3 cakes, whisk 500 ml of heavy cream into a strong foam, lay the cakes on top of each other, brushing them with cream.Also garnish the cake on top, then sprinkle with chopped nuts. Feel free to cook a nut cake for the holidays - all guests will like it!
Try sprinkling nut flour on any salad or porridge - the dish will immediately sparkle with new flavors. Eat nuts more often, especially in winter, when the immune system weakens, treat your household with mouth-watering snacks and experiment in the kitchen when you are in the mood!
What to look for
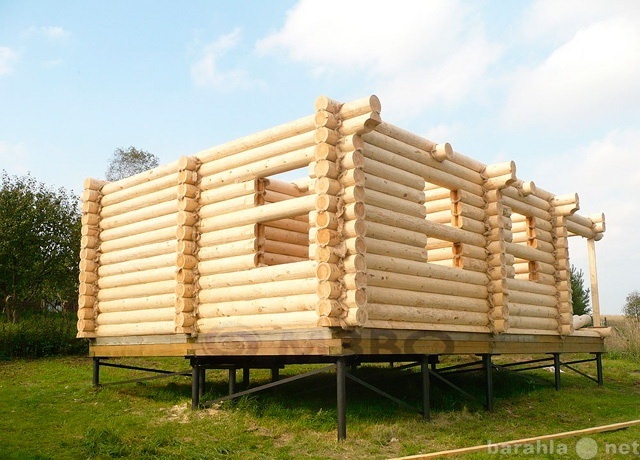
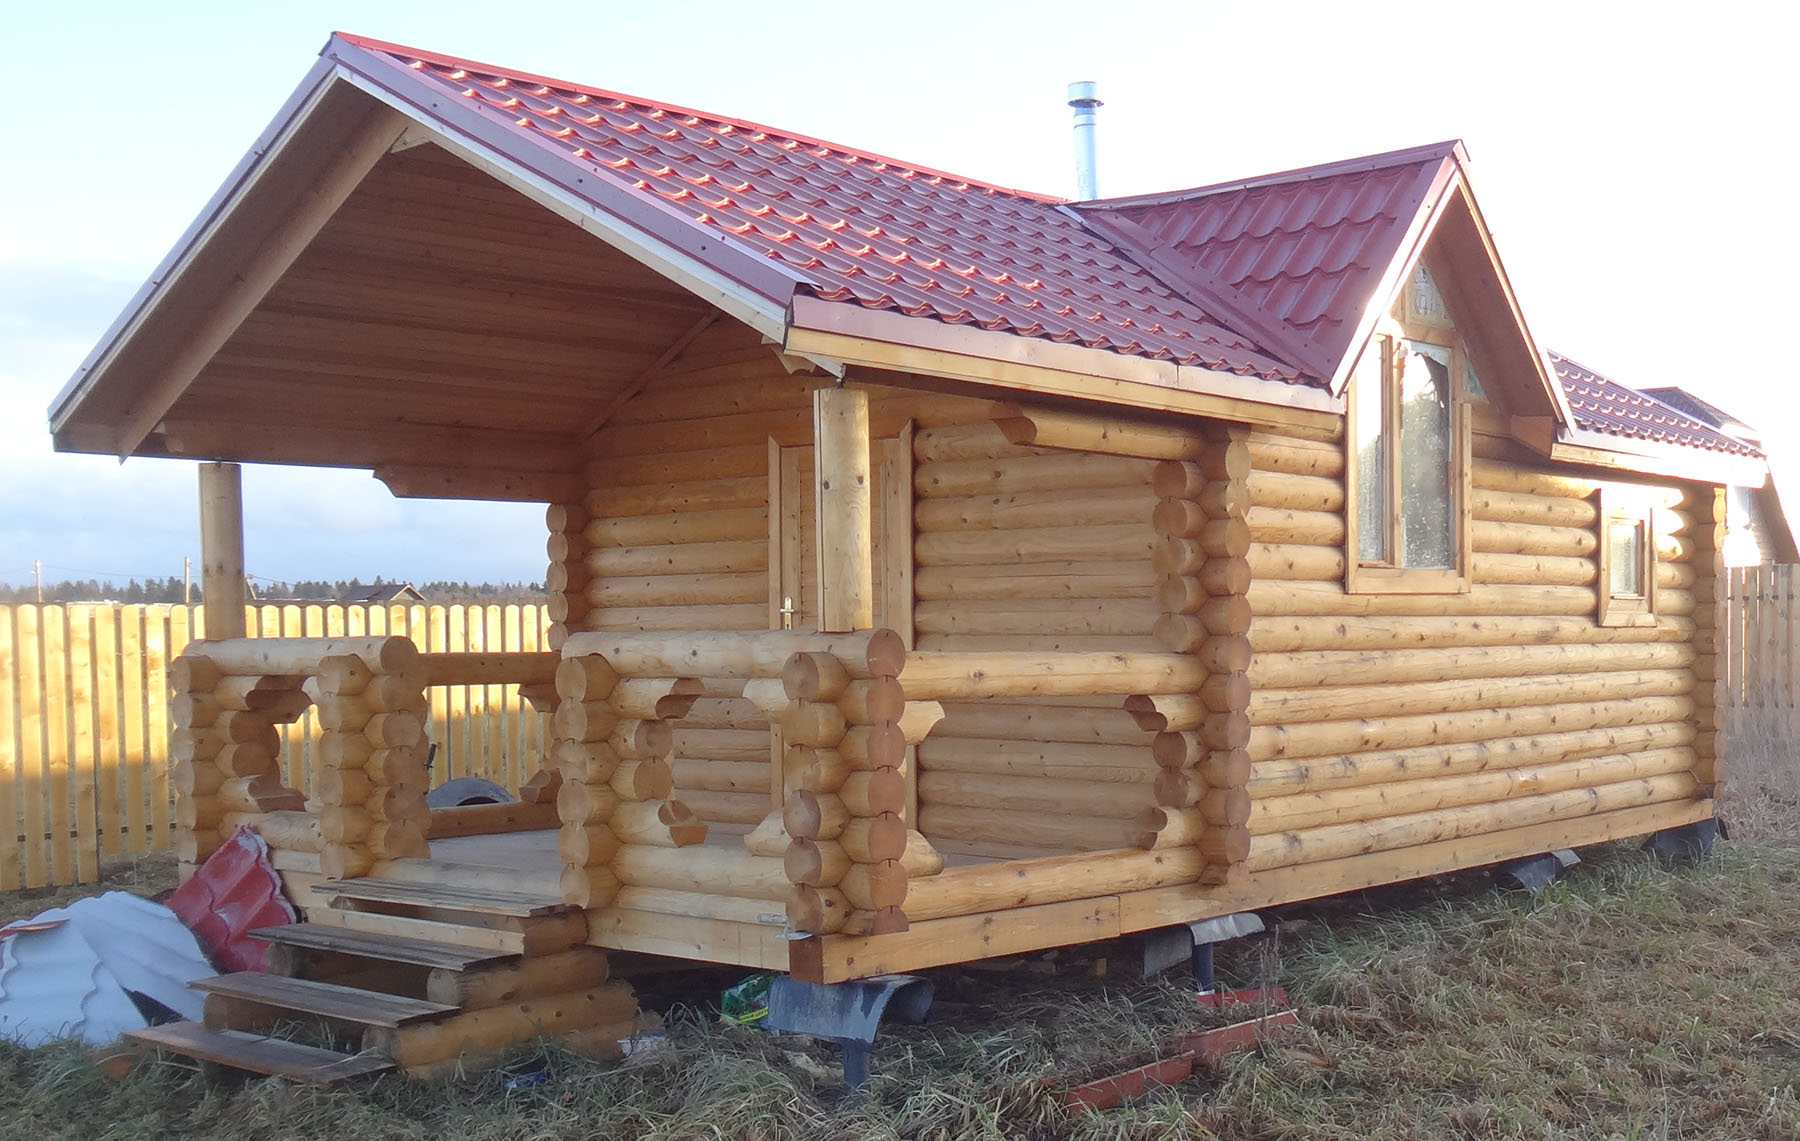
On screw piles, lighter designs of baths are usually erected with their own hands. You can build brick walls on a concrete grillage, slab, but this will require a rigidly tied pile field. Wood-based construction reduces overall weight and thermal conductivity.
The piles are screwed in with a clearance of 2 ÷ 3 m, depending on the rigidity of the base beams. It is advisable to tie the central pillars with a channel to support the lag.
 Organization of drain
The rise of moisture from the pillar is prevented by laying a layer of roofing material on the head, protruding a couple of centimeters along the edges.
There should be a drain in every room. Where water is not used for washing, it is used for cleaning and disinfection. If you plan to visit the bath once a week or less often, do not put plums with a water seal. They will dry out, the smell of sewage will appear. In this case, it is better to install a dry seal.
Tape supports for a log house
The blockhouse of a bathhouse is allowed to be installed on strip foundations made of monolithic reinforced concrete, natural stones (cobblestones, rubble). It is allowed to arrange a bath on prefabricated tape bases, for which reinforced concrete blocks are used. Do not assemble precast concrete with your own hands - you will have to call lifting equipment.
 In central Russia, it is enough to equip a shallow foundation for a log house
Distinguish between shallow and conventional strip foundations. A shallow tape will require digging trenches with a depth of 0.3 m to 0.7 m. Conventional tape bases are buried to a distance of 1.7 m.
What foundation to choose for a log bath? To answer this question, it is worth determining such indicators of the site as the depth of freezing, the composition of the soil and the level of groundwater.
If the site contains weak soils with a low bearing capacity, it is best to choose the option of a conventional strip base, but it is worth remembering that work on arranging a strip under a frame will require a lot of labor and time. After marking the foundation on the site, you will need to dig a large volume of trenches, install the formwork, make a reinforcing cage, after which you can start pouring the concrete solution.
The finished foundation-tape made of monolithic reinforced concrete is gaining strength for about a month, so you should not plan the start of construction in the autumn period or the beginning of winter, so that you do not have to perform a complex of additional conservation work foundation for the winter.
Watch a video on how to make a tape base and a concrete sub-floor for a bath with your own hands.
Stages of work
To install a screw foundation for a bath, you have to perform the following sequence of actions.
Determine the depth of immersion
This value depends on the level of dense soil layers. The fact is that the device of the "hanging" version of the foundation ultimately ends with subsidence or deformation of the grillage part, which entails the destruction of the outer walls.
Conventional calculations by definition of bearing capacity soils allow reliable data to be established, showing only the current situation at the construction site. In the event of a change in the level of groundwater, seasonal movements, heaving from frost, all your calculations will lose their relevance.
There is only one, but the most correct way - trial drilling or complete installation of one pile support. The desired value will be the depth at which the pile will begin to contact with a dense soil layer.
Determining the height above the soil surface
The following factors influence the height of the upper parts of the pile supports:
- snow level in the winter season;
- flooding with water during floods and rains;
- location of groundwater.
You can find certain data in the current SNiPs, others will have to be clarified in geological or meteorological stations.
The main goal is to raise the bathhouse on a pile foundation to such a height as to exclude or reduce the degree of negative impacts. As a rule, the bath is raised above ground level by forty to sixty centimeters, which is quite enough to exclude the contact of the walls with snow and water.
Benefits of screw piles
Screw pile SVL-250 / 76-1000
- With the help of screw elements, even large buildings from logs and beams can be successfully erected without fear of uneven subsidence. Regardless of the type of soil, the shrinkage will be uniform.
- Installation takes little time.
- The bathhouse can be built near a lake, river or near flooded areas, regardless of the level of groundwater.
- During the change of seasons, the supports do not move.
- Due to their sharp shape, screw piles are well deepened to the required size.
- This is a relatively cheap way to make a foundation (compared to other methods).
- Environmental safety for the surrounding landscape.
- Convenience and versatility of use.
- There is no need to carry out earthworks.
First, on a site cleared of vegetation, marking is carried out along the perimeter of the foundation. Then the stage of installing the supports begins. They can be installed at different distances. The exact gap between them is determined by the characteristics of the soil.
If the building is small, then it is enough to screw them in at a distance of 2-3 meters. In case of heterogeneous soils for structural strength, the piles are lowered to different depths.
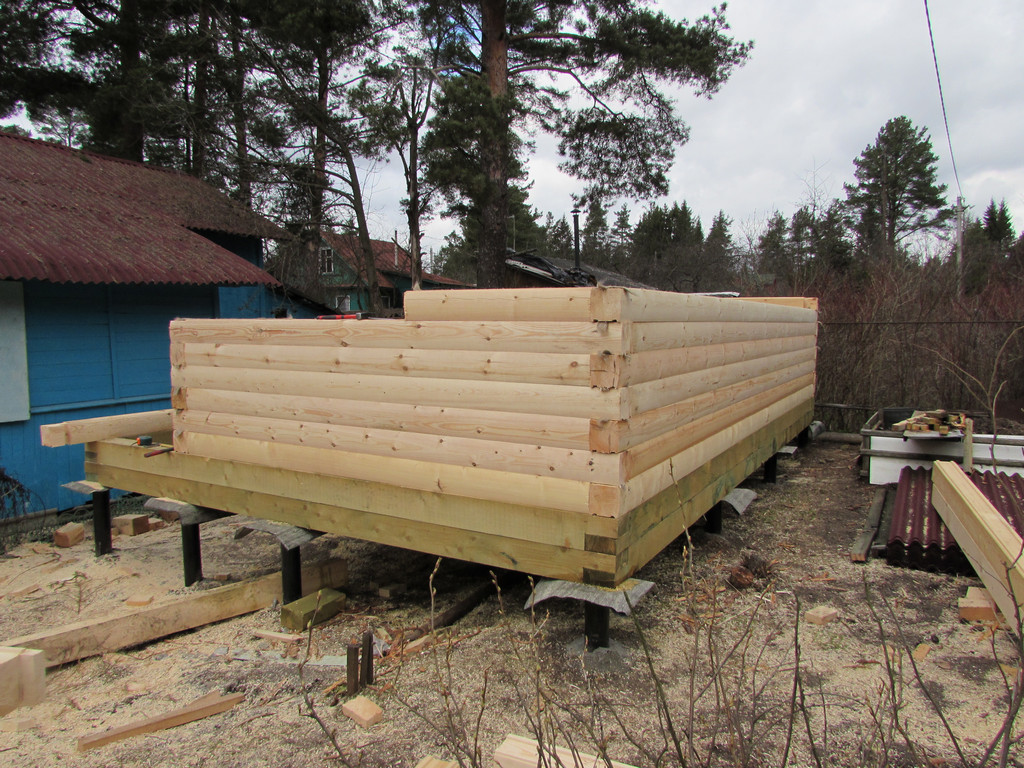
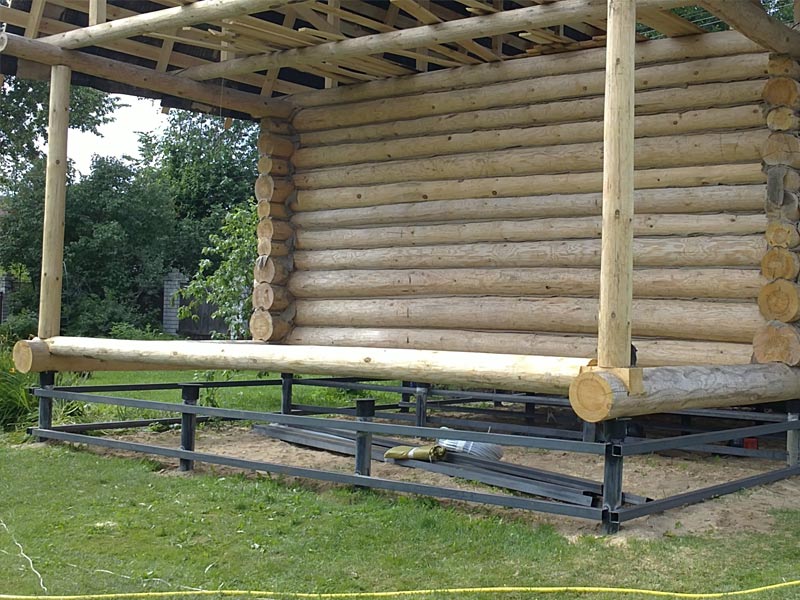
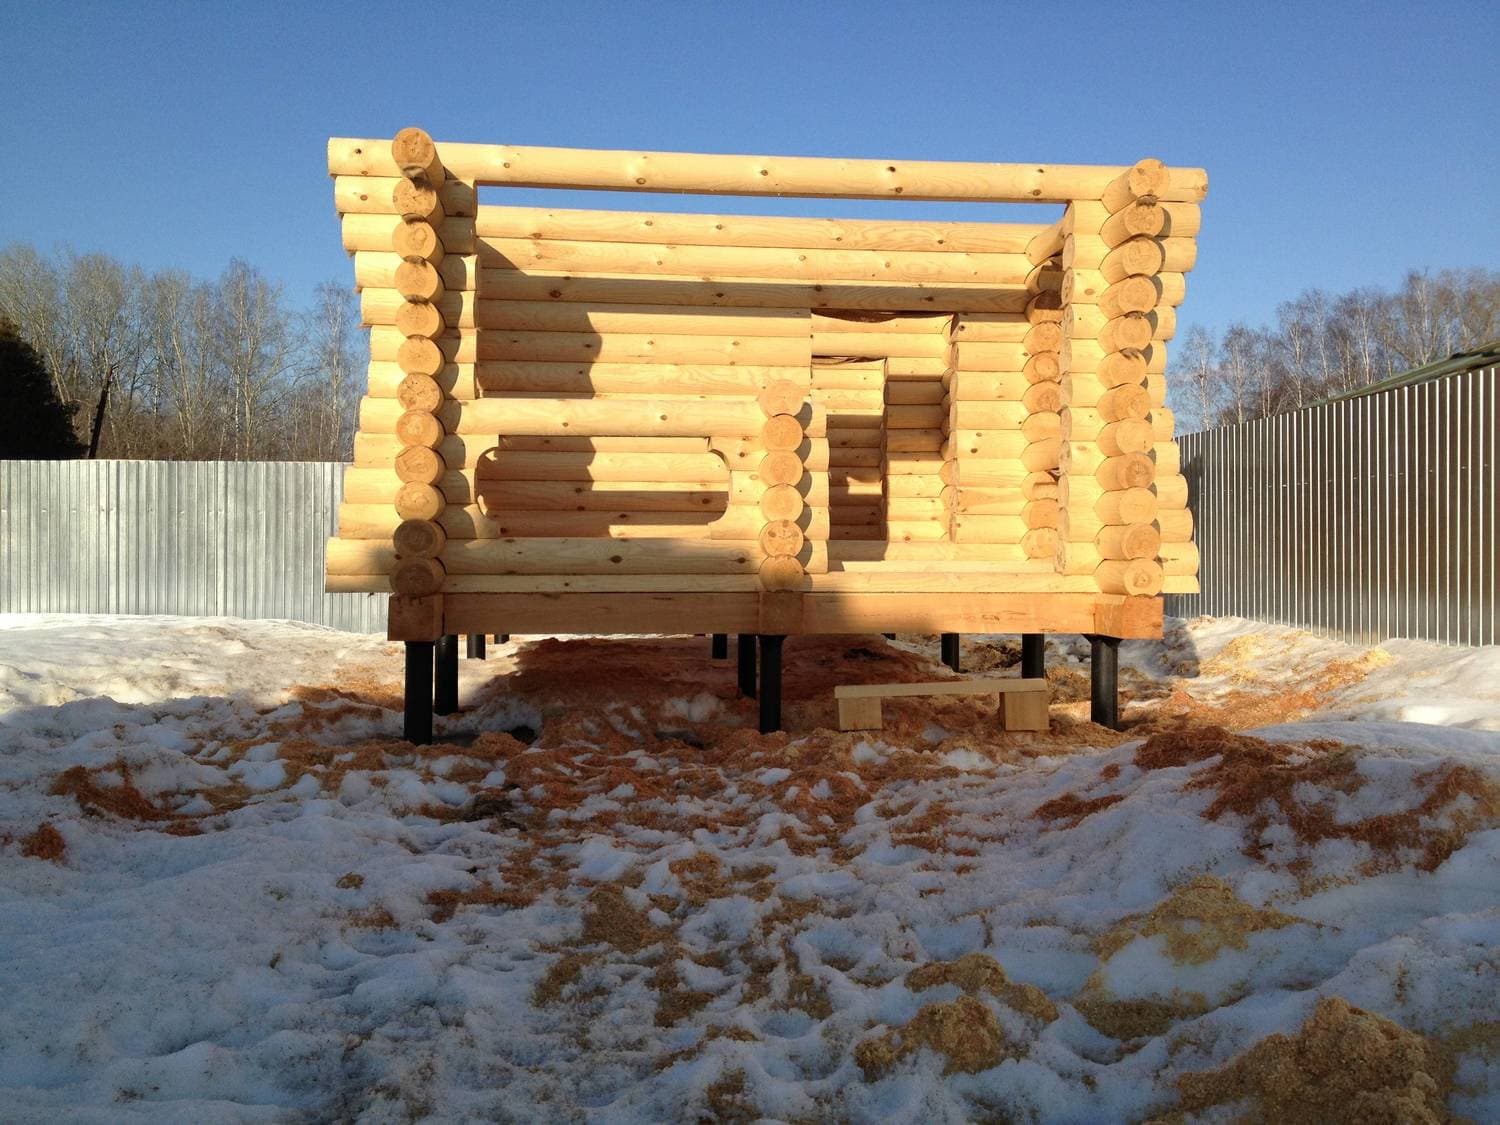
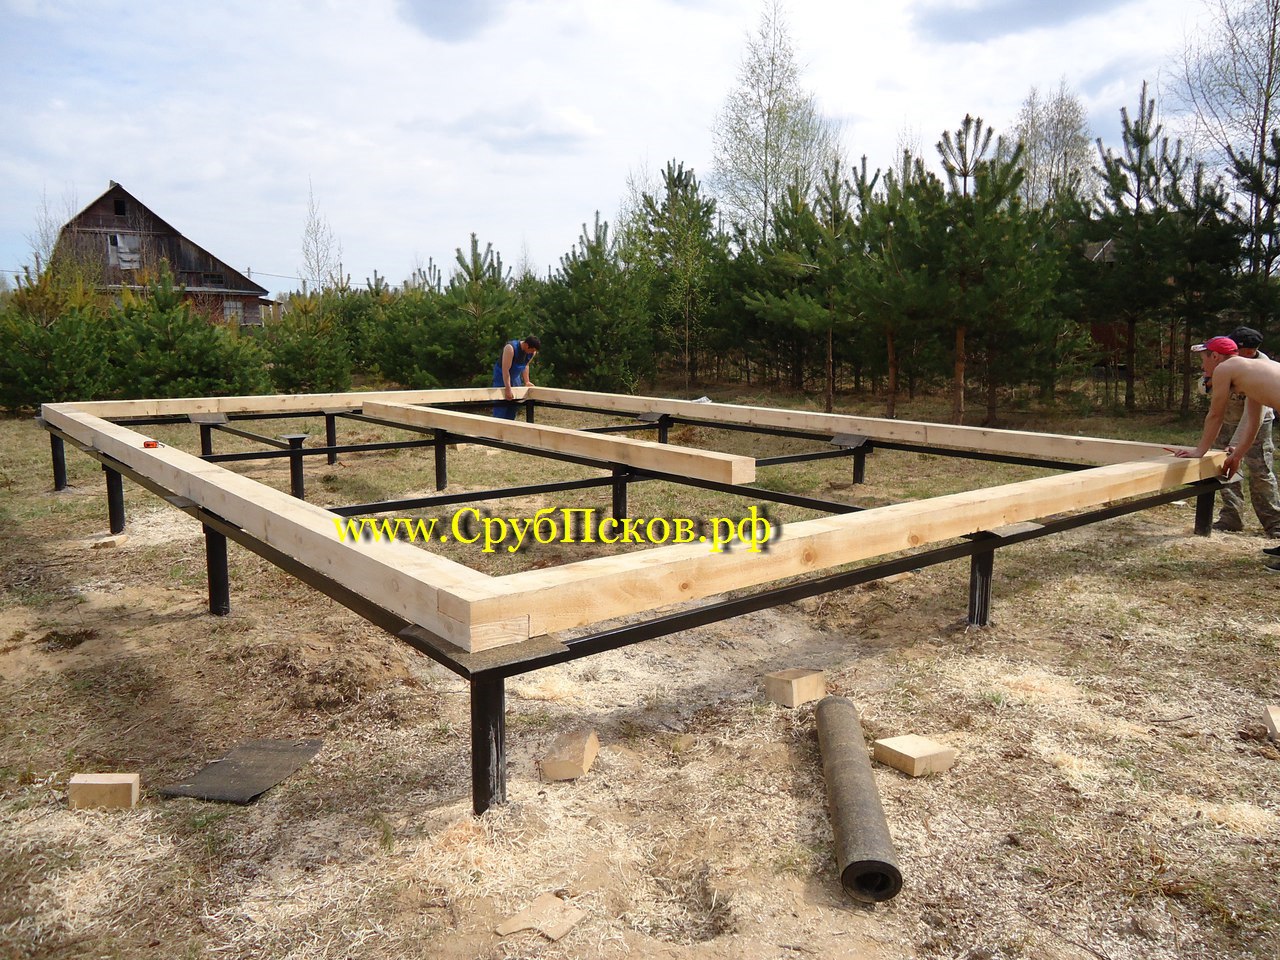
When the required number of piles is screwed in, heads of a standard diameter - 250 x 250 mm are attached to each of them by welding. Then the timber is laid.
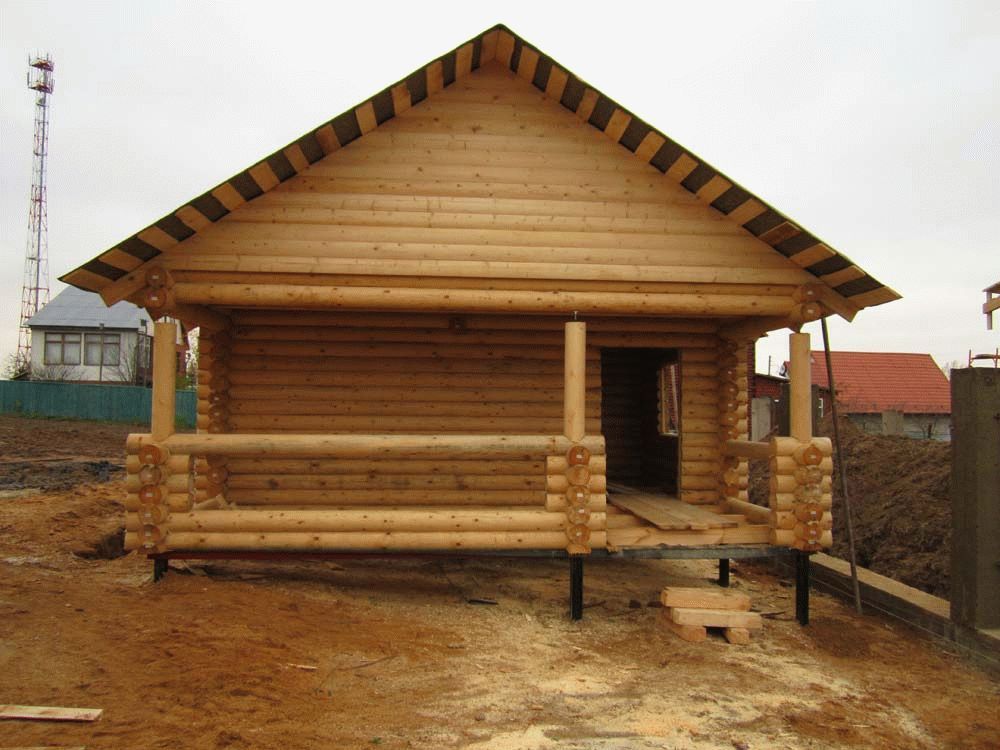
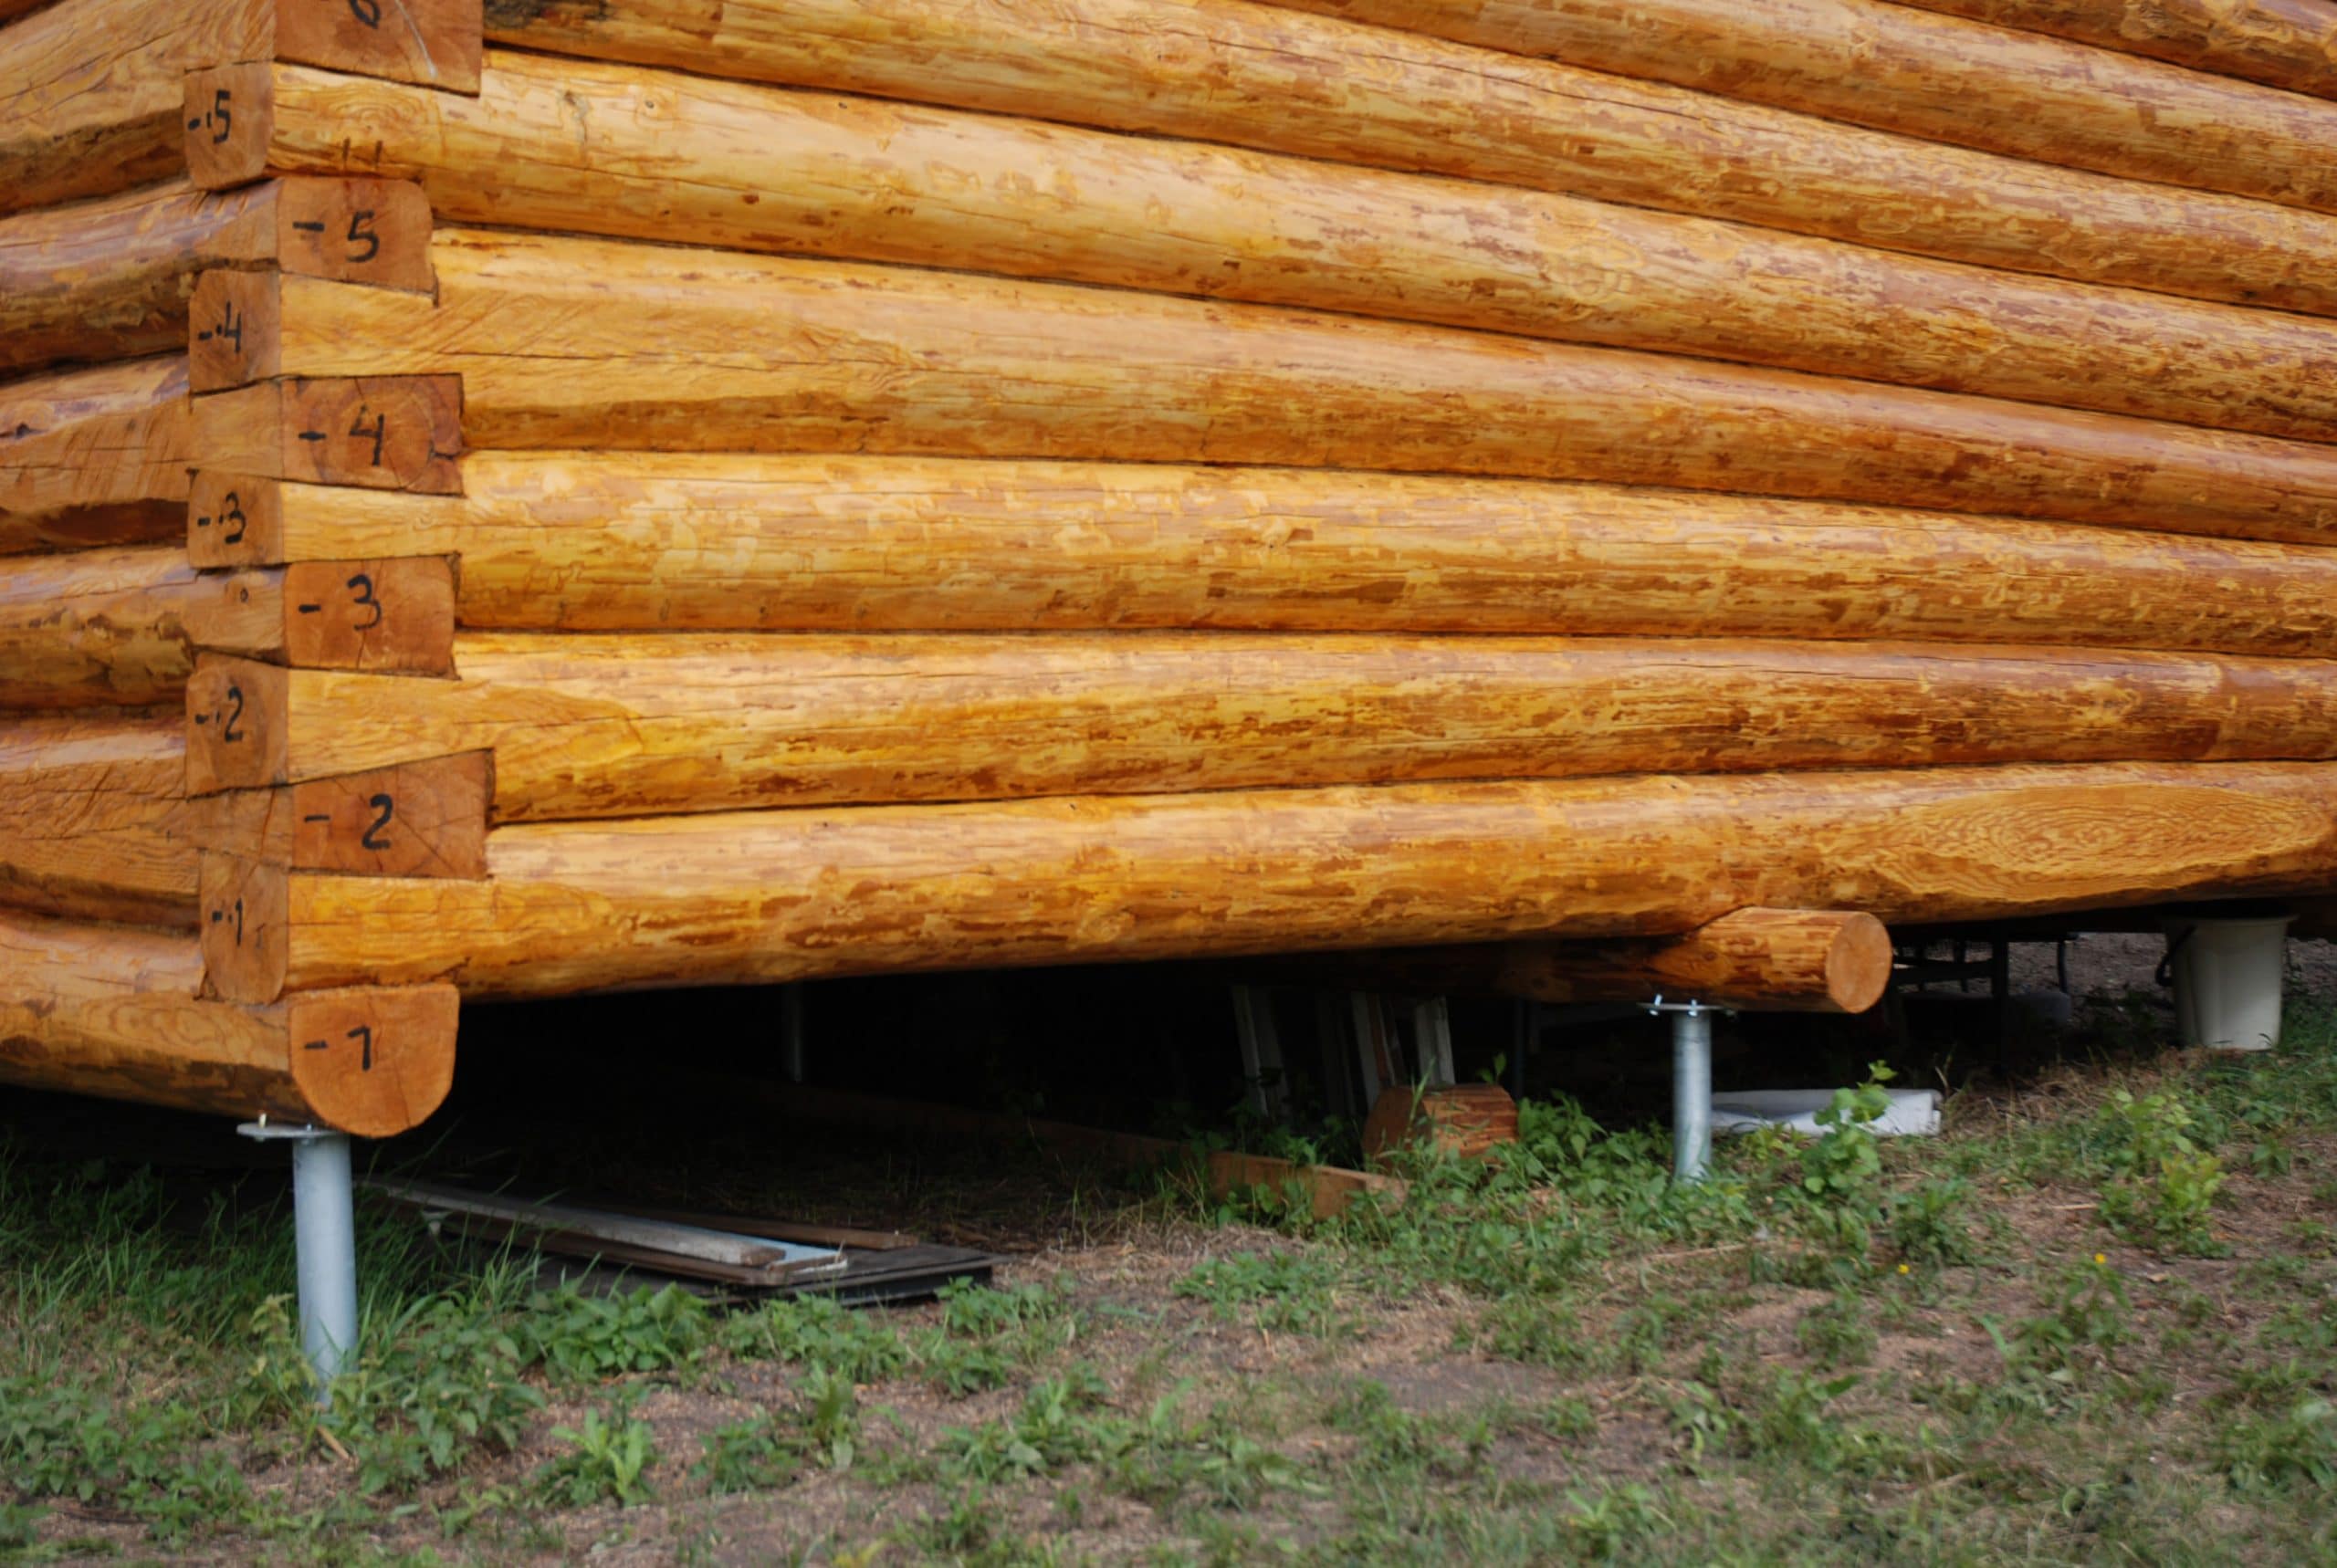
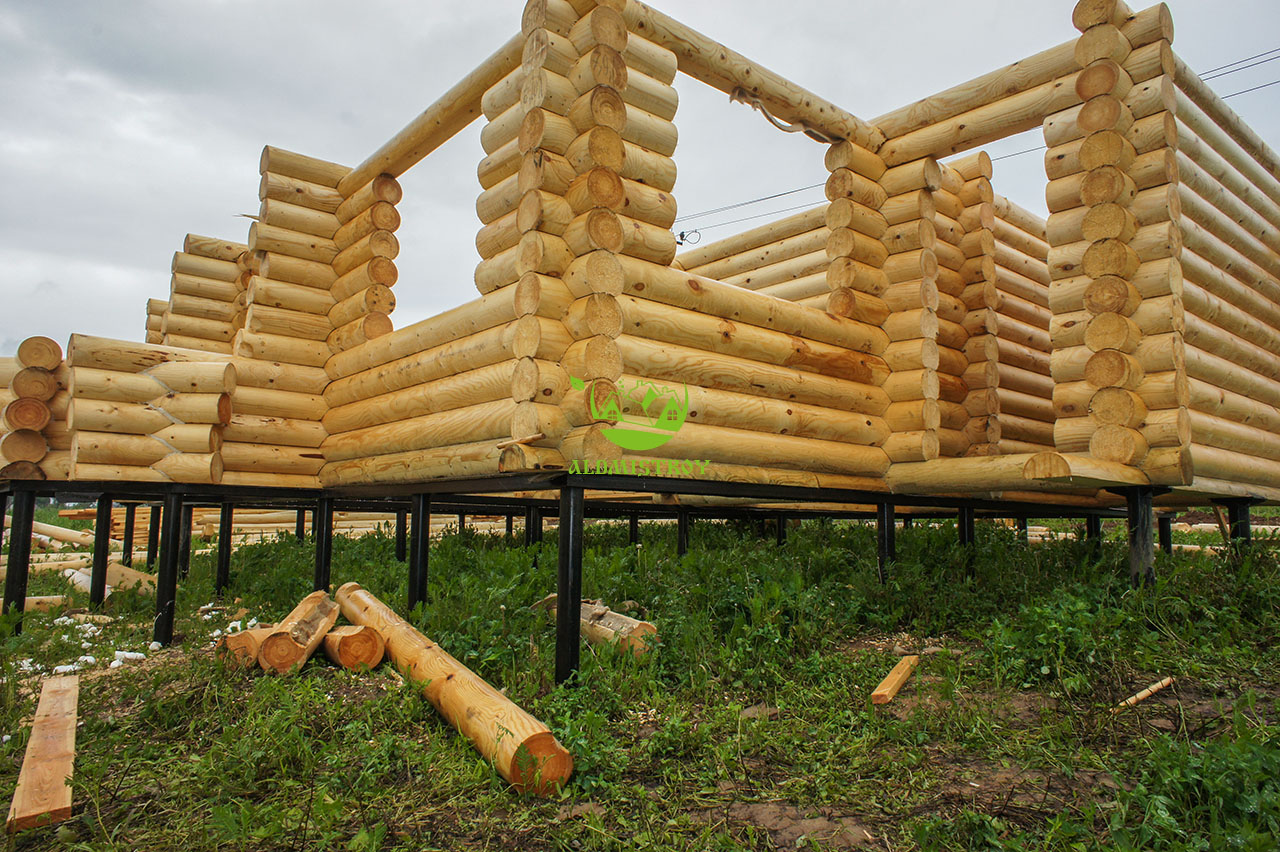
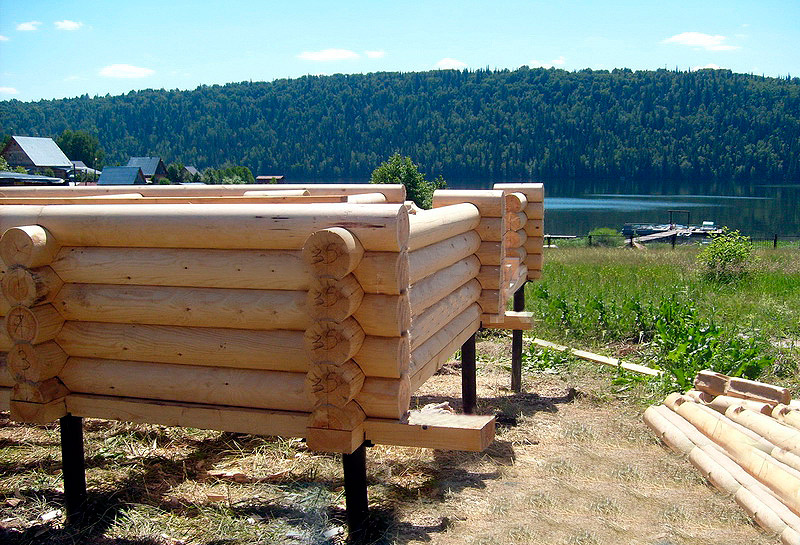
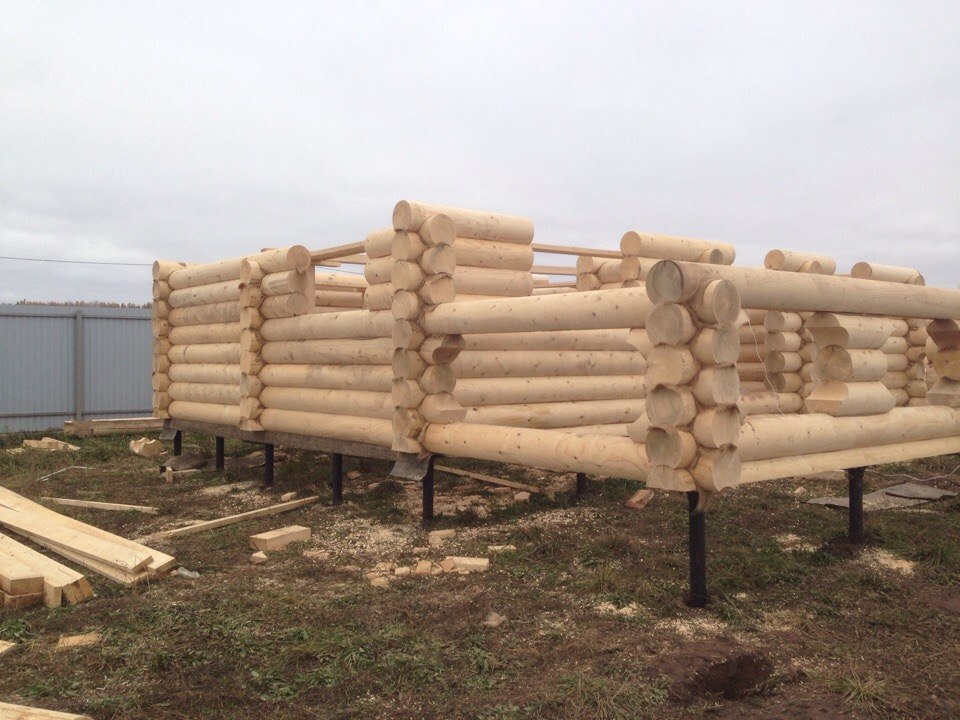
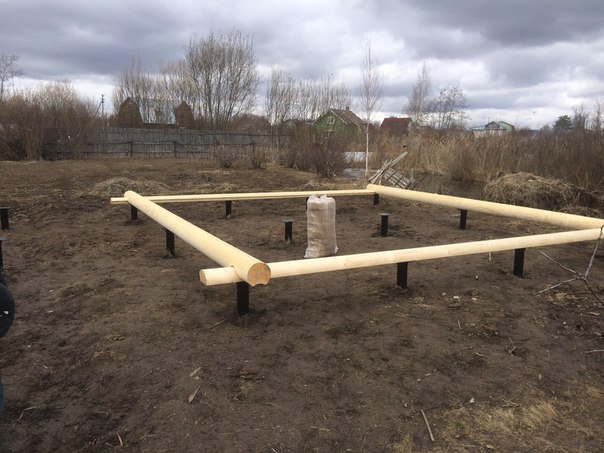
If the material for the bath is a rounded log, then the lower crown is attached to the head. Experienced builders recommend making "cuts" only above the head platforms, since all others can weaken the timber and cause it to bend.
Installation of a bath on screw piles
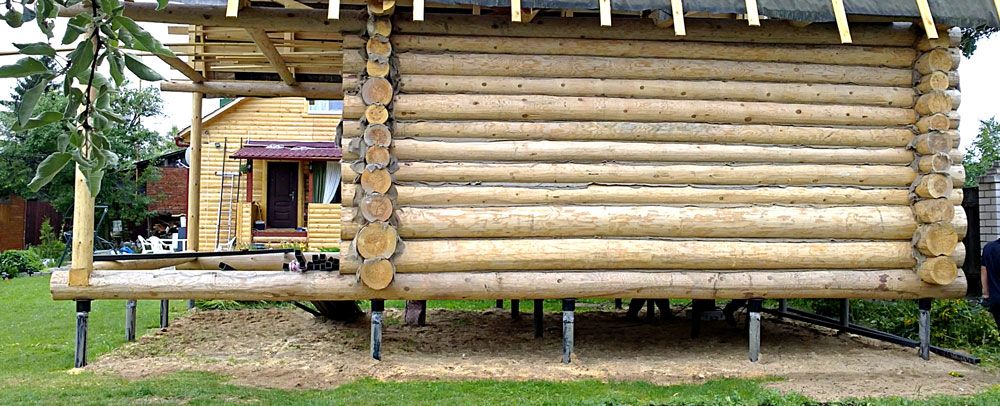
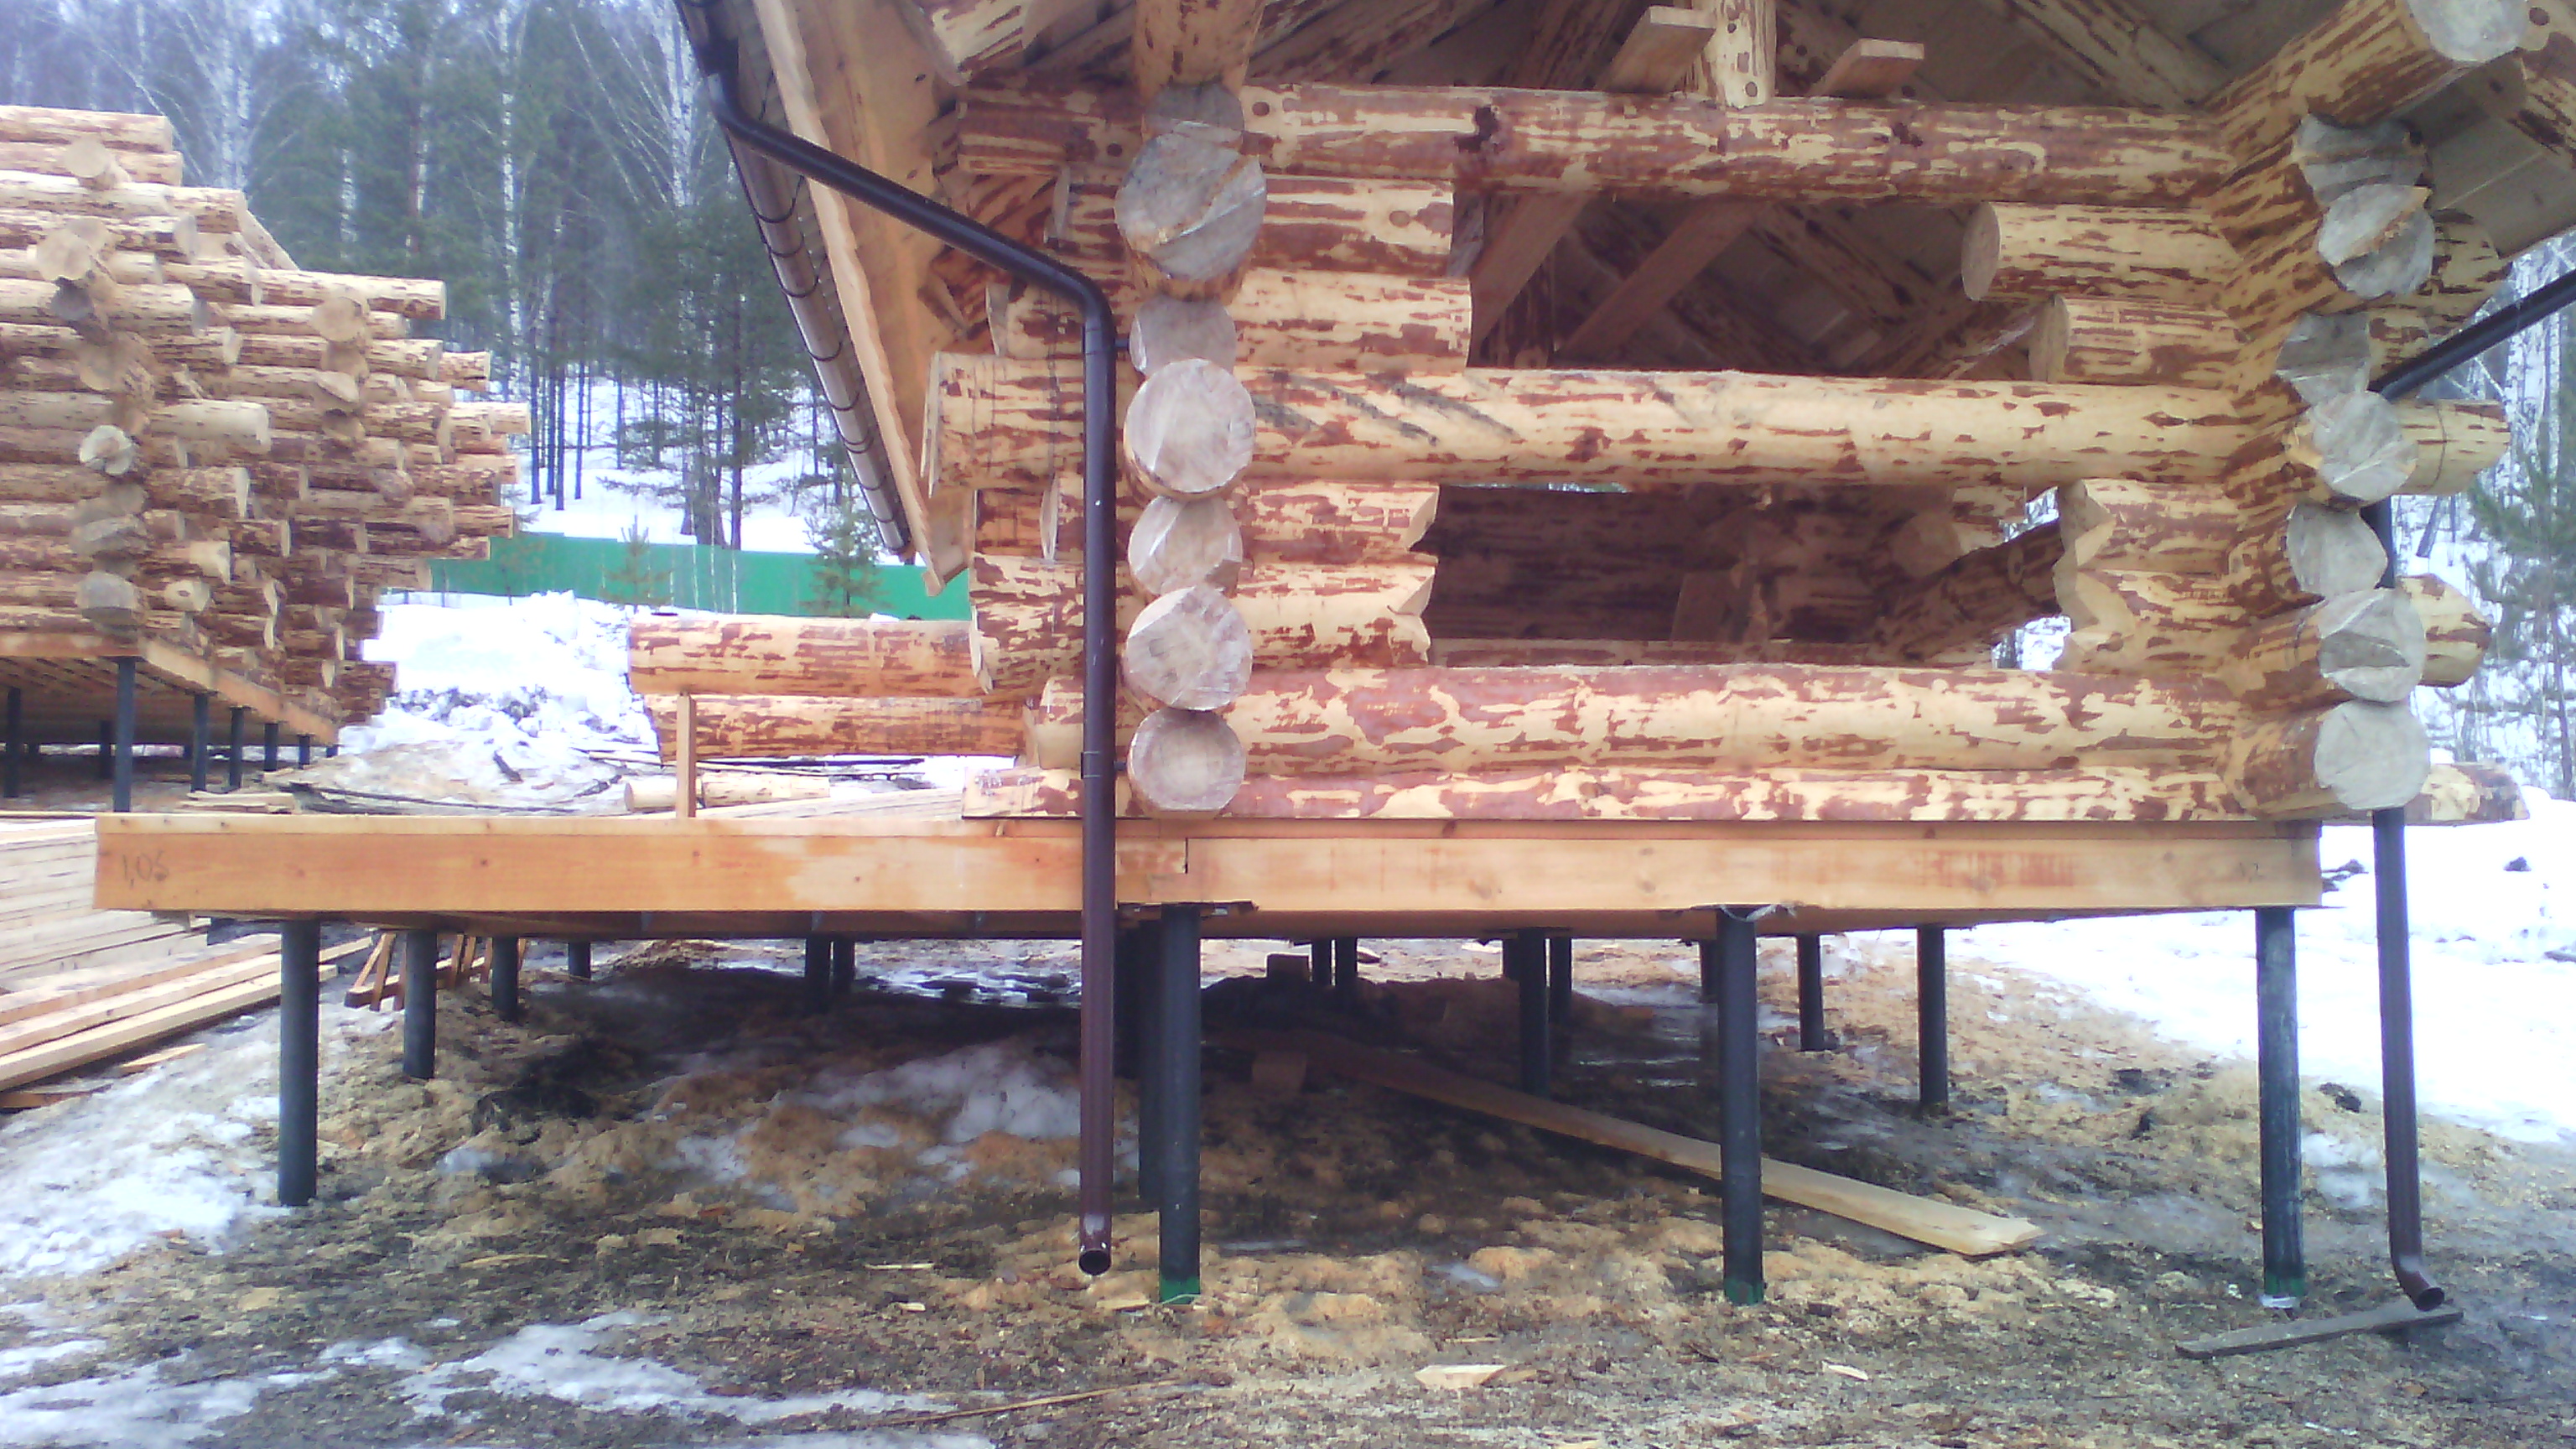
When each of the screw piles reaches its stop, you need to cut it off with a grinder to the desired level. For frame houses, this is a horizontal plane. The log house has a drop between the longitudinal and transverse beams of the crown. It can be selected with pads or with different height for trimming posts (150 mm).
Making a frame
 Installation of the frame on piles
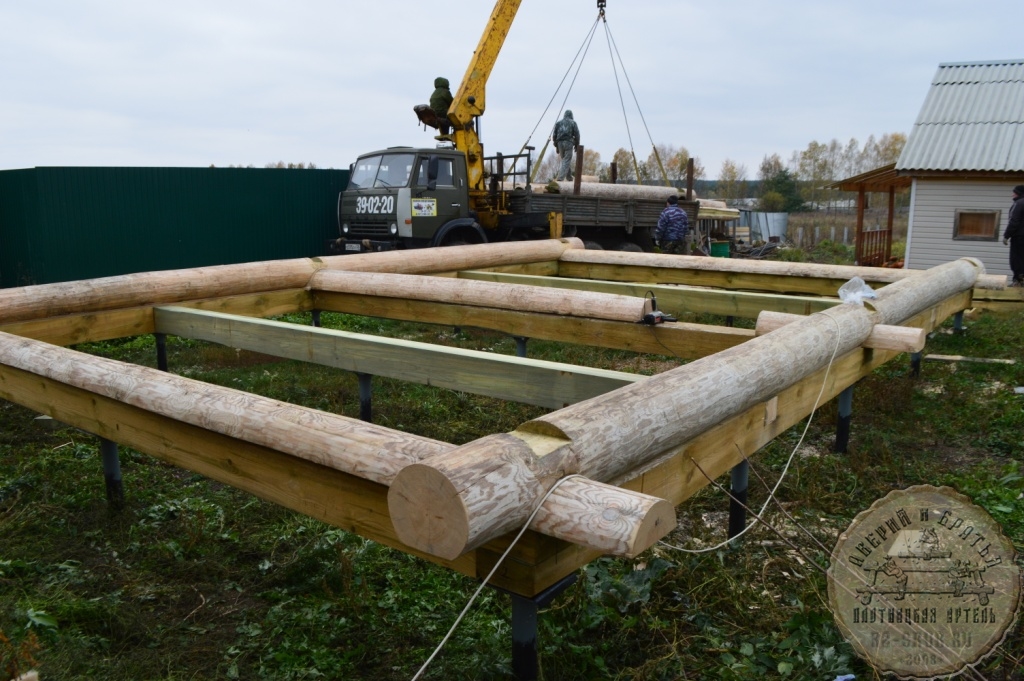
The base is made of timber with an edge of 150 mm. For heavy structures - 200 mm. Assembly order:
- We spread it on the heads, mark the cutouts in the “floor of the tree” or “in the paw”;
- We fold the frame on the heads along the cutouts, attach 1 screw in each corner;
- We achieve a right angle at the intersections by measuring the diagonals;
- We fix it with the second screw at each intersection;
- Fasten from below with bolts to the heads;
- We cut the inner timber “into the floor of the tree”.
We collect the log house
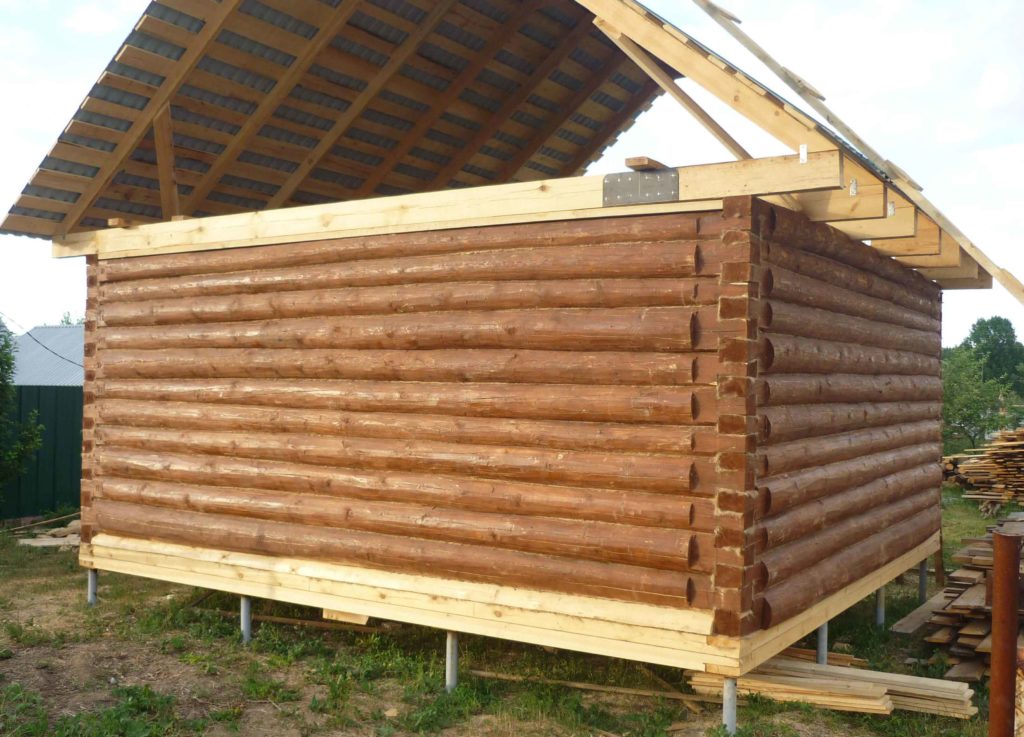
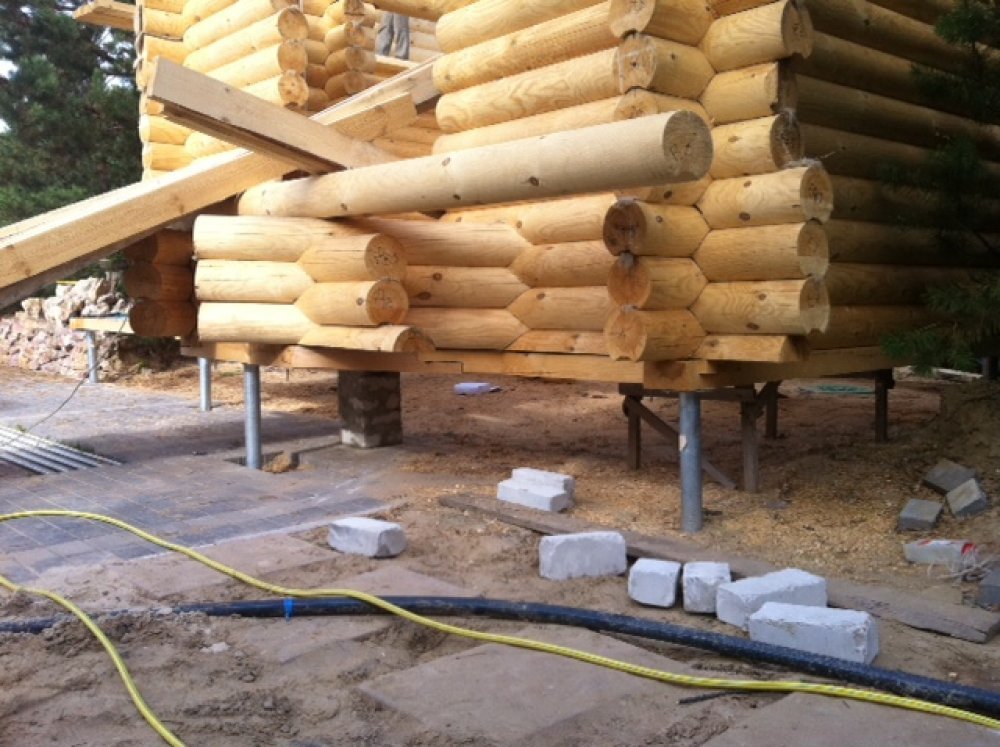
In a small area log house without loaded internal walls, installation is often carried out directly on its crown instead of a grillage. The first row should always be thicker than the next. It is laid not immediately on the head, but on a lining of larch, beech, pre-treated with resin (with the exception of the ends). The difference between the longitudinal and transverse logs is compensated by the thickness of the board. The corner is additionally stapled.
Further, the blockhouse is assembled according to serial numbers with gaskets made of hemp, tow, felt, according to the instructions. The number of walls and the presence of a protruding porch make it clear how many support points are needed.
They also put the log house on the grillage from the channel. Holes are drilled in the crown from below, under which vertical pins are welded onto the steel strapping. The log is "put" on the rod. A stiff clutch is obtained.Watch a video on how to mount a log house on piles.
Ready option
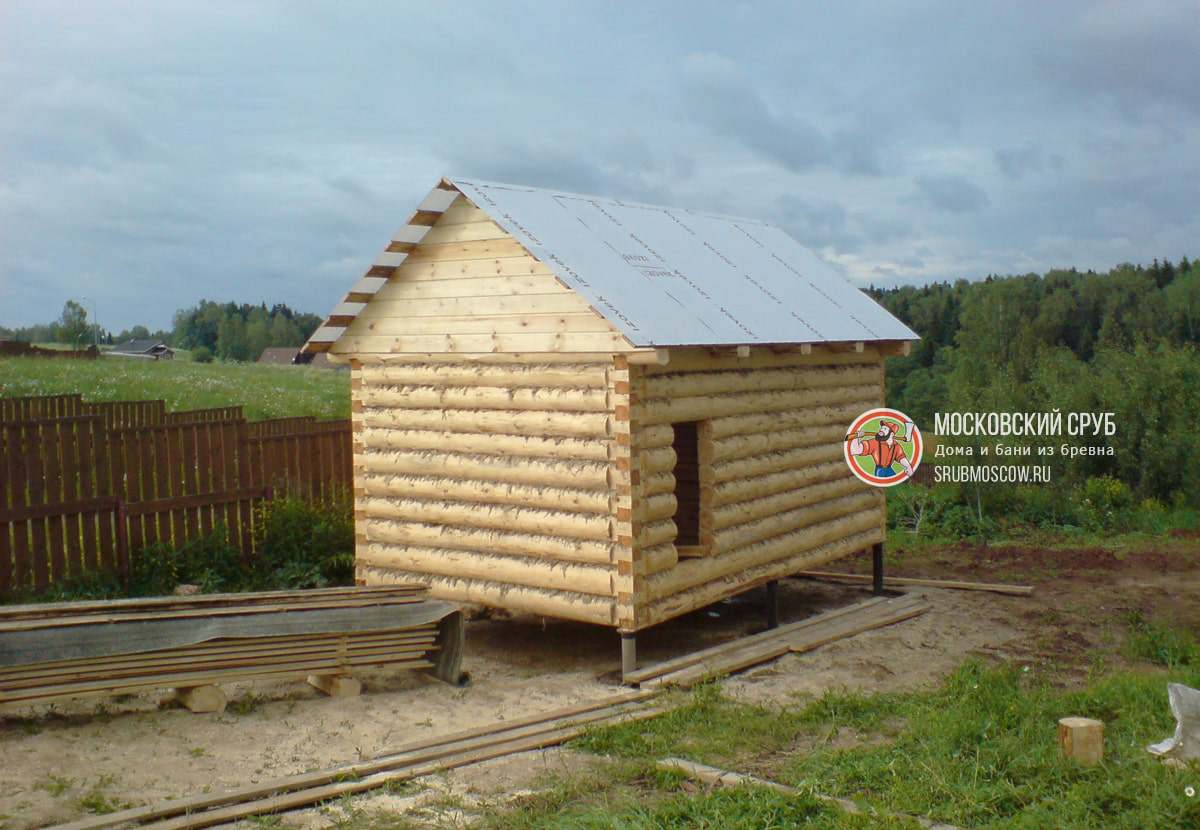
If you need to install a ready-made building on the foundation, then the corners are additionally fixed and, with the help of jacks, pads, I-beams, are lifted into place.
Design
Near water bodies and in areas with frequent flooding of water, they tried to raise objects above the soil surface, for which they drove logs into the ground, placing them along the corner sections of the structure, under walls and partitions. For such piles, hard wood was used, capable of resisting moisture for a long time.
Nowadays, pile supports made of wood are used quite rarely, but the foundation from such supports is the most profitable and completely reliable.
In modern construction, twelve options for pile supports are known, but for low-rise buildings one of three is used:
- driven reinforced concrete;
- screw metal;
- bored.
The foundation on reinforced concrete piles is a rarity, because to install such supports, you will have to hire special equipment. But on such pillars, the foundation is the most durable.
The screw version is a good way of screwing in - this work can be done manually. The disadvantage lies in the material of manufacture - the metal is able to conduct heat. We'll have to additionally arrange insulation so that walking on the floor is comfortable.
When erecting a pile foundation on their own, in most cases, the third type is preferred. Bored piles, although they are considered the most labor-intensive option in the installation, provide an opportunity for good savings.
Secrets of Cooking Nut Flour
Pastry nut flour should be finely ground. This is primarily flour, not just ground nuts.
It is very important that no oil is released when grinding the nuts, otherwise the flour will not work. If you decide to grind nuts in a coffee grinder, place them in small batches and turn on the grinder for no more than 20 seconds, otherwise the knives will overheat, the nuts will oily and stick together
When you sift the nut flour through the sieve, the remaining nut grains can be transferred back to the coffee grinder, grinded and sieved until all the nuts are flour.
There are some peculiarities of working with different nuts. For example, not everyone knows how to make hazelnut flour without soaking. The fact is that the skin of this nut cracks when roasting, and then it can be easily removed if you pour the nuts on a towel and rub, so the hazelnuts do not need to be soaked. It is enough to pour over the pistachios with boiling water, and then dry them in the oven.
Floor device
When constructing this type of bath with your own hands, it is very important to provide for the correct construction of the floor, the construction of which is directly depends on the foundation... Hot steam condenses and tends to drain down, like water from a shower
Therefore, the design of the non-leaking floor of the bathhouse, located on an elevation of screw piles, is more complex:
Draft level
 Sub-floor equipment
Plank covering, no gaps, treated with anti-fungal impregnations. Lined with film materials to protect it from moisture from below, filled with expanded clay.
The top is also covered with a film. The use of roofing material and other bitumen-containing coatings, in the future, can complicate life with an unpleasant smell of resin. The height of the drain pipes, the passages for them at all levels of the floor, are marked immediately.
Thermal insulation
Insulation is made from available material:
- Mineral wool (stitched mats, roll) - 0.25 m thick;
- Foam polymer, polystyrene (plate) - 0.15 m
Protection from moisture on top is required. Expanded polystyrene is resistant to this effect. Other insulation materials reduce their properties. Membrane coatings have proven to be excellent as protection.They are produced in sufficient size in length and width (maximum 61 × 15.5 m) to be closed in one piece, with an upward overlap on the walls. In a frame house, vapor barrier is made along the walls, with the release of condensate onto the membrane for gravity drainage.


