Technical features
When changing the configuration of the building and the construction of a capital structure, it is necessary to make the design of the veranda to the house or the attached terrace in the appropriate authorities. According to the Housing Code of the Russian Federation, an extension without a foundation, used seasonally, does not need to be drawn up.
Before construction work, you need to consider the following factors:
- the location of the extension relative to the house and its entrance;
- type of construction (veranda or terrace, open or closed);
- type of building (capital or non-capital);
- insulation, electrification, heating during the construction of a capital structure;
- materials for construction;
- the shape of the roof;
- finishing of the extension.
Important! Requirements for the construction of outbuildings are regulated by article 15 of the Housing Code of the Russian Federation and SNiP 30-02-97. If you are building a capital structure with a foundation and load-bearing elements, its project will need to be drawn up in the BTI .. Competently draw up the type of building in order to comply with fire safety standards between residential buildings
The distance between capital buildings must be at least 3 m
Properly design the type of building in order to comply with fire safety standards between residential buildings. The distance between capital buildings must be at least 3 m.
Types of verandas
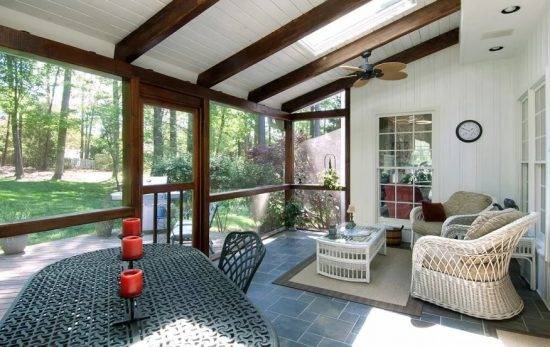
An add-on structure can be built from the same material as the house or cottage itself, or from any others. The choice of building elements depends on the preferences of the developer, the characteristics of the project. Combination of different types of building materials is more often used. By building a terrace or veranda, you can hide the imperfections of a building or make an architectural accent.
Verandas are classified into:
- open. The structure is being built under the same roof as the main building. The extension is built in the form of a large canopy mounted on poles. The walls of the structure are not completely sewn up or partial sheathing of the lower segment is made. An open veranda can be built both during the construction of the house and at any other time. The space is used for summer vacations, family meals in the fresh air, and home celebrations. Additional square meters are furnished with weather-resistant materials;
- closed. The extension is a full-fledged room in the building, it makes it possible to use the additional space for various purposes. The walls of the structure are made solid, hinged, with window openings. A closed building is being built at the entrance. It protects the house from wind, rain, snow, cold. In the insulated structure, it is possible to equip a kitchen, office, hallway, living room, gym, botanical garden, which can be used all year round.
To make the extension last longer, start construction with the construction of a high-quality foundation level with the foundation of the house. Build the floor of the veranda on the same level with the floor.
Types of terraces
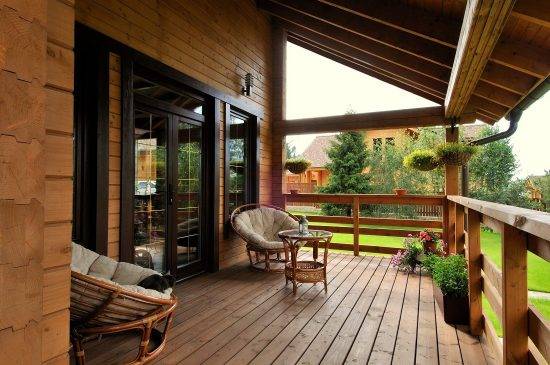
Terrace buildings are platforms with a canopy, fenced with railings, raised to a height of 10-15 cm from the surface of the earth. The structure is erected close to the house, erected at a distance from the building or attached to the porch. The main elements of the terrace are posts, railings, floor and roof. The walls of the structure are made open.

Do-it-yourself landscape design of the courtyard of a private house with photos Depending on ...
Terrace construction is used as:
- gazebos for relaxation;
- a summer dining room under the same roof as the house;
- playground for children or sports;
- places for recreation, family holidays.
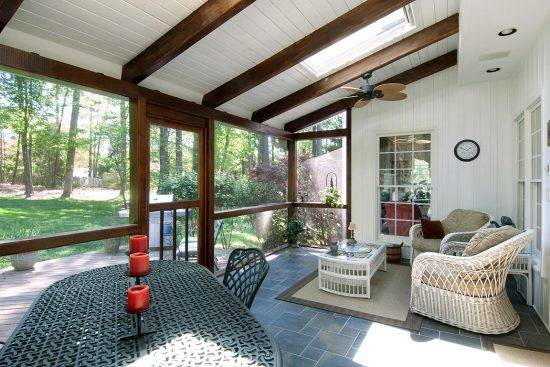
Arrangement of a terrace near the house allows you to fully relax in nature, shelter from precipitation
During construction, pay great attention to the high quality of materials that will be resistant to temperature extremes, humidity, solar ultraviolet, and practical.The structure is installed on racks laid on compacted soil, or built directly on the ground
Terrace buildings are classified according to the type of location - attached to the cottage or house, separately erected, built around the perimeter around the building, roof terraces. The structure is furnished with furniture made of practical, moisture-resistant materials.
Dimensions and materials for its construction
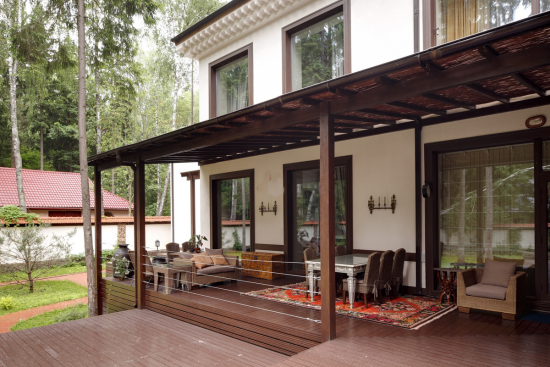
After choosing the construction site for an open terrace or a closed veranda, calculate the dimensions of the extension, select the type of frame, building materials.
Terrace annexes and verandas are built from:
- metal. Metal structures have a service life of at least 30-50 years. In construction, a steel profile or a welded frame is used. Mount handrails made of wood, brick or forged elements. An extension on a metal frame requires the construction of a foundation (screw piles, blocks, strip base);
- wood. Popular building material for the construction of terraces and gazebos of any type. A frame built from a bar or log with a minimum diameter of 15 cm. Railings, rafter systems are made of boards;
- brick. For the construction of brick extensions, it is necessary to install the base. A foundation is laid under the brickwork in the form of blocks, concrete fill or tape. The frame is built on pillars of 1.5 or 2 bricks, the rafter system is built from boards or a metal structure;
- combination of materials. Durable and attractive structures are obtained by combining different building materials. For example, a brick or metal frame with wood, glass, polycarbonate.
Important! When designing a roofing system for an add-on veranda or terrace, take into account the spring snow melt. On the edge of the slope of the building, it is necessary to install delays or to select the optimal angle of inclination of the roofs of both structures .. The roof of extensions is made more often in one slope
If the veranda or terrace is adjacent to the building, the roof of the structure is made a continuation of the general house. When building a separate building, the roofing form can be gable, broken, domed, pergola. The total cost of the structure depends on the materials chosen for construction.
The roof of the extensions is made more often in one slope. If the veranda or terrace is adjacent to the building, the roof of the structure is made a continuation of the general house. When building a separate building, the roofing form can be gable, broken, domed, pergola. The total cost of the structure depends on the materials chosen for construction.
The dimensions of the extensions depend on the area of the site, the project being implemented, and the location of the structure. On a large terrace or veranda, equip several areas at once - for relaxation, cooking, family meals. Dimensions are calculated based on the planned purpose of the structure, the number of guests, interior elements.
Materials (edit)
The recreation area is made of any material: wood, stone, brick, metal, concrete, WPC (wood-polymer composite). Each material has pros and cons:

To create a terrace, it is not necessary to buy everything new; you can use the remnants of building materials after the construction of the main building. Then, the extension will surely be combined in color and texture with the house.
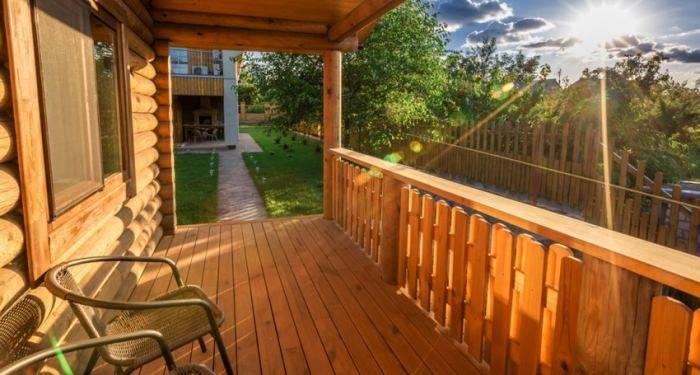
Construction stages
- foundation construction;
- flooring assembly;
- installation of auxiliary structures.

The last point can be skipped, but additional parts significantly decorate the extension and make it more efficient and practical.

Projects of country houses with a veranda
If the dacha is going to be built from wood - timber or logs - it doesn't matter, the most popular project is 6x6 meters. This is due to the fact that the standard length of lumber is exactly 6 meters
With this size of the house, waste is minimal.Considering the projects, we notice that it is necessary to look at six meters - this is only the residential part or together with the veranda.
For example, in a project from a bar, the photo of which is located below, the entire building area is 6 * 6 meters, 2 * 6 is a veranda, the inhabited part is only 4 * 6 meters. The internal area will be even less - it is necessary to take into account the thickness of the walls and finishing materials.
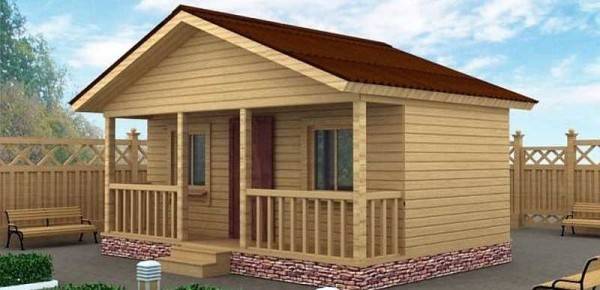
The project of a small cottage from a bar with an open veranda
In another project, 6 * 6 meters is only a building, and a veranda is attached to it. The total building area is larger (see photo).
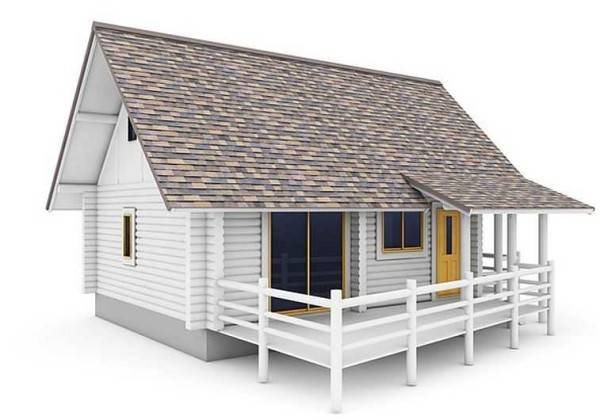
In this project, the house stands on a strip foundation, a veranda for cost reduction on a pile
Popular summer cottages attic houses and a veranda (as in the photo above). With such a layout, having occupied a small area under the house, use it to the maximum. Another of these summer cottages is in the picture below.
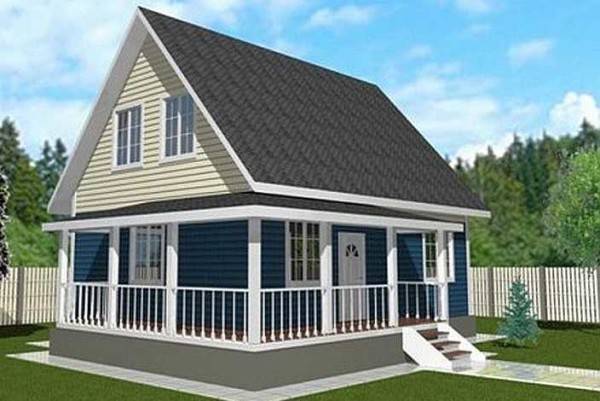
Cottage with veranda and attic
In this project, the attic floor is larger than the ground floor space, overhanging a spacious corner veranda that spans the two sides of the house. Since the load from the attic is also transferred to the racks of the veranda, a common strip foundation was made.

Small country house with an attic floor and a veranda along the facade
The next project was created for a country house made of foam concrete. The asymmetrical roof gives it an oriental flavor, which is echoed by the style of the veranda.
Terrace styles
An additional decoration of the country houses is a modern terrace. A properly designed transition from home to garden will become a favorite vacation spot for the whole family. To make the extension look original and cozy, its functional purpose should be taken into account during construction. The interior space of verandas can be decorated in one of the following popular styles:
- Modern. Explicit minimalism includes comfort, coziness, simplicity and functionality. The furniture is of high quality design. There are no or very few decorative elements. These can only be functional items (auxiliary furniture, floor lamps, fireplace, etc.). Materials for execution are stone, metal, PVC;
- Traditional. The main features of this style are rigor, pedantry. The mood here is set by dull pastel colors. Bright colors are excluded. Such verandas are considered as a replacement for the study. The use of decor on railings, supports is allowed. Stone, wood with a unique natural pattern are used as building materials.
- Colonial. The highlight of the style can be any item that matches the theme of the former British colonies. Lush green spaces will help create the appropriate atmosphere, climate on the terrace. The ideal furniture is wicker, wooden. A colonial-style terrace can be filled exclusively with natural materials (wood, ceramics, stone, multi-colored textiles);
- Beach. It is better to use this design if the cottage is located on the seashore. For complete harmony with the surrounding landscape, a thematic figurative row is used - all shades of blue, sand, green. Furniture is suitable for wooden, textile, leather;
- Country. A good solution for timber houses. It is characterized by rough furniture, a maximum of textiles and wood, the presence of decorative household items. For the floor, you can use wide deck boards, logs. Clay pots with vegetation look favorably on a wooden rack.

Open type
The open veranda is a frame building without walls, and the roof is installed on beams. This design has a number of advantages and disadvantages.
Advantages and disadvantages
Of the undeniable advantages of an open veranda, it is worth noting the following:
- Easy to install. Its construction takes a minimum of materials and time. It is not difficult to build it.
- Easy care.Such a veranda is more of a part of the street than a house. Therefore, to keep it clean, it is sufficient to regularly sweep the floor.
- An open veranda will allow you to enjoy the opening landscape and breathe clean air when you are on it.
Open terrace
Like all hand-made works, an open-type building also has disadvantages:
- Not suitable for use in the cold season.
- It is impossible to install upholstered furniture on an open veranda, since it will be impossible to take care of it, which means that your stay here will be deprived of a certain home comfort.
- Difficulties may arise with the choice of finishing materials, as they will be exposed to the negative influence of the environment.
Tools and materials
For construction you will need:
- Concrete foundation posts.
- A bar for a frame with a section of 150 × 150 mm.
- Cement and sand.
- A bar for strengthening the frame with a section of 120 × 120 mm.
- Bracket for joining the timber.
- Lathing for the bottom of the veranda. It can be OSB, forging or slats in the form of slabs or balusters.
- Self-tapping screws for wood 100 mm and 25 mm for fixing OSB or wooden lining.
- Wooden lining.
- Roof beams 150 × 150 mm.
- Anchors 150-200 mm.
- Croquettes 60 × 120 mm.
- Roofing material, for example, metal or ondulin.
- Boards for the manufacture of roof lathing.
- Lags 100 × 100 mm.
- Wind board.
- Floor boards 30–40 mm.
- Paints and varnishes for wood processing.
- Roll waterproofing for the foundation.
- Drill and saw.
- Level.
You have already familiarized yourself with the method of making the foundation, so we will omit this point in our description of the construction of an open type of building. Let's go straight to features of the flooring.
Features of the device floors
To carry out a high-quality installation of the floor, you must first prepare the base. To do this, first of all, the earth is leveled and compacted. Adjustable supports can serve as supports for the logs. Moreover, their number will directly depend on the planned loads on the floor. This idea is great for open-type verandas.
Then install the logs on the adjustable feet and fasten them. Thanks to these supports, the slope of the floor can be adjusted and leveled. Installation of boards begins from the edge of the veranda parallel to the joists. The boards must be flat and dry. They should be stacked back to back. Fastening the boards to the joists is carried out with nails or wood screws.
The device of the frame and roof does not differ from the technology described in this article.
Finishing features
In order for the wooden elements of the open veranda to last longer, they should be impregnated with special antiseptics and covered with paints and varnishes. Among other things, these actions will highlight the structure of the tree and help make the extension more attractive.
The lower part of the veranda also needs some finishing. To do this, you can use rails that are fixed at an angle of 45º, forged elements or balusters. If you use a wooden or plastic lining for this, then under it you will need to make a frame of beams.
For finishing the ceiling and gable, you need to use the same material. It can be wooden lining or OSB slabs.
At this stage, it is important to run the electrical cables for the veranda lighting and make the appropriate holes in the ceiling sheathing
Editorial advice:
- how to build a brazier out of bricks with your own hands;
- how to build a winter greenhouse with your own hands;
- how to build a gazebo with your own hands from wood.
Seat selection
The place for construction is chosen taking into account many factors:
- Location of the entrance to the dwelling. The extension can combine the functions of a porch and a resting place.
- The location of the house relative to the cardinal points.For example, a terrace in the northern part of the house will provide an opportunity to enjoy the coolness in the summer heat.
- Opening view.
- Soil characteristics - the type of foundation depends on the type and characteristics of the soil on the site.
- Features of the relief - the extension should not violate the general style of the yard and be combined with the house.
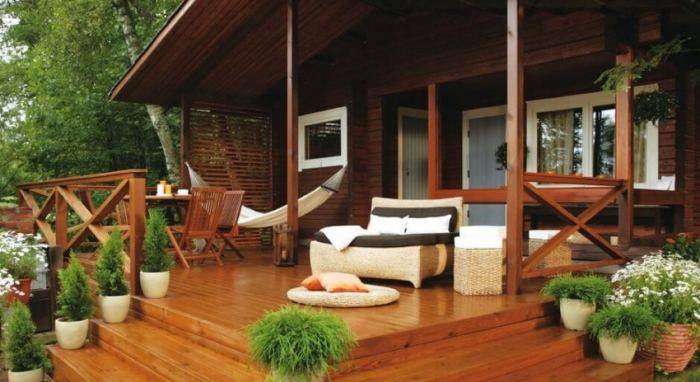
If there is a pool or natural body of water on the site, the terrace is often placed as a separate building. The location of the structure relative to the house determines the following types of terraces:
- detached terrace;
- attached to one of the walls of the house;
- the terrace surrounding the whole house is ideal for a house with a small plot, where it is impossible to build a large terrace along only one of the walls.
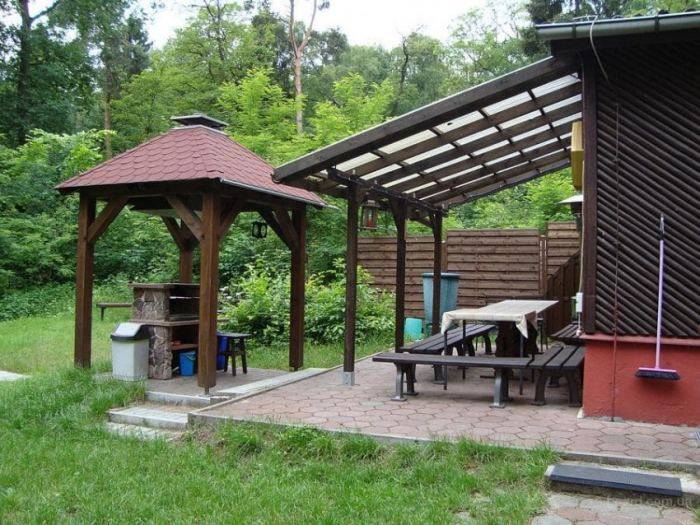
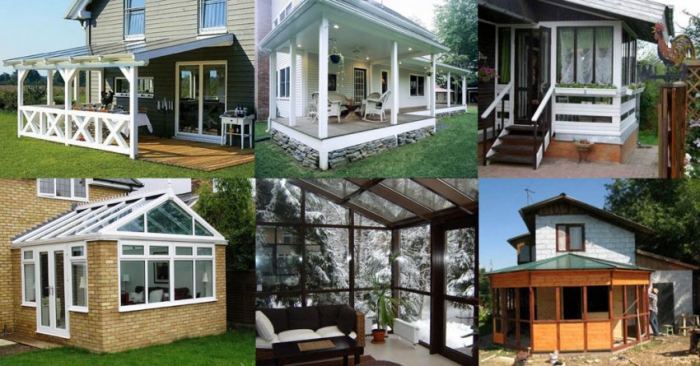
Terraces can be of any shape: oval, polygonal, asymmetrical.
A good option for the implementation of the project is a multi-level terrace, a practical and beautiful building. This type of terrace makes it possible to get rid of the construction of individual steps or stairs, especially steep ones, and also allows you to implement a high-quality drainage system.

Simple terrace designs for a one-story home.
A ground-level terrace is the simplest type of construction. Its level coincides with the level of the ground or is slightly raised above it. Railings have a decorative function, so you can do without railings, but you need to find other ways to visually emphasize the perimeter. Due to the fact that the building is close to the ground, its main task is to be well protected from moisture and rot. For these purposes, a special board made of wood-polymer composite (WPC) is used, which, having all the advantages of wood, is not subject to decay due to the presence of 30 to 80% polymer in its composition.
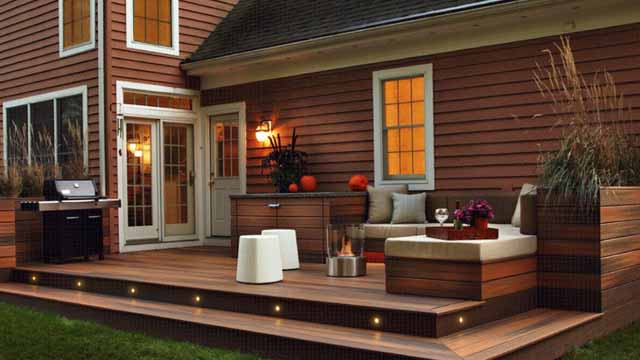
For the construction of a site near the house, you can use any other material intended for direct contact with the ground, for example, tiles. Please note that all building materials are treated with at least two coats of sealant to extend the life of the underside of the deck. In addition, I would like to say that elements such as a canopy, benches, gazebo or grill provide the style and functionality of such layouts.
An extension to the house from a bar and a strapping from a bar for a terrace
Since the terrace has no walls, the load on the foundation will be minimal. But before installing it, you still have to mark the area. According to the marks obtained, they dig to the freezing depth for the pillars, into which the crate, reinforcement is installed, and then concrete is poured. For the foundation, waterproofing and strapping are made without fail, to which the subfloor logs are subsequently attached from a bar with a section of 100 x 50 mm.

The best material for building a wooden deck is larch boards
The subfloor is sewn up with OSB or edged boards, covered or insulated. It is covered with lash insulation, which, in turn, is sewn up with OSB boards.
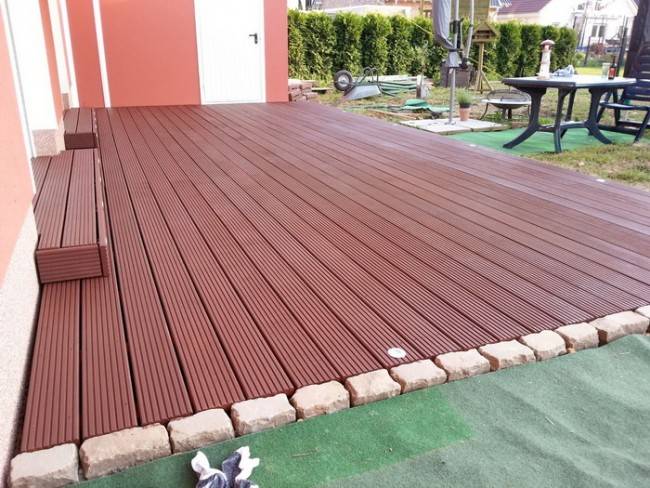
Boards need to be treated with an antiseptic compound and laid, leaving a gap for better ventilation
Brick veranda attached to the house
If a metal or wooden structure is considered universal and can be used for almost any type of private house (frame, log house, capital), then a brick veranda with plastic windows is suitable only for capital construction.
Here, unfortunately, there is no way to give a diagram or a sketch with a layout according to materials - the construction of a brick or block is too individual. However, the main stages and nuances can be distinguished:
- for such a structure, columnar and pile foundations are not suitable; a serious strip base with good waterproofing is required.It can be made monolithic or block, the depth is calculated depending on the depth of soil freezing in a given region. Read more about the structure and waterproofing of foundations in the article;
- the structure can be solid - with full-fledged walls that take the load from the roof - or with columnar supports. The second option is more economical in terms of material and time costs. Columns with 4 or more bricks in a row of masonry are necessarily arranged at the corners of the veranda and, if its area is large, additionally in intervals. The photo above shows just such an option, with columns, the space between which is filled partly with metal-plastic windows, partly with single-row brickwork;
- the overlap of a brick veranda can be arranged on wooden beams or on metal trusses, depending on the weight of the roofing material;
- the installation of metal-plastic windows in this case is carried out after the initial finishing of the walls and the installation of the roof. Otherwise, there is a high risk of damage to frames and sashes under the influence of a suddenly increased load or during construction work;
- The best finishing option for a brick veranda is considered to be facing bricks and tiles, including imitating wild stone, plaster, painting.
To build a veranda that is most successfully combined with the house, you will have to use embedded metal parts that will connect the main wall of the house with the new extension.
The main connection goes at the level of the foundation, the strip base reinforcement for the veranda is connected to the foundation of the house.
The connection between the walls / columns of the veranda and the wall of the building is carried out in the same way.
If possible, roof trusses / rafters are also driven into the main wall of the house. This will allow better waterproofing of the seam between the wall and the canopy, and will increase the stability and strength of the structure as a whole.
Veranda foundation and terrace foundation
Summer - this is the definition that naturally pops up in thoughts when the terrace is mentioned, and for good reason. Such objects are simply created in order to spend warm summer days and evenings on them. In fact, they are an extension consisting only of a floor raised to the foundation. In this case, the foundation itself is usually individual for the object and is not created together with the main one. As a rule, a monolithic foundation is not used for terraces. Most often, only tape and columnar versions of such structures are used. Much less often - the pile option. Piles are placed only when there is a reservoir nearby that can quickly raise the groundwater level, or if the site has very loose or sandy soils that give strong shrinkage.
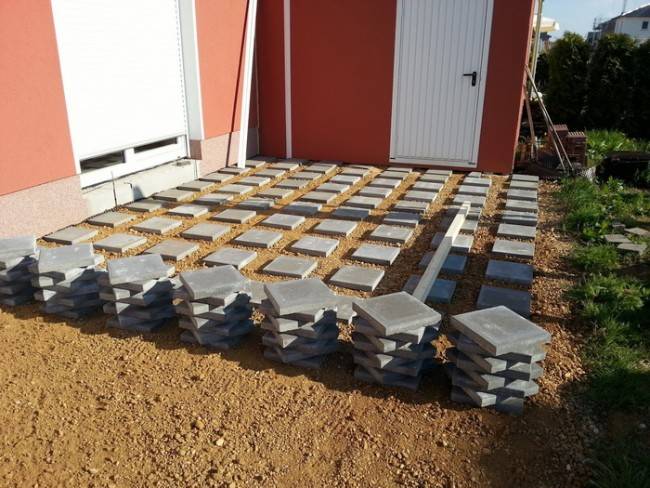
Preparing the base
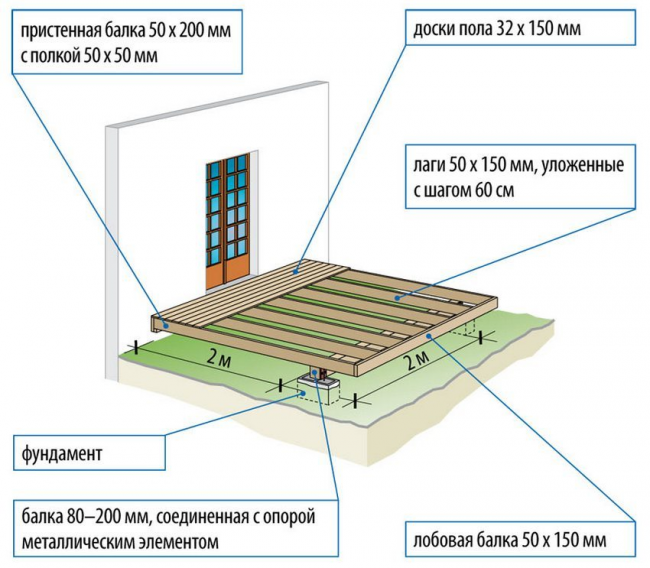
Diagram of a wooden terrace
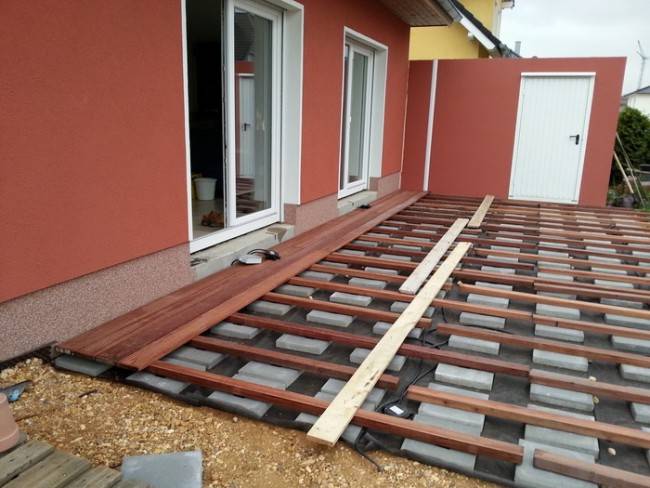
Installation of flooring
The place where the roof of the veranda adjoins the house
As a rule, when covering the roof of the veranda, the same roofing materials are used as when building a house, so as not to disrupt the overall design of the building as a whole. The adjoining of the roof of the extension to the house can be done in different ways, depending on which of the walls the veranda is attached to. If the roof of the veranda is ultimately an extension of the roof of the house, then the task is greatly simplified, since it is enough to merge two rafter systems. It turns out that the roof of the veranda is adjacent to the roof of the house.
In this case, proceed as follows:
- The upper veranda harness with the fastening of the racks is being formed.
- Ceiling beams are attached to the harness, to which the veranda ceiling will subsequently be hemmed.
- The rafter legs of the house are shortened so that they do not go beyond the wall.
- Elements of the extension's rafter system are attached to the house's rafter system as shown in the image below. The mounting method is selected depending on the complexity of the design. For greater reliability, metal pads are used.
- In order for the structure to be reliable and able to withstand the loads, special reinforcing struts are attached, the purpose of which is described in the image below.
If the width of the veranda is more than 2 meters, and also if heavy roofing material is used, additional spacers are installed. As a rule, they are not attached to the sides of the rafters, but inserted between the upper and lower beams, after which it is better to secure them.
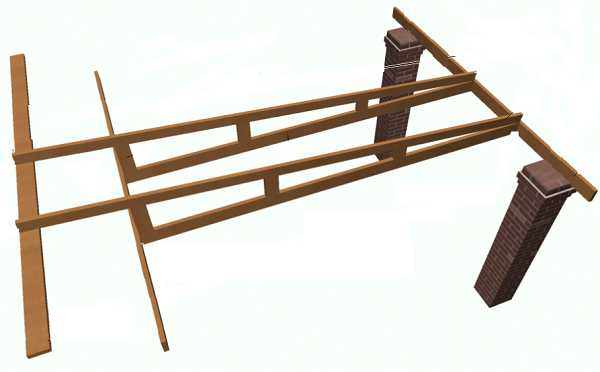 In order to eliminate the sagging of the roof, spacers are installed between the ceiling beams and the rafters.
Sometimes it turns out that the roof of the veranda is adjacent to the wall of the house. To solve this problem, it is necessary to make a groove in the wall and lay a special profile in it, carefully sealing up all the cracks. The second side of the profile enters the surface of the roofing material, which excludes the ingress of precipitation into the space, which is due to the abutment of the structure to the wall.
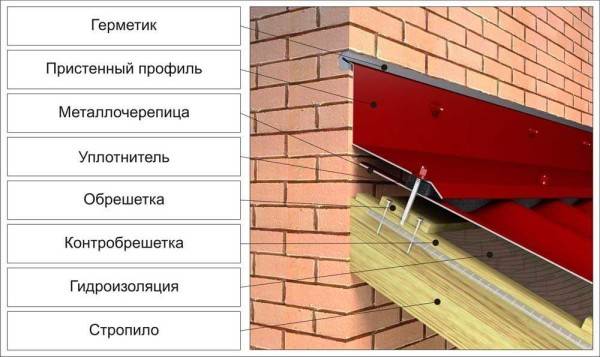 How to attach the roof of the veranda to the wall of the house
Such a profile can be made by hand by bending the galvanized section accordingly. The design differs in that it is necessary to strengthen a special beam, which moves this apron from the wall to the required distance. The apron is also attached not to the wall itself, but to the timber embedded in the strobe. In fact, if the construction of the extension is simple and primitive, then such an apron can also be fixed to the wall, bending the edge accordingly. After that, it is better to cover the strobe with a sealant.
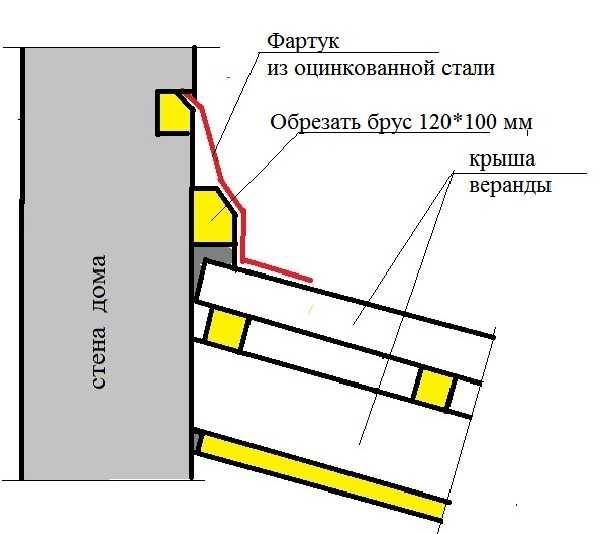 The second option for joining the roof of the extension to the wall of the house
The rafters are attached to the outer upper harness using metal corners, as shown in the photo below, since the dimensions of the elements do not allow for special cuttings, as in the presence of a Mauerlat.
 Mounting method rafter legs of the veranda to top harness
The solution is simple and reliable, although it does not look very good, but in fact, no one will see it after the roofing material lies on the roof, and the ceiling is lined with any finishing materials.
