Hip roof structures
Planar plan of the hip roof. With it, you can quickly calculate the roof area.
Before proceeding with the device of the hip roof, it is necessary to complete the drawing of the rafter system. This will facilitate the installation and help to calculate the required amount of building material. To do this, you need to decide on the future slope of the roof slopes. More materials are needed to equip a roof with a steep slope. An accurate calculation will guarantee the durability of your roof, its reliability and appearance.
The device of the rafter system of the hip roof should be started with the Mauerlat, on which the rafters will rest. Under the Mauerlat, it is necessary to equip a reinforcing belt made of reinforced concrete, it will help to strengthen the bearing capacity of the wall.
The formula for calculating the hip roof. The angle of inclination of the trapezoidal slopes is decisive.
A formwork is installed on top of the brick wall, into which a reinforcing cage is placed, after which concrete is poured horizontally. In the process of work, studs 10 mm in diameter are attached to the frame from galvanized metal. They should protrude from the Mauerlat by 3 cm. After the concrete hardens, its upper part is treated with hot bitumen and roofing material is glued. This will help keep the Mauerlat wood from rotting. Drill holes in the timber and put it on the protruding pins, and tighten the nuts.
For Mauerlat, as a rule, a wooden bar is used, pre-treated with an antiseptic, with a section of 100 * 150 mm or 150 * 150 mm. In parallel with the future ridge, a central beam is laid on the Mauerlat. Later, racks will be installed on this beam, which will support the ridge.
Components of the frame structure
The rafter system of a hipped roof is a frame that consists of various rafters of a hip roof: privates, oblique, diagonal, rafters, puffs, struts. To strengthen the slant rafters, a structural element such as a truss is sometimes used.
Sprengel is a beam of timber, rolled at an angle along the intersecting walls to the outside. In order for the beam not to bend, two struts are installed in the truss structure. Such a support is called a truss truss.
Hip type roof marking scheme.
All rafters are made of softwood and must be dried to 20% moisture. By the method of pairing two boards, the rafter legs are lengthened, which gives additional strength. All elements of the truss system made of wood must be treated with an antiseptic. The device of the rafter system begins with the installation of vertical racks that support the girder (ridge beam). The uprights are attached to the central beam. After that, the installation of diagonal rafters is carried out.
A rafter can be an edged board with a section of 50 * 150 mm. The main element of the rafter system is the slant leg or diagonal rafter, which carries the main load. Diagonal rafters must be of the same length. are made within 60 cm, but can reach up to a meter in places of high wind loads.
The most difficult thing is to dock correctly the diagonal rafters, ridge beam and central rafter from the end of the house. First of all, slant rafters are installed, then ordinary rafters with a distance of within 60 cm. To the ridge bar and Mauerlat, ordinary rafters are fastened using the cutting method, additionally fixed by setting the upper crossbars and ties; they are attached to the diagonal rafters on each side, which fasten the slant rafters to the Mauerlat.
The installation of ordinary rafters and rafters is performed at an angle of 90 degrees to the ridge parallel to each other. Sprengel is a bar that is laid on two walls, converging at an angle. A vertical rack is installed on the beam.
Mounting rafters device - drawings
The diameter of the diagonal rafters matches the dimensions of the ordinary elements. Since in our example the slope of the trapezoidal slopes and hips is different, one of the slant legs is placed slightly higher than the other.
The process of creating and installing nipples is as follows:
- Using the laces, we outline additional lines for marking the gash, pulling it to the corners and the center of the slope from the top point of the ridge beam.
- Determine the angle between the top of the corner stem and the lace. This will be the angle for the bottom cut (α). The upper cut (β) is calculated by the formula: β = 90º-α.
- Take a piece of board and cut one edge in it at an angle β. Having attached the workpiece to the joining point of the upper parts, we combine its rib with the lace. We mark the surplus and saw off.
- In another workpiece for the lower heel, saw off a section at an angle α.
- Using the templates obtained, the first diagonal rafter is cut out. If there is no whole board of the required length, the element is assembled from two pieces. They are spliced using an inch board, 1 m long, placing it on the outside of the rafter. The finished element can be installed.
- The second half of the diagonal rafters is made in a similar way, not forgetting that it should be placed slightly lower than the first. The junction of the two halves of the slant should not coincide with the piece of joining the boards into one piece.
- Docking of the boards is done with nails at a distance of 40-50 cm.
- Further, along the lace on the rafter, it is necessary to draw a line of the saw so that it can be docked with the adjacent diagonal element.
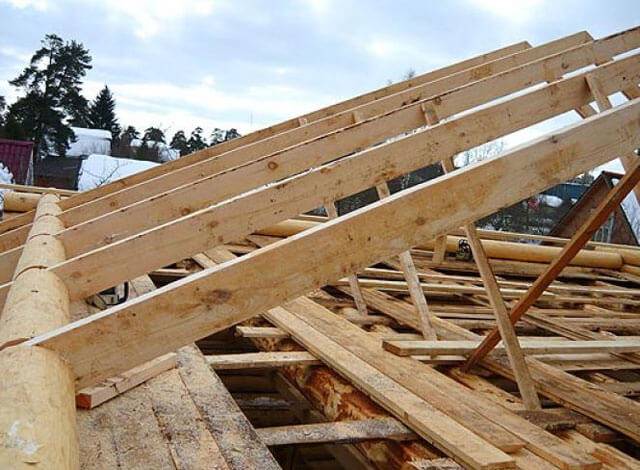
The other 3 parts are made in the same way. Supports are installed under each of these rafters in the places where the beams with corner outlets are joined. Additional supports near the ridge are required if the span exceeds 7.5 m.
Rafter system
The rafter system can be of two types - hip and hip.
The hip-type rafter roof consists of four triangular surfaces - hips, and the hip type of the system provides for two trapezoidal slopes, as well as two triangles.
Arrangement of the rafter system of a four-slope structure is quite difficult technologically, but at the same time it pleases with the result at the end of construction.
Impact of loads
During the design of the hipped roof structure, it is required to take into account that it will be exposed to periodic as well as temporary loads. The rafter system, roofing materials can be classified as permanent loads.
The rafter system, roofing materials can be classified as permanent loads.
As for temporary loads, they are precipitation in the form of snow and rain, wind, a lot of necessary equipment, a lot of people performing roof maintenance.
It is worth knowing the following:
If there is a roof slope in excess of 70º, the snow load is not taken into account.
When the slope is less than 30º, there is no wind effect.
If the slope of the roof is less than 60º, it will be necessary to take into account the snow load, which is observed in central Russia, according to SNiPu. Thus, the load is 180 kg / sq.
meter.
The wind load in central Russia is 35 kg / sq. meter.
The mass of materials is determined by calculation: the specific weight of each building material is multiplied by the roof area.
The mass of additional equipment is determined individually for each roof.
Installation work
The hipped roof structurally represents, in addition to the rafters, also a support bar, called the Mauerlat and laid on the walls.
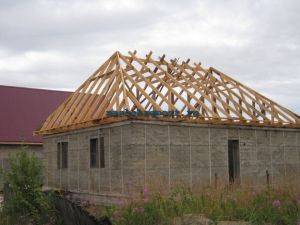
Ceiling beams are laid along the support bar.
If the structure is made of wood, the rafters are fixed to the crown of the log house located on top.
The main feature of the roof of this type is the correct installation of the slant rafters, which are a ridge beam.
For the definiteness and correctness of the installation work, it is worth familiarizing yourself with useful tips.
Consider the following:
- Diagonal rafters should also be strengthened by means of rafters, which are shortened rafter legs. They also attach to the Mauerlat and carry out the support of the slant rafters.
- If a large roof area is to be arranged, truss trusses are arranged, which take part of the load on themselves, directed from the rafters.
- Truss trusses should be carried out with ties, on which the emphasis of the same trusses is carried out. They can be fixed to existing longitudinal or transverse beams.
- In addition, the installation of braces systems, crossbars, puffs, crossbars, creating a rigid frame is provided.
- The diagonal rafters are fixed to a ridge girder resting on a longitudinal floor beam. Fastening is carried out at the top of the ridge girder.
- The ends of the rafters from the bottom are connected to the support beam by means of specialized cuts, inserts, which are supplemented with fixing elements.
- At the end of the setting and strengthening of the diagonal rafters, you can proceed to the installation of ordinary rafters, while the step between them should be determined by using calculations. Calculations are performed depending on the degree and strength of the loads, the type of material, but often the indicator does not exceed 70 centimeters.
- The overhead rafters are interconnected by means of a horizontal tie at the top (the tie is called a crossbar).
- The crossbar is made from a board with a section of 12 x 4 centimeters. The crossbar is located one meter from the top of the ridge. The main task of the girder is to increase the resistance to wind loads.
Pay attention to the connections of the Mauerlat and rafter legs.
It is worth noting that the joints are the main points responsible for the strength of the rafter system.
With regard to the overhang, it must be regulated by the length of the diagonal rafters, and because of this, sometimes the rafter boards are lengthened by fastening two boards together.
After the rafter system is installed, the lathing, waterproofing, vapor barrier, counter-lattice are performed.
Installation work, design, calculations and much more, as for the construction of a house and a roof, must be carried out responsibly.
Remember that there are no insignificant stages in construction.
Video on the implementation of the drawing of the structure of a hipped roof.
What else to read on the topic?
Design features
Due to the inclined position of the pitched surfaces, the design of the four-pitched roof is significantly different in shape from the rectangular one. It is the non-standard shape that first of all determines the main difficulties in the calculations and during the installation process, in particular, in how to calculate the area of the hipped roof of a house, calculate the required number of certain elements, how to connect the structural parts of the roof, how to calculate the volume of the hipped roof roofs, etc.
Roofs with four slopes, depending on the variety, can have different structures and components. However, the general principles of their design are largely identical, and they can be considered using the example of hip roofs - as the most typical version of hipped roofs.
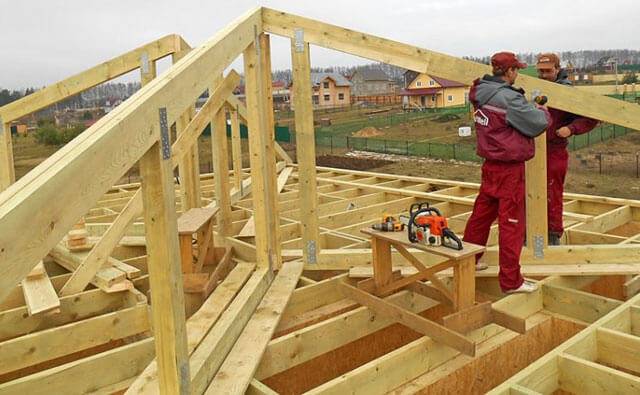
When considering the device of the central part of the hip roof, you can notice the similarity with the usual gable roof. The process of arranging the central part of such roofs also has a lot in common. Most often, rafter systems of the layered type are used here, hanging rafter structures are used somewhat less often. When arranging a layered variety of rafters, they are supported on a ridge girder located at the top of the roof, which, in turn, is installed on a girder frame. The frame for the installation of the ridge girder consists of racks and a horizontally located bed. A very important point is its support on a solid foundation, which can serve as a load-bearing wall in the center of the structure being built. Sometimes in the rafter systems of complex hip roofs, not one central girder is arranged, but two parallel beams.
The strength of concrete slabs is usually large enough to withstand the load from any type of roofing system and of any weight. Therefore, the question of how to calculate a hipped roof in terms of weight indicators, in this case, does not matter much.
It is only important to correctly make all other measurements, and then carry out the installation process in accordance with them.
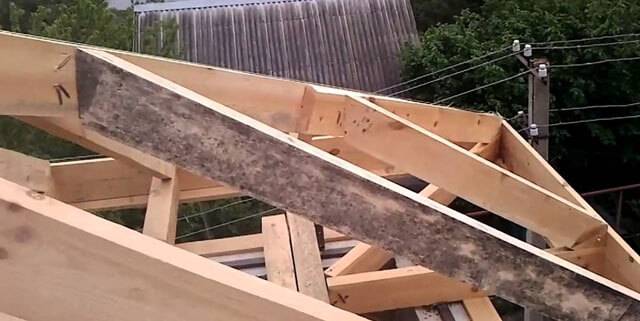
Sometimes, instead of concrete slabs, a floor of wooden beams is used to equip supporting structures. Naturally, in terms of strength, this method is noticeably inferior to the previous version. At the same time, the running frame is installed on a thick beam with dimensions of 100-150 by 200 millimeters. The ridge girder itself is made of a similar material, as well as the bed, if there is a need to use it. The laying of the supports under the racks of the running frame is made crosswise with the floor beams. Stands, struts and wind braces are made of a bar measuring 100 x 150 millimeters.
The complexity of the design of the hipped roof makes it difficult to equip supports for pitched surfaces. For this purpose, the corner zones are connected to the ridge girder by means of diagonal rafter beams (nipple rafter legs). These beams are longer than usual and should have greater strength, since the shortened rafters of the pitched structures abut against them.
How can you calculate the height of the roof of a house?
Roofing is one of the most important construction processes, the quality of which directly affects the performance of the roof itself and the entire building. Construction should begin with the calculation and design of the roof structure on paper. One of the most important data for the calculation is the height of the ridge, in connection with which the angles of inclination of the slopes, the type of roof and the amount of building materials are found. Let's figure out how to independently calculate the height of the roof of different structural types.
Preparing for calculations
Creating a roof plan and calculating a number of its parameters is important for subsequent installation. Advance calculation helps:
- Calculate in advance the amount of required building materials and not miscalculate when buying them up or down.
- Even at the design stage, think over and distribute various systems, such as gutter, snow retention, etc., and determine their place in the future project.
Before calculating the height of the roof, it is important to consider some factors:
- the size of the house;
- plans for the use of under-roof space;
- the planned shape of the roof and the number of its slopes;
- the angle of inclination of the slopes;
- load on the roof structure: wind, snow, etc .;
- type of roofing.
In this article, we will look at how to correctly calculate the height for the three most common roof structures.
Calculating the height of a gable roof
The gable type of roof is easy to design and build. The design of this type implies the presence of two planes that stand on opposite bearing walls and, merging on the ridge, form a triangle with equal sides.
Calculation of the height of the ridge of a gable roof is in direct proportion to the value of the angle of inclination of the slopes.
The choice of the slope of the roof slopes should not be arbitrary. Its value depends on wind and snow loads, the rules for determining which are regulated by SNiP. The recommended slope for the regions of central Russia is 30-45 °. Also, the choice of the slope of the roof slopes is influenced by the selected roofing material.
Having decided on the slope of the slopes, you can calculate the height of the roof of the house. Its value is calculated according to the well-known geometric formula:
where a is the desired value, b is the value of half the width of the house, tg α is the tangent of the selected angle, which can be found in a specialized table.
With a slope of 45 °, the elevation of the ridge beam will correspond to the width of the house.
Calculation of the four-slope structure
A roof with four slopes is the most resistant to wind load. There are two types of hipped roof:
- Hip - all slopes converge at a single point at the top of the structure.
- Hip has two triangular and two trapezoidal slopes, the latter are connected at the top by a ridge bar.
It is possible to calculate the ridge height for both types of roofs using the formula used for the gable structure. However, for a more careful calculation and drawing up a detailed diagram, it is also necessary to calculate the length of the rafters, and for the hip roof - the length of the ridge beam.
Mansard roof design
A mansard or sloped roof also has two slopes, a feature of which is a characteristic break. It allows you to increase the space under the roof and makes the broken structure one of the most suitable for creating an attic.
The calculation of the height of a broken roof begins with the calculation of the angles of inclination of all pitched roof surfaces. Experts in the field of construction recommend determining the angles of inclination of the attic structure by a practical method, using the rule of the golden ratio. To do this, you need to write a sketch of the future roof in a circle on paper. This method will allow avoiding such design flaws, in which the broken structure does not look aesthetically pleasing.
Design and calculations are important and fundamental steps in the creation of a roof. Their competent and correct implementation is the key to the construction of a reliable and aesthetically attractive roof that will last for many years.
Assembling the ridge section of the hipped roof
The center section of the hip-type roof is nothing more than a traditional gable structure. Therefore, it is assembled using pitched roof technology. Although such a design usually provides for the presence of a bed, on which supports for the ridge are placed, in this example the functions of such an element are assigned to the central floor beam.
The ridge section of the roof is performed as follows:
- First, the support structure is assembled under the rafters, which with the upper heels will abut against the ridge beam. The ridge itself will be supported by three support posts, of which the middle one is mounted directly on the central floor beam. In order to correctly install the two extreme pillars, transverse bars are placed under them on top of the overlap, covering at least 5 beams in length. The struts provide additional structural stability. The supporting elements of the frame are made from a bar with a section of 100 × 150 mm, and the struts are made from boards of 50 × 150 mm.
- So that all the rafters are the same, a template is made for cutting them. To do this, the board of the required length is tried on at the installation site, the cuts are marked, after which all the rafters are cut along it.
- The finished rafters are supported on the ridge beam with the cut-in place, and the lower part is fixed on the extension.
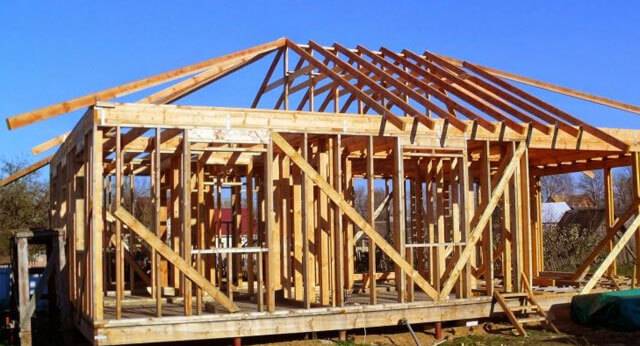
Usually, floor beams are placed perpendicular to the box so that the support of the rafter legs in the central part of the roof falls on them. Since in the example under consideration, the rafters are joined with the extension, it is necessary to install additional supports. They are placed in such a way as to redistribute the load from the rafters and supports to the walls.
At the end, you need to install three rows of stems on each side. After that, a cornice is attached strictly horizontally to the floor beams and outriggers, which facilitates further work with the roof.
Laying plan for supports on the Mauerlat
Depending on the material used to erect the walls of the building, the Mauerlat can be laid in different ways.
General recommendations are as follows:
- In the upper part of the walls made of gas silicate or foam concrete blocks, you need to fill in a reinforced concrete belt, in which to place anchors for the subsequent fixation of the Mauerlat.
- When constructing brick walls, in their upper part, a side of 1-2 bricks is made in such a way that a recess for a wooden frame is formed in the center of the wall. As the masonry progresses, wooden corks are placed between the bricks, to which the Mauerlat will be fixed with brackets.
For a Mauerlat, you will need a bar with a section of 100 × 150 or 150 × 150 mm. Thicker beams should be used when planning the use of the roof space. The elements of the frame are joined by oblique cuts, followed by reinforcement - with nails, wood grouses or self-tapping screws, and in the corners - with staples.

Next, you need to place the floor elements on the Mauerlat. They are made from bars with a cross section of 100 × 200 mm. The central beam is laid first. If the length of the lumber is not enough, it is made from two pieces of timber. Moreover, the junction should be on a supporting element, for example, a load-bearing wall.
In this case, the beams are laid in 60 cm increments. As a rule, the box has imperfect dimensions, so the spacing between the beams can be slightly adjusted to smooth out imperfections. The distance from the walls of the house to the extreme beams located on both sides should be 90 cm. It is required for the installation of outriggers.
An extension is attached to the end parts of the floor beams. For convenience, at first they are placed only in those places where the rafters will be installed later. They are attached to the surface of the Mauerlat with nails, and to the beams - with pins, large-section nails, self-tapping screws, after which the fastening is reinforced with corners.
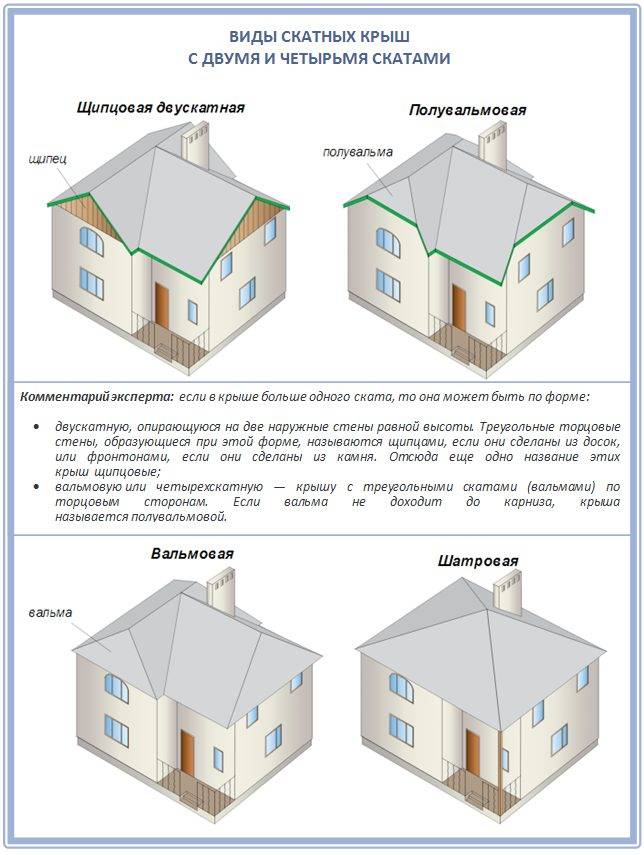
Varieties of hipped roofs. Photos of interesting options
Several types of structures can be attributed to hipped roofs, which have the same number of inclined surfaces, but a different device.
The classic design is the hip design, as can be seen in the photo of a house with a hipped roof. It consists of two triangular slopes and two trapezoidal ones. The place of their connection is called the ridge, which has a length much shorter than the length of the house. A hip roof is a structure of increased complexity, in which design and installation is a very time-consuming and complex process that requires certain skills and experience.
This structure is suitable for the base of a rectangular building. This is the most aesthetically pleasing roof option. However, it is also the most difficult, both in terms of the necessary calculations and in terms of the construction technology, since a complicated rafter frame is used here, which is proved by the rafter system diagram, which requires additional measurements and adjustment of the material on site.

An example of a hip hip roof with a complicated structure
The semi-hinged Dutch roof at the same time refers to a gable and four-pitched structure. It consists of two oblique trapezoidal slopes and two truncated triangular hips. Small hips do not completely replace the gables, which makes it possible to install simple vertical windows, which are much cheaper than attic windows. In the photos presented on the Internet, you can see various projects of houses with a hipped roof of this type.
The semi-hip Danish design has four trapezoidal ramps, which differ in size. The truncated hips do not extend from the ridge, but slightly lower, leaving room for a triangular pediment. There is usually a dormer or vertical window for additional natural light, as can be seen in the photo of a house with a hipped roof. This design is the most resistant to strong winds. Therefore, it is advisable to arrange it for houses located in areas with increased wind activity.
The four-pitched mansard roof consists of two triangular hips and two broken surfaces with a varying angle of inclination. Such a complex structure helps to obtain an overall attic with a high ceiling, which is especially important for one-story houses. Projects with a hipped roof of this design are a clear confirmation of this.
The hipped roof is erected on square-shaped buildings, mainly used for frame houses. The rafter system does not provide for the presence of a ridge girder. The structure consists of inclined surfaces of the same size and triangular shape, which are connected at a peak.

The hipped roof consists of four surfaces of the same size and triangular shape, which are connected at a peak
Architectural traditions and new trends
Now let's look at both roofs from the aesthetic point of view. For many centuries in Russia, a gable roof was decorated with dormers, platbands and weather vane, and even lucarnes, especially recently. But the hipped roof suggests a more minimalist design, and the excess of roofing elements on it looks ridiculous.
In other words, the gable roof is an architectural classic for private homes. In addition, for the eye of a Russian person, such a roof is more familiar, because this is exactly what was built here for many centuries. Therefore, even today, most projects of country houses and cottages are made with a gable roof. The end of such roofs usually ends with a vertical brick wall, with a triangular outline and a cornice. Those. such a pediment only vaguely resembles the ends of the gable roofs of past centuries, but the shape remains familiar to many at home.
But abroad, a four-pitched roof is considered a popular option, which differs from a gable roof in that it forms two trapezoidal slopes and two triangular ones at the ends. But if you decide on a four-pitched roof, the Russian style of home decoration and ethno-exterior will no longer work. All that remains is to be content with European laconicism and simplicity of forms, which still looks unusual and unusual for the overwhelming majority.
Although, according to unofficial statistics, a house with a hipped roof today is easier and easier to sell than a gable roof, because a gable roof looks more solid, high-quality and solid, while an ordinary gable roof today looks more and more like a country house. But multi-slope gable roof can compete with the hipped roof.
Take a look yourself:
1 Sliding systems
Compared to hanging systems, layered systems are structurally simpler, not so material-intensive. If there are internal or intermediate supports in the middle of the building on a reinforced concrete slab, a layered system is a good choice. As a rule, such structures are mounted when arranging roofs, the slope angle of which does not exceed 40 degrees.
The structure of the layered rafter system includes:
- Oblique rafters installed diagonally towards the corners of the wall structures;
- Narozhniki or shortened rafters that form slopes;
- Racks;
- Braces;
- Beds;
- Runs;
- Crossbars;
- Sprengeli.
Let's consider each of the structural elements in more detail. You can clearly imagine the design features on photo and video materials. Slant rafters are the basis of the future roofing system. A Mauerlat is installed as their support along the perimeter. A slightly different option can also be used, when a beam is cut into the Mauerlat on one side, and a pair of rafter legs on the other. The main task of this element is to take the load from the roof and distribute it evenly over the enclosing wall structures.
The slant rafters, in turn, will serve as a support for the people. Therefore, experts advise to perform them longer than the length, since they can withstand a significant load during operation. It is difficult to give any recommendations regarding the choice of the length of the overhead rafters; here it is necessary to make a special calculation.
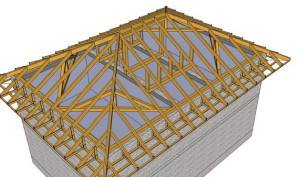
Narodniks rely on the rafters on one side, and on the Mauerlat on the other. To equip the roof of a building with a large area, the hangers are made multi-span. It is necessary to resort to the creation of composite rafter structures if the width of the structure exceeds 4.5 meters.A long span is subject to significant stress during operation. To reduce it, struts and struts are installed - elements that reduce the length of the span. To prevent the occurrence of an emergency during the operation of the building, it is possible to correctly calculate all the elements of the system and the load on them.
DIY gable roof device
The construction of a country house is associated with considerable costs. Therefore, many people are looking for options to reduce the cost of this process through the use of modern materials and technologies. Currently, frame buildings with gable roofs have become very popular. This is largely due to the fact that even a person with minimal knowledge of the construction business with appropriate preliminary preparation is capable of performing such a structure.
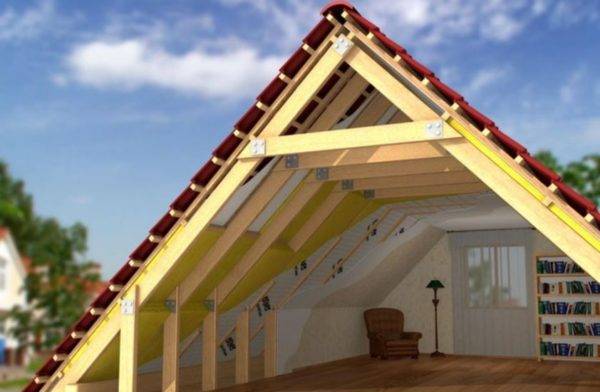 A gable roof is formed by triangular trusses, interconnected by a longitudinal upper beam (ridge girder) and lathing
However, building a roof is a crucial moment that requires serious consideration. You need to calculate:
- correct angle of inclination;
- the length of the rafters;
- the distance between them;
- ways of connecting various parts to each other.
Without experience in the production of such work, you should not take on complex structures, but you can easily build a small house with a simple gable roof with your own hands.
Additional installation guidelines
In addition to the above nuances, there are some other features that should be considered when choosing a hipped roof for a house:
- The design of the four-pitched roof allows you to equip large overhangs on all four sides, protecting the facade and walls from precipitation.
- Although, in general, a four-slope roof structure is more expensive than a dual-slope one, however, due to the absence of the need for arranging gables, this difference is not so great.
- If a hipped roof is intended for a mansard structure, then visually it will look lower, which should be taken into account when designing.
- Installation of any kind of hipped roof should be started with a ridge structure. The Mauerlat must be securely fixed and connected at the corner sections, and the purlins must have a solid foundation.
- It is recommended to use modern metal fasteners for fixing various roofing elements.
- At the end of all work, before calculating the hipped roof of the house completely ready for use, you should once again revise all structures, elements and butt joints.
- Since the construction of a hipped roof is not an easy task, you can take on it only if you have sufficient self-confidence. Otherwise, the most correct solution would be to entrust the installation work to specialists.
Why is a hipped roof more popular than a gable?
"Why then the extra headache and difficulties?" - you ask: "After all, you can build a simple gable roof much faster and cheaper." Here, the masters emphasize some important points in favor of choosing exactly four slopes for the roof:
- High wind resistance. The four-pitched roof has no gables, all of its planes are inclined towards the ridge. Such a structure minimizes the impact of strong winds and reduces possible destructive consequences to "0".
- The most successful load distribution. The multi-slope roof withstands the maximum amount of precipitation, since the gentle slopes take part of the main load. Therefore, sagging, deformation and destruction of the rafter system, in this case, have a minimal likelihood.
- The availability of a choice of any method of roof insulation. Straight gables require a special approach when choosing the type of roof insulation, as they are located vertically and are subject to blowing by the wind. The gentle slopes of the hip and tent systems allow you to uniformly insulate the roof with any available material.
In addition to the listed "pluses", a roof with four slopes perfectly conserves heat, can be clad with any roofing material and always has a neat appearance.
