Decor for a summer residence - photos of ready-made examples
Armed with imagination, in addition to interesting garden paths made of plastic, you can make a good fencing of the site.


If you buy glue and fix the lids together in the shape of a circle, then an unusual table for tea drinking will come out.
Thematic material:
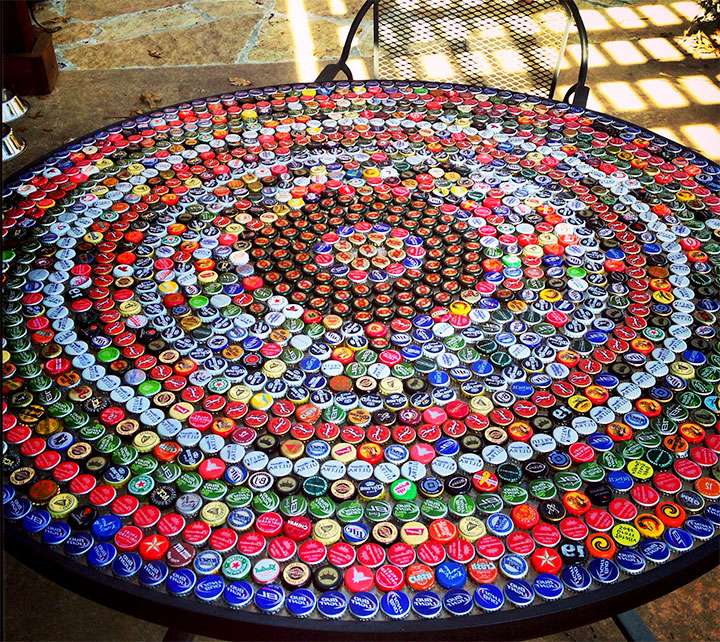
Photo: cork table
Lovers of mosaics can be patient and try to create a whole picture that will please the eyes of others for more than one year.
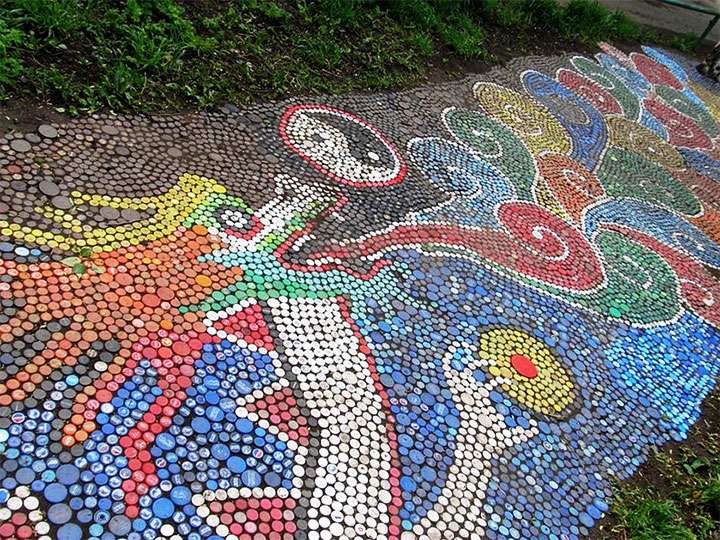
Photo: mosaic of covers
A simpler, but equally interesting option is to use whole bottles, turned upside down, as a fence for a flower bed.
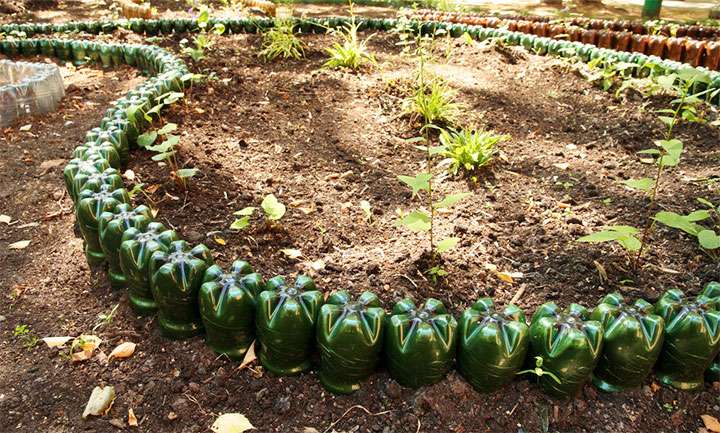
Photo: border for a flower bed
Having picked up the corks by color and shape, you can make wall compositions. They will become an interesting decoration of the fence, walls of outbuildings, gazebos, baths, houses.
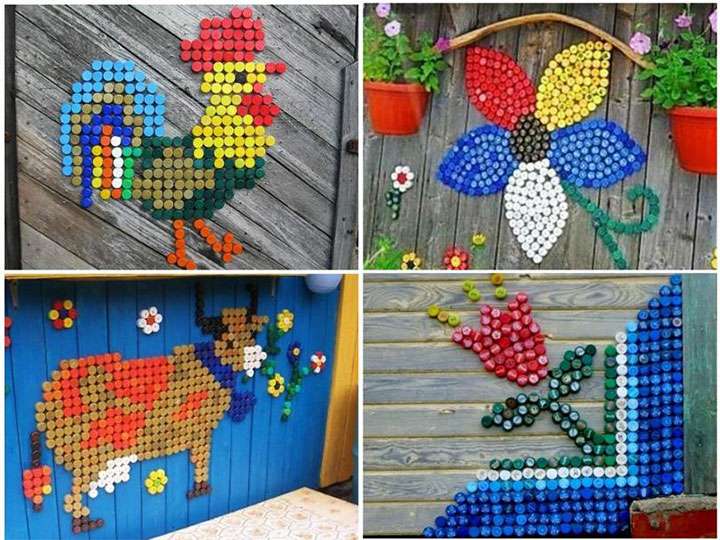
Photo: other crafts
This is how original decorative elements are obtained from unnecessary things, which are easy to make yourself. And if you invite children to help, beautification of the site will turn into an exciting creative process for the whole family.
Covering from lids or bottoms
Such coatings are made according to the same technology: a cut-off bottom with curly ribs or a lid must be sunk into sand or concrete mortar so that a small part is above the base.

To perform this work, you need to dig a trench, as described above, and place a pillow of ASG or sand on the bottom. The thickness of the layer under the concrete base is 10 cm. If the base is made of sand, then you just need to fill the trench to the top, tamp the sand and fill it up as necessary, leveling the path with the soil surface. For a concrete base, a formwork should be installed on a sand cushion, the edges of which will be raised above the soil by 5-7 cm.
Since the caps or bottoms need to be immersed in the base material, which takes time, it is better to prepare a concrete solution in small portions and pour individual fragments of the track. Each part must be made of such a size so that all the plastic elements can be installed before the concrete sets. Especially a lot of time is spent on drawing up a mosaic pattern from colored parts. Rice. 3. All this must be taken into account when choosing the size of a fragment of a track with a concrete base.
On any basis, the installation of plastic elements is carried out according to the following scheme:
- 1In accordance with the selected pattern, place the bottoms, cut at a height of 10 cm, or bottle caps on the prepared base.
- 2 Press the plastic part into the mortar or sand. The bottoms are slightly more difficult to press in than the lids, so a rubber mallet can be used to immerse them in the base material and to level the mosaic surface. With light blows on the bottom, it can be very accurately adjusted to the already installed ones.
- 3Sweep off with a broom or a brush crumbs of sand or mortar that accidentally fall on the surface of the plastic.
The concrete takes about 10 days to fully cure, and the sandy path, paved with lids or bottoms, can be used immediately.
When paving paths with a mosaic of colored parts, you need to be as careful as possible and follow the chosen pattern. Lids or bottoms can be of different sizes. Gaps between larger parts can be filled with smaller ones. The combination of plastic with shards of tiles or glass elements also looks very good.
Let's get down to business
By making garden paths from plastic bottles, you will ennoble the garden, divide it into cozy zones.
How to make a garden path using whole bottles
- We dig a shallow trench along the length of the future track;
- we put the formwork;
- we lay broken brick or other similar waste;
- we fall asleep with earth;
- ram;
- we arrange a pillow of sand;
- ramming again;
- pour sand into the bottles;
- we compact the content;
- we lay the bottles on the prepared base horizontally with the necks to the edges;
- we place the board on top and press it down, pressing the bottles evenly;
- pour sand mixed with cement in between;
- again we put the board and ram it well, and for this we just walk on these boards;
- remove excess filler;
- pour with water;
- when the cement hardens, we remove the formwork.
Nothing complicated, right? And so that the track is also pleasing to the eye, looks more aesthetically pleasing, you need to try more:
- If you have a lot of yogurt bottles, then they are pretty and smart in themselves. We put them as they are;
- Transparent water bottles filled with sand look, frankly, not very good, therefore:
- in an empty bottle we put colored paper or foil, in general, whatever you come up with, and then sand. At the same time, before sticking it into the bottle, roll the paper into a tube - it will straighten out there and lie on the walls, but you can also mix the sand with pieces of elegant candy wrappers or add dye and then the sand will be colored. In other words: do whatever your imagination is enough for;
- when you remove the formwork, you will see that the necks of the covers along the edges of the path look somehow not harmonious. And make a border: from the same bottles or bricks, or floral - just pick the flowers so that their whips do not lie on the path, or they can completely close.
You can put just such a figure at the curb, the material for which is also, if not entirely plastic bottles, then the caps from them:
Useful: want to get a snow-white track? Add chalk to the bottle.
Tracks from the bottoms
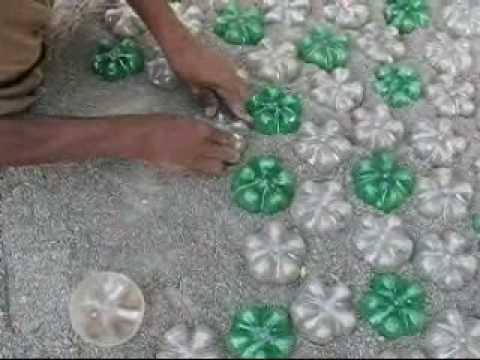
We act in the following sequence:
- we take scissors and cut off these very bottoms, leaving 1/5 of the height of the bottle;
- in the same way as in the first case, we make a trench, tamp the earth, pour sand;
- water well in the trench. The sand should be completely wet;
- we press the bottoms into the sand.
Keep in mind: do not throw away what is left after cutting off the bottoms, but put it aside. In the spring, the remains from the bottle will make excellent greenhouses:
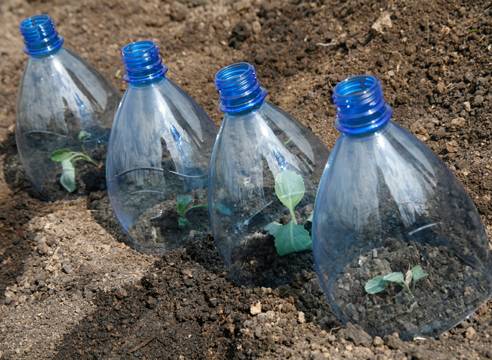
Ornamental garden paths
Besides the fact that a plastic bottle is a cheap material, it is also waste-free. We have already considered how to make a garden path using different parts of its body, there are only corks left. This work is so exciting and creative that it will not leave indifferent any of the family members. Stoppers can be stacked:
- creating an even coating;
- ribs up, then you get not a path, but a rug for massaging bare feet.
The only problem can be that traffic jams will be required, well, a lot, so announce to all your friends and acquaintances that from now on, traffic jams are not thrown away, but collected and delivered to you. By joint efforts it is quite possible to accumulate material for such a track. To prevent the caps from popping out over time, we will slightly change the styling technology:
- we will make a trench, but not solid, but with a breakdown into rectangles;
- drive in supports;
- we make formwork from boards, attaching them to the supports;
- on the edges we put spacers for greater strength of the formwork. Distance 100 cm;
- we put crushed stone there;
- tamp;
- sorting corks based on color and size;
- We prepare a mixture in the ratio: 1: 3 - sand and cement, glue, which is used to stick ceramic tiles - 1 part;
- add water gradually, stirring next. Everything should be sufficiently wet, but by no means liquid;
- alternately add a mixture of sand, cement and glue to each rectangle;
- we quickly lay, pressing the covers into the solution, until the cement seizes;
- if the track consists of stripes, then when making a turn, we unfold the stripes diagonally.
It is permissible, when paving garden paths, to lay the covers and not on cement, but on wet sand, but then the strength characteristics will be worse.
Important: when making the formwork, the nails must be driven in so that the heads are inside, and not the sharp part. Intricate patterns can be laid out with lids:
Intricate patterns can be laid out with lids:
- using cross stitch patterns;
- pictures that are attached to the children's mosaic;
- lay out in disarray that the first one comes to hand;
- apply your own imagination.
Chamomile from bottles
Instructions on how to make crafts from plastic bottles for the garden.

For the craft, you will need 2 plastic bottles of brown, white and 2 green colors. You also need acrylic paints, a sharp nail and wire.

A neck with a cork is cut off from a brown bottle to a length of 3 cm. Then it is cut into thin longitudinal strips. These will be stamens. A hole is made in the middle of the cork with a sharp nail. The bottom is cut off from the white bottle, stepping back from the edge by 3 cm.


Further, the edges of the bottle are divided into equal 5 parts according to the number of petals. Oblong petals are cut out of five parts. In a white bottle with cut white petals, the neck is carefully cut off, not cutting 3.5 cm to the petals.

Finally, cut white petals are inserted into a brown bottle between the cork and the stamens.

A thin strip is cut from a green bottle with a spiral, which is tightly wrapped around a thin wire. The beginning of the strip is fixed at the end of the wire with a thermal gun.

The wire is pushed into the hole in the plug and secured. You will get a white daisy. You can stick the wire into a piece of styrofoam. From another green bottle, you can cut the leaves and fasten them with a stapler or glue to the stem.


Also, the petals can be cut in the same way from 2 bottles, so that the petals are larger and the flowers are more luxuriant. You can burn the edges of the petals on a candle so that they are wavy
You will have to bring it to the fire carefully so that the edges do not burn. Clean the soot.

Advantages and disadvantages of such tracks
Plastic and glass materials have a number of advantages and disadvantages.
- The advantages of using plastic containers and lids from it are:
- durability;
- moisture resistance;
- availability;
- immunity to decay;
- the ability to choose a variety of color backgrounds;
- cheapness.

- Cons of using plastic:
- deformation due to temperature difference;
- slides in rain or frost; subject to deformation under load;
- a large amount is required for design (relevant for caps).
Did you know? When buying mineral water in plastic containers, 90% of the price is made by the bottle itself, and the cost of water accounts for the remaining 10%.
- Glass has its positive qualities:
- availability of material (you can always find it);
- cheapness;
- ecological cleanliness;
- decorativeness;
- durability.

- The disadvantage of using glass containers is:
- its fragility;
- can break and injure a person;
- heats up quickly in the sun;
- gets dirty easily.
The creation of a pedestrian zone from glass or plastic containers is painstaking and not quick work. But, having completed it, you can boast to your neighbors of a decorative path made of inexpensive material.
How to make
Plugs can be laid in different ways:
- face up (the result is a flat surface);
- ribs up (this path can be used instead of a massager);
- inner side up (the coating is textured).
In the photo - do-it-yourself paths from corks from plastic bottles:
The latter option is only suitable for small areas under a canopy. Otherwise, during precipitation, water and dirt will accumulate in the grooves of the plugs. And such an uneven surface is difficult to care for.
Mosaic laying scheme
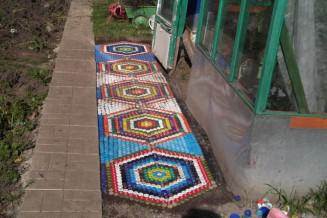
This is the most creative part of the job. Before you start paving directly, you need to decide exactly how your path should look like. You can lay out the lids in even rows, regardless of the color. As a result, you will get a multicolored scattering of colored highlights in your garden. Such a path is eye-catching and looks impressive.
But if you want something more extraordinary, choose a pattern for your track yourself. Cross-stitch patterns will help you with this.Tracks with colored geometric patterns look good. If you are confident in your abilities, you can choose the drawings more difficult.
Some summer residents create real story panels under their feet in their garden. It is in the country that such decorations are popular.
Experiment with color. Encourage children to participate in this work. During a fun game, you can come up with your own drawing for the track.
Tools and materials

Despite the cheapness of the material, the approach to creating tracks from traffic jams must be serious. Sometimes it is advised, before laying the cork mosaic, to simply level the ground and start creating by sticking the caps directly into the ground or a layer of sand.
A carpet like this won't last long. Not only will the lids not hold out for a long time and will begin to fly out one after the other, so the grass will rush to germinate between them. Better to spend more time, but do everything well.
- covers of different colors;
- cement;
- sand;
- building glue or ceramic tiles;
- wooden blocks and boards for formwork.
Any track must have a base. Whether it's a path paved with paving stones, wood or plastic covers. First, they prepare the site.
To build a track you need:
- decide on the area of the track and make markings;
- remove sod and topsoil;
- dig a trench 10 cm deep;
- drive in supports along the edge of the recess;
- make a wooden formwork, and nails need to be hammered from the inside of the structure;
- install spacers for reliability (the optimal distance between them is 1 m);
- fill in a layer of crushed stone, gravel, broken brick;
- prepare a mortar of cement and sand (4: 1) and add one part of the glue to it, the mass should be of medium consistency;
- pour a small amount of the solution onto the prepared area;
- quickly lay the covers, according to the chosen scheme, slightly press them into the cement;
- the solution should almost completely cover the lids;
- after the cement has hardened, brush over the top layer with a stiff brush to remove excess cement.
The mortar hardens quickly, especially in hot weather, and the installation of the mosaic is time-consuming. Do not fill the entire track with cement. Work by sector. Break your drawing into pieces or conditional squares and fill in small areas.
on: do-it-yourself paths in your garden
Dignity
- The coating performs an aesthetic function not to the detriment of practical.
- The material does not require material investments.
- Plastic tolerates temperature extremes well.
- Such paths do not lose their aesthetic appearance for a long time.
- Paths made of unusual mosaic are easy to repair: any cover can always be replaced.
- The lids do not need to be painted. They contain a persistent dye that will survive the winter without any problems.
Disadvantages and methods of dealing with them
But such tracks are not ideal, they have serious drawbacks. But knowing in advance what difficulties may arise with them, you can easily avoid them.
- Plastic paths from the lids become very slippery after rain. Such coatings should not be installed on the central paths. Their place is in the garden and near the recreation areas.
- An icy path becomes dangerous. If you need to walk on it in winter, it is better to combine mosaics made of plastic lids with patterns made of cement, ceramic or wood.
Here you can see the laying of sand and paving slabs.
Do-it-yourself pebble garden path with patterns step by step
One of the most creative and perhaps painstaking ways to make a garden path from stone with your own hands is to lay it out of river pebbles. This material is available to almost everyone - the shore of any reservoir is strewn with pebbles of various sizes and colors. Such a path will become a real decoration of any site and will delight all neighbors.
Do-it-yourself pebble path is done quite simply, but painstakingly. Before starting the process itself, you need to dream up a little and prepare a drawing of the track. And already, depending on your drawing, you need to select pebbles - they can be of different colors and sizes, combined in an ornate pattern or a strict geometric pattern. To create such a masterpiece, you will need the following materials:
- pebbles
- plywood
- fine river sand
- cement (M300)
- level
- hard brush
- gravel chips
Before starting work in the marked area for the track, you need to dig a trench. Then pour a mixture of cement, sand and gravel chips on the bottom, and you can lay out the pebbles in accordance with your drawing.
At the end of the work, in the cracks between the stones, you need to pour a mixture of cement with a dog and pour it from a hose for tamping. For a day, it is better to cover the composition with plastic wrap.
Important: the resulting path will dry for several weeks, so it is better not to walk on it at this time, so that the result has time to consolidate.
PET bottles for decorating a summer cottage
Due to its properties, plastic containers have long been successfully used by our summer residents to create garden decor. Next, we will consider several examples of the successful use of plastic bottles of various sizes in garden decoration.
Fencing of beds and flower beds
The simplest construction of a fence made of plastic containers is a palisade. In order to make a solid fence of such a structure, you will need a lot of bottles of the same volume and shape, filled with earth (sand, clay)
Now the matter is small: we assemble the structure. We dig each container half the length into the ground, creating a "bottle palisade". After construction. You can leave it as it is, or you can paint the resulting border in any colors of the rainbow.
You can go a simpler way: do not dig in the elements of the palisade, but fasten them together with adhesive tape.
The design is simply placed on the grass outlining the boundaries of the flower bed or garden bed.
garden path
To create a garden path, you will need bottoms from PET bottles with a capacity of 2 liters.
- the soil is leveled.
- covered with a layer of wet sand, layer thickness 70-100 mm.
The bottoms are laid out on the future track and carefully hammered into the sand until they are completely filled. The joints between the bottoms are filled with dry sand, and for better fixation - with sand-cement mortar.
Flowers from PET bottles
It is enough just to decorate a summer cottage with the help of "plantings" of plastic flowers.
It is extremely simple to make such a composition: you just need to wake up your imagination, pick up a knife, several plastic bottles and a coil of thick wire.
From the tapering part of the bottle, you can create beautiful flowers that will be used for creating bouquets, decorating crafts for home and garden.
Cut the neck lengthwise, forming six petals. Round off each one with scissors. We melt the edges of the petals over an open flame to give them volume. The inner part of the flower can be cut out of plastic of a different color. We glue (sew) the structure using polymer glue or thin wire.
Animal figurines for garden decoration
The Internet is replete with pictures of funny animals made from plastic bottles. If you also decide to decorate your garden with funny animals from PET containers, then the easiest option is funny pigs and bunnies.
The bunny is done simply:
- in the tapering part, two cuts are made for the "ears";
- the ears themselves are cut from a plastic bottle.
The structure is assembled with glue.
On this topic:
BACK
FORWARD
1 of 40
Pigs are made in the same way, but only horizontally. The main thing is to color your creation correctly and make it recognizable.
Caps are also used
A more interesting option for a summer cottage path, if you use bottle caps.
Call the children to create such a path. Making mosaics will cheer them up. But first you need to prepare your workplace.
Draw a path for the future. If desired, install formwork and thoroughly compact the ground in the selected area, before placing construction waste there.
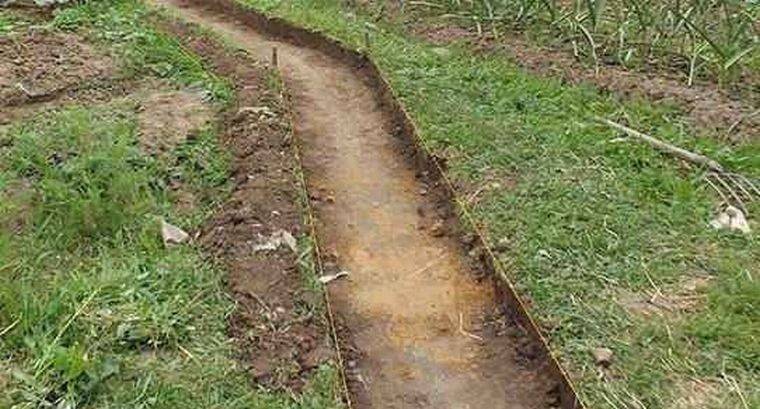
We lay out all the plugs.

We put the boards on top and tamp them so that the covers are on the same level.
For a pleasant look, you can also fill in the gaps with sand and walk again with a board, then with a brush to remove unnecessary soil already on the finished summer cottage path.
A cork track will look more elegant if you lay it out like a mosaic, in the form of a beautiful pattern.

The footpath of inverted lids will be a pleasant massage for your feet. 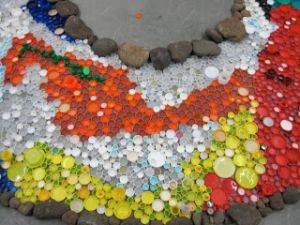
The principle of creating a track is similar, only at the end of the work it is not necessary to fill it with building mixture.
This path is not intended for constant walking, only for medicinal and decorative purposes.
Vertical method of making a border
Considering a photograph of a flower bed made of bottles, made precisely by the vertical method, everyone mistakenly believes that it is difficult, but this is not so.

The vertical method is simpler than the horizontal one. You will need plastic bottles of absolutely any capacity.


It is preferable not to take bottles with soft plastic, but opt for hard ones. When filling, bottles made of hard plastic will keep their shape more stable.


You need to bury in a previously dug trench of small depth. You will get a good, pretty high fence. The only drawback is the weak stability of this structure.

