Frame partition
The frame sheathing partition is the simplest and most economical option.
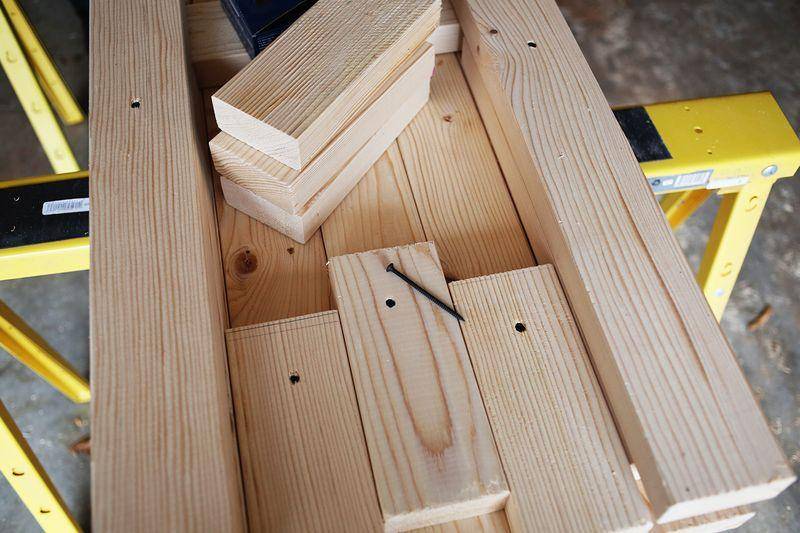
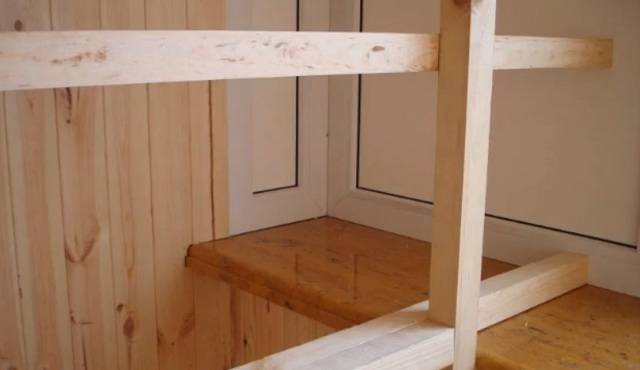
To mount the frame interior partitions with your own hands, you need to prepare a strapping from a wooden bar. The dimensions of the timber will depend on the size and weight of the future partition.
For supporting beams and frame ribs, a beam of the same section can be used. The use of smaller cross-section beams for internal ribs for sheathing will reduce the cost of the structure. The following tools and materials will help to make partitions with your own hands:
- Level Plumbing Pencil Drill Saw Screwdriver Self-tapping screws or screws, mounting dowels Metal angles Screwdriver Bars: for vertical and horizontal posts.
This will make it possible to avoid further subsidence of the floor at the installation site of the partition.
It is better to install partitions on the subfloor.
The best option is if the wooden partition is installed on the subfloor and not on the topcoat. In this case, all the logs are clearly visible, and if the need arises, then with the help of the crossbars, you can install an additional beam.
The rails can be attached to the floor in different directions: along the beams or perpendicularly. If the room has high ceilings, then the weight of the partition will be rather big.
Therefore, the base must be strengthened, for which an additional beam must be installed. If the interior partitions are mounted on the second floor, then in this case it is better to build a lighter structure. This will allow you not to worry that under the weight of the partition, the beams will bend and the geometry of the house will be violated.
The next stage of work is marking.
The stretched cord will allow you to mark a straight line along which the guides will be attached. The fixing starts from the ceiling, then the rails are installed on the floor and walls. The ribs of the frame are installed with such a pitch that corresponds to the width of the sheathing sheets, but no more than 600 mm.
In the process of work, it is necessary to constantly use a level and a plumb line and check the accuracy of the installation. When the frame is mounted, all its parts must be carefully treated with antiseptic impregnations in order to protect the wood from drying out, fungus, and mold.
The space between the inner ribs is filled with insulation. To fasten it, you can use a special mesh, stretch a steel wire between the slats, or use any other convenient method. Then sheathe the partition with the selected material.
The interior partition can have a sliding structure. To do this, you need to purchase moving parts. They can be installed on the outside on either side of the partition or fixed inside.
Drywall is not always involved in dividing the room; often a novice builder is faced with the question of how to make a wooden partition with his own hands.
Such structures have special characteristics, and they are not difficult to erect. Let's try together to make a partition made of wood with our own hands.
Categories
-
All about wood
Wood species
-
Wood products
- Booths for dogs
- Hangers
- Doors
- Children's houses
- Kids toys
- Paintings
- Bird Feeders
- Benches
- Stairs
-
Small architectural forms
- Huts
- Wells
- Mills
-
Furniture
- Buffets
- Children
- Chests of drawers
- Armchairs
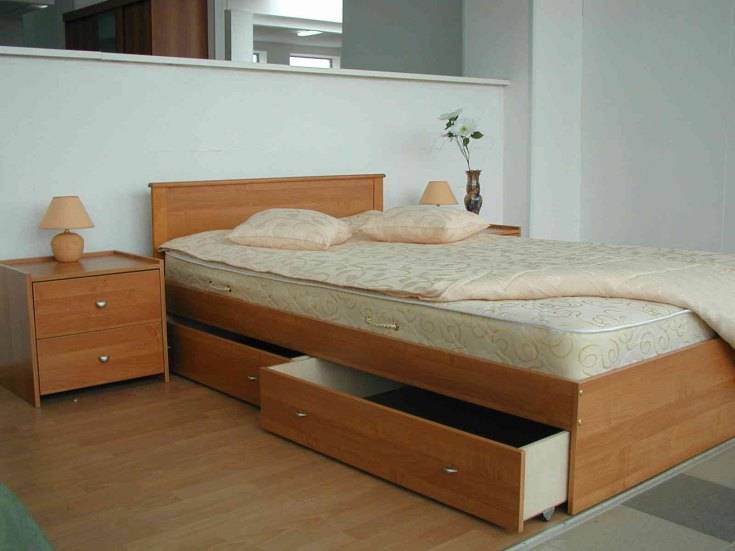
- Beds
- Kitchens
- Shelves
- Benches
- Tables
- Chairs
- Chests
- Stools
- Models
- New Year
- Parquet
- Dishes
- Cutting boards
- Light fixtures
- Birdhouses and bird houses
- Watch
- Caskets
- Master
-
Craftsmen and workshops
- Alexander Viktorovich
- Alexander Dobryakov
- Alexander Materkov
- Alexander Stakin
- Anatoly Verezhnikov
- Andrey Granovitov
- Vadim Likadziyauskas
- Victor Melnik
- Vladimir Goncharuk
- Vladimir Kislov
- Evgeny Belyaev
- Ivan Shishkin
- Igor Oskolkov
- Ilshat Zakirov
- Workshop "Carpentry"
- Workshop "Build yourself"
- Nikolay Nachinov
- Sergey Katrenko
- Sergey Cherkasov
- Carpentry workshop "ArtBrus"
- Carpentry workshop "Hello tree!"
- Carpentry workshop "Maxim Bolgaru"
- Joinery Alexander
- Yura Ananiev
- news
- Equipment
-
Wood processing
- Wood protection
- Sawing
- Wood carving
- Finishing
- Milling
-
Useful Tips
- Tool
- Woodworking books
- Other
- Machine tools
-
Construction
- Bath
- Individual houses
- Finishing
- Terms and Definitions
- Technology
- Photo collections
- It is interesting
What kind of wood to choose
One of the most critical stages is the choice of source material. Each of the types of wood is endowed with special mechanical and physical qualities. You need to know the features of different types in order to determine which one is ideal for solving a specific task. All wood can be divided into two categories - hardwood and softwood.

Hardwood
This range includes the most valuable breeds, endowed with outstanding strength, high density, expressive texture and attractive natural shades.
Wood has the highest value:
- beech;
- walnut;
- mahogany.
If there is no reason to spend money on expensive raw materials, you can get by with more affordable
Pay attention to the advantages:
- cherries;
- oak;
- ash.
These rocks also have high strength, but do not require as significant costs as representatives of the first category.
Oak wood is very durable and resistant to decay. Due to the content of tannins, which react with dyes when pickling, it allows to achieve intense color effects. Processing the material is not difficult - it lends itself well to the action of simple tools. Making parts of an unusual, curved shape from it is not a problem.
Ash is as hard and durable as oak. However, this material needs regular treatment with antiseptic compounds. Otherwise, at the onset of the first wet season, it will begin to rot.

Conifers
Coniferous wood never loses its popularity. This is due to its availability and an extensive palette of positive qualities. Materials made from pine are most in demand, followed by spruce.
The strength characteristics of pine are somewhat lower than those of hardwoods. This disadvantage is more than offset by its high resistance to biodegradation, mold and mildew, excellent thermal conductivity and exceptional flexibility during processing. The high ability to air and moisture permeability guarantees a decent quality of processing with protective compounds.
Spruce is more prone to rotting in comparison with pine, but has less hygroscopicity and thermal conductivity. Products made from this material retain their original shape much longer.
If you choose between these two species, you should give preference to pine.
Materials (edit)
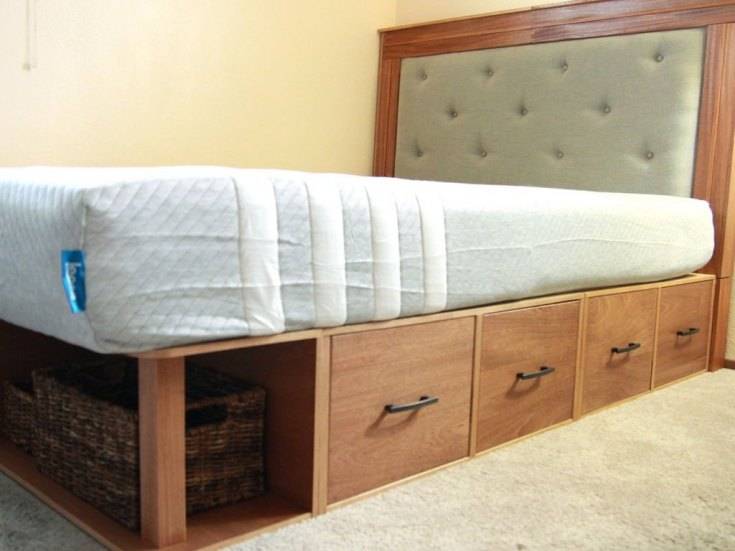
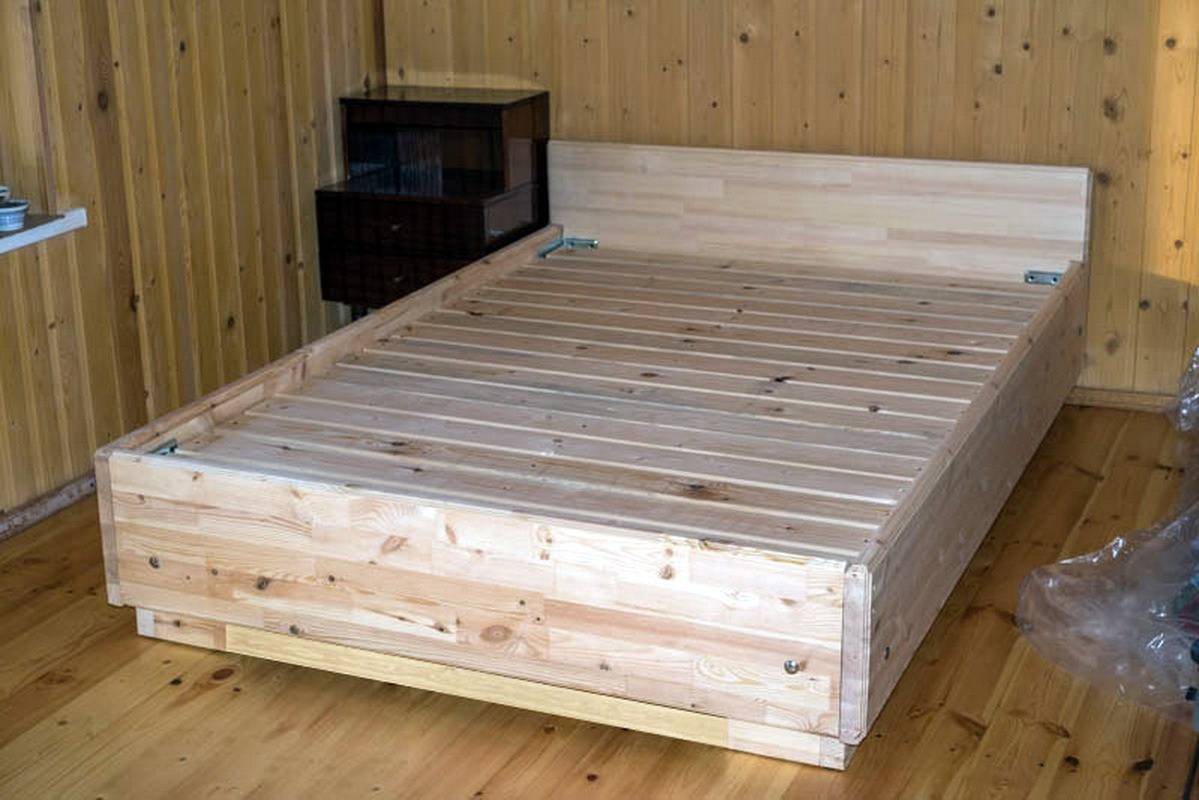
The durability of the bed primarily depends on the quality of the materials used. A solid construction will be made of solid wood. A bar is ideal for making legs, the frame can be made from boards of sufficient thickness. When going to the store, you need to understand that the better the wood, the higher its price, but it is not at all necessary to buy all the most expensive. It is necessary to find that golden mean, the price segment, in which the cost is fully consistent with the quality.
The board for the frame (frame) must be of high quality, dry, otherwise it will lead. You should choose lumber with a minimum number of knots, without cracks, darkening and traces of pests. The choice of wood species depends on the project and the funds available.
If the goal is not so ambitious, for example, you need furniture for a summer cottage, then you do not need to spend a lot. In this case, it is easier to make a bed of plywood or wood-based panels with your own hands. Another option for a summer cottage or a hunting lodge can be a bed made of solid logs with a diameter of about 80 mm. She is able to decorate a bedroom in a city apartment, decorated as halls with hunting trophies.
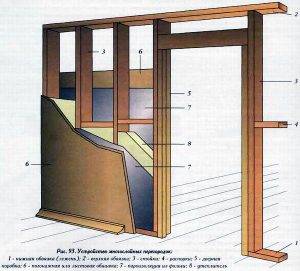
How to make partitions in a wooden house
Installation of frame partitions
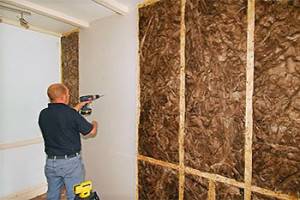
After mounting the horizontal elements, install the vertical ones. The standard distance between them is 55 centimeters. But this is not a dogma, it is necessary to take into account the design features of the material and the overall size of the wall, its height. Nowadays, an aluminum building profile is actively used as a frame. The docking itself is carried out in the middle of the racks. Plasterboard sheets, plywood, fiberboard are used as cladding. Here, the hygroscopicity of the material is taken into account. The space between the cladding inside the frame is filled with a sound-insulating substance - foam or mineral wool.
Installation of solid partitions
The rest will be deprived of the opportunity to move freely. When constructing interior partitions in a wooden house, the future wall can be sheathed with plywood, fiberboard or chipboard sheets. You can perform a capital option by lining them with shingles and plastering. Then an additional lag must be present in the structure, which will hold the heavier structure.
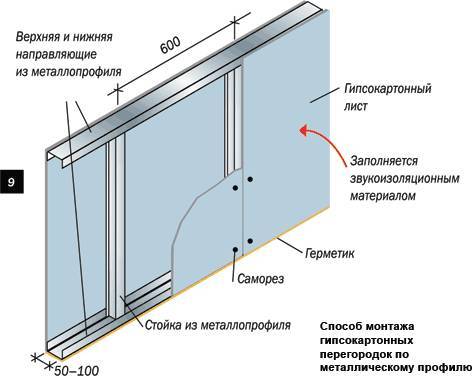
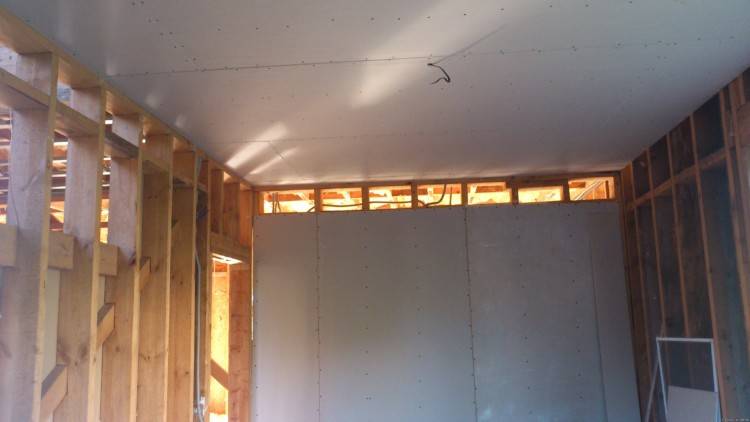
Installation of plasterboard walls
How to make interior partitions in a wooden house from plasterboard correctly? The main advantage of drywall in this task is the ability to level the walls. The job can be done very quickly
It is important to consider that a wooden house almost always shrinks. This should not affect or destroy the drywall. Work begins with marking, drawing the line of the future wall on the ceiling
Then they project it onto the floor using a plumb line
Work begins with marking, drawing a line of the future wall on the ceiling. Then they project it onto the floor using a plumb line.
The frame is made using an aluminum profile. Less commonly, wooden beams are used, although the design is cheaper and more environmentally friendly. With the direct installation of drywall sheets, it must be borne in mind that the structure will move slightly. If the sheets are mounted tightly end-to-end, they will collapse. Small gaps should be left to compensate for expansion due to temperature and humidity. As a base for installation, the following can be used:
- walls made of wood,
- wooden slats,
- wooden beams,
- lathing made of wood,
- frame made of wood,
- the wooden wall itself or the floors.
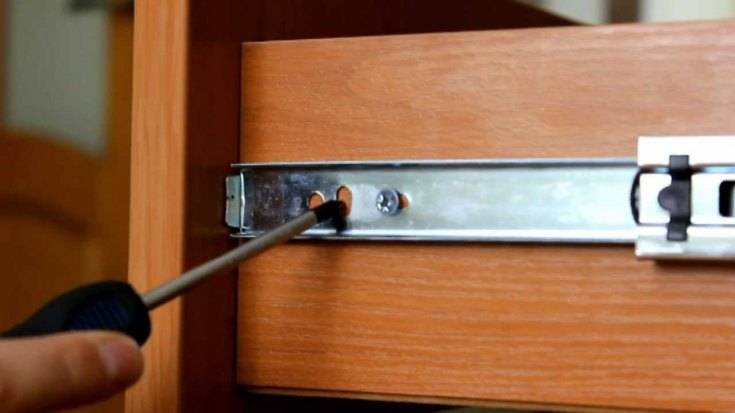
There are several methods of attaching the drywall itself to the rail. This will require dowels, a screwdriver, self-tapping screws, a file, an electric or mechanical drill. A beam with a section of 50 × 100 mm or 50 × 74 mm will be used for the role of rails. The optimal place for fastening is in the middle of the rail or bar. The best gap between the screws is 15 cm. The fasteners should be slightly buried in the drywall. The joints should ideally be sealed with an adhesive reinforcing film. If the dimensions of the joints turned out to be more than 3 mm, then they should be putty, and then sealed with reinforcing tape.
When installing wall partitions made of glass and other material, all of the above principles are used. And the installation of designer partitions depends only on the design itself and is developed directly by the designer or architect.
How to build a house cheaply and quickly read here
Making partitions in a wooden house with your own hands, you can perfectly show your abilities and building talents. These works are easy to perform with little installation skills and abilities. The main thing is ingenuity, logical thinking, adherence to the simplest building rules.If you make mistakes, it will not be difficult to redo and correct them. Well, there should be no consequences, except for wasting on spoiled material.
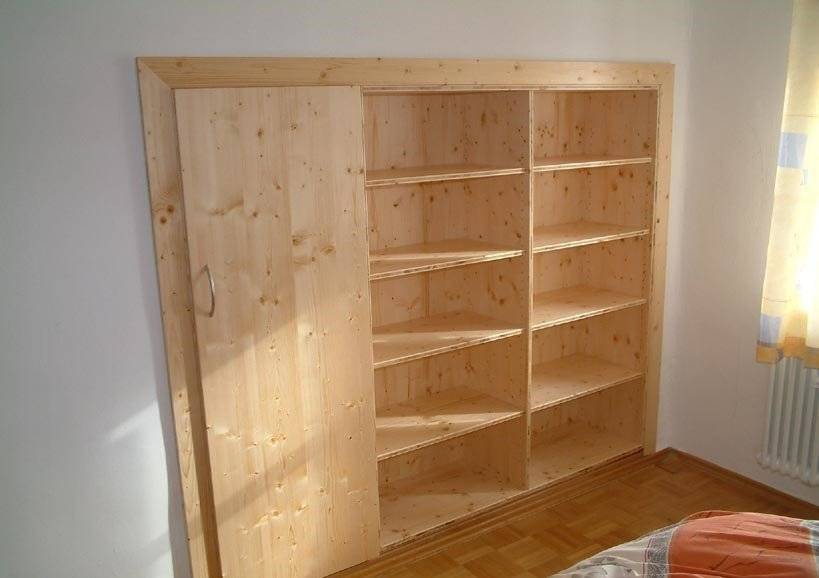
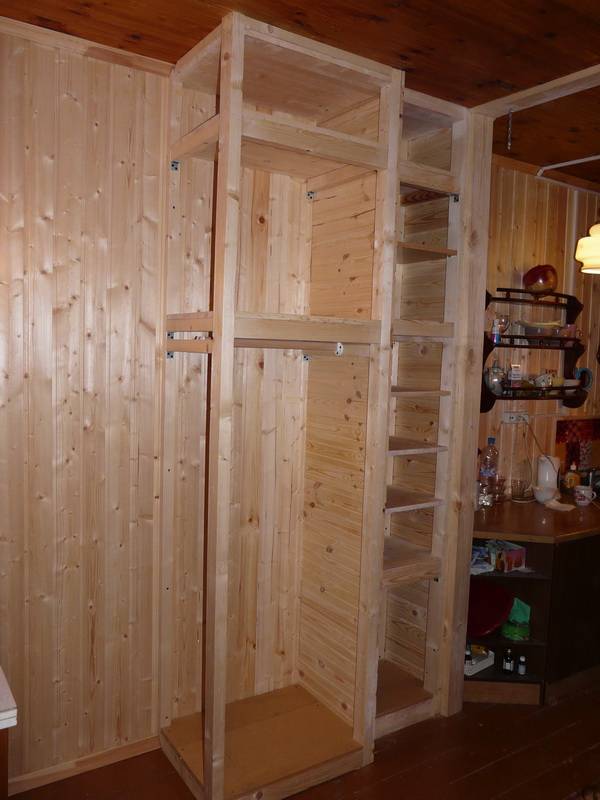
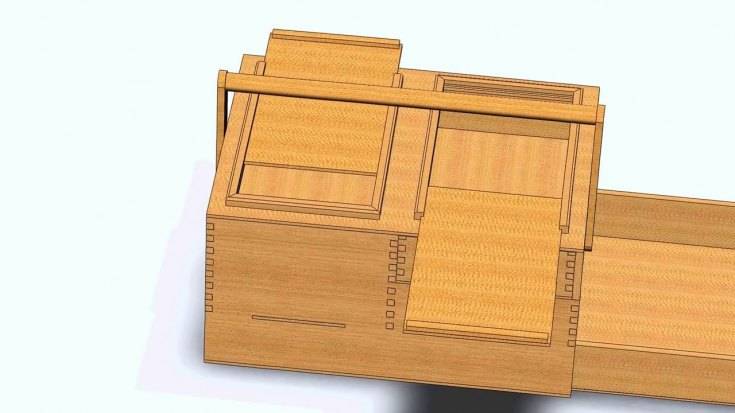
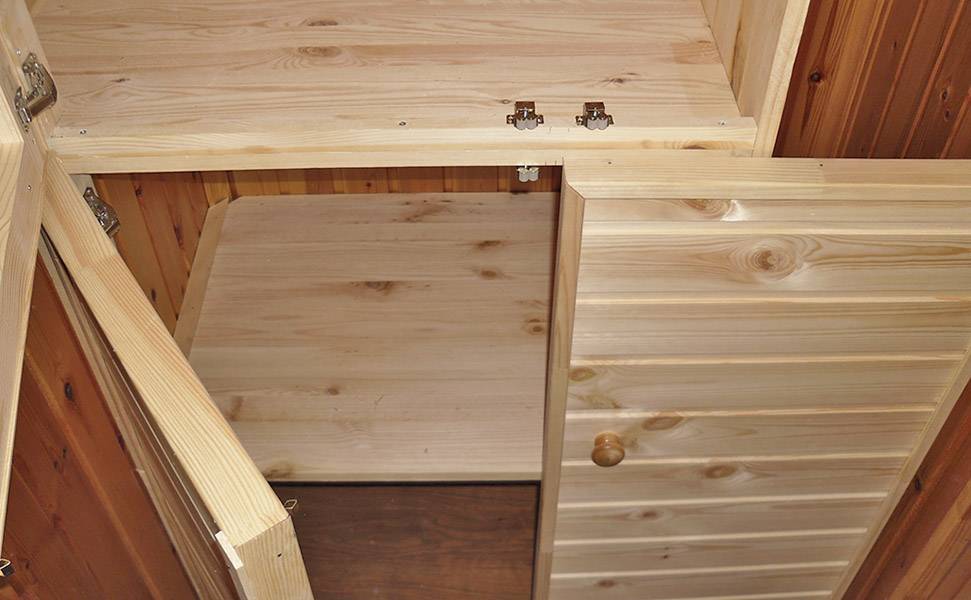
Drawing of the future cabinet
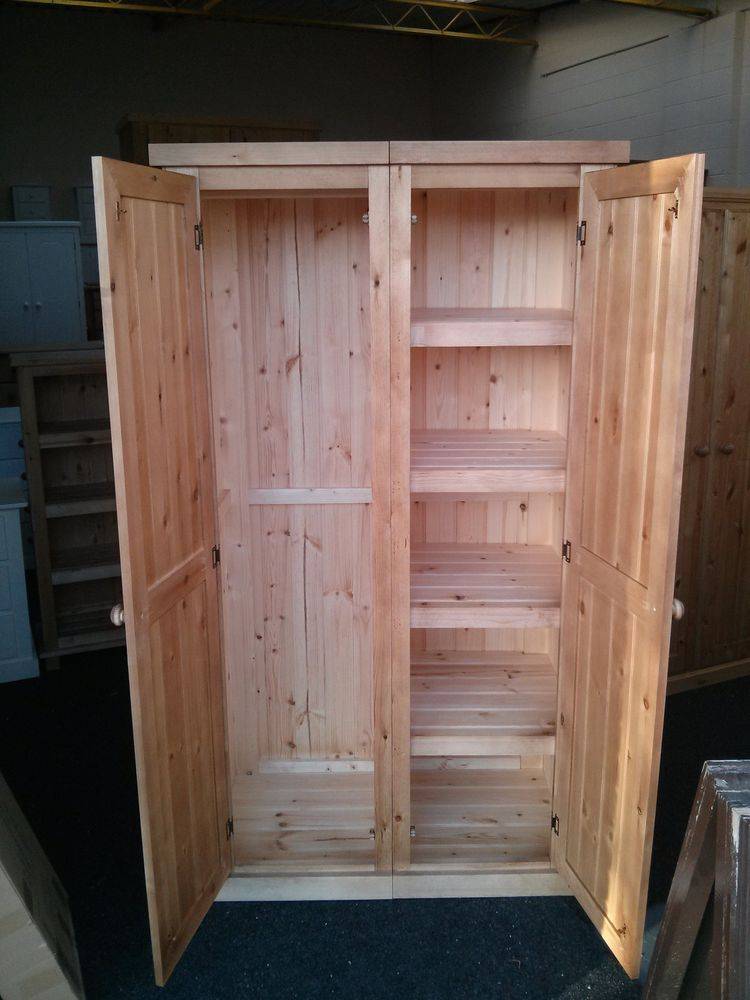
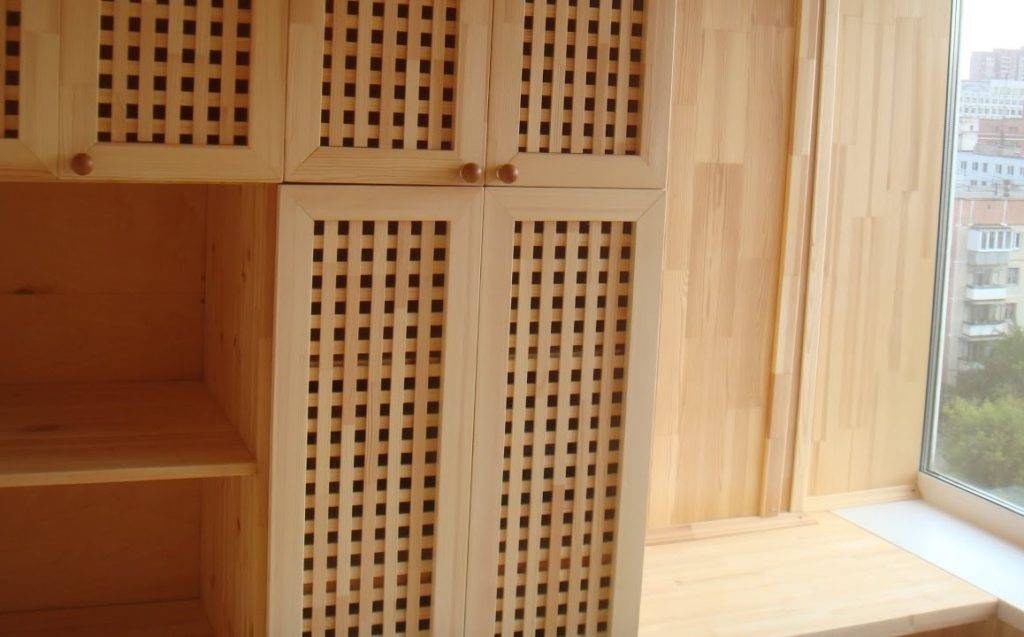
The design drawing is of great importance for all further stages of product creation. It is compiled taking into account the size of the closet itself and the layout of the apartment. The purpose of the cabinet also matters in the choice of the model and the elaboration of the details of the drawing. If a cabinet is required, for example, for tools, it is worth making it wider and low, and if for books - high and narrow. Next, you need to decide on the number of shelves and compartments, and for this you need to know what will be stored in the cabinet.

The cabinet has a unique design.
Of course, the very first time it will hardly be possible to do everything perfectly.
After the cabinet model has been selected, it is necessary to transfer its plan to paper, depict it in the form of a drawing. First, the frame of the future product is designed, the dimensions of the walls, doors and bases of the cabinet are indicated. Then you need to depict the shelves and the internal component of the product, indicating the length and width.
He will help to place all the necessary things in the room, and with his originality will bring a touch of extravagance into the living room.

For the manufacture of pieces of furniture today, about 40 types of wood are used, which have different characteristics.
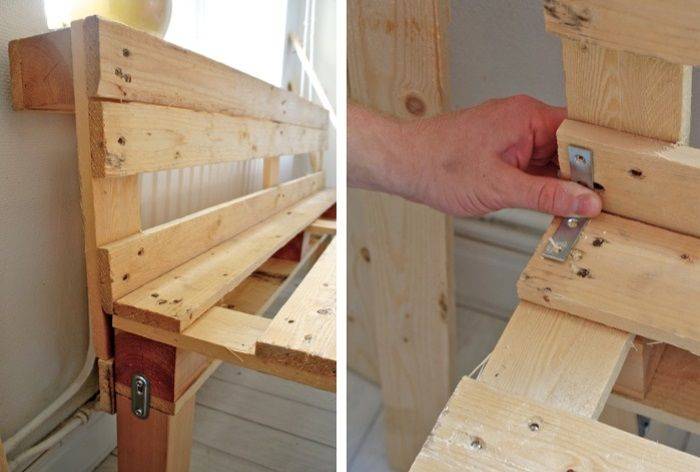
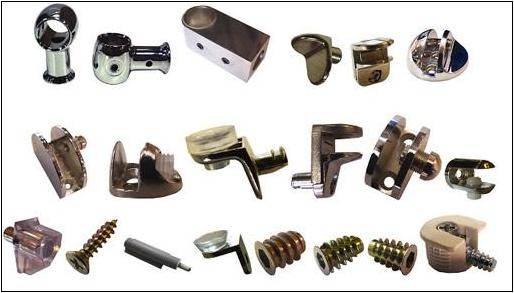
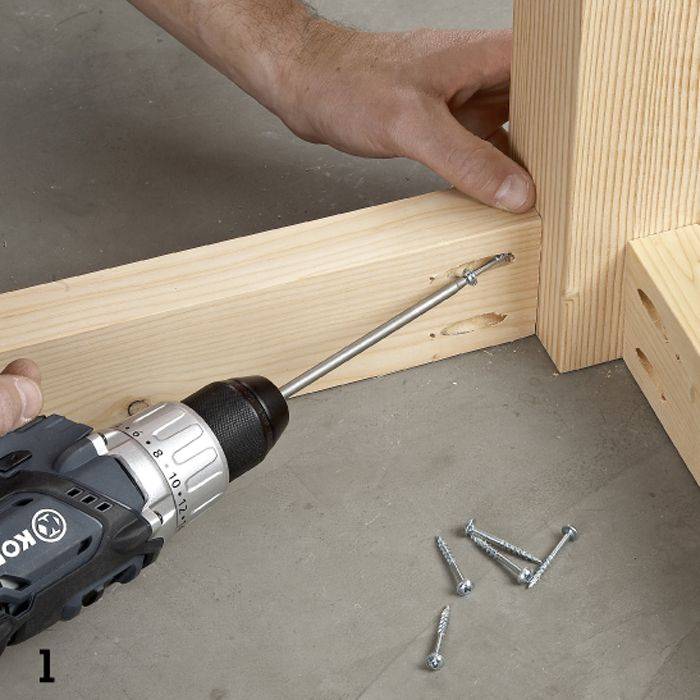
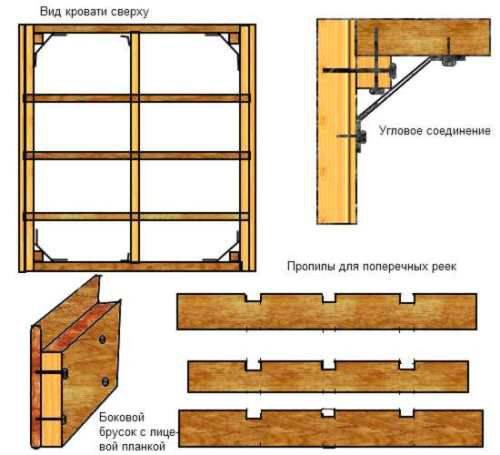
Fasteners for solid wood products
During the manufacture of wooden beds, special attention is paid to the fasteners. Among those you will need:
- Self-tapping screws for wood (different lengths);
- Metal corners with a rounded stiffener (to make the wooden structure more reliable);
- Nails (not suitable for all woods).
For a more reliable fastening of parts, it is recommended to use clamps.
How to choose self-tapping screws for fastening two specific parts:
- Measure the thickness of the part to which the second part will be attached;
- Measure the thickness of the part that is attached to the main one;
- Add both values (in mm);
- Subtract 10 mm from the resulting figure;
- The resulting value will indicate the length of the self-tapping screw required to fasten the 2 above-mentioned parts.
For example:
- The main part is 55 mm thick;
- The thickness of the attached part is 25 mm;
- 25 + 55 = 80mm;
- 80-10 = 70mm.
To fasten two parts (55 and 25 mm) with a total thickness of 80 mm, self-tapping screws 70 mm long must be used.
Drawing of the future cabinet
The creation of any piece of furniture begins with a detailed drawing of the future product. To obtain the basic dimensions, measurements are taken of the place in the room where the home-made cabinet will be installed, and a frame is drawn with an indication of the external width, depth and height.
Then the design and content are thought over (the number and location of shelves, partitions, doors, boxes), their location inside the frame is applied, the dimensions and indents are indicated.
A thorough study of all the nuances at the stage of drawing is important, since in the future the sawing and assembly of the future structure will be carried out according to the dimensions and marks indicated in the diagram.
If there are difficulties with creating an individual drawing, you can use ready-made projects by converting the dimensions to suit your own needs.
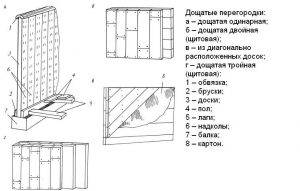
Types of partitions and their manufacturing technology
Partitions in a wooden house made of timber or rounded logs, as well as frame buildings, can be of the following types:
- frame and frame-panel board;
- panel board and carpentry;
- frameless.
All of the above types refer to timber structures. As additional options, you can make fences from plasterboard or tongue-and-groove. They also have a fairly low weight and are easy to install.
To understand how to make interior elements for a house from a bar or rounded log with your own hands, you need to consider each type separately.
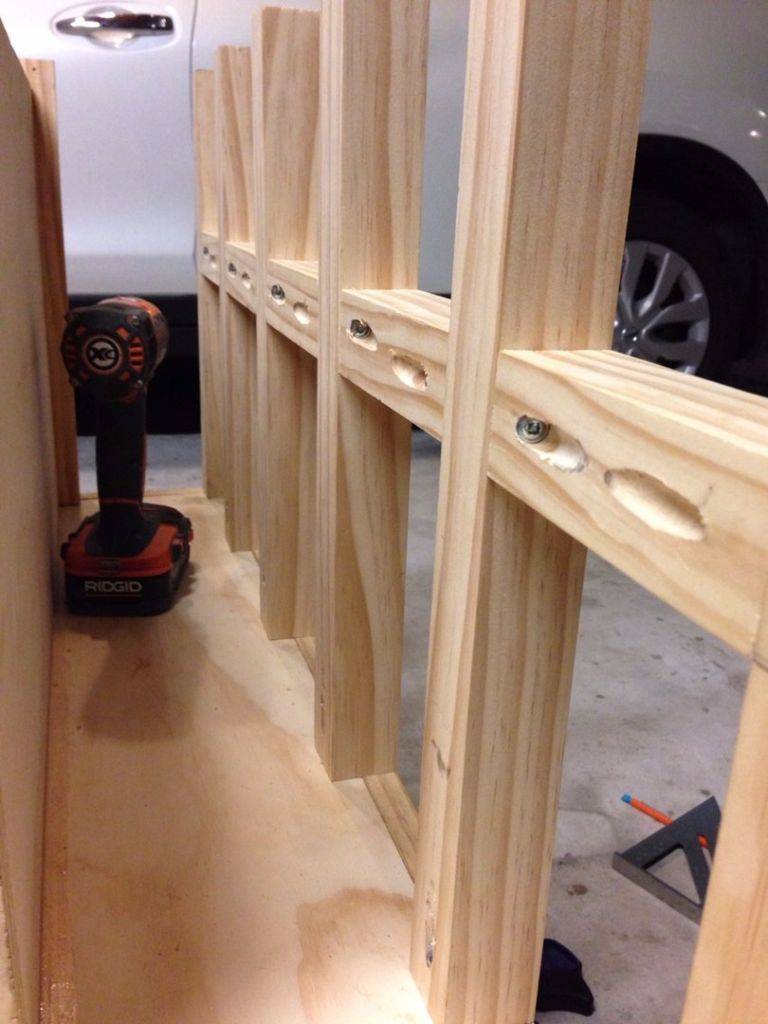
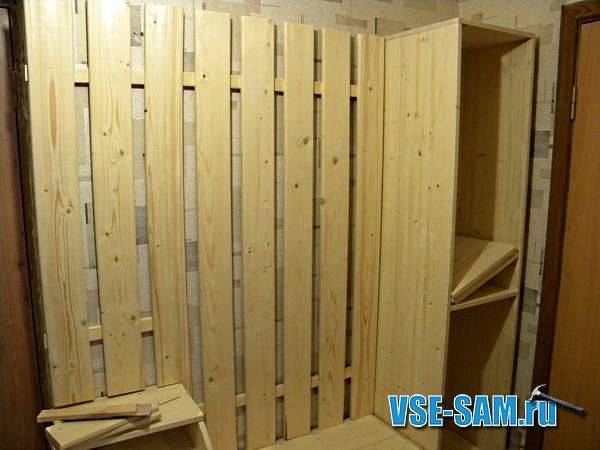
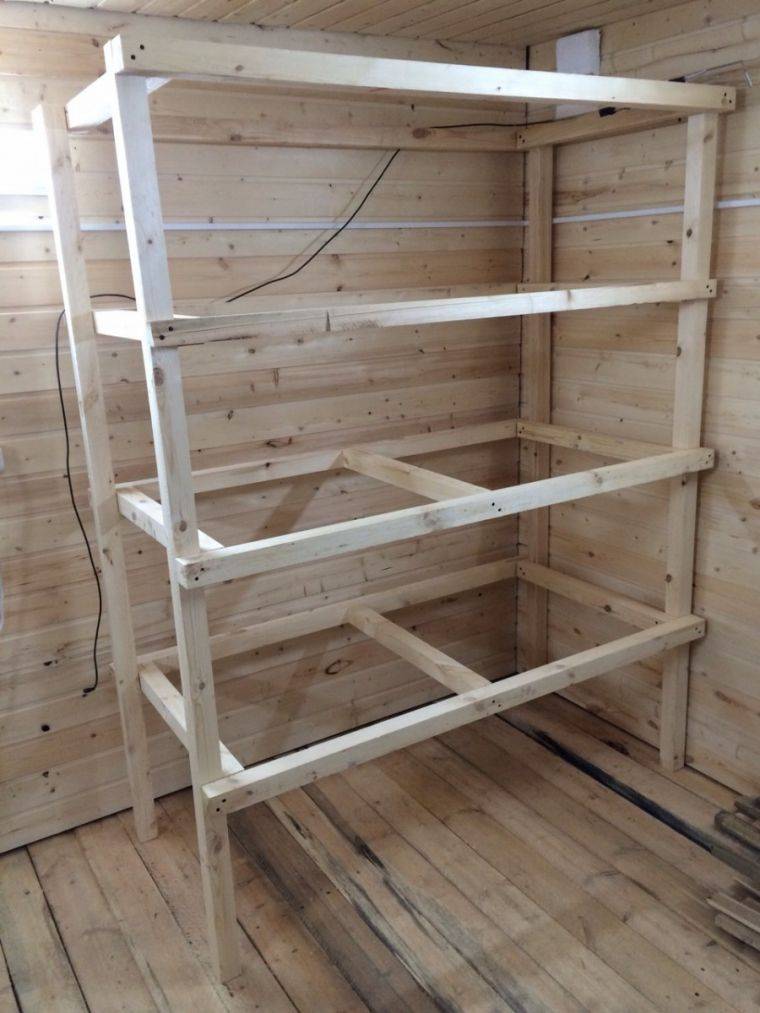
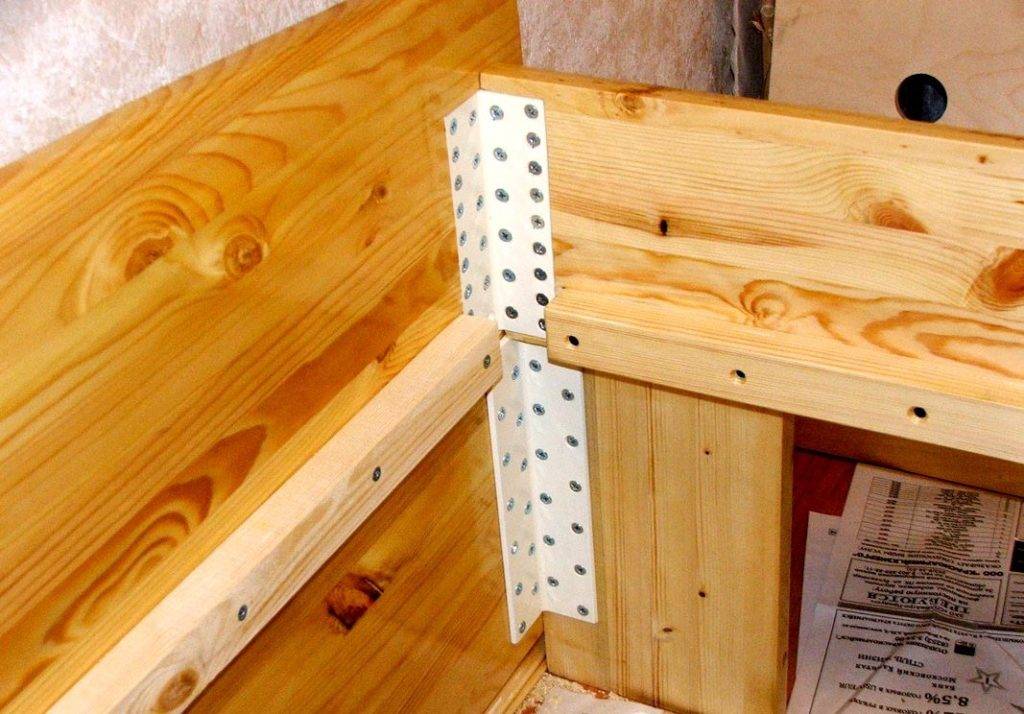
Partitions on the frame
Such partitions in a wooden house made of timber or logs can be used at the request of the future owner, and for frame buildings they will be the most optimal option.
Manufacturing technology is as follows:
- Measurements of the room and marking on the floor where the interior structures will be located.
- Bars of the lower strapping are made, guided by the obtained dimensions. The elements are fastened to the floor with screws or self-tapping screws.
- Next, the racks and transverse elements of the frame are cut out according to the measurements. Do-it-yourself installation of them in the design position can be carried out in two ways: separately or the installation of the frame after assembling it on the floor. Fasteners are made with screws or self-tapping screws. The end posts are fixed directly to the wall.
- The frame is wedged at the top and fixed with fasteners.
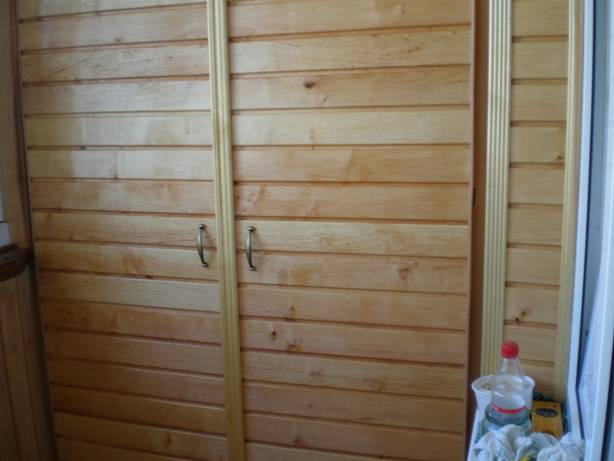
- After that, a heater is laid between the elements of the frame (if it is needed for sound insulation) and sheathing is performed. You can sheathe with plasterboard or clapboard. In this case, the sheets and sheathing elements are cut so that their joint falls in the middle of the frame post.
Panel and joinery
To make this type of interior fences with your own hands for a house made of a bar or log, you need to be guided by the following procedure:
- Room measurements and markings.
- Manufacturing of board boards (solid) from boards with a thickness of 20-40 mm.
- Bars are nailed to the surface of the floor and ceiling, which form grooves for installing shields. The shield can be two-layer or three-layer. In the manufacture of a three-layer structure, boards of lesser thickness are used for the inner layer.
- Collect a partition from shields in height. By inserting them into the grooves formed by the bars.
- Soundproofing material can be placed between the layers.
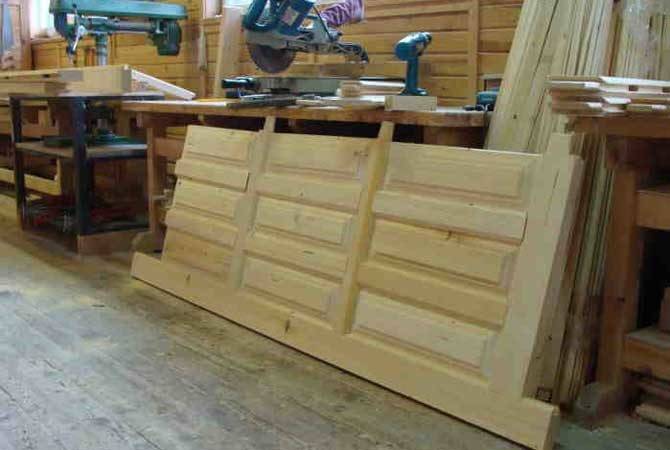
The dimensions of the joinery partitions depend on the purpose. They look like door leaves, they can be deaf or glazed.
They are made both for the entire height of the room, and with a gap of 30-50 cm from the top edge to the ceiling.
Frameless
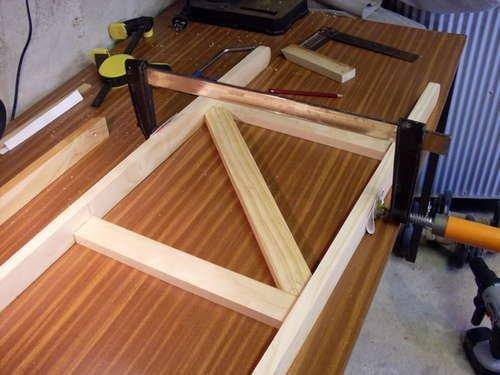
When making the simplest structures of this type with your own hands, work is done in the following order:
Scheme of the simplest frameless partition
- Room measurements and markings.
- Securing the bottom harness.
- Making a groove strapping on a bar by nailing two bars. The groove should be equal to the thickness of the partition boards.
- A triangular bar is attached to the ceiling. It will be part of the top mount slot, so the location must match the bottom mount.
- Install vertical boards, starting with the one located against the wall. It is squeezed and nailed to the triangular bar from above.
- Install all the boards in turn. The space between the individual elements is filled with tow, polyurethane foam or an insulating cord.
- After completing the installation of the boards, the second triangular groove element is nailed to the ceiling.
- The sheathing of the partition is carried out.
Instead of bars for fixing to the floor and ceiling, metal corners can be used.
In order to competently make partitions for a house from a bar or other wooden elements with your own hands, you need to choose the right type of them, mount them without deviations vertically and horizontally, and securely fasten the parts of the structure together. For manufacturing, it is recommended to choose wood of the first or second grade of coniferous species. All wood is necessarily treated with antiseptics to prevent rotting. If desired, the elements can be treated with fire retardants to increase fire resistance.
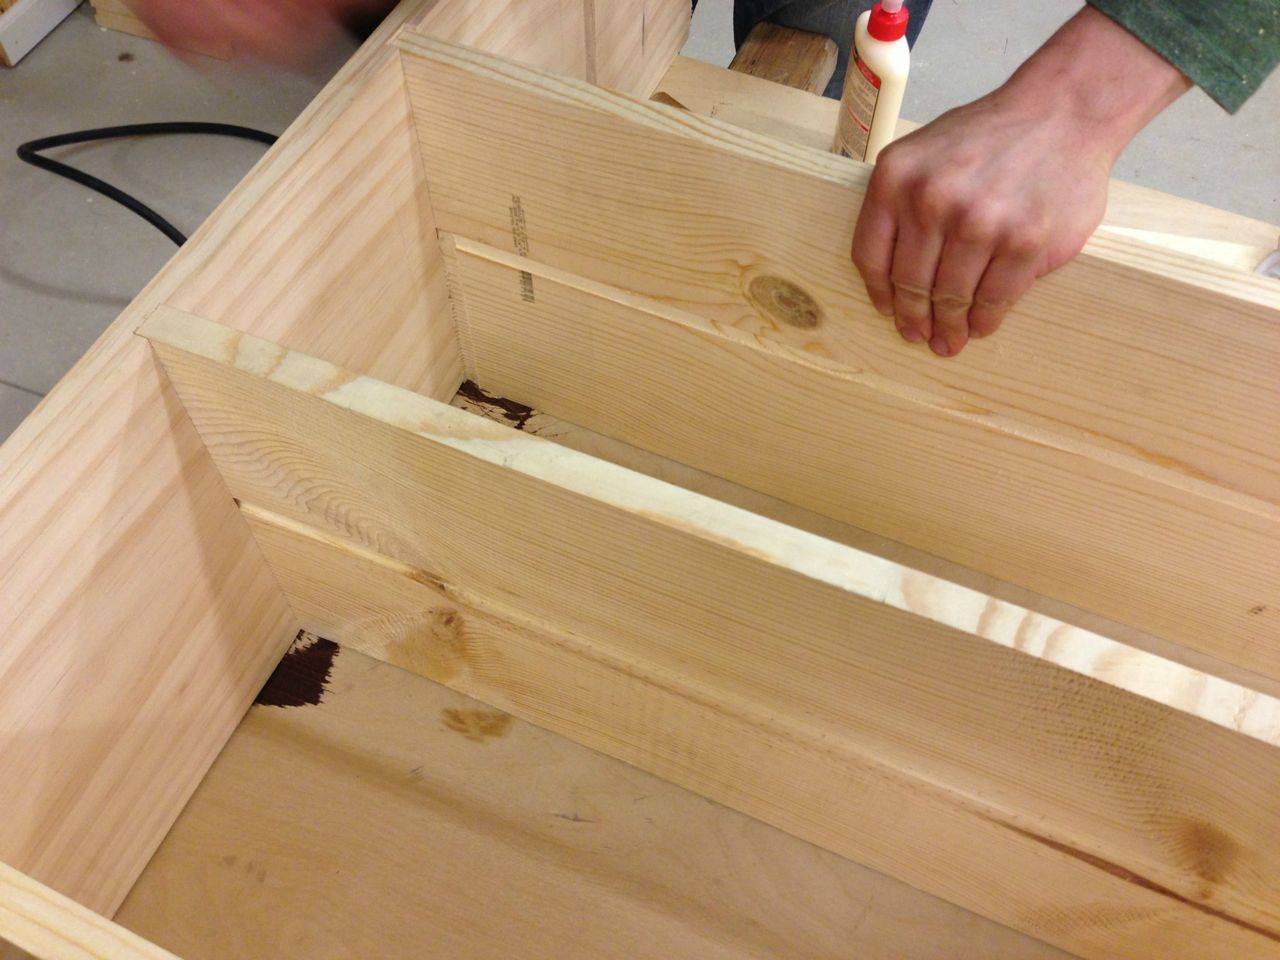
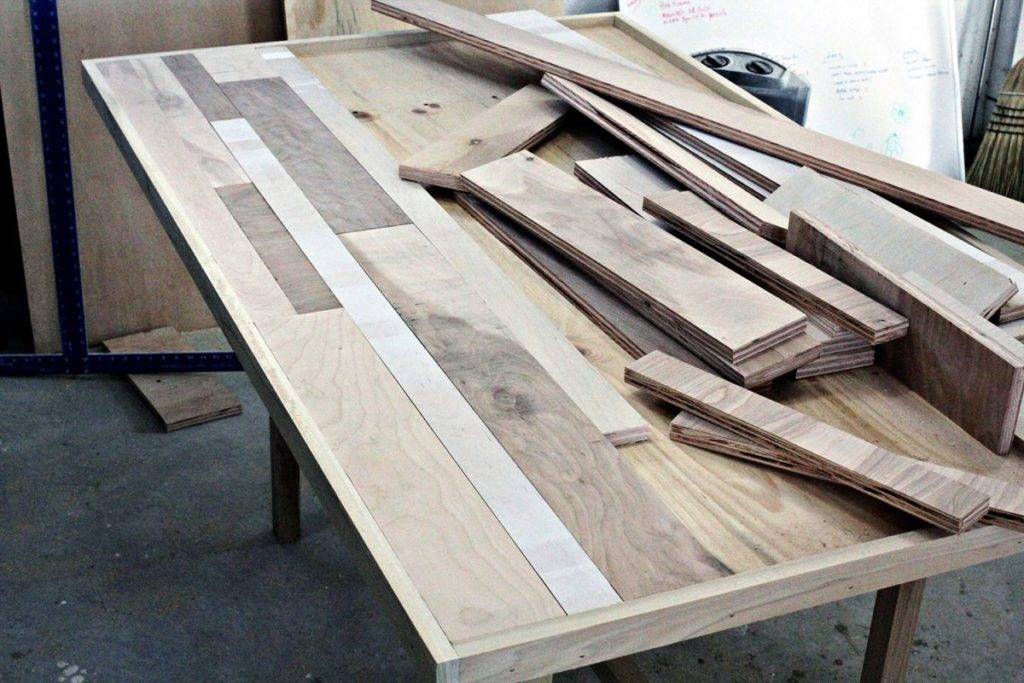
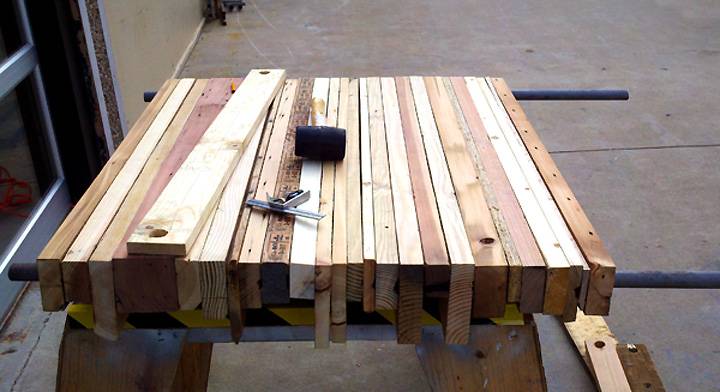
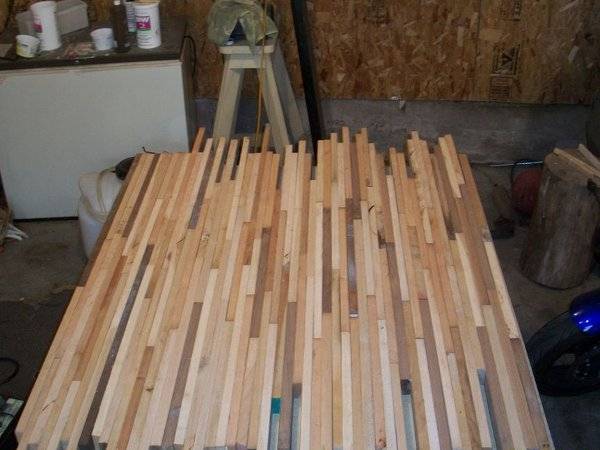
Gluing the shield in the usual way
Quality
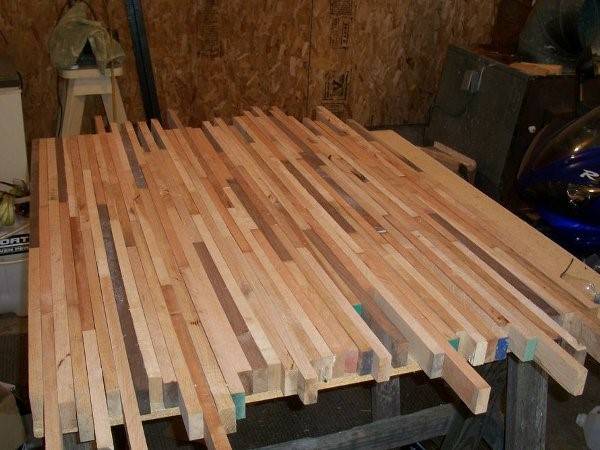
glued furniture board primarily depends on the preparation of the blanks.
The wood is selected dry, even and without knots, for example, beech. Can buy
finished timber and pass it through a thickness gauge so that the workpieces are the same
thickness.
It has
the appearance of the glued board is important, so the blanks are laid out by color.
After that, the annual rings are marked with chalk and the arrangement of the blanks is changed so that
so that their direction alternates. If the growth rings are in one
direction, then when the tree dries, it will bend in one direction. At
there will be no bend in the alternation of the direction of the tree rings.
 The location of the growth rings
On
of a decomposed structure, draw lines with chalk, which are then used during assembly
shield after fitting.
 Shield with chalk mark
Because of
the uneven sides between the plots remain gaps. To remove them, the boards
folded by the sides and jointed on the machine.
 Preparing boards for planing
After
planing check the tightness of the fit of the workpieces to each other. If not all
defects are removed, then the jointing is repeated.
Fitted
the plots are folded to each other according to the marks in a shield and prepared for gluing.
 Assembling a shield from fitted boards
Blanks
glued with PVA glue. It is applied to the end of the board from a special bottle, and then
a roller with soft rubber is leveled over the surface.
 Applying glue to workpieces
Blanks,
smeared with glue, collected in a shield, and then squeezed with four clamps: two
from below, and two from above. The clamps cannot be pinched, otherwise the shield will squeeze out in one direction.
 Compression of the shield with clamps
At the joints
workpieces are also installed with clamps.
 Clamps at the joints of workpieces
After 2 hours, the clamps are removed, and the remaining glue is removed with a boot knife. The prepared surface is sanded with a soft trowel and 100 - 180 size sandpaper.
 Furniture board grinding
After grinding, the furniture board is used for its intended purpose.
An example is taken from the YouTube channel of Vladimir Zhilenko, the video "How to make a furniture board. How to make a wood board"
Placement method
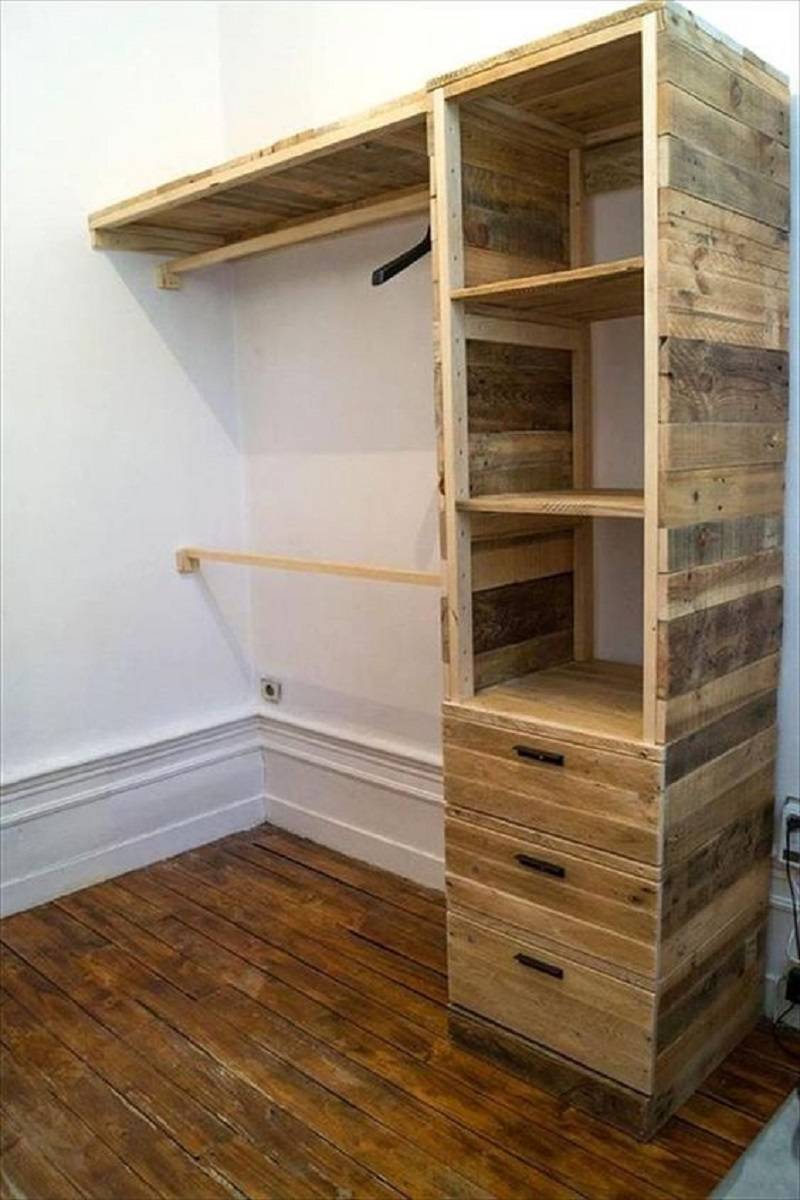
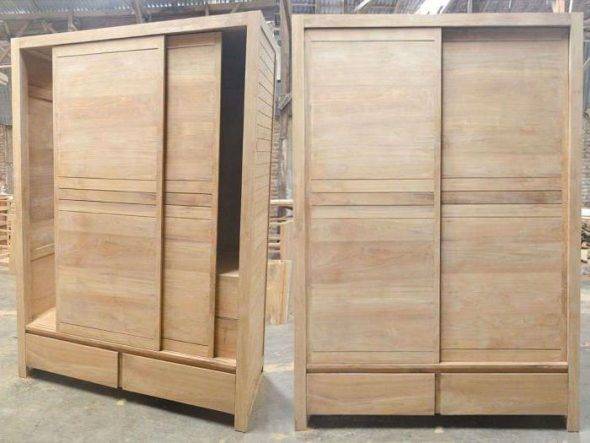
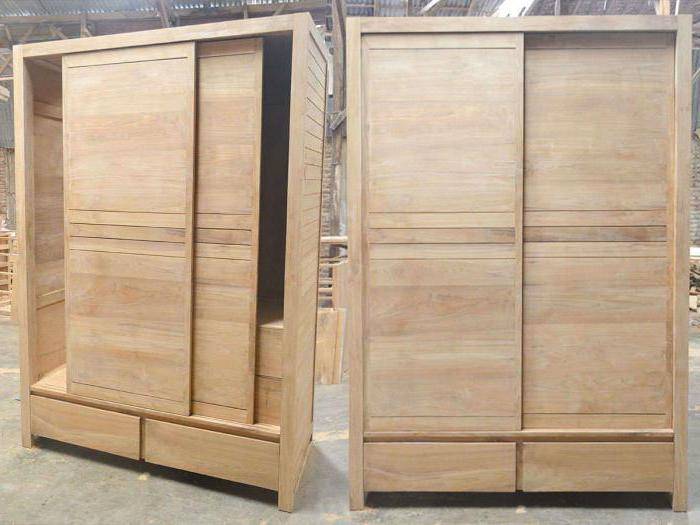
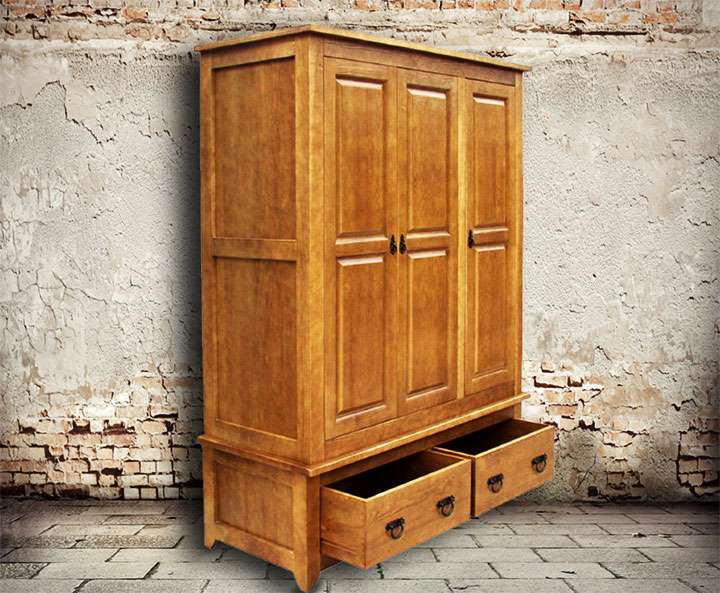
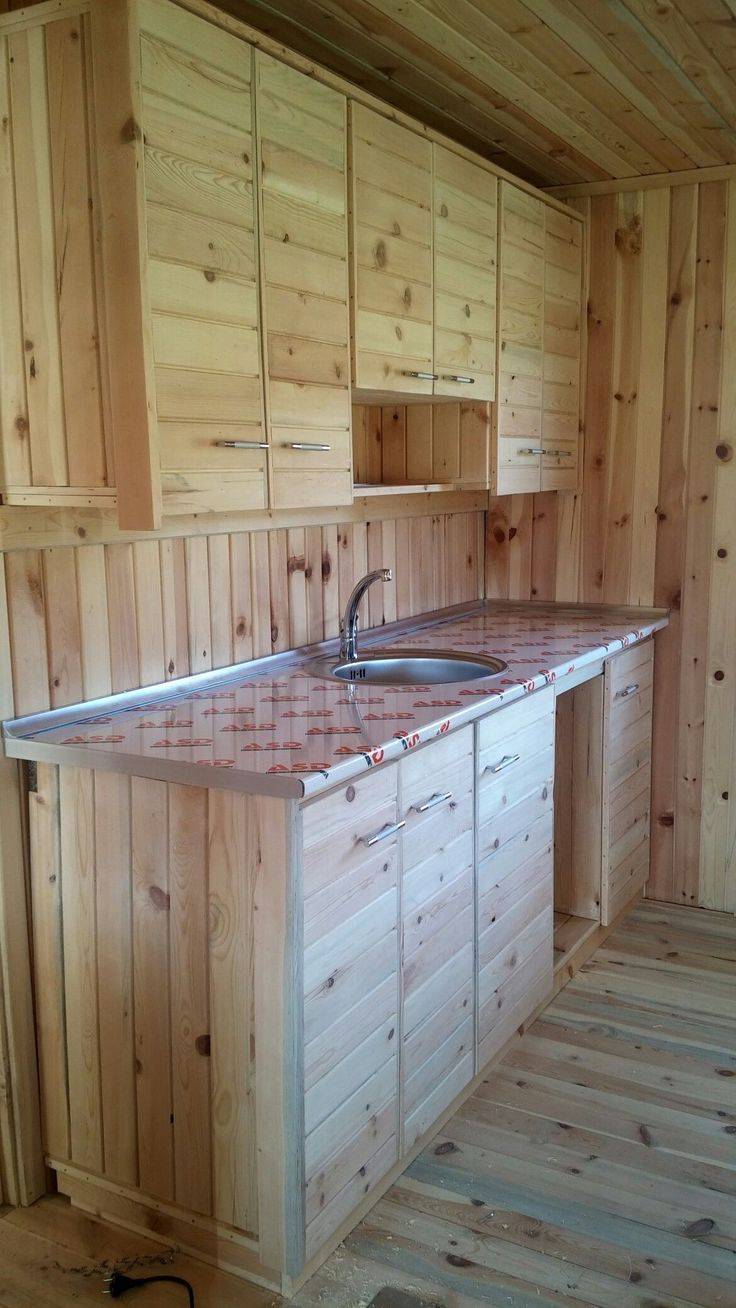
According to the method of placement, cabinets can be cabinet or built-in. Both options have their own characteristics. At the same time, it is not always possible to use the second option, since it requires a special niche.
Cabinet cabinets consist of several modules. They are placed in any suitable place, and if necessary, the cabinets can be moved or disassembled. They can be given any shape or size.
Built-in wooden wardrobes are placed in special niches or storage rooms, where it is impossible to put classic furniture, effectively using the space. When creating them, you have to focus on the dimensions of the place where the installation is planned. An important advantage of the cabinet is the ability to do without one or more walls, as well as the floor or ceiling. It is enough to install the most necessary elements into the walls and install the doors.
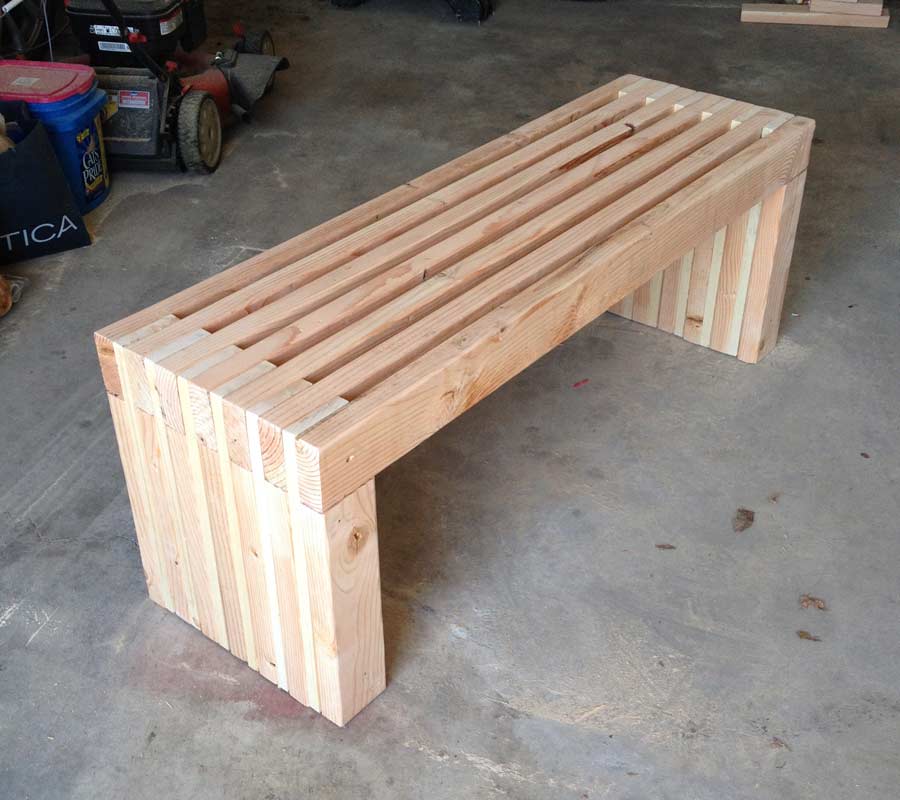
A simple do-it-yourself table made of wood and ready-made furniture legs
This option is even simpler, also because the master is not bound by certain dimensions.
Finished furniture legs are made of wood and / or metal, can be single or in the form of flat / figured supports, smooth or decorated.

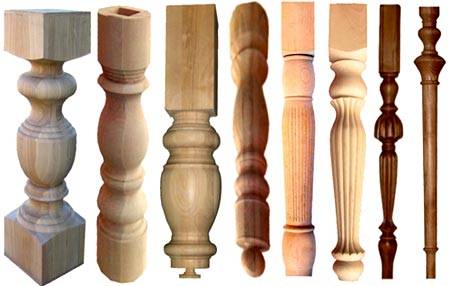
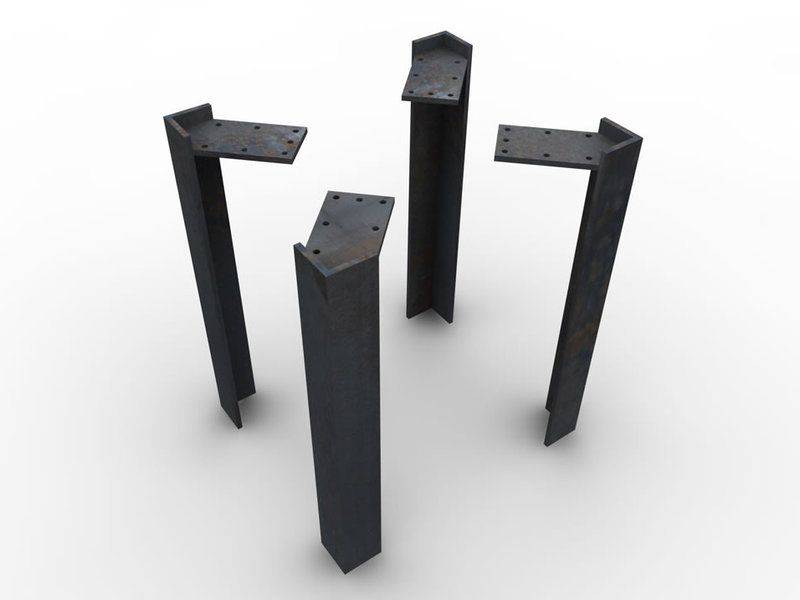
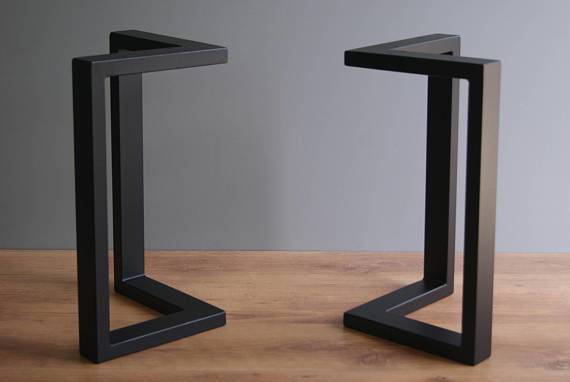
In some models, the height can be adjusted (within certain limits) using a thread or a telescopic mechanism.
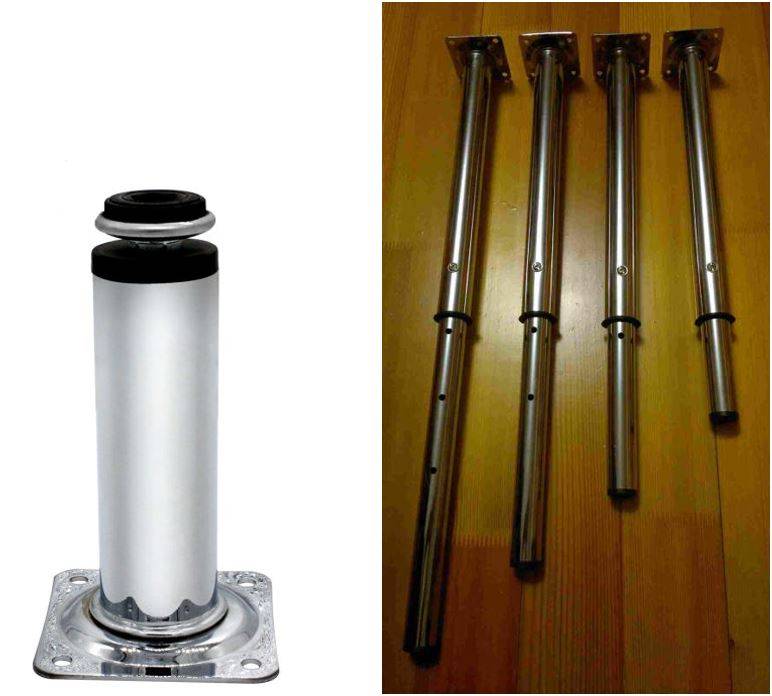
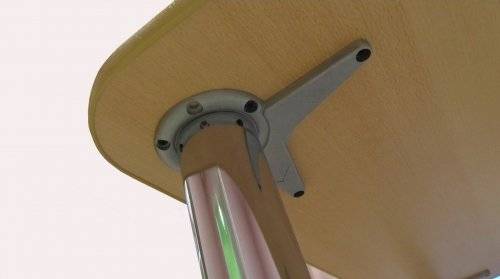
A mounting platform or a single mount allows you to mount these legs on almost any worktop. One limitation is that it must be one piece, not a national team. The national team will need tsars.
There is an interesting nuance when using these legs. A small support area requires the mandatory reinforcement of a wooden tabletop, therefore, after marking the fastening points, special washers are driven into these places.
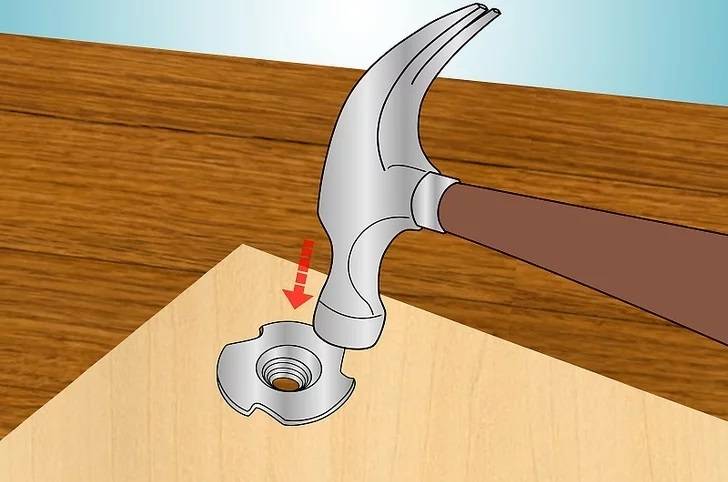
Then threaded parts are screwed into them.
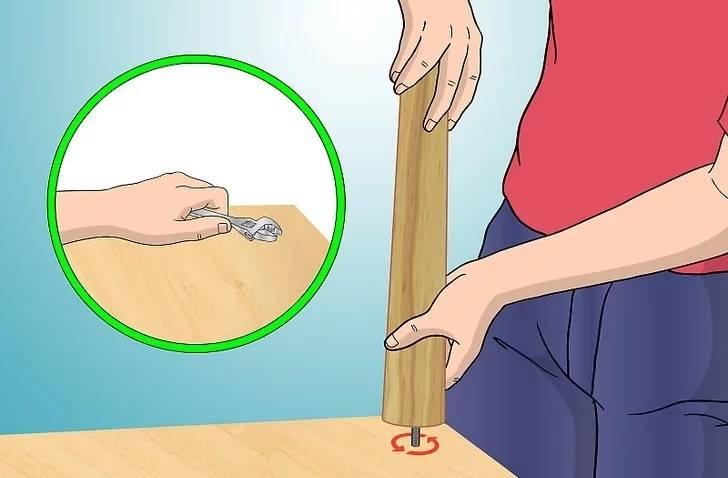
Unfortunately, this method of assembly does not provide the stability and strength of the table - in soft wood (for example, in a pine furniture board) the fasteners do not hold well, the table quickly begins to wobble.
More reliable is the option of assembling using carpentry joints reinforced with glue and / or self-tapping screws.
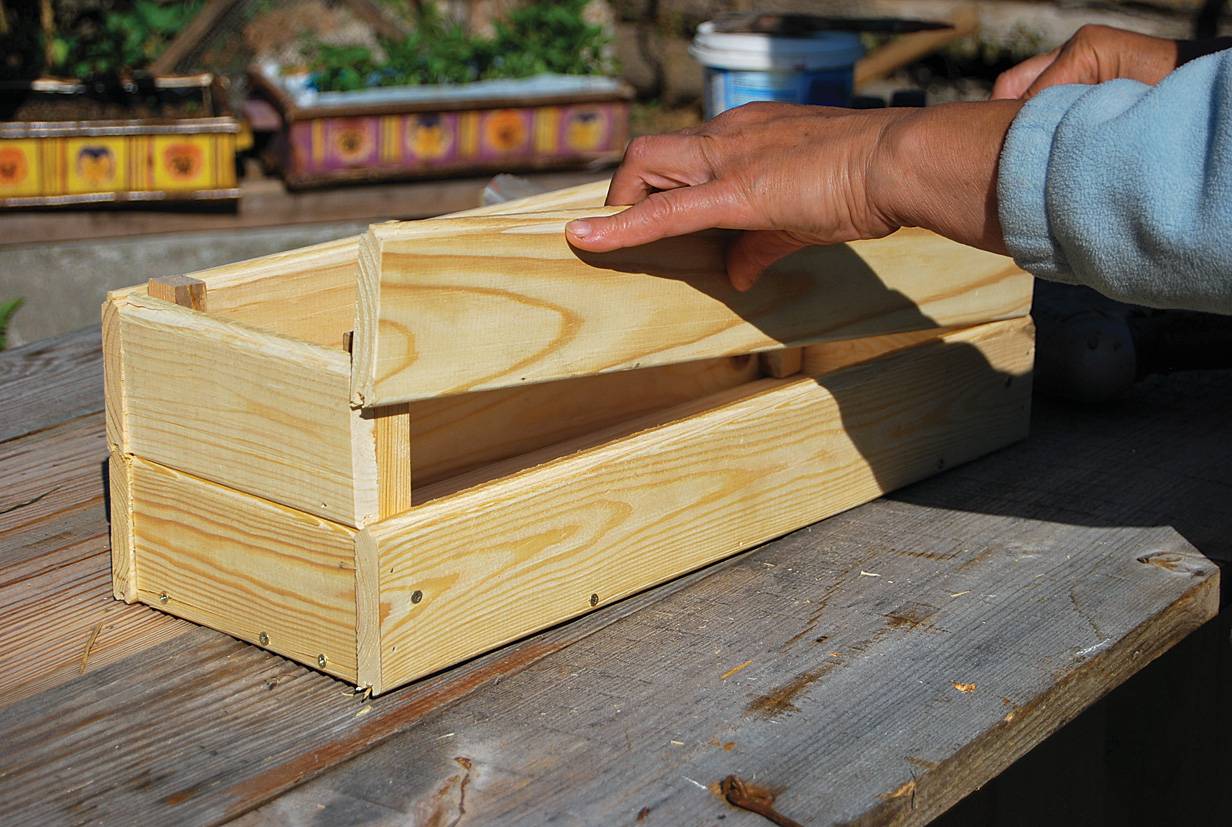
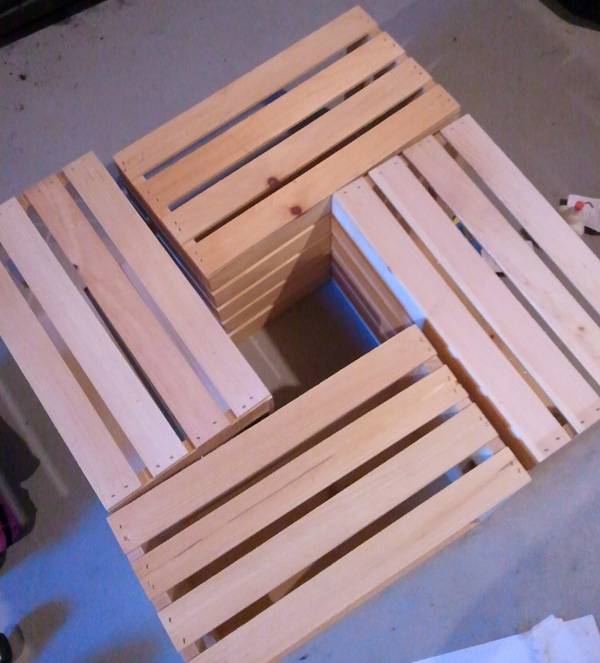
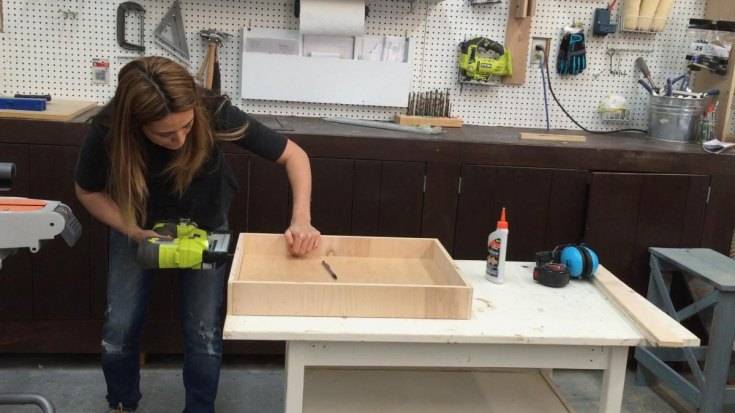
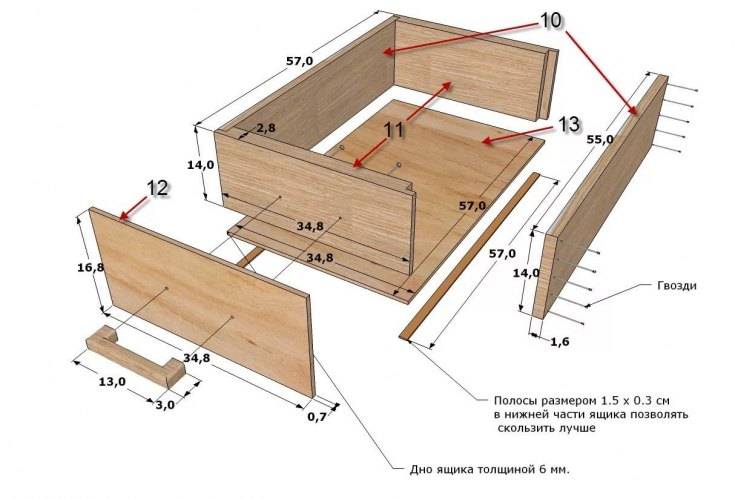
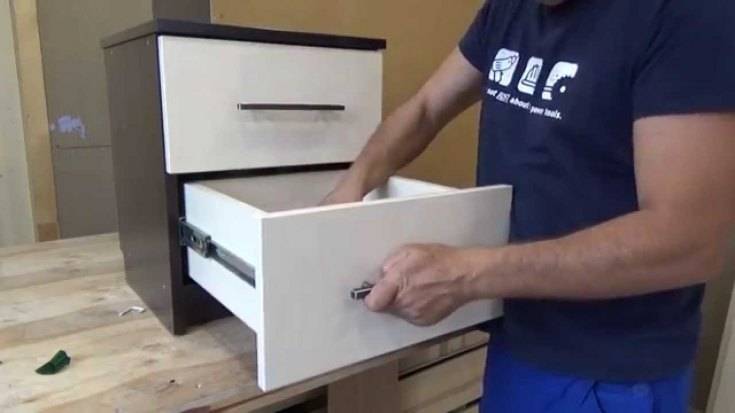
Drawer
How to make a drawer? Purchase:
- woodworking machine;
- roulette;
- building corner;
- unedged board 2.5 * 25 * 130 cm.
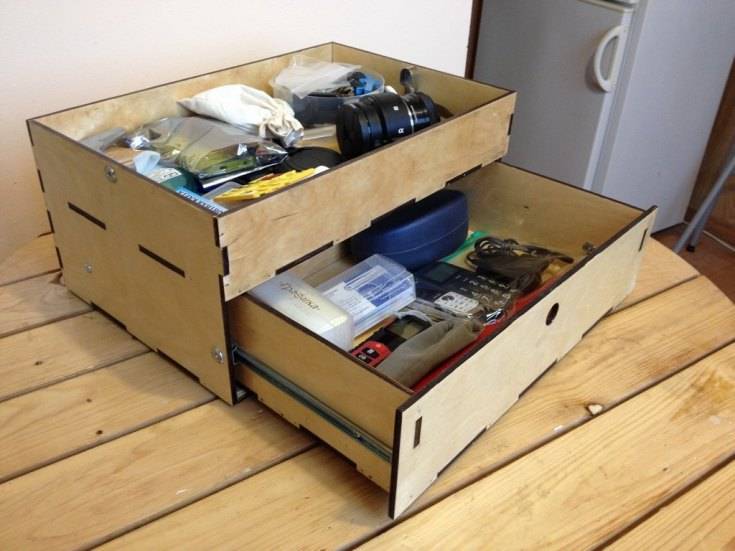
You will also need a hammer and nails. And 4 more wheels from a toy stroller and attachments to them.

Procedure:
- We transform unedged timber into edged timber.
- We cut the board into several segments - four 20 cm each and 1 24 cm long.
- We process blanks.
- The remaining boards are cut to a width of 4.5 cm along the grain of the wood.
- We collect the box.
- We attach the wheels to the bottom.
Here are some guidelines for building:
- use nails 1.5 * 50 mm, this will increase the likelihood that the boards will not split during the process of connecting them;
- start by nailing the sidewalls of the lower and upper planks to the end cut, and then distribute the rest of the blanks between them;
- attach the strips 24 cm long with nails from below.
You can put children's toys in such a box.
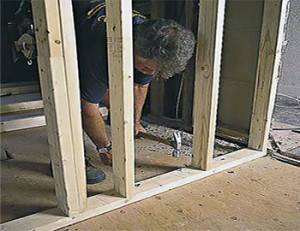
Door frame and door assembly
At the next stage, the box is installed and the door is hung.
- We install the formed box in the opening and fix one side with long self-tapping screws in places that will be closed with hinges.
- We attach the hinges to the canvas and the box and hang the door.
- We close the door and outline the place for the striker. We drill a recess to fit the latch.
- We fix the second side of the box. Before that, it is necessary to close the door and correct the gap, making it the same over the entire height of the canvas.
- We install a wooden wedge between the frame and the doorway at the latch level and fix it with a self-tapping screw through the hole provided for the locking fittings.
- We mount the striker plate and fix the box with wooden wedges.

Materials and tools
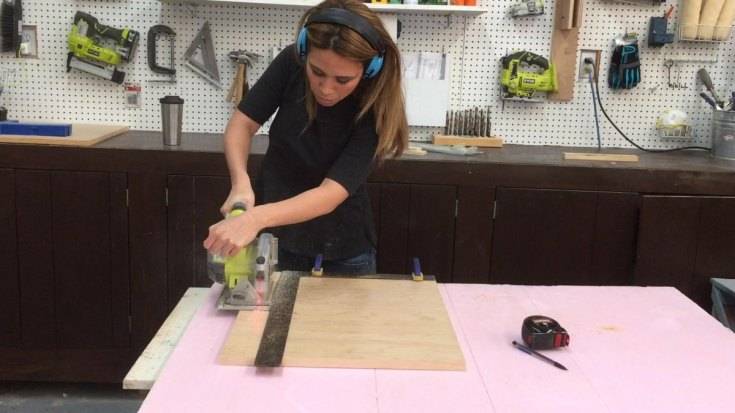
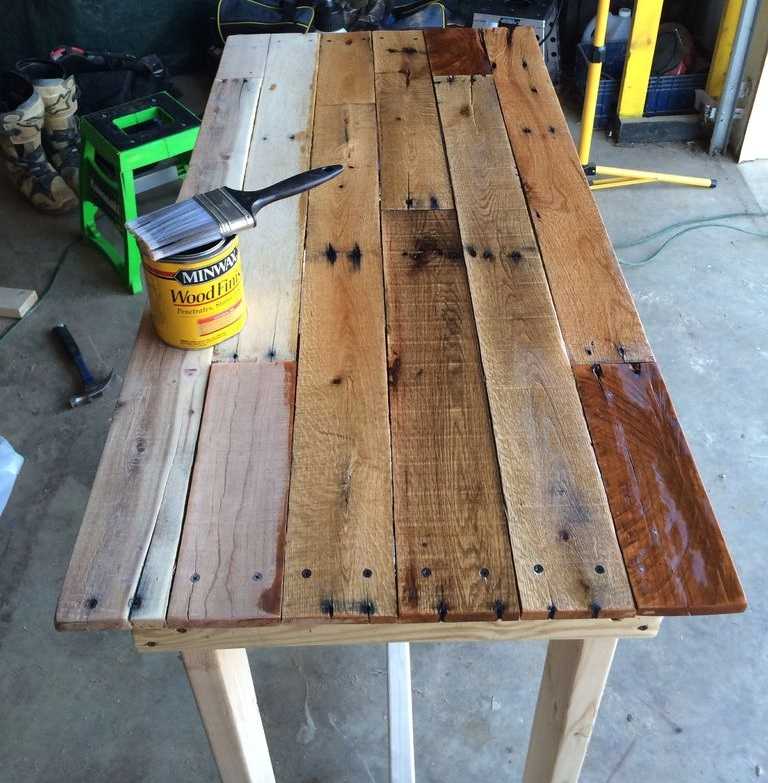
If you are going to make a table with your own hands, you need to select the necessary materials in advance and prepare them.
For the simplest model, you will need a bar with a section of at least 40x40 mm (for legs), a board with a section of 10 ... 20x50 ... 100 mm for a side bar (can be replaced with a bar) and an array, a furniture board or boards with a thickness of at least 18 mm for a table top.
Important: when choosing a massive edged board or slab as a tabletop (a longitudinal cut of a trunk with an unaligned edge), it is necessary to increase the cross-section of the supports - the load on them will be much greater than from a conventional light panel.
All lumber is cut to size, processed to smoothness with an abrasive material or tool, and adjusted to each other. After completing the assembly, the wood must be treated with a protective impregnation (this can be done before installation) or varnish / paint.
For work you will need:
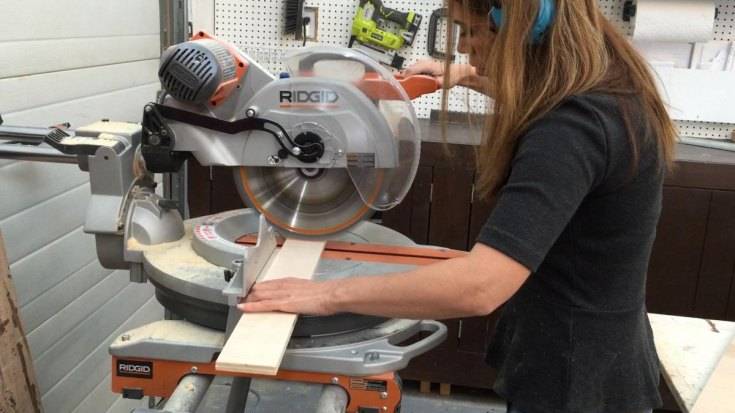
- saw for wood, hand or electric (chainsaw);
- drill for drilling holes;
- sander or sandpaper (sanding sponges) with different grain sizes;
- a screwdriver / screwdriver when using threaded elements for assembly, a hammer when assembling on nails, a mallet and chisel for grooving when choosing carpentry connections.
You will almost certainly also need a brush / roller / rag to apply impregnation, varnish or paint, and tools for marking.
Working with wood usually poses no health hazard, but protective clothing and - especially! - it will not hurt to get gloves, nobody needs splinters in the fingers.
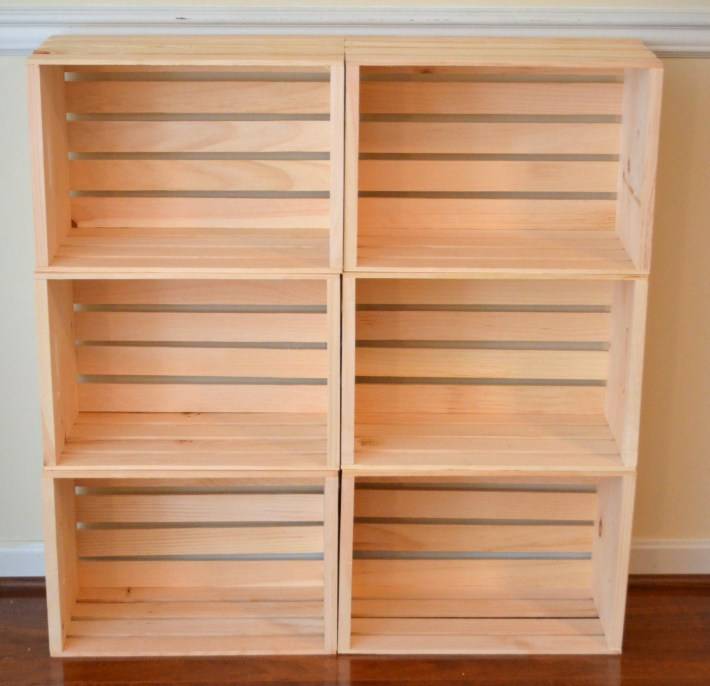
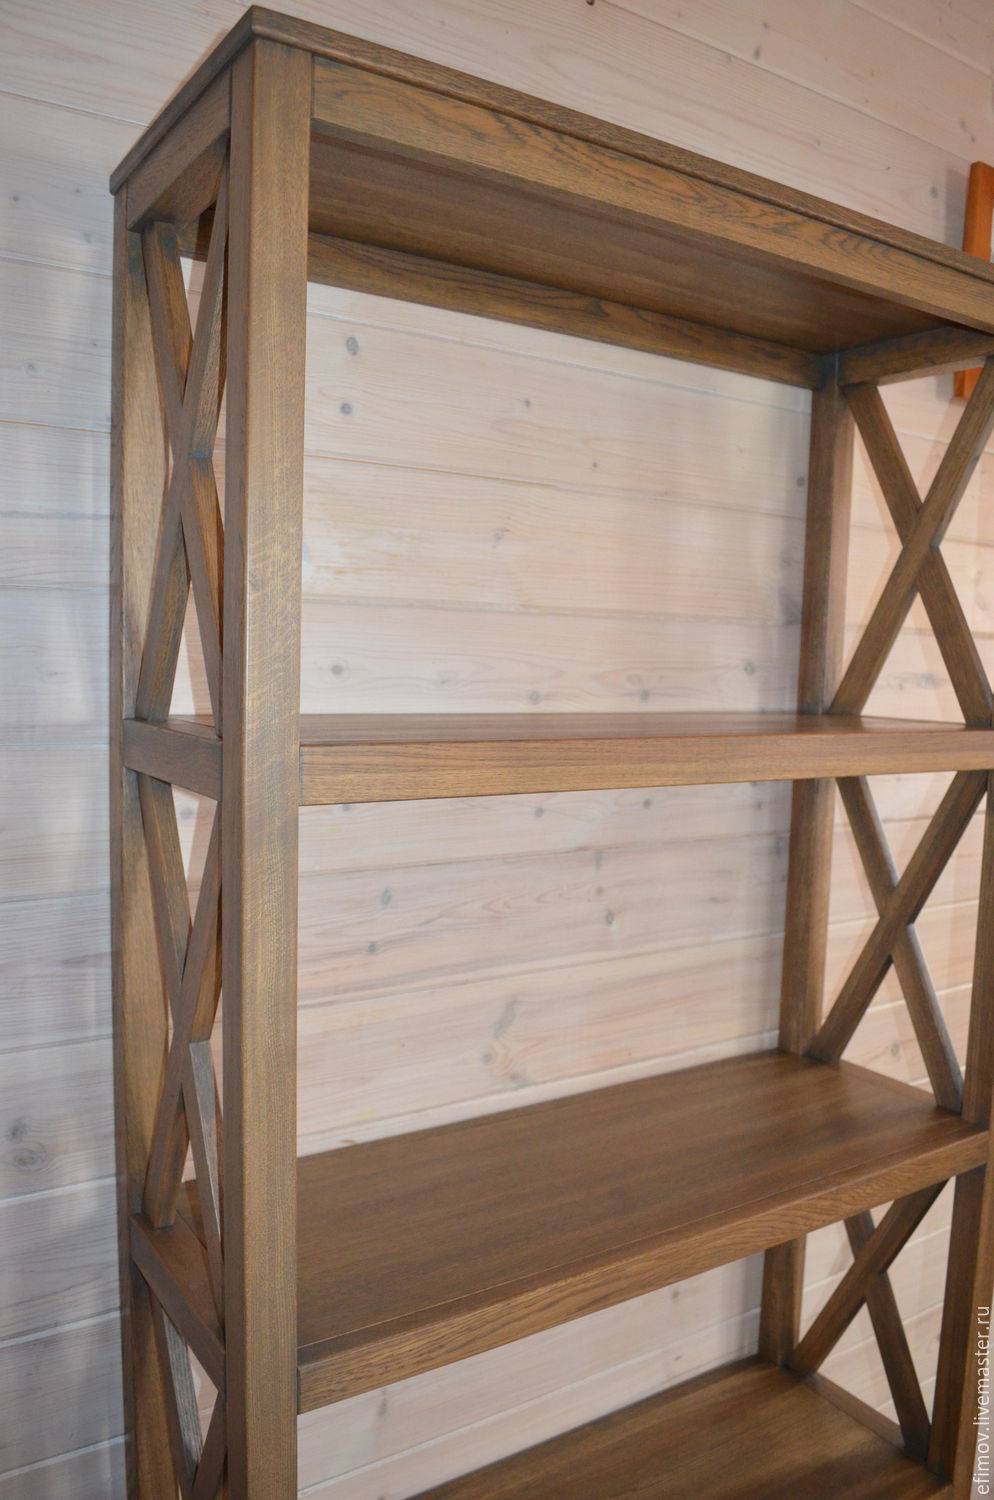
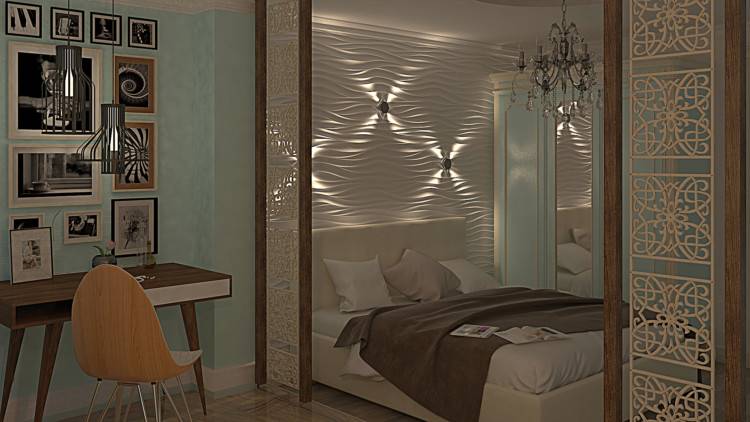
Varieties of interior partitions made of wood
A wooden interior partition is a simple structure that you can make yourself if you want. In private construction, 3 types of partitions are usually used, each of which has its own design features.
Frame-panel board
This is one of the most common options for wooden partitions, which provides additional heat and sound insulation of interior spaces. From the name it follows that such partitions are made on a frame basis, then sheathed with shields.
For the frame, a bar with a section of 60 x 100 mm is usually used, which forms a horizontal and vertical strapping. The distance between the elements can be calculated by the thickness of the insulation, which will fill the free space. For these purposes, mineral wool or foam is usually used.
As a wooden sheathing, the following options are assumed:
- plywood. A practical and affordable material that is easy to process and install, however, plywood can delaminate over time, so it is not suitable for rooms with high humidity;
- Fiberboard. Fiberboard, which is made from wood processing waste and cellulose by hot pressing. The composition often includes fire retardants, polymer additives and antiseptics;
- Chipboard. Chipboard, which is made on the basis of shavings and sawdust, resin or formaldehydes act as a binder. The products cannot be called environmentally friendly, although manufacturers assure that the content of volatile compounds is in accordance with the standards. Chipboard is not recommended for the construction of partitions, which are planned to be subsequently transferred or installed in the nursery. Damage always remains in the fastening areas, the fibrous structure does not hold fasteners well.
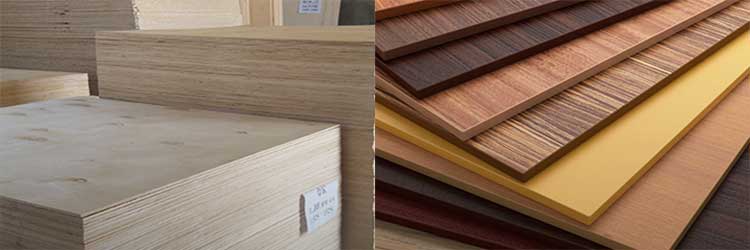
When choosing wood sheathing, you can pay attention to OSB - oriented strand board, which is a strong and durable material. Disadvantages include high cost and dependence on a humid environment
Carpentry
This is a paneled structure that usually does not require finishing, which provides significant benefits when performing construction work. In the manufacture usually used wood of valuable species, which is covered with several layers of varnish.
Here it should be borne in mind that such partitions do not imply the use of insulation, therefore, they are not able to provide the premises with heat and sound insulation. The design performs an exclusively decorative function and is used for space zoning, for example, it separates the dressing room from the total area of the bedroom.
Solid
Solid-type partitions are erected from the material that was used in the construction of the house (timber, log, frame structure), therefore, they have a fundamental look, although they do not heavily load the base. The structural elements are fastened together with metal spikes, which give the wall additional rigidity and stability. The partition is connected to the supporting bases by means of triangular bars and nails.
The indicators of heat and sound insulation directly depend on the characteristics of the lumber, but if desired, they can be increased by flashing the surface with foam.