Creating a separate structure
This option is more complicated. They resort to it if it is not possible to install a canopy under the shed. A separate structure is created, which will require more material and effort. At this stage, you need to already decide on the place on the site, as well as on the material from which the shed for firewood will be made.
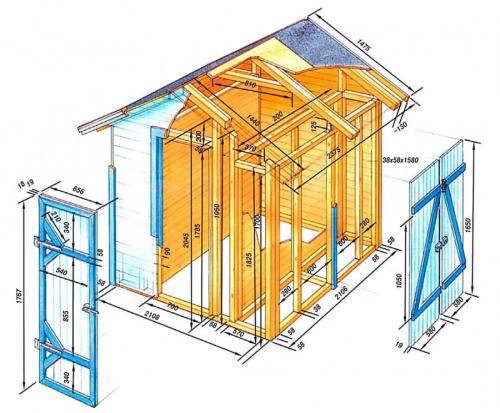
The next thing to do is put together a project. This will be a guide to help you in your work. It consists of drawings showing the selected material and the exact dimensions. One of them can be seen in this photo:
Further work can be divided into separate stages.
Preparatory stage
It includes the choice of location and the creation of drawings. To the points noted above, you can add nuances about the placement. A firewood is not a gazebo, so it is better not to place it in the center of the plot in plain sight. Such an outbuilding must be installed close to the house so as not to carry firewood far. The second point concerns the delivery of firewood. It is desirable that there is a vehicle entrance to the shed. It is not necessary to place the structure close to a bathhouse, a gazebo with a barbecue. As for the drawings, it is enough to make a sketch with the dimensions of the future canopy. If it will be a whole complex with a separate room for tools, then you need to make a detailed layout.
The preparatory stage also includes the preparation of raw materials for work. We will look at creating a wooden structure. The wood for it must be dry, that is, have a moisture content of no more than 20%. You can not only buy material, but also use the leftovers available on the site. As for the tools that will be required for work, they are as follows:
- garden drill and shovel;
- hacksaw or chainsaw;
- hammer;
- pliers;
- plumb line, tape measure, level, pencil and square;
- twine and pegs;
- ladder.
Now we will learn how to make a firewood shed with our own hands.
Creating a foundation for a structure
The firewood shed will not have a lot of weight, but in order for the structure to be stable, a lightweight foundation is required. This is not a strip design, but a columnar one. Another option is to simply concrete the support pillars.
- Markings are made on the site, where the placement of the pillars is indicated. If the firewood shed is small, it is enough to make 4 holes in the corners.
- In the selected place, with the help of a drill or a shovel, holes are dug to a depth below the freezing of the soil.
- The bottom layer is covered with sand and rammed. Such a pillow will make the foundation more stable.
- Posts are installed in the pits. They can be made from bricks. They are built using cement masonry.
So that the tree, which will later be laid on bricks, does not rot, you need to waterproof it. For this, 2-3 layers of roofing material are laid on the surface.
Creating the frame for the canopy
When the pillars are ready, the beams are laid on them, serving as the lower strapping. A bar with a section of 150x200 mm is used. The beams are attached to each other by means of metal corners and self-tapping screws, or simply with anchors. In addition, the harness itself must be attached to the posts. For this, a metal pin is installed between the bricks during the laying process.
The lintels are laid perpendicular to the two strapping beams, which are needed to create the floor. They are fixed in increments of 0.5–08 m. After that, vertical frame elements are installed using corners. In this case, the first step is to install the rear struts, then the middle ones and at the end the front ones. Temporary braces are used to provide structural rigidity.
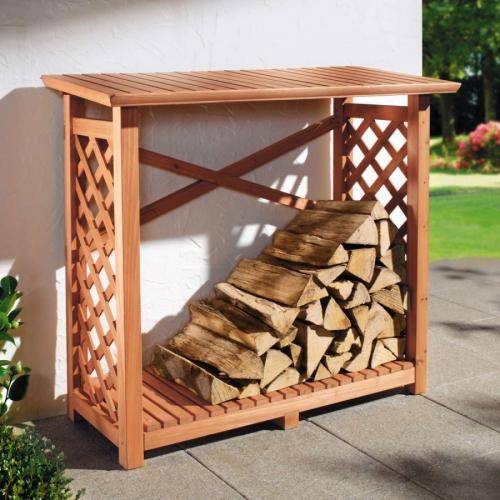
The next stage is the top harness. These are horizontal planks that connect vertical supports. Rafter boards will be installed on the strapping at the top. Below you can see what an almost finished do-it-yourself firewood shed looks like in the photo:
It remains to make the roof and floor.
The final stage
First you need to make the floor. An ordinary wooden board is used, which is stuffed onto prepared beams.A small expansion gap is left between the boards. You can fix the boards with nails or screws.
As for the roof, it is enough to make a simple option - a pitched roof. For this, a crate is created. We will use corrugated board as a roofing material. It is cheap and easy to install. Alternatively, cover everything with slate.
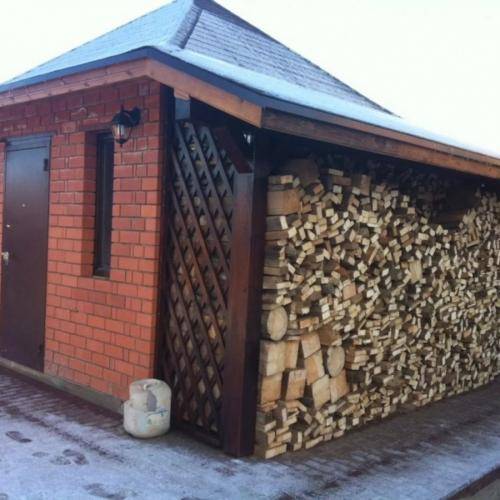
It remains only to sheathe the walls with boards or bars on three sides. It is not necessary to make the walls solid, they can be fixed in 10 cm increments. In the photo you can see how to make a canopy for firewood:
This completes the creation. But, there is another option, which is easier.
Log shed: harmony in the details
A canopy is an important part of a woodpile in order to preserve its quality characteristics as much as possible. The main function of the canopy is to provide natural ventilation and protect the logs from precipitation. As a material for a canopy, metal, slate, boards, bricks, polyethylene, etc. can be used. But the most optimal, according to experienced summer residents, is wood. Its advantages are as follows:

- durability;
- profitability;
- ease of use;
- aesthetic appearance;
- ease of transportation;
- the ability to quickly assemble and disassemble;
- does not require laying the foundation.

The main requirement for the construction of a firebox is a sufficient level of drying of the material used.
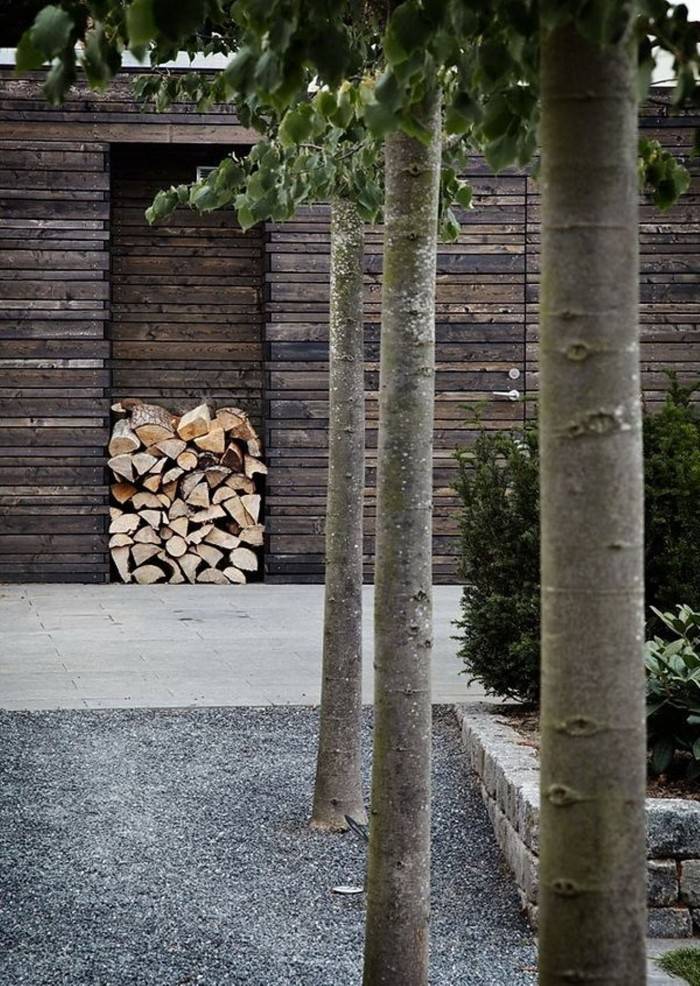
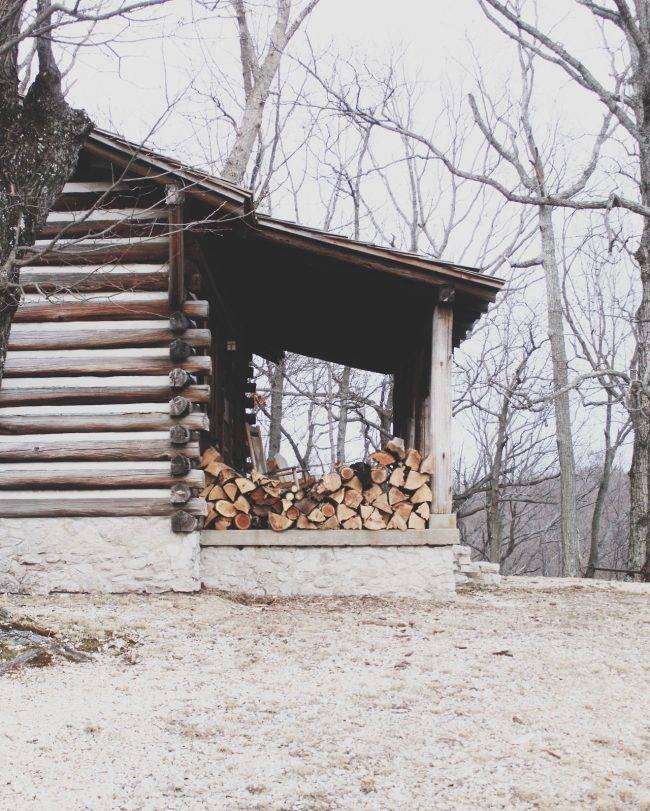

Leveling is the most important part of building a canopy. If you treat this issue carelessly, the design will quickly become unusable.


Recently, polycarbonate products have become especially popular. The material itself is inexpensive and has good quality characteristics. Therefore, it is often used to erect a woodpile canopy.

What are
A sheet of metal will protect the walls from wood borers (wooden, of course)
If you do not pay attention to the size, there are two types of firewood sheds - attached to the wall of a building or standing separately. It is clear that it is easier and faster to attach, but it is not always possible to do this. Rather, not with all buildings: it is dangerous to attach to wooden walls
And not only from the point of view of fire safety. A whole army of wood-boring beetles "arrives" with firewood, which will gladly take over your home. Therefore, it is better not to attach woodsheds to wooden buildings, even with wood treated with biosecurity, and if you really want to, then nail an iron sheet to the wall. As in the photo. It should be larger than the size of the log. Then all the bugs (most of them - for sure) will remain in the wood.
Freestanding wood boxes can be completely open - several posts, a couple of lintels and a roof. The main thing is that the roof is large enough: it is advisable to make more overhangs. And the rest will be done by the air and the sun. They say that it dries in them no worse than in more closed structures. In regions with heavy snowfalls, so that the snow does not clog inside for the winter, they attach (attach) sheets of plywood below. They are removed in the spring.
How walls are made
Most often, firewoods are built with lattice or crevice walls. It is better if the boards are stuffed at some angle - like blinds. Then precipitation, even with an oblique wind, gets little inside. But even if the boards are filled with some kind of gap, everything dries well.
Planks / planks are stuffed onto the frame mainly horizontally, sometimes vertically, also - they make gratings from thin strips or put them obliquely. In any case, there should be a lot of ventilation slots.
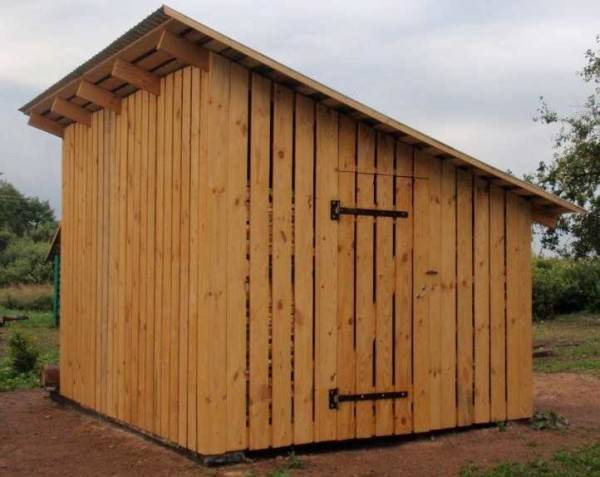
Vertically padded planks are rare. Such is the woodshed with a pitched roof
Does the drying speed depend on the way the planks are installed? No comparisons have been made, so it's hard to tell for sure.But one owner claims that if you fill the boards obliquely (he has 10 cm with a 2 cm gap), with each wall in a different direction, it dries faster and faster: in a month.
About the size of the slots: they are made from 2 cm to 10 cm. But it also depends on the width of the board. If you leave the gaps very wide, snow will be swept up heavily. If there is not much snow or you are not worried about the amount of snow, you can fill the boards less often. It is also more economical.
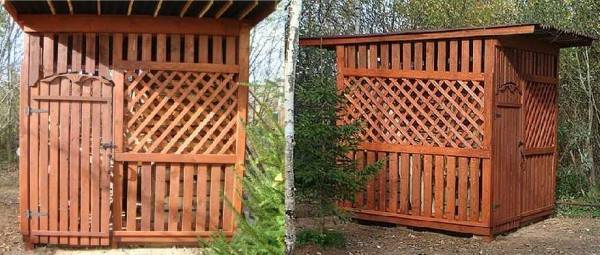
Beautiful woodshed for a summer residence
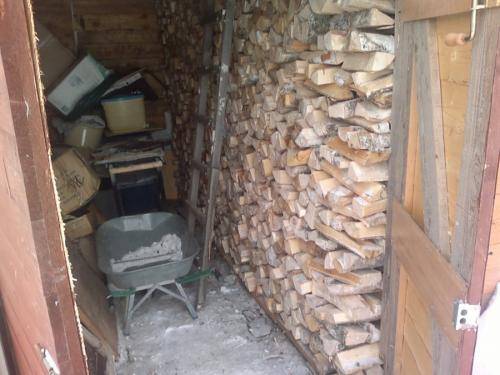
Not all woodcutters have doors (with doors they are also called "wood shed"), as in the version in the photo. Often there is not even a front wall: this way it is more actively ventilated. The front wall and doors are needed if they steal in your area, but in general you can do without them.
Log arrangement
Now a little about the structure of the woodshed. If it is small and everything fits in one row, then there are no special problems - everything is available. But if large volumes are loaded, it is better to divide the area into sectors into which the consignments of firewood will be loaded. Thus, those imported earlier and already dried up will not be covered with fresh ones.

It is better to divide the area into sections, so that you can go inside
If the log shed is square, arrange the sections so that you can go inside, taking out the driest logs. For this, a passage is left in the middle. In depth, it should not be up to the wall, but it is desirable that you are separated from the wall by only one, maximum - two rows of logs (and generally depends on the volume) - so they will all be accessible. It's easier with rectangular ones: they are simply divided into non-sectors by a partition. For example, as in the photo.
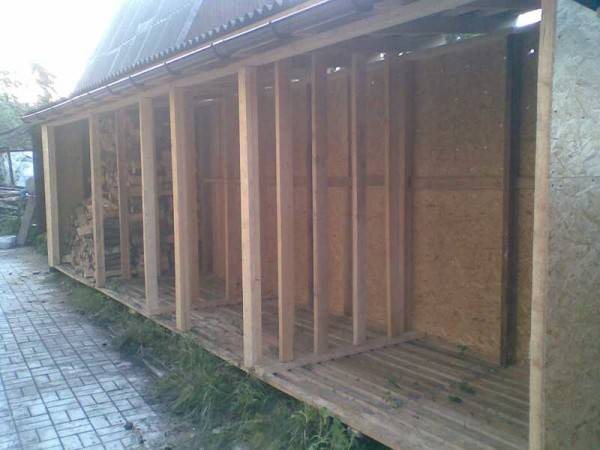
Such a large shed for firewood - one machine fits in each section - about 4 cubes. The back wall is not solid, if you look closely, there are holes.
And a little about the height. A large wood log is not needed for a summer cottage (seasonal). All you need is one or two cubes for the heating in autumn / spring, and even then only for the weekend. But if you have to heat a house, and even a bathhouse, you will have to build something solid. Then, regardless of the layout - long or square, the height is made about 2 meters. With an average height, you can download almost to the ceiling. but there should be a ventilation slot on top.
Criterias of choice
- Before starting the construction of a firewood, we select the selection criteria.
- Money, based on the amount, we can determine with building materials, we choose an acceptable option.
-
The dimensions of the firewood are directly dependent on the frequency and what you will use the firewood for. If you live and heat a dwelling, a bathhouse, then you need to build a large woodpile. If you rarely use a country house and grill a kebab, then build a small firewood. You can make a simple canopy.
Place of installation:
- The soil must be dry. In a low, damp place, firewood will quickly deteriorate (mold, rot, damp, and therefore burn badly). The approach must be clever, so that the firewood can be folded and taken without hindrance.
- Accessibility - think over the location, the brought firewood must be quickly placed so as not to carry it across the entire plot, place the woodpile next to the unloading point. The firewood should not create a shade for the cultivated garden crops and the garden. Place a large woodpile next to your home or bathhouse. Other When using the wood stand outside, it can be installed side by side. The main thing is to comply with fire safety rules, to install at a sufficient distance so that sparks from the fire do not fall on the wood.
- The surface must be flat - on a surface with a slope, it will be difficult to lay the blocks in a reliable, stable structure.
- Type of construction. Depending on the size and location, we outline the type of construction.
- A woodshed can be made open and closed. An open woodshed can be in the form of a frame with a floor and a roof without walls, it can have one, two or three walls. It looks beautiful in the form of a gazebo. A closed woodshed is a solid structure like a barn.
- Materials - taking into account the above points, you are determined with the materials.
Polycarbonate awnings and why they are better
A fairly new material for the construction of temporary structures is polycarbonate.It has become available relatively recently, has an ideal combination of price and quality. It will be more profitable to make a canopy from just such a material for several reasons:
- Material availability. 1 square meter of polycarbonate will cost the owner 120 rubles. Let's take a sheet with a margin and a little thicker - it will come out at 170 rubles. Compared to metal, it is a little cheaper, and if you consider that polycarbonate does not need to be painted, treated with anti-corrosive mixtures, then the price will turn out to be completely low.
- Absolute resistance to corrosion. Water, sunlight, acids, alkalis - all this will not affect the structure of the material, polycarbonate will be as good as new for many years.
- Ease. The low weight offers many benefits. Firstly, it is very convenient to transport it, you can even bring it by a car. Roof mounting is even more convenient. If you choose calm weather, then even one person can easily perform the installation. One sheet will weigh several kilograms, it rises easily, does not overload the roof lathing, therefore, support elements can be installed much thinner.
- Flexibility. If you need to create an extraordinary roof, then polycarbonate is the best option. You can even screw it into a ram's horn, as it is elastic, flexible, unlike any other roofing material that cannot be bent.
The construction process is a little more complicated than in the manufacture of the above structures, but there is nothing supernatural. Metal supports 45x45 centimeters are installed (preferably with concreting), then strapping is carried out along the top, to which the arched frame is already attached. The only difficulty is the transverse lathing for each polycarbonate sheet, but it can be done after 80-90 centimeters. Arched profiles are attached to the transverse lathing, into which a polycarbonate sheet is installed. They eliminate the possibility of leakage during heavy rains, and also additionally compact the sheets.
We have considered the most profitable and simple structures of awnings that can be made in the country with your own hands, but if you wish, they can become not just a roof under which you can hide firewood, but also full-fledged decorations for your yard. To prevent firewood and other materials that will be under the canopy from getting wet during a strong thunderstorm, the roof slopes need to be made a little longer so that the angle from the end of the roofing material to the beginning of the firewood is at least 45%. The lower the warehouse is, the more "cozy" it will be inside, but less firewood will fit into it - consider this in advance.
Stages of woodpile construction
Before starting work, the tree must be treated with an antiseptic and well saturated with linseed oil. The iron must be cleaned of rust and covered with a primer.
The construction of a summer cottage is carried out in the following sequence:
- Installation of supports. Steel or wood supports are immersed in pre-dug holes and carefully leveled. For this, props and stretch marks are used. Concrete mortar is poured into the pit or broken brick mixed with sand is poured. Concrete needs at least 5 days to harden. If stone backfill is used, then construction can be continued immediately after it has been tamped.
- Manufacturing of the upper and lower strapping. These structures will be the base for the woodpile floor and roof. Steel pipes are welded together. The wooden beam is inserted into the grooves of the supports and fixed with nails.
- Pallet assembly. It is made from a bar, which is nailed to the lower strapping at an interval of 10-15 cm. To prevent the pallet from sagging, it is advisable to put bricks under it, covered with roofing material on top.
- Arrangement of the roof. It is best to make a simple single-slope design. The roofing material is laid on a lathing made of timber or steel pipes. To prevent water leakage, the roof slopes must be carried out 30-40 cm beyond the edges of the woodshed.
- Sheathing the frame with slats, carrying out minor finishing works, installing windows and doors. A closed woodpile can be used to store garden tools and other property.
The final step in building a woodpile is to decorate and paint it.If you have time, desire and imagination, it can be turned into a real fairytale tower.
Requirements for a simple woodcutter
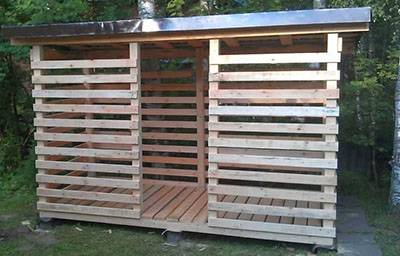
Both for a summer residence and for a home, it must be well ventilated. For this, the walls of the storehouse are made with cracks.
In such a structure, the wood will be ventilated and dry faster. And dried logs burn better, give more heat and less soot.
The woodshed must have sufficient capacity. The canopy (roof) must not leak to prevent rain from entering. Otherwise, the wood will rot and rot.
It is advisable to put the structure on the foundation. But in the country you can do without it. Only in this case will the floor be unventilated.
Place for construction
It should be such that the dry fuel trip does not turn into a long trip. Even if the structure is made in an unusual style, it should still not stand out too much.
For the best choice, you can draw up a site plan, where you mark a suitable place. The site should be flat, preferably on a small hill and located in a place where the building and the firewood in it will be well ventilated.
The sun's rays should not directly hit the wood, as this will lead to their drying out. It is better to use the northern side of the site under the woodshed.
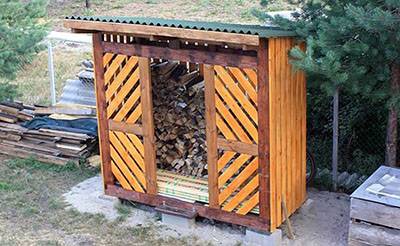
The storage can also be located near the wall of a house or a bath. In such structures, firewood should be stacked with an indent from the wall.
This is important for ventilation.
If the volume of the logs is small, then they can be placed in a specially designated place inside the building. Such a place is usually allocated in the garage or near the hearth.
But the situation should be such that the fire from the hearth could not spread to the wood. The floor of such a woodshed is padded with additional material so that moisture and fungus from the wood cannot get onto the flooring.
Important! When constructing a storage near a wall, it must be spanked with iron or other material. We do this so that rot and wood pests do not spread to the wall.
To equip a small woodshed on the street, you do not need to erect a capital structure on a foundation. To do this, it is enough just to choose a ventilated place where firewood can be stored evenly.
What material do we build
Any available can be used for construction:
- Polycarbonate. The design is lightweight, does not require a foundation. It is being built quite quickly. The disadvantages of such a structure are that it can be easily damaged by stacking firewood. And also it is necessary to make at least a couple of vents for ventilation.
- Brick. It is rarely used. To build such a woodshed, you need a reliable strip foundation. The advantages of brick construction are reliability and durability. Cons in the cost of construction. You need the ability to do masonry.
- Wood. The most common type of storage due to its low cost, availability of material and ease of construction. Bars, boards (maybe a slab), nails (screws) are used. A wood shed is erected both without a foundation and on screw piles. Instead of screw piles, a point frame is also used.
- Metal. There is no need to make a foundation for such a structure. The main thing is to take into account the size of the structure: for a house and a bath - more, and for a barbecue and a barbecue - of a small size. The design is durable with proper care. Cons in the price of the material and the skill of the welder will be required.
Preparation for construction step by step
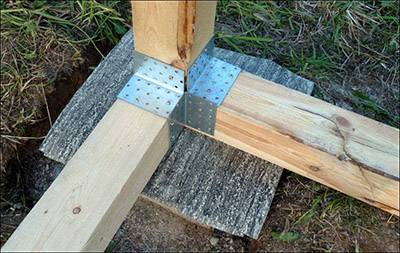
Before you start building a woodshed and erect a foundation, you need to decide on its size. They depend on the amount of wood consumed.
On a cleared and level area, mark the outline of the future structure. If the woodshed is brick, then a strip foundation is required.
For wood, it is suitable on screw piles or point.Screw piles are screwed into the ground and concrete is poured into them.
For the construction of the strip foundation, you will need to dig a trench along the contour of the structure, erect the formwork. The point frame does not require digging a trench. Several holes are dug, on the bottom of which a layer of gravel and sand is poured. Next, concrete is poured. After it has solidified, brickwork or foam blocks is installed.
Tools for building a woodshed:
- shovel;
- Master OK;
- hacksaw;
- axe;
- level;
- hammer;
- screwdriver;
- welding machine.
Hozblok with wood log
Such a building combines separate compartments for storing household equipment and firewood. Accordingly, the part for storing inventory should be more protected from bad weather and uninvited guests. In part, the degree of security depends on what kind of inventory will be stored - good waterproofing is needed for power tools, and for wheelbarrows, hoses and shovels, a normal roof and the absence of strong moisture are enough.
Since a large supply of fuel is usually stored in a wood log attached to a utility block (or built with it), a foundation will be required. For it, you can use monolithic supports, block or piles. In the presence of wooden ridges (butt parts of large trunks, not less than 0.7 ... 1 m in diameter), they can be used as supports. To do this, the ridges are cleaned of bark and possible damage (rot, fungus, blue), impregnated with an antiseptic (for example, engine oil) and coated with molten bitumen. For greater safety, you can make a second layer of waterproofing - after being coated with bitumen, wrap it hot with roofing material.

An approximate foundation plan for a utility block with a wood log

An example of a utility block with a wood log
Pay attention - the part where the tool is stored has a solid sheathing, and the side and rear walls of the woodshed are sheathed apart

An example of a frame structure on columnar supports. The woodshed is located on the left
The construction principle is the same as for a conventional free-standing storage facility:
- organization of foundation supports (preferably on a pre-prepared site with gravel / crushed stone / sand filling and tamping);
- fastening racks to supports using studs, embedded or fastening profile;
- assembly of transverse and longitudinal frame elements;
- the device of the rafter system;
- wall cladding (solid for the utility block, sparse for the firewood). Part of the sheathing can be replaced with crosses or several bars stuffed transversely (parallel to the ground);
- roof device (waterproofing, roofing material decking);
- hanging the door on the utility block.
To figure out how to build a firewood with your own hands, the video will help.
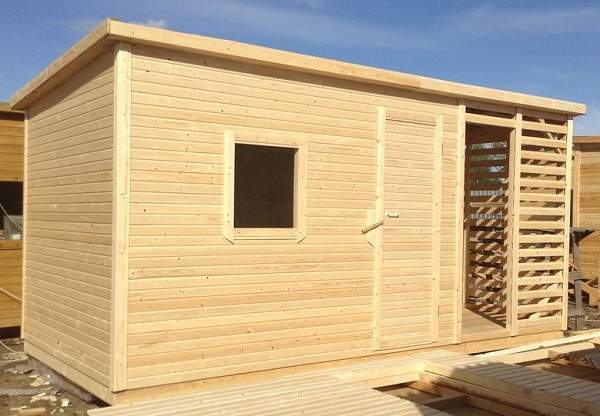
Please note - the utility block does not have to be designed to store useful things. There may be a summer toilet or shower, even a summer kitchen or a place to sleep.
Alternative or just beautiful firewoods at their summer cottage
If you do not have the time to build a firewood on your own, or you simply do not have a desire for this work, you can use alternative options: constructions of a different profile. They are perfect for storing wood stocks.
The most popular alternatives are:
Structures from warehouses used to move various goods - pallets. Usually they are folded in the form of a cube, attached to each other. And on top they are covered with roofing material, or a film.


Unused rabbitry. The grids and doors that form its front side are removed from it. And after that, you get a good wood log for storing firewood.

Firewood rack:

This option resembles the famous Callax shelving from Ikea.
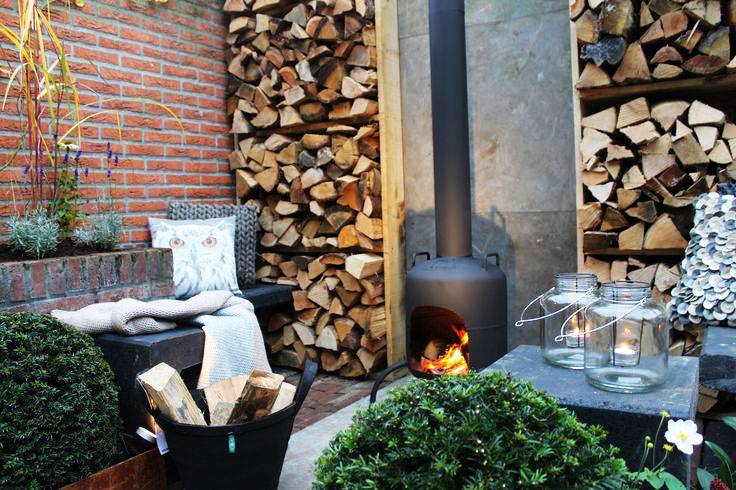
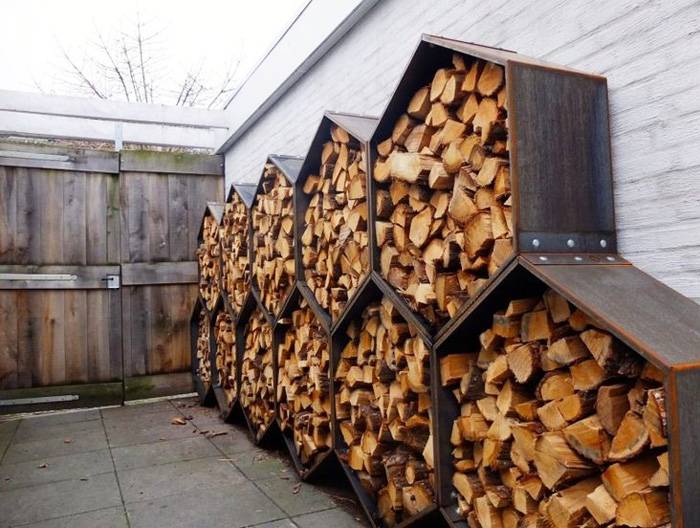
An extension for firewood. We make an extension for firewood
It is good if the local area is asphalted or paved with tiles.Then the bottom rows of the wood stock will remain dry. For better ventilation, install several bricks or cinder blocks as supports in the corners of the future base.
Place a piece of plywood or a storage pallet on top of them. There may be several of them, depending on the amount of firewood. For strength, fasten the pallets together with metal staples or steel wire. Punch holes in the bottom.
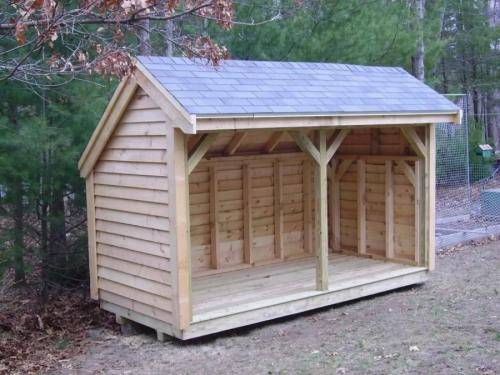
The elevation can be made from a wooden or metal frame, tightened with a dense waterproofing material (roofing felt). To keep the woodpile stable, fix it at the ends with two pairs of poles, nailing them to the base with nails. Place the logs in a stack, parallel to each other. Thicker end towards the retaining wall.

A woodpile folded like a crate will be much more stable. Each subsequent row is folded perpendicular to the lower one. Round timber or chocks are laid along the edges, split into two halves. This is the simplest type of woodshed. Even a teenager can handle his device.
If conditions and your abilities allow, the frame is made more durable. Dig four metal pipes or beams into the ground to a depth of 30 cm. These will be racks. We pour them around the circumference with crushed stone, we compact.
Treat the part of the timber in contact with the ground with an antiseptic impregnation to protect it from decay. Trim the uprights on two or three sides - whichever you prefer. This is the so-called "strapping". A floorboard (25 mm) or a rail, polycarbonate sheets is suitable for it.
For fasteners, we use screws or nails, two on each side. The main thing is that there is a gap between the sheets or boards for free air ventilation. This will keep the wood from damp.
On top of the corners, a roof is attached from any available roofing material. There is a trick here. We make the rear pillars 20-30 cm higher. So we get a roof with a slope, along which water will roll down without spoiling our firewood. The floor is packed on long boards (logs), laid on posts made of bricks or cinder blocks.

On top of them, the main covering of a board of a larger diameter is laid so that the floor is not pressed by the weight of the woodpile. If there is little firewood, plywood can be used as a base. There should be several block or brick supports under the logs.

Lay out the bottom row of the stack with meter-long firewood. When everything is ready, cover the wooden parts of your masterpiece with an antiseptic on the first layer, after drying - paint with an additive from pests or polyurethane varnish.
It is important to take one more precaution. If the house near which you are building the log storage is wooden, you need to think about how to protect it from wood bugs and dampness. To do this, leave space between the wall and the logs for ventilation.
Protect the section of the wall in the desired place from bark beetles with a steel sheet
To do this, leave space for ventilation between the wall and the logs. Protect the section of the wall in the right place from bark beetles with a steel sheet.
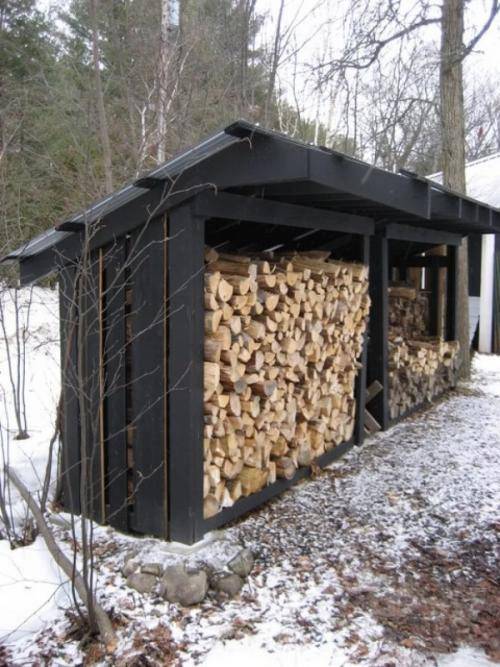
I had to meet a wood-shed near the house, the frame of which was welded from an iron corner. Such a structure is not afraid of dampness, you can not be afraid that a strong wind will turn it over. However, the cost of material and welding work is much higher than that of the designs described above.
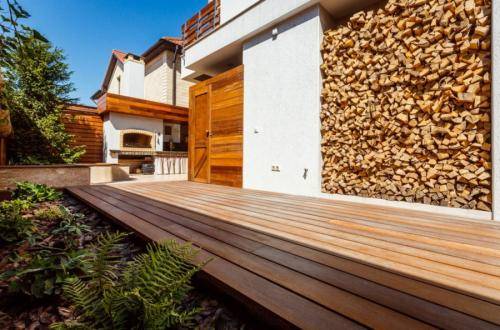
Do-it-yourself firewood for summer cottages
This beautiful summer cottage firebox combines style and functionality. Sheathed to the sides and sloped roof, the covered rack has a clean look and solid structure. Since the structure is self-contained, it can be moved as needed. The firebox does not need a foundation, when it is filled with firewood, it is very stable, even in strong winds.The rack is quite spacious, 1.20 m high, 2.50 m wide. Since the storage area is protected and raised, meaning there is no contact with the ground and there is good air circulation, the wood dries quickly and is ready to use whenever you need it.
Assembling the frame
- Join the edges of the front posts to form corner posts. Drill through holes at 20 cm intervals. Drill the holes and connect the pairs with screws. Connect the rear posts in the same way.
- Join the two bottom rungs and the two end rails into a rectangular frame. Place the third crossbeam in the center (see photo). Drill two screw holes at the ends of the bars. Attach end straps between the front and rear corners
- If the corner posts are straight upright, place a 5 cm spacer next to each corner post to support the frame. Place the bottom guide frame between the corner posts and secure the frame to the corner posts by screwing two screws through the corner posts and into the outer surfaces of the bottom bars. Saw off the rear and front crossbeams, roof supports, B-pillar and B-pillars. The roof supports and center supports are compressed at the ends.
- To cut at an angle, mark a point 4 cm from each end along the edge of the board. Draw diagonal lines from each point to the opposite corner. Cut along the lines with a circular saw. Place the front rail on the roof supports.
- Drill through holes in the rear rail. Use the long screws to secure the rear rail to the back of the rear corner posts. Repeat the procedure to attach the bracket to the outside of the corner posts. Make sure the tops of the posts are flush with the top of the ends of the posts. Install the front crossbar by threading the screws through the outer roof supports.
- Install the roof supports. The top of the crossbeam must be flush with the tops of the rooftops. Attach the middle supports between the front crossbar and back rail, 75 cm from each end of the crossbar. Attach the roof covering to the supports starting at the rear edge. Make sure the wide edge of the siding is facing down.
"Pallet"
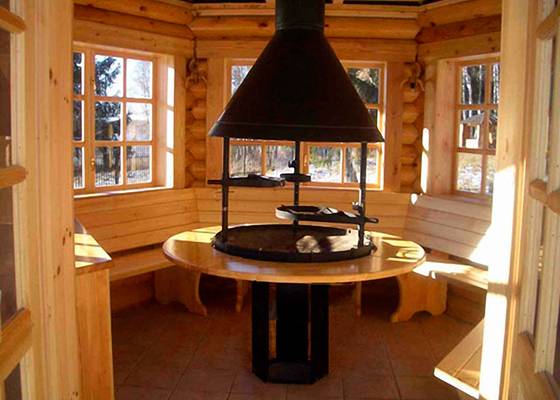
As in serious construction, it was necessary to act according to science. The first thing I did was to clear and plan the selected area. Otherwise, it is impossible, removing garbage mixed with earth will be much more difficult.
Then he took up the base. Since I really didn't want to mess with concrete, and nobody canceled the forces of frost heaving, I decided to make the foundation columnar by installing supports on sand cushions.
In some magazine it was written about square pits for the size of a brick, or something like that, but again it seemed to me to work with a drill a simpler thing than poking into the ground with a shovel, and therefore for an hour and a half I dug in the ground for three a row of holes half a meter deep and 300mm in diameter.
The interval between them was kept in a meter, although in theory it would be possible to make two-meter spans. But firewood, as we found out, is a heavy thing, so the reinsurance was not superfluous.

Then I covered the grooves with sand and walked well over it with a rammer. Thus, creating a non-porous bedding for the canopy.

I installed 140mm high brick posts on it. It is quite enough that the firewood is not heated with melt water.

Then it was necessary to cover the posts with pieces of roofing material and lay wooden beams on top, the role of which was a larch bar with a section of 100 × 100 mm.


It was a pleasure to saw it, it's good that I remembered about the chainsaw in time. I'll tell you honestly: for such formats, she is the perfect assistant.
But the flooring turned out to be pine. It, of course, could have taken lumber and more reliable, but finances were running out.

Please note that the front ends of the flooring protrude 30 mm beyond the crossbar and a mandatory ventilation gap of 25 mm is left between the boards
