Distinctive features of the device of foundations
As you know, on unstable and heaving soils, especially when they are deeply frozen, the erection of a base for a building is fraught with certain difficulties. For example, a strip foundation made of reinforced concrete, which often requires deep foundation, is not only technically difficult to implement, but also not justified from an economic point of view. At the same time, there is still a high risk of deformation of the foundation wall with the subsequent formation of cracks in it.
A slab foundation used in such soil conditions, with a large area of the building being erected, involves the consumption of a large amount of concrete and metal reinforcement, which also makes it economically inexpedient.
The columnar base arrangement is, of course, more efficient and much cheaper. However, the insufficient stability of such foundations on horizontally moving soils requires the arrangement of a rigid grillage to absorb possible lateral displacement.
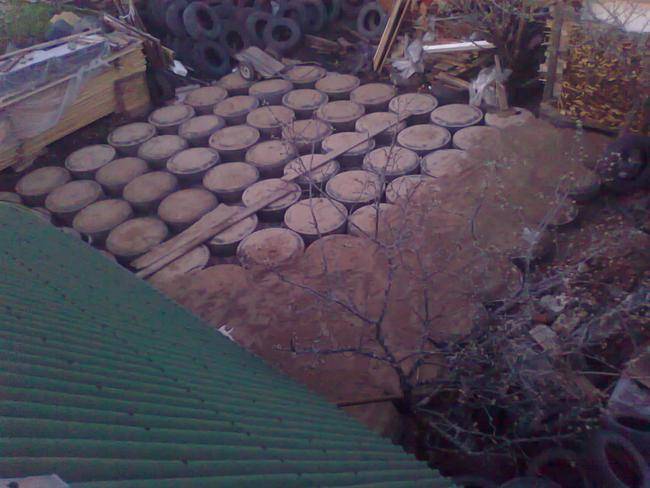
Semykin's invention is focused primarily on the owners of estates. It has proven itself well in the construction of both a small frame house and a summer gazebo, a Russian bathhouse or a garage. Its essence is as follows:
- in increasing the stability of the structure during seasonal soil mobility;
- in the minimum demanded volume of concrete required for the construction of foundations on tires.
Approximately one third of the total budget for the construction of any object is spent on the construction of its foundation. The use of car tires can significantly reduce costs. For practically waste material, you will have to pay only the cost of its delivery. In addition, the foundation from old tires can be made with your own hands, which also provides significant financial savings.
How to do it?
First of all, it is necessary to prepare a project and an approximate estimate. But you also need to calculate the load, and decide on the type of soil. The drawing should initially be made on paper, and during the execution of work, strictly follow it.
To lay the foundation from old car tires, in addition to the wheel products themselves, other tools and materials will be required:
- a shovel to dig a pit;
- rake for leveling the surface;
- crushed stone and gravel to fill the voids between the tires;
- cement mortar and sand for it;
- fittings;
- building level;
- broken brick to fill the tires from the inside;
- roofing material from which the leveling layer and waterproofing will be made.

The technology for installing different types of foundation has its own differences.
Platen
Before erecting any of the foundations, you must first clear the area and remove the debris. Removal of the vegetation layer should be carried out about half a meter deep, after which the site needs to be leveled. Next, fragments of brick or crushed stone are poured, again leveling and compaction.
It is better to use tires from wheels of heavy trucks or other large vehicles. Large tires must be laid in rows and very tightly, and then filled with roofing material, which has the function of a waterproofing agent and holds the padding. Further, fragments of brick, earth and sand are poured inside. The packing should be laid as tightly as possible, the shock-absorbing properties of the tires and the level of load on the structure depend on it. In cases where the base needs to be made as rigid as possible, it must be poured with concrete.

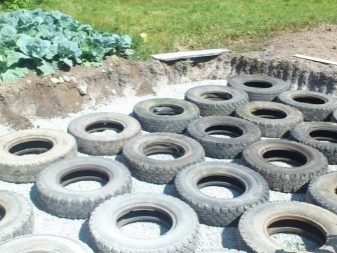
Next, you should fill the voids between the tires with prepared materials, with the exception of sand, which can settle. After that, the formwork is mounted, which should be wide enough to overlap the outer edges and protect them from the negative effects of sunlight.When these works are completed, the base is covered with roofing felt to improve the waterproofing properties.


When concreting, first of all, you need to clean the formwork and the place of work itself, remove debris and oil stains. After that, beacons are installed, by which the level of the concrete surface will be determined. The concrete mixture itself must be plastic in order to fill all the voids without problems without the use of additional tools. Concrete can be compacted using special mechanisms or manually, the main thing is that the process is carried out efficiently.
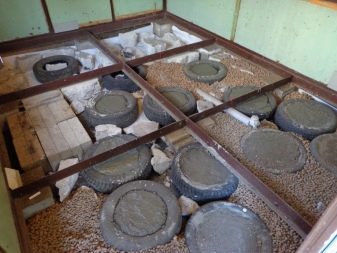
The base itself should be as flat as possible, this is checked using a building level. The maximum deviation in this case is 10 millimeters per meter. After that, the structure is left for a period of about a week for the concrete to gain strength. The formwork is removed one day after the mixture has been laid. The finished foundation looks like a monolithic slab; the structures of the structure are installed on it. The lower parts of the structures must be fixed to the anchors.

Tape
The technology for installing the strip foundation, despite the similarity to the slab, has its own characteristics. First of all, you need to determine where the axes of the bearing walls and partitions will be located. Pegs are installed at a distance of at least one meter from the axles. This is important as it helps to distribute the load correctly.
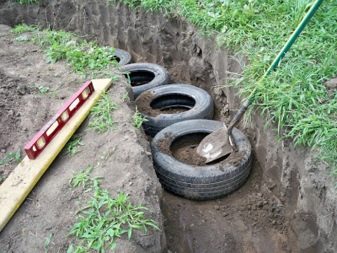
Next, you should dig a trench in accordance with the location of the axes. Its width should exceed the width of the tires, and the depth should be less than the soil is able to freeze through. Tires are laid in at least two rows and filled with prepared materials /

Columnar
When installing a columnar foundation, a thick layer of soil is removed before starting work. After that, you need to dig a pit of the required size. It is filled with gravel, which is carefully compacted.
The sequence of work with your own hands
Even the simplest way to make a tire foundation requires careful preparation. It starts with drawing up a project and making calculations for the required property.
Tools and materials
To work you will need tools:
- shovel, hammer, ax, hacksaw;
- level, tape measure;
- Bulgarian;
- rammer;
- marker.
The need for a concrete mixer depends on the volume of mortar that will have to be made for pouring and the type of base. Columnar supports can be poured manually using a pallet or bucket with a mixer. To pour the slab foundation, you definitely need to purchase a concrete mixer.
You need to buy the following materials:
- geotextile fabric;
- formwork boards;
- cement;
- sand;
- crushed stone;
- dye;
- rope.
Column foundation
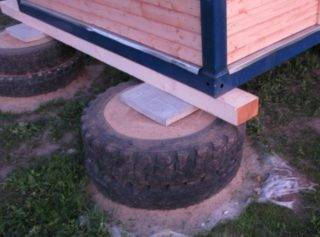 For the strength of the structure, a concrete mixture is poured into the tires.
The decision to create a support structure is taken when construction is carried out on dense and stable ground, including on slight slopes. The pillars are installed at the corners of the building, as well as under its internal and external walls at intervals of 200 cm. If there is no fertile layer, installation can be carried out without first removing the soil. But this happens rarely, the summer resident still has to do earthwork.
The installation of the pillars should be carried out in the following sequence:
- Make a markup, check the correspondence of opposite sides and diagonals. Mark the places for the supports by driving stakes into the ground.
- Dig round pits, tamp their bottom, lay a geotextile lining.
- Backfill with sand and gravel, level and compact the pillow.
- Lower the wheels into the holes, give them a strictly horizontal position, operating with a level and a shovel.
- Make a mixture of rubble and sand, moisten it to fill the space inside the tires. Repeat the procedure until the desired height is reached.
- Make and pour concrete mortar inside the assembled mines. Remove air bubbles from it with a steel pin or an electric vibrator. Level the surface.
- Let the structure stand for 28 days to gain full strength.
Slab foundation
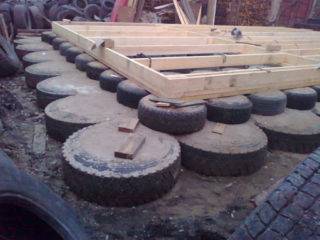 Tires of different sizes can be used for slab foundations
Monolithic foundations are made with the expectation that they will serve throughout the entire design life of the building. These are monumental structures designed for high vertical loads.
Construction stages:
- Carry out a markup - apply a contour of the future foundation to the site in accordance with the previously drawn up diagram. It is necessary to provide a place for the installation of formwork or strapping.
- Excavate soil. The depth of the pit should be between 50-80 cm, depending on the height of the tires and the thickness of the cushion. Clean the bottom of the pit from stones, plant roots, level it and compact it thoroughly.
- Lay the geotextile fabric into the pit, fixing its edges. Add sand and gravel. Moisten, level and compact the backfill.
- Prepare the filler. It is a mixture of solid fragments and sand, which ensures that there are no voids. It is better if the fragments are as small as possible.
- Install the formwork. To facilitate its removal after the solution has hardened, attach cellophane, roofing felt or other similar material to the inner walls of the mold.
- Pour the mixture into the voids between the wheels and into their internal cavities. Tamp and level the surface well. Check the level of the surface with a level.
- Install a waterproofing layer. Make the joints of the strips with an overlay of 15-20 cm, and then glue them with tape.
- Make a lattice from reinforcement. Lay it on props 2-3 cm high.
- Mix the concrete mortar and pour it into the mold so that it covers the tires with a layer of 5-10 cm, depending on the expected load. Level the surface.
- After the concrete stops flowing, cover it with cellophane. After a day, begin daily watering the plate with water to ensure it dries evenly.
Choosing a foundation depending on the type of gazebo
It is important to understand what types of structures and what bases are recommended. Below we will dwell on this issue in more detail.
Brick gazebo foundation
The foundation for brick gazebos for the country house must be solid, it must withstand serious loads. For the construction of such buildings, use a strip or slab foundation.
As for the depth of the foundation, 30 cm is considered the best option.
Wooden gazebo posts
If you decide to build a wooden gazebo on your site, take a columnar base, or from concrete blocks. It uses vertical bearing supports. The grillage is the first row of the gazebo.
With the wooden construction of the gazebo, some nuances are taken into account. Initially, bricks must be laid directly parallel to each other on a concrete slab on a special mortar. The next step is to lay the bricks in a checkerboard pattern on the cement mortar. All this is repeated until the required height is obtained.
For polycarbonate gazebos and professional pipes
A columnar foundation is suitable for a polycarbonate gazebo with a frame made of a professional pipe. Pits are dug with a depth of 70 cm according to the number of supports and then reinforcement 12-16 mm is inserted into them. The next step is laying roofing material and a cushion of rubble and sand on the bottom. After that we fill it with concrete and install a mortgage from 10 mm steel on top.We fasten the mortgage with M12x150 anchors. We weld the support to the mortgage and weld 4 kerchiefs at the corners for stability.
Pros and cons of using car tires
Of course, the biggest advantage of tires is affordability. Buying them at any service station for a penny (or even picking them up for free) is not a problem. Starting the construction of a summer house, gazebo or bathhouse, even at the stage of budgeting, it turns out that the foundation is the most expensive part of the construction. Therefore, saving on material is only welcome.
In addition to availability, the pluses include:
- waterproofing properties of rubber, so the foundation on used tires in places with swampy soil is a very practical and reliable solution;
- durability of tires, because without the destructive influence of ultraviolet radiation, rubber can retain its properties for decades;
- the amortization properties of car tires, which prevent deformation of the house due to ground movements;
- the possibility of constructing the foundation of the building with your own hands, without the use of special machinery and equipment (and even alone).
The tire foundation, obviously, will not replace the traditional one for a massive multi-storey building. However, it is easy and practical to build such a foundation with your own hands under a small country house, garage, shed or bathhouse.
A significant, albeit slightly exaggerated, disadvantage is that rubber, when heated, releases toxic substances. On a hot day, the foundation on car tires may well warm up to a critical temperature.
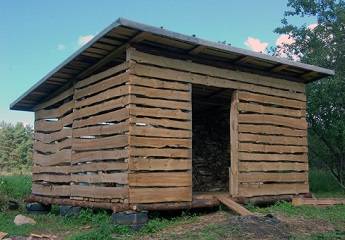
Shed on a tire foundation
The way out of this situation is to apply an insulating material to the surface of the tires. Regular oil paint is fine. Yes, this is an extra stage of work, but complete safety is guaranteed. In addition, it is not necessary to paint all the tires, only those that are most susceptible to heating (open areas, the upper row of tires) are sufficient.
The appearance of car tires also cannot be called their competitive advantage. Although the same garage will look good, in other cases, cladding materials can be used. This will help to further insulate the rubber and reduce the concentration of emissions into the air.
Necessary equipment for the construction of the foundation
The construction of a tire foundation does not require the use of heavy equipment, except for solving issues of delivery of tires or bulk material. In order to build a base for a garage, a bathhouse, a summer house with your own hands, there are enough tools that can be found in every summer cottage, namely:
- shovel and rake - for removing and leveling the topsoil;
- building level - to check the correct laying of tires;
- timber or wooden board - for leveling concrete;
- concrete mixer or container for the preparation of mortar.
Such a basic set is enough for building a foundation with your own hands in a small area, without any special structural excesses (for a garage, a shed, a gazebo, a stove). If facing work or reinforcement of the foundation will be carried out, an appropriate tool will be required.
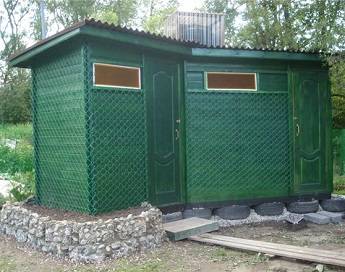
Outdoor shower on a tire foundation
In order to save time and money, experienced builders advise not to rent a concrete mixer or prepare the mortar themselves, but to buy concrete by agreeing with a construction organization on delivery. On the agreed day, the mixer will deliver the solution and fill the prepared foundation on car tires.
What materials will be required for the construction of the foundation?
In addition to tires, you need to stock up on such materials for doing work with your own hands:
sand or sand and gravel mixture for compacting and leveling the bottom layer, filling tire cavities, preparing a solution;
soil, broken brick or glass as backfill (here it is important not to use clay soil, which, although it is well compacted, is also easily eroded);
boards for the construction of formwork (if there is no such number of boards, you can rent a removable formwork, many companies provide a similar service);
roofing material, linoleum, dense polyethylene as a waterproofing layer between the rows of tires.
The listed materials are quite enough to make a small foundation of tires with your own hands, for a garage or a change house. If the goal is to build a more solid and reliable foundation for a massive building (for a house made of timber, for example), reinforcing elements, floor slabs will be required. In this case, the cost of the foundation increases and can even be compared with the cost of the traditional tape or pile option.
Tape

Perhaps the most popular in the construction of houses and sheds is the strip foundation. True, it is not always suitable for gazebos. The reason is simple - redundancy. Even if the pergola is heavy, there is no need to deploy capital construction and make such a strong foundation. Of course, it is one of the most durable and reliable, it copes well with possible soil deformations. But be prepared for a solid financial investment.
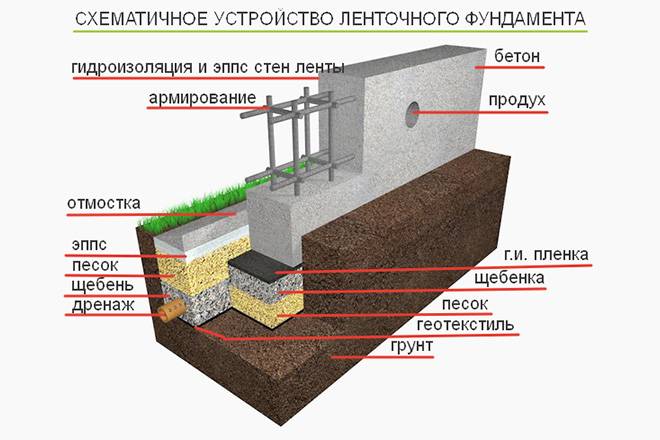 Strip foundation device
If we consider the strip foundation in section, it consists of a sand cushion, rubble and waterproofing. Next comes concrete grade M200, structural and working reinforcement. We conclude that a strip monolithic foundation is not the best option for installing an outdoor area.
Criteria for choosing a foundation for a gazebo
The foundation is the fundamental part of any, even the smallest, structure. Any foundation is bad and does not fulfill its functions if it is built incorrectly.
Basically, there are very few types of foundations. They all have a certain depth; lie on a cushion of draining rubble, pebbles, sand. There is always waterproofing between the foundation itself and the structure erected on it. As exceptions, pile foundations can be noted, which do without a pillow (although sometimes there is a buried grillage of the pile foundation on the pillow), and not buried, simply lying on the pillow, foundations used for the lightest structures.
Types of foundations
By the depth of location, all foundation foundations are subdivided into buried, shallow and not buried.
By engineering design, they are divided into four main types: slab, tape, pile and columnar.
Platen
It is used in cases of quicksand, close occurrence of waters, subsiding soil. Advantages: solidity, reliability; in our case, a thin monolithic foundation can be much more convenient than a strip foundation, since a platform is immediately created - the floor of the gazebo. Disadvantages: requires more labor and more materials than other types, respectively, it is more expensive.
The heavy slab foundation shown in the diagram is, of course, redundant for the gazebo
Tape
Usually, strip foundations are the most popular option, but not for gazebos. Advantages: solidity, reliability. Disadvantages: completely redundant for a gazebo. Although if it is very heavy, then a strip foundation is preferable to a monolithic one - it is cheaper and better copes with soil deformations.
A strip monolithic foundation is not the best solution for a gazebo
Pile
These are supports of a small cross-section, deeply embedded in the soil and well-fixed in it - asbestos-cement or metal pipes. Rarely, but still sometimes such a foundation is made of a wooden beam, but its special preparation is necessary. In some cases, factory-made metal screw piles are used, which increases the reliability of the structure and adhesion to the soil. Advantages: ideal for unstable soil, when building on a slope; a pile foundation made of asbestos-cement pipes does not require large financial investments. Disadvantages: requires labor and great care when strengthening the piles and is often unnecessary in the case of building a gazebo.
Pile foundation with screw piles and concrete grillage used on slopes
Columnar
The lightest in execution and most often used for gazebos is the foundation. Sometimes it is buried, shallow and not buried. For gazebos, the last two types are used. The blocks are placed on a crushed stone or gravel bed either directly on the cleared area or in the pits. Advantages: extreme ease of execution, very cheap, suitable for any soil. There are no downsides.
Column foundation made of blocks with a wooden grillage - the best solution for a gazebo
Video: construction of a slab foundation for a gazebo
Since your main house has already been built, you already have on hand the expert opinion on your grounds, made before designing it. Moreover, you already know how your buildings behave: what are subsidence, soil shifts, flooding. The choice of a type of foundation for a gazebo or veranda will be based on the opinion of professionals and your own personal experience. Of course, you have to consider the indicators of the site survey. But in the case of a gazebo, everything is much simpler: the requirements are not so stringent; deepening is either insignificant or absent; the grillage is the simplest.
Arrangement of a columnar foundation made of tires
The second development option involves the use of tires as pillars of the structure. To install them with your own hands, it is necessary to calculate in advance the location of the corners of the future building and outline the points between them.
 The device of a columnar foundation made of tires
As in the first case, you must first remove the fertile soil layer. Then you need to dig a pit of a suitable size and tamp the soil inside it, filling it after that with fine gravel.
The next step is to mark the area and drive small pegs into the tire installation sites. After that, using a tape measure, you need to measure the distance between the individual pegs along the perimeter and diagonally. If the deviation is small, you can start laying.
The tires are put directly on the pegs, after which they are aligned with the help of a level relative to the horizontal. A filler is poured into the well from tires: crushed stone or expanded clay.
The filler must be filled both into the well formed by the layers of tires, and into each tire separately. After that, roofing material is laid on top of the rubber, which is necessary so that the concrete solution, poured over the tires, does not drain.
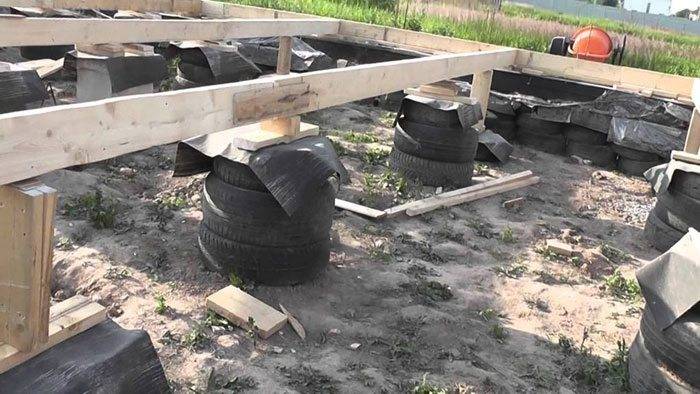 Erection of a columnar foundation
At the last stage, along the entire perimeter of the subfloor, you need to install a formwork with bumpers 10-15 cm high with your own hands on the roofing material.As in the previous version, the formwork is poured with concrete, and after a few days, when it hardens, you can lay the lower trim from the timber. To further strengthen the base, iron reinforcement is placed in it during the pouring of concrete. Over time, when this reinforced concrete slab dries out, it can serve as the floor of the future home.
In addition, there is another easy way to build a foundation from tires with your own hands. In this case, car tires are laid along the perimeter of the building, poured with concrete and tied with channels. After that, the lower rim of the building is tied.
So, the tire foundation can be easily erected with your own hands as the basis for a garage, outbuilding, gazebo, bathhouse or shed. It is both a great way to save on building materials and a way to recycle used rubber tires from automotive products. Considering all the advantages of this material and the functional characteristics of the resulting buildings, we can say that this original method is becoming more and more popular.
How to make a foundation from tires with your own hands - a step by step diagram
Step 1: foundation pit
Before starting the foundation pouring, it is necessary to stock up in advance with all the tools and materials that may be needed in the process. And then prepare the construction site for further construction. First you need to clear it of debris and stones. You will need to dig a pit on the site, while it is necessary to take into account the indentation on each side of the trench by 20 cm.The depth is recommended no more than 30 cm, depending on the selected source material for pouring.
Step 2: packing tires
The bottom needs to be leveled and tamped, and then check the work done with a building level. Next, prepare car tires, take one at a time and lay them on the bottom of the dug pit, end-to-end, without gaps, parallel to the plane of the ground. Taking the broken brick and prepared gravel, earth and sand with a shovel, fill the space inside the tires, carefully tamping the material with a hammer. By the same principle, then you need to get rid of the gaps between the tires. The layer of the resulting embankment should be positioned in such a way as to completely cover the tires.
Step 3: formwork
After tamping and preparing the base from the tires, you can proceed directly to the pouring. The first step is to lay sheets of roofing material, which will act as waterproofing for the future bath or garage. After that, you can make the formwork according to the standard building technology, using a beam and a pre-prepared board. The formwork must be designed in such a way that the result is a monolithic slab of concrete that acts as the top of the foundation.
Despite the advantages of using tires, such a foundation will need to be reinforced using reinforcement, channel bars or metal tied with wire for this. In some cases, it is quite important to use a ready-made monolithic concrete slab for the upper part, but in this case it is necessary to calculate in advance its cost and the economic feasibility of using such material.
Step 4: fill
Filling the formwork is easy to do with your own hands, it is made with a standard concrete solution, but it is recommended to add a special agent to it - a plasticizer. This will ensure the absence of further cracks and chips of the finished foundation. Covering the poured solution with old rags and rags soaked in ammonia can significantly save drying time. A slab of concrete must stand for at least 7-10 days, this will allow it to gain strength and reliability. After this time, the formwork can be safely disassembled
With this method of making the foundation with your own hands, it is very important to accurately observe the horizontal surface of the slab; for constant checks during installation and pouring, it is recommended to use the building level
Alternative foundation options
A columnar structure made of plastic pipes also has a right to exist. Let's say more - it is being built very quickly, and it costs about three times cheaper than a strip foundation. Since we are dealing with plastic, it is also not necessary to treat it with anti-corrosion agents. Such pipes are not afraid of dampness and moisture.
Column foundation with plastic pipe
By the way, if you raise the gazebo on plastic supports about 30 centimeters above the ground, you can protect it from heavy rains and spring floods. The work on creating a foundation from plastic pipes consists of the following stages:
- Site preparation. Includes the removal of the top layer of the earth (30 centimeters), marking.
- Digging holes. It is recommended to install the posts at a distance of 150 centimeters from each other.The optimal depth is one and a half meters, the hole diameter is 25 cm.
- The bottom is slightly widened and covered with a 5-cm layer of sand and gravel. Roofing material is laid on top.
- Plastic pillars are placed on the finished waterproofing. The optimal diameter is 20 cm, and the length is about 2 m.The supports should rise 30-50 cm above the ground.
- Each pipe is leveled and covered with soil, and about 30% of the volume is poured inside with cement mortar. If you lift the post slightly after pouring, the concrete below will flow out and strengthen the foundation. True, you will again have to work with the level and check the structures for horizontalness.
- Reinforcement with a diameter of 1 cm is laid in the columns, the final pouring of the concrete mixture is carried out. The final stage is the construction of a grillage from a bar or reinforced concrete.
Car tire foundation
Car tires can also be used to equip the foundation of the gazebo. The material is inexpensive, affordable, has several significant advantages:
- Durability. The service life of rubber is calculated in decades. She is not afraid of precipitation, or severe frosts, or summer heat. The base will turn out to be reliable and strong.
- Reduced load. Rubber has an amazing ability to deform without losing its properties. Even if the load is heavy, the tires will soften the pressure and distribute it neatly over the entire area.
- Saving. Metal pipes, concrete blocks, and other materials listed above are not cheap. What can not be said about tires, which are literally lying around idle in the yards. You can get such material practically for nothing.
- Rubber is already a good waterproofing material.
When constructing a "rubber" foundation, it is necessary to protect the tires from direct sunlight. Since rubber can emit harmful substances when heated. Shallow foundation is recommended. For construction, it is better to take tires with a large diameter. They are much stronger.
Point foundation
From tires, you can create another version of the foundation - a point one. The required number of car wheels is determined by taking into account the height of the base and the type of terrain. The construction process involves the following sequence of actions:
- When the topsoil has been removed, a shallow trench must be made. Its depth should not exceed 40 cm. The bottom must be compacted manually. Tamp the soil itself, and place a layer of rubble on top.
- Measure and mark the plot. Install pegs under the places of future supports.
- Place the tires on the bases. To align the level, you need to use the rule.
- Place a sealant inside the tires. It can be gravel, sand. This layer should not reach the edges by only 5 cm.
- Pour in concrete and add the missing sealant.
- Eliminate the remaining solution so that the chambers are equally filled.
- To prevent the formation of cracks under the influence of temperature, polyethylene must be laid on top of the cement.
And here is what it looks like and how the construction of the foundation for an extension to a brick house is carried out.
