We cover the floor with linoleum: the important thing in the little things
Linoleum is still one of the most popular flooring for areas that require frequent wet cleaning, such as the floor of the veranda.
- Linoleum is laid on chipboards (as we remember, they must be treated with an antiseptic) or on a concrete screed.
- To level the material, he is given a rest after marking and cutting for a day (if the waviness persists, then more).
- Linoleum shrinks, so when cutting it, an allowance of about 20 mm should be made, and the longer the strip, the larger the allowance should be.
- The strips are laid with an overlap so that the upper one covers the lower one by about 20 mm. This is done in order to make the joint tighter. After fixing the linoleum to glue or mastic, the edge of the upper and lower canvas is cut along a metal ruler, and the cut strips are removed.
It is important!
The knife for cutting linoleum should be very sharp, and plywood or hard cardboard should be placed under the bottom edge of the material.
After the canvas becomes even and takes the shape of the floor surface, the linoleum is fixed.
Linoleum must lie down to be perfectly flat
The cement screed is coated with a special mastic, and if the floor is wooden, then PVA glue or other water-based glue is applied to it. The adhesive is applied to the surfaces in such a way that the edges are 100 mm unsticked. If mastic is used, and linoleum is without a base, then the holding time of the composition is about 20 minutes, linoleum with a fabric or felt base requires a slightly longer period - about half an hour.
- After the mastic has set a little, the coating is pressed tightly to the base, leveled out, all the air is expelled from under it. This is best done with a sandbag that is rolled over the coating.
- The joined edges are raised low, trying not to make creases, an adhesive composition is applied to them and carefully pressed to the floor with boards with a load placed on them. After three days, the coating is ready for use.
It is important!
Before laying linoleum, the concrete base is very thoroughly cleaned of debris and even dust. In addition, if it is rather loose, then before gluing the linoleum, it is treated with liquid mastic (primed) and allowed to harden for five to six hours.
Materials for covering the floor on the veranda
The most common floor coverings are:
- Ceramic tile.
- Paving slabs.
- Terrace board.
- Wood.
- Linoleum.
- Laminate.
How to cover the wooden floor on an open veranda
In order to choose the right coating, you need to pay attention to the structure of the subfloor. Most often, the material for it is edged board.
Such a flooring is inexpensive, it is quite simple to install. If larch served as the material, then the durability of such a floor is comparable to the service life of the entire building. The surface of timber flooring is imperfect, so the floor covering must be thick enough to compensate for variations. The most successful choice would be a decking board, which has good performance, it is durable, resistant to moisture, its surface is equipped with longitudinal shallow grooves that reduce the possibility of sliding. A floor made of decking looks good and serves for a long time, but at first it will emit a certain amount of harmful volatile substances, which is due to the way the material is made. Polymer board is made from a mixture of wood flour and binder resins.
Option for covering a wooden floor on a closed veranda
There are much more options than covering a closed-type plank floor. A wooden sub-floor behaves better in such conditions, it is less illuminated by the sun's rays, the base warps less and changes its geometry.In addition, there is no danger of the coating getting wet due to rain or snow, which allows the use of certain types of laminate, PVC plastic tiles, linoleum. Various wood coatings show themselves well, for example, tongue-and-groove or parquet boards. A polymer board, which is the easiest to lay, is also suitable. It is equally good for heated and cold terraces.
Attention! For wooden rough floors on open and closed verandas, it is possible to use ceramic tiles, but installing it will require a rather complex set of preparatory work
How to cover a concrete floor
Concrete floors are much more stable and durable, for them it is not so important whether an open or closed veranda is. The main task of the coating in an operational sense is waterproofing, therefore the most effective materials are linoleum and ceramic tiles.
At the same time, if you cover an open terrace with linoleum, even a slight humidity or light rain will make the surface very slippery. This option is best used for a closed veranda. On open terraces, street flooring - paving slabs - shows itself well. It is resistant to temperature changes, durable, and has a high degree of wear resistance. This coverage is effective and relatively cheap. The downside is the possibility of water penetration between the individual tiles, therefore, the sub-floor must be waterproofed before laying.
Open veranda flooring
Each material suitable for flooring on an open veranda has its own characteristics. Therefore, it is necessary to decide what to cover the floor on the veranda with taking into account the totality of characteristics, comparing the pros and cons of materials.
Tile
Tile is considered a "cold" material. Indeed, on such a surface it is unpleasant to walk barefoot and in slippers with thin soles. If it is envisaged to be on the veranda in outdoor shoes, consider laying tiles on the floor - it is durable and moisture resistant, not afraid of temperature changes. These qualities are inherent in materials for outdoor use. For safety, make sure that the surface of the cladding is non-slip. If perfect cleanliness is important to you, and you are thinking about how to cover the floor on an open veranda so that it can be washed as often as you like, tiles will also be a rational solution. It is resistant not only to moisture, but also to chemical attack, for example, active elements of detergents.
 Tile as floor covering on the veranda
Choosing porcelain stoneware instead of ordinary tiles, you will spend a little more, but get better quality. Porcelain stoneware is more durable and has no pores where it could get and freeze, destroying the structure, in winter, moisture.
Important: Consider the fact that the tile creates a fairly large additional load, this can be important when using a pile foundation. You can find out what quartz vinyl floor tiles are in our separate article.
This modern flooring material also has several advantages.
You can find out what quartz vinyl floor tiles are in our separate article. This modern flooring material also has a number of its advantages.
And about how to cover the lining on the balcony, read another article on the site. In it you will find a list of suitable materials and useful tips for work.
Planks
The plank floor is traditional, but not outdated, but always up-to-date. Natural wood is the best suited for a country house and a summer residence. Most often, coniferous boards are chosen, which are more resistant to moisture due to the presence of resinous substances.Oak boards are quite expensive, but also durable, their ability to resist decay is due to the presence of tannins.
Special decking boards (decking) will require costs that will pay off with the durability of the coating. You can choose solid wood decking boards, specially treated or composite products, which combine the advantages of natural wood and various types of polymers that are durable and resistant to external factors.
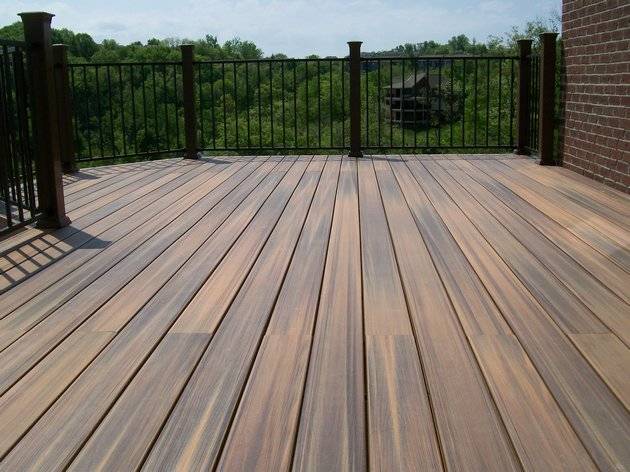
Decking floor covering combines beautiful appearance and high reliability
Self-leveling floor
Self-leveling floors are not the cheapest, but one of the most durable and reliable options. It is easy to find dry building mixtures for such purposes on sale. To achieve the desired result, it remains only to accurately follow all the points of the instructions for the preparation of the solution and its use.
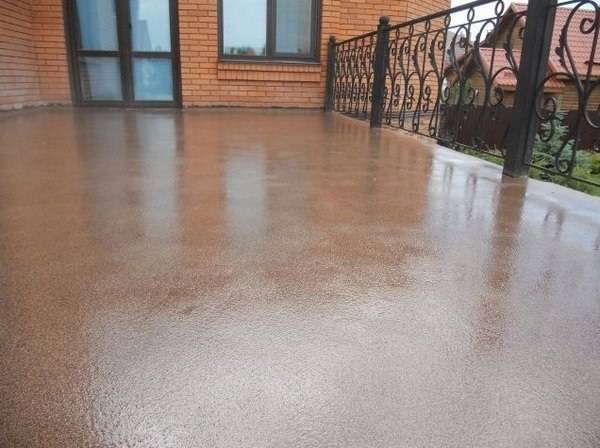
Self-leveling floor on the open veranda
Rubber floor
Rubber is one of the coating options that deserves special attention. It has all the qualities necessary for use in open spaces. There is hardly any other material than to cover the floor on the terrace, as lightweight, moisture resistant, practical, durable and non-slip. When choosing the type of material, consider your experience and capabilities. A conglomerate of rubber (chips or granules) requires the use of special technologies. It is much easier to purchase a covering by the footage or in the form of modules that are assembled into a solid covering with the help of convenient locks.
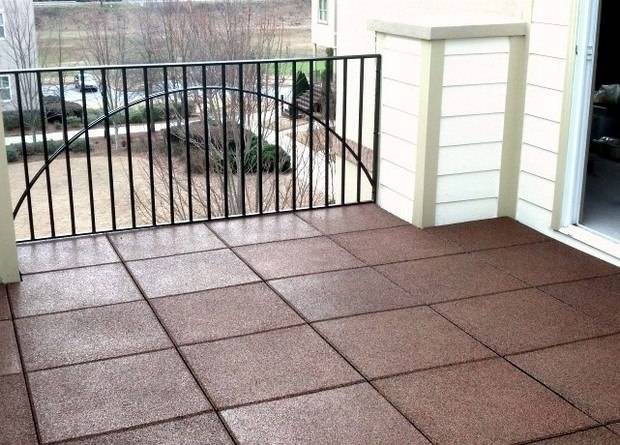
Veranda floor with rubber covering
Linoleum
Linoleum is an economical option for a veranda. It is beautiful, but has very mediocre performance characteristics, and therefore will require replacement in a few years. When deciding what to make the floors on the open veranda, choose linoleum only if you have a budget deficit.
No. 6. Wooden boards
Wood is traditionally used to cover the terrace floor. The planks provide a warm, inviting and durable finish. In most cases, the boards are laid on logs, although laying on a crushed stone pillow is also possible (if the boards are thick and antiseptic).
If the terrace is open, then the boards should be made of moisture resistant species (oak, larch, iroko, teak, etc.). They are denser, and therefore do not rot, are not susceptible to insects, and do not change their original appearance for a long time. Although similar characteristics are given to the material and artificially - by heat treatment. This is how spruce, birch, pine, beech, ash boards are processed.
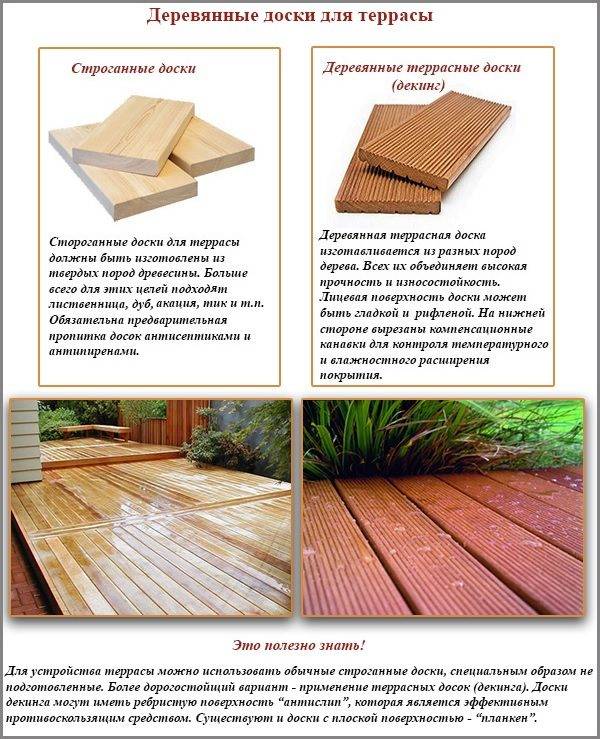
Wooden planks for the terrace
pros
- a variety of textures, shades, sizes;
- warm surface;
- environmental friendliness;
- attractive appearance;
- good shock absorption characteristics.
Minuses
- color change under the influence of ultraviolet radiation;
- the need for regular treatment with antifungal agents;
- the complexity of leaving.
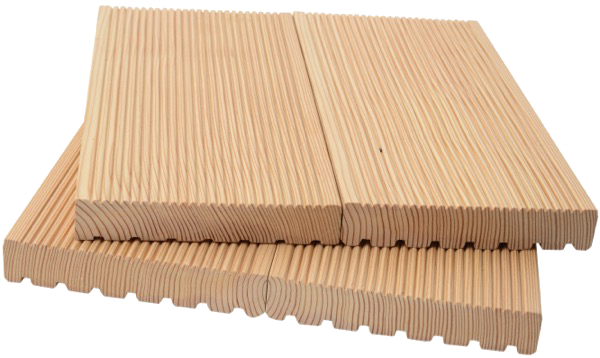
Terrace board
Boards can be both planed (required - after fire-retardant / antiseptic treatment) and deck (or terrace). The second type is more preferable, because such boards are made of hardwood (as an option, they are heat-treated). There is no spike-groove fastening, the elements have rounded edges. When laying, a small distance is left between the boards, so that the precipitation flows freely through the cracks. The surface can be either grooved or smooth.
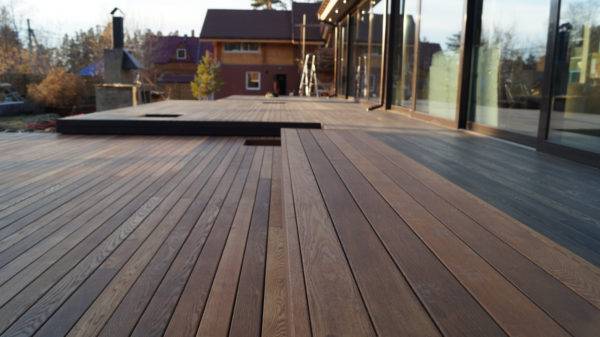
Larch deck board
Feasibility of a wooden floor on the veranda
Pine boards are used as building materials. Wood is inexpensive and easy to handle and install.
Pine flooring has several advantages:
- Environmentally friendly material (has the ability to absorb and preserve unpleasant odors, does not emit harmful chemicals, is not toxic, emits a pleasant pine aroma).
- Possesses high strength, reliability and long service life.
- It is very useful for human health (walking barefoot helps to prevent diseases of bones and joints; lying on the floor made of pine boards helps to relieve fatigue and drowsiness, increases the physical activity of the body).
- The fine structure of the wood gives the room a comfortable and cozy atmosphere.
- High coefficient of thermal insulation.
Wooden flooring can be made single or double. For an open-type structure, a single coating is suitable, and for a closed one - a double one.
Double flooring is a complex process that requires certain knowledge, skills and money. Double floors are made up of "black" and "clean" floors. For the installation of a "rough" floor it is necessary: load-bearing logs or beams, not planed pine boards of the second grade.
Draft underlay
The beams are installed in 50-100 centimeters increments. The step width directly depends on the thickness of the boards. Basically, a 25-30 mm board is suitable for the "rough" version.
Installation of "black" floors is in progress. Fastened with nails or self-tapping screws to the beams. Gaps are acceptable when laying the first layer. Clearances are necessary for "freedom" of the tree. At negative temperatures, the material shrinks, if moisture is present, it expands.
Finish coating
The next step is to lay the waterproofing layer. For “clean” floors, planed, well-finished, knot-free pine boards are required.
Before installing the second layer, the boards are placed on the first layer and left for several days. This stage is very important for the necessary "aging" and adaptation to the temperature and humidity of the room. After several days, you can start installing the second layer of flooring.
The prepared elements are laid transversely to the first layer and fastened with self-tapping screws. It is necessary to leave a gap of 5-10 millimeters around the entire perimeter of the room (along the walls). This action will help protect the tree from deformation. To maintain even gaps between the wall and floor, wooden dies are inserted.
The first element is laid down, the second is laid next to it, 50-70 cm shorter. In a "clean" coating, gaps and crevices are unacceptable. For tight pressure, the installed elements are tapped with a rubber hammer and fastened with self-tapping screws.
Installation of floors "at random" will help to give the necessary strength and rigidity of the structure. Using self-tapping screws, you will need to pre-drill holes in the wood so that the material does not burst during direct installation. It is not recommended to cover the floor made of natural wood with linoleum (this will create a greenhouse effect and the floors will deform).
When choosing a section of lags and beams, you should take into account the length of the span of the room. The longer it is, the larger the section will be required. Span 2 meters - section 110x60 mm; 3 m - 150x80 mm; 4 m - 180x100 mm; 5 m - 200x150 mm; 6 m - 220x180 mm. The cross-section of the beams and the lag are chosen in a rectangular shape.
Additional tips:
- When installing boards to the joists, it is unacceptable to skip each fastener in order to avoid violating the integrity of the coating.
- The joint of the boards should fall exactly on the middle part of the log.
- The first row should have a gap of 8-10 mm from the wall.
Wooden floors are always fashionable and relevant. The ecological purity and beneficial properties of pine boards help a person to maintain health. Wood floors are always warm and have a beautiful and attractive structure. Wood, as a finishing and building material, will add a cozy atmosphere to the room, help you relax and have a great rest.
Highlights when painting a floor
Before processing with any coloring agent, the surface must be cleaned of dust and grease. The dust will leave extra lumps that will be very noticeable, and the grease will prevent the paint from sticking to the surface.
In addition, when working on an open terrace, it is necessary to check the weather forecast - do not paint before the rain, as it will wash off the coating, and after painting it for 6-8 hours it cannot be covered with anything.
Of the tools, it is necessary to have several brushes - synthetic or natural (in fact, this does not really matter, since both types are similar to each other), a paint bath.
When working with latex paint, you will need a special leveler - a long-handled spatula. Work with it is carried out only in dry weather - rain, even light rain, will spoil the drying latex, which will require you to remove it and paint the surface again.
What requirements should the floor of the veranda provide
The requirements to be met by the veranda floor apply to all operational and structural issues. The most important ones are:
Resistant to moisture. The floors on the terrace absorb moisture both from the outside in the form of precipitation or fog (this is especially true for an open terrace), and brought on the shoes of people entering. If the floor material is not able to withstand such contacts, the coating will soon fail and you will have to cover the veranda with some other material, which means both labor and money costs.
Resistance to the perception of mechanical stress, in particular - to abrasion. In this case, the problem is exacerbated by difficult operating conditions and significant temperature changes that disable the coatings.
The floor surface should not be slippery. This moment must be taken into account without fail, moreover, a material that is completely safe in a dry state can be very slippery when wet. Walking with wet shoes on such surfaces can cause serious injury, which must be prevented in advance.
Among other things. an important point is the aesthetic appeal of the terrace floor. Operational requirements should in no way exclude the decorative qualities of the veranda floor; both qualities of the material should be combined.
Not all materials are to be fulfilled at the same time, each of them has its positive and negative sides.
What material do you like the most about the house?
Log house
25.47%
Brick house
19.37%
Log house
15.33%
House of aerated concrete blocks
13.92%
Canadian technology house
12.28%
Rounded log house
4.46%
Monolithic house
3.93%
House of foam blocks
2.63%
House of vulture panels
2.63%
Votes: 2623
Choice of materials
How to cover the floor on the terrace when there is a wide range on the market for every taste? When choosing, it is worth considering the cost of the material - especially when creating a large terrace.
Sidewalk tile
The paving slabs for the terrace are stone, concrete or polymer, which is given the required shape. At the moment, the most common square shape, as well as typesetting tiles.
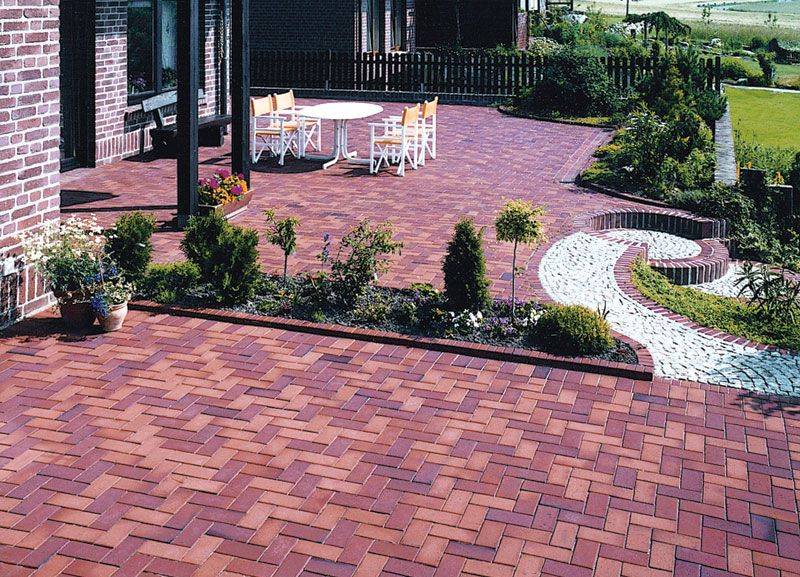
The greatest advantages of this type of material are:
- waterproofness;
- resistance to fading;
- undemanding care.
The main requirement of paving slabs to the foundation is a flat surface - for example, a cast concrete floor is required. The tiles are laid with a cement mixture that fixes them firmly to the surface. Use a standard mortar - crushed stone with sand and cement
When installing tiles next to the pool, it is necessary to make drain gaps - you need to leave gaps of 5-10 mm between the tiles, and the foundation itself should be made with a slope of 1-1.5 degrees towards the desired drain.
Also, the best solution would be to use tiles without a deep pattern - this can lead to excessive accumulation of water.
Tile tile
This terrace floor tile is made by firing a clay mixture in the shape of rectangles. After that, various patterns and designs are applied to them. The shapes of tiles usually do not differ in variety - the most common are square and rectangular, but you can also find non-standard options on sale, such as round or oval tiles.

Like paving slabs, tiles are waterproof and resistant to fading, however, with their beautiful appearance, they have a slippery finish and are much more fragile.
For installation, the tiles require a level foundation, which will provide an opportunity to create a level tiled surface for the outdoor terrace. It is an excellent solution for a pool deck due to its water-repellent properties.
Board
Terrace flooring is an extremely versatile material. At the moment, this concept can include a huge number of materials, but the most suitable for a terrace will be:
- solid wood;
- thermally fired decking and WPC;
- MDF and other particle boards.

Solid wood is an ordinary board made of wood of various species. They are relatively cheap, easily installed on various foundations (columnar, concrete, and others), and also do not require special skills in work. The main disadvantage is low resistance to moisture and rapid destruction under the influence of ultraviolet radiation. This is solved by pre-coating the board:
- antiseptic before styling;
- wood oil (after installation and after 1-2 years).
When choosing a floorboard for a terrace, it is better to give preference to coniferous species - for example, pine or spruce. Conifers are generally denser and more resistant to moisture and fading. Near a pool or other bodies of water that involve a large amount of moisture entering the terrace, it is better to give preference to larch due to its unique, water-repellent properties.

To cover the floor on the terrace with a board, it is important to make gaps between the floors, as the board will expand during hot weather. We recommend that you do the following distances:
How to level or raise a veranda floor
Changing the geometry of the veranda floor is a frequent occurrence in a private house or in the country. Seasonal movements of the soil, shrinkage of the wooden strapping or other processes contribute to the subsidence of one side of the plane, the appearance of a fold or other disturbance. In order to level a wooden floor, you should determine the direction of the slope using a building level. Then you need to dismantle the flooring and adjust the position of the log relative to the horizontal. If the deviations are small, you can get by by placing small planks under the flooring boards; in case of more serious violations, you will need to dismantle the logs and reinstall them in the correct position.
The concrete floor can be leveled by pouring an additional leveling screed. The self-leveling floor created on the veranda with your own hands will help with this. This is a ready-made mixture sold in stores. Before pouring, it must be diluted with water in the desired ratio and applied in an even layer to the surface. After drying, a flat horizontal plane will appear.
There are different ways to raise the floor level. The easiest one is to remove the flooring and install additional bars of the required thickness on the working edges of the logs. This option makes it possible to simultaneously correct horizontal deviations, if any.
It is possible to raise the floor by pouring concrete screed of a certain thickness. This option gives a tougher and more durable surface, levels it qualitatively, but you need to be sure that the process of subsidence or movement has stopped, otherwise all efforts will be in vain. In addition, to accept an additional load, the logs must have a certain margin of safety.
Another option for leveling the plane with your own hands is to fill the surface with expanded clay, distribute it to ensure the horizontal and pour a concrete screed. This method allows you to simultaneously insulate and level the plane, it is relatively inexpensive. The only drawback is the need to wait for the screed to harden. In order to be able to get into the house, it is necessary to install a temporary ladder that does not rest on the surface of the flooded plane.
Terrace fencing
The next step after laying the board on the floor is the construction of the fence of the open terrace. Fencing the terrace with your own hands can be done in different ways. In this case, everything is as simple as possible and no frills. The standard height of the guardrail is 90 - 100 cm. The main part of the guardrail is a board (for longitudinal bars, corner posts and wall mounts) and a bar (for cross bars), plus a board for the handrail of the fence.

It is more convenient to assemble the fence for the terrace on small trestles, but with small amounts of work, it can be mounted directly on the new floor of the terrace.
The order of installation of the fence, subject to accurate measurements and cuts, does not play a big role, but it is advisable to start with one of the side parts of the fence. To maintain the required level of inclination, use a building level, placing pieces of lumber under the fences.
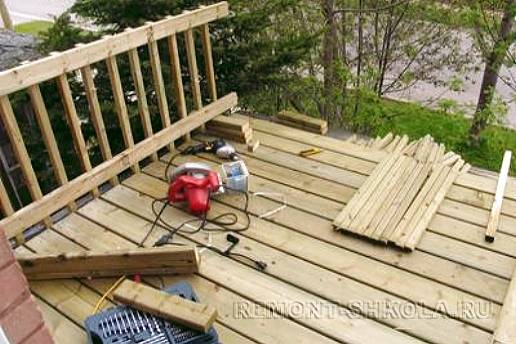
Installation of the terrace fence is carried out section by section, starting from one of the side elements.
The fence bars are attached to the longitudinal board with wood screws. Moreover, for high-quality fastening and reinforcement of the structure, it is recommended to fasten the bars with four self-tapping screws, two on each side.

Mutual fastening of all three elements of the corner joint provides additional rigidity to the entire structure of the fence.
The corner posts in the lower part are fixed to the floor with metal corner-type fasteners. In the upper part, these racks are attached to the longitudinal elements using self-tapping screws, two self-tapping screws to each longitudinal board.
The uprights against the wall are attached to it with brick anchors. Enough for two for each post, but anything can happen, so it is better to play it safe and screw in three anchors for each post - top, bottom and middle.
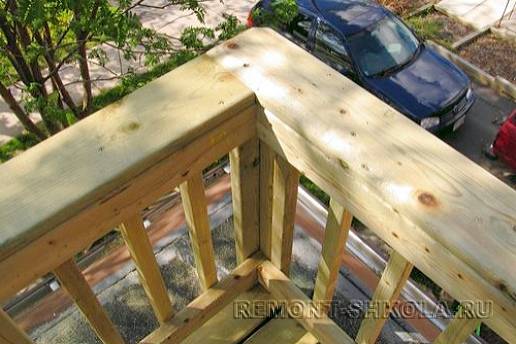
The width of the guardrail is determined individually. It is possible to install a handrail both along the inner or outer edge, and along the center line of the fence.
And the last thing to do is to install handrails on the terrace railing. Fastening the handrails is as simple as using wood screws.
The handrails must be carefully polished, otherwise the appearance of accidental splinters is guaranteed.
The terrace railing is ready. All that remains is to bring out a couple of wicker chairs and a small table.
Decking board made of composite materials
A board made of wood-polymer composite (decking) is an excellent option for finishing the floor on the terrace, combining the aesthetics of wood and the durability of plastic. Decking is made from a mixture of plastic (20%) and shredded wood (80%) by extrusion. This allows you to achieve 100% product homogeneity.
 Decking
Advantages of decking:
- Due to the waterproof composition of the composite decking board, its surface does not absorb moisture, does not warp, does not peel off, and retains its appearance and shape for a long time.
- Temperature resistant from -45 ° C to + 80 ° C.
- The presence of anti-slip corrugation on the surface.
- Polymer board does not need additional processing and coating.
- Ease of assembly, disassembly and maintenance.
Disadvantages of composite material:
- The material, despite the visual similarity to wood, is still unnatural.
- Longitudinal grooves do not fully exclude sliding, especially in winter.
- Decking made by unscrupulous manufacturers is susceptible to abrasion of the decorative coating.
- The high price of the coating can be frightening.
In conclusion, it should be noted that when choosing a terrace flooring, it is worth experimenting and not getting hung up on a specific option. Combining several materials is an original and fairly common way of flooring.Also, it is worth noting that this topic is quite extensive and the installation techniques were not touched upon in detail. Floor technologies with specific materials require additional consideration.
Finally
This completes the construction of the simplest do-it-yourself wooden terrace with a fence. It cannot be said that something out of the ordinary and unique came out, but this was not the goal. But now there is where to drink a cup of delicious tea on a quiet summer evening.
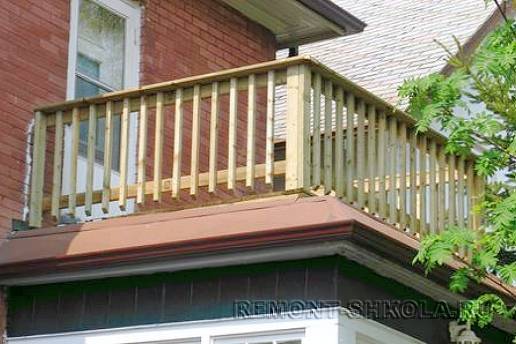
Small wooden terrace. General finished view from the street.
Finally, a couple of tips. An open-type wooden terrace is not such a place that requires constant maintenance, but be prepared for the fact that in three to four years there will be a need to renew the floor covering of the terrace, and indeed all its elements.
Also, an open terrace requires periodic cleaning of leaves, twigs and various natural debris - do this regularly.
Due to the low humidity in the winter, and the possible shrinkage of the wood after this season, check and, if necessary, tighten the loosened hardware.
