Other options for combining with a gazebo
It is not necessary to build this building with a small utility block. At the moment, on the Internet, you can find many options for the designs of combined gazebos, for example:
- Double building. Summer open shed with a glazed winter building.
- Gazebo with a guest room. If part of the structure is equipped with a shower, toilet and kitchen, then a small sofa can be placed in another section of the building and this room can be provided to guests.
- Combined kitchen. An open building with a built-in kitchen will give the owners the opportunity to cook food right on the street.
- Bar. Next to the kitchen or instead of it, you can put a bar counter and relax in the air with a cocktail.
We suggest that you familiarize yourself with the information on how to make a gazebo canopy near the house.
With a bath
When building such a structure, it is worth remembering that a bathhouse is a capital structure that requires a serious approach to the foundation and construction as a whole. So such a structure should be called a bathhouse with a wide terrace. But if the open part of the room is equipped with light furniture and a table for drinking tea, then this will be a pleasant bonus for lovers of bath procedures.
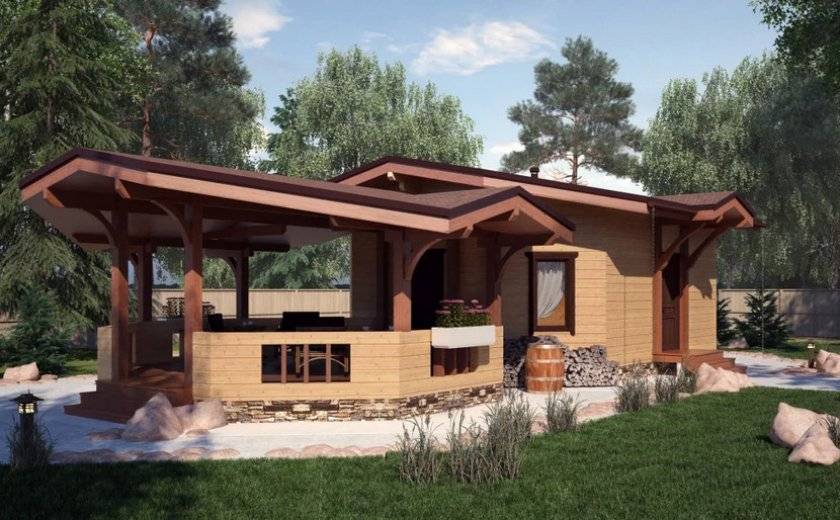
- The combination of such premises facilitates the solution of such problems:
- creation of separate communications for the gazebo (wiring electricity or laying paths);
- saving space in the backyard;
- in monetary terms, the combined construction of these two facilities will be cheaper than separately.
With shower
A household block with a shower is created when the main country house has not yet been built and work is underway to domesticate the territory, break out beds or create a summer cottage landscape. That is, you need a place where you can put yourself in order when leaving for the city. Although in the future, a second shower will not hurt in any case, especially if the family is large and the weather is hot.

With barbecue and woodshed
For lovers of barbecue and just fried meat, the option of a gazebo with a barbecue and a wood-burning stove is suitable to keep the fuel material dry.
We suggest that you familiarize yourself with the information on the construction of a two-story gazebo with your own hands.
When creating such a structure, you should remember:
- the woodshed must be well insulated from moisture;
- if a large barbecue installation is being mounted, the building must have a solid foundation;
- such a design will not do without a smoke collector;
- the foundation and flooring must be made of refractory materials.

It is not difficult to build a gazebo with a barn under one roof. The main thing is to have experience with wood and follow a number of simple rules. Well, there are a large number of options for such structures, the owner only has to choose the most suitable one.
Arbor-barn made of wood. Self-construction
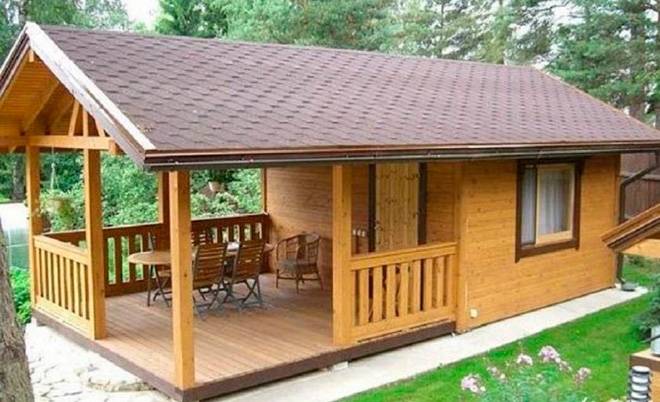
We propose to build one of the simplest options for a gazebo "2 in 1" - a wooden pergola with a barn. If the groundwater goes deep, and the soil in the area is sandy, ordinary piles or pillars will be enough. They are installed in the corners.
To make a pile foundation, you will need an asbestos-cement pipe with a diameter of 15 cm or more.
Dig holes in the ground and prepare a sand pad.
After carefully tamping, insert a piece of pipe, secure it with metal pins.
Fill the supports with concrete 1/3 of the length. In doing so, each pipe is lifted slightly so that the solution falls under the base. This will make the foundation more solid.
If the structure is heavy, reinforcement is additionally inserted inside. Or they install brick columns. Owners of areas with wet soil will have to make a strip foundation.
As a basis, you can use sand concrete blocks. Pre-remove 30 cm of the topsoil, cover 15 cm of sand, carefully tamp. Then sand concrete blocks are laid. Don't worry - they can easily support a log house.
Foundation construction requires good waterproofing. A variety of materials are used for these purposes. Bituminous plastic and roofing material have proven themselves best.
It is important to avoid wood contact with the waterproofing material. The latter is laid on top of the supports.
The next stage is the construction of the harness at the bottom in the form of a square from a bar with a section of 15 x 15 cm
The beams laid on the supports are fastened with anchor bolts, and logs are laid on top in the form of transverse beams. They will support the flooring. A beam of 10 x 10 cm will be enough.
During operation, the tree can be damaged by rodents, insects and mold. Constant presence on the street, exposure to rainfall also destroys wood. But this process can be slowed down if the timber is pre-treated with an antiseptic solution.
When the joists are installed, you need to fix the frame beams in an upright position. Sections with a length of 2.5-3 meters and a section of 10 x 10 cm are suitable.
At the top, they make a strapping of boards 10 by 5 or 15 by 5 cm.The frame will become more rigid, it will be a support for the rafters.
It is desirable to make the roof pitched. This will make it easier for the snow to melt, and the water will not linger. Almost any roofing material is suitable for cladding - from slate and shingles to metal sheets. Sometimes the roof is made different. For example, the gazebo is covered with wood, and the barn is tiled.
At the stage of final finishing, the gazebo is varnished. The procedure is repeated every year. In order to avoid rotting wood, the house is installed on a site made of tiles or concrete. Original furniture, climbing plants, flower pots are used for decoration.
Of course, building a structure that combines a gazebo and a shed is not an easy task. You need free time, certain investments, physical strength. But on the site there will be a structure that combines a platform for summer meetings with friends, a veranda, a shed for storing tools or even a shower. Any household work done on your own always warms the soul.
By the way, ideas for construction or finished projects can be gleaned from the video:
Building types
The summer kitchen is a closed or semi-open room for cooking. The summer kitchen is very often erected even before the construction of the main house as a change house, attaching other rooms to it, for example,
- rest room;
- utility block;
- bathroom;
- bath;
- garage.
The role of the change house during construction is irreplaceable; it will depend on the attached premises and its functional purpose. Very often, such a makeshift is needed for a team of builders to live. After the construction of the house, change houses with a summer kitchen will be converted into a kitchen with a utility block and a terrace for outdoor recreation.
In addition, change houses with a kitchen are necessary in the country, since they can replace the construction of a full-fledged house. Country cabins have no more than one or two rooms, a kitchen, a bathroom and a utility block - this is everything you need to spend the night in a summer cottage.
When the summer kitchen is erected after the house has been built, much more attention is paid to its project. They immediately try to attach a garage and a bathhouse to it, and only then change houses and other utility rooms. Therefore, projects of summer kitchens with a utility block can be conditionally divided into simple and complex, they will be discussed further.
Choosing a project
The choice of a summer kitchen project combined with a utility block should not be spontaneous, since you need to take into account a lot of nuances:
- The size of the building as a whole and its location on the site.
- Construction budget.
- Functional purpose.
- What extensions need to be done, a garage, a bathhouse or change houses.
- In what style will the summer kitchen be, and whether it will fit into the design of the site as a whole.
- When composing and choosing one or another summer kitchen project, you need to take into account all the norms of construction, fire safety and sanitation. This will make it easier for you to register the site and save you from litigation.
How to build a gazebo in 3 steps
It is best for a home craftsman to build a gazebo with a utility block made of wood or metal.You need to start from the availability of tools and skills, so if you do not have a welding machine, and you do not know how to cook, then forget about the metal.
The collapsible version (on studs and bolts) is suitable for a simple canopy, but it is difficult to assemble a room in this way. But any person who owns a hacksaw and a hammer can build a frame from a bar and sheathe it, for example, with a planed board, so we will talk about this particular option.
Step # 1: making the foundation
In this case, it makes no sense to pour a strip foundation or a reinforced concrete slab under the entire structure. These types of foundations are mounted under brick or stone structures. For a wooden shed, it is enough to equip a row of pillars and install a frame on them.
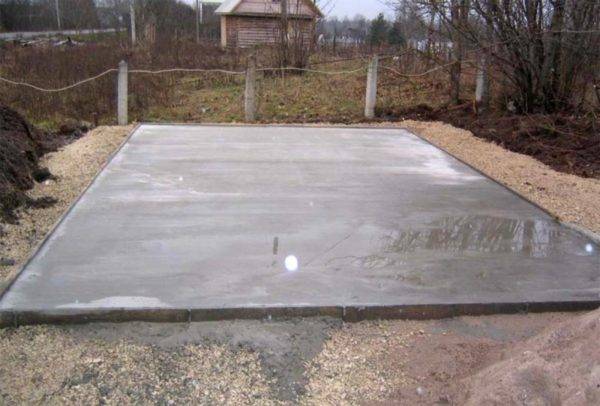
It makes sense to fill the foundation slab only if the floor in the gazebo is planned to be made of concrete.
Pillars can be made square or round, I personally prefer to fill in round pillars, because it is easier, faster, and most importantly, more reliable. Although the technology for arranging pillars is the same in both cases.

Diagram of a square pillar for a gazebo.
- First, arm yourself with a garden drill and make holes 50-70 cm deep at the nodal points of the structure. Usually the pitch of the posts is 1 meter. By the way, if you decide to make square pillars, then they are deepened by 35-40 cm, this is due to the fact that they are larger in area;
- Now fall asleep at the bottom of the hole 10-15 cm of sand and gravel mixture and tamp it well;
- Roll a pipe from roofing material along the diameter of the hole and insert it into the hole;
- Tie the reinforcement cage and insert it into the center of the hole;
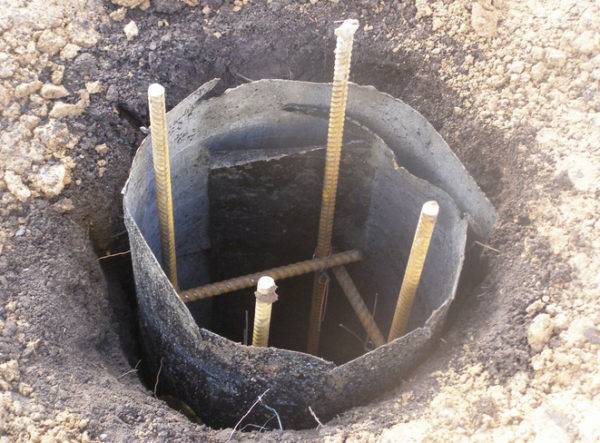
The easiest way is to make formwork from roofing material.
- In the very center there should be a long reinforcing bar or threaded stud. We calculate so that after pouring the concrete, this rod sticks out of the post by 30 - 40 cm, we will fix the frame for the floor to it;
- Further down the level (in all pillars the same), pour concrete and wait a couple of weeks until it gets stronger.
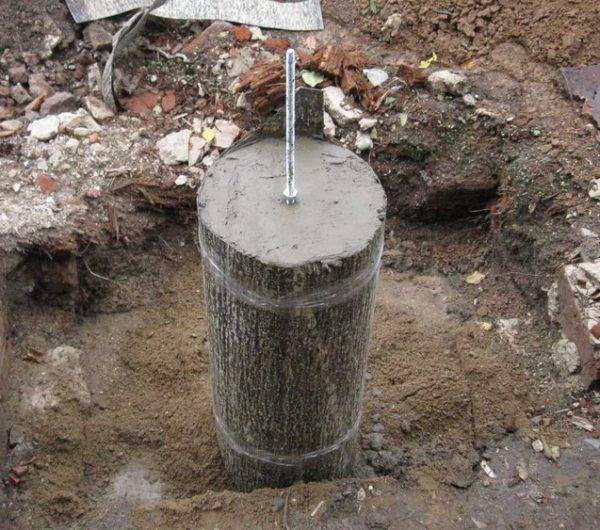
It is advisable to install a hairpin in the center of the post.
If you are going to build a brick brazier or stove, then a separate foundation must be poured under it, the diagram of this foundation is given below.
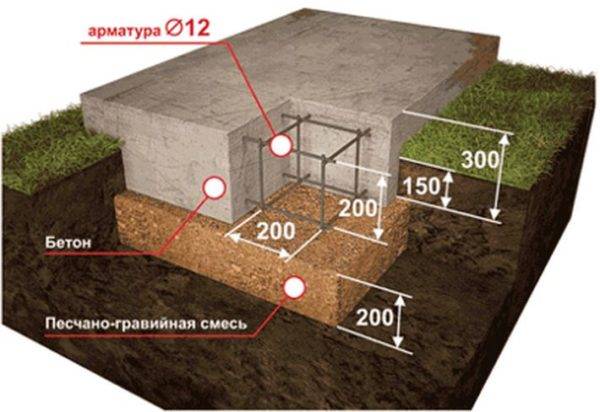
Foundation diagram for a brick brazier or oven.
Step number 2: knock down the supporting frame
For the supporting frame, I recommend using a beam with a section of 100x100 mm. The frame for the floor is knocked off first, after which it is immediately installed on concrete pillars and fixed with studs. Keep in mind that the tree should not come into contact with concrete, therefore, before installing the frame, gaskets of roofing material are laid on the posts.
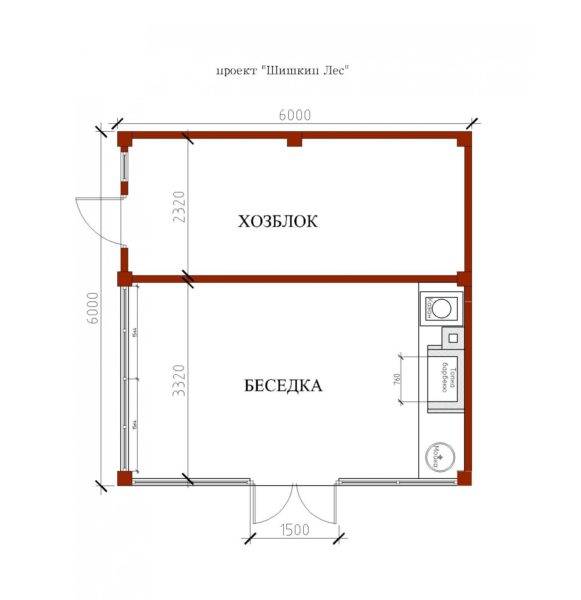
The simplest project of a gazebo with a utility block.
A timber not thinner than 50x100 mm is taken for intermediate floor joists, the joists themselves are installed in increments of 30-40 cm.
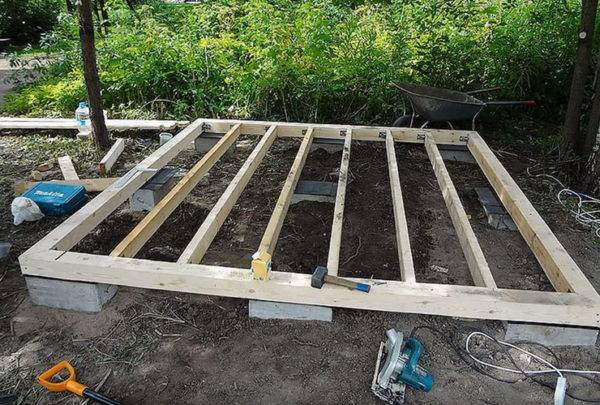
The supporting frame is fixed with studs to the foundation pillars.
Now we install the vertical wall racks. It is also desirable to make these racks from 100x100 mm timber. There is an interesting point here, professional carpenters join the timber by cutting, and in different ways, I recommend you to use metal corners and other similar fittings, it is much easier and faster.

It is more convenient to join the beam with the help of metal fittings.
What should be the roof on the gazebo - everyone has their own opinion, but if you have never been involved in the installation of a rafter system, then I advise you to stay on a single-slope version.
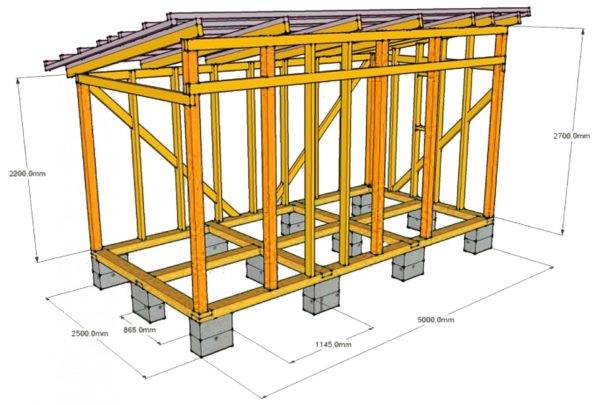
Frame diagram for a lean-to gazebo.
The most you can still try is the simplest gable structure. Believe me, hip, tent, multi-level and other complex types of rafter systems are beyond your power.
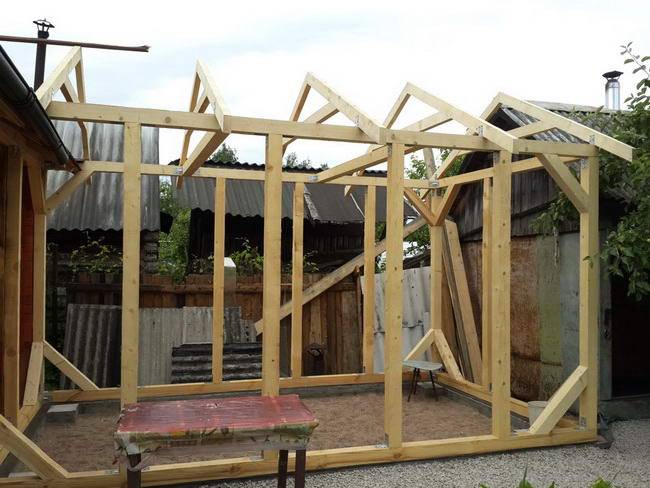
The gable rafter system is relatively simple.
When the rafters are installed, a subroofing lathing is stuffed on them, the frequency of this lathing depends on the type of roofing material.The most economical would be to use a profiled sheet or asbestos-cement slate, under which the crate is stuffed with a step of 200-300 mm.
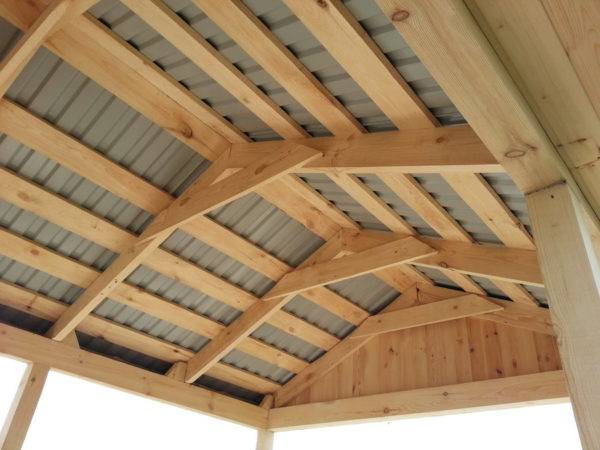
Roofing made of profiled sheet is inexpensive and can be installed quickly.
Step # 3: cladding
Since we are talking about a summer gazebo, accordingly, the cladding will be light. The easiest option is to take a planed board 20-30 mm thick and sheathe the frame with it. To make the structure look more original, the board can be stuffed not in the usual smooth way, but with a herringbone, as in the photo below.
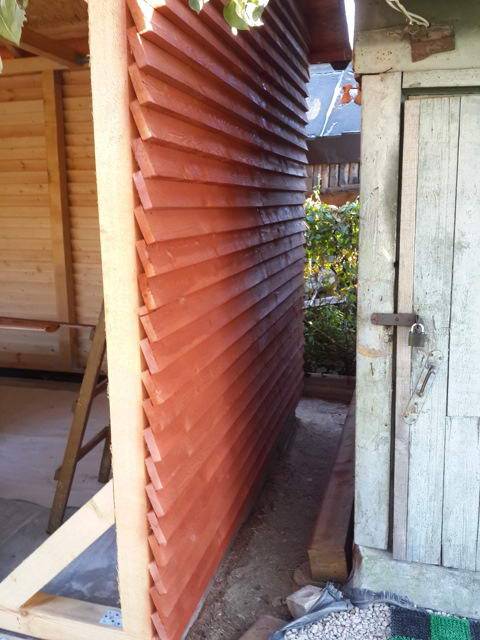
Herringbone cladding looks original.
Work order
So, the drawing is ready. Suppose that a decision has been made to build a utility block from wood. For work, you will need the following tools:
- concrete mixer and buckets;
- hammer, pliers, nails;
- hacksaw, ax;
- roulette, level;
- nails, screws;
- cord;
- drill, screwdriver.
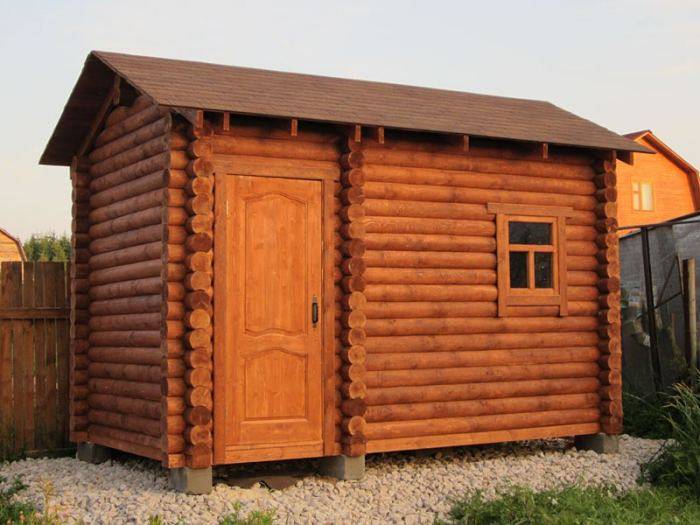
Perhaps something from the list will not be useful, but something is not on the list - everything will be clarified in the process. They start by choosing a flat spot for the building.

Since the total weight of the utility block is small, there is no need for a strip foundation, but it is quite possible to do with a columnar foundation. To erect it, first mark the site with a lace.
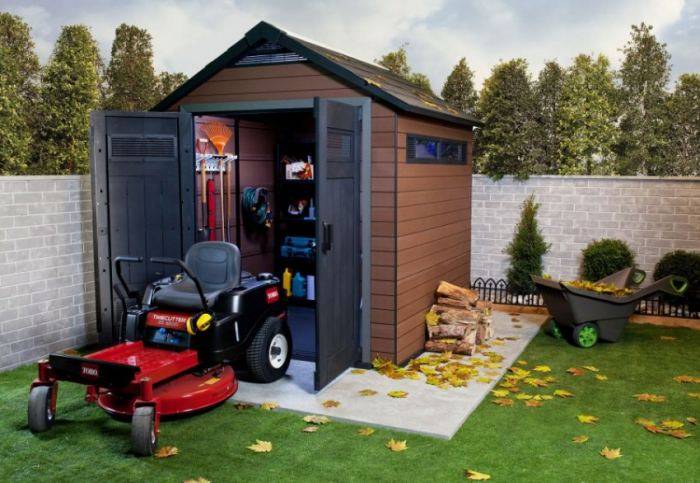
They start with the corner posts - they dig out pits about a meter deep, square section 50x50 cm in size. The distance between the posts should not exceed one and a half meters. The bottom of the hollows is covered with a layer of sand, tamped, then with a layer of rubble and tamped again.
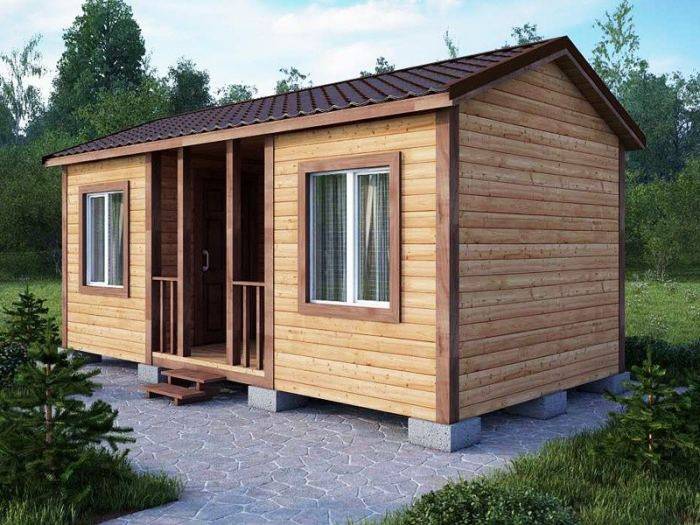
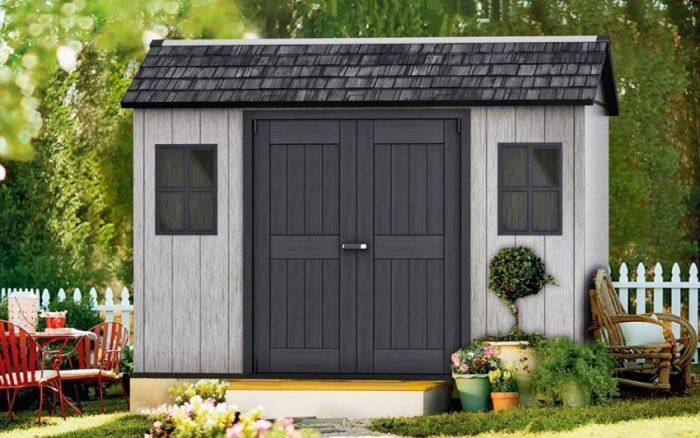
If it is planned to build a bathroom or shower, then water supply and sewerage are provided, and the part of the pipes that is on the street is necessarily insulated.
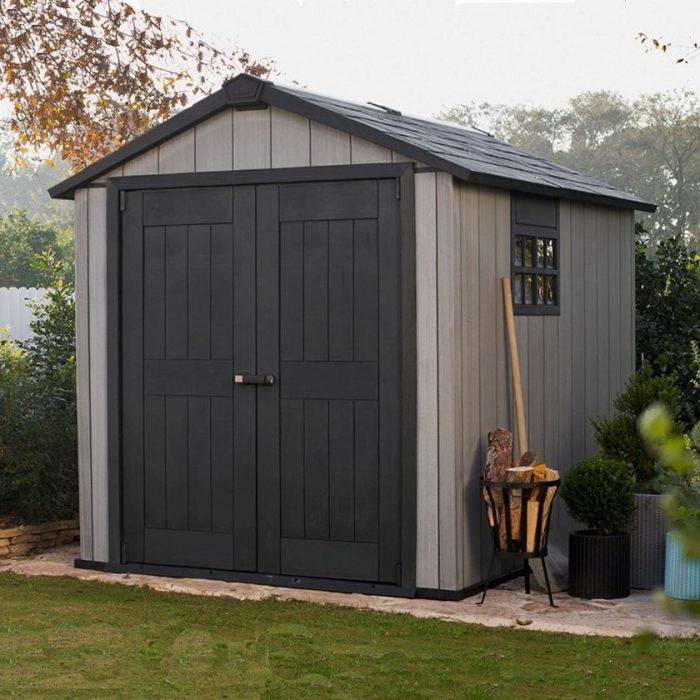
All elements made of wood must be protected from decay using antiseptic impregnation. A strapping is made from a bar, to which the beds are attached, logs are installed on them. First, a rough floor of boards is laid on top of the logs, then plywood. Pillars from a bar are installed on the harness, which constitute the support of the frame.
Door and window openings are additionally reinforced with pillars and crossbars. From above, the rack is tied in the same way as from below. Insulation is placed between the racks if the utility block is planned to be used in the cold season.

You can sew up the room with clapboard, OSB, drywall. If the utility block should look neat and elegant, you can even decorate it with siding on the outside.
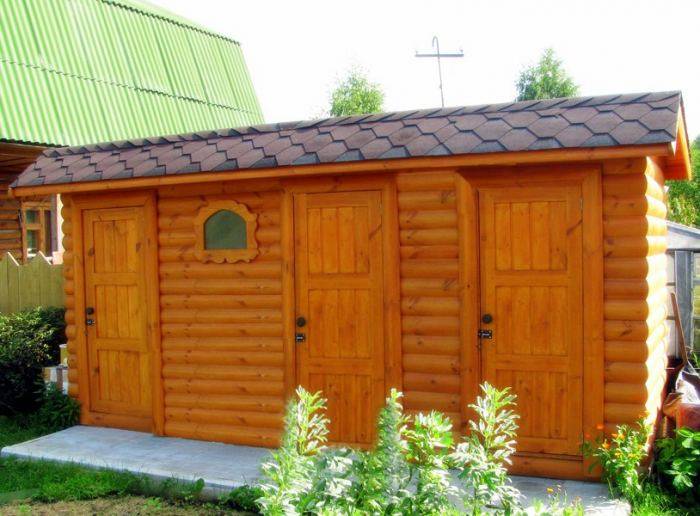
In order not to complicate your life, you can completely get by with a lean-to roof. They equip the rafter-beam system, to which the crate is attached. As a roof, corrugated board, ondulin, slate or tile are used. If there is a desire to get a utility block with a beautiful, expensive-looking roof, they use tiles.
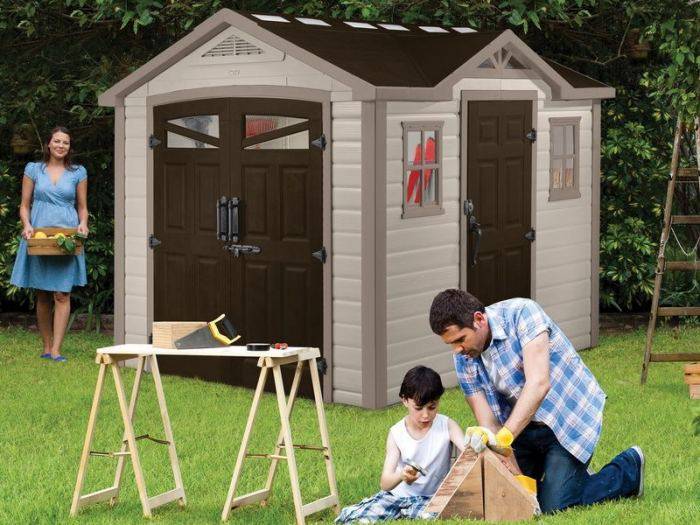
Cooking the frame
Frame construction is more popular. The frame begins with the lower strapping with a 15x15 centimeters bar and the same racks up to the upper strapping.


There is the same beam, it will also fulfill the role of a Mauerlat, to which the roof rafters and its covering are firmly attached on one- and two-story construction.

Next, vertical sheathing is carried out with panels, plywood or tongue-and-groove boards. In this case, gaps are not allowed. Planks can be used to lay out the “herringbone” horizontally from the bottom row, and each one above becomes a “canopy” for rain drainage.

Shields made of compressed straw impregnated with fire-fighting agents are already on sale. They are inserted into the frames first, and then sheathed with the above materials on both sides, up to the lining and PVC strips.


Bath + utility room
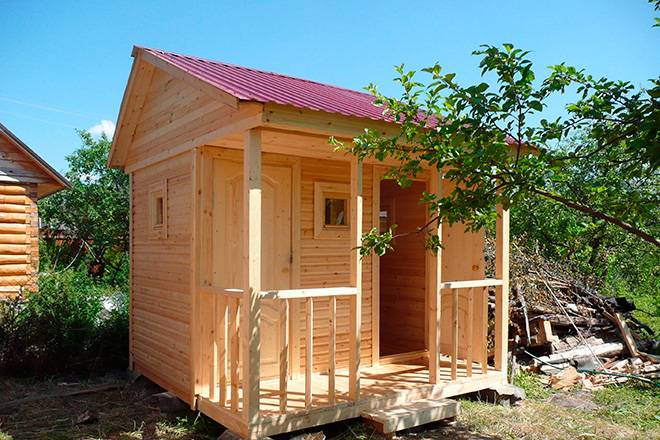
Steam room, utility block are built on the same foundation. An extension with communications is being made nearby. To make the complex not only effective, but also safe, a number of requirements are imposed on it:
- It is desirable to make separate inputs / outputs.
- The supply of a separate branch of water supply will be very useful. The nominal capacity is often insufficient.
- The joint roof is more efficient.
- Sewer outlets for the utility block, baths should be different.
If you or your guests are used to spending more than 2 hours in the bath, the extension can be equipped for a kitchen block. And turn the rest room into a real living room.
Styles in the design of gazebos
In the design of gazebos, several popular styles should be distinguished:
Russian style - assumes the presence of a stove, rough natural forms, close to the rustic style, there are open or closed options.
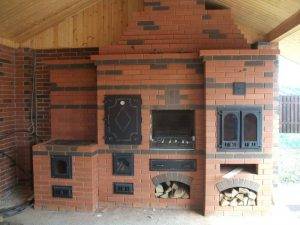

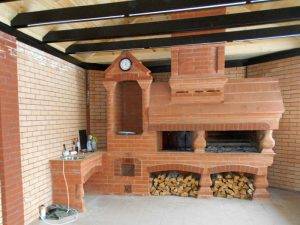
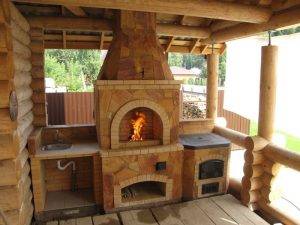
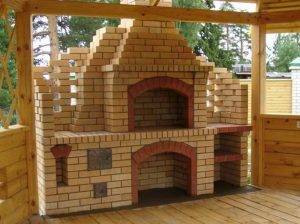
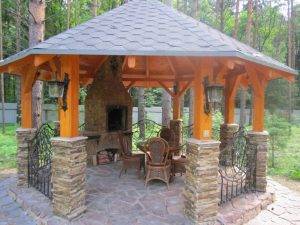

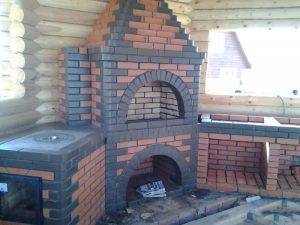
Chalet - resembles ancient buildings of stone and wood with rough furniture, a fireplace and a wide roof, mostly closed areas.
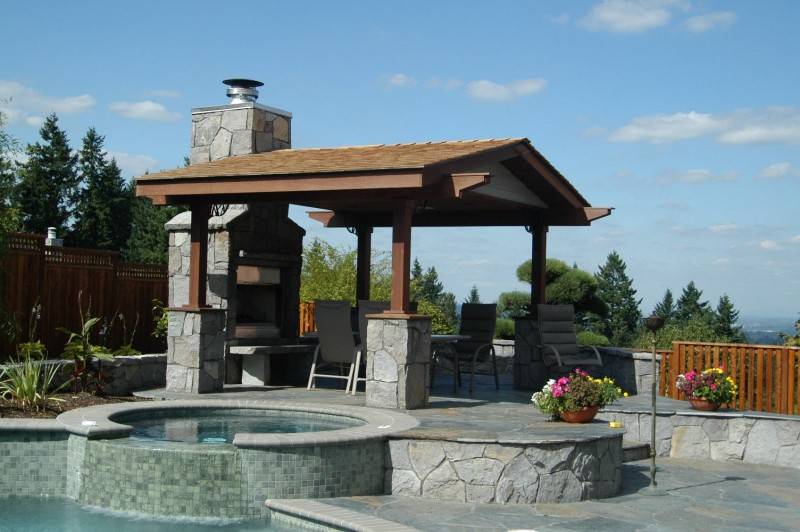
Provence - light romantic, with pastel colors, lots of light textiles, suitable for all types of gazebos.
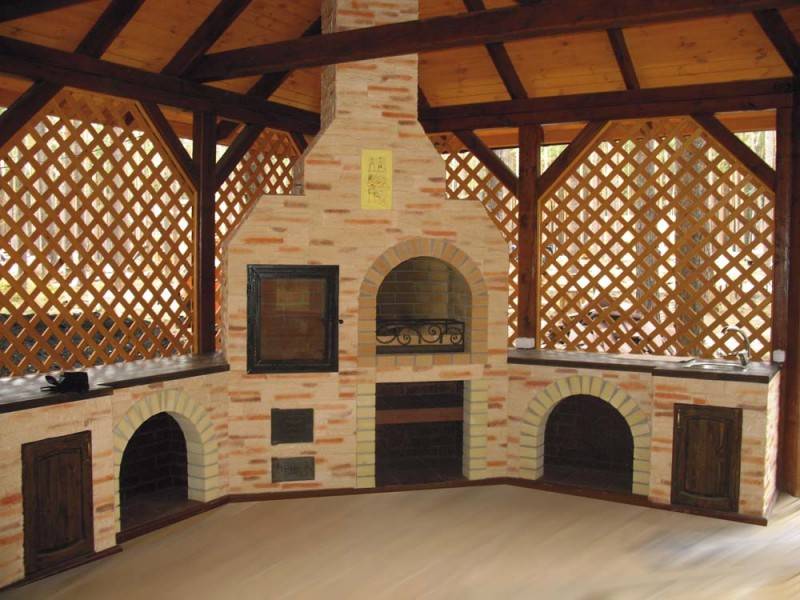
East style - with a variety of ornaments, bright colors and original decor and textiles.

Contemporary style - filled with the latest equipment and furnishings.
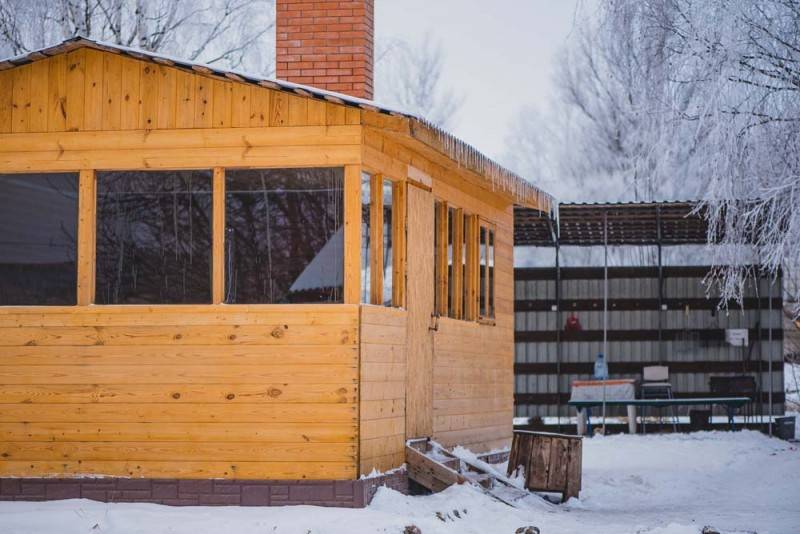

Some have been improving buildings over the years, creating coziness and making adjustments to create more comfort.
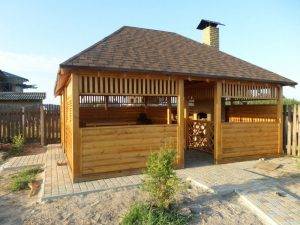
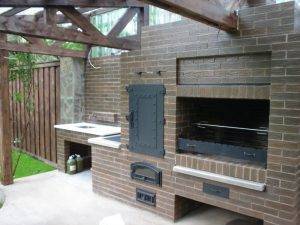

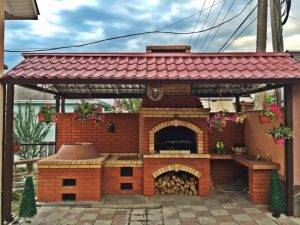


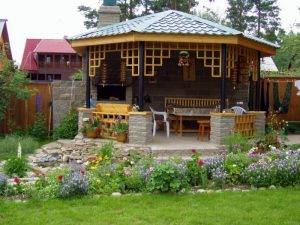
What is the secret of the popularity of combined gazebos
It has been noticed that practical people, having at their disposal a plot for a summer residence, begin its arrangement precisely with the construction of a combined gazebo. This decision is not accidental, because a gazebo with a household block has many advantages.
The advantages of combined buildings
While the house is being built, under a canopy you can take a break in the midday heat and hide from the rain, and the entire tool will be stored in a shed nearby, plus you can still spend the night there;

The construction of most modern summer cottages began with combined gazebos.
- In an inhabited dacha, an economic block is rarely used as a barn; it is wiser to make a summer kitchen, a bathhouse or at least a shower cabin out of it;
- Not every owner is ready to build a major garage in the country, but a good shed with an extension will save the car from the sun, and there will be where to hide the tool;
- If there is a stove or barbecue in the gazebo, then the extension will be an excellent place to store firewood, there they will definitely not get wet;
- An experienced summer resident is a jack of all trades; putting a workbench and other devices in the house is not the best solution, but an extension next to the shed will make an excellent workshop.
The only thing that is undesirable to attach to a summer shed is a country toilet with a cesspool. Here, like you, do not cover the cesspool, but there will still be a smell under the canopy.
Dimensions and shapes of combined arbors
The choice of the size and layout of such structures is a purely individual matter; in this area, there are simply no dogmas and guidelines. The drawing and inventory of one of the simple gazebos with a two-section block is placed below, but you can endlessly supplement and modernize it.
The size of the utility block depends on its purpose, but it makes no sense to make a gazebo for rest less than 12 m².
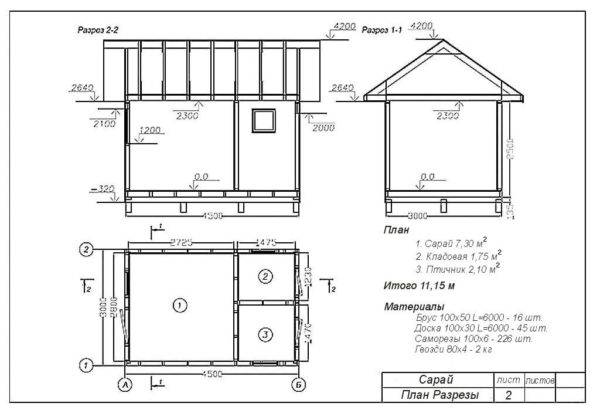
A drawing of a simple gazebo with a two-section layout of the utility block can always be modernized.
As for the shapes and layout of nodes, there are also no well-established opinions here, below I have posted only the most common projects, but you can come up with your own based on them.
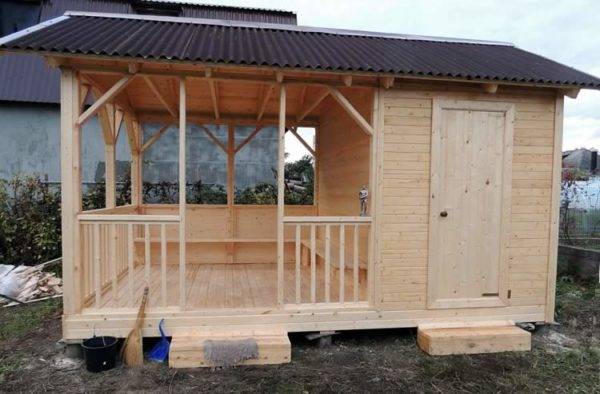
A barn with blank walls is a good option for an avid gardener.
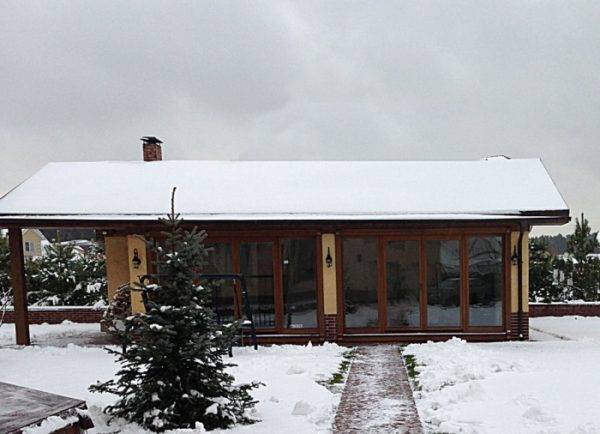
In the photo on the left, we see a summer shed and a winter glazed gazebo combined under one roof.
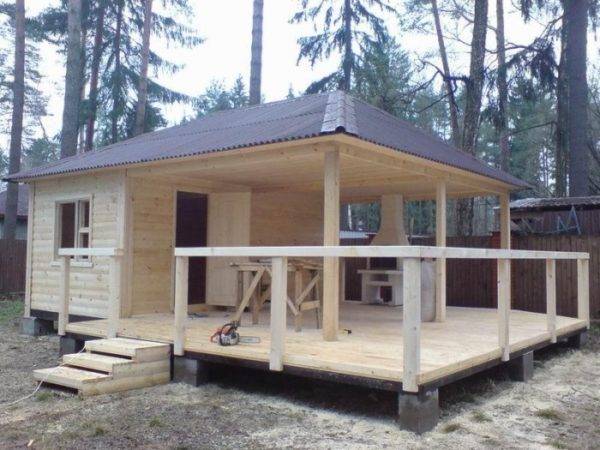
A wooden summer house with a large terrace and a small room will suit those summer residents who are often visited by guests.
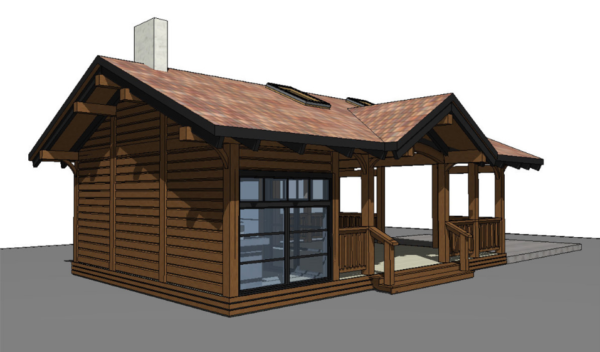
The summer kitchen option with an extensive canopy is perfect for culinary gourmets who prefer to cook in nature.
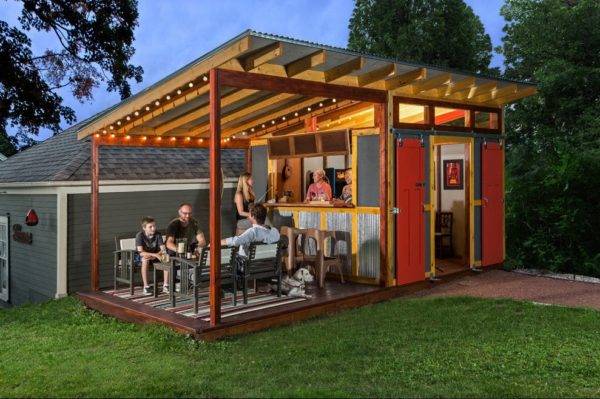
An interesting version of a canopy with a kitchen, where the side wall is transformed into a bar counter.

A canopy exclusively for a car is being erected by the owners who already have a good summer gazebo for relaxation.
What are they built from?

A capital brick gazebo is considered the strongest and most durable structure, but its cost is almost the highest.
In addition, an amateur should not undertake such work, because the construction of a brick house is not an easy task.
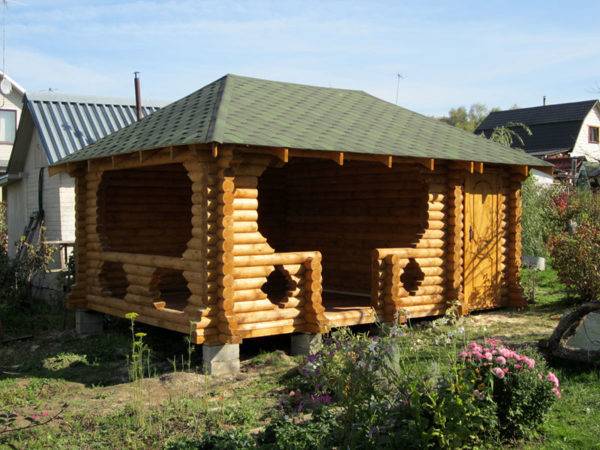
The Russian tradition of building from a log is now actively reviving, but this is an expensive pleasure, because rounding a log by hand is problematic, and the finished material is expensive.
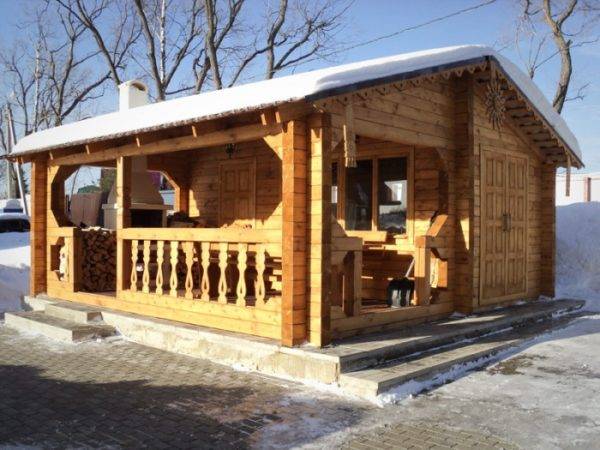
A construction from a profile bar is cheaper than a log cabin, plus, if desired, such a gazebo can be folded with your own hands.
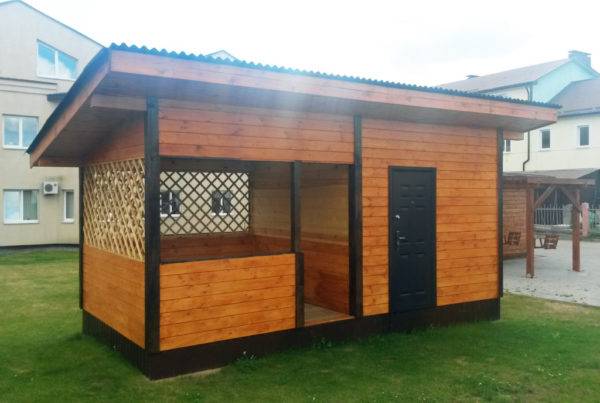
An excellent economy option, but it is exclusively summer. Here you only need to assemble a frame from a bar, sheathe it with a board and build a roof.

For the construction of the frame of metal sheds, a profile pipe is used, and the walls of the utility block are sheathed with either a profiled sheet or a board.
Hozblok + gazebo with one roof
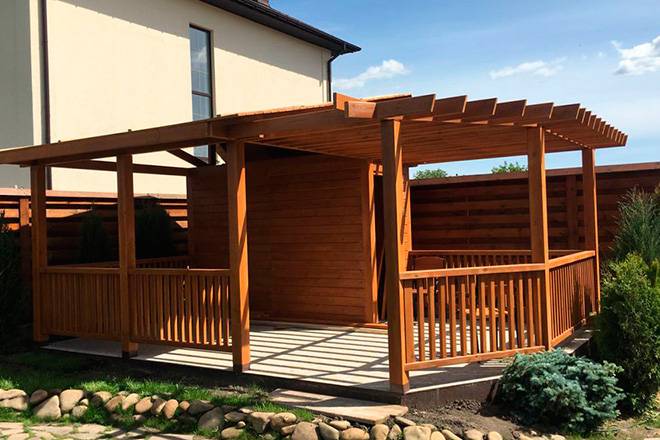
The pergola, which combines a place for a meal, a household block, has many obvious advantages. Here they are:
- Reduced costs. Especially when compared to a stand-alone design.
- Choosing the style of two buildings at the same time, you can achieve the perfect combination. From a landscape design point of view, this is very reasonable.
- It is also not necessary to equip additional paths to connect the gazebo and other utility rooms.
And in the summer, such a structure can be easily turned into a sleeping area. And this is another plus of the combination "2 in 1". You can more clearly see the construction process of such a structure in the video below:
This is interesting: Fireplaces for summer cottages - we will describe the essence
Designing a gazebo combined with a barn
If the suburban area does not have a territory for building a house, then the owners are advised to equip a gazebo, combined with a utility room. The room, which serves as a warehouse, is erected separately from other buildings. For a rational distribution of space, you can build:
- change house with a bathroom (shower, toilet);
- barn, summer kitchen and carport;
- utility block with a recreation room;
- warehouse for tools, combined with a gazebo, a room with a stove.
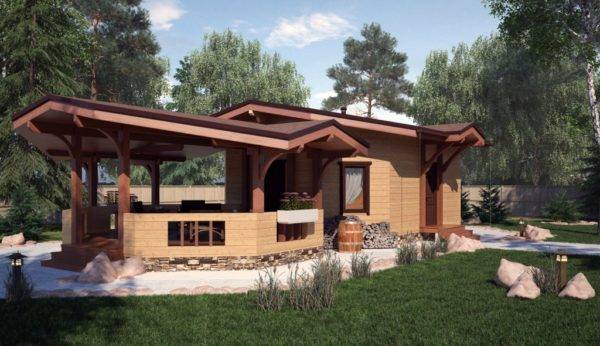 If the area on the site is small, then the shed can be combined with a gazebo
There are many options, their choice depends on the existing conditions and the wishes of the owner. A change house with a veranda or a gazebo is in great demand. These rooms can be covered with one roof structure. All buildings on the site must be made in the same style, have visual appeal and functionality.
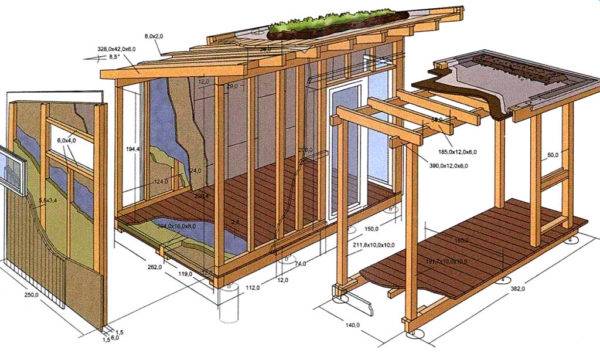 Under the roof of the gazebo, you can easily hide from the rain
Materials for building a barn
The simple design of the household house allows you to do it yourself if you have basic installation skills. For construction, you can use:
- Wooden boards, beams. A gazebo with a utility block made of such material will perfectly decorate a summer cottage with any landscape. Natural raw materials give warmth and comfort at any time of the year, and due to their low weight, it is easy to install without a capital foundation.
- Metal sheets. The work is done by welding all parts, so you need an experienced welder with a special tool. With a low weight, such utility rooms can be easily transported to any place and do not need a foundation. Summer verandas with forged metal elements look elegant.
- Stone or brick. A change house made of such materials is a capital structure, the heaviest in weight and difficult to install. It is better to build such premises if there is already a finished house and other additional buildings, so that they all correspond to the general design.
The advantages of combining a change house with a gazebo
The advantages of arranging utility rooms with a gazebo under one roof are:
- significant space savings;
- ease of use for cottage owners;
- aesthetics: a well-designed and decorated bathroom together with the utility block does not stand out from the overall design of the site;
- practicality and functionality: the household block is suitable for storing food supplies, which can be quickly obtained, and treat the family who have gathered at the table in the gazebo.
If the gazebo is equipped with a barbecue area, then, as a rule, a woodshed is attached to this room.
It is important to comply with some requirements:
- The place should be sheltered from the rays of the scorching sun, located at a considerable distance from a cesspool and a toilet without a sewer.
- The structure should not cast a shadow on the landings.
- The utility block is recommended to be erected using the north, north-west or north-east wall of the arbor. So it will be reliably protected from cold air currents, and staying inside will become comfortable in any weather.
Video: utility block to which you can attach a gazebo
The implementation of combined construction projects will help to rationally use the free area of the summer cottage, save materials, money, time and effort for installation. Each owner will be able to choose the option for combining premises, taking into account their preferences and capabilities.
Garage and kitchen in one room
This idea comes to the owners of suburban real estate when the area of the site is limited. As for the implementation, in order to avoid incorrect installation and additional costs of materials, it is recommended to contact specialized construction teams. When drawing up a project, you should decide on the purpose of the future extension, which may become:
- garage;
- a barn;
- summer kitchen.
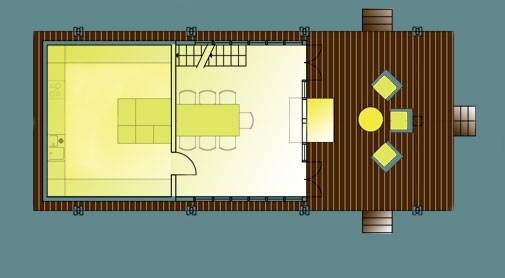 The location of the garage under one roof with the summer kitchen is very convenient
When creating a project, the entire site is divided into:
- a place for buildings equipped with all the benefits of civilization for a comfortable stay of residents (heating, running water, sewerage);
- free area, allowing the owners to enjoy the beauty of nature.
Property owners are often interested in the option of combining small buildings with a house for seasonal use, for example, during a warm season. The main advantages of such construction are:
- rationality of the distribution of the territory;
- reduction of labor costs, reduction of project implementation time;
- minimization of the cost of materials (the wall of the house serves as the basis for a new room).
 Thanks to the combined construction, you can save money and land area
Aesthetically, several rooms under one roof do not always look attractive, so it is important to choose the best option, for example, a summer kitchen and garage project. Combining a garage with a summer kitchen has its advantages
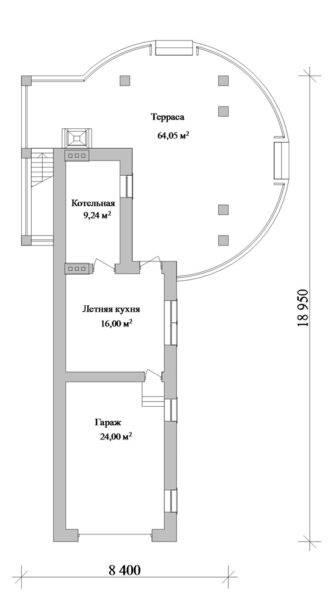 Combining a garage with a summer kitchen has its advantages
When choosing a place for the construction of an extension, it is enough to study the requirements for each of the planned buildings and choose the most suitable option for each of them.
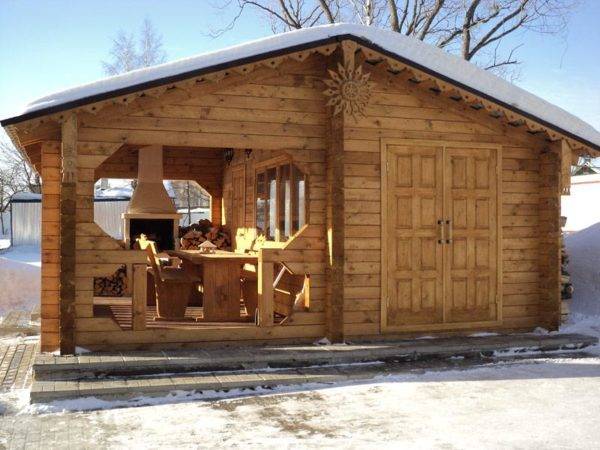 Summer kitchen can also be combined with a barn
A summer kitchen, which is simply necessary on the site, can be built with an open terrace, which is in demand by married couples with children for outdoor recreation. Here you can create a small boiler room, which will not take up much space and will combine all engineering communications, which is very convenient when performing their repair and maintenance. The only drawback of a summer kitchen and a garage under one roof is a violation of fire safety rules.
If the summer kitchen is to be built in conjunction with the garage, then a number of factors must be taken into account:
- The frame of additional premises is being erected depending on the parameters of the free area.
- The place for the outbuildings is selected on the basis of the rules of household zoning.
- Cultivated areas and recreation areas require competent distribution.
- A playground and a recreation area for adults are located as close to each other as possible, which will ensure maximum comfort and safety for the whole family in nature.
- The summer kitchen is built closer to the garden or vegetable garden, so that it is convenient for the owners to harvest, process it, preserve and prepare fruits for storage.
Summer kitchen: planning rules in a suburban area
Construction summer kitchen is carried out on basis:
- the size of the free area;
- the number of people living in the house;
- equipment for use in the kitchen.
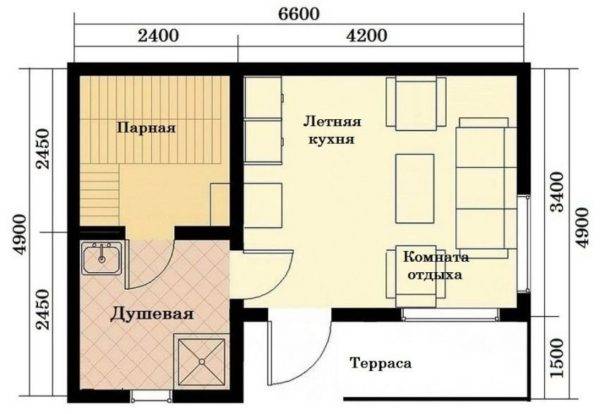 Summer kitchen can be located under one roof and with a bath
For a family of 3-4 people, 12 m2 will be enough for a kitchen built as a box or a semi-closed canopy. If the family is large and the suburban area is quite spacious, then the best option would be to add a kitchen, veranda and dining room. A summer kitchen and a garage under one roof is a multifunctional and easy-to-use room that requires competent design to reduce the risk of fire.
