Preliminary work
Before starting construction, we determine the location of the future gazebo, then select a suitable drawing, and also stock up on tools and building materials.
To complete the work you will need:
- profile pipes of square (for supports) and rectangular (for crate and fence) cross-section;
- roofing polycarbonate or other finishing materials;
- concrete and cement or ready-made supports for a columnar foundation;
- fittings;
- paint or primer with anti-corrosion properties.
When choosing a suitable place, generally accepted rules are followed. It should be a secluded, quiet place, preferably with beautiful views. The site should be clearly visible so that the gazebo itself serves as a decoration. If you will use it for a kitchen, you should not locate the building far from home.
Measurements and project
The dimensions of the building are determined taking into account the area of the allocated area, then the project is already selected. Since pipes can be bent if necessary, there are many suitable options, simple and complex. The scheme provides for:
- exact dimensions;
- consumption of building materials;
- type of foundation;
- roof shape.
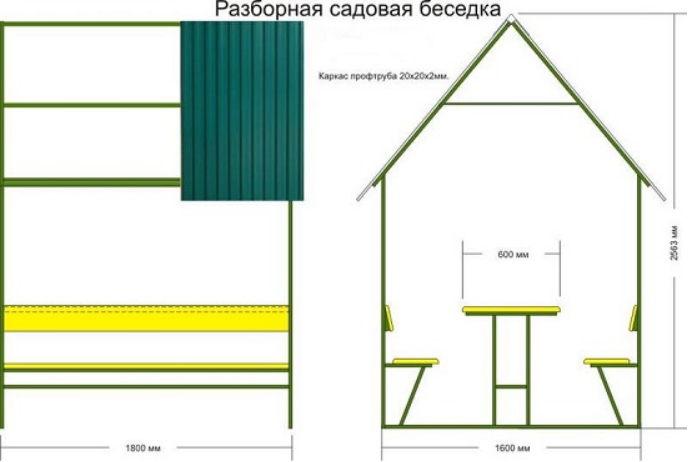
If necessary, you can stop at a collapsible design. It is assembled in 2-3 hours, with the onset of frost, the structure is assembled and hidden in the house. The floor and foundation are made from cheap materials, fastenings are carried out with bolts.
A stationary building will require a more reliable foundation, it will take more time to build it. Inside the bricks, you can fold a stove or barbecue, conduct electricity, organizing a cozy place for home gatherings. In this case, it is better to make the gazebo hexagonal or octagonal, the chimney is organized through the central part of the pitched roof.
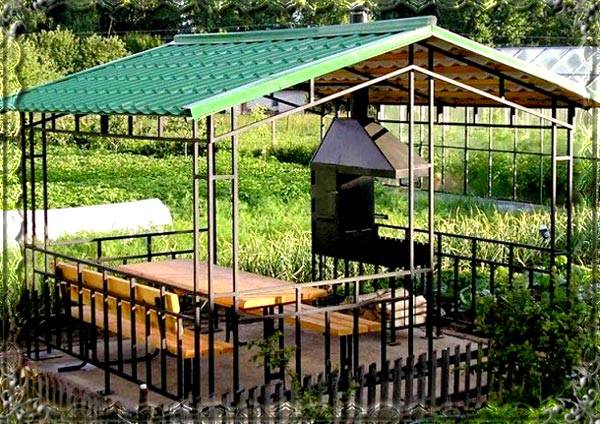 You can build a collapsible gazebo and fold it for the duration of the frost
Gazebo pavilion for summer cottages
This, of course, is not the easiest project, but the pavilion gazebo for a summer residence is an ideal place for a summer dining room. You can always change the size and design of the pavilion to suit your needs and budget, but it is better to use the instructions and advice provided in the diagrams. A gable roof will improve the appearance of the structure, but it will require a large investment and a lot of materials. If you're looking to build a simple pavilion to enjoy with family and friends, there are several options you can choose from. On the one hand, you can build a gazebo or a simpler structure like this wooden pavilion. You can do it yourself, but you have to plan every step of the construction from the very beginning. It is recommended that you buy the very best materials you can afford. They should be weather resistant such as pressed wood, pine or cedar. Take accurate measurements carefully before adjusting sizes. Pre-drill holes in the parts before driving in the screws to prevent the wood from splitting. All stages of construction are shown in step-by-step diagrams, detailed instructions are on the site.
Types and technological features of metal arbors
Garden houses can be built from various materials - brick, stone, wood, metal. Each of these materials has its own advantages and disadvantages.
Let's consider in more detail the technological features of metal arbors. The main advantages of metal structures over products from other materials:
- high strength (the strong frame of the metal arbor can withstand mechanical loads, does not deform when the soil subsides);
- durability (metal structures can last for several decades);
- fire safety;
- combination with other materials: profiled sheet, slate, polycarbonate can be used as a roof for a metal frame.
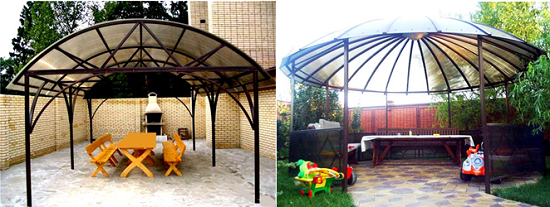
The combination of iron with polycarbonate - metal gazebos, photo
Unlike wood, metal does not burn, it will last much longer, does not fade in the sun and does not crack. It will not be damaged by insects and it will not collapse under the influence of weather factors. The only drawback of metal is a higher price compared to wood (by about 15%), as well as certain difficulties in assembly (welding).
Tip: you can extend the life of a metal product with regular maintenance - timely detection and elimination of corrosion traces.
Varieties of metal structures
Garden metal buildings can be divided into two groups:
- stationary - capital buildings built on a permanent basis on a strip or columnar foundation;
- temporary - collapsible structures installed directly on the ground so that, if necessary, they can be easily removed or moved to another place.
Photo of metal arbors - stationary and portable
If you decide to build a metal gazebo for a summer residence with your own hands, you need to start by choosing a project and determining the method of manufacturing the structure.
when choosing a technology for constructing a metal structure with your own hands, be guided by your own construction skills, as well as the availability of tools and special equipment.
The simplest option is a profile gazebo. It can be built from a corner, round or shaped (rectangular) pipes, channels (metal beams). You can assemble such a structure using bolts, or welding.
Tip: if you cannot weld a gazebo from a profile, you have no experience with a welding machine, choose a prefabricated bolted connection.
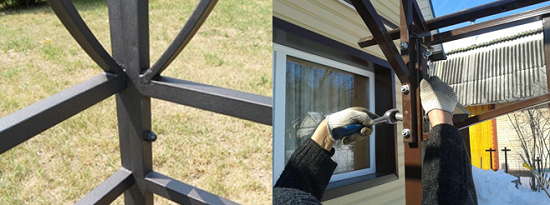
Welded and bolted connection of elements - photo of gazebos from a metal profile
The gazebos from the professional pipe are mobile, resistant to the influences of the external environment, and reliable. This material is used as a supporting element to form the frame of the structure, since it can withstand heavy loads and does not lend itself to deformation.
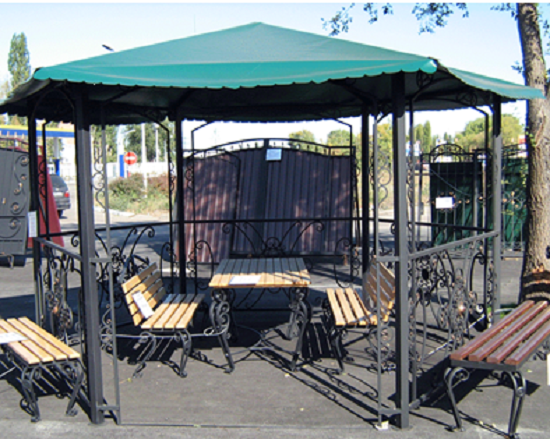
Photo of a gazebo from a profile pipe using forged elements
Profile pipes are often used for the construction of garden houses. And, if the iron pipes are quite heavy, then you can use an aluminum profile pipe, which is lightweight and cheaper.
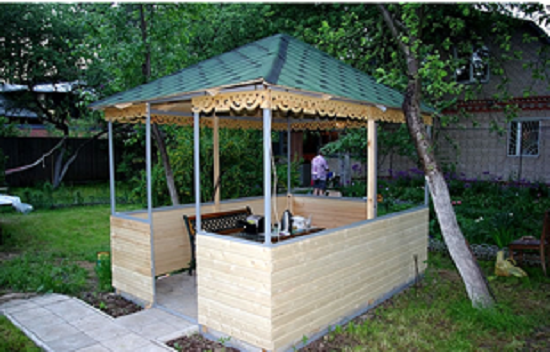
Gazebo on a metal aluminum frame
If the structures from the professional pipe look simple, then forged gazebos are more elegant. Ornate patterns, curls, openwork inserts made by artistic forging will give the building originality and a beautiful appearance. But to create a forged structure, you must have blacksmithing skills, and have special equipment. An alternative would be to buy a ready-made forged gazebo, which you can assemble yourself.
Please note: Since the forged steel structure is laborious to perform, it is quite expensive.
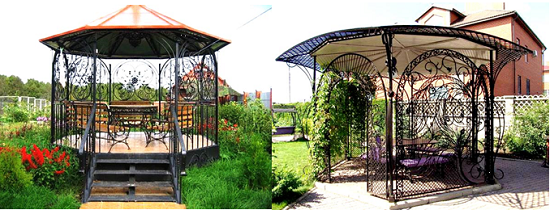
Forging products - summer cottages made of metal, photo
Do-it-yourself metal gazebos are always prestigious. Iron construction can have various configurations. The most common are rectangular and square structures, a little less often - eight- and hexagonal garden buildings.

Complex design projects can only be realized by experienced craftsmen - original iron gazebos, photo
Considering the constructive solution and functional purpose of the garden metal gazebo, it can be equipped with various attributes for relaxation - furniture, barbecue table, barbecue.In some gazebos for summer cottages, special brackets are provided on which you can install seats around the perimeter. This greatly improves the comfort of the building.
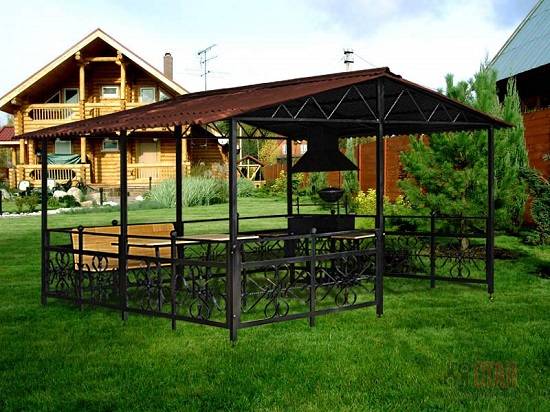
Summer building with barbecue - a cozy place for outdoor recreation
Varieties of gazebos
A gazebo, a gazebo, a pergola and a pavilion - only the names of this seemingly unprepossessing structure can be recalled a good half dozen and behind each hides its own little technical feature. Therefore, it is easier to classify "cultural sheds" according to the type of dominant structural material, than to later recall all the differences between a gazebo and a gatehouse.
So there are 3 fundamentally different groups of materials:
- Stone. These are bricks, shell rock, rubble and even monolithic concrete.
- Wood. In this group: a board, a log, a bar and even a willow twig.
- Metal. And finally, we include gazebos made of professional pipes, sheet steel or forged parts as metal canopies.
At the same time, structures made of brick and wood are quite massive and require a foundation for their installation, and this, in turn, not only affects the price of the issue, but also imposes some restrictions on the site. After all, it is easier to bury concrete in the ground than to extract it from there, and grow a lawn in its place.
At the same time, arbors from ordinary metal pipes can not only be built by hand, but also do not require any "preferential" conditions for installation. In some cases, it is possible to arrange canopies even on the garden path, and even if necessary, hide them for the winter in the garage. Of course, not all models can boast of such mobility, but there is plenty to choose from.
And for those who do not believe in the design potential of steel and, in spite of everything, believe that it cannot compete with natural materials, we suggest looking at the following selection of examples.

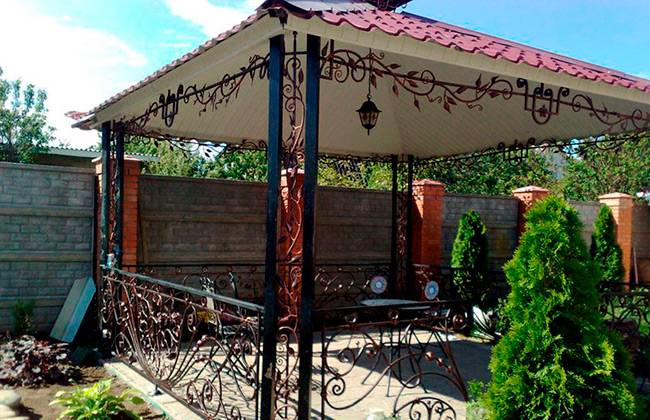
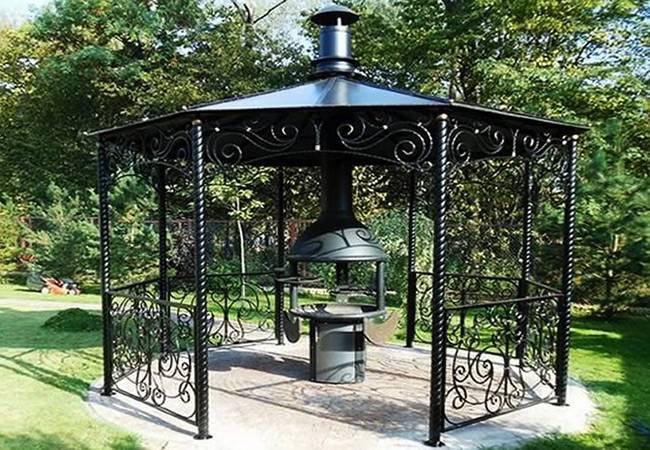
Agree, it is felt that there is a soul in these awnings.
Profile specifics
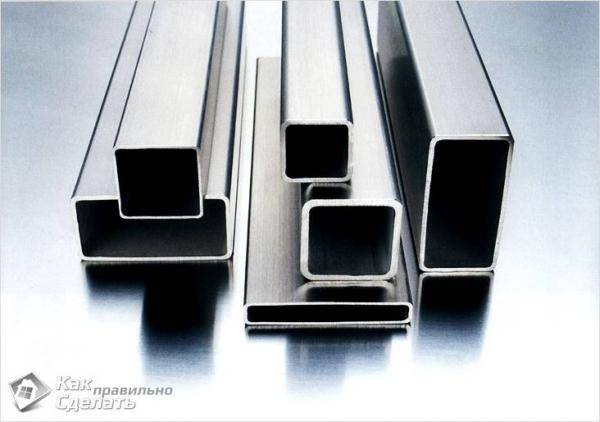
The specifics of the profile and the advantages of gazebos from it
The structure made using the profile looks quite original. You can make such a building as soon as possible. The main condition is experience in working with welding equipment.
The initial material from which the frame of the gazebo is made is pipes, in most cases found with a rectangular or square section, made of carbon and low-alloy steel.
The raw materials are characterized by sufficient strength, versatile resistance to harmful influences and practicality.
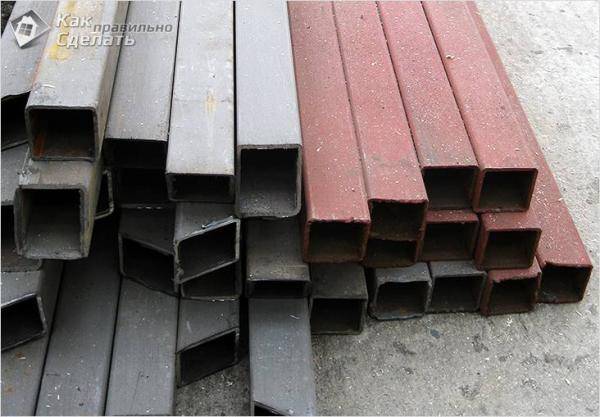
Profile pipe for a gazebo
Profile pipes, taken as the basis of the gazebo, endow the building with a number of positive characteristics. The main ones are:
- low specific gravity of the structure (excludes the preparation of a powerful base);
- long period of operation;
- acceptable cost of the material;
- fire resistance;
- no need for periodic repairs.
Arbor from rolled metal photo instruction
And now let's look at those photos and drawings that will allow us to create a strong and beautiful gazebo ourselves from a profile pipe, and we will also revise the necessary tool. Still, steel is not a birch. You can't do with her grandfather's ax.
Therefore, before you go to the metal base, make sure that your workshop has:
- Welding machine
- Angle grinder
- Electric drill
- Screwdriver
- Saw or jigsaw
- Pencil
- Level
- Gon
- Protractor
- Roulette
- Brush or pulver
If something is missing, it must be purchased, borrowed or rented.
Now find a suitable concreted area (or prefabricate one) and get to work. And in order not to waste extra letters, as well as to make the presentation of the material more laconic, we will divide the process of making the gazebo into stages and provide each of them with a visual illustration.
- We draw a regular octagon with a radius of 1800 mm right on the ground and make a steel contour from a profile pipe with a cross section of 60 × 40 mm along its perimeter, from the corners of which we raise eight racks with a height of the same 1800 mm, but already from a profile of 60 × 30 mm. Control the accuracy of the work carried out with a level or plumb line.
- To stiffen the struts, tie them at the end with a 40 × 20 mm pipe belt. To work, you will need to cut 8 fragments, each 1345 mm long.
- The next stage is floor logs. For their construction, you will again need rolled products with a cross section of 60 × 40 mm and our scheme. Work strictly according to the drawing, because this intricate layout is not only the basis of the boarding, but also the support for the benches.
And now, in fact, a little about the shops themselves. Their installation should begin with jumpers, which must be positioned at a height of 400 mm. Then add center supports to them. And finally, focusing on them, fasten the side "geo-frames" to the racks. Details on the diagram.
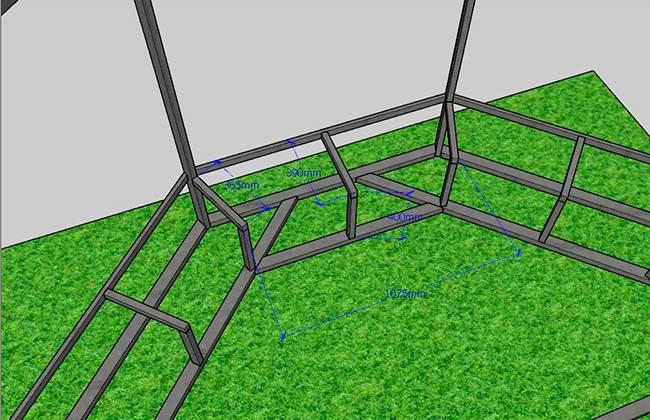
- Stepping back 225 mm above the plane of the bench, weld four rows of square pipe 20 × 20 mm between the posts, observing a 50 mm step between them. It is a multifunctional item. On the one hand, there is a plane for attaching the back boards, on the other, a stiffening strapping. The same as slanting.
- It's time to get to the roof. For her rafters, take a profile of 40 × 30 mm and a length of 2071 mm. If you are not sure that you will have enough experience to connect all the elements strictly at one point, start installation with one pair of straps, gradually adjusting other frame parts to it.
- The gazebo will not look without overhangs, and therefore you should take care of metal filly. A twenty-centimeter visor will be enough.
- And two more octagonal rings from the thirtieth profile and the twentieth square and with welding, we will assume that you figured it out.
- Now the most time consuming process. It is necessary to grind all welds and possible rust, open the structure first with a primer, and then with anti-corrosion paint. And remember, paint-primer will not be the best solution here.
- Woodwork should also be done from the bottom up. First, build a flooring from a fortieth board, after passing the lumber through a thickness gauge and opening it with paintwork. This way the tree will last much longer.
- Then sew the supports under the benches and their backs, not forgetting to leave small gaps between the boards.
- And finally, roofing works are being completed. If desired, the rafter skeleton can be covered with ordinary corrugated board or sheet metal without fuss. But soft tiles will look much more interesting there. But for its installation, it is necessary to prepare a base of OSB or plywood.
- And only then lay the modified bitumen. And this is how your pavilion will look like if you followed our instructions exactly.
Do you already have a place to meet guests? If not, roll up your sleeves and get to work.
What is important to know before starting work
As a starting material, you can use profile pipes, which can have a square or rectangular cross section. This material outperforms other types of rolled products, such as angles, rods and round pipes. The special shape of the cross-section provides the profile pipes with the ability to withstand high loads. The design of these products is durable and weighs little. The gazebo will be beautiful and attractive.
It is convenient to adjust the attachment points from either side, but this cannot be said about circular pipes. Profile pipes are universal. They can be used as load-bearing elements such as roof beams. The racks should be made of pipes of such a diameter so that the structure is strong and reliable. The rest of the elements can be made from smaller products, which will depend on their functional purpose.
Construction of a gazebo from a profile pipe step by step
The first step towards building a metal structure is choosing its type.It can be open, semi-closed or completely closed, with or without lighting. For this, a construction project is drawn up.
Design
The sketch can be sketched by hand, or entrusted with the development of a professional designer. At this stage, you should decide on the dimensions of the structure. The height of the structure should slightly exceed the average height of a person (180-200 cm), the width of the entrance opening should be no less the width of the front door (about 1 m).
a drawing indicating the actual dimensions of the building is needed in order to calculate the number of pipes for installing the frame, as well as other necessary building materials.
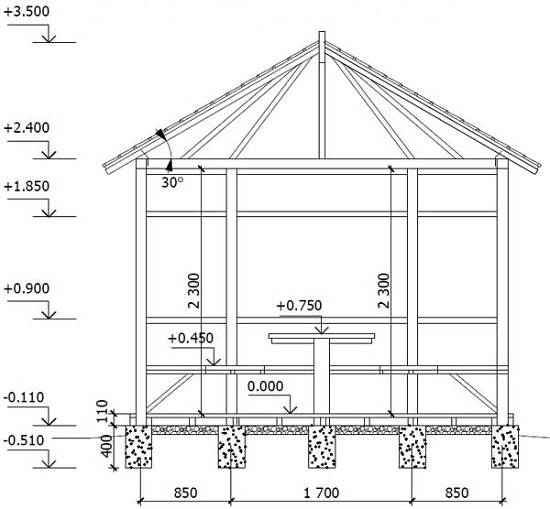
Detailed drawing of a metal gazebo
For the installation of an iron structure you will need:
- profile pipes with a cross section of 50x50mm and a wall thickness of 2-4 mm for the frame;
- iron rods or pipes with a section of 20x40 mm for the transverse elements of the sheathing;
- roof covering;
- electrodes, welding;
- grinder, drills for metal;
- screwdriver, self-tapping screws.
Preparatory work
Next, they begin to prepare a place for installing a metal gazebo. It can be a site near a reservoir, in the shade of trees, or near a house - the main thing is that it is picturesque and comfortable for relaxation. In the selected area, remove the top layer of soil (15-20 cm) and level the base. Since the metal gazebo is lightweight, a columnar foundation will be enough for it.
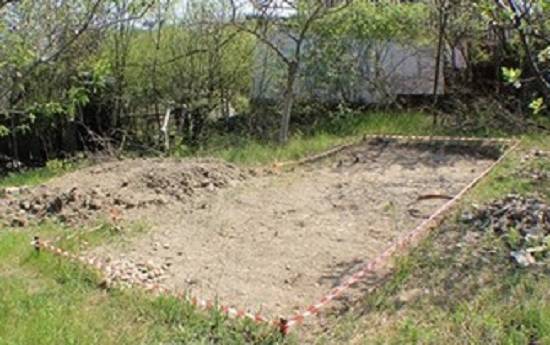
Preparation of the site for the gazebo
Next, they begin to install the columnar foundation - the base of the gazebo. To do this, holes are dug at the corners of the site with a depth of 50-70 cm, into which a layer of crushed stone (20 cm) is poured and the supporting profile pipes are poured with concrete.
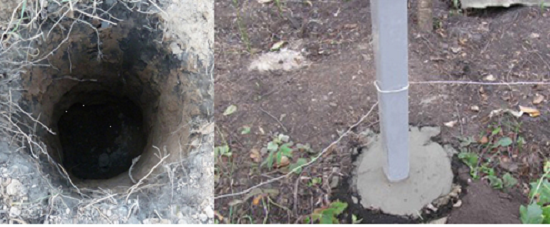
Preparation of the site for the gazebo
Attention: the evenness of the installation of the pillars must be checked with a level.
Formation of a metal frame
After installing the vertical metal racks, proceed to fastening the horizontal crossbars. To do this, you can use iron rods, or pipes of a smaller section. Metal elements can be connected to each other by welding, or using bolts and self-tapping screws. Transverse pipes for fencing the structure are installed at a height of 1-1.2 m. And the top of the support pillars is fastened using the upper strapping.
Please note: piping should be welded to each upright to ensure structural reliability.
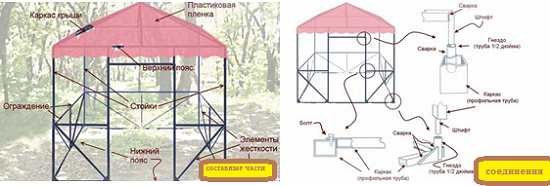
Methods for fastening elements of a gazebo made of metal, photo drawings
Next, proceed to the installation of the frame under the roof. So that precipitation does not linger on it, the transverse logs are fixed at an angle (30-45 degrees). For a gable roof, several support triangles are made, which are connected with a common profile along the upper point, and their bases are connected to the main frame of the gazebo.
Construction of the frame of a metal gazebo for a summer residence, photo
Advice: before installing the roofing, the metal frame should be primed and painted, since after the overlap it will be problematic to do this.
Roof
One of the simplest and most economical roofing options for a gazebo is polycarbonate. Cellular polycarbonate 8 mm thick is suitable for the roof of the gazebo. It is attached to special bolts with thermal washers. For this, polycarbonate sheets are cut to the required dimensions, and holes are drilled in the pipes for fasteners. The ends of the polycarbonate sheets can be closed with special strips - this will provide them with additional protection and give a more neat look. As a result, we get a rather cozy and inexpensive gazebo, which only remains to be equipped with benches or other furniture for a good rest.
Attention: when installing roofing, install it with a slight overhang.This will protect all structural elements from atmospheric influences. ... Do-it-yourself ready-made gazebo from a metal profile
Do-it-yourself ready-made gazebo from a metal profile
Metal gazebos in the country are a sign of the good taste of the owners of the site. They will be a harmonious addition to landscape design, a reliable and cozy place for outdoor recreation. These structures can be of different shapes and sizes. Metal combines well with other building materials, which allows even the most daring design ideas to be realized.
Dimensional Drawings
Before assembly, detailed sketches of structures should be made: the diagram (drawings, dimensions, detailing) will help to correctly calculate the amount of material. As a sample, you can use the gazebos that are commercially available in construction firms. Most often, these are options for an unconventional shape: arches and semi-arches, a pentagon, a trapezoid, etc. The construction of a simple 4-6-corner garden building of the classical type can also be taken as a basis.
When drawing up a drawing, it is important to determine the height inside the structure so that a person can stand erect. Benches in non-standard gazebos are often located near short walls or slopes of an arch.
There must be at least 1 m above the seats to the metal structures to prevent injury.
Do-it-yourself large gazebo made of wood
This large gazebo can be called a pavilion rather. Not a bad option if you have a large yard or enough space on the site. Not a bad project in the sense that in the future, under such a canopy, you can install a brazier or barbecue, or even organize a stationary summer kitchen. To build such a gazebo, you need a columnar foundation, but perhaps the most difficult part is the roof. To do this, the upper contour of the gazebo must be installed with horizontal ties. Then fix them with self-tapping screws to the supports.
For the reliability of the screed, it is necessary to fasten it with metal strips. Then secure all other parts. Finally, saw off the central support flush and lay the crate.
Please note that the lathing is made in different ways, depending on the roofing material, if under the slate, then it can be either single-layer or two-layer. But this is a separate topic.
The whole process of building a gazebo is shown in step-by-step photos, if you have any questions, the instructions are on the original site, the link is under the gallery.
Preparation for construction
Before starting construction, you need to transfer the dimensions of the gazebo to the site selected for the construction of the structure. If you need an option with a foundation, dig a pit of the desired shape and type:
- for columnar (pile) drilled recesses for piles: at the corners of the structure and on the entire floor area with a step of 50-70 cm;
- for tape along the perimeter of the building: depth - at least 70 cm, width - 30-40 cm;
- for slab, soil is chosen over the area of the entire floor of the gazebo and 15-20 cm beyond its perimeter.
Concrete is poured into the pit to the level of the soil and the main supports (angular and along the length of the walls) are strengthened in it. After that, a formwork is placed in order to raise the basement above the ground by 15-50 cm. After solidification, the surface is leveled, measuring the height differences between adjacent posts or along the upper plane of other types with a long building level.
While the foundation is gaining strength, you need to prepare the necessary tools:
- grinder;
- drill (for bolting);
- welding machine (if the connection of parts is welded);
- building level, square, tape measure.
Design features
When planning a gazebo from a profile, you should definitely decide on its design, which can be of two types:
- collapsible (that is, created with fasteners);
- capital (welded).
The first type is a frame assembled from shaped tubes with a canopy made of plastic or water-repellent fabrics. The advantages of this option are the simplicity and high speed of installation, for which neither special skills nor specialized tools are required.The process of erecting a gazebo rarely takes more than 2-3 hours, and when cold weather sets in, it is just as quickly removed. Other features of such structures include the lack of a foundation and the need to fasten the main assemblies with bolts and pins.
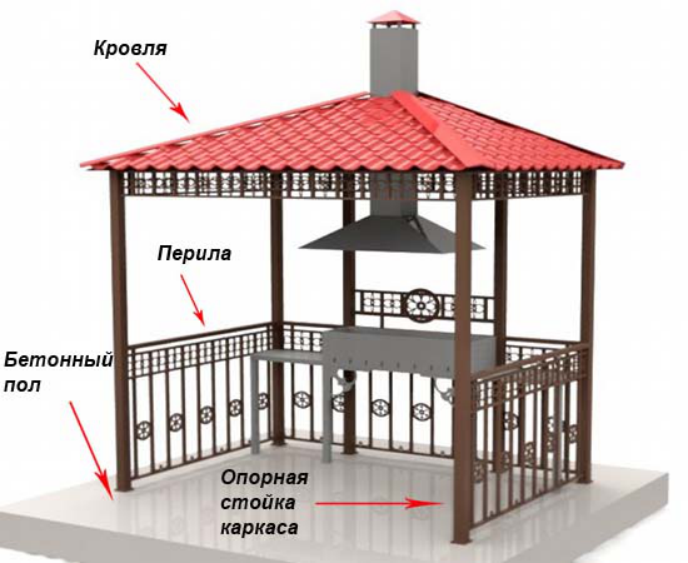
Non-collapsible options are built on the foundation. And their main advantages are durability and the ability to withstand serious loads. In this case, the frame is made of a metal profile, and other elements are made of brick, plastic or wood. A stationary gazebo can be open, semi-closed and closed - and the latter type makes it possible to place furniture and even household appliances inside. Electricity is supplied to such gazebos, thanks to which they practically play the role of summer kitchens.
Do-it-yourself open gazebo
It shows how to build an open gazebo with your own hands from wood. The design, as you can see, is solid. The main building material will be wooden beams, the volume, and the quantity will depend on the size of the structure, the author does not give figures, so you will have to select it yourself. The second required material is metal rods of two types, T-shaped and L-shaped. And you also need screws, very large screws, twice the thickness of the beams. Do not forget about the ladder, preferably a sturdy one, in this project it is the main tool. Concrete is another essential material for building your gazebo and will be used as the base and anchor for the entire structure.
After making the drawing, you can see what dimensions are needed for all the wooden parts. If you have tools, you can cut all the components yourself. This is the cheapest option. If you don't have the skills or tools, you need to find someone to do it ..
The first step is to build the base.
- Prepare the area and fill the slab of the desired size. If you want more strength, add metal reinforcement concrete.
- Next, install the wooden beams and metal supports into the concrete at a 90 degree angle.
- If there are gaps between the metal and wood parts of the supports, use tar and silicone to fill in and create a waterproof seal.
- Repeat this step for all supports. Typically four pillars are installed, but if you choose a different design, more pillars may be required.
- The next step is to place the wooden rungs on the supports, remember to measure all sides and make sure they are equal. Then secure them in place with the screws.
- The next step is to attach the side rails to the ones you installed on the posts.
- Then you need to make a triangular structure that will support the roof. The triangular shape of this part of the structure is designed to distribute weight down to the supports, which will be especially useful if you live in an area with high rainfall, especially snow.
- Use metal rods to hold the diagonal pieces securely in place. Pass the metal bar through the two pieces of wood to make sure they hold firmly in place.
- Now install the top bar where the roof will be attached. This may require the use of a rope or extra help to keep the pieces together.
- Now it's time to put in the roof supports to help support the weight. Place the support approximately every 55 cm. Fasten the supports securely with screws.
- Cover the roof with sheets of plywood, this layer must withstand a lot of weight, it must be fixed very securely.
- Then attach the waterproof layer. There are different types of roofs, you can choose whichever you prefer, but laminated tiles are a popular and effective choice.
Photo of metal gazebos
In general, the options for gazebos made of metal structures are very numerous: welding, forging, various materials with which the frames are finished. Profile pipe, round, made of steel and aluminum, there are even stainless steel options.All this is complemented by any shape: from a square and a rectangle to any complex shape. Metal is so plastic that there are a lot of variations. Some of them are collected in the photo gallery.
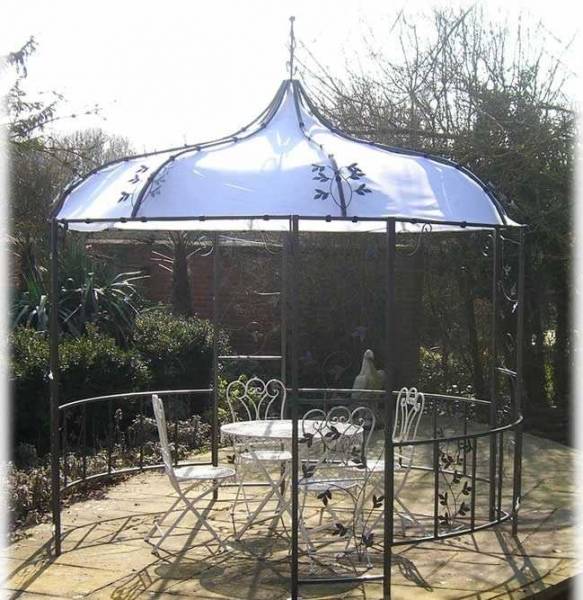
Unusually shaped roof and awning, which were visible decorative elements, stretched from the inside

A metal frame covered with an awning instead of a roof: there is a shadow, not hot and inexpensive

Unusual openwork made of thin pipes, painted white gives the structure lightness
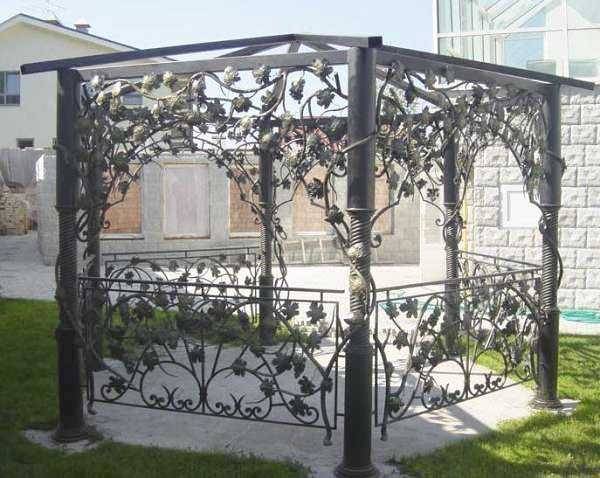
Very nice decor. This is not a metal gazebo, but a song in metal

Another option for a multifaceted gazebo
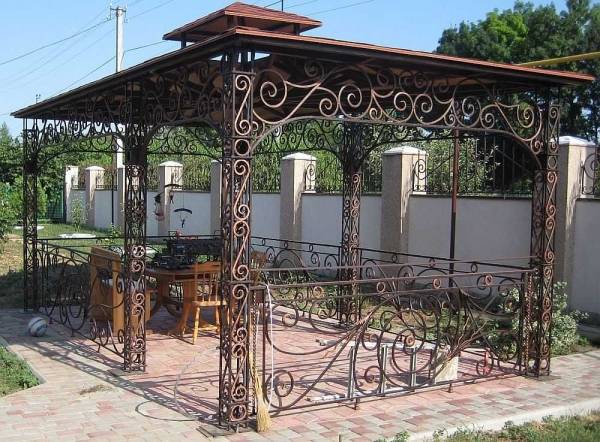
Artistic forging in the design of the racks - elegant and exclusive
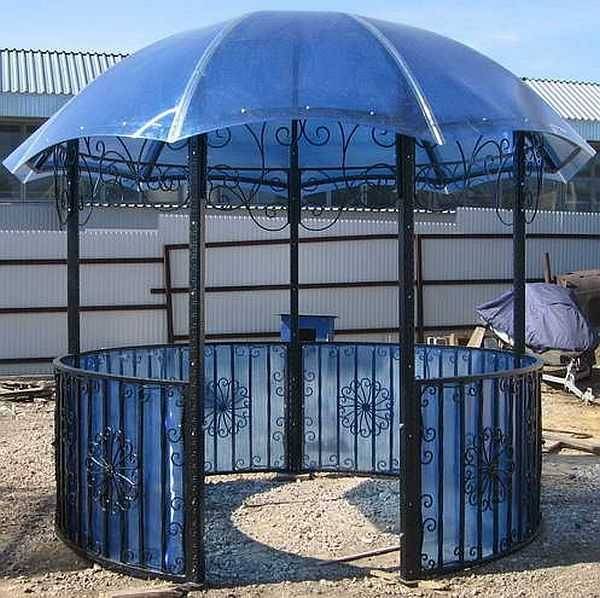
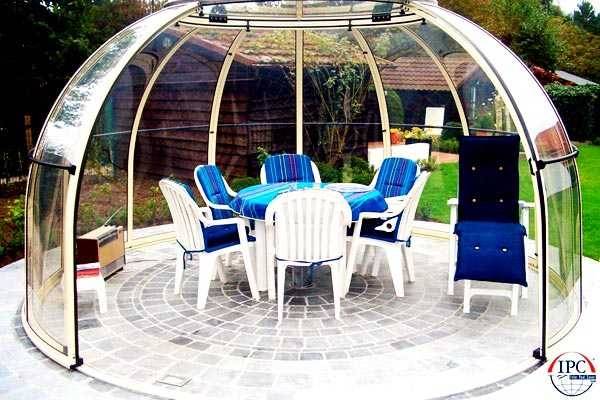
Round gazebo for summer cottages under blue polycarbonate - romantic
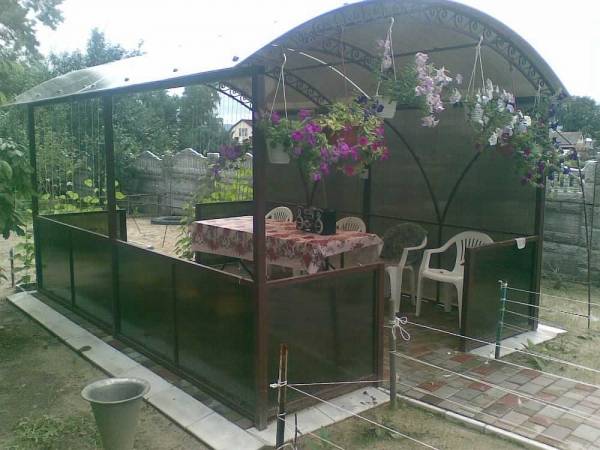
A simple solution for a summer residence: a square gazebo covered with beige polycarbonate
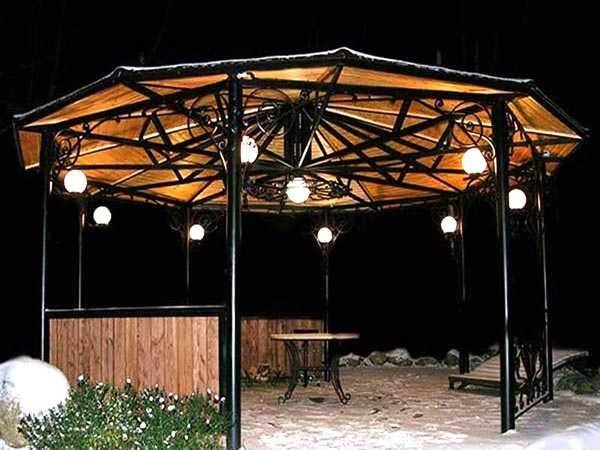
The rafter system can be beautiful
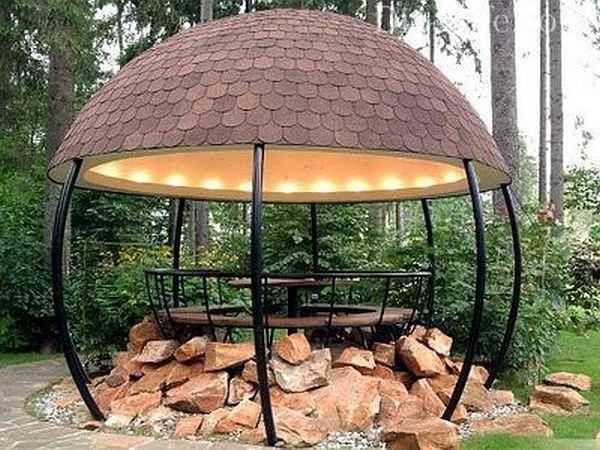
Unusual structure is a very interesting solution

You rarely see a metal gazebo made of round pipes. The welder is a master of his craft
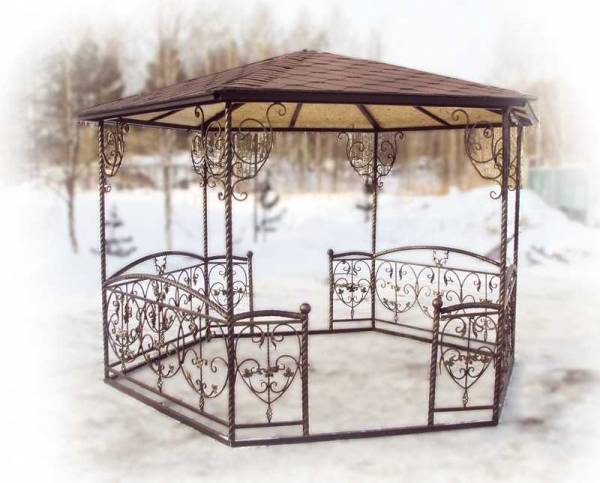
An openwork gazebo made of metal - a summer option for a summer residence or in the yard near the house
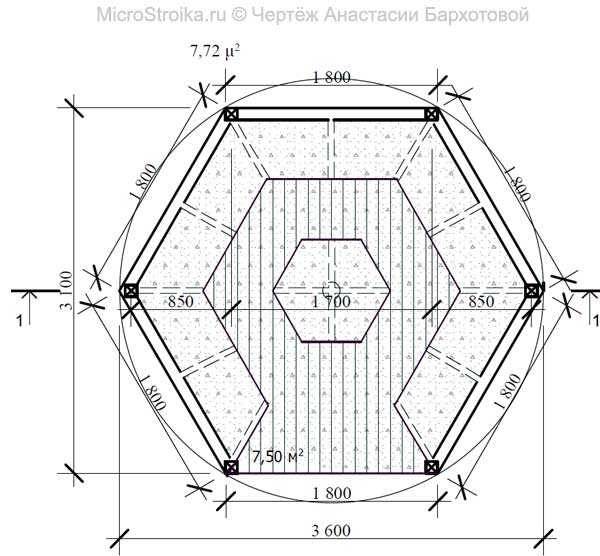
Drawing of a hexagonal arbor - top view

Drawing of a hexagonal arbor - frontal part
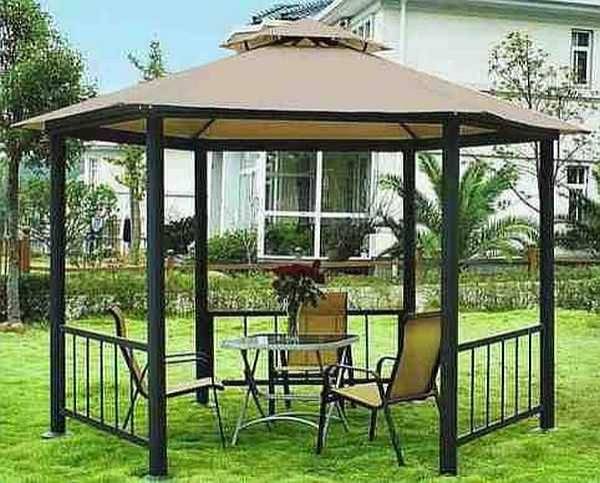
Iron hexagon open gazebo
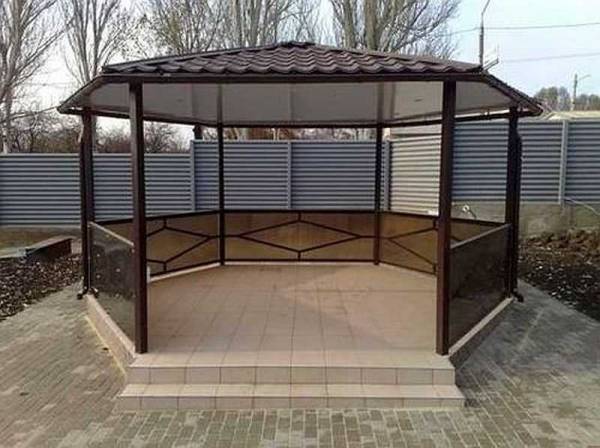
A sketch of a metal gazebo with polycarbonate finish.In the lower part, a figured finish of pipes, which are closed with dark translucent polycarbonate
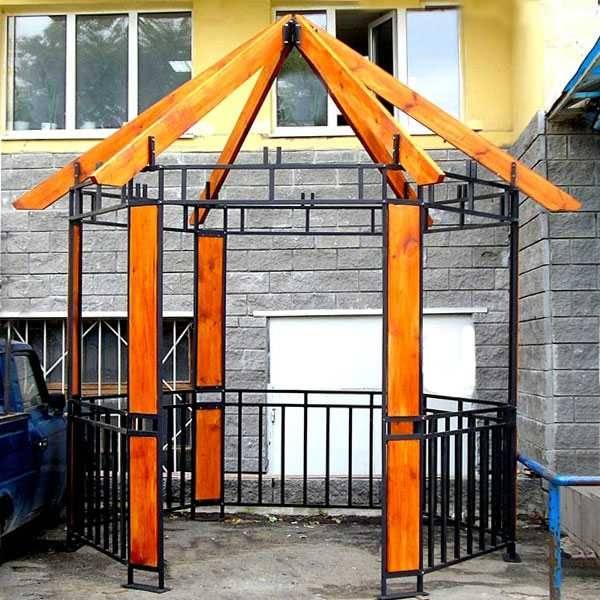
Photo of a hexagonal gazebo made of metal profile with partial wood trim
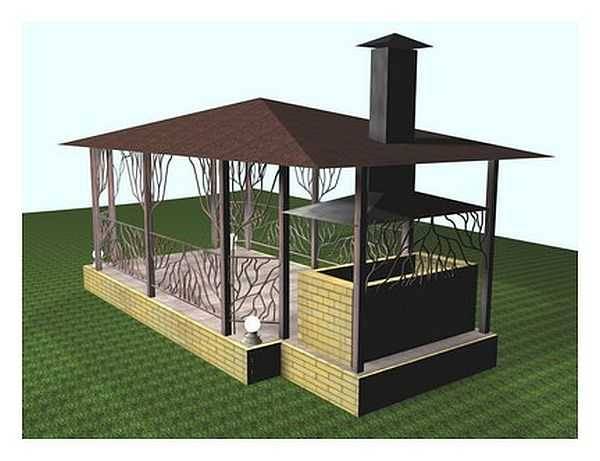
Broom gazebo with BBQ
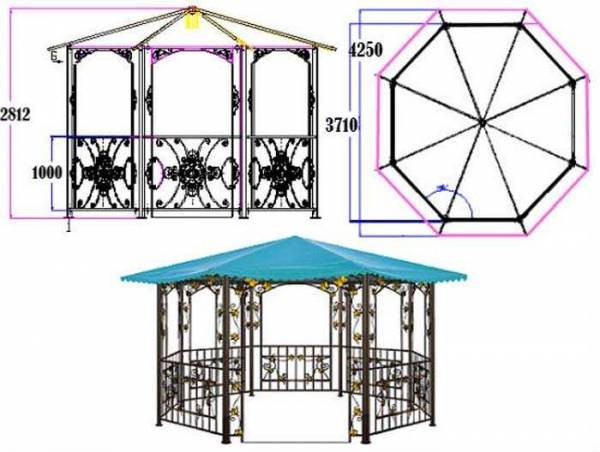
Drawing of an octagonal metal gazebo with dimensions
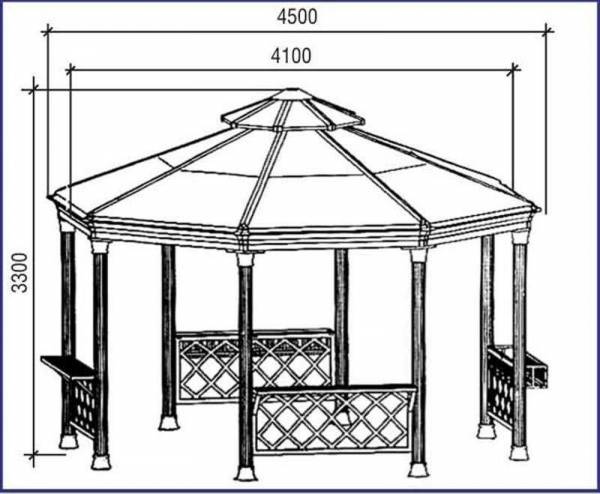
Sketch of an octagonal metal gazebo with dimensions
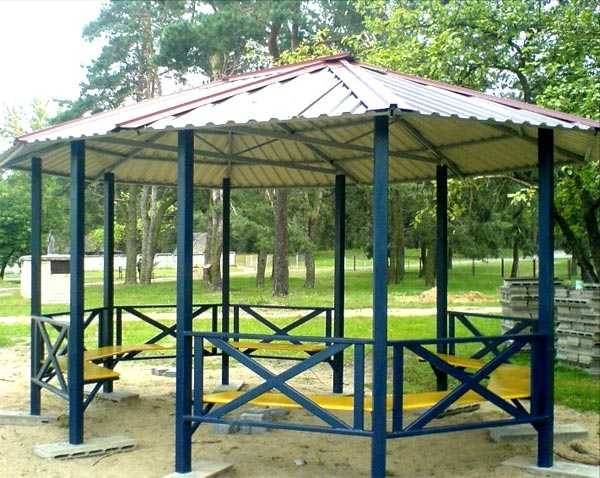
Octagonal metal gazebo
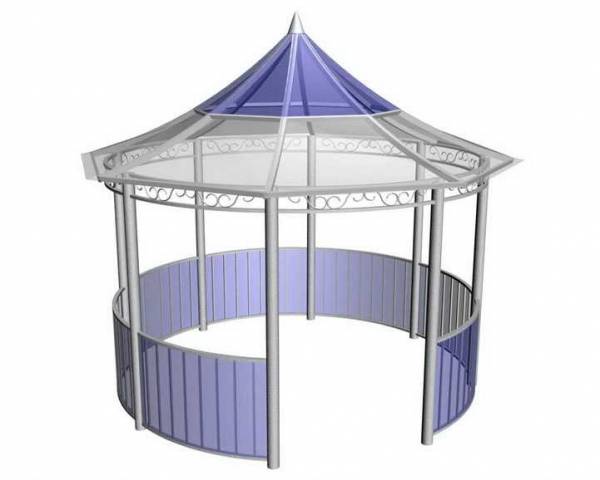
Round gazebo with metal frame and polycarbonate sheathing
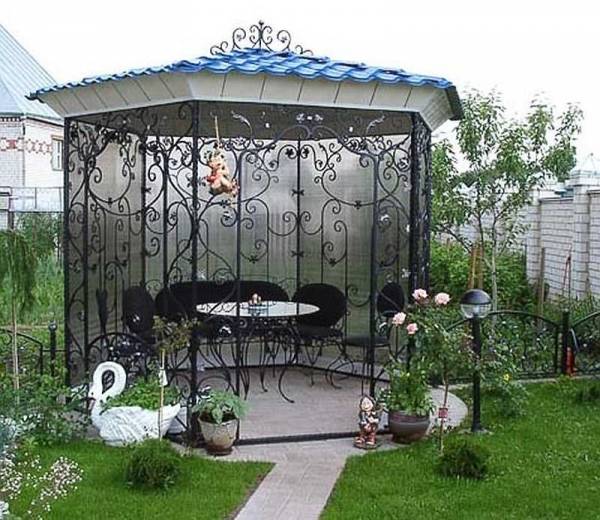
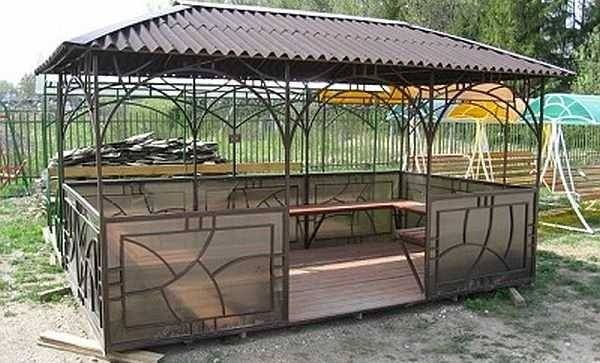
Metal frame combined with tinted polycarbonate sheathing

This is probably the simplest gazebo: two bent pipes that are attached to the backs of the garden benches. Polycarbonate is attached to the pipes. Summer garden gazebo is ready
How to cook a gazebo for a summer residence, see the video.
DIY garden gazebo
This project is, of course, more ambitious. To build a garden gazebo with your own hands, you do not have to be a high-class carpenter or a jack of all trades, although it would not hurt. All stages of construction are shown here.
- Work begins with marking. Remove the sod and about 10 cm of soil to ensure proper drainage and prevent grass and weeds from growing.
- Then cover the prepared area with gravel.
- Then set up the spot foundation molds and fill them halfway with concrete.
- Use a level to make sure the top of each shape is at the same height.
- In this case, the relief is slightly inclined, so the height of the molds for each hole is different.
- In the second photo you can see the device, the laser level, which was used for marking.
I will not describe all the details further, in the photographs everything is shown quite well, and detailed instructions can be read on the website, the link is under the gallery.
Construction of a gazebo
The first stage in erecting a gazebo from a profile with your own hands is the construction of a foundation - usually a pile or columnar one. To do this, first dig holes for the support posts, install the structures themselves, fill in the recesses stones or chipped bricks and poured with cement-sand mortar.

The next stage is the device of a metal frame, which is attached to the supports and placed in such a way as not to interfere with the passage to the gazebo - that is, above the level of human growth in the area of the door. This moment should be taken into account even at the stage of drawing up the drawing.

When creating a structure cladding, polymeric materials are most often used. And the roof is installed on a metal profile lathing.The simplest design for self-made gazebo is the classic gable roof, easily installed on any frame.
Finishing work with the arrangement of the gazebo. After that, the stylish and durable design will be an excellent decoration for the garden or country landscape. And it will provide an additional place where you can relax, chat and even cook food, if the design provides for combining with a barbecue area or installing a stove right inside the gazebo.
How to care for a metal gazebo?
In order for a gazebo made of a professional pipe to serve as long as possible, without losing its attractiveness and original qualities, it must be properly looked after. As noted earlier, after the completion of construction, but before proceeding directly to operation, all metal elements must be covered with a special anti-corrosion primer, and then painted with a protective paint (the latter will protect not only from rusting, but also from the negative effects of moisture)
It is also important that the protective cover is renewed approximately every 4-5 years. As with any other structure, be sure to make sure that no precipitation accumulates on the roof of the gazebo.
That's all - the metal profile structure does not require any other processing or washing. You can only do periodic watering with a hose in order to remove accumulated dirt.
That's all, now you know what a gazebo made from a profile pipe is, what are its pros, cons, varieties. In addition, you have read the step-by-step instructions for making a structure with your own hands. We hope you have found answers to all your questions here. Good luck with your work and warm winters!
