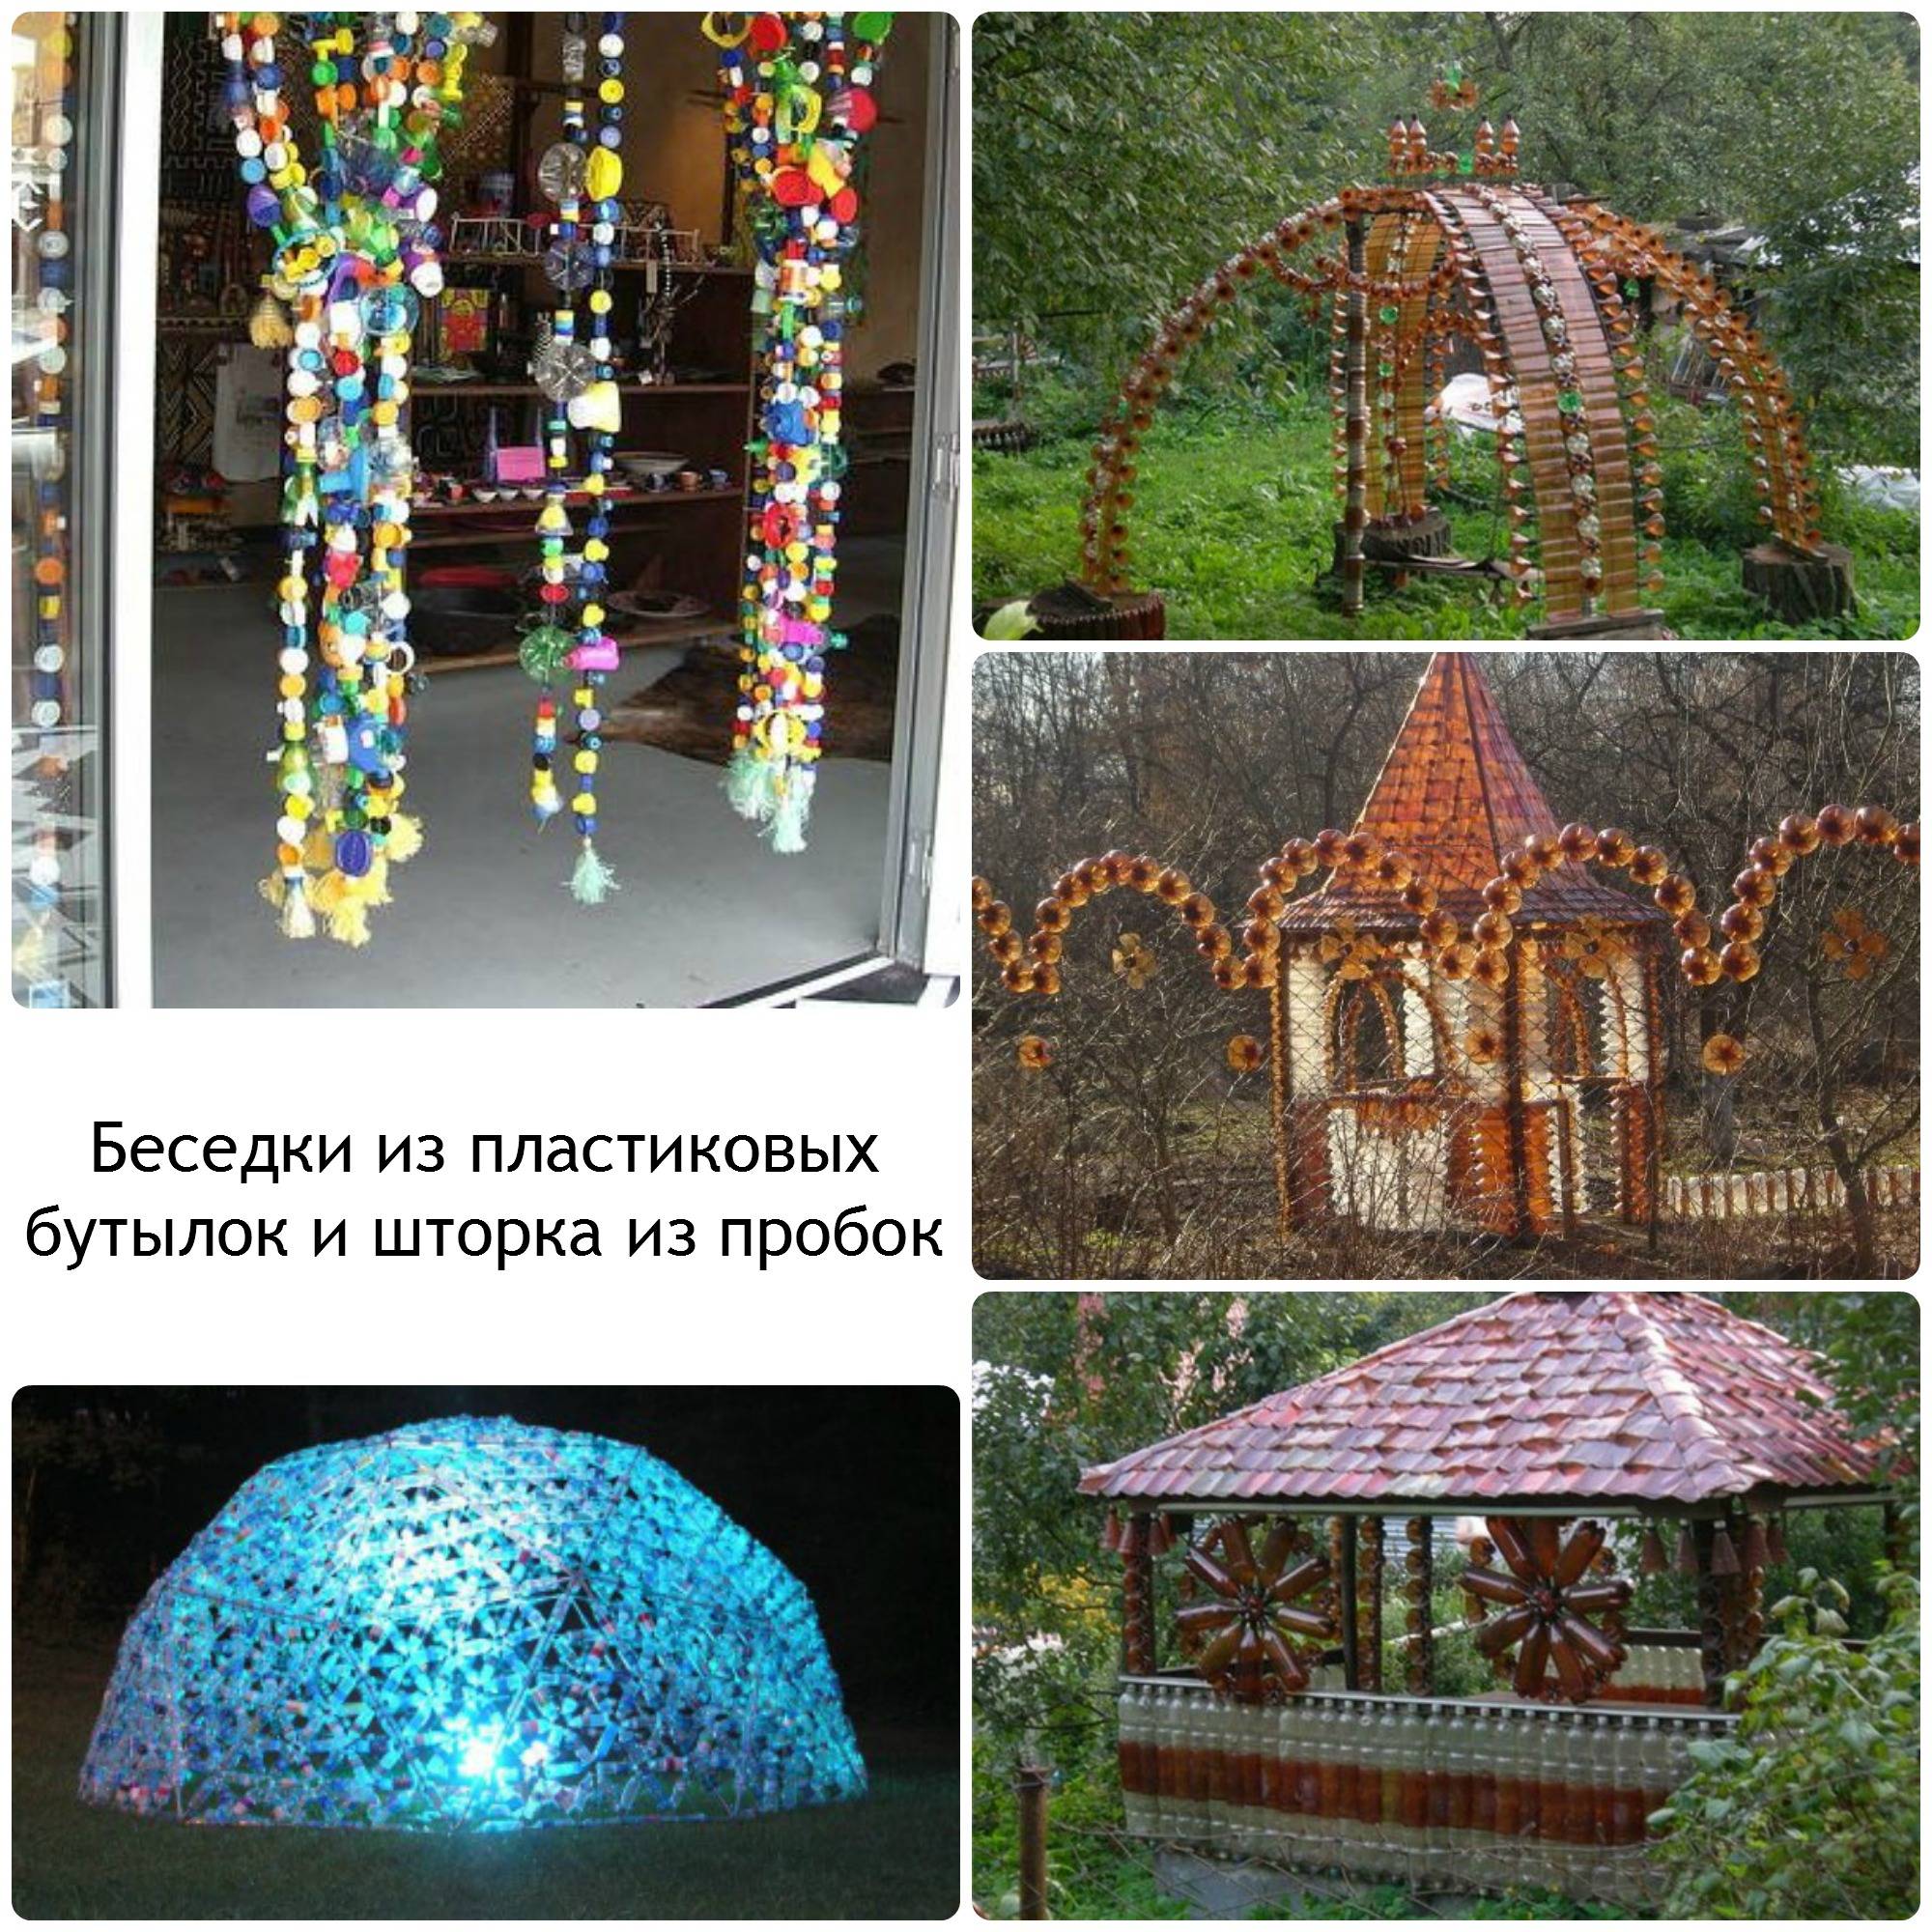
Construction from empty containers and wire
For the construction of an open gazebo made of plastic you will need:
- a certain number of bottles (we will indicate the necessary calculations below);
- wire;
- rebar and wire trimming;
- sand, well-aimed pebble;
- wooden beam for the frame and supports;
- plywood sheet;
- small nails;
- metal profile and pipes;
- large sharp scissors.
Instruments:
- hacksaw for metal and wood;
- pliers;
- screwdriver and self-tapping screws;
- shovel;
- plumb line;
- furniture stapler.
Even for such a simple structure, you will need a drawing.
Foundation and frame
For the construction of a small open gazebo, we need 4 wooden beams with a section of 100x100 mm. The height of two supports will be approximately 2 m, the other two - 2.15–2.20 m (for further installation of a pitched roof).
Please note that before starting work, all wooden parts are carefully treated with an anti-rot and insect agent. You will need some wooden beams
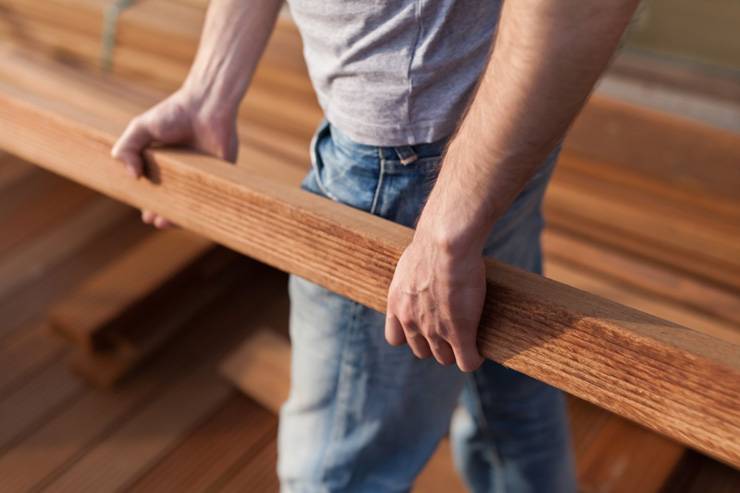 You will need some wooden beams
After clearing and leveling the place, we start construction from the foundation. The stages of foundation construction will be as follows:
- We outline the places where the supports will be placed.
- We dig holes 80–100 cm deep.
- We insert supports into them, strengthen them with broken stone or construction debris, check the vertical with a plumb line and fill them with cement mortar.
- After installing the supporting structures, further work can be performed in 2-3 days, allowing the solution to solidify completely.
Let's move on to making the frame:
- We begin to carry out the frame with the lower strapping of wooden beams installed in the foundation of the supports. For this, a thinner material with a section of 50x50 mm is used. Fastening is done with self-tapping screws.
- Then, at a height of 1 m, we perform the same operation (we make the upper strapping).
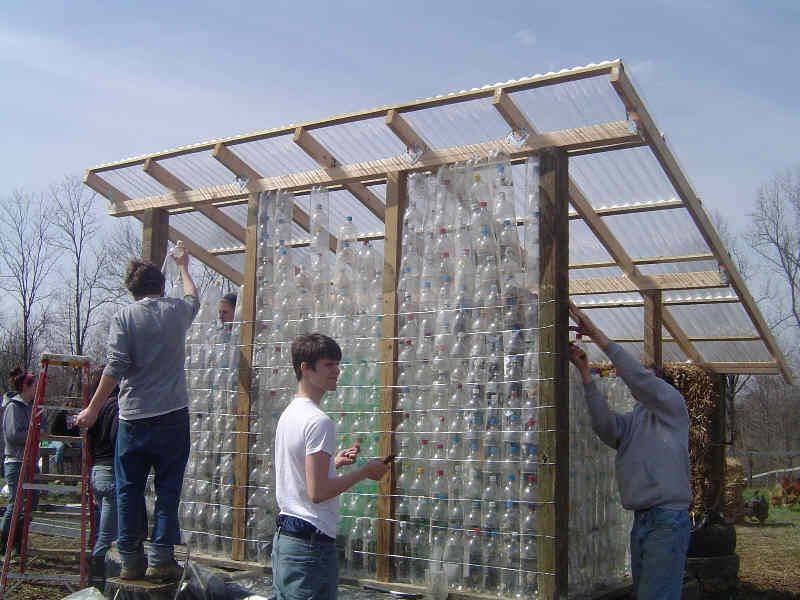
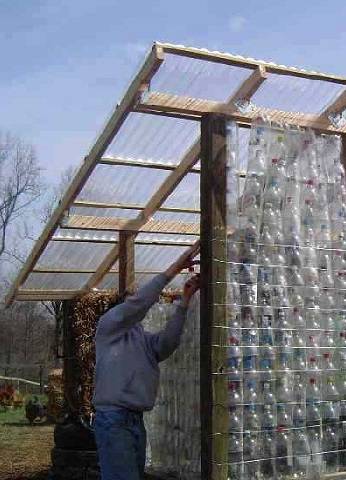
Vertical mount
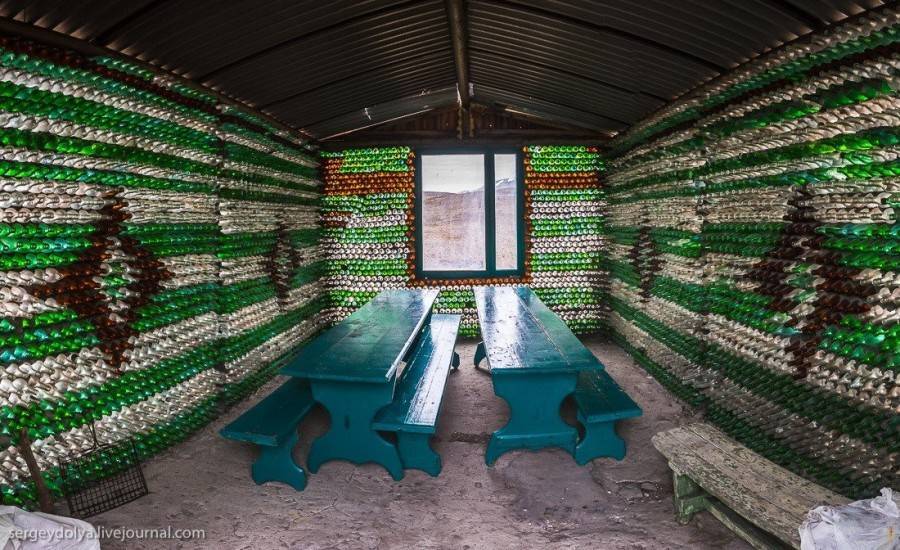
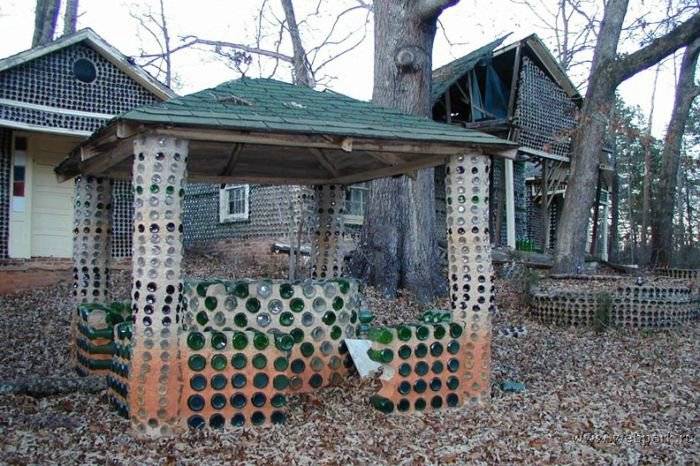
When using the vertical mount, the bottles will be pushed upright, one on top of the other. An approximate calculation of the number of containers per 1 sq. m is equal to 40 bottles with a capacity of 1.5 liters.
We will describe all the actions step by step:
- In each empty container without a lid, cut off the bottom with scissors (cut off 5–6 cm from the beginning of the bottom).
- We put the cut off part of the bottle on the neck of the previous one, "fasten" them as tightly as possible with a twisting movement (for reliability, the junction can be wrapped with tape).
- Putting 3-4 bottles on top of each other, we get the desired height.
- We pass the wire through them passing through the necks.
- The resulting "column" of the wall with the help of wire is fixed to the lower and upper frame strapping.
- We repeat all actions many times until all the walls of the gazebo are covered with bottles.
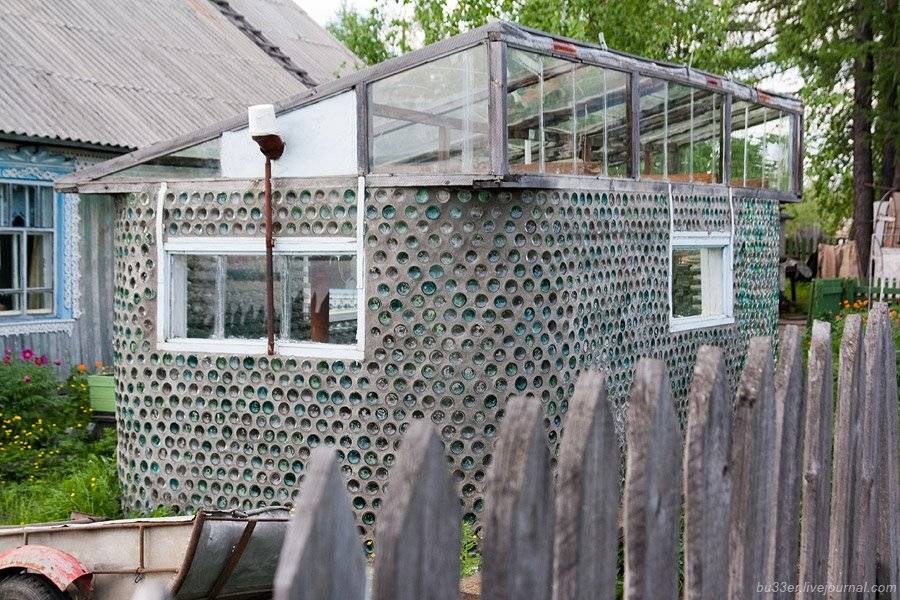
When creating a more complex structure using windows, we recommend that you additionally use wall panels (wooden frames). Elements of walls, frames for windows are initially attached to them. Subsequently, the finished structure is fixed to the frame with self-tapping screws.
The lower part of the structure is ready, we proceed to the construction of the roof.
Roof
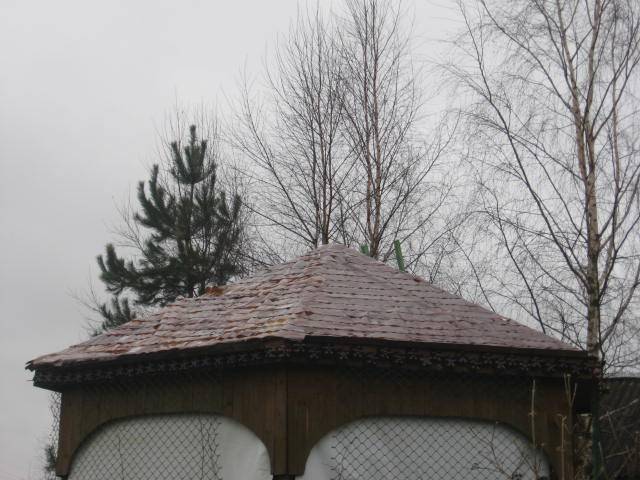
On a light structure, a light roof should also be present. A sheet of plywood is fine. We cut it according to the original dimensions and fasten it with self-tapping screws to four racks. It turned out to be a wonderful lean-to roof. For safety from rain and an aesthetic appearance, tiles are needed.
It is easy to make it from the same source material:
- We cut off the bottom and neck of the bottles with scissors.
- Cut the resulting cylinder lengthwise. Find the middle of the rectangle, draw a line and cut again. As a result, we get two tiles from one cylinder.
- We spread the plastic rectangles on the edge of the plywood roof and lay the first row around the perimeter using a stapler or small nails. At the same time, do not forget to alternate the concave side of the rectangle with the convex side.
- The second and subsequent rows are overlapped, slightly overlapping the previous row of tiles.
We have detailed the procedure, but we will make a reservation that it is easier and more convenient to first lay the tiles on a sheet of plywood on the ground. After fixing it ready-made on the pillars of the base.
 We also make the roof from bottles.
Where to get the material
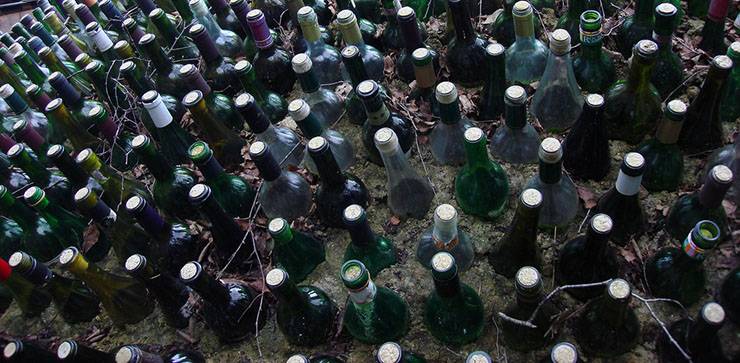
It would be logical to assume that for the construction of such a structure, a large number of bottles will be required and not everyone, even the most avid drink lover, is able to accumulate the volume of empty containers necessary for construction.
In order to speed up the process of collecting building materials, you can contact any outdoor cafe. In high season and good weather, you can collect the required amount of plastic in a couple of days.
It is best to agree with the administration of the establishment and redeem the used container at a mutually beneficial cost. After drinking the contents, the bottles are usually sent by the owners of the cafe for disposal and you will have to pay only to collect the used containers in special bags.
This is interesting: How and how to paint a gazebo made of wood - we reveal all the nuances
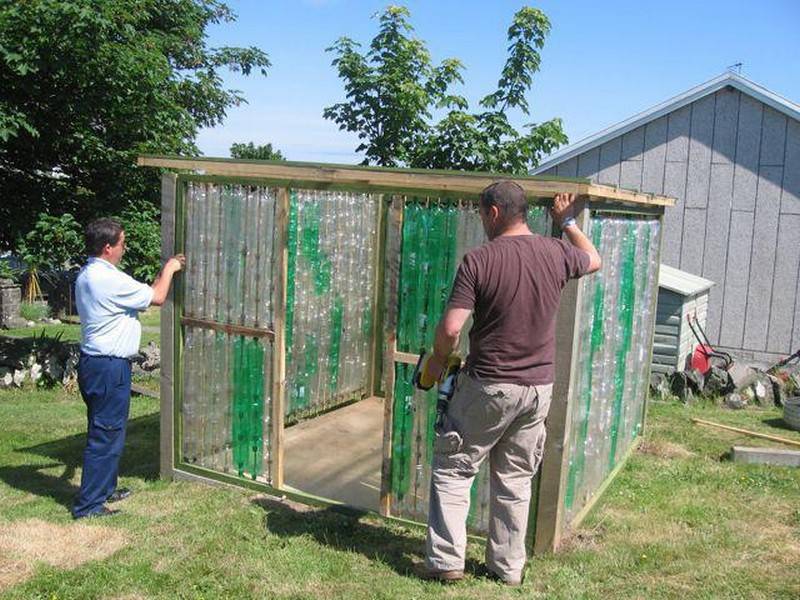
Preparatory stage
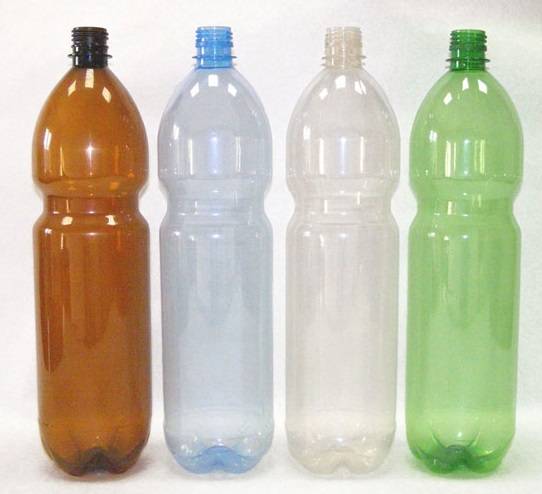
The frame of the future structure is best made from a wooden bar; plastic bottles can be used for the walls. But first you will have to collect material for a long time. For a garden building, 1.5 and 2 liter bottles are suitable, from which labels are previously removed.
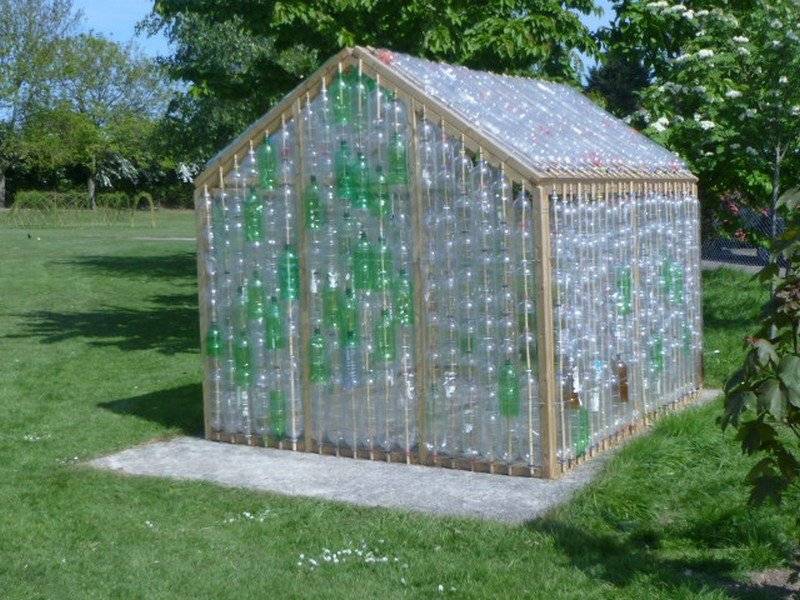
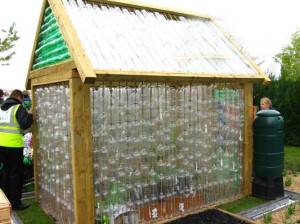
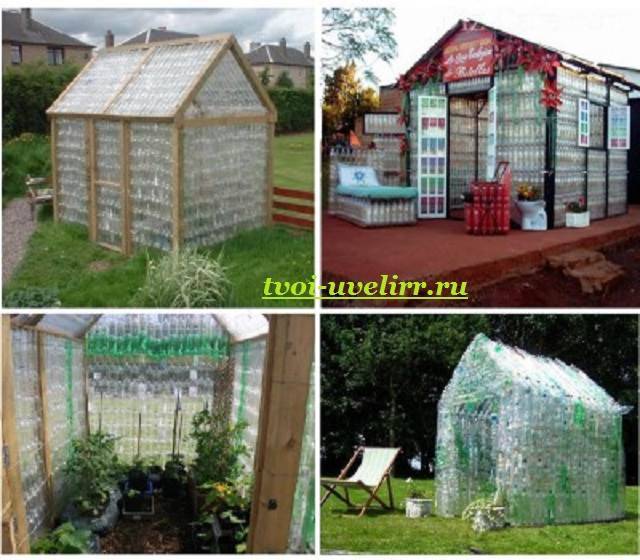
The plastic structure can be made in two ways - in the form of a house and a classic gazebo with a roof.
Preparation for construction includes the following stages:
- Clearing a place for a building.
- The ground should be leveled and sand should be poured.
- Establish supports for the foundation. These can be pieces of metal pipe or beams.
After installing the supports, you can proceed to the construction of the plastic structure. Arranging the foundation will increase the cost of the building, but will additionally strengthen it and allow you to make the floor. This is necessary if the soil is too wet.
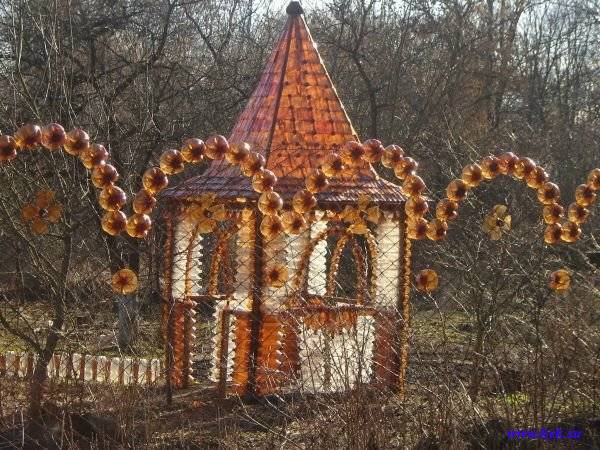
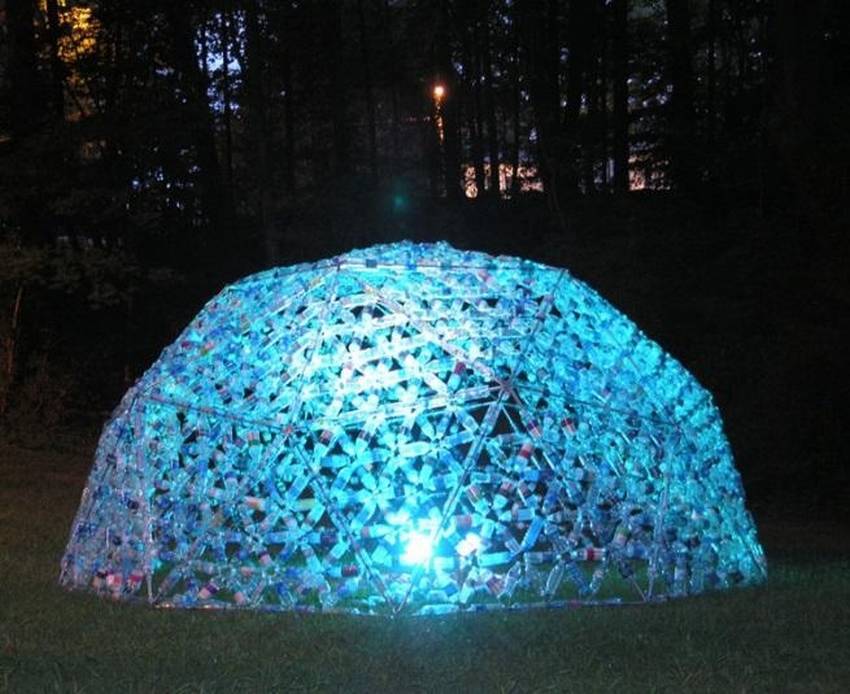
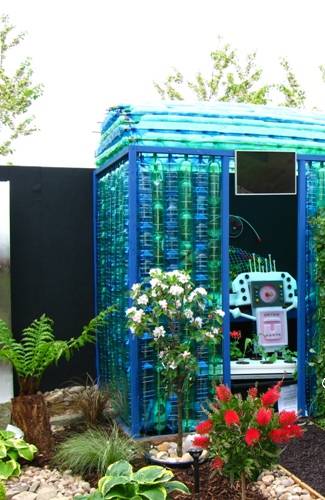
The use of multi-colored bottles will allow you to get a unique design.
Methods for making flowers
The most common plastic bottle crafts are garden figurines and flowers. Read about garden figurines here. There are also other interesting ideas, but many interesting animals and insects have been collected. And we will tell you about flowers from plastic bottles below - these are probably those crafts from plastic bottles that give the most pleasure. The process is simple, there are a lot of possibilities, the result is amazing.
You've probably noticed that the bottom of a PET bottle looks like a flower. All you need to do is find a bottle of a beautiful color, cut off the bottom of it. Now you have already got a pretty flower. In the middle, you can add petals cut from the central part, a core made of a strip of plastic cut into noodles, or glue beads inside, but about everything in a little more detail.
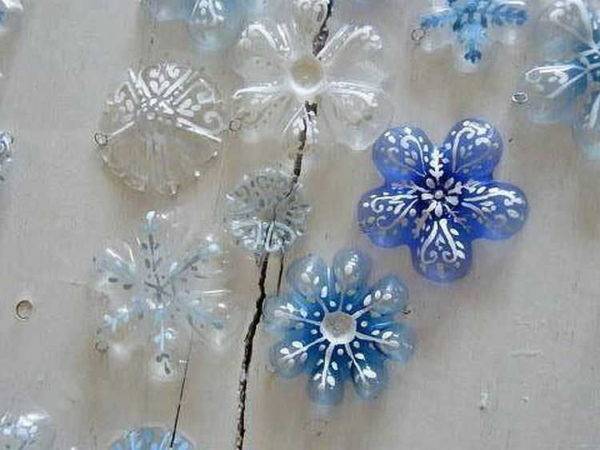
If you paint the cut-off bottoms, you get flowers that are magical in their beauty.
Using the power of fire
For work, you will need a marker, a lighter or a candle (it is more convenient with a candle). If available, use a pair of pliers, tweezers or pliers to hold the workpieces while processing. You will also need acrylic paints, you may need glue and beads. The entire manufacturing process boils down to several steps:
We take a bottle, draw the outline of a flower on it with a marker. You can draw on any part. It's just that the petals will be curved to varying degrees.
Cut along the contour.
We light a candle and gently heat the petals
It is important to capture the moment and not melt the plastic. Heat the edges a little more so that they melt a little, forming a more natural edge of the petal.
With the help of an awl heated on a fire, we make holes in the middle of the resulting petals.
We paint with acrylic paints
The flowers will be opaque. There are also paints for glass (for stained-glass windows), but they are expensive, although it turns out beautifully.
When the paint is dry, you can collect the flower by aligning the holes in the center, expanding the petals as you like. You can fasten them with a thread or thin wire with a threaded button or a large bead. A button or bead is the core. You can combine the petals and fasten with a drop of glue, and arrange the core with a strip of the same plastic (or a different color) cut into noodles.
The stem can be made of green wire, or you can wrap any wire with a strip of green plastic (in a spiral) heated on a fire candle.
There are a lot of options here. Just start doing. Immediately, it may not work out perfectly, but you will understand what and how you can fix it. Look at a few more pictures with step-by-step photos of the process of making flowers from plastic bottles.
The most simple
For novice craftsmen, you can try making flowers from simple shapes of plastic bottles to decorate the garden. In this case, you can also use milk containers. To avoid staining plastic, look for colored
And it is not so important whether they will be transparent or not. They can be combined to produce flowers of different shapes.

Cut out the petals from the part near the neck
To create such colors, use the part near the neck. It is cut to form petals. Next - warm it up a little, giving the desired bend to the petals, a little paint, a core made of a melted piece with a thread (a bottle of a smaller diameter, a pharmacy will do too). So it turned out a buttercup.
Another option is to cut from the neck into strips of equal width - 1-1.5 cm, bend them (warming up a little at the base). Make the middle whisk from the side of the milk bottle or paint the clear plastic with acrylic paint.
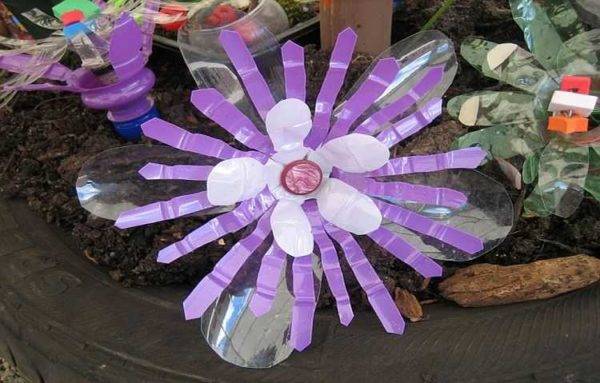
It's even easier - cut into strips for the outer whisk, make the middle out of white plastic milk bottle
The middle is any bright one. Here is a piece of cork, but you can cut it into thin noodles, roll it up and then heat it. You will get a shaggy core.
The topic is actually inexhaustible. Flowers from plastic bottles are made very different. From simple and uncomplicated to very realistic. It's not so much about skill as about different tastes and desires.
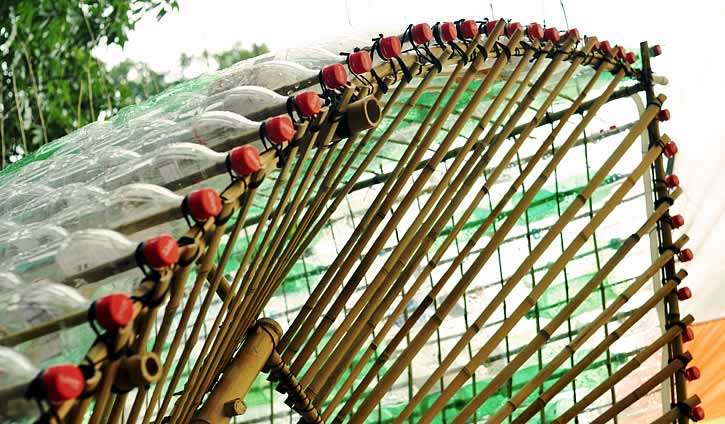
Roof fabrication and installation
The roof can also be made from bottles. The bottoms and necks are cut off from them. The resulting ring is cut in half.
But the pieces of plastic must first be straightened out. They are dipped in hot water and then put under pressure for a couple of days. A kind of plastic tile is suitable for roof installation.
Finished roof elements are laid, starting from the edges and up, overlapping. Plastic is attached to the wooden crate with self-tapping screws. Rubber gaskets will help prevent damage to homemade plastic tiles.
The method of laying the last, topmost layer depends on the shape of the roof. For sloping roofs, the final layer of shingles is fixed so that the upper elements are found on the wall to protect all joints.
With a gable or hipped roof, the joints of adjacent parts are closed, fixing them at both ends of the roof.
Bottle roof. Lightweight and durable roof.
Installation of walls
Having decided what kind (vertical or horizontal) the construction of the bottles will be, you can start assembling.
In the event that the gazebo is built by stacking plastic bottles, then all that is required is the stitching of such a laying with wire and adhesion with an adhesive mass. Clay with sand works well. This will make the structure heavier and limit its swaying in gusts of wind.
This construction method is the simplest and does not require special knowledge.
It is important to take into account that no more than three rows of bottles should be stacked in one pass - it is necessary to wait until the previous layer of adhesion hardens
A do-it-yourself gazebo with vertical or horizontal stacking in the form of "logs" differs in terms of installation technology from conventional stacking. In this case, the "logs" are sewn onto the frame beams or they are fastened with a wire.
Sealing the walls in this method is achieved only by tightly tightening the "logs" together, without the use of additional materials and mixtures.
Construction stages
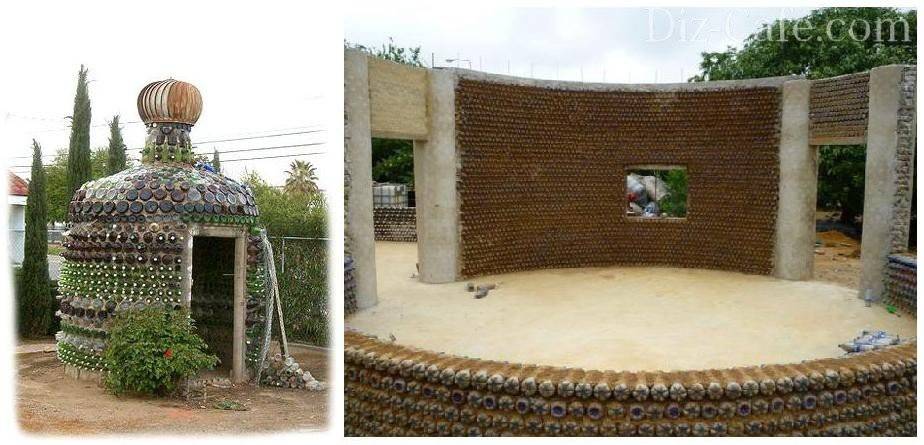
First, you need to decide whether the future construction will be made on a foundation or without it.
- The first option is resorted to if you plan to make a massive and closed structure.
- The second method is applicable for organizing a light canopy gazebo.
To create a more comfortable atmosphere and the absence of the likelihood of new grass appearing, you can cover the prepared area with pebbles, or, on the contrary, cover it with special layers of turf.
Then, depending on the project that you have chosen for yourself, you need to start installing a metal, wood or PVC frame. Alternatively, you can use a stone, although it works worst with such an airy and light material as a bottle. It is quite difficult to lay it with your own hands, but if you have experience, then this material will also work.
After the frame is ready, it is important to draw a plan according to which you will lay the bottles, because they come in different colors, so you can make a kind of mosaic. Then you need wire
With its help, we fasten the bottles together and fasten them to the frame. They can be positioned both horizontally and vertically.
Step-by-step instructions for installing the structure
For most PVC gazebos, a full foundation is not required. Here it is enough to simply get rid of the sod and make an embankment of gravel, rubble and lay it out with stones or tiles - this will give the building a neatness and prevent the germination of grass in the future, this will also provide comfort. To further limit the germination of grass, you can use an ash backfill before covering the floor.
First, design drawings are developed, and after purchasing tools, they begin cutting and assembling the frame, applying step-by-step material:
- First, markings are carried out to install the supports. They are made in the amount of at least four - at each corner. They give the necessary rigidity and stability to the structure.
- Pits are dug under the risers, from 20 cm. The deeper the support is installed, the better the gazebo will withstand the elements. A loosely fixed gazebo can be damaged even if you lean on it, so it is worth digging in the risers with high quality.
- Pieces of metal tubes are placed in the pits, plastic ones will be inserted into them, their size depends on this. Alternatively, fittings can be used. Then the plastic pipes will be pushed onto it. Digging in the frame retains its strength, eliminates incidents associated with the fall of the gazebo from gusts of wind.
- After fastening, you can begin to make the strapping. In the process, it is better not to rush, because mistakes can lead to the fact that the gazebo is sideways or tilted. The upper parts of the frame are connected to each other and to the risers with fittings. Use triple do or corner. They are chosen depending on the project.
Such a frame has an average resistance to weather conditions, therefore, in order for the structure to withstand gusts of wind, sufficient attention must be paid to the fasteners.
Wall decoration
Walls can be made of plastic sheeting, and polycarbonate is also common.A tarp or curtains are also good solutions. To sew loops to the canvas use:
- construction stapler;
- awl;
- a thread.
The fabric for such a canopy must be waterproof so that the rain does not cause inconvenience. The curtains can even be hung over the sheeting to provide shade and coolness in hot weather.
The polycarbonate profile is attached to the finished frame; for this, a sealant, thermal nuts, or both are used. Such a structure is more difficult to disassemble, but it is less sensitive to the weather. Polycarbonate comes in a variety of colors, and is also frost and mechanical damage resistant.
Roof and flooring

The fittings used in the piping allow you to design any roof design. The easiest option is a gable roof.
Advice! To prevent the roof from leaking during rain, you need to ensure the integrity of the material during the installation phase.
If film is used, there should be no punctures on it. In the process of upper strapping, tees are attached to the pipes at an angle of 45 °. Then the rafters are inserted.
A roof is laid on top of such a frame. It is preferable to build a roof at an angle in any case. This allows the water to drain freely and maintains its tightness under certain conditions.
Plastic is a modern material, practical, inexpensive and lightweight. It is suitable even for complex structures. So, from ordinary water pipes, you can make an inexpensive and full-fledged resting place, which can even be disassembled if necessary. Plastic has its drawbacks, but with a limited budget, building PVC pipes with your own hands is a good option. Such gazebos made of polycarbonate easy to clean - just use soapy water and wipe with a damp sponge.
Gazebo construction technology
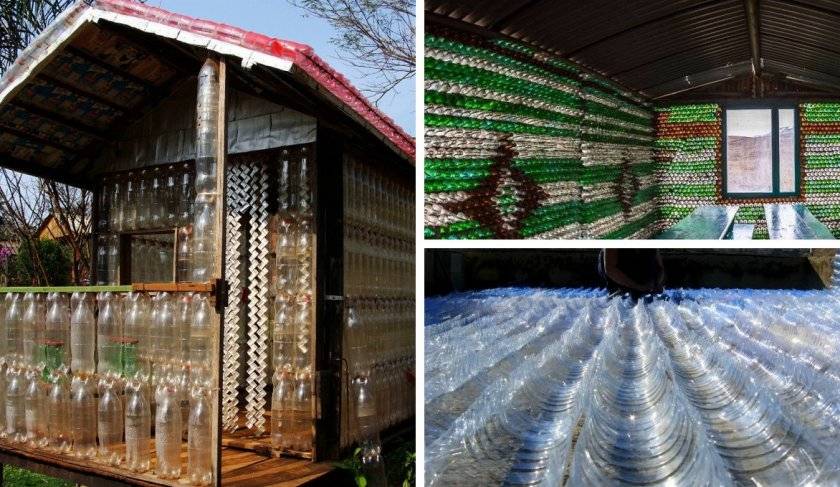
 If you are building a gazebo for a long time, then the frame for it must be done, for this they use a wooden bar. Your gazebo can have any shape: square, rectangular, six - or octagonal, in accordance with the selected shape, the frame is also mounted, which is connected by the lower and upper straps. The walls of the gazebo are assembled from the bottles, and they can also be used as roofing material.
The roof rafter system is also made of wooden bars, and the lathing for the roofing material can be made of thinner slats. The frame racks can simply be dug into the ground at a level below the soil freezing line, or you can still make a columnar or strip foundation.
The bottles, from which the fence of the gazebo will be made, are pre-washed from the labels and sorted by shape and color.
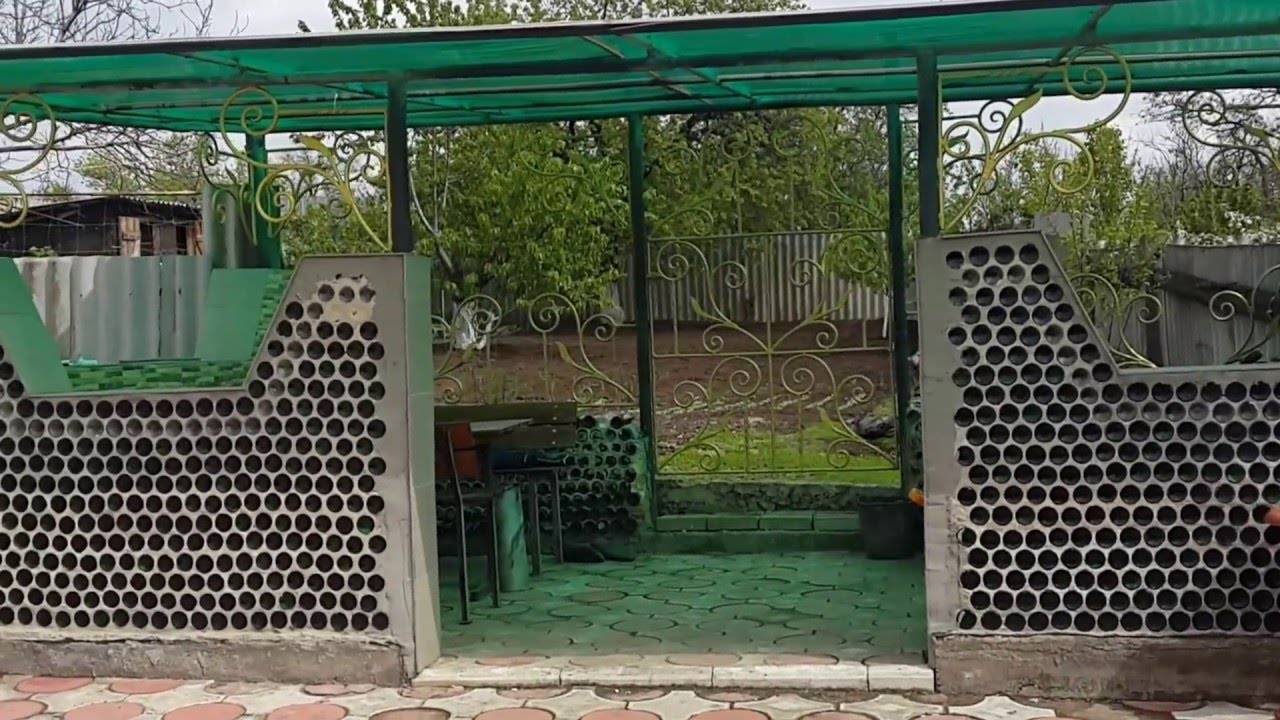
- If you want to arrange a light fence, then empty bottles in the form of a certain ornament are put on steel wire, which is fixed between the support posts of the gazebo. Bottles on a wire can be fastened bottom to bottom and cork to cork. There is already full scope for your imagination: you can collect bottles of different sizes and colors in fancy patterns.
- The second variant of the bottle fencing device will require the installation of additional wooden strips in the form of racks, on which these bottles are installed tightly to one another and attached to the glue. If you want the fence to be heavy, pour clean, dry river sand into the bottles. Accordingly, the boards for the "shelving" should be of such a cross-section to withstand the weight of the bottles with sand.
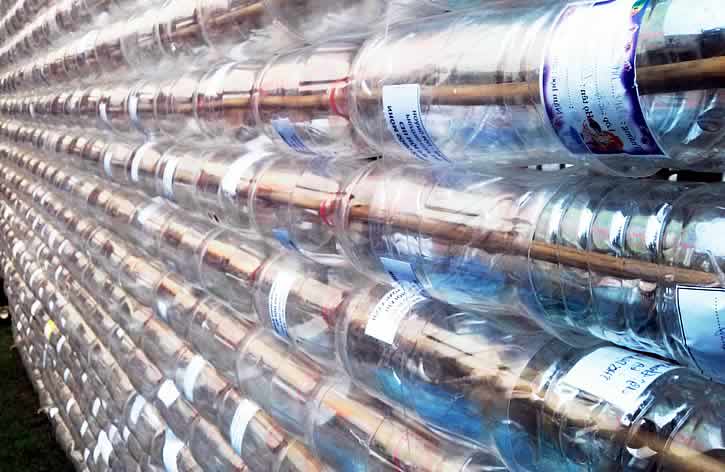
- In the third version, the bottoms of the bottles are cut off and the caps are unscrewed, and then the bottles are put one on top of the other until the “tubes” of the required size are obtained. It is better to fill the main bottle on which the rest are put on with sand, then the building material will be durable. Such "tubes" are installed vertically and connected with a wire.
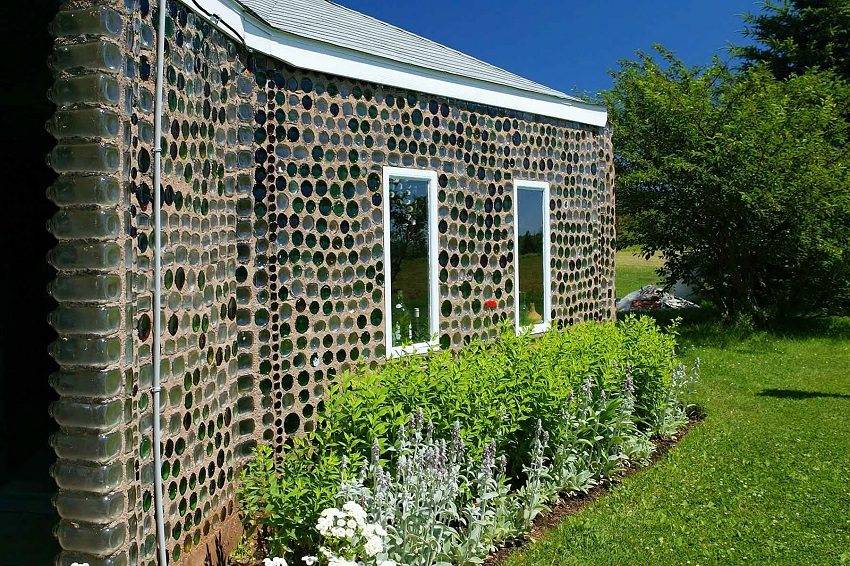
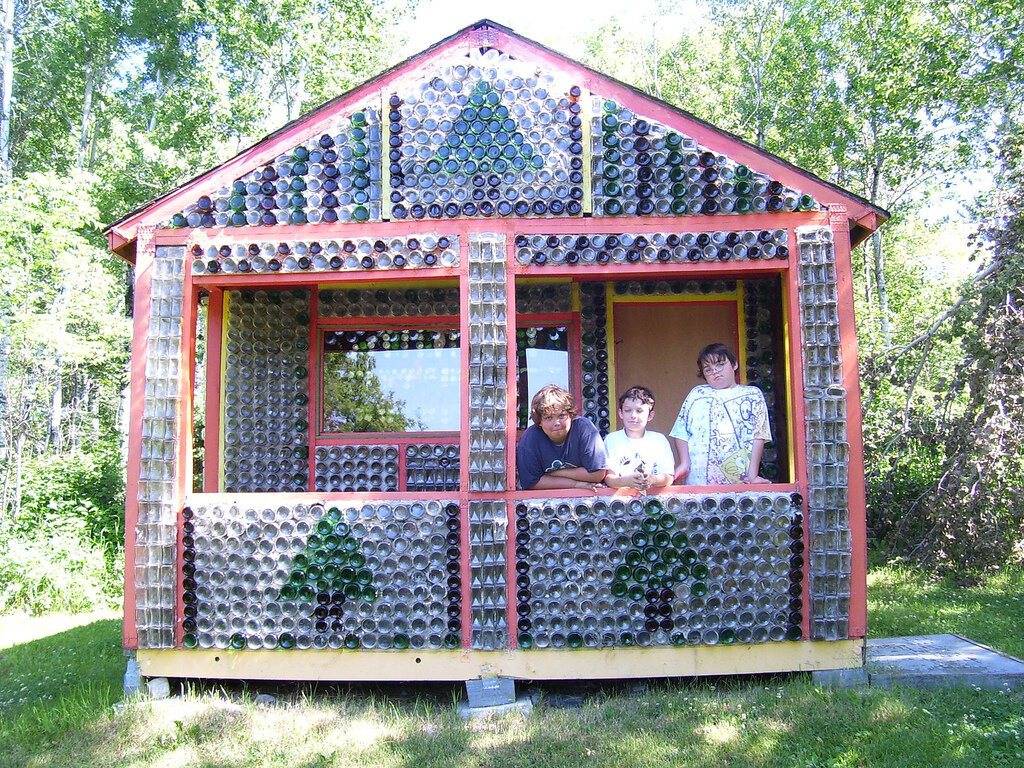
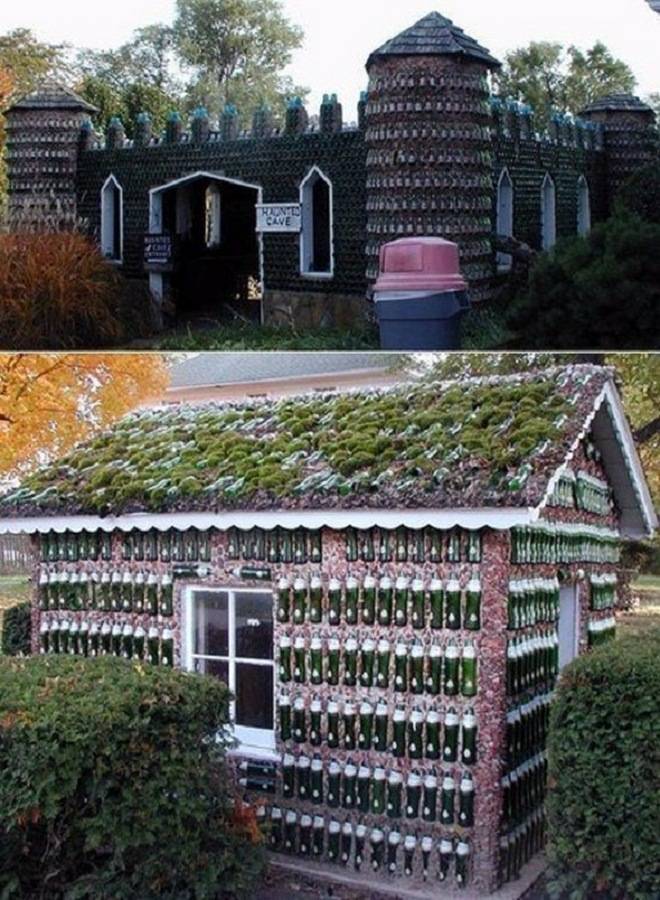
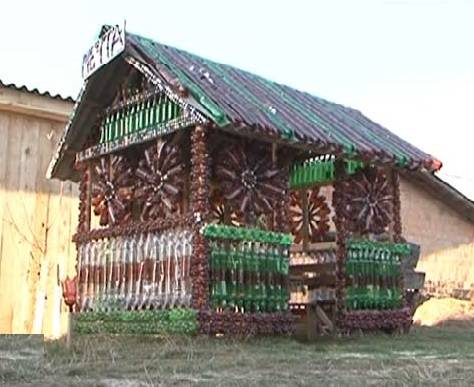
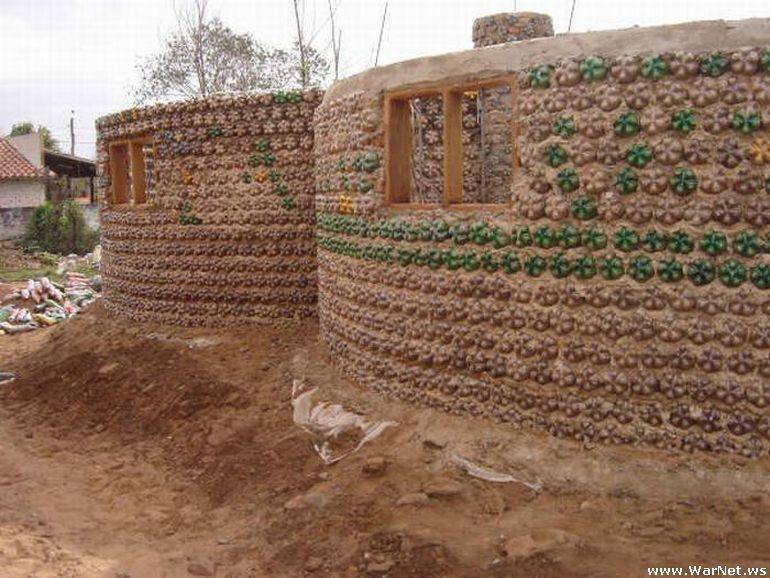
- The strongest walls are obtained when the bottles of sand serve as a kind of bricks, and from them the walls of the gazebo are laid. Cement mortar is a heavy thing, and river sand poured into bottles also weighs a lot, so for such a gazebo you need to make a shallow strip foundation.The bottoms and caps of the bottles in the masonry must be visible, they give the wall a mosaic look.
To make a plastic "tile" on the roof of a gazebo from bottles, they cut off the bottom and top, cut them lengthwise and put them in hot water, but not in boiling water, otherwise the plastic will "shrink". Then the plates are taken out and placed under the load. You need to work with them as with flexible shingles, i.e. make a continuous crate and overlap these pieces of plastic in a row.
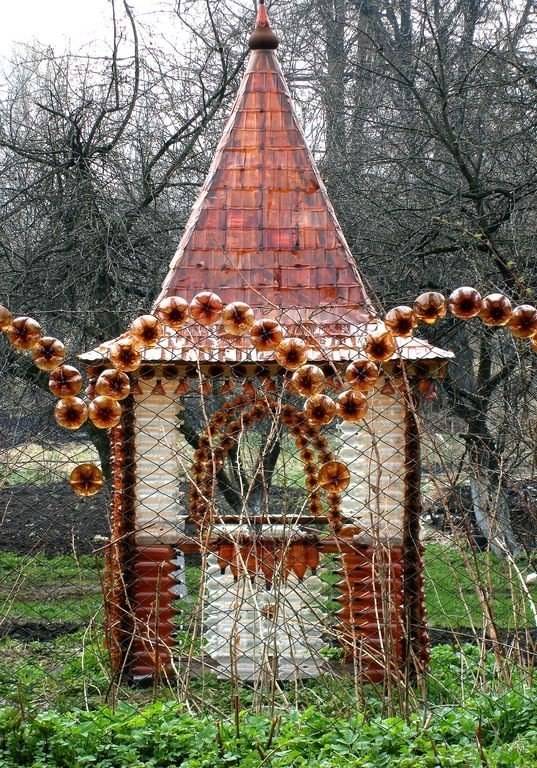
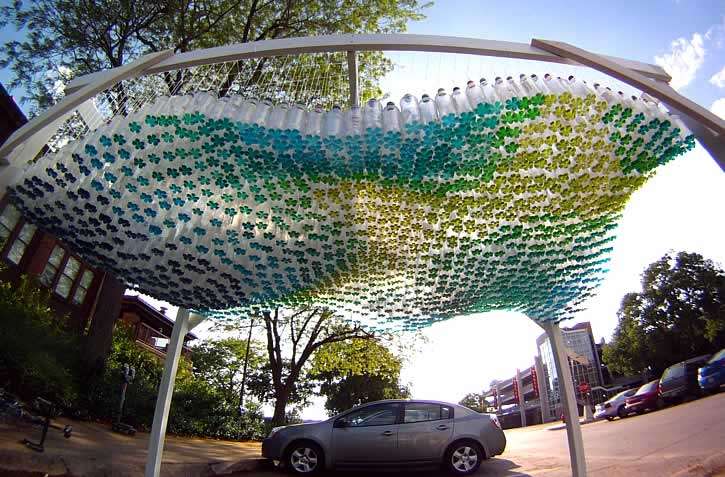
Industrial options for plastic arbors
 Industrial production, of course, does not use plastic bottles for the manufacture of arbors. But, nevertheless, many companies offer gazebos made of plastic.
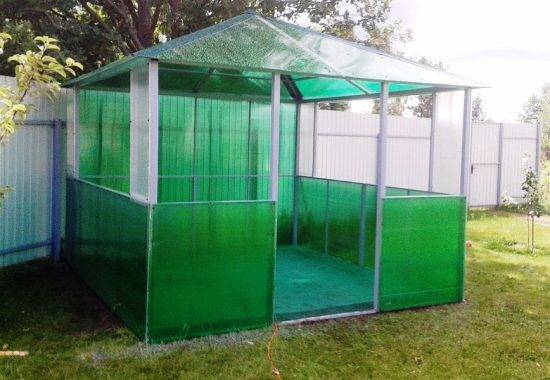
First of all, these are structures consisting of a metal frame on which a roof made of cellular polycarbonate is attached. The options can be very different, since polycarbonate holds its shape well. It can cover not only the roof, the walls of the gazebo are also made of this material. In most cases, metal frame of such gazebos made of pipes and does not imply any fixation to the site. It can be installed anywhere in the garden and is not difficult to move if, for some reason, the installation site has ceased to suit the owners.
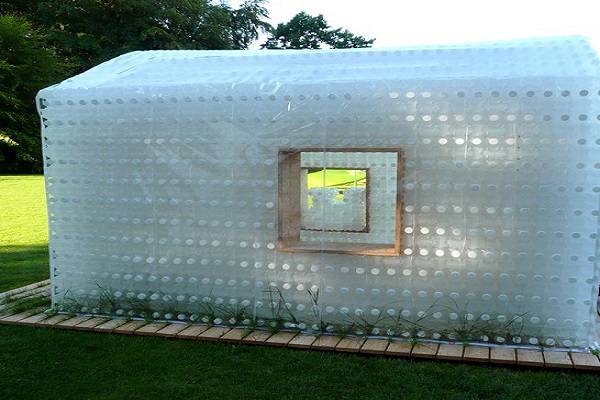
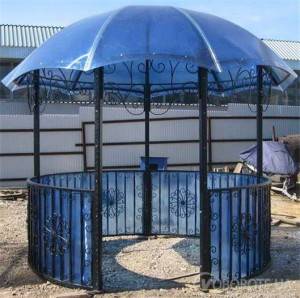
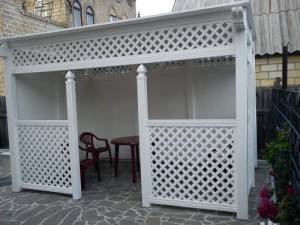 Fully plastic arbors are also available. The frame of the gazebo is made of a denser material, on which patterned plastic fences and a roof made of polycarbonate or the same plastic are installed. The gazebo can be with or without floor. The foundation is not needed for it, a flat platform is enough. During installation, the support posts of the structure are dug into the ground, and since the plastic does not rot, they do not need to be additionally insulated, and the structure itself must be covered with something additionally.
Which version of the gazebo you choose depends on your site, your free time and finances.
Useful home ideas
PET containers turned out to be such a good material that a lot of useful things are made of them. In this section, we have collected useful crafts from plastic bottles that can be used on the farm.
For the kitchen and not only
If you cut off the bottom of a bottle with a capacity of 2-3 liters, you get a bowl or bowl, and so that its edges are even, they can be melted on a heated iron. But so that the sole does not have to be cleaned later, use a special silicone pad. If not, you can do it through a sheet of parchment for baking.

Food container. Plastic is food grade ...
Cut off the threaded part from the same bottle. 1-2 cm of plastic should remain around the thread (the edges are melted using the already known technology). Now it will not be difficult to hermetically close any package: we pass it through the cut neck, wrap it outward, twist the lid.

Seal food bags tightly
The bottom of the bottles, attached to the bar, makes an excellent newspaper shelf (photo on the right). You can also store umbrellas.
Containers of various shapes can be weaved from plastic cut into strips. Bottles need an even shape, with thick walls. They are cut into strips of a certain thickness. It is necessary to cut in a spiral - as a result, rather long stripes are obtained. If their length is not enough, they are perfectly sewn.
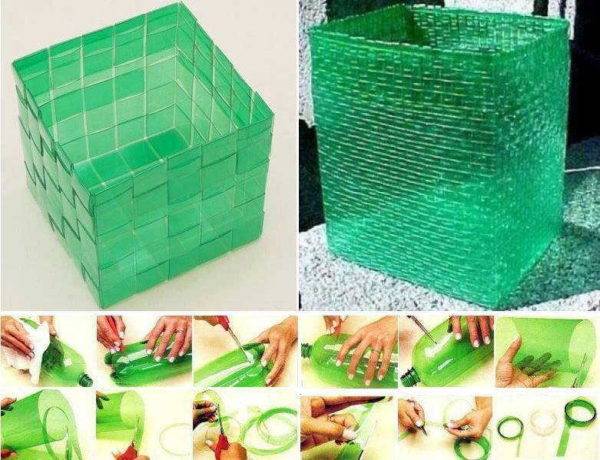
Laundry baskets from strips: weaving from plastic bottles
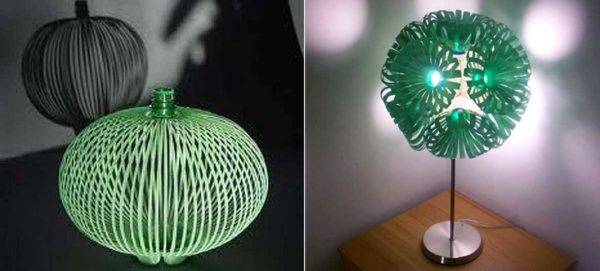
Lampshades
You can even make a lampshade, but on one condition: you will use such crafts from plastic bottles in lamps with LED lamps - only they almost do not heat up. Plastic is incompatible with other lamps. Let's describe three ways to make a lampshade from a plastic bottle.
First. You need a large bottle. We draw it into strips of the same width. At the beginning and at the end of each strip, we make holes with a heated soldering iron or a nail heated on fire.We insert scissors into this hole, cut. Straight stripes are obtained.
Lampshades from plastic bottles
When the strips are cut, we also make a hole in the bottom, pass thick fishing line through the neck, take it out through the hole in the bottom, and attach the decor on the back side. You can - a button, you can - a pebble of a suitable color. Now, by pulling the line, we get an interesting shape of the lampshade. You can put a low power light bulb in it.
Another lampshade is made using a similar technology. But then a part of the bottle with a neck was cut into strips, the strips were wrapped and fixed on the neck. To give the desired shape, the fold can be slightly warmed up over a candle or lighter flame. We attach the resulting "flowers" to the base. So we get an unusual design.
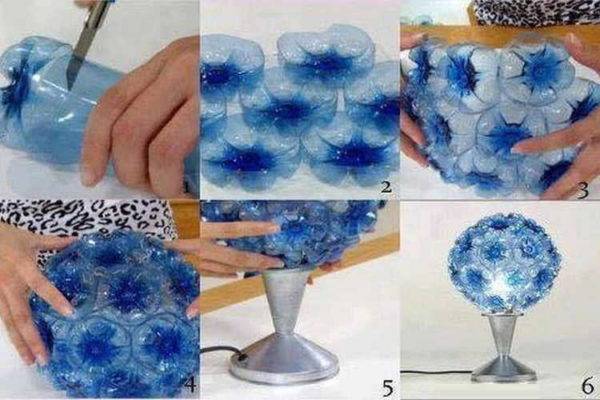
We use the bottoms
They also make lampshades from the bottoms. It is necessary to find a sufficient number of identical bottles, cut off the bottom of them, glue them together using universal glue (choose transparent). The main thing is that it glue the plastic and freeze quickly.
Flower vases
Making a vase from a plastic bottle - what could be easier ... Just cut off the neck and you're done. But there is a technique that allows you to get patterned walls. You will need the thinnest soldering iron. Its power should not be too high. Then everything is simple: with the help of a heated sting, you burn out the patterns.
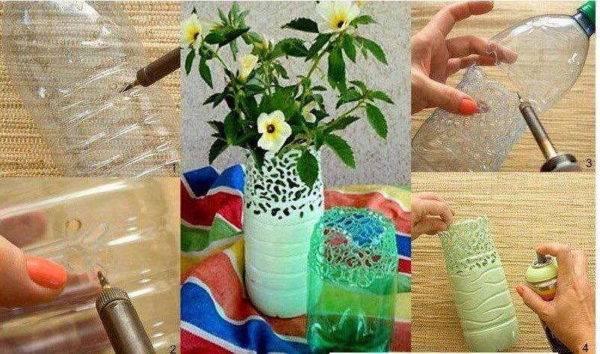
Beautiful vase from a plastic bottle
Magically! To make the drawing appear brighter, we take acrylic paint and paint the resulting beauty. The paint can be in a regular can, but it is faster and more convenient to work with a spray can.

These are the options ...
How to quickly make a gazebo from bottles with your own hands?
- Preparing plastic bottles for work
- Arrangement of wall fragments and base for the gazebo
- Installation of walls for the gazebo
- Roof and gazebo decoration
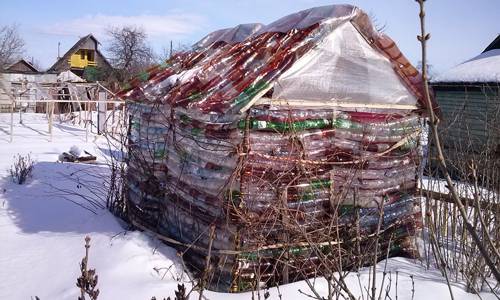
Recently, people prefer to make creative and non-standard gazebos for their summer cottage.
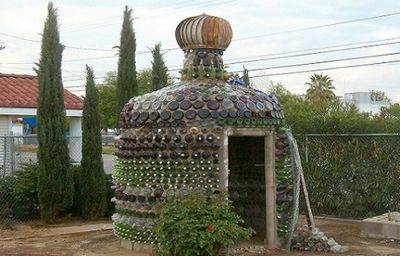
If you want to make an unusual and exclusive gazebo, you can use bottles to build it. Such a gazebo will cost quite cheaply.
This is a fairly cheap and uncomplicated do-it-yourself gazebo. which almost anyone can do.
To begin with, on a sheet of Whatman paper, draw a drawing with all the elements and dimensions of the gazebo. This is very necessary in order to calculate the approximate number of plastic bottles. Then prepare the area for the gazebo by clearing the ground of debris.
Preparing plastic bottles for work
Before starting construction, it is necessary to collect the plastic bottles and clean them thoroughly.
The next step will be the procurement of the necessary materials. First of all, you need to stock up on plastic bottles. It is best to choose them with a volume of 1.5 liters with a minimum degree of hardness. To make the bottle gazebo look beautiful, you need to clean the container from dirt and labels. To do this, heat the water, add soda to it and soak the bottles for 3 hours. But be careful: plastic can't stand boiling water. Therefore, the water should not be very hot.
After cleaning the container, you can sort it out by color. This is optional, but it is quite advisable if you want to make a pattern on the gazebo. You can pick bottles of the same color, then you don't have to sort anything at all.
If you wish, you can paint the bottles in certain colors. To do this, purchase acrylic paint, dilute it a little with water, and then just pour it inside and shake it. This will give you the color you want. You can paint at least the entire container. The main thing is that you do not need to wait until it dries, since all the paint will be inside. And even in the future, it will not be washed off or damaged.
Now we turn to the process of constructing a gazebo from bottles.
It consists of 4 main stages, the order of which is important to observe so that the design turns out to be reliable and beautiful. So, select a few bottles and get to work.
Arrangement of wall fragments and base for the gazebo
The scheme for creating # 8220 log # 8221 from plastic bottles.
At the first stage, you need to build the so-called logs for the device of the gazebo from bottles. They will serve you as separate fragments of future walls. To do this, the bottoms of the bottles must be cut off and the bottles inserted into each other.
All joints must be wrapped with transparent tape for reliability. The length of such logs should be equal to either the length of the wall or its height # 8211, depending on how you will make the walls (vertically or horizontally).
Now we take on the supporting base. To do this, a part of the top is cut off at the bottles, and sand or heavy stones are poured into the remaining resulting "vase". After that, each "vase" is set in the ground and compacted along the edges. This is done around the entire perimeter, and the bottles are placed close to each other and at the same height. It is necessary to fill the bottles with sand or stones so that the gazebo is not blown away by the wind. This is the so-called "anchor" of the structure.
Installation of walls for the gazebo
Now we move on to the second step # 8211 - the construction of the walls. To do this, take logs prepared in advance from bottles and stack them in rows (horizontal walls). In this case, each row is fastened to the previous one in several places with wire. To do this, the bottles are pierced with an awl, and a wire is inserted into the resulting holes, and then twisted. Moreover, it is also necessary to connect the logs with the lowest row ("anchor").
Roof and gazebo decoration
The roof for the bottle gazebo should be made of lightweight material.
The third stage is the installation of the roof in the gazebo. It will already be made not from bottles, but from an ordinary light sheet of plywood, covered with thin decorative tiles on top. Plywood must be cut in advance to the required size and impregnated with a water-repellent compound. After that, it is attached to the edges of the walls with a wire and additionally fixed with superglue. Decorative tiles are placed on top of screws or bolts.
And finally, the fourth stage # 8211 decorative finishing. Here you can connect your imagination and come up with anything. It would be very appropriate to make several plastic figures. Plastic trees planted near the gazebo look original. You can even make a mini-table out of plastic by simply gluing the bottles with liquid nails. The gazebo is ready for use!